for the happy couple

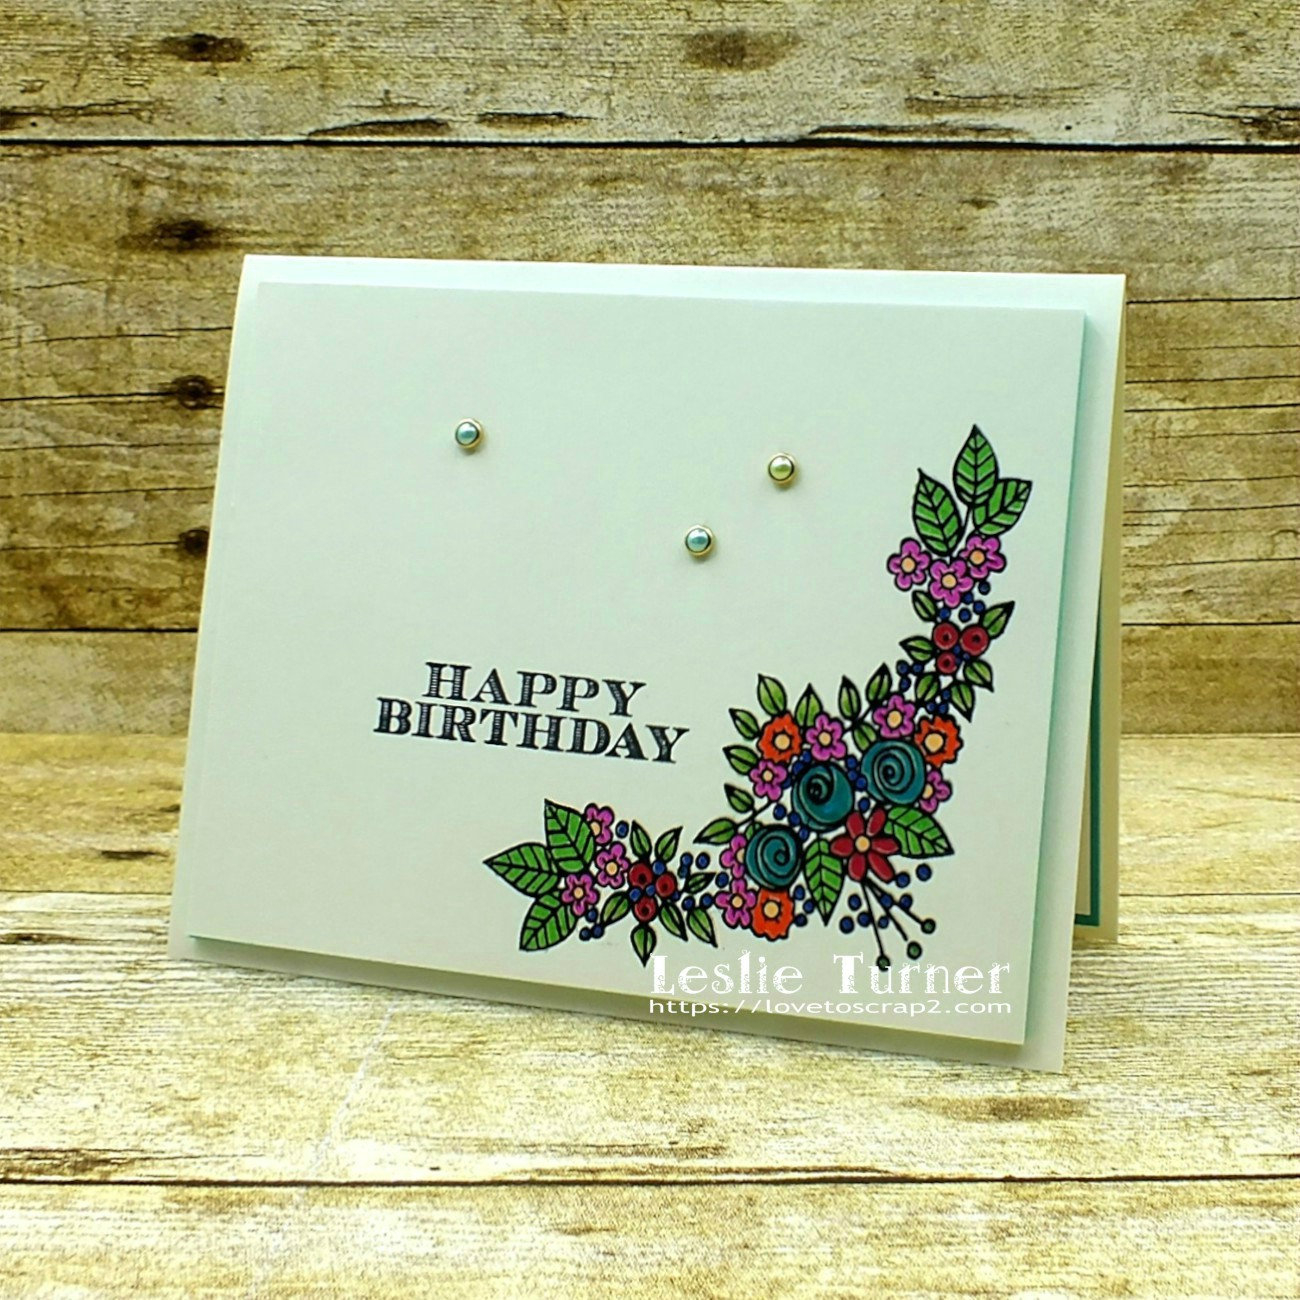
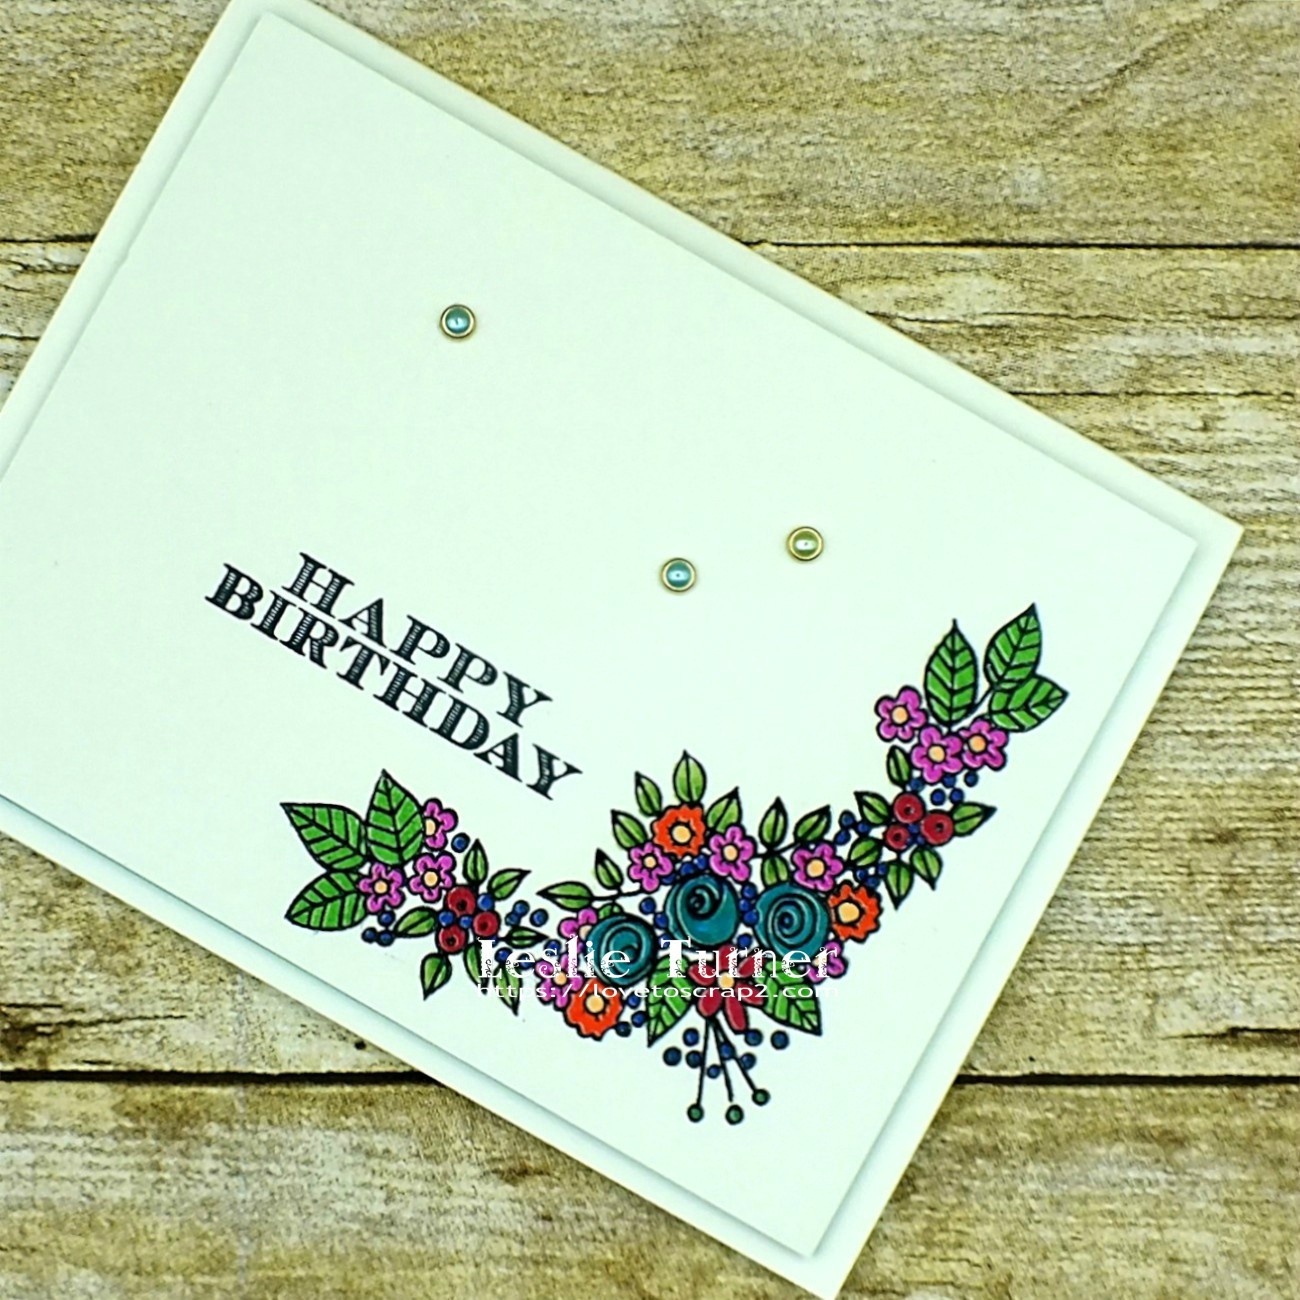
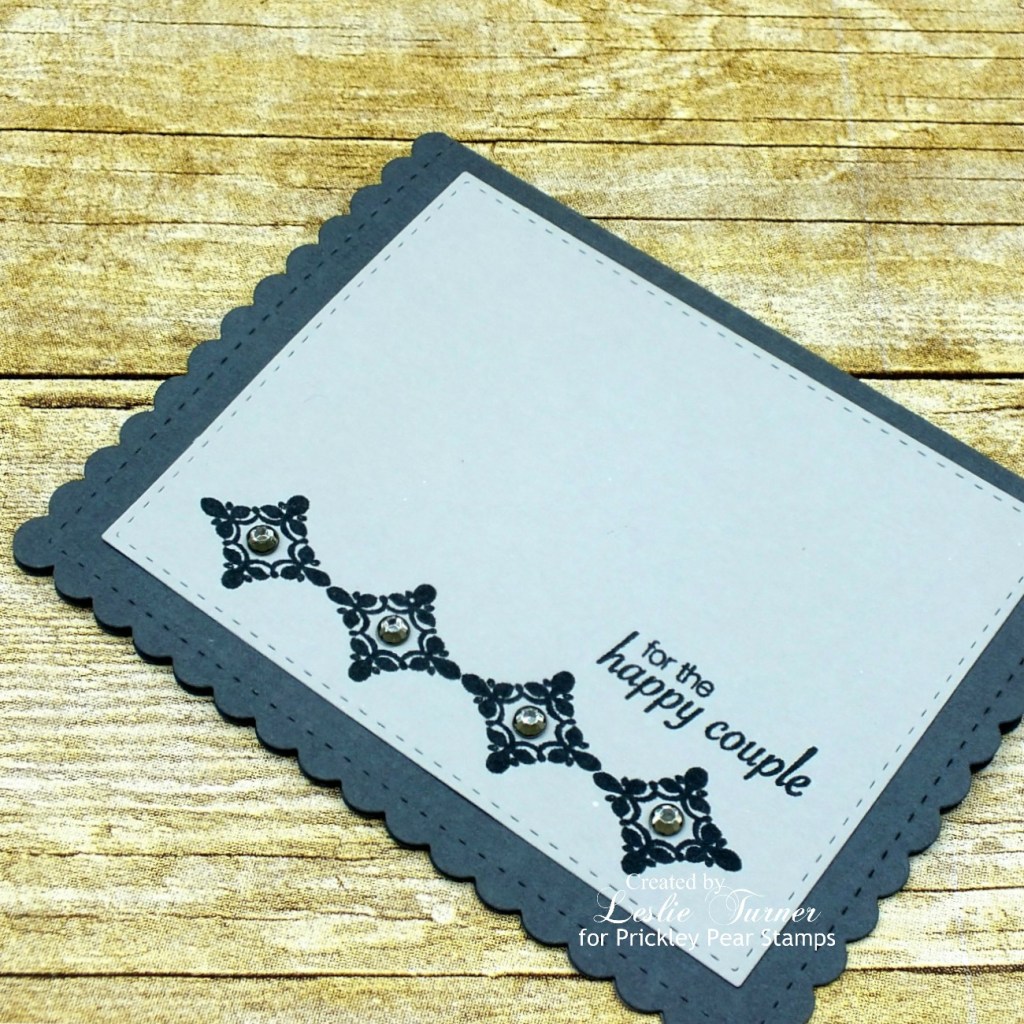
Mornin’ peeps! It’s Fri-YAY and I’ve popped in this morning to share another sample I created for the Prickley Pear Stamps Hochanda show early last month. I’m finally winding down with the Hochanda samples… I have one more to share later today and I’ll be done for this go-round. This was quite an undertaking and I’m so proud to have been asked to do it! I created this pretty CAS wedding card in shades of gray using the Scalloped Oval and Scalloped Oval 4-Floral stamp sets.

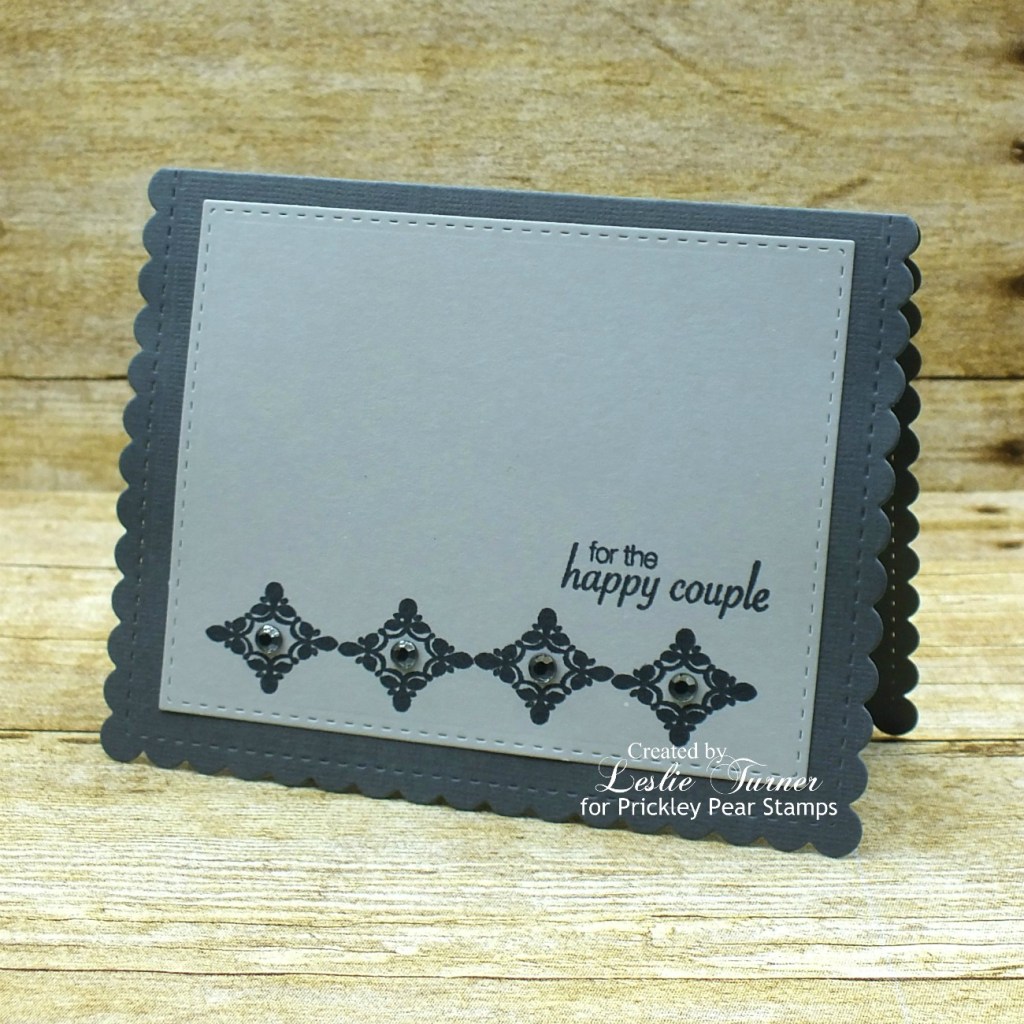
I used an A2 card die set to create the card base and layers, and created the card base in dark gray and the layers in light gray. I stamped the sentiment and image strip in black ink, and added a smoke-colored gemstone to the center of each of the diamonds in the image strip.

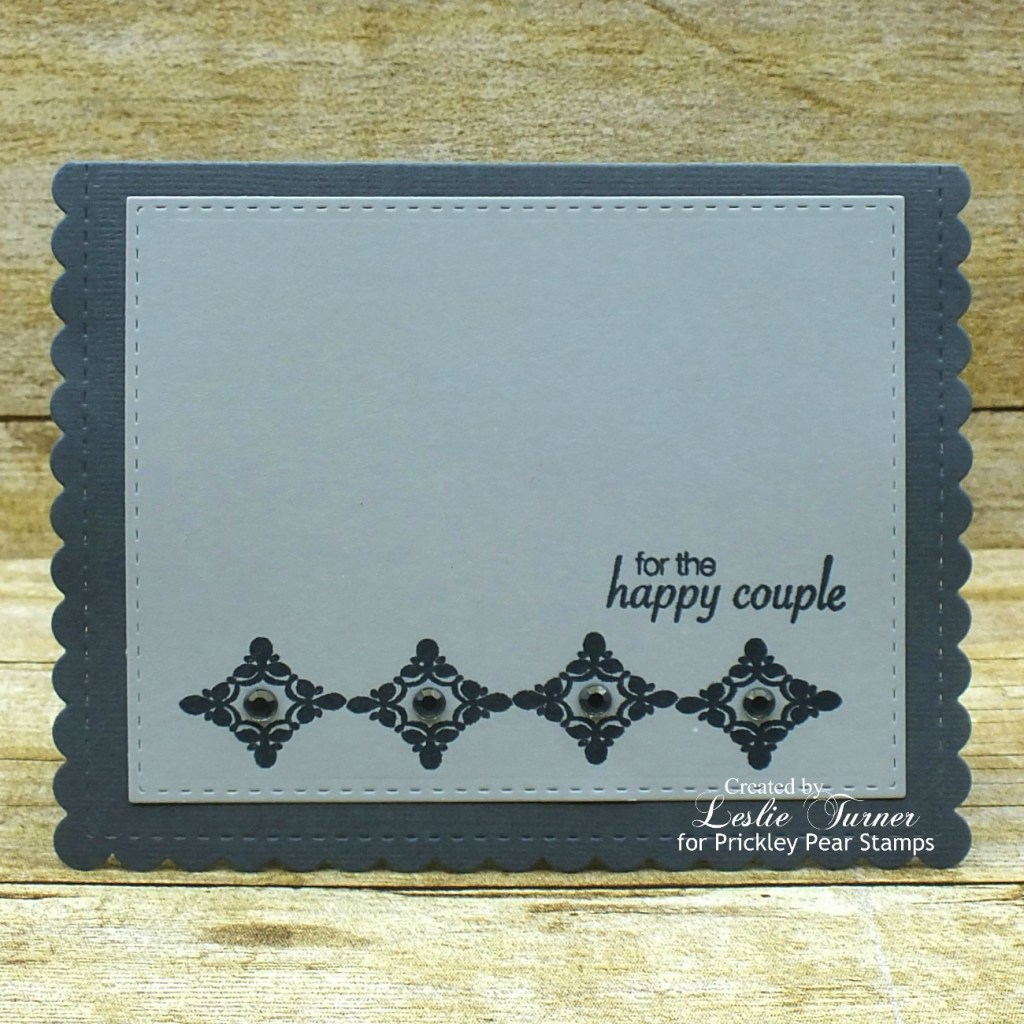
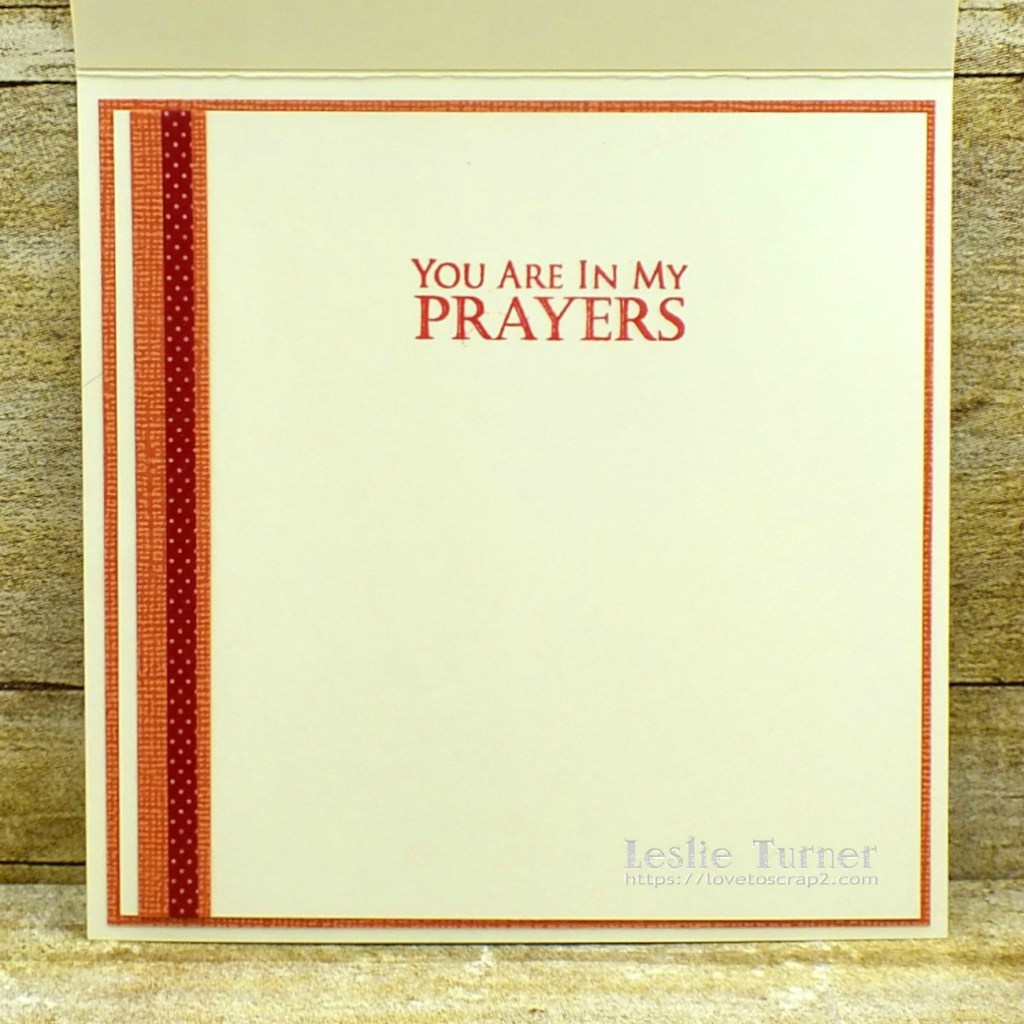
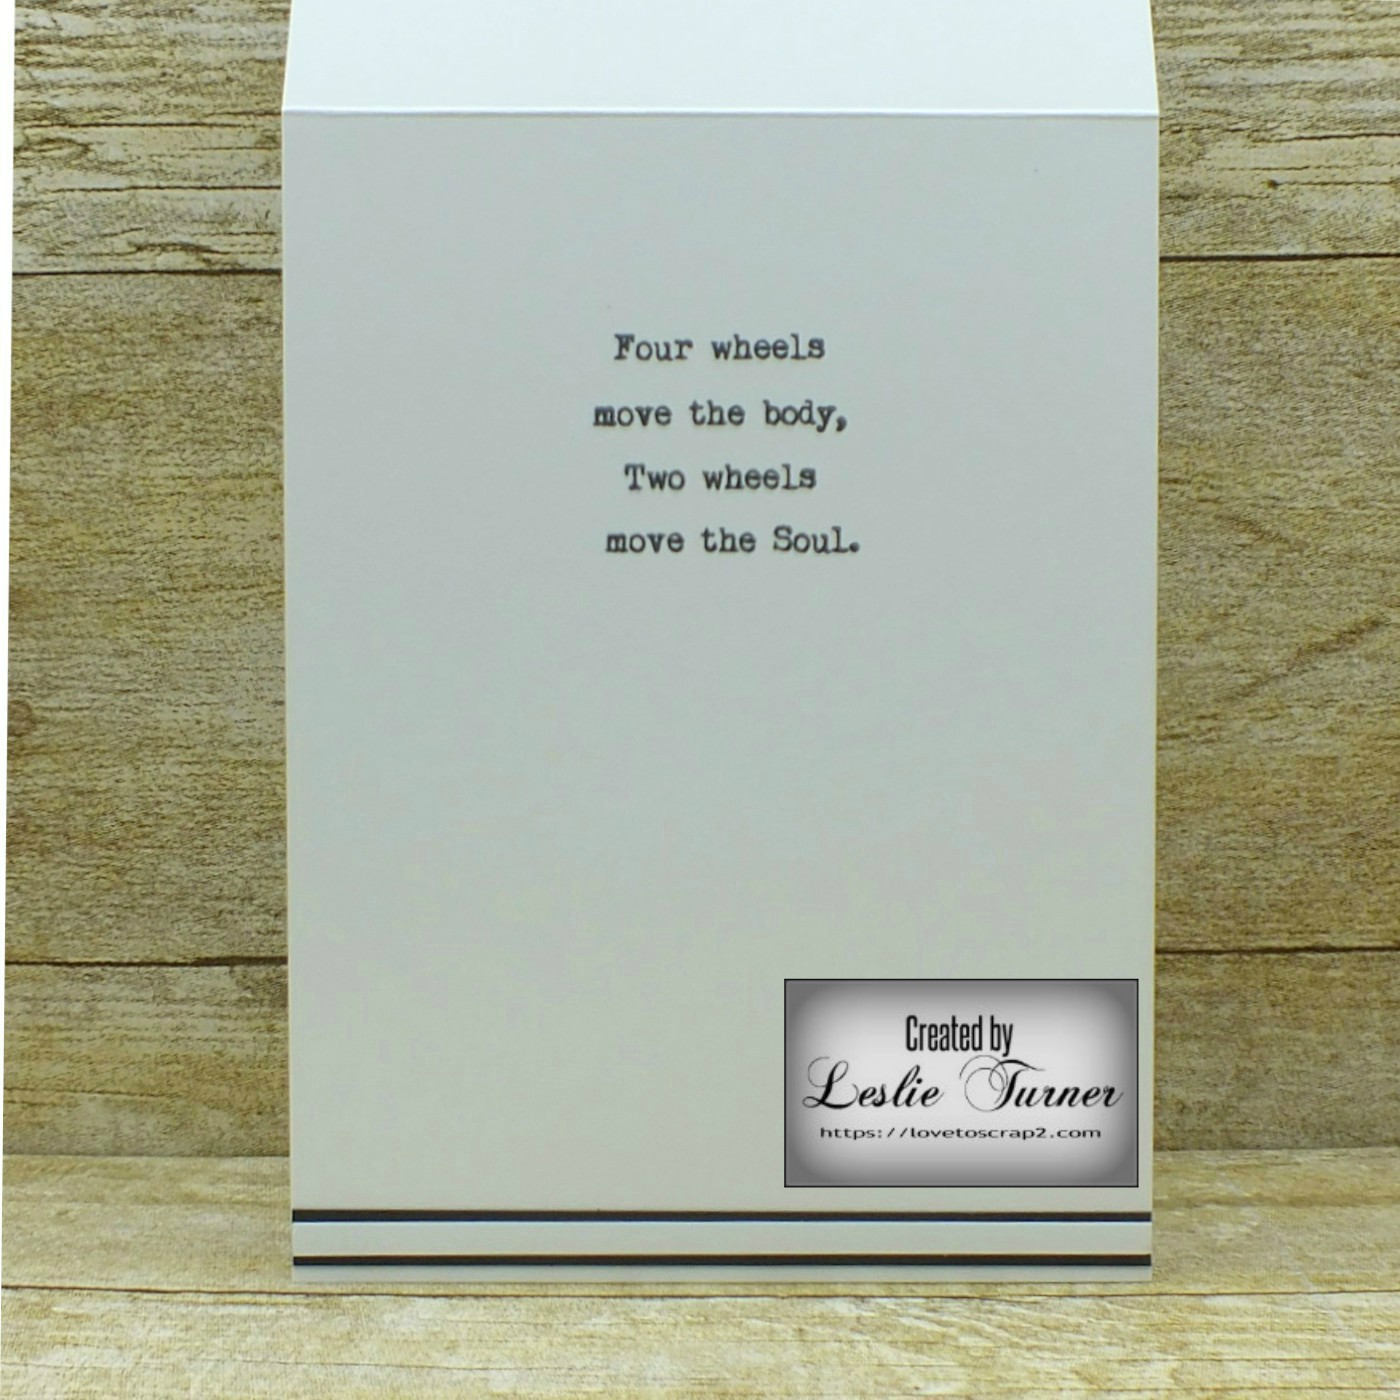
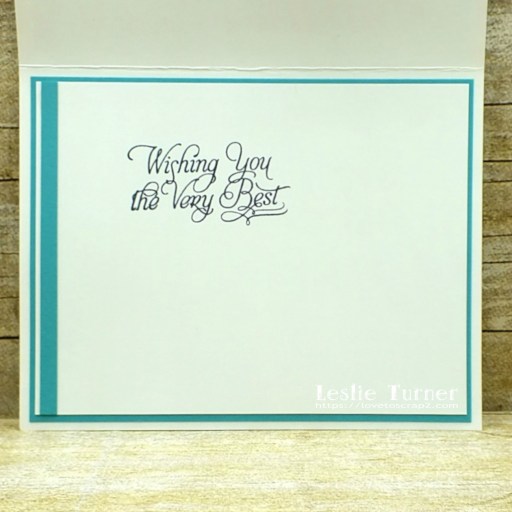
For the inside, I once again stamped the sentiment and image in black ink.

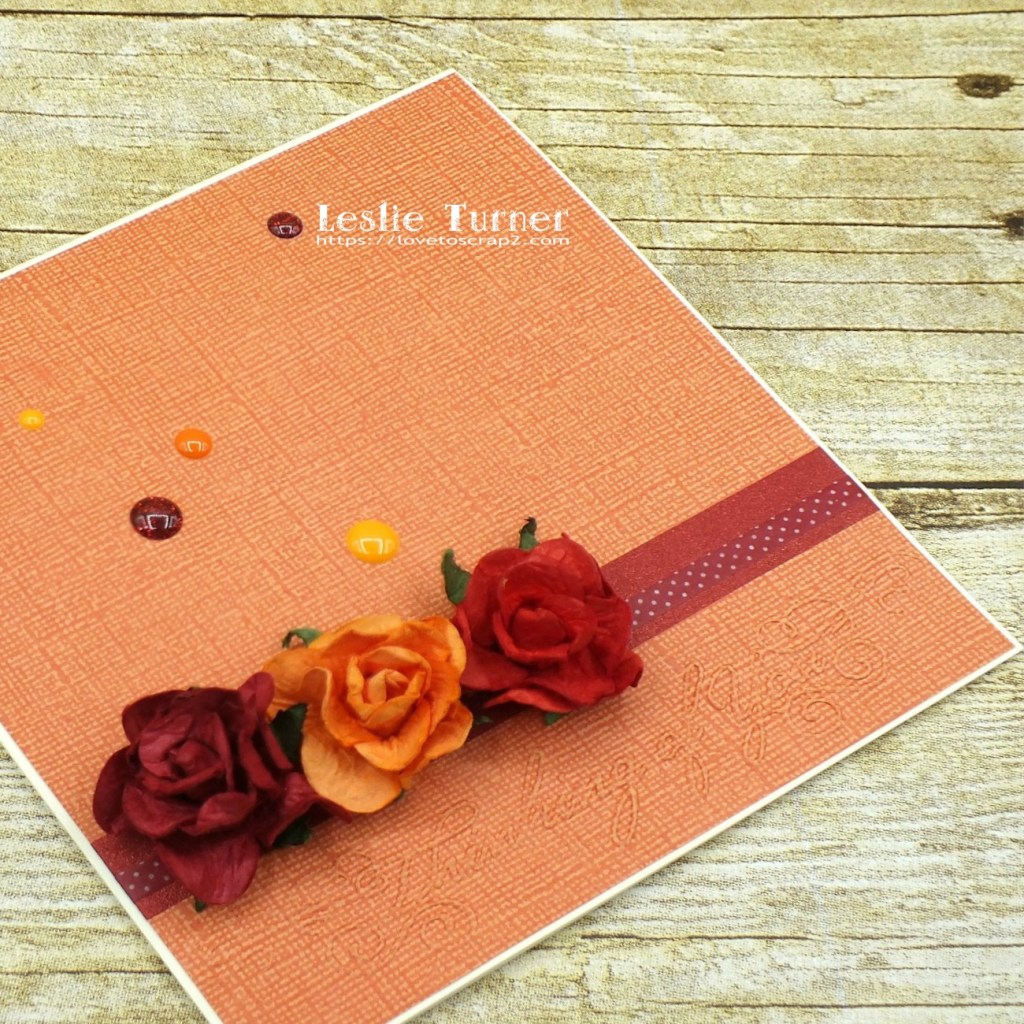
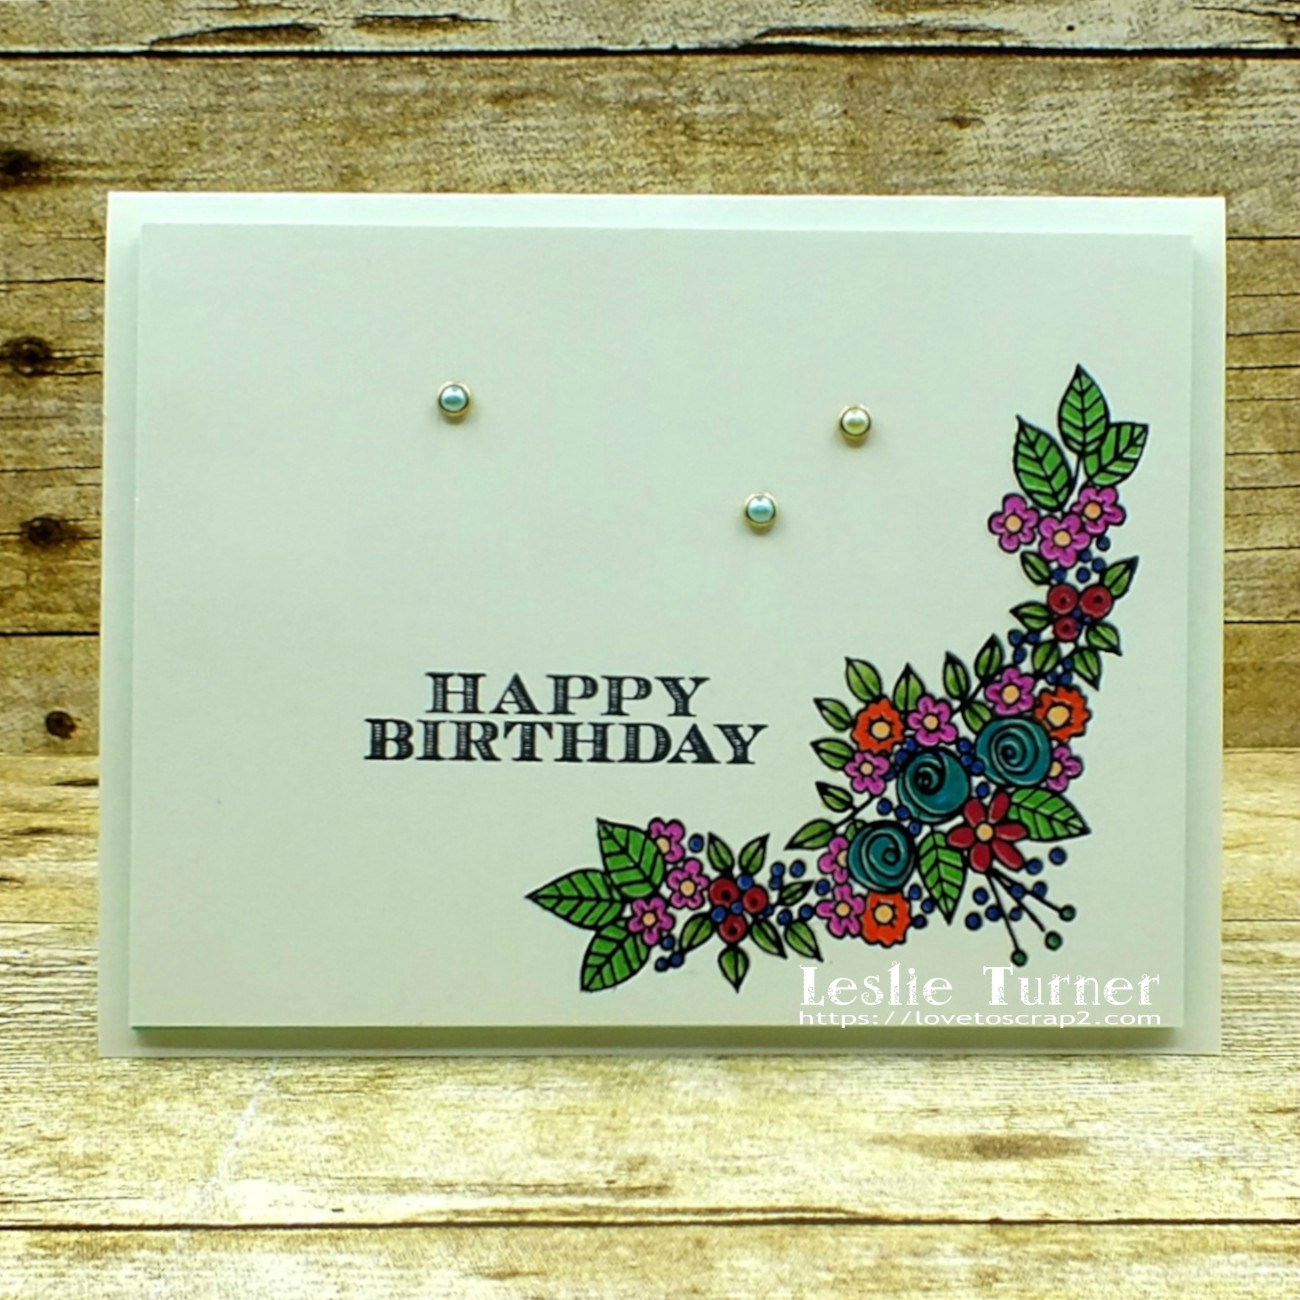
One more peek… loving how this turned out! Such a pretty and simple design in timeless gray!

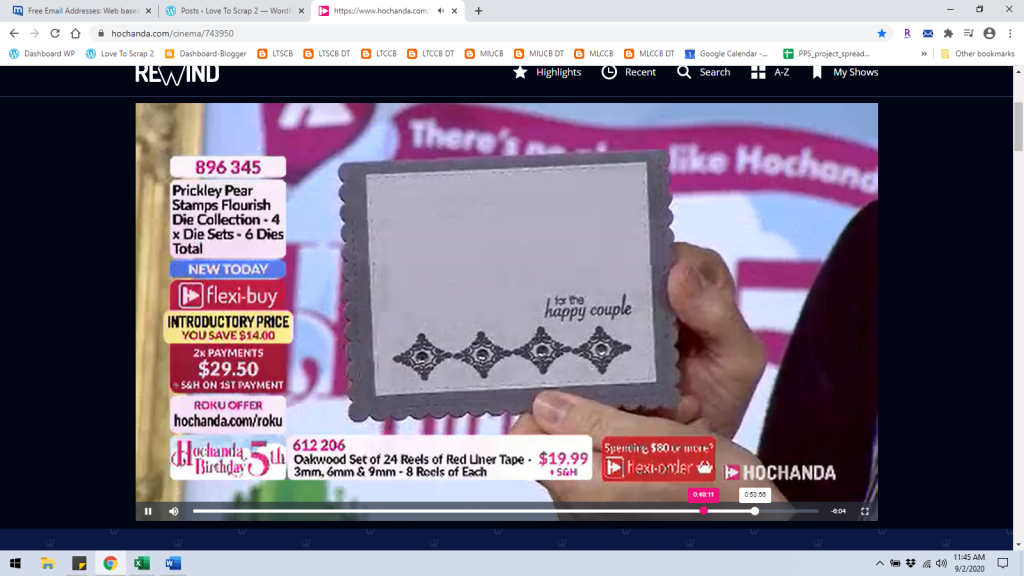
Finishing this post with a screenshot of Alex holding this card up on air! Fun, fun, fun!

Sharing in the following challenges:
1. 613 Avenue Create: October Anything Goes w/ optional Winged Things (no twist)
2. Classic Design Challenge: #10 – Anything Goes
3. Creative Inspirations: October Anything Goes
4. Creative Moments: #200 – Anything Goes
5. Lemon Shortbread Challenge Blog: #130 – Anything Goes
6. The Paper Girls Challenge: #209 – Wedding/Anniversary

Products used:
Cardstock/Paper: CutCardStock Dolphin and Shadow Gray textured cardstock
Stamps: Prickley Pear Stamps Scalloped Oval clear stamp set and Scalloped Oval 4-Floral clear stamp set
Ink: Memento Tuxedo Black ink
Dies/Punches: Papertrey Ink Noted: Scalloped A2 Die Collection
Accessories:  Tombow Mono permanent adhesive, MISTI stamp tool, Gemini Junior, Darice smoke gemstones

I hope you’ve enjoyed this project! Be sure to check out all the awesome stamps and dies at Prickley Pear Stamps! If you’d like to save 10% on anything on the site when you shop at Prickley Pear Stamps, use the coupon code LESLIE10 at checkout! And be sure to ‘like’ and ‘follow’ the Prickley Pear Stamps Facebook page to keep up with news and sales, and join Prickley Pear Pals (the fan group) for lots of fun crafty ideas and to share your creativity! And finally, we’d love to see you visit the Prickley Pear Stamps blog that’s in the process of being revived and become a Follower! Hope to see you there! Thanks so much for stopping by today – we’ll see you next time! ;)

Scrappy hugs,
lesliesig

‘Just Be-Claws’ note card

Hi everyone! Happy Saturday! I’m stoked to be back on the Eyelet Outlet blog today with another awesome DT inspiration project! I created a clean and simple note card with a beachy feel. Love me some note cards, and this would be a great one to mass produce to create a set to give as a gift!

I love super simple designs that pack a punch! I started by splattering white ink across the front of the card base with a fan brush to tie in the white sentiment strip. I created the sentiment on the computer and cut it in a strip, then layered it on orange cardstock which I embellished with a strip of brown Glitter Skinny Washi Tape. I alternated the Crab & Lobster Brads on the left side of the sentiment and then adhered the strip to the card base.

I embellished the inside panel with strips of kraft and orange cardstock. Since this is a note card, I left the inside blank, leaving plenty of room to write a custom message.

And one more peek… just loving how this turned out! Aren’t these crabs and lobsters just the cutest?!

Sharing in the following challenges:
1. 2 Crafty Critter Crazies: #42 – Anything Goes
2. Classic Design Challenge: #9 – Anything Goes
3. Creative Inspirations: September Challenge – Spots & Dots or Inky Splats
4. Not Just Card Challenges: September Anything Goes
5. Scrapping4fun Challenges: #175 – Anything Goes

Eyelet Outlet products used:
Crab & Lobster Brads
Glitter Skinny Washi Tape (brown)

Other products used:
Cardstock/Paper: Papertrey Ink Classic Kraft and Canyon Clay cardstock, Neenah Classic Crest Solar White cardstock
Ink: Copic Opaque White ink
Accessories: Tombow permanent adhesive, Bearly Art precision craft glue, fan brush, Ranger distress sprayer

I hope you’ve enjoyed today’s project! Be sure to check out all the fun goodies at Eyelet Outlet! I can already see you drooling, lol! Be sure to ‘like’ and ‘follow’ Eyelet Outlet Facebook Page to keep up with news and sales! Thanks so much for stopping by today – we’ll see you next time! ;)

Scrappy hugs,
lesliesig

#alonetogether inspired hello

Hi everyone! I hope you’ve had a great week! I’m happy to be back on the Eyelet Outlet blog today with another awesome DT inspiration project! I created a CAS friendship card featuring a couple ‘flutterbys’. Hubby and I are still doing the #alonetogether thing for the most part which led me to this super simple design which I thought would be so awesome for mom or dad to create with a child!

I settled on a pink and green color combo which is another color combo favorite. I pulled out a lonely grass border die from my stash that doesn’t get a lot of use, cut several grass borders, and layered them across the bottom of the front panel. Using a leaf punch, I punched a stem and leaves, and adhered it to the front panel. I curled the edges of all three layers of a Paper Flower, attached them with a 6mm Amber Jewel Brad and adhered the flower to the front panel. I added two Butterfly Brads and Sun and Cloud Brads. I stamped a simple sentiment in black ink in the upper left corner.

I embellished the inside panel with a couple leftover strips of the green and pink cardstock used on the front, stamped the inside sentiment in black ink and layered the panel on the pink cardstock.

And one more peek… love how this turned out! I sure hope somebody is inspired to make this with a youngster! So cute!

Sharing in the following challenges:
1. Aud Sentiments Challenge Blog: #258 – Anything Goes + A Sentiment
2. Creative Moments: #197 – Anything Goes
3. Lil Patch of Crafty Friends: #140 – Anything Goes

Eyelet Outlet products used:
Paper Flower
6mm Amber Jewel Brad
Butterfly Brads
Sun and Cloud Brads

Other products used:
Cardstock/Paper: Neenah Classic Crest Solar White cardstock, Stampin’ Up Rose Red cardstock, American Crafts Leaf cardstock
Stamps: Hero Arts Color Layering Swallowtail stamp set
Ink: Memento Tuxedo Black ink, Nuvo alcohol marker- 412
Dies/Punches: Precious Marieke Grass Border die, Stampin’ Up Leaf Punch
Accessories:  Tombow Mono permanent adhesive, Bearly Art precision craft glue, MISTI stamp tool, Gemini Junior

I hope you’ve enjoyed today’s project! Be sure to check out all the fun goodies at Eyelet Outlet! I can already see you drooling, lol! Be sure to ‘like’ and ‘follow’ Eyelet Outlet Facebook Page to keep up with news and sales! Thanks so much for stopping by today – we’ll see you next time! ;)

Scrappy hugs,
lesliesig

Thinking of You

Hi everyone! Happy Saturday – hope you’re doing something fun! We are having some super windy weather with a few raindrops here and there, so I’m busy taking project photos and writing blog posts! I’m sharing a clean and simple card I created for The Outlawz Monday Greetings Challenge where the theme is flowers with dry or heat embossed background. Jan’s Digi Stamps is our sponsor this month so come on over and play! I created an encouragement card in warm tones with some pretty paper flowers and an embossed sentiment across the bottom.

The Core’dinations cardstock already had a cool embossed linen look so I thought an embossed sentiment across the bottom of the CAS design would be perfect. I’ve had a set of sentiment embossing folders in my stash for several years and have never used them, so in my quest to use ‘new unused stuff’ from my stash, I thought this would be a wonderful opportunity to use one of them!

I dug through my stash of paper flowers and found three that complimented the paper beautifully. I put down a strip of red glitter Washi Tape and then another strip of skinny red dotted Washi Tape on top, and then added the flowers. I finished the front with some randomly placed sprinkles and glittered gumdrops.

I embellished the inside panel with a strip of the cardstock and Washi Tape used on the front, and layered it on the same cardstock.

One more peek… absolutely loving how this turned out! I believe this would be just the ticket to let a friend know you’re thinking about her!

Sharing in these additional challenges:
1. Crafty Calendar Challenge: June Challenge – Flowers
2. Crafty Catz Challenge: #509 – Anything Goes w/optional CAS (playing twist)
3. Crafty Friends Challenge Blog: #137 – Anything Goes
4. Through The Purple Haze: #168 – Wedding, Anniversary or Anything Goes

Products used:
Cardstock/Paper: Neenah Classic Crest Baronial Ivory cardstock, Core’dinations Vintage Collection cardstock
Stamps: The Cat’s Pajamas Simply Stacked Sentiments stamp set
Ink: Ranger barn door archival ink
Accessories:  Tombow Mono permanent adhesive, Ranger distress collage medium, Darice Phrases embossing folder set, Gemini Junior, Peachy Cheap red glitter Washi Tape, skinny red dotted Washi Tape, MISTI stamp tool, Wild Orchid Crafts paper flowers, YNS red glittered Gumdrops, Doodlebug Design tangerine Sprinkles

I hope you’ve enjoyed this project and will come join us in The Outlawz Challenges! Lots of fun going on! Thanks so much for stopping by – we’ll see you next time!

Scrappy hugs,
lesliesig

When life gets complicated… Ride

Hi friends! Happy Saturday – hope your weekend is off to a great start! I have a fun project to share with you today – a very cool card that could be used for any favorite biker in your life, male or female! I used to be very intimidated by ‘clean and simple’ but am loving this kind of design more and more every day. I won a gift certificate to an online store several months ago and when I saw this rubber stamp set I knew I had to have it – and I knew exactly how I wanted to use it!

2020_02140017

I stamped the bike and front sentiment in black ink on Strathmore Bristol smooth white cardstock. I stamped the image and sentiment again in Versamark (right over top of the black), applied clear embossing powder and heat embossed them. I very rarely use colored embossing powders anymore… I like to stamp in colored ink, then stamp right over that in Versamark, apply clear embossing powder and heat emboss. This gets you virtually any color of embossing you could ever imagine! A very cool trick I learned a number of years ago. I trimmed the bike image and layered it on thick black foam for some hefty dimension. I trimmed the sentiment into a strip, layered it on black cardstock and adhered it to the bottom of the focal image.

2020_02140019

I kept the inside very simple. I stamped the sentiment (from the same stamp set) in black ink and adhered a thin white strip layered on black cardstock across the bottom which added a little interest.

2020_02140020

And one more look… super happy with how this turned out!

2020_02140021

I’d love to enter this card into the following challenges:
Addicted To Stamps and More: #386 – Anything Goes
Alphabet Challenge Blog: B is for Boy’s Card
Crafty Catz: #503 – Anything Goes
WordArt Wednesday: Weeks #436/437 – Anything Goes

Products used:
Cardstock/Paper: Strathmore Bristol smooth white cardstock, GKD Black Onyx cardstock scraps
Stamps: IndigoBlu Ride Long rubber stamp set
Ink: Memento Tuxedo Black ink, Versamark
Accessories:  ScraPerfect Best Glue Ever, MISTI stamp tool, Hero Arts clear embossing powder, black Commotion Almost Leather

I hope you’ve enjoyed this project! Thanks so much for stopping by today – we’ll see you next time! ;)

Scrappy hugs,
lesliesig

Happy Birthday

2/29/20 Spotlight Winner at A Perfect Time To Craft Open Challenge!

Hi friends! Hope your week is off to a great start! I have a pretty birthday card to share today that features a CAS panel popped up on colored foam! I love adding colored foam beneath a focal image so there’s just a hint of color peeking out from around it.

2020_0202001

I created the card base and trimmed down the background panel. I stamped and heat embossed the floral swag image, then colored the image with bright markers and put it off to the side while I trimmed a piece of teal-colored foam to go behind the background panel and cut the inside panels. I adhered the focal image to the foam, adhered the piece to the card base, and then added a few pearl embellishments.

2020_0202002

I embellished the inside panel with a strip of teal cardstock, stamped the inside sentiment and layered the panel on teal cardstock.

And one more look… I couldn’t be happier with how this turned out! And I always need more birthday cards in my stash! ;)

2020_0202004

I’d love to enter this card into the following challenges:
AAA Cards #159 – One Corner + optional Love Those Older Supplies (markers & foam)

A Perfect Time To Craft Open Challenge Blog: #02-2020 – Anything Goes
Allsorts Challenge Blog: #560 – Make It Girly
Aud Sentiments: #245 – Anything Goes + Sentiment
Brown Sugar Challenge Blog: #298 – February Anything Goes
Classic Design Challenge: #2 – Anything Goes
Crafty Cardmakers: #251 – Embossing
Crafty Friends Challenge Blog: Gemstones/Pearls
Creative Moments: #185 – Anything Goes with optional For The Girls
If You Give A Crafter A Cookie: #136 – photo inspiration

Jan’s Digi Stamps Challenges: #8 – Anything Goes
Krafty Chicks Challenge: #495 – Clean And Simple
My Time To Craft: #426 – No Digis Allowed
Not Just Cards Challenges: February Anything Goes
World Wide Open Design Team Monthly Challenge: #02 – February Anything Goes

Products used:
Cardstock/Paper: Stampin’ Up thick and regular Very Vanilla cardstock, Stampin’ Up Bermuda Bay cardstock
Stamps: Spellbinders Flowers Swag 2 rubber stamp, The Cat’s Pajamas Simply Stacked Sentiments stamp set
Ink: Memento Tuxedo Black ink, Versamark; Bic Mark-It markers- Margarita Green, Key Lime, Forest Green, Hot Aqua, Rambunctious Red, Fandango Pink, Summer Melon, Sunset Orange, Deep Sea blue
Accessories:  ScraPerfect Best Glue Ever, Perfect Cleaning Cloth, Gold ‘n Pearls embellishments and Embellie Gellie; Hero Arts clear embossing powder, Darice teal craft foam

I hope you’ve enjoyed this project! Thanks so much for stopping by today – we’ll see you next time! ;)

Scrappy hugs,
lesliesig

You are too kind.

Hi everyone! I’m back with another fun project this morning! A new challenge is live over at Mix It Up Challenge Blog and I’m stoked to share my DT inspiration project for MIUCB #22 – Anything Goes + Rubberband Stamping! Nope, I’m not out of my mind, lol! You really CAN stamp with rubberbands – either wrapped around an acrylic block or a brayer! I created a clean and simple thank you card using two sizes of rubberbands wrapped around a 3″ square acrylic block, and it turned out pretty neat!

2018_11180004a

I masked the top and bottom portions of the panel, inked the center with two light shades of distress ink, stamped in the center with two darker shades of distress ink, and then removed the masking paper. I stamped a large sentiment across the bottom and then layered the panel and attached it to the card base. I stamped large flowers on Valspar paint cards and punched them out. I affixed glitter gumdrops to the centers of the flowers and adhered them to the front of the card.

2018_11180005a

I embellished the inside panel with strips of the same cardstock used to layer the front panel and adhered a stamped/punched flower. I left the inside blank to write a custom sentiment.

2018_11180006a

And here’s one more look… I really like rubberband stamping! ;)

2018_11180007a

Products used:
Cardstock/Paper: Stampin’ Up thick and regular Whisper White cardstock, Stampin’ Up Pumpkin Pie cardstock, Valspar paint cards- Caramel Cream, Orange Ochre, Vivid Orange and Classic Red
Stamps: Stampin’ Up Flower Shop and One Big Meaning stamp sets
Ink: Ranger distress ink- dried marigold, wild honey, rusty hinge, barn door; StazOn White ink
Dies/Punches: Stampin’ Up Pansy Punch
Accessories:  Tim Holtz Stamp Platform, YNS White Glitter Gumdrops, Masking Paper, thin and medium rubberbands

I hope you’ve enjoyed today’s project and will link up with us this month! Remember, all of our challenges are ‘anything goes’ and the technique twist is not required to play! Although you have to admit that you’re now intrigued with rubberband stamping, arent’t you, lol, so give it a go! Thanks for stopping by today and we’ll see you again soon! ;)

Scrappy hugs,
lesliesig

Quirky CAS

Hi everyone! I’m posting the new August Anything Goes challenge today on the a2z Scrapbooking blog and I’m happy to share my DT inspiration project using the very cool Hero Arts Weird and Wonderful stamp set! I created a fun one-layer clean and simple friendship card for a Quirky… Oddball… One of a Kind… friend!

Leslie

This card is really CAS. No layers. Doesn’t get much easier than this. I stamped the three bold sentiments from the stamp set in black ink, then stamped over top of them in Versamark and heat embossed with clear embossing powder. I added five purple sequins for a little interest.

2018_07210005a

I kept the inside very simple with just a stamped sentiment. No layered panels this time.

2018_07210006a

Products used:
Paper/Cardstock: Stampin’ Up Whisper White cardstock
Stamps: Hero Arts Weird and Wonderful stamp set
Ink: Memento Tuxedo Black ink, Versamark ink
Accessories: Hero Arts Clear Embossing PowderHero Arts Ombre Purple Sequins

I hope you’ve enjoyed this card and will link up a project with us! We’d love to see what you create! Be sure to check out all the amazing crafty goodies in the a2z Scrapbooking storeAND if you use the code Leslie15 you’ll get 15% off your order of $25 or more! Thanks so much for stopping by today – we’ll see you soon!

Scrappy hugs,
lesliesig