best day ever

Hi friends! I hope you are having the kind of beautiful weather we’re having out here in southwestern Colorado! I’m delighted to share that one of my projects was a top pick a few weeks ago over at Scrapping4fun Challenges. I was invited to guest design for an upcoming challenge, so here I am just in time for Challenge #235 – Wedding/Anniversary! I dug into my arsenal of SVG cut files and came up with this pretty church box card (cut file from SVG Cuts) to make for this challenge. I tailored it for a wedding by changing the wreath a bit, adding yellow vellum to the windows, and adding grass on the sides of the church. I love how it turned out!

Using my Cricut Explore Air 2 and the SVG Cuts Church Box Card cut file, I cut all the church pieces from CutCardStock Basis White cardstock and the wreath from 12×12 Cardstock Shop green and pink textured cardstock. I assembled the wreath, adding flower sequins and a white heart from the Keep It Simple Sprinkles Polymer Clay-Pink & White Hearts with Pearls mix.

Next, I die cut a grass border for each side of the church from the green textured cardstock using the Precious Marieke grass border die, and hand-cut small pieces of 12×12 Cardstock Shop yellow vellum for the front and side windows. The final touch on the front was adding a Tim Holtz idea-ology Small Talk sentiment sticker to the bottom steeple element.

For the back, I stamped a floral pattern on the frame using the Keep It Simple Simply Spring stamp set in Catherine Pooler Pink Champagne ink. I colored the florals with a few alcohol markers (to bring in the purple and pink in the iridescent flower sequins on the wreath) and added some Eyelet Outlet white glitter enamel dots. I stamped a tiny sentiment from the Trinity Stamps A Sentiment for (Almost) Everything stamp set in Memento Tuxedo Black ink on a Basis White scrap, trimmed it, and adhered it horizontally to the sentiment panel. The assembly is always the most fun, and I really enjoyed putting this one together. It was quite easy, actually!

Affiliate links are used in this post at no cost to you – I really appreciate your support! 

Products used:
CARDSTOCK/PAPER: CutCardStock Basis 80# 12×12 White cardstock, 12×12 Cardstock Shop Green Textured and Pink Textured cardstock and Yellow Translucent vellum
STAMPS: Keep It Simple Simply Spring stamp set, Trinity Stamps A Sentiment for (Almost) Everything stamp set
INK: Catherine Pooler Pink Champagne ink; Spectrum Noir Tri-Blends- MG1, DG1, LV1; Memento Tuxedo Black ink
DIES/PUNCHES: SVG Cuts Church Box Card SVG cut file, Precious Marieke Grass Border die
ACCESSORIES: Cricut Explore Air 2, Fiskars 12″ ProCision Rotary Bypass Paper Trimmer, Elmer’s Craft Bond Tape Runner, Bearly Art precision craft glue, MISTI stamp tool, Big Shot, Tim Holtz Alterations/Texture Fades Woodgrain embossing folder, Keep It Simple Sprinkles Polymer Clay-Pink & White Hearts with Pearls, Eyelet Outlet white glitter enamel dots, Tim Holtz idea-ology Small Talk sentiment stickers

I hope you’ve enjoyed seeing this project and will link up a wedding or anniversary project with us this time! Thanks so much for stopping by today – we’ll see you next time! ;)

Scrappy hugs,

Hoping all your birthday fishes come true

Hey everybody! Well, another weekend has come and gone, and here we are officially in the middle of January! I’m delighted to share that one of my projects scored both Stand Out and Top 5 Creation honors over at Scrapping4fun Challenges a few weeks back, so I was invited by the lovely Rachelle to guest design in Challenge #231. The theme of this challenge is to Add Turtles or Fish, so I pulled out some Carta Bella beachy papers and stickers along with an adorable flatback resin fish from Buttons Galore & More to create this double diamond fold! I was inspired by the cards Lisa Curcio showcased on her blog using this fold and I love how mine turned out. I’m sure I’ll be making this again!

I cut the card base from CutCardStock Lessebo White and the layering panels from Lessebo Sunset Orange and Carta Bella Beach Party Collection Kit. I stamped the sentiment from the Stampin’ Up Whale Done stamp set in Memento Tuxedo Black ink on the center panel and added a couple shell stickers. Next, I added a fish from the Buttons Galore & More Aquarium Flatbackz Embellishments, and the finishing touch was adding iridescent and yellow gemstones.

Here’s an angled shot showing the construction, and the best part is this card folds flat for mailing!

Sharing in the following challenges:
1. 613 Avenue Create: Anything Goes w/ optional New Beginnings (no twist)
2. A Perfect Time To Craft Open Challenge: January #1-2024 – Anything Goes
3. Alphabet Challenge Blog: U is for Under Something (under the sea)
4. Classic Design Challenge: #01-2024 – Anything Goes w/ optional Blue & White
5. Critter Crazy Challenges: #82 – Anything Goes with a Featured Critter

Affiliate links are used in this post at no cost to you – I really appreciate your support! 

Products used:
CARDSTOCK/PAPER: Neenah Classic Crest 80# Solar White cardstock, CutCardStock Lessebo White and Lessebo Sunset Orange cardstock, Carta Bella Beach Party Collection Kit
STAMPS: Stampin’ Up Whale Done stamp set
INK: Memento Tuxedo Black ink
ACCESSORIES: Tonic Studios 12″ Guillotine Paper Trimmer, Elmer’s Craft Bond Tape Runner, Bearly Art precision craft glue, MISTI stamp tool, Buttons Galore & More Aquarium Flatbackz Embellishments, cordless hot glue gun, iridescent and yellow gemstones

I hope you’ve enjoyed seeing this fun fold and will link up with us this month! We’d love to see your project with a turtle or fish! Thanks so much for stopping by today – we’ll see you next time! ;)

Scrappy hugs,

Vintage Post Card

Hey everybody! Wowzers, get ready for some heavy traffic on my blog today as there is a lot going on! I’m delighted to share that at the end of June one of my projects scored Stand Out and Top 5 honors over at Scrapping4fun Challenges and I was invited to guest design for an upcoming challenge, so here I am! The theme for Challenge #227 is Vintage so I created a mixed media vintage post card using some older stamps in my stash.

I cut a post card base from CutCardStock Cougar Smooth 80# White cardstock and lightly swiped Catherine Pooler Sand Castle ink over it to give it a little color. Using my Tim Holtz distress sprayer, I spritzed water through my fingers onto the panel and blotted it with a paper towel. I randomly stamped images from the Paper Wings Productions Art Textures and Writing Backgrounds stamp sets over the background (using my finger tips) in Catherine Pooler Icing on the Cake and Cummerbund inks, stamping off once for a lighter impression. I inked the edges of the panel with Ranger walnut stain distress ink, making some tears in the edges and dirtying it up a bit.

I swiped Catherine Pooler All That Jazz ink on a scrap piece of Cougar White cardstock, stamped the vintage car from the Dare 2B Artzy Classic Dad stamp set in Icing on the Cake ink and then cut it with the coordinating die from the Classic Car die set. I stamped the Route 66 sign from the same stamp set in the brown ink and cut it with the coordinating die. I added a strip of Eyelet Outlet Road washi tape horizontally toward the bottom of the panel and adhered the car and sign to the panel, popping the car up on a foam strip. Finally, I stamped the sentiment across the bottom in Icing on the Cake ink which completed the front of the post card.

I created a snippet of a post card on the Gecko Galz Postage 1 digital image sheet which I enlarged a bit to fit the back of the post card and added a sticker ‘stamp’ from the Echo Park Away We Go Collection Kit.

Sharing in the following challenges:
1. A Perfect Time To Craft Open Challenge: September #9-2023 – Anything Goes
2. Classic Design Challenge: September #9 – Anything Goes
3. Crafts Galore Encore Challenge Blog: #115 – Anything Goes
4. Creative Artiste Challenge Blog: #97 – Anything Mixed Media Goes
5. Di’s Digistamps Challenge: Die Cuts and/or Punches
6. If You Give a Crafter a Cookie: #184 – September/Browns

Affiliate links are used in this post at no cost to you – I really appreciate your support! 

Products used:
CARDSTOCK/PAPER: Cougar Smooth 80# White cardstock
STAMPS: Paper wings Productions Art Textures and Writing Backgrounds stamp sets, Dare 2B Artzy Classic Dad stamp set, Gecko Galz Postage 1 digital image sheet
INK: Catherine Pooler Sand Castle, Icing on the Cake, Cummerbund and All That Jazz inks; Memento Tuxedo Black ink, Ranger walnut stain distress ink
DIES/PUNCHES: Dare 2B Artzy Classic Car die set, Kadomaru Pro Corner Rounder
ACCESSORIES: Tonic Studios 12″ Guillotine Paper Trimmer, Tombow Mono Dots adhesive, Bearly Art precision craft glue, MISTI stamp tool, Big Shot, Tim Holtz distress sprayer, Eyelet Outlet Road washi tape, 1/4″ double-sided foam strip, Echo Park Away We Go Collection Kit

I hope you’ve enjoyed seeing this project and will link up with us this time! Thanks so much for stopping by today – we’ll see you next time! ;)

Scrappy hugs,

all day your way!

Hey everybody! Happy July 1st! I have but one question… how did July get here so fast?! I’m delighted to share that one of my little matchbooks scored a Top 5 honor in May over at Scrapping4fun Challenges and the lovely Rachelle invited me to guest design in an upcoming challenge, so here I am, just in time for Challenge #225 – Birthday! Rachelle and the Scrapping4fun Challenges blog both have birthdays this month, so a big ol’ Happy Birthday to them – and what better way to celebrate than to have a birthday-themed challenge!

I have sooooo many cut files in my arsenal and had the urge to play, so I got out my Scan N Cut and a cut file from SVG Cuts, and created an awesome toolbox box card for Ed’s birthday. Needless to say, he loved it! With all this amazing detail, who wouldn’t?!

Using my Scan N Cut and the SVG Cuts Toolbox Box Card cut file, I cut the toolbox, tools and note pad from CutCardStock Basis Navy, Basis Gray, Stardream Metallic Silver, Pop Tone Lemon Drop and Cougar Smooth 80# White cardstock. I also used a couple patterned papers from The Paper Studio Entirely Textures 2 12×12 paper pad and P13 Always and Forever 6×8 design paper pack.

I always totally enjoy the assembly of projects like this – it’s so fun watching them come to life! I used the Stampin’ Up Happy & Heartfelt stamp set for the front sentiment and the Stampin’ Up Charming Sentiments stamp set for the back sentiment, both stamped in Catherine Pooler Suede Shoes ink.

Here’s one final shot of the card folded flat ready to put in the envelope.

Affiliate links are used in this post at no cost to you – I really appreciate your support! 

Products used:
Cardstock/Paper: CutCardStock Basis Navy, Basis Gray, Stardream Metallic Silver, Pop Tone Lemon Drop and Cougar Smooth 80# White cardstock, The Paper Studio Entirely Textures 2 12×12 paper pad, P13 Always and Forever 6×8 design paper pack
Stamps: Stampin’ Up Happy & Heartfelt and Charming Sentiments stamp sets
Ink: Catherine Pooler Suede Shoes ink
Dies/Punches: SVG Cuts Toolbox Box Card cut file
Accessories: Brother Scan N Cut, CutCardStock Plus High Capacity adhesive, Art Glitter Dries Clear adhesive, MISTI stamp tool, 1″ double-sided foam strip

I hope you’ve enjoyed seeing this project and will link up with us this month! We’d love to see your birthday project! Thanks so much for stopping by today – we’ll see you next time! ;)

Scrappy hugs,

‘To someone sew nice’ Matchbook

5/7/23 Art Impressions Fan Feature!

Hey everybody! A very Happy Saturday to you all! I hope you have something fun planned this weekend! I’m stoked to share that I’m once again guest designing for the lovely Rachelle over at Scrapping4fun Challenges! One of my projects scored a Shout Out Creation honor a few weeks back, so here I am with a GD project for Challenge #222 – Ladies/Girls + Add Layers! I’m so in love with the Art Impressions Matchbook line (and several other Ai lines to be truthful!) and really enjoyed creating this sewing-themed Matchbook! It fits the theme perfectly!

Using the Art Impressions Matchbook Template Die, I cut the base from a double-sided piece of patterned paper from Polly’s Paper Studio. I stamped all the layers from the Art Impressions Sewing Room Stamps on CutCardStock Basis 80# White cardstock, colored them with alcohol markers, and cut them with the coordinating dies.

Then came the fun of assembling this adorable little Matchbook. Next I created the tiny little envelope using the Art Impressions Matchbook Envelope Dies and another double-sided patterned paper from Polly’s Paper Studio. ;)

Here are a couple more angled shots. So stinkin’ cute I can’t stand it!

Affiliate links are used in this post at no cost to you – I really appreciate your support! 

Products used:
Cardstock/Paper: Polly’s Paper Studio patterned papers, CutCardStock Basis 80# White cardstock
Stamps: Art Impressions Sewing Room Stamps
Ink: Memento Tuxedo Black ink; Arteza alcohol markers- CG06/08, Y24/27, PB09, G09/34/36, B29, RP09/23/26, YG06/07, R14/15/21, BG05/07, BR62/63
Dies/Punches: Art Impressions Matchbook Template Die, Matchbook Sewing Room Dies and Matchbook Envelope Dies
Accessories: Tonic Studios 12″ Guillotine Paper Trimmer, Bearly Art precision craft glue, MISTI stamp tool, Big Shot

I hope you’ve enjoyed seeing this adorable sewing-themed Matchbook and will link up a ladies/girls project with layers! Thanks so much for stopping by today – we’ll see you next time! ;)

Scrappy hugs,

Surfin’ Santa with a ho ho ho

Hi friends! Happy Tuesday to you! Since it’s the first day of November, it’s busy here on my blog this morning, lol! Another one of my projects was in the Top 3 at Scrapping4fun Challenges several weeks ago and I was invited to guest for Challenge #218 – Summer/Winter, so here I am! I featured both Summer AND Winter in my DT inspiration project and just love how it turned out! You know I’m a huge fan of box cards, so I used the Surfing Santa Card cut file from Simply Crafty SVGs!

I cut the card base from Cardstock Warehouse Brown Box 100# Kraft cardstock, and the rest of the pieces from CutCardStock Pop Tone Black Licorice, Pop Tone Hot Fudge, Pop Tone Jellybean Green, Pop Tone Sweet Tooth, Pop Tone Wild Cherry, and Sandcastle cardstock, along with Hot Off The Press Seascapes & Sand 6×6 double-sided cardstock and Brutus Monroe blue glitter cardstock. I always say the most fun part is the assembly, and this one was no different! I love watching them come to life!

Here is a shot of the back showing the panel to write a custom message and signature and an angled side shot showing the construction. Box cards are so much fun!

Affiliate links are used in this post at no cost to you – I really appreciate your support! 

Products used:
Cardstock/Paper: Cardstock Warehouse Brown Box 100# Kraft cardstock; CutCardStock Pop Tone Black Licorice, Pop Tone Hot Fudge, Pop Tone Jellybean Green, Pop Tone Sweet Tooth, Pop Tone Wild Cherry, and Sandcastle cardstock; Hot Off The Press Seascapes & Sand 6×6 double-sided cardstock, Brutus Monroe blue glitter cardstock
Stamps: Paper Smooches Holiday Cheer stamp set
Ink: Catherine Pooler Suede Shoes ink
Dies/Punches/Cut Files: Simply Crafty SVGs Surfing Santa Card cut file
Accessories: Bearly Art precision craft glue, MISTI stamp tool, Eyelet Outlet blue Enamel Dots

I hope you’ve enjoyed seeing this project and will link up a Winter/Summer project with us this time – can be either/or or both like I did, lol! Thanks so much for stopping by today – we’ll see you next time! ;)

Scrappy hugs,

Happy Birthday

Howdy everybody! Happy Monday – I hope you had a fabulous weekend! I’m proud to share that another one of my projects was Featured over at Scrapping4fun Challenges several weeks ago which scored me another guest gig – this time for Challenge #215 – Tags or Add a Tag on Your Creation! I love adding tags to my card fronts so I really enjoyed making this one! I had the Spellbinders Wild Hello June 2021 Kit of the Month in my stash so I pulled it out and decided to loosely CASE one of the card samples in the kit that I fell in love with. I used cardstock, a line die, patterned paper, die cut shapes (one being a tag which was in line with this challenge) and chipboard embellishments from the kit to create a birthday card.

I cut a standard A2 size top-folding card base from white cardstock in the Spellbinders kit along with a layering panel and strip from the patterned paper. I die cut the Happy Birthday line sentiment from black cardstock and adhered it to the seam of the patterned papers. I arranged a couple die cut shapes and several chipboard embellishments which completed the card front.

I cut the inside panel from white cardstock in the kit and embellished it with leftover strips of patterned paper and cardstock. I added a couple die cut shapes and layered the panel on black cardstock.

And one more look… totally loving how this turned out! The tag takes center stage with the die cut frame, and then comes the die cut sentiment and those chipboard embellishments! Love, love, love!

Sharing in the following challenges:
1. A Perfect Time To Craft Open Challenge: #8-2022 – Anything Goes
2. Classic Design Challenge: August #8 – Anything Goes
3. Country View Challenges: August 2022 – Happy Birthday
4. Moving Along With the Times: #145 – Anything Goes
5. Penny’s Paper-Crafty Challenge Blog: #526 – Anything Goes with Paper

Affiliate links are used in this post at no cost to you – I really appreciate your support! 

Products used:
Accessories: Spellbinders Wild Hello June 2021 Kit of the Month (white and Black cardstock, Happy Birthday Die, Patterned Paper, Die Cut Shapes and Chipboard Embellishments); We R Memory Keepers Mini Guillotine Paper Trimmer, Bearly Art precision craft glue

I hope you’ve enjoyed seeing my GD inspiration project and will link up a tag project with us this time! Thanks so much for stopping by today – we’ll see you next time! ;)

Scrappy hugs,

Sending Hugs & Good Vibes

Hey everybody! Hope you had a good weekend and your week is off to a nice start! I tell you what… March 1st sure got here fast, lol! Affiliate links are used in this post at no cost to you – I really appreciate your support! Another one of my projects was a Featured Creation over at Scrapping4fun Challenges so I’ve once again been invited to guest design, this time for Challenge 210 – Something with Watercolors! I created a watercolored panel for the front of this clean and simple get well card, and I actually attempted my first process video while creating the watercolored panel… and my dang brush kept losing bristles on the wet panel! So the camera got turned off and the brush went into the garbage! Bahahaha! I’ll try again soon, so stay tuned! :D

I created a narrow watercolored panel from Ranger Distress Watercolor cardstock and Ranger salty ocean, peacock feathers, mowed lawn and mustard seed distress inks. I used the heat tool to ensure that it was dry before stamping the floral image from the STAMPlorations Beautiful You stamp set in Catherine Pooler Midnight ink. I then layered the panel on CutCardStock Royal Linen Eclipse cardstock. I cut a standard A2 size top-folding landscape card base from CutCardStock Basis 110# White cardstock and rounded the bottom right corner. I adhered the watercolored panel to the card base along with a sentiment from Taylored Expressions Simple strips In Reverse – Everyday Occasions cut with the coordinating Taylored Expressions Simple Strips – Asymmetrical die. The finishing touch was adding several gemstones from Trinity Stamps Melanite Magic Embellishment Mix with the Trinity Pick Up Stick.

I cut the inside panel from Neenah Classic Crest 80# Solar White cardstock and embellished it with a wide strip of CutCardStock Pearl Canvas Textured Surf cardstock layered on CutCardStock Royal Linen Eclipse cardstock. I added another sentiment from Taylored Expressions Simple strips In Reverse – Everyday Occasions cut with the coordinating Taylored Expressions Simple Strips – Asymmetrical die, and layered the panel on the smooth side of the surf cardstock.

And one more peek… I’m so smitten with this card! I’m telling you, less really is more sometimes! Love how this turned out!

Sharing in the following challenges:
1. A Perfect Time To Craft Open Challenge: 33-2022 – Anything Goes
2. Classic Design Team Challenge: March #3 – Anything Goes
3. Crafting Happiness Challenges: #121 – March Anything Goes Always
4. Crafts Galore Encore Challenge Blog: #97 – March Anything Goes
5. Jan’s Digi Stamps Challenge: February Anything Goes
6. Paperbabe Stamps: #162 – Anything Goes
7. QKR Stampede: #439 – Anything Goes
8. The Crafter’s Cafe: #282 – Make Your Own Background
9. The Creative Crafters: #49 – Anything Goes

Products used:
Cardstock/Paper: CutCardStock Basis 110# White cardstock, Ranger Distress Watercolor cardstockCutCardStock Royal Linen Eclipse cardstock, CutCardStock Pearl Canvas Textured Surf cardstock, Neenah Classic Crest 80# Solar White cardstock
Stamps: STAMPlorations Beautiful You stamp set
Ink: Ranger distress inks- salty ocean, peacock feathers, mowed lawn and mustard seed; Catherine Pooler Midnight ink
Dies/Punches: Kadomaru Pro corner rounder, Taylored Expressions Simple Strips – Asymmetrical die
Accessories: We R Memory Keepers Large Guillotine Paper Trimmer, Bearly Art precision craft glue, Ranger Distress Sprayer, Milwaukee heat tool, MISTI stamp tool, Big Shot, Taylored Expressions Simple strips In Reverse – Everyday Occasions, Trinity Stamps Melanite Magic Embellishment Mix, Trinity Pick Up Stick

I hope you’ve enjoyed seeing this project with watercoloring and will link up with us this month! Thanks so much for stopping by today – we’ll see you next time! ;)

Scrappy hugs,

best mother ever

Hey everybody! A very Happy Tuesday to you! Hope you had a great weekend and did something fun! Affiliate links are used in this post at no cost to you – I really appreciate your support! Today would have been my parents’ 74th wedding anniversary and my oldest sister was born nine months and four days later, lol! Happy anniversary in Heaven, Mom and Dad! I’m sure you are celebrating! Now on to my card… one of my projects was dubbed a Featured Creation over at Scrapping4fun Challenges a couple months ago and I was invited to guest design in an upcoming challenge, so here I am sharing my GD inspiration project for Challenge 209 – Anything Goes! We have a hardware store here in our little town that sells everything but the kitchen sink (lol), and the owner commissions me to make Mother’s Day cards every year and they sell like hotcakes! I created this card with a precolored image from Jan’s Digi Stamps Lily of the Valley set.

Using the Crafter’s Companion Ruth Create-A-Card die set, I cut the card base from Neenah Classic Crest 110# Solar White cardstock along with a slightly smaller layering panel from Stampin’ Up Crushed Curry cardstock. I printed the image on Neenah Classic Linen 80# Solar White cardstock and cut it with a smaller die in the set, adhered them together and then to the card base. Using the Stampin’ Up And Many More stamp set, I stamped the sentiment horizontally in black ink, and then added a few dots of English Mustard Crystal Drops to finish the card front.

Using the same Crafter’s Companion Ruth Create-A-Card die set, I die cut the inside panels from Neenah Classic Crest 80# Solar White cardstock and Stampin’ Up Crushed Curry, and adhered them together. I stamped the inside sentiment from the Stampin’ Up Grateful Bunch stamp set in black ink and adhered the piece to the inside of the card base.

And one more look… I just love Jan’s Digi Stamps images, and the precolored ones are gorgeous and make perfect cards!

Sharing in the following challenges:
1. A Perfect Time To Craft Open Challenge: #2-2022 – Anything Goes
2. Classic Design Challenge: February #2 – Anything Goes
3. Crafting Happiness Challenges: #120 – February Anything Goes
4. Crafts Galore Encore Challenge Blog: #96 – Anything Goes
5. QKR Stampede: #437 – Anything Goes

Products used:
Cardstock/Paper: Neenah Classic Crest 110# Solar White cardstock, Neenah Classic Linen 80# Solar White cardstock, Stampin’ Up Crushed Curry cardstock
Stamps: Stampin’ Up And Many More and Grateful Bunch stamp sets
Ink: Memento Tuxedo Black ink
Dies/Punches: Crafter’s Companion Ruth Create-A-Card die set
Accessories: Tonic Studios 12″ Guillotine Paper Trimmer, Gemini Junior, MISTI stamp tool, Tombow Mono permanent adhesive, Nuvo English Mustard Crystal Drops

I hope you’ve enjoyed seeing this card and will link up an Anything Goes project over at Scrapping4fun Challenges this time! Thanks so much for stopping by today – we’ll see you next time! ;)

Scrappy hugs,

Hello Hello Hello

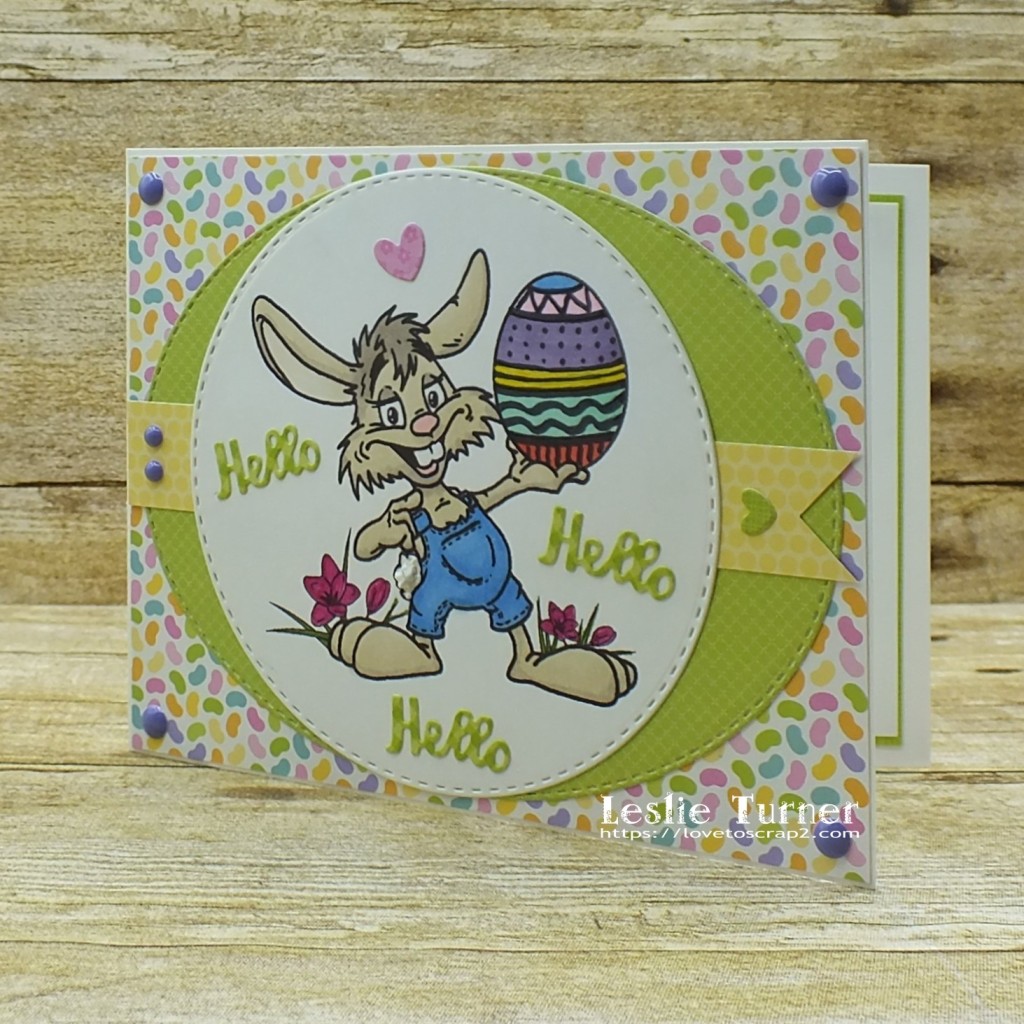
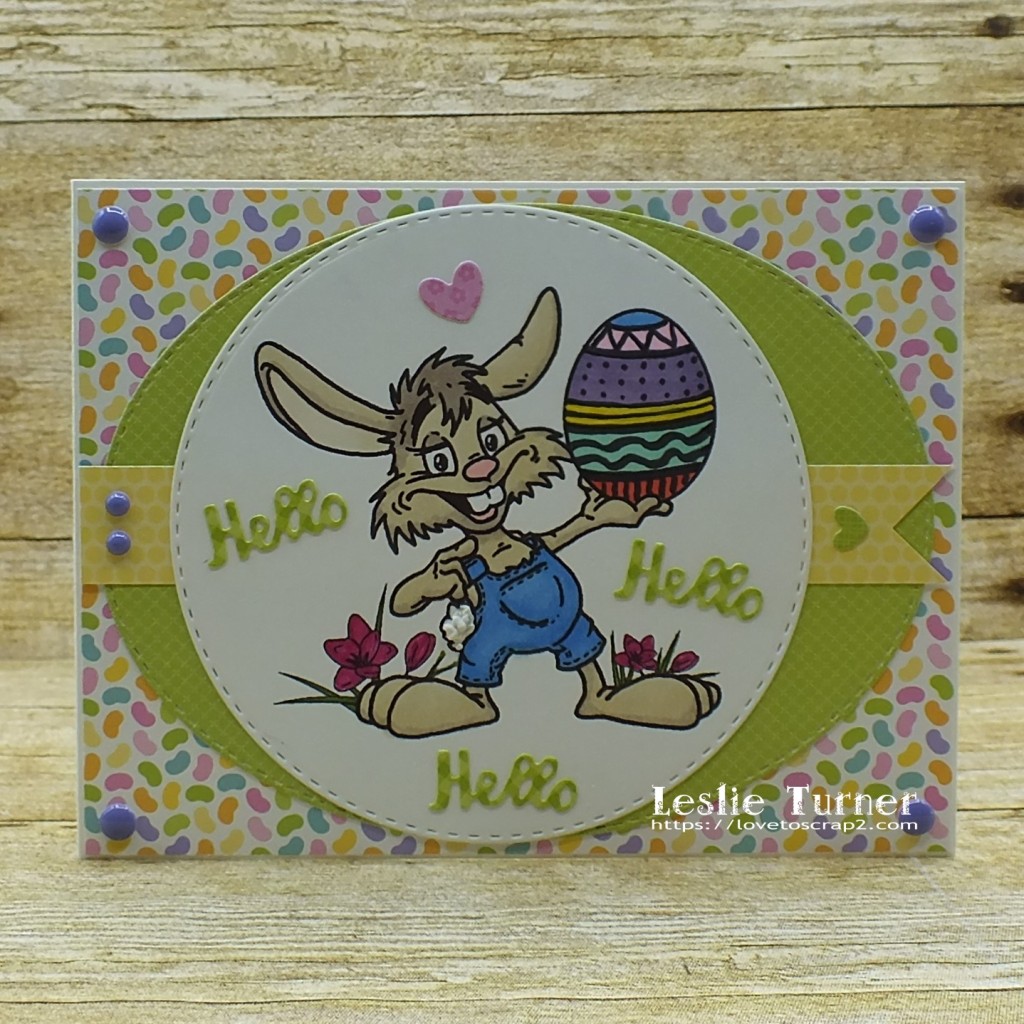
Hi everyone! I hope you’re having a fabulous week – the weekend is almost here! Affiliate links are used in this post at no cost to you. I really appreciate your support! I’m stoked to share that I’m guest designing for Scrapping4fun Challenges again! One of my projects was a Featured Creation a few weeks back and I was invited by the lovely Rachelle to be a guest designer for Challenge #188 – Easter/Spring, so here I am! Our sponsor this time is Fabrika Fantasy so come on over and play! I created a fun Easter card featuring Fabrika Fantasy’s Easter Bunny digital image – isn’t he the cutest?! He reminds me of that obnoxious friend in junior high school who wouldn’t take no for an answer, lol! Bahahaha!

I absolutely love this image and have had it in my stash for a couple years. I’ve only used it once before so I thought it only fitting to use it for this Easter challenge, and I paired it with some fun Doodlebug Design patterned papers. I printed the image on Neenah Classic Crest Solar White cardstock, colored it with alcohol markers and cut it with a stitched circle die. I layered it offset slightly to the left onto a stitched oval die cut with a banner sandwiched between, to which I added a tiny heart die cut. I adhered a jelly bean patterned paper panel to the card base and then adhered the focal image. I adhered three Hello die cuts and a heart die cut to the focal image, and then made some fluff on his tail with my Marvy Snow Marker. The finishing touch was the addition of several purple enamel dots.

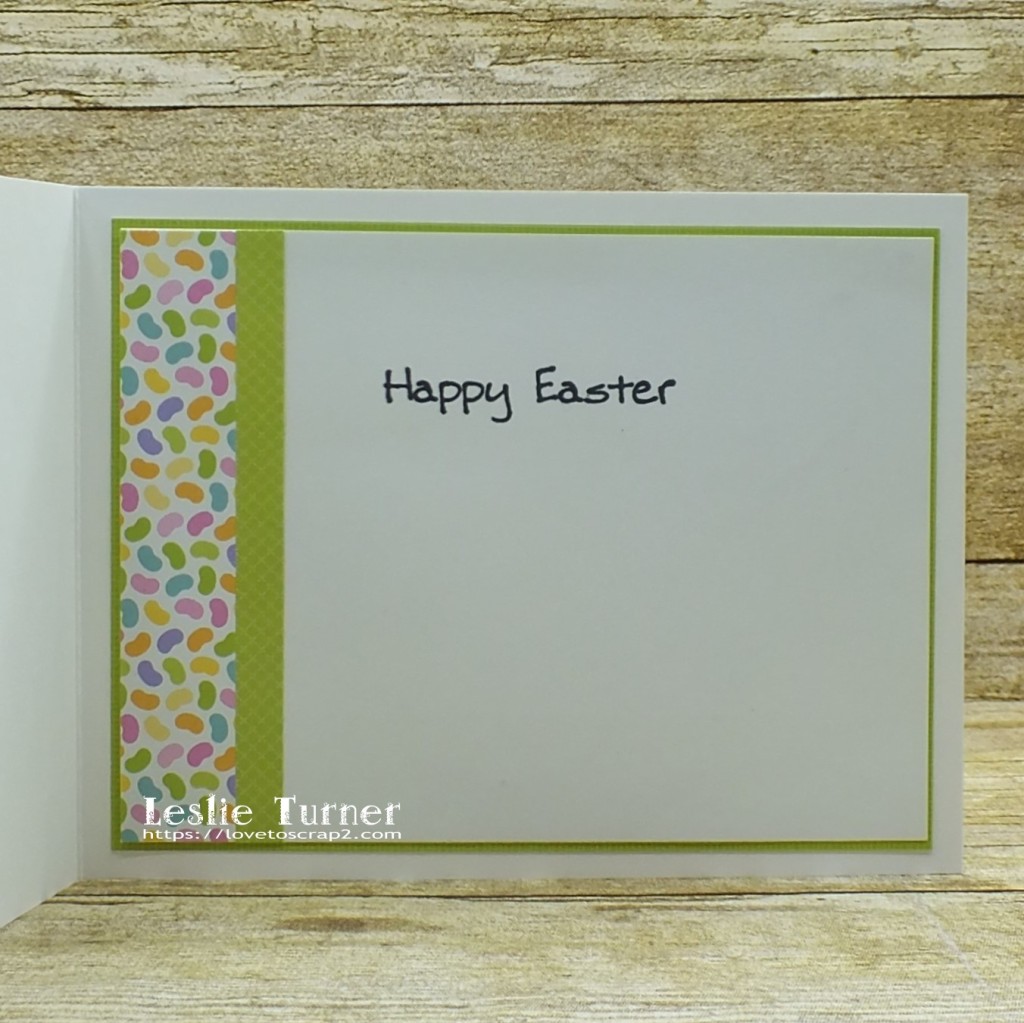
I cut the inside panel from Neenah Classic Crest Solar White cardstock and embellished it with leftover strips of patterned paper, stamped the inside sentiment, and layered the panel on green cardstock.

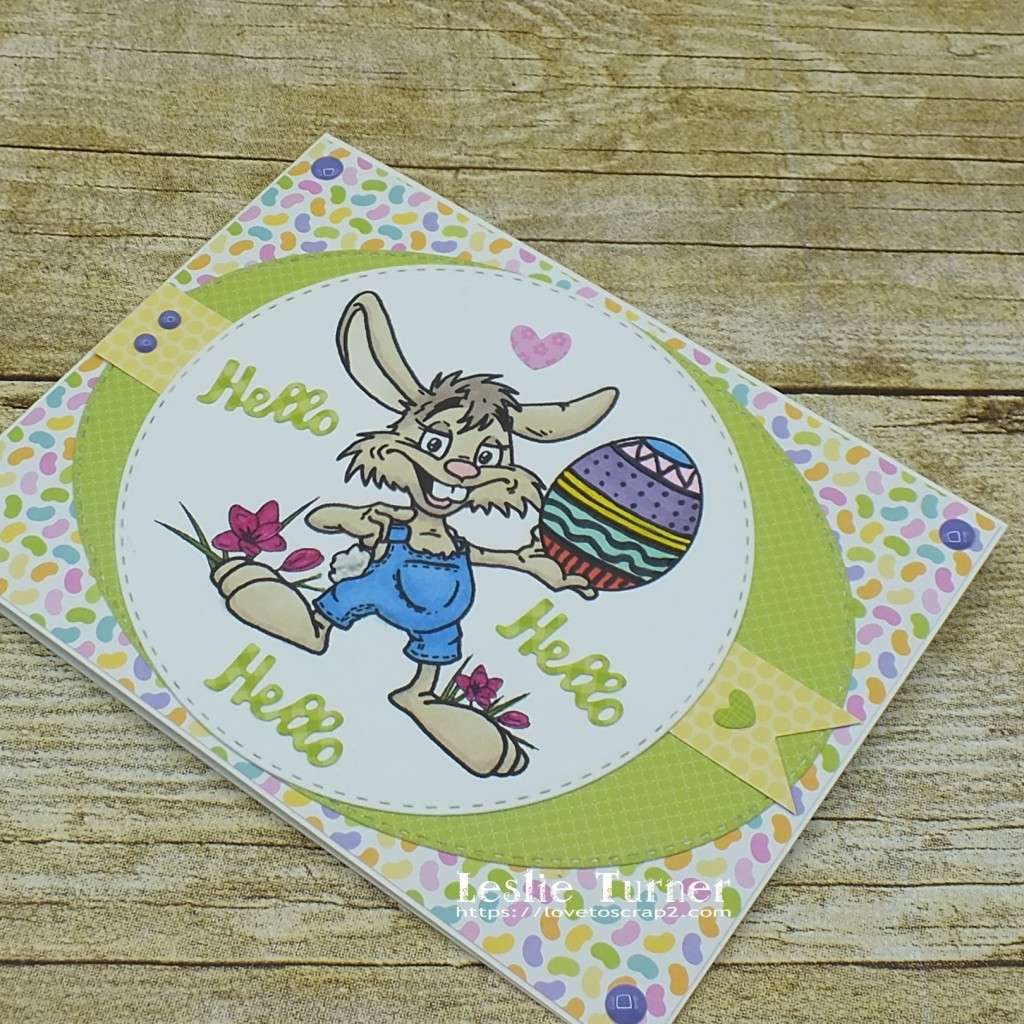
And one more look… love this guy! He’ll make somebody happy on Easter!

Sharing in the following challenges:
1. 2 Crafty Critter Crazies: March Anything Goes
2. A Perfect Time To Craft Open Challenge: #3-2021 – Anything Goes
3. A Place To Start: #3 – Pick A Shape (Circle)
4. Classic Design Challenge: #3 – Anything Goes
5. Crafty Gals Corner: #217 – Make It Green
6. Happy Little Stampers: March Anything Goes with Dies Challenge
7. International Art & Soul: #104 – Bunny
8. Lemon Shortbread Challenge Blog: #141 – Anything Goes
9. Mod Squad Challenge: Springtime Bunnies
10. Pammie’s Inky Pinkies Challenges: #2111 – Anything Goes

Products used:
Cardstock/Paper: Neenah Classic Crest Solar White cardstock, Doodlebug Design Gingham-Linen Rainbow Petite Prints and Hello Spring 6×6 paper pads
Stamps: Fabrika Fantasy Easter Bunny digital image, Stamp Camp Simple Sentiments 1 stamp set
Ink: Nuvo alcohol markers- 432, 497, 495, 449, 427, 360, 405, 439, 375; Faber Castell Pitt Artist pens- May Green and Middle Purple Pink; Memento Tuxedo Black ink
Dies/Punches: Memory Box Stitched Circle Layers and Stitched Oval Layers dies, Sizzix Traveler’s Notebook Inserts die set, EK Success 3/4″ square punch
Accessories: Tombow Mono permanent adhesive, Bearly Art precision craft glue, MISTI stamp tool, Gemini Junior, Marvy Uchida Snow Marker, Eyelet Outlet Purple Enamel Dots

I hope you’ve enjoyed today’s project and will link up an Easter/Spring project with us! We can’t wait to see what you create! And be sure to check out all the fun digis over at Fabrika Fantasy! Thanks so much for stopping by today – we’ll see you next time! ;)

Scrappy hugs,
lesliesig