you are fabulous

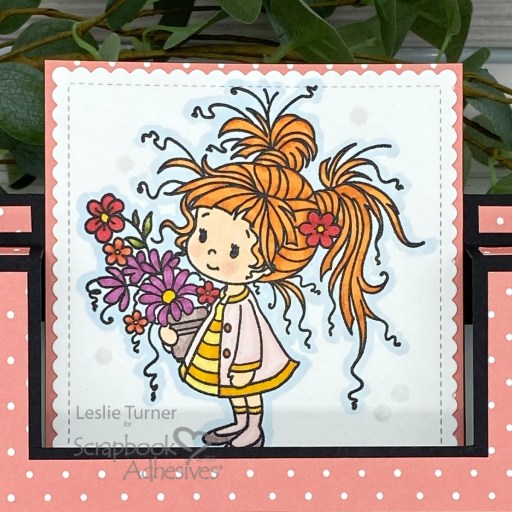
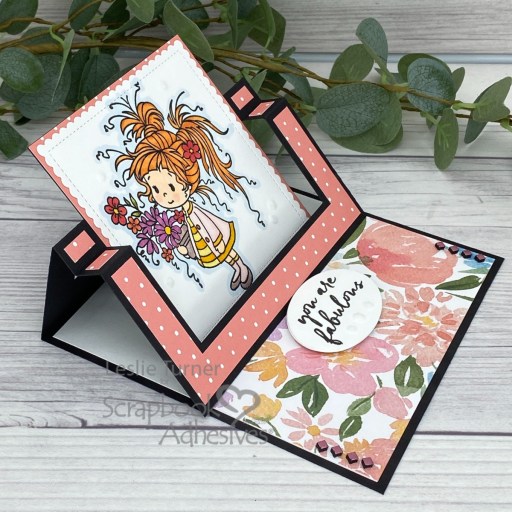
Hey everybody, happy Tuesday! I hope your week has started off on a nice note! I’m up on the Scrapbook Adhesives By 3L blog today with an inspiration project featuring a variety of our amazing products. This swing easel card design is truly one of my all-time favorites and I’ve used Dolly, an old Whimsy Stamps rubber stamp (which I’m pretty sure I’ve never used before), as my focal because she paired so nicely with this friendship theme and patterned papers!

I used the E-Z Runner Grand Permanent Strips to adhere the patterned paper and stamped image, 3D Foam Squares Micro Black and Metallic Transfer Foil Sheets Pastel Colors (in pink) for the tiny diamond embellishments on the bottom flap, 3D Foam Circles Black Mix to adhere the stopper, and the Dual Tip Glue Pen along with white flock in my stash to create some Flock Dots. I’ve never seen or heard of Flock Dots before, so to my knowledge, they are my own invention, lol!
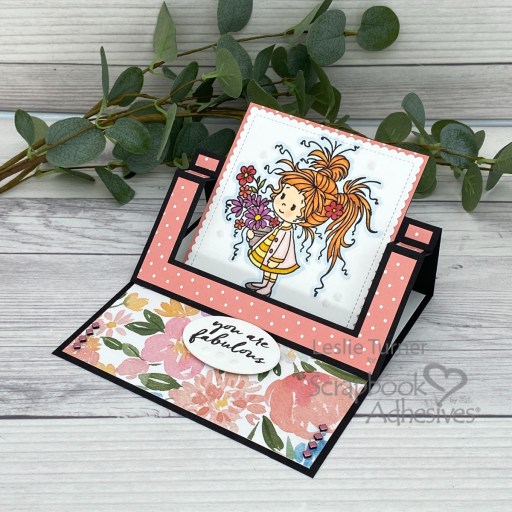
I cut the card base from CutCardStock Lessebo Pitch Black cardstock, along with layering panels from two coordinating prints in the Echo Park My Favorite Spring Collection Kit and a sentiment panel for the inside cut from Solar White. I stamped and heat embossed the Whimsy Stamps Dolly image on Classic Crest Solar White cardstock and colored her with a variety of alcohol markers. I cut the image with a My Favorite Things Mini Scallop Square STAX die, and then adhered all of the panels with E-Z Runner Grand Permanent Strips.

As I mentioned above, I created what I’m calling Flock Dots – small dots of adhesive from the Dual Tip Glue Pen dropped onto parchment paper and then dusted with white flock from my stash. I allowed these to dry overnight and used them as embellishments on the focal image panel when I assembled the card. They are so delicate and sweet!
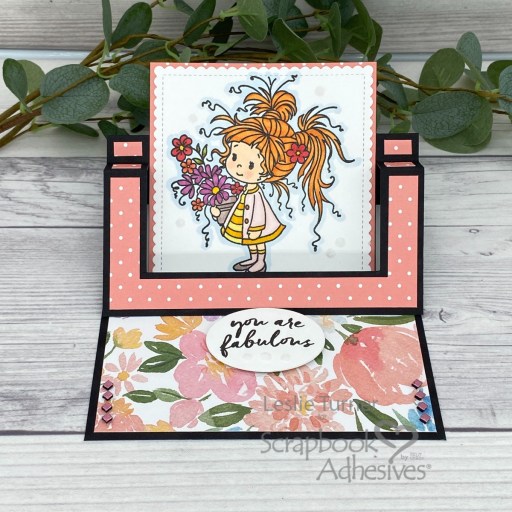
I stamped a sentiment from the Hero Arts You Are Fabulous stamp set which I punched with the Stampin’ Up! Extra Large Oval Punch to use as the easel stopper. I adhered it to the bottom panel with 3D Foam Circles Black Mix. I employed the ‘Wear Your Adhesive on the Outside’ technique using 3D Foam Squares Micro Black with pink foil from the Metallic Transfer Foil Sheets Pastel Colors, which I added to the outside corners of the bottom panel in diamond orientation. This completed the card, and I am SO smitten! ;)
Sharing in the following challenges:
1. https://hereisaplacetostart.blogspot.com/2026/10/challenge-202610-anything-goes.html
2. https://alphabetchallengeblog.blogspot.com/2026/10/m-is-for-motivational-cardproject.html
3. https://movingalongwiththetimes.blogspot.com/2026/10/challenge-194-easel-card.html
4 https://mynbus.blogspot.com/2026/10/nbus-challenges-91.html
5. https://sparklesforumchallenges.blogspot.com/2026/10/205-use-dies-die-cutting.html
6. https://wordartwednesday.blogspot.com/2026/10/anything-goes-774-775.html

Products used:
Scrapbook Adhesives by 3L®
E-Z Runner® Grand Permanent Strips Refillable Dispenser
3D Foam Circles Black Mix
3D Foam Squares Micro Black
Metallic Transfer Foil Sheets Pastel Colors

HomeHobby™ by 3L
Dual Tip Glue Pen

Affiliate links are used in this post at no cost to you – I really appreciate your support!

Other products used:
CARDSTOCK/PAPER: CutCardStock Lessebo Pitch Black cardstock, Classic Crest 80# Solar White cardstock, Echo Park My Favorite Spring Collection Kit
STAMPS: Whimsy Stamps Dolly Rubber Stamp, Hero Arts You Are Fabulous Stamp Set
INK: Versafine Onyx Black Ink, Versamark; Stampin’ Blends- Pumpkin Pie Light & Dark, Real Red Light, Calypso Coral Light & Dark, Daffodil Delight Light & Dark, Barely Blush Light & Dark, Petunia Pop Light & Dark, and Old Olive Light & Dark; Copic Ciao- E00/71, R20; Arteza GB08 Alcohol Marker
DIES/PUNCHES: My Favorite Things Mini Scallop Square STAX dies, Stampin’ Up! Extra Large Oval Punch
ACCESSORIES: Stampin’ Up! Paper Trimmer, Mini MISTI, Big Shot, Hero Arts Clear Embossing Powder, Milwaukee Heat Tool, white flock from stash

I hope you’ve enjoyed this project and you’re inspired to get your crafty supplies out and play! Be sure to check out the awesome array of adhesives and other craft supplies Scrapbook Adhesives By 3L has to offer! And be sure to follow us on Facebook, Pinterest, Instagram and Twitter for lots of crafty inspiration! And if you haven’t yet subscribed to our YouTube Channel, be sure to do that, too, for even more inspiration! Thanks so much for stopping by today – we’ll see you next time! 

Scrappy hugs,

You are fabulous

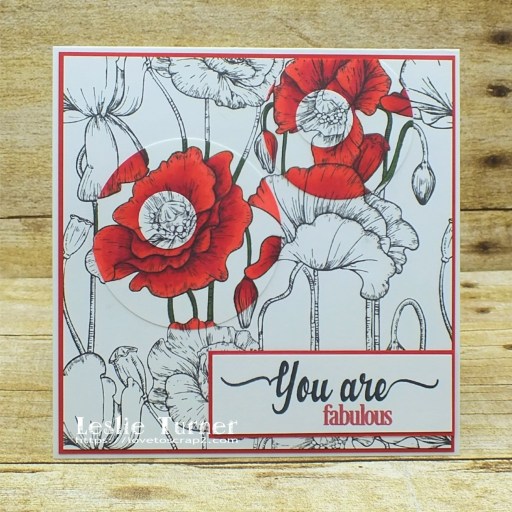
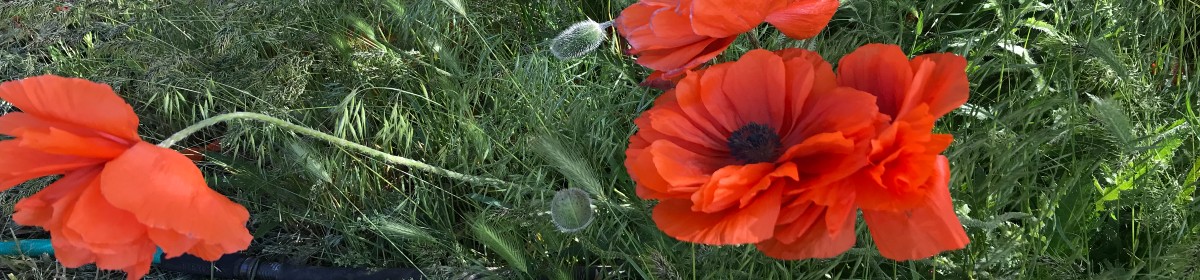
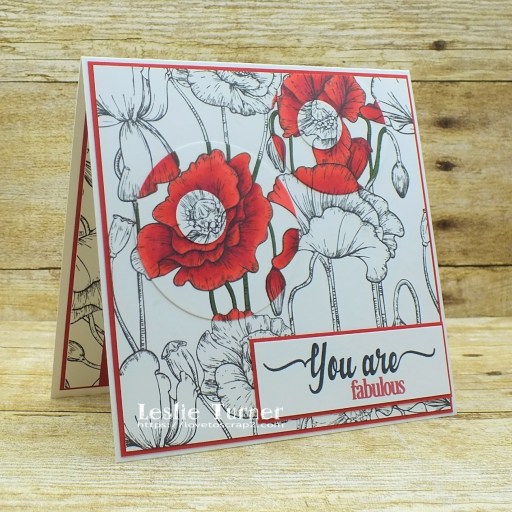
Hi everyone! Happy Sunday! I hope you’re having a wonderful weekend and it’s not too awfully hot where you are! Affiliate links are used in this post at no cost to you. I really appreciate your support! It’s time for another fun challenge over at Love To Craft Challenge Blog and I’m stoked to share my DT inspiration project for LTCCB #61 – August Anything Goes! I’m particularly excited about this post because it’s my first time trying the spotlight technique and I’m loving how it turned out! I actually went one step further and added an offset ‘reverse’ spotlight in the center of the spotlight which yielded a very cool effect, I think!

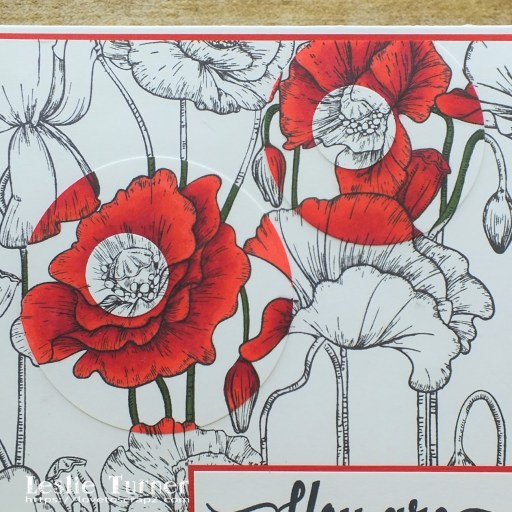
I’m in love with this My Favorite Things Poppies Background stamp which is perfect for this kind of technique. I cut a 5-1/2″ top-folding card base from Neenah Classic Crest Solar White cardstock. I stamped the background twice in black ink on Neenah Classic Crest Solar White cardstock and trimmed one of the stamped images to use for the background panel. I punched a 2-1/2″ circle and a 2″ circle from the second stamped image, colored the poppies and adhered the circles to the background panel, trimming the 2″ circle across the top so it was even with the edge of the panel. I layered the panel on CutCardStock Habanero Red cardstock, and adhered it to the front of the card base.

I decided I wanted to go one step further and add the ‘reverse’ spotlight (at least that’s what I’m calling it, lol) to the center of the spotlighted colored poppies, so I stamped the top portion of the background once more on Neenah Classic Crest Solar White cardstock. I punched 3/4″ circles from the center of the same two poppies and adhered them to the center of the colored circles.

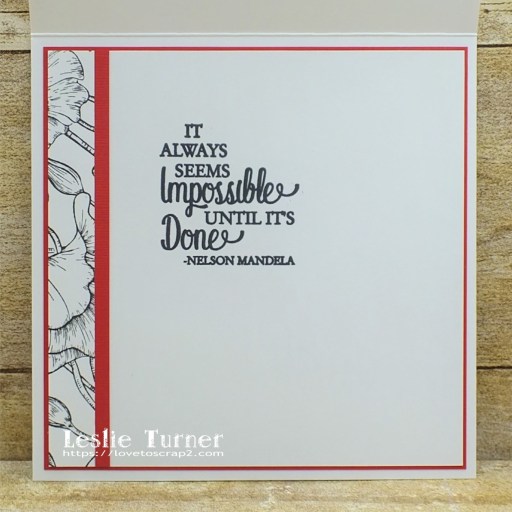
I cut the inside panel from Neenah Classic Crest Solar White cardstock and embellished it with a leftover strip cut off of one of the stamped images along with a narrow strip of CutCardStock Habanero Red cardstock, stamped the sentiment in black ink, and layered the panel on red cardstock.

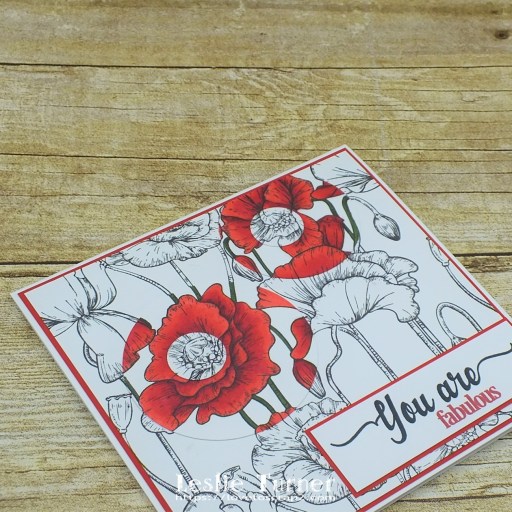
And one more peek… this was definitely a fun technique that I’m sure I’ll be doing again! Can’t believe I haven’t tried it before now!

Products used:
Cardstock/Paper: Neenah Classic Crest Solar White cardstock, CutCardStock Habanero Red cardstock
Stamps: My Favorite Things Poppies Background stamp; Inspired by Stamping You Are and Words of Wisdom II stamp sets
Ink: Dare 2B Artzy Totally Black ink; Nuvo alcohol markers- Rich Reds Collection, Woodland Greens Collection; Memento Tuxedo Black and Rhubarb Stalk ink
Dies/Punches: Fiskars 2-1/2″ circle punch; Stampin’ Up 2″ and 3/4″ circle punches
Accessories: Tonic Studios 12″ Guillotine Paper Trimmer, Tombow Mono permanent adhesive, Bearly Art precision craft glue

I hope you’ve enjoyed today’s project and will link up an ‘anything goes’ project with us this month! We’d love to see what you’re working on! Thanks so much for stopping by today – we’ll see you again spoon! ;)

Scrappy hugs,
lesliesig

you are fabulous

4/1/21 Top 5 at QKR Stampede!

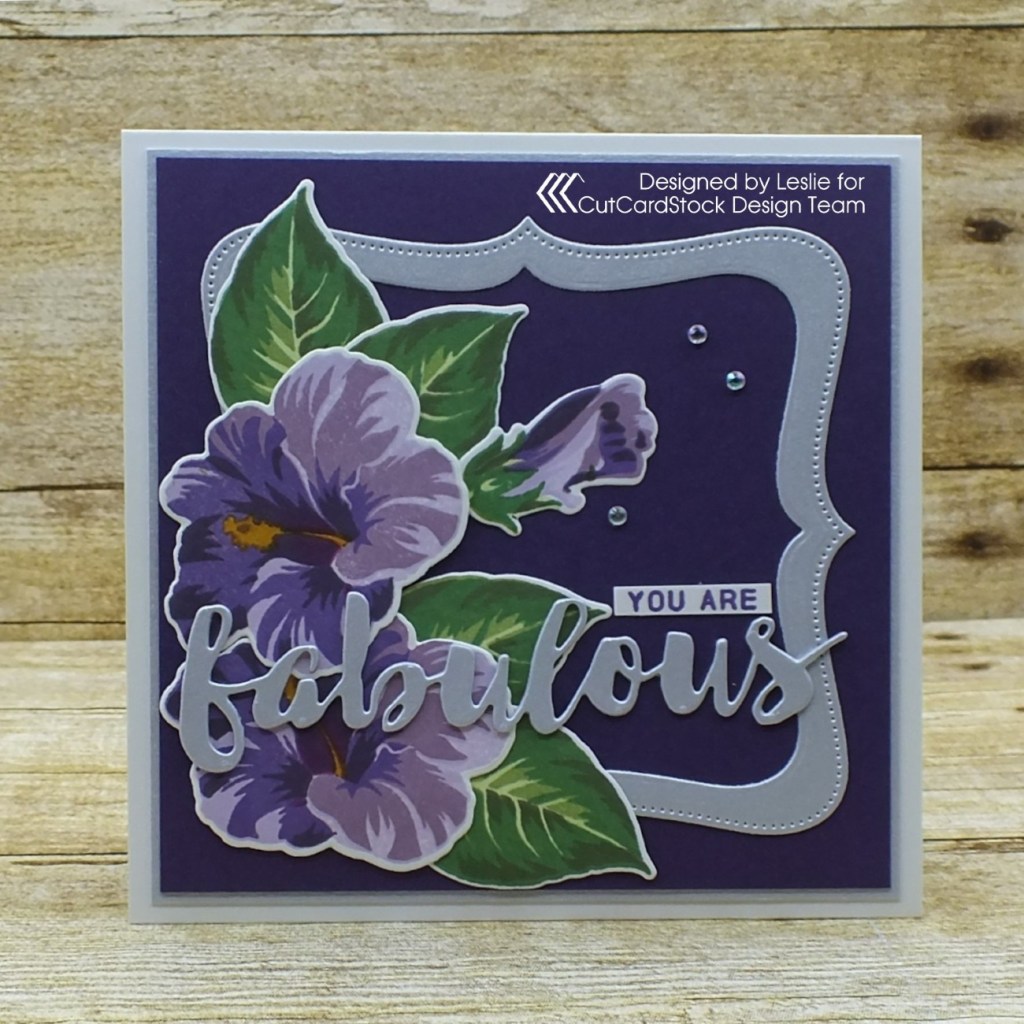
Hi friends! It’s Thursday, the weekend is fast approaching and I hope you have something fun planned! I’m stoked to be back on the CutCardStock blog today with an awesome DT inspiration project featuring Curious Metallic cardstock which happens to be on sale this month so be sure to get some! Affiliate links are used in this post at no cost to you. I really appreciate your support! I created a pretty friendship card on a Classic Crest card base with shimmery layers of Curious Metallic cardstock and stamped/die cut hibiscus flowers, buds and leaves.

This card base is 5″ square and cut from Classic Crest Solar White 110# cardstock. I layered panels of Curious Metallic Violette 111# cardstock and Curious Metallic White-Silver 111# cardstock, and added a pierced ornate frame cut from Curious Metallic White-Silver 111# cardstock. I arranged the hibiscus flowers, single bud and leaves in the left lower corner on top of the frame. The hibiscus is my first Altenew stamp set and I couldn’t be happier with how they turned out. These stamps line up perfectly and they look amazing! Plus I’ve made a HUGE change in my ink stash recently by replacing all my Stampin’ Up ink with Memento ink. I was a Stampin’ Up demonstrator a few years back and have nearly 70 SU ink pads that I’ll soon be moving out of my studio. I had quite a few Memento ink colors already so I only had to buy a few to get the complete line plus a few reinkers. Okay, back to my project… I cut the ‘fabulous’ sentiment twice from Curious Metallic White-Silver 111# cardstock, layered them together and adhered it across the lower portion of the card front. I stamped the remaining portion of the sentiment in purple ink on a white cardstock scrap, trimmed it and adhered it just above the die cut. The finishing touch was the addition of small iridescent gemstones.

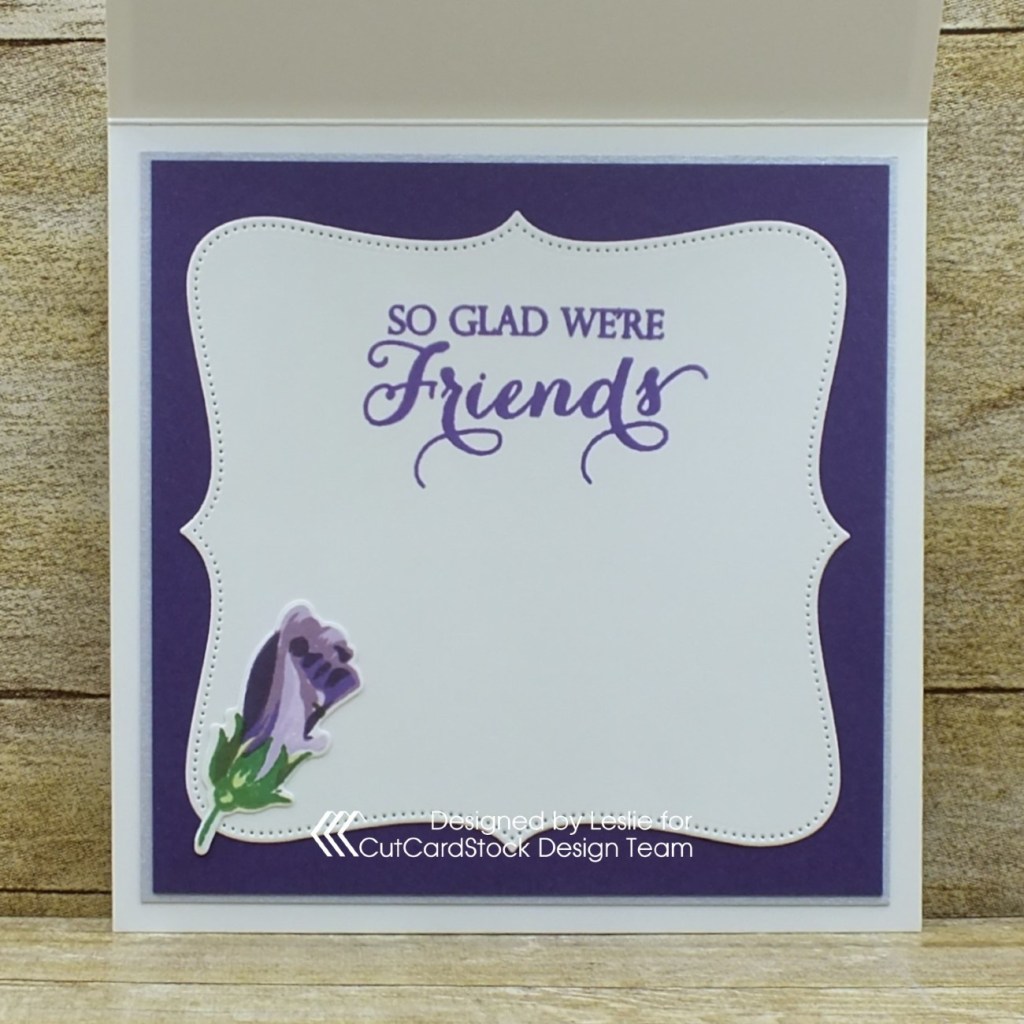
For the inside, I layered panels of Curious Metallic Violette 111# cardstock and Curious Metallic White-Silver 111# cardstock, and added a pierced ornate die cut which I cut from Classic Crest Solar White 80# cardstock. I added the other hibiscus bud in the lower left corner and stamped the sentiment in purple ink.

And one more look… I’m thrilled with this card! I can’t say enough about how amazing this Curious Metallic cardstock is. And I’ve mentioned numerous times that Classic Crest (both 110# and 80# weights) is a staple in my studio. I’ve used many brands of white cardstock over the years and Classic Crest surpasses them all for card bases, stamping and basic layering.

Sharing in the following challenges:
1. A Perfect Time To Craft Open Challenge: #3-2021 – Anything Goes
2. Classic Design Challenge: #3 – Anything Goes
3. Crafty Calendar Challenge: March Challenge – Feminine
4. Happy Little Stampers: March Anything Goes with Dies Challenge
5. Jan’s Digi Stamps Challenge: March Anything Goes
6. Lemon Shortbread Challenge Blog: #141 – Anything Goes
7. Let’s Craft and Create: #169 – Anything Goes w/ optional Purple and Green (playing twist)
8. Moving Along With The Times: #128 – Spring is Coming
9. Penny’s Paper-Crafty Challenges: #492 – Anything Goes
10. QKR Stampede: #416 – Anything Goes
11. Sweet Stampers Challenge Blog: #54 – Easter/Spring
12. The Creative Crafters: #38 – Anything Goes
13. World Wide Open Design Team Challenge: #03 – Anything Goes

CutCardStock products used:
Classic Crest Solar White 110# cardstock
Classic Crest Solar White 80# cardstock
Curious Metallic Violette 111# cardstock
Curious Metallic White-Silver 111# cardstock

Other products used:
Stamps: Altenew Build-A-Flower Hibiscus stamp set, The Project Bin Just Sayin’ stamp set, Inspired by Stamping Friends stamp set
Ink: Memento New Sprout, Bamboo Leaves, Cottage Ivy, Olive Grove, Lulu Lavender, Sweet Plum, Grape Jelly, Elderberry, Lilac Posies and Peanut Brittle ink
Dies/Punches: Altenew Build-A-Flower Hibiscus die set, CUTplorations Pierced Curly Nesting Dies, CUTplorations fabulous word die
Accessories: Tombow Mono permanent adhesive, Bearly Art precision craft glue, Gemini Junior, MISTI stamp tool, Darice iridescent gemstones

I hope you’ve enjoyed today’s project and you’re inspired to get crafty! Be sure to check out all the awesome cardstock and other goodies at CutCardStock (adhesives, labels, stickers, pens, watercolors and ribbon to name a few). And head on over to the CutCardStock Facebook Page for more inspiration! Thanks so much for stopping by today – we’ll see you next time!

Scrappy hugs,
lesliesig

you are fabulous

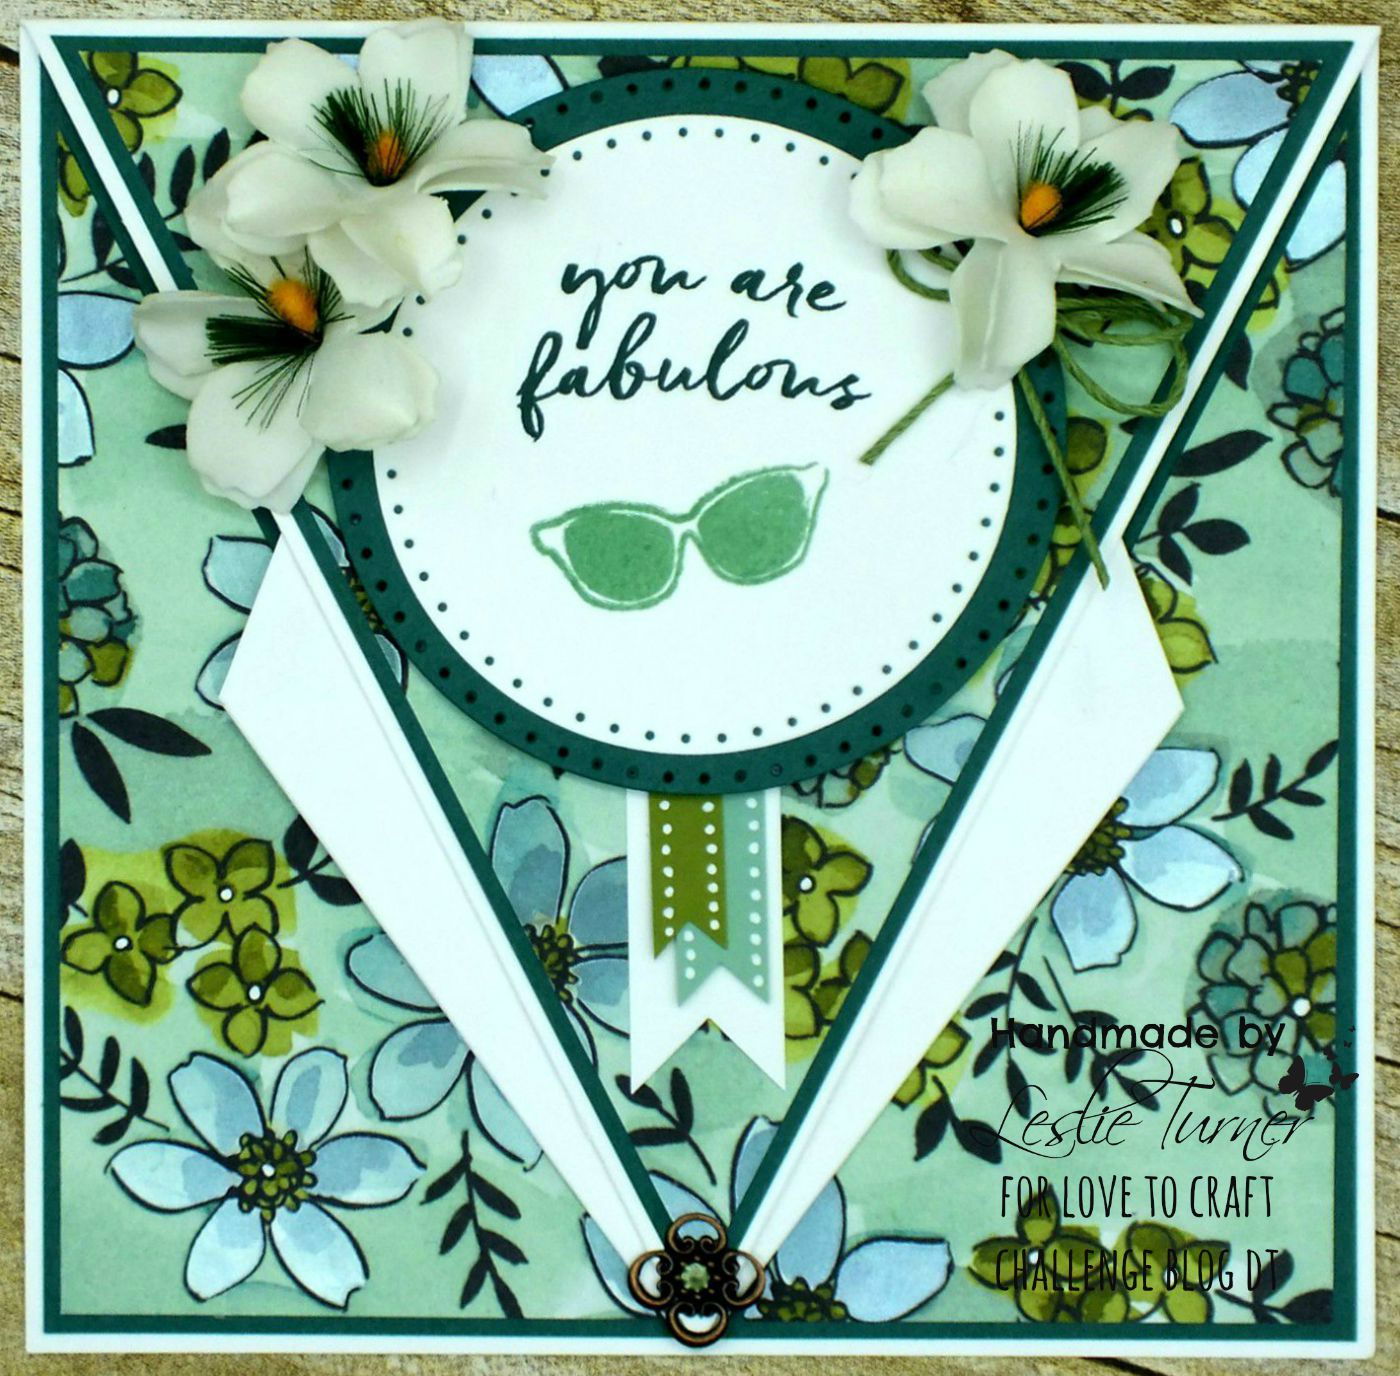
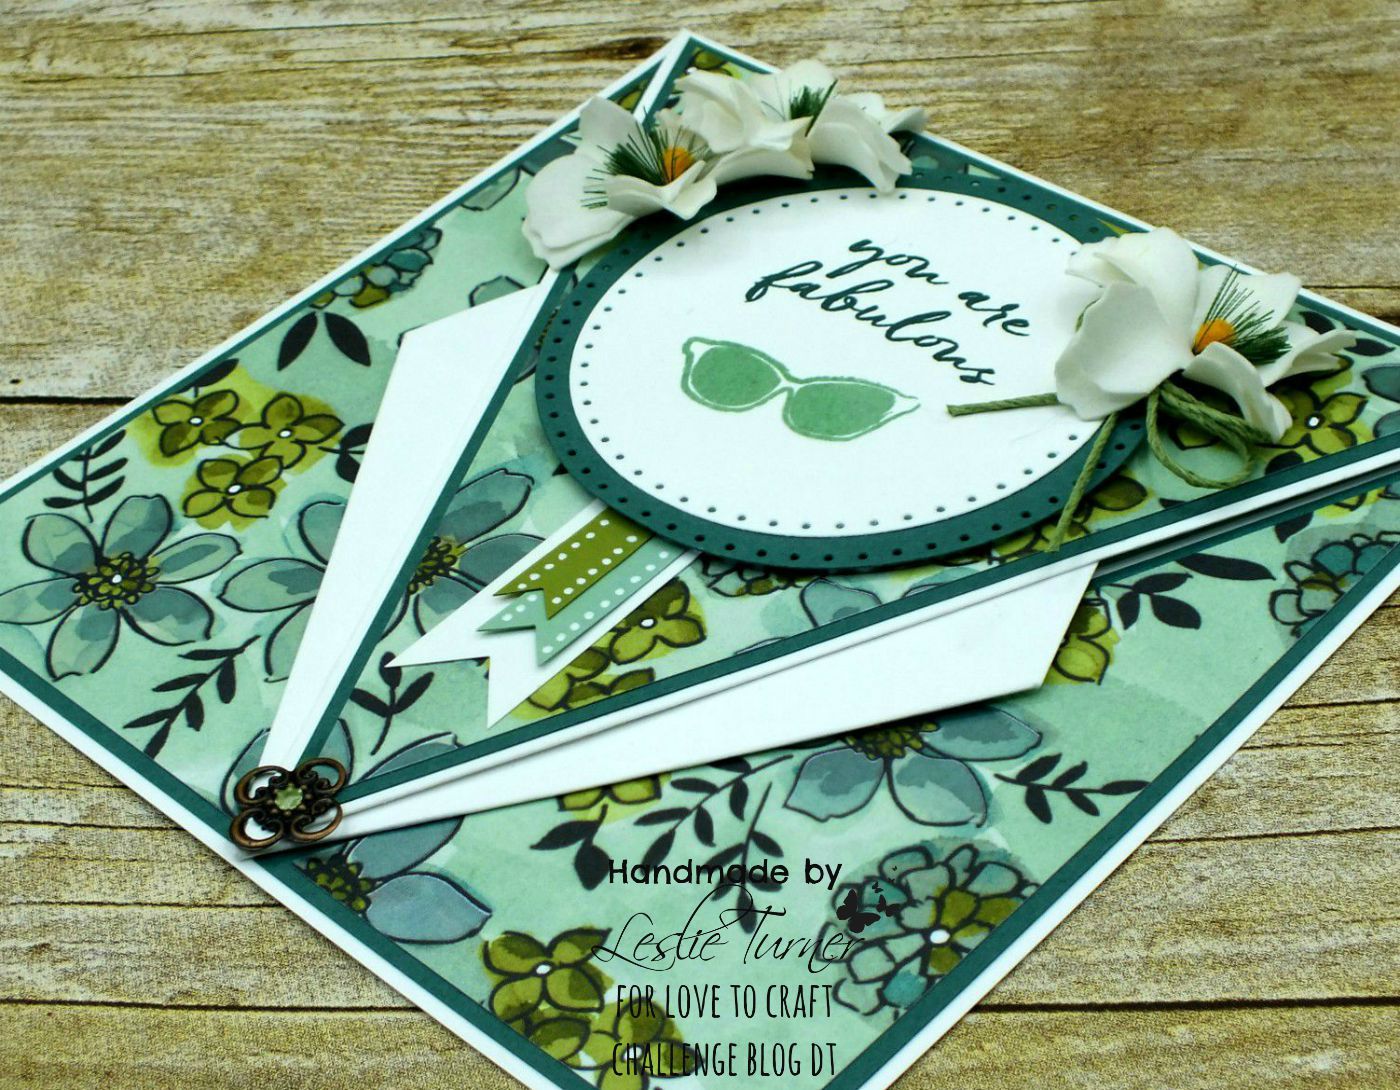
Hello, my crafty peeps! Time is flying by and a new challenge has launched this morning over at Love To Craft Challenge Blog. I’m happy to share my DT inspiration project for LTCCB #33 – April Anything Goes – an Arrow Fold friendship card! Anyone who knows me knows that I absolutely love fancy folds and this one rates right up there with the best! My inspiration came from Sam, HERE. Sam is one of my newer YouTube subscriptions and she’s fantastic!

I used Stampin’ Up paper and cardstock, and a new Hero Arts stamp set. I used a couple dotted circle dies for the layered sentiment, some pretty flowers and a twine bow, a few flags embellished with white dots, and a filigree charm.

Leslie

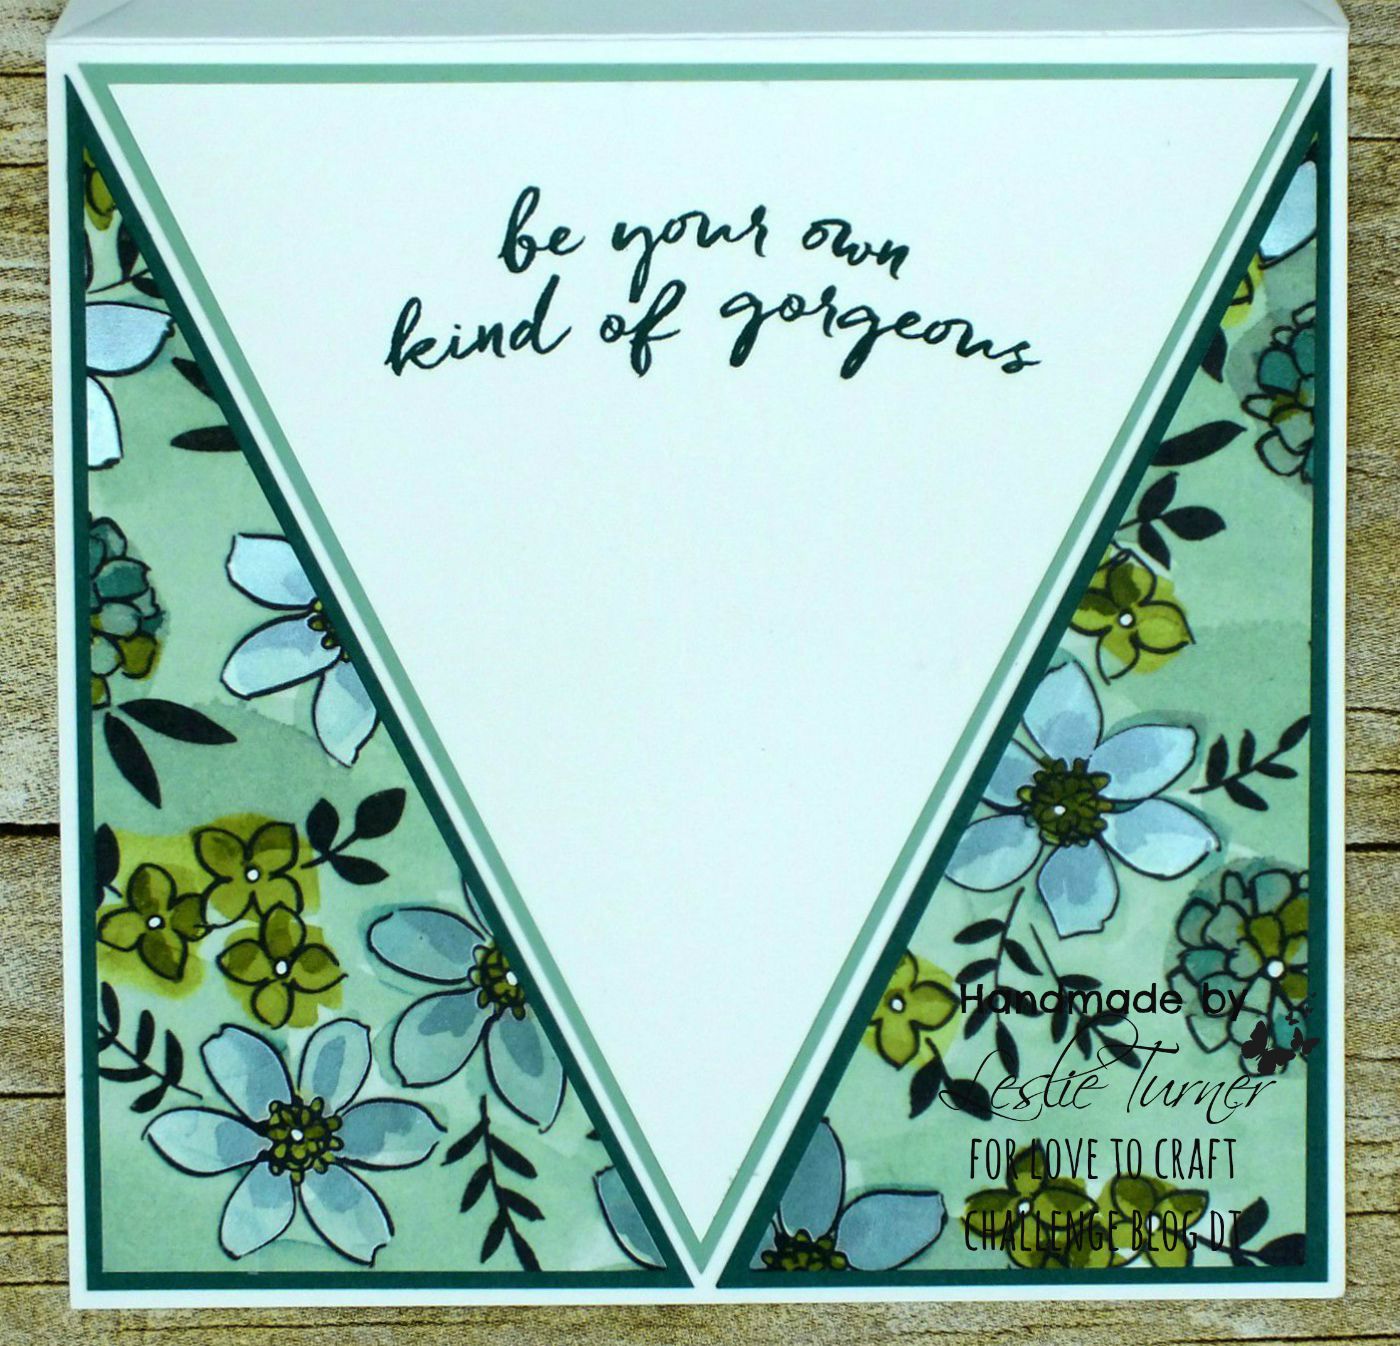
Here’s a shot of the inside. I’m thrilled with how this turned out. This paper is so pretty! I did embellish the centers of most of the flowers with my white Gelly Roll pen to make them pop.

2018_0930002a

And one more look… such a cool fold!

2018_0930003a

Products used:
Cardstock/Paper: White Clear Path Paper cardstock, Stampin’ Up Tranquil Tide and Mint Macaron cardstock, Stampin’ Up Share What You Love Specialty DSP
Stamps: Hero Arts You Are Fabulous stamp set
Ink: Stampin’ Up Tranquil Tide and Mint Macaron ink, Versamark Dazzle, Sakura White Gelly Roll Pen
Dies/Punches: Sizzix Dotted Circles dies, EK Success 3/4″ Square Punch
Accessories:  Hero Arts Clear Embossing Powder, Hobby Lobby Flowers, The Funkie Junkie Boutique Filigree Charm, Nuvo Bottle Green Crystal Drops, Hemptique Green Bamboo Cord

I hope you’ve enjoyed seeing this Arrow Fold and will link up a project with us this month! We can’t wait to see what you’re working on! Thanks for stopping by today – we’ll see you again soon! ;)

Scrappy hugs,
lesliesig