Merry Christmas mini slimline

Hi friends! Happy Happy Monday! I hope you had a great weekend! It’s finally starting to warm up here… for a minute there we thought Mother Nature was really ticked off because we were getting snow while our family and friends in Florida were enjoying the beach! What’s wrong with that picture?! Our very first challenge is live this morning over at Christmas BINGO Challenges and I’m super stoked to share my DT inspiration project for Challenge #1 – Anything Goes with Featured Christmas BINGO Card!

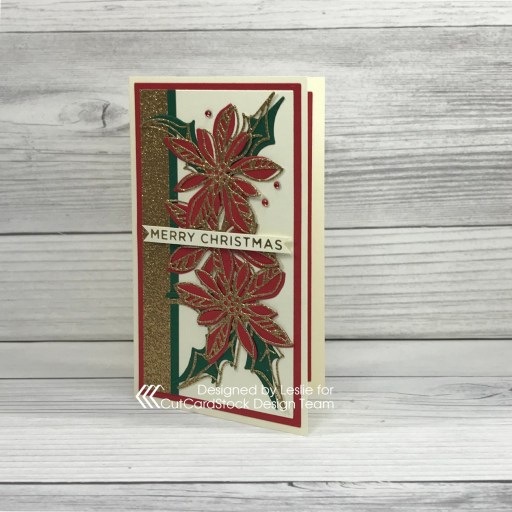
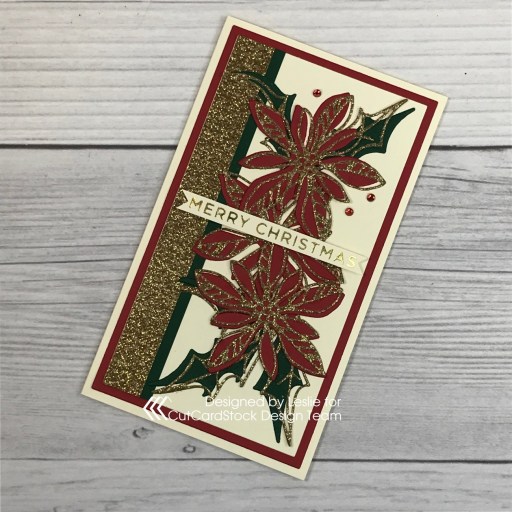
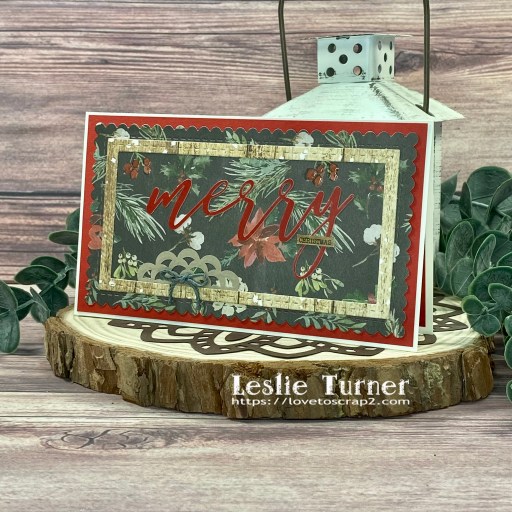
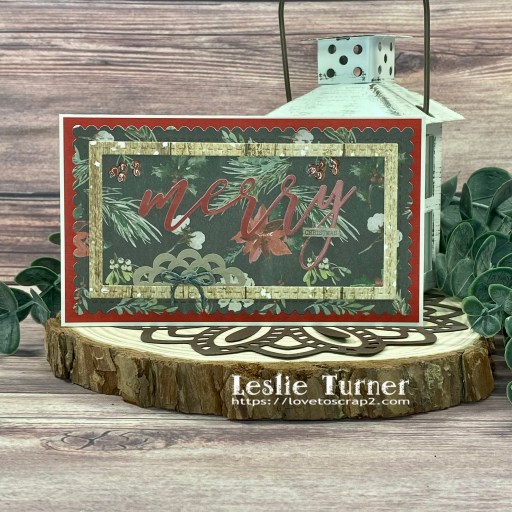
Here’s a short run-down of how this new challenge works: There will be a BINGO Card featured in each challenge and our designers and participants will need to use at least three items in any column under the B, I, N, G or O on a Christmas project. This is not your typical BINGO card where you go up/down, left/right and diagonally… you can only go up and down using the columns. There is a free space in each column that you are welcome to use if you want. You cannot mix and match columns – you can only use one letter. We really hope you’ll check it out and come play with us! I went with column G and made a mini slimline card with red, stitching and a doily.

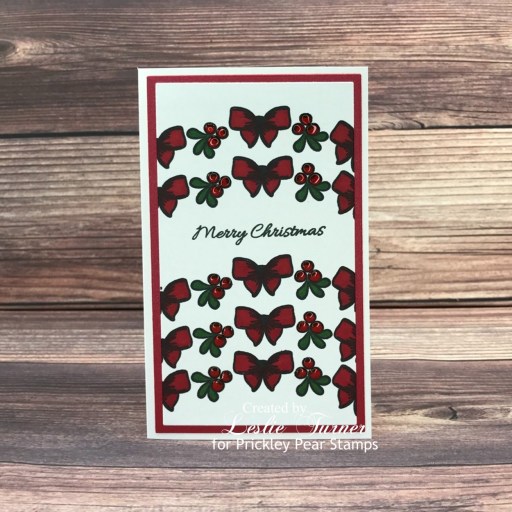
I cut a 3-1/2″ x 6″ mini slimline card base from CutCardStock Basis Natural along with a layering panel from CutCardStock Basis Red. Using the Kat Scrappiness Mini Slimline Scalloped Edge Dies, I die cut a panel from a pretty patterned paper from the Carta Bella Christmas Collection Kit. Then, using the Kat Scrappiness Mini Slimline Tri-Frame Dies, I die cut a frame from another Carta Bella paper. I used ‘merry Christmas’ sentiment stickers from the Carta Bella kit. I cut a small Stampin’ Up doily roughly in half and adhered the smaller piece to the bottom left corner and adhered a bow fashioned from a piece of hemp crafting cord. The final touch was adding some small dots of Glossy Accents to the berries on the patterned paper.

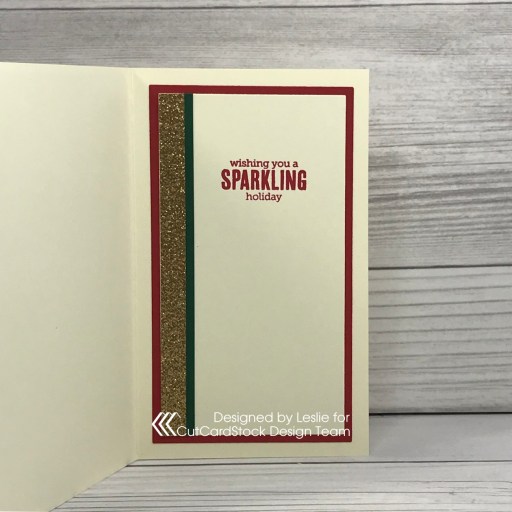
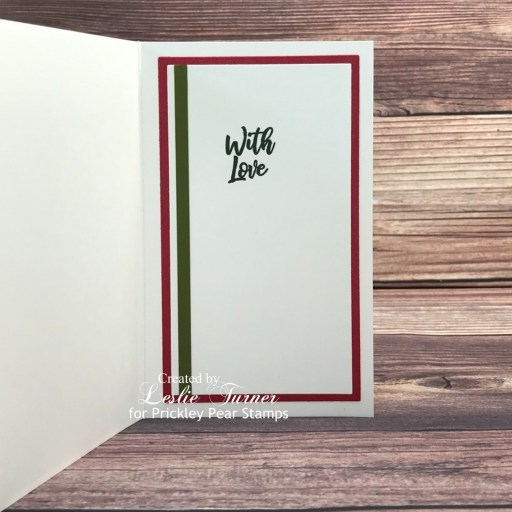
I cut the inside panel from CutCardStock Basis Natural cardstock and embellished it with leftover strips of patterned paper and red cardstock used on the front. I stamped a sentiment from the Taylored Expressions In & Out Christmas stamp set in Catherine Pooler Black Jack ink.

Sharing in the following challenges:
1. A Perfect Time To Craft Open Challenge: May #4-2023 – Anything Goes
2. Classic Design Challenge: May #5 – Anything Goes

Affiliate links are used in this post at no cost to you – I really appreciate your support! 

Products used:
Cardstock/Paper: CutCardStock Basis Natural and Basis Red cardstock, Carta Bella Christmas Collection Kit
Stamps: Taylored Expressions In & Out Christmas stamp set
Ink: Catherine Pooler Black Jack ink
Dies/Punches: Kat Scrappiness Mini Slimline Scalloped Edge Dies and Mini Slimline Tri-Frame Dies
Accessories: Tonic Studios 12″ Guillotine Paper Trimmer, Scotch Advanced Tape Glider, Art Glitter Dries Clear adhesive, MISTI stamp tool, Big Shot, Stampin’ Up Tip Top Taupe doily, Hemptique Earthy Pastel crafting cord, cordless glue gun, Glossy Accents

I hope you’ve enjoyed seeing this project and will link up with us this time in our debut Christmas BINGO Challenge! We can’t wait to see what you create! Thanks so much for stopping by today – we’ll see you next time! ;)

Scrappy hugs,

Merry Christmas Mini Slimline

Hey everybody! A very Happy Saturday to you – another week has come and gone! My sister’s 70th birthday is in two days, and for years now, I’ve said that once her birthday comes and goes, Christmas will be here in no time! I have an awesome CutCardStock DT inspiration project to share with you today featuring Neenah Classic Crest Baronial Ivory cardstock that I paired with our Basis Red and Basis Green cardstock along with our Gold Glitter cardstock. What a gorgeous traditional Christmas color combo in a mini slimline size which is one of my favorites!

I cut a 3-1/2″ x 6″ mini slimline card base from Neenah Classic Crest Baronial Ivory cardstock, along with layering panels from Basis Red and Baronial Ivory cardstock using the Waffle Flower Mini Slimline Layers die set, and embellishing strips from Gold Glitter and Basis Green cardstock. I cut the poinsettia layers from Basis Red, Basis Green and Gold Glitter cardstock. I assembled the panels and adhered them to the card base, and then adhered the poinsettias. I created a foiled sentiment strip with a Baronial Ivory cardstock scrap and my Spellbinders Glimmer Hot Foil System, Spellbinders Glimmer Gold Foil, and Spellbinders Glimmer Holiday Sentiments Series 2 Hot Foil Plate & Die Set. I flagged the ends with an EK Success 3/4″ square punch and adhered it to the card front with a Darice double-sided adhesive foam strip. The finishing touch was adding several Eyelet Outlet red gemstones.

I cut the inside panels from Neenah Classic Crest Baronial Ivory and Basis Red cardstock using the Waffle Flower Mini Slimline Layers die set. I embellished the ivory panel with strips cut from Gold Glitter and Basis Green cardstock, stamped the sentiment from the Hero Arts Christmas Messages stamp set in Catherine Pooler Rockin’ Red ink, and adhered the panel to the red cardstock layer.

And one more peek… I really love a Christmas card in traditional red and green… as much as I love Christmas cards in non-traditional colors! And I have to say that this die set is one of my favorites!

Sharing in the following challenges:
1. A Perfect Time To Craft Open Challenge: August #8 2022 – Anything Goes
2. A Place To Start: #082022 – Anything Goes w/optional By The Book (no twist)
3. Classic Design Challenge: August #8 – Anything Goes
4. Crafty Calendar Challenge: August Anything Goes
5. Wednesday’s Creative Inspirations Challenge Blog: August Challenge – Anything Goes

Affiliate links are used in this post at no cost to you – I really appreciate your support!

CutCardStock products used:
Neenah Classic Crest Baronial Ivory cardstock
Basis Red cardstock
Basis Green cardstock
Gold Glitter cardstock

Other products used:
Stamps: Hero Arts Christmas Messages stamp set
Ink: Catherine Pooler Rockin’ Red ink
Dies/Punches: Sizzix Seasonal Sketch Thinlits, Waffle Flower Mini Slimline Layers die set, EK Success 3/4″ square punch (used to flag the sentiment strip)
Accessories: We R Memory Keepers Large Guillotine Paper Trimmer, Bearly Art precision craft glue, MISTI stamp tool, Big Shot, Spellbinders Glimmer Hot Foil SystemSpellbinders Glimmer Gold FoilSpellbinders Glimmer Holiday Sentiments Series 2 Hot Foil Plate & Die Set, Darice Double-Sided Adhesive Foam Strips, Eyelet Outlet Red Jewel Bling Strip

I hope you’ve enjoyed today’s project and you’re inspired to get crafty! Be sure to check out all the awesome cardstock and other goodies at CutCardStock (adhesives, labels, stickers, pens, watercolors and ribbon to name a few). And head on over to the CutCardStock Facebook Page for more inspiration! Thanks so much for stopping by today – we’ll see you next time!

Scrappy hugs,

Merry Christmas mini slimline

Hi friends! We’ve reached another Hump Day and the weeks are just buzzing by! I’ve popped in this morning with one final card sample created for Prickley Pear Stamps, and this one catches me completely up! For now, lol! I’m working behind the scenes on more samples which I’ll be sharing later. ;) This Merry Christmas mini slimline features one of the curvy stamps from the Scalloped Borders Fall stamp set that I used a repetitive fashion, leaving a slight break in the stamping for the sentiment.

I cut a mini slimline card base from 110# Solar White cardstock along with layering panels from CutCardStock Stardream Metallic Jupiter cardstock and 80# Solar White cardstock using the Waffle Flower Mini Slimline Layers die set. I stamped the bow and mistletoe from the Scalloped Borders Fall stamp set five times down the length of the white cardstock panel and colored the images with alcohol markers with Glossy Accents added to the berries. I stamped the sentiment (from the same stamp set) in Catherine Pooler Spruce ink and layered the panels together and then to the card base.

I cut the inside panel from 80# Solar White cardstock, again using the using the Waffle Flower Mini Slimline Layers die set, and embellished it with a single strip of CutCardStock Pop-Tone Jellybean Green cardstock. I stamped the sentiment from the Christmas Holiday Gift Tags stamp set in Catherine Pooler Spruce ink and layered the panel on the Metallic Jupiter cardstock.

And one more peek… this was a fun card to create. Repetitive stamping is challenging but yields a cool effect. I’m such a rebel… I never measure anything – I just eyeball it – and I think this turned out pretty well!

Affiliate links are used in this post at no cost to you – I really appreciate your support! 

Prickley Pear Stamps products used:
Scalloped Borders Fall stamp set
Christmas Holiday Gift Tags stamp set

Other products used:
Cardstock/Paper: Neenah Classic Crest 110# and 80# Solar White cardstock, CutCardStock Stardream Metallic Jupiter cardstock, CutCardStock Pop-Tone Jellybean Green cardstock
Ink: Catherine Pooler Midnight and Spruce inks; Arteza alcohol markers- YG02, R21
Dies/Punches: Waffle Flower Mini Slimline Layers die set
Accessories: Tonic Studios 12″ Guillotine Paper Trimmer, Bearly Art precision craft glue, MISTI stamp tool, Big Shot, Ranger Glossy Accents

I hope you’ve enjoyed this project! Be sure to check out all the awesome stamps and dies at Prickley Pear Stamps! If you’d like to save 10% on anything on the site when you shop at Prickley Pear Stamps, use the coupon code LESLIE10 at checkout! And be sure to ‘like’ and ‘follow’ the Prickley Pear Stamps Facebook page to keep up with news and sales, and join Prickley Pear Pals (the fan group) for lots of fun crafty ideas and to share your creativity! And finally, we’d love to see you visit the Prickley Pear Stamps blog that’s in the process of being revived and become a Follower! Hope to see you there! Thanks so much for stopping by today – we’ll see you next time! ;)

Scrappy hugs,