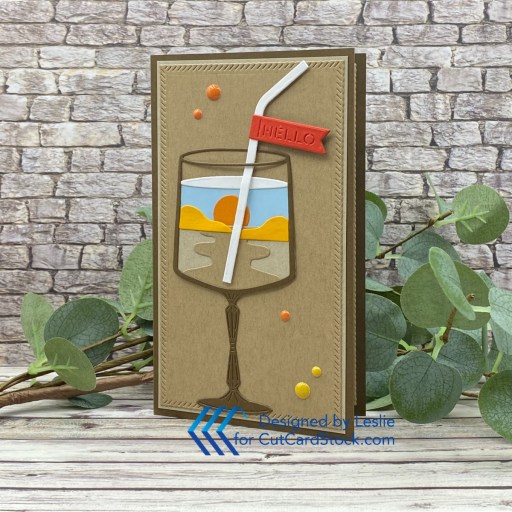
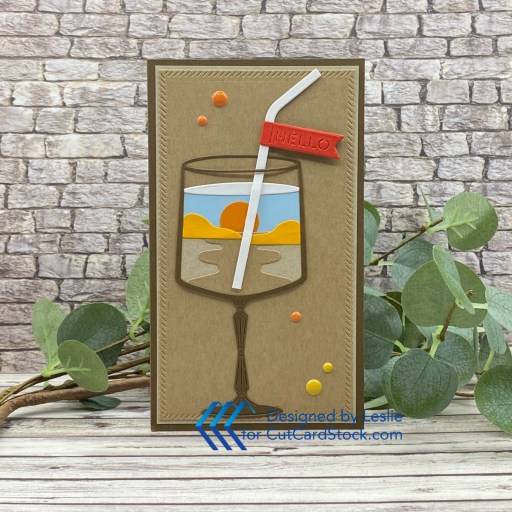
Hi friends – I hope you’ve had a great work week and you have something fun planned this weekend! I’m delighted to share that I’ve joined the Cut It Up Challenges design team! I was dubbed Top Cut a couple times in recent weeks, so instead of signing up to guest design, I offered to be their resident designer utilizing SVG cut files rather than wafer dies for challenge projects. The lovely Larelyn accepted my offer, so here I am! You know how much I LOVE playing with my Cricut and cut files! Our new challenge is live this morning and I’m stoked to share my DT inspiration project for #355 – Something With Wings! I used the Dreaming Tree Flamingo Card SVG cut file, a variety of cardstock from CutCardStock, and stamps from the Spellbinders Diamond & Arch Motif stamp set to make this fun slimline size card.
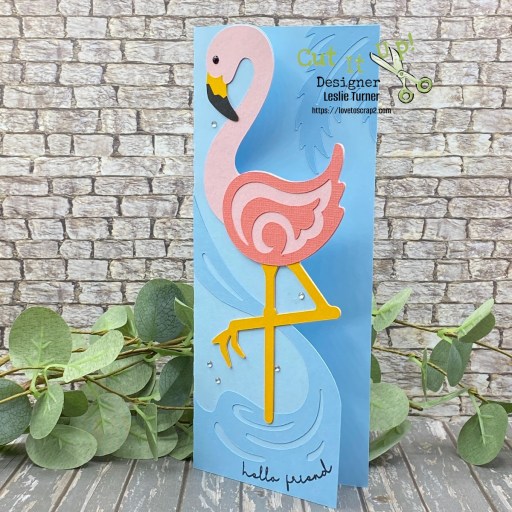
Using my Cricut Explore Air 2 and the Dreaming Tree Flamingo Card SVG cut file, I cut all the pieces from CutCardStock Pop Tone Black Licorice, Flamingo, Lessebo Artic Blue, Basis Pink, Lessebo Salt Water Blue and Lessebo Sunset Orange cardstock. I also used Wedding Cake 12×12 for the envelope but forgot to include that in the photos. It’s always so much fun assembling these kinds of projects and this one was pretty straight forward. It was super easy seeing where everything fit.
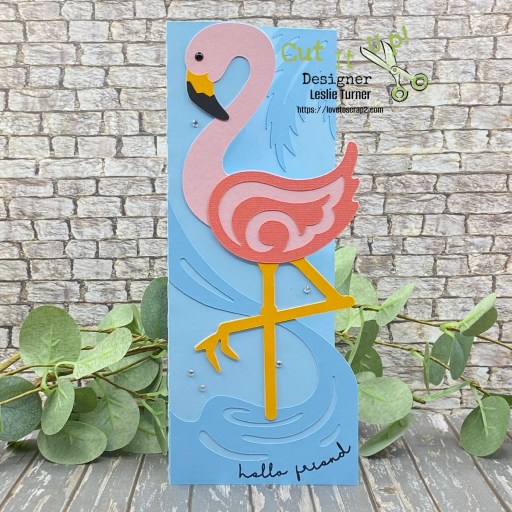
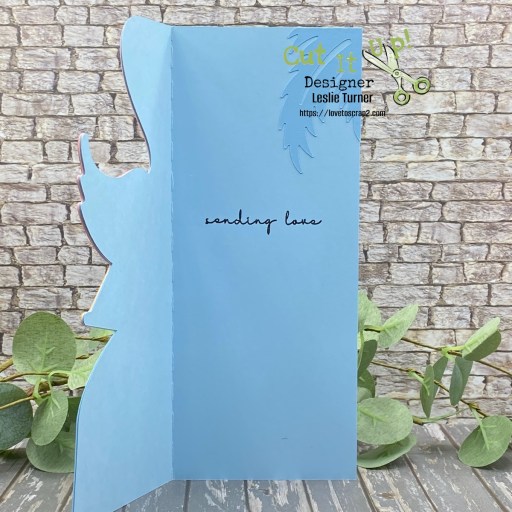
I used the Spellbinders Diamond & Arch Motif stamp set for both the front and inside sentiments, stamping them in Versafine Onyx Black ink.
Sharing in the following challenges:
1. https://cardsgalorechallenges.blogspot.com/2026/05/may-2026-challenge-147-crafts-galore.html
2. https://wordartwednesday.blogspot.com/2026/04/anything-goes-weeks-750-751.html
Affiliate links are used in this post at no cost to you – I really appreciate your support!
Products used:
CARDSTOCK/PAPER: CutCardStock Pop Tone Black Licorice, Flamingo, Lessebo Artic Blue, Basis Pink, Lessebo Salt Water Blue, Lessebo Sunset Orange, and Wedding Cake 12×12 cardstock
STAMPS: Spellbinders Diamond & Arch Motif stamp set
INK: Versafine Onyx Black ink
DIES/PUNCHES: Dreaming Tree Flamingo Card SVG cut file
ACCESSORIES: Circut Explore Air 2, My Sweet Petunia Precision Glue Press, Bearly Art Precision Craft Glue, MISTI Stamp Tool, Keep It Simple Back To Basics Black Enamel Dots, clear iridescent gemstones
I hope you’ve enjoyed seeing this project and will link up with us this time! Thanks so much for stopping by today – we’ll see you next time! ;)
Scrappy hugs,