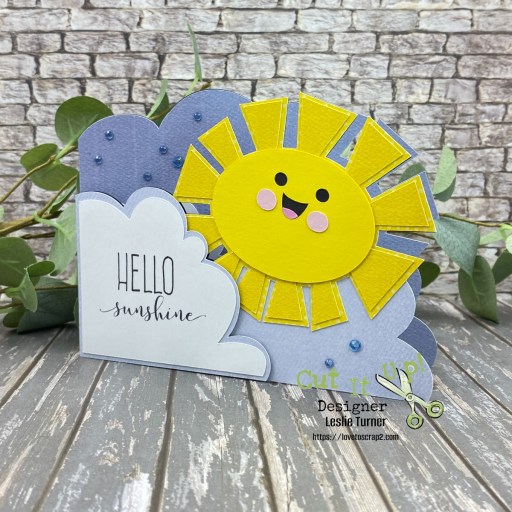
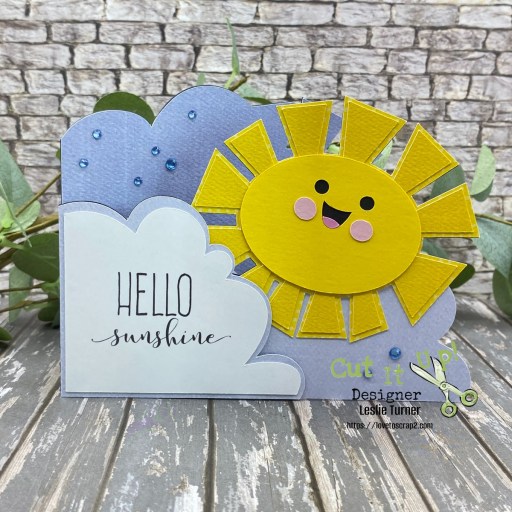
Hey everybody, happy Friday! Dang, the weeks just seem to roll by faster and faster, don’t they?! Our new challenge is live this morning over at Cut It Up Challenges and I’m thrilled to share my DT inspiration project for #366 – More Than One Die Cut! I created a shaped thank you card which includes cloud and sun die cuts. I used the Hello Sunshine A2 Shaped Card SVG cut file from My Scrap Chick, and I just love how it turned out!
Using my Cricut Explore Air 2 and the My Scrap Chick Hello Sunshine A2 Shaped Card SVG cut file, I cut all the pieces from CutCardStock Basis 12×12 Navy, Lessebo Sunflower Yellow, Pop Tone Black Licorice, Basis Pink, and Pink Tutu. Also used Keep It Simple Back To Basics Lemon 12×12 and Royal 12×12 Collection Packs, and Classic Crest 80# Solar White cardstock. I used the Print then Cut function on the Cricut for the front sentiment, and added several light blue gemstones. This completed the card front.
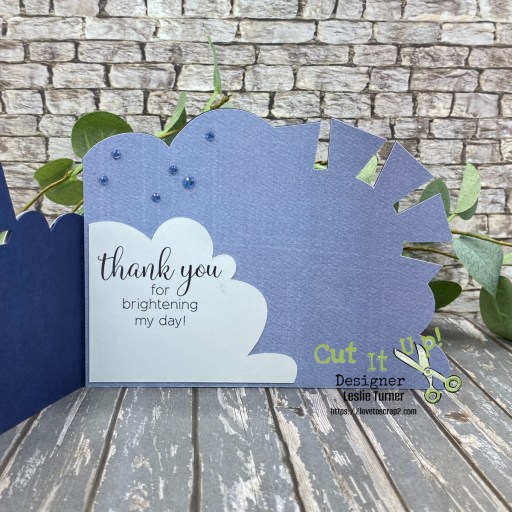
I also used the Print Then Cut function for the inside sentiment. This was such an easy project and I really enjoyed putting it together. Shaped cards are the best!
Affiliate links are used in this post at no cost to you – I really appreciate your support!
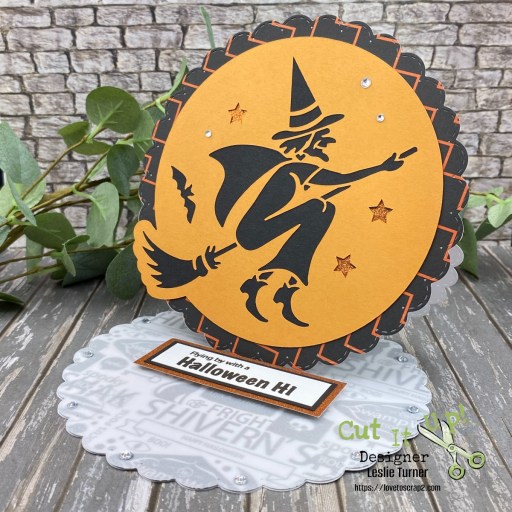
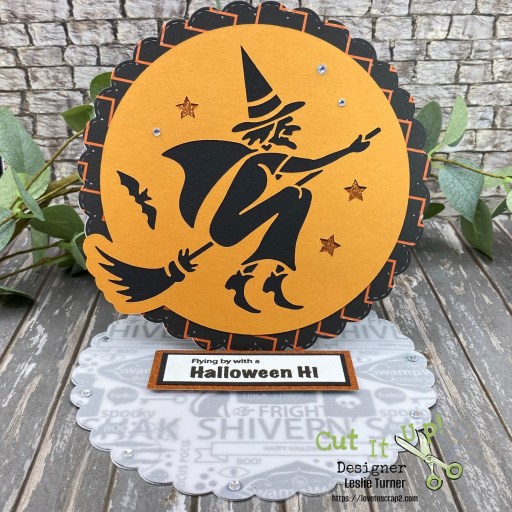
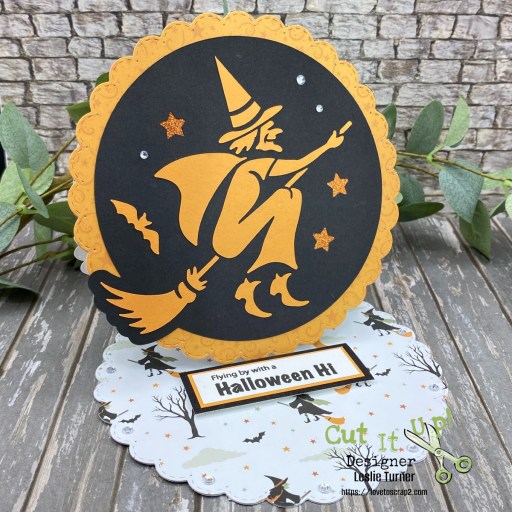
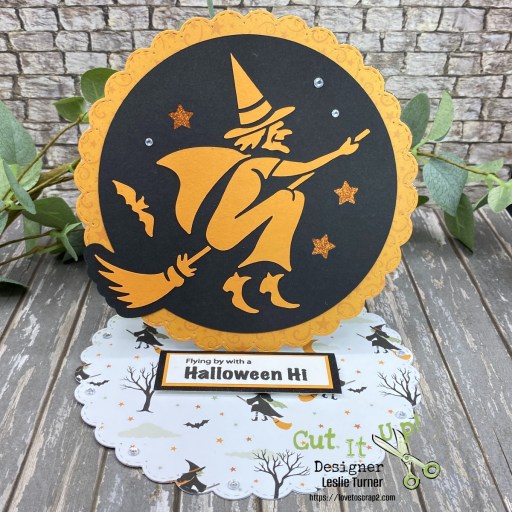
Hey everybody! I hope you’re having a good week and have something fun planned this weekend! Our new challenge is live this morning over at Cut It Up Challenges and I’m delighted to share my inspiration project for #365 – Orange & Black! I created a circular easel card which turned into a ‘two-fer’ using the SVG Cuts Vintage Witch SVG cut file. One card is made with the regular cut file design and the other is made with the negative space pieces left on the mat which I held in place with Press ‘N Seal. Why not get two super cute cards out of the deal, right?!
Using my Cricut Explore Air 2 and the SVG Cuts Vintage Witch SVG cut file, I cut the focal image pieces from Pop Tone Orange Fizz and Pop Tone Black Licorice cardstock. I peeled the orange layer off the mat and held the negative space pieces in place with Press ‘N Seal to use for the second card. Next, I cut the card base from CutCardStock Cougar 100# Smooth White cardstock along with layering panels from prints in the American Crafts Halloween 6×6 paper pad, all using the KIS Cuts: Nested Stitched Scallop Circles. I grabbed my Stampin’ Up! 3/4″ circle punch and punched three circles from Celebration Warehouse Non-Shedding Orange Glitter cardstock to place behind the star apertures. I added a few clear gemstones to the background which completed the upper portion.
I felt like the bottom portion was a little too busy so I cut an additional scalloped circle from CutCardStock Glama Natural Translucent Clear Vellum which toned it down a good bit. I stamped the sentiment from the Prickley Pear Stamps Bats stamp set, trimmed it and layered it on Pop Tone Black Licorice and the Orange Glitter cardstock. I popped it up on Scrapbook Adhesives Crafty Foam Tape to use as the stopper. Card #1 is complete, now on to card #2!
I cut a second card base from CutCardStock Cougar 100# Smooth White cardstock along with layering panels from prints in the Echo Park Spooky Collection Kit. I cut the plain background from the cut file a second time from the black cardstock, applied wet glue to the back of all the negative pieces on the Press ‘N Seal and adhered them in place. Once again, I punched three circles from Celebration Warehouse Non-Shedding Orange Glitter cardstock to place behind the star apertures, and added a few clear gemstones to the background which completed the upper portion.
As before, I stamped the sentiment from the Prickley Pear Stamps Bats stamp set, trimmed it and layered it on Pop Tone Orange Fizz and the Black Glitter cardstock. I popped it up on Scrapbook Adhesives Crafty Foam Tape to use as the stopper. These turned out so stinkin’ cute and they were so easy!
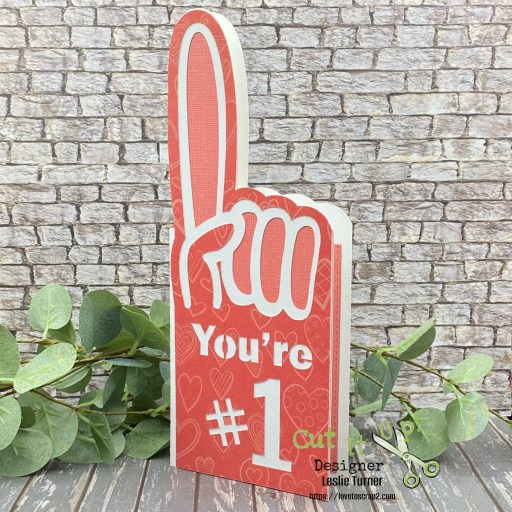
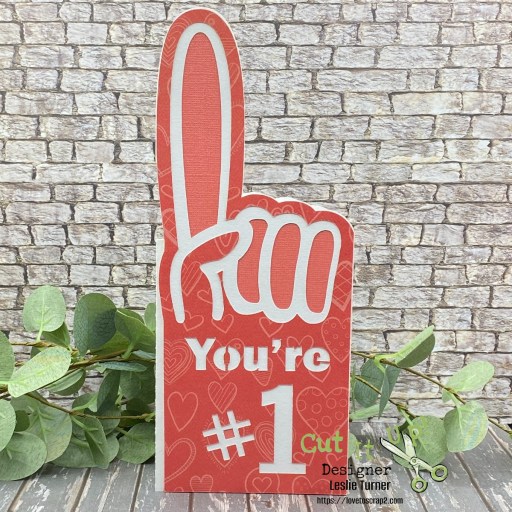
Hey everybody – happy first Friday in September! I hope you have something fun planned for this long Labor Day weekend! Our new challenge is live this morning over at Cut It Up Challenges and I’m delighted to share my DT inspiration project for #364 – In Shape! We want to see your shaped card, so I played with my Cricut and the Simply Crafty SVGs Fan Finger SVG cut file, and made a card that could be used for a variety of occasions. This fan finger SVG cut file is from 2022 and I’m not sure why it has taken me so long to use it! Such an easy card to assemble and I like how it turned out!
Using my Cricut Explore Air 2 and the Simply Crafty SVGs Fan Finger SVG cut file, I cut the pieces from CutCardStock Basis White and Flamingo cardstock along with a print in the Keep It Simple Crafty Girls Flip Sides Pack.
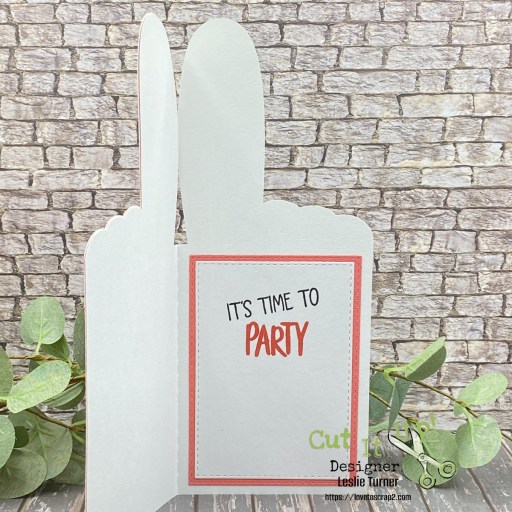
For the inside panel, I used the Love From Lizi Stitched Rectangle Nested Cutting Dies to cut rectangles from Basis White and Flamingo, and adhered them together. I used the Keep It Simple Back To Basics Birthday Sentiments stamp set to stamp the sentiment in Versafine Onyx Black and Catherine Pooler Polished inks. So what occasion would you send this kind of card for?
Affiliate links are used in this post at no cost to you – I really appreciate your support!
Products used: CARDSTOCK/PAPER: CutCardStock Basis White and Flamingo cardstock, Keep It Simple Crafty Girls Flip Sides Pack STAMPS: Keep It Simple Back To Basics Birthday Sentiments stamp set INK: Versafine Onyx Black ink, Catherine Pooler Polished ink DIES/PUNCHES: Love From Lizi Stitched Rectangle Nested Cutting Dies ACCESSORIES: Cricut Explore Air 2, My Sweet Petunia Precision Glue Press, Bearly Art Precision Craft Glue, Mini MISTI, Big Shot
I hope you’ve enjoyed seeing this project and will link up with us this time! Thanks so much for stopping by today – we’ll see you next time! ;)
Hi friends, a very happy Friday to you! How is the weather where you are? It’s pretty warm and somewhat humid here, and I have to say I’m ready for Fall! That didn’t take long, did it?! I’ve mentioned many times that I’m not a Summer weather person, lol! Our new challenge is live this morning over at Cut It Up Challenges and I’m delighted to share my DT inspiration project for #363 – Moving Along! We’d love to see your project depicting some sort of transportation, and remember to use wafer dies or an electronic cutting machine. This Route 66 Box Card SVG cut file from SVG Cuts was off-the-chain fun! OMGosh, I can’t even express how much I enjoyed making this! There is so much for the eyes to see!
Using my Cricut Explore Air 2 and the SVG Cuts Route 55 Box Card SVG cut file, I cut pieces from CutCardStock Lessebo Arctic Blue, Lessebo Dawn Maroon, Lessebo Coffee Bean, Lessebo Salt Water Blue, and Pop Tone Black Licorice cardstock and CutCardStock Glama Natural Translucent Clear Vellum, along with Classic Crest Recycled Classic Natural White.
Also used an assortment of patterned papers – Crafter’s Companion Just for Men Urban Collection and Bright Collection 6×6 paper pads, Urban Style 4×8 design pad, and Studio Kitsch Souvenir digital papers printed on HP 32# copy paper. I pulled out RiverCity Rubber Works Postage Stamps rubber stamps to stamp a postmark in Memento Tuxedo Black ink on the postage stamp, and used red gemstones and Keep It Simple Back To Basics Black Enamel Dots for embellishments.
I used the Stampin’ Up! Let’s Set Sail stamp set for the sentiment on the back. I cut the envelope from Simple Stories Wood & Gingham Basics 12×12 paper pad and used Scrapbook Adhesives Crafty Power Tape on the flap with the liner left intact. My hubby turned 66 on his birthday a little while back (yes, I’m a cradle-robber, lol) and this was his birthday card. Needless to say, he loved it!
Affiliate links are used in this post at no cost to you – I really appreciate your support!
Products used: CARDSTOCK/PAPER: CutCardStock Lessebo Arctic Blue, Lessebo Dawn Maroon, Lessebo Coffee Bean, Lessebo Salt Water Blue, and Pop Tone Black Licorice cardstock; CutCardStock Glama Natural Translucent Clear Vellum, Classic Crest Recycled Classic Natural White; Crafter’s Companion Just for Men Urban Collection and Bright Collection 6×6 paper pads, Urban Style 4×8 design pad, Simple Stories Wood & Gingham Basics 12×12 paper pad, Studio Kitsch Souvenir digital papers, HP 32# copy paper STAMPS: RiverCity Rubber Works Postage Stamps rubber stamps, Stampin’ Up! Let’s Set Sail stamp set INK: Memento Tuxedo Black ink DIES/PUNCHES: SVG Cuts Route 66 Box Card SVG Cut File ACCESSORIES: Cricut Explore Air 2, Bearly Art Precision Craft Glue, Mini MISTI, red gemstones, Keep It Simple Back To Basics Black Enamel Dots; Scrapbook Adhesives E-Z Dots Permanent, Thin 3D Foam Squares, and Crafty Power Tape
I hope you’ve enjoyed seeing this project and will link up with us this time! Thanks so much for stopping by today – we’ll see you next time! ;)
08/05/26 Rising Star honor at A Place To Start! 08/08/26 Weekly Favorite (favorited by two crafters) at Splitcoast Stampers! 08/12/26 Featured Project at Little Red Wagon!
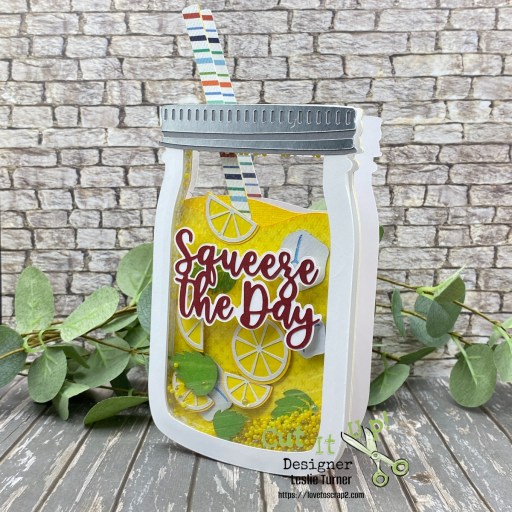
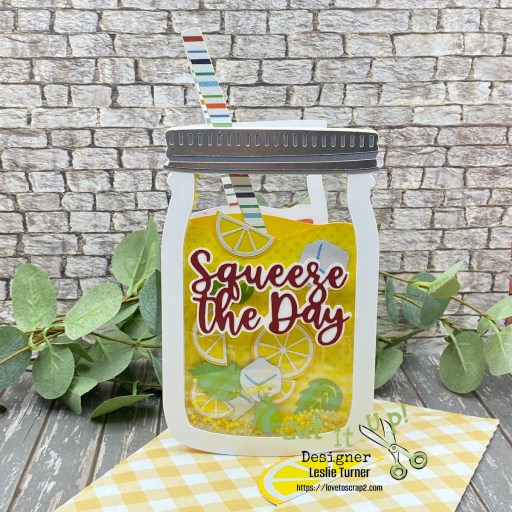
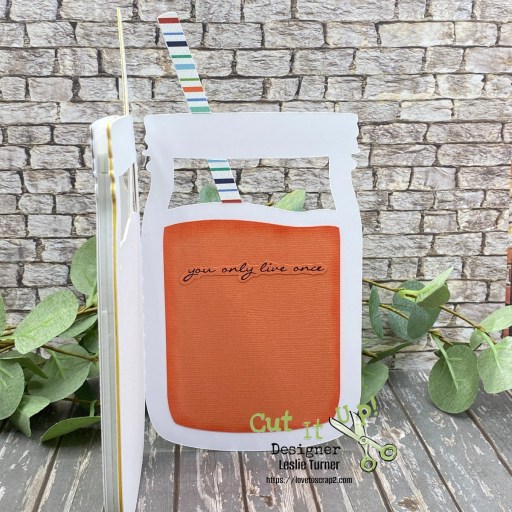
Hi friends! Well, another Friday has rolled around and we’re now into the first week of August. How is that even possible?! Our new challenge is live this morning over at Cut It Up Challenges and I’m thrilled to share my DT inspiration project for #362 – Add A Sentiment. I used the Dreaming Tree Lemonade Shaker SVG cut file and although it took a little more work to assemble, it was an absolute delight to make. I LOVE shaker cards (and shaped cards), so this was definitely a win-win! And I love the fact that this one has die cut pieces mixed in with the shaker bits!
Using my Cricut Explore Air 2 and the Dreaming Tree Lemonade Shaker Card SVG cut file, I cut all the pieces from CutCardStock Basis Dark Red, Lessebo Granite Gray, Granny Smith, Bazzill Peach, Blue Hydrangea, Pop Tone Lemon Drop, Bright Silver Foil, Stardream Metallic Pluto, Rubber Ducky Yellow, and Cougar 100# Smooth White and 80# Smooth White cardstock, as well as a couple patterned papers from the Carta Bella Beach Party Collection Kit. I cut the envelope from a gingham print in the Simple Stories Wood & Gingham Basics 12×12 paper pad.
Here’s a shot of the inside, and admittedly I’m not thrilled with it. I got interrupted and when I came back to my craft table, I absent-mindedly adhered the panel before I stamped the sentiment (from the Hero Arts To Seize or Not To Seize stamp set). *sigh* So I ended up stamping it in Versafine Onyx Black ink on a scrap piece of the peach cardstock and fussy cutting it. All crafters blunder from time to time (bahahaha), right?! All in all, though, it’s really a fun card and I love how it turned out!
Affiliate links are used in this post at no cost to you – I really appreciate your support!
Products used: CARDSTOCK/PAPER: CutCardStock Basis Dark Red, Lessebo Granite Gray, Granny Smith, Bazzill Peach, Blue Hydrangea, Pop Tone Lemon Drop, Bright Silver Foil, Stardream Metallic Pluto, Rubber Ducky Yellow, and Cougar 100# Smooth White and 80# Smooth White cardstock; Carta Bella Beach Party Collection Kit, Simple Stories Wood & Gingham Basics 12×12 paper pad STAMPS: Hero Arts To Seize or Not To Seize stamp set INK: Versafine Onyx Black ink DIES/PUNCHES: Dreaming Tree Lemonade Shaker Card SVG cut file ACCESSORIES: Cricut Explore Air 2, Bearly Art Precision Craft Glue, Grafix Crystal Clear Craft Plastic, Mini MISTI; Scrapbook Adhesives 3D Foam Strips, Thin 3D Foam Squares and Crafty Power Tape; Keep It Simple Sprinkles (all 2mm Beads)- Yellow Caviar Glass, Matte Sunshine Yellow, Matte Yellow and Clear Caviar Glass
I hope you’ve enjoyed seeing this project and will link up with us this time! Thanks so much for stopping by today – we’ll see you next time! ;)
07/25/26 Weekly Favorite (favorited by two crafters) at Splitcoast Stampers! 07/31/26 Top Pick at Festive Friday Challenge! 08/15/26 Top Pick at AAA Birthday!
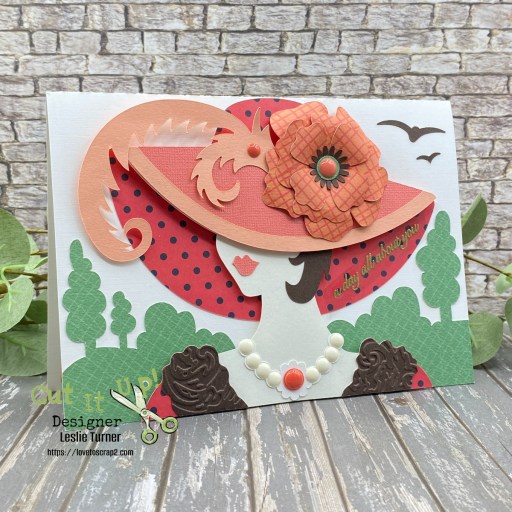
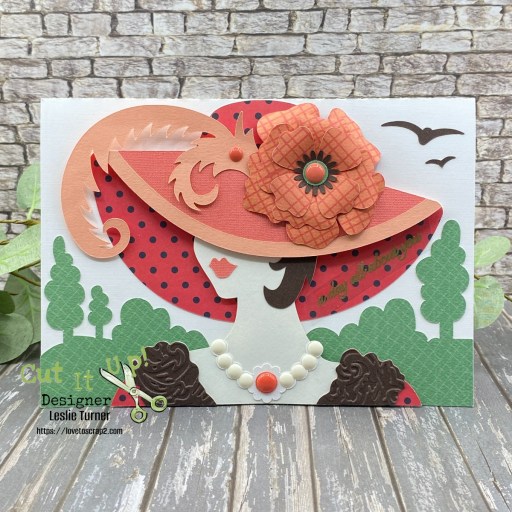
Hi friends, happy Friday! Only one more Friday in this month and then we’re into August! This year is flying by just like the last 20 have, lol! Our new challenge is live this morning over at Cut It Up Challenges and I’m stoked to share my DT inspiration project for #361 – Emboss It! We’re looking for either dry or heat embossing, and I’ve used both on my card – dry for the trim on her dress and heat for the front and inside sentiments.
You may have noticed the special contest running on the CIU blog right now – we’re now only TWO away from 1000 followers! When the 1000 followers milestone is reached, there will be a random drawing from all of the entries in the challenge where 1000 followers was reached and reward the lucky random winner with a box full of crafty goodies! Come on over and follow us – AND get in on the chance to win that box of goodies! ;)
Using my Cricut Explore Air 2 and the Rosey Card SVG cut file from the Dreaming Tree Le Chapeau SVG Bundle, I cut all the pieces from Neenah Classic Linen 100# Solar White cardstock; CutCardStock Basis Natural, Flamingo, Basis Coral, and Pop Tone Hot Fudge cardstock; Darice Ooh La La cardstock, and patterned papers from the Keep It Simple Hello Adventure Flipsides Pack and Back To Basics Jade 12×12 Collection Pack. I used the Tim Holtz Alterations Texture Fades Regal Flourishes for the trim on her dress for the dry embossing.
I used the Stampin’ Up! Birthday Blossoms stamp set for the front and inside sentiments, heat embossing the front sentiment in Brutus Monroe Gilded Embossing Powder on a scrap piece of Keep It Simple Back To Basics Acetate. I used Keep It Simple Back To Basics Ruby Enamel Dots and White Enamel Dots for her hat and necklace which I thought added some great texture.
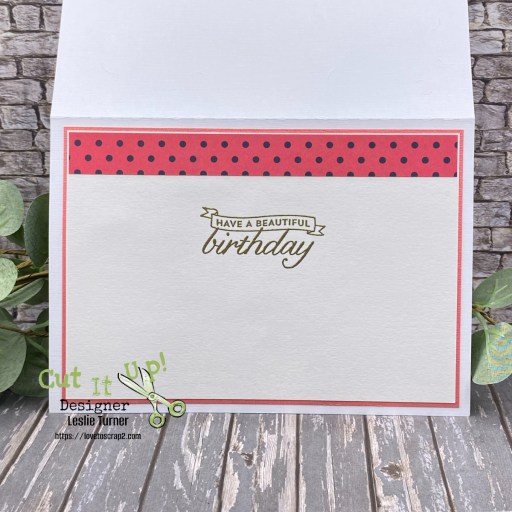
I cut the inside panel from CutCardStock Basis Natural and embellished it with a leftover piece of the dotted paper used on the front. I typically don’t use white and off-white cardstock together but it was used on the front so I carried it to the inside. I heat embossed another sentiment from the Stampin’ Up! birthday Blossoms stamp set in Brutus Monroe Gilded Embossing Powder using my Milwaukee heat tool. Love, love, love how this card turned out – these SVG cut files are fabulous!
Affiliate links are used in this post at no cost to you – I really appreciate your support!
Products used: CARDSTOCK/PAPER: Neenah Classic Linen 100# Solar White cardstock, CutCardStock Basis Natural, Flamingo, Basis Coral, and Pop Tone Hot Fudge cardstock; Darice Ooh La La cardstock; Keep It Simple Hello Adventure Flipsides Pack and Back To Basics Jade 12×12 Collection Pack STAMPS: Stampin’ Up! Birthday Blossoms stamp set INK: Brutus Monroe Clear Embossing Ink DIES/PUNCHES: Dreaming Tree Rosey Card from Le Chapeau SVG Bundle ACCESSORIES: Cricut Explore Air 2, Fiskars 12″ ProCision Rotary Bypass Paper Trimmer, My Sweet Petunia Precision Glue Press, Bearly Art Precision Craft Glue, MISTI Stamp Tool, Tim Holtz Alterations Texture Fades Regal Flourishes Embossing Folder; Keep It Simple Adhesive Basics Foam Adhesive & Acetate Sheets, Brutus Monroe Gilded Embossing Powder, Milwaukee Heat Tool, Keep It Simple Back To Basics Ruby Enamel Dots and White Enamel Dots, Scrapbook Adhesives 3D Foam Squares
I hope you’ve enjoyed seeing this project and will link up with us this time! Thanks so much for stopping by today – we’ll see you next time! ;)
07/18/26 Top Rocker at 613 Avenue Create! 09/01/26 Top Pick at Love To Scrap Challenge Blog!
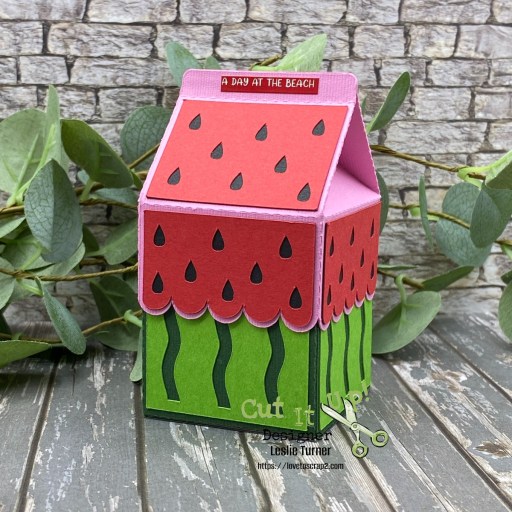
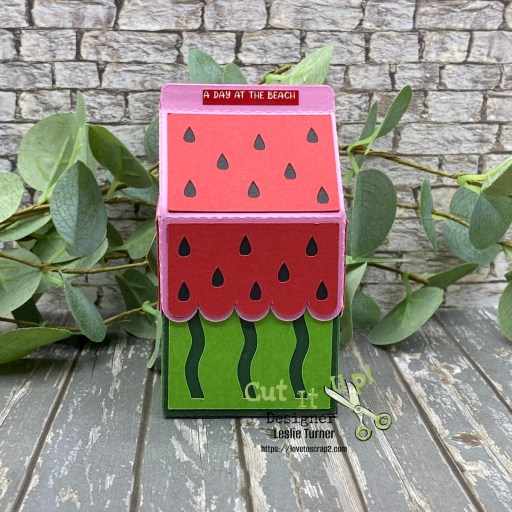
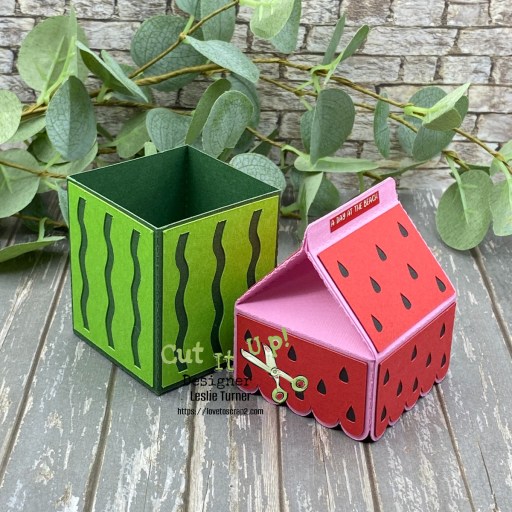
Hi friends, happy Friday! I hope you’ve had a great week and you’re ready to have some fun this weekend! Our new challenge is live this morning over at Cut It Up Challenges and I’m delighted to share my DT inspiration project for #360 – Make Your Own Background. I used the Cyndy G SVG Watermelon Milk Carton SVG cut file, and of course the background looks like a watermelon! It’s a box that can hold all sorts of things from treats to jewelry to money or a gift card! And who doesn’t love eating watermelon at a party… especially a beach party?! This has to be one of the easiest challenge themes of all time because there are so many ways to make your own background. I hope you can join in the fun with us!
Using my Cricut Explore Air 2 and the Cyndy G SVG Watermelon Milk Carton SVG cut file, I cut all the pieces from CutCardStock Kale Green, Granny Smith, Pink Tutu, Pop Tone Black Licorice, and Pop Tone Red Hot cardstock. The assembly was a breeze, and the final step was adding a sentiment sticker from the Carta Bella Beach Party Collection Kit. You can opt to close the top with a clothespin, small paper clip or some other type of closure, but I chose to glue it like a real milk carton.
And here’s one final shot of the lid off the box. How stinkin’ cute is this?!
Affiliate links are used in this post at no cost to you – I really appreciate your support!
Products used: CARDSTOCK/PAPER: CutCardStock Kale Green, Granny Smith, Pink Tutu, Pop Tone Black Licorice, and Pop Tone Red Hot cardstock; Carta Bella Beach Party Collection Kit (sentiment sticker) DIES/PUNCHES: Cyndy G SVG Watermelon Milk Carton SVG cut file ACCESSORIES: Cricut Explore Air 2, Bearly Art Precision Craft Glue
I hope you’ve enjoyed seeing this watermelon milk carton project and will link up with us this time! We’d love to see you project using either wafer dies or an electronic cutting machine! Thanks so much for stopping by today – we’ll see you next time! ;)
06/30/26 Rising Star honor at A Place To Start! 07/04/26 Weekly Favorite at Splitcoast Stampers!
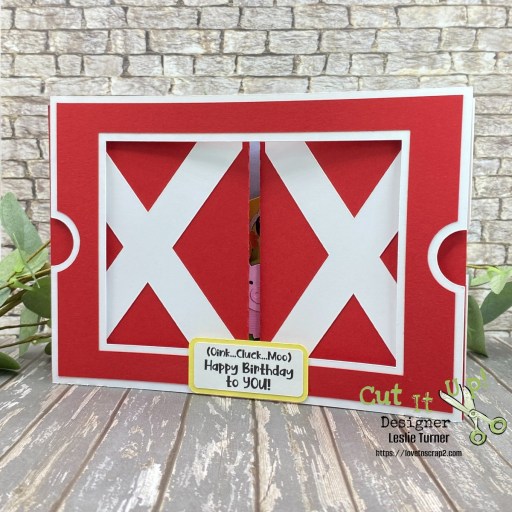
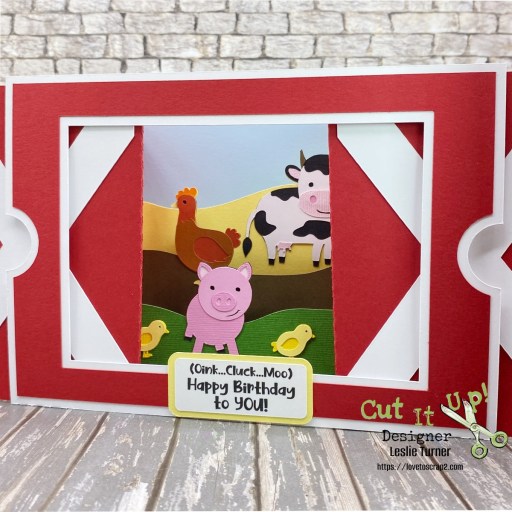
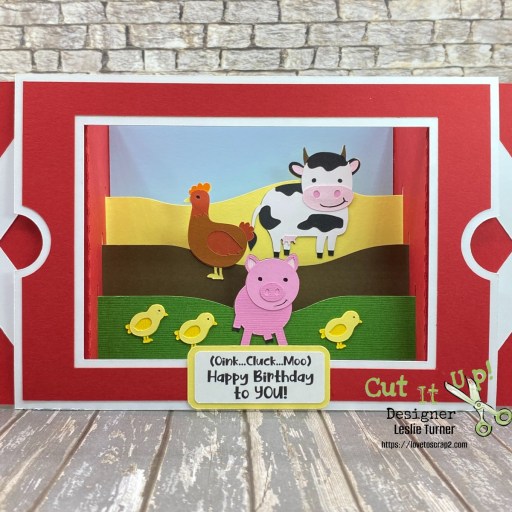
Hey everybody, happy Friday! I hope you have something fun planned this weekend! Our new challenge is live this morning over at Cut It Up Challenges and I’m thrilled to share my inspiration project for #359 – Critters! This farm-themed sliding shadow box card with the pig, chickens and cow is so stinkin’ cute, I can’t even stand it! I’ve made several of these over the years (also called a theatre card) by hand-cutting the pieces. Well, I’m here to tell you that this SVG cut file is a game changer!
Using my Cricut Explore Air 2 and Lori Whitlock’s Sliding Shadow Box Card SVG cut file, I cut all the pieces from CutCardStock Cougar Smooth 110# 12×12, Cougar Smooth 80# White, Red Pepper 12×12, Pop Tone Black Licorice, Pop Tone Tangy Orange, Basis Dark Orange, Lessebo Coffee Bean, Light Yellow, Rubber Ducky Yellow, Scottish Highlands Green, Lessebo Arctic Blue, Poodle Skirt Pink, Pop Tone Cotton Candy, Pink Tutu, and Basis Orange. I used the print and cut function on my Cricut to print the sentiment on Neenah Classic Crest 80# Solar White cardstock.
I always say that the assembly is the most fun and I thoroughly enjoyed putting this one together. Despite it’s complex look, it’s really pretty simple and it was absolutely delightful watching it come to life. This SVG cut file is in a bundle and now I can’t wait to make the others!
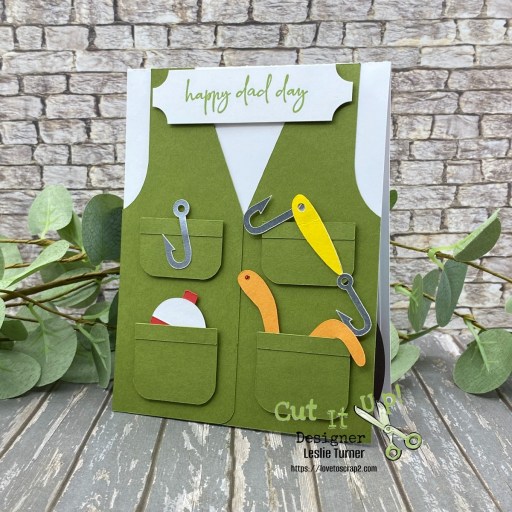
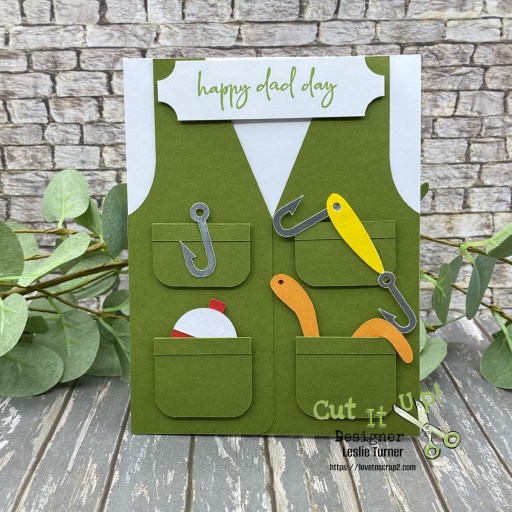
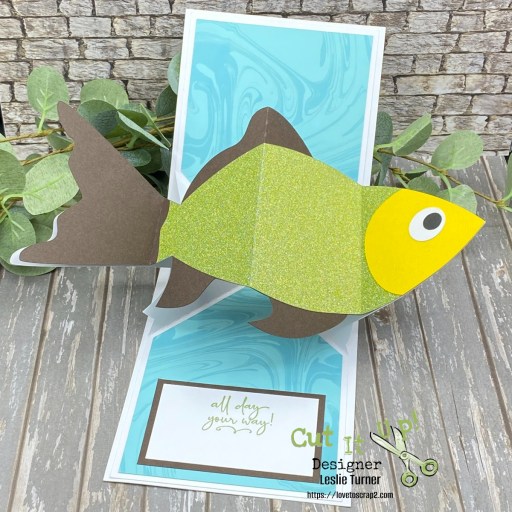
Hey everybody – welcome to the middle of June…almost! Where did May go?! Our new challenge is live this morning over at Cut It Up Challenges and I’m delighted to share my DT inspiration project for #358 – One For the Boys (or Men)! Father’s Day is approaching and this card is near and dear to my heart. My husband loves nothing more than fishing, and having grown up in Montana, he was a fly fishing fanatic in his younger years. I totally LOVE this interactive Fishing Twist Card from Cyndy G SVG!
Using my Cricut Explore Air 2 and the Cyndy G SVG Fishing Twist Card SVG cut file, I cut all the pieces from CutCardStock Cougar Smooth 80# White, Pop Tone Jellybean Green, Pop Tone Orange Fizz, Pop Tone Black Licorice, Pop Tone Hot Fudge, Pop Tone Red Hot, Bright Silver Foil, and Rubber Ducky Yellow cardstock, along with Bazzill Marble cardstock and American Crafts POW! Cricket glitter paper.
I used the Stampin’ Up Happy & Heartfelt stamp set for the front and inside sentiments, stamped in Memento Bamboo Leaves. The Spellbinders 3-in-1 Corner Notch Punch is one of my favorites for punching the corners to create a little interest.
And here is the best part of the card… the twist ‘n’ pop inside! Okay, I have a confession… me being the buzz-kill that I am, I just HAD to show my husband when I finished it! I couldn’t wait, lol! Of course, he thought it was very cool!
Affiliate links are used in this post at no cost to you – I really appreciate your support!
Products used: CARDSTOCK/PAPER: CutCardStock Cougar Smooth 80# White, Pop Tone Jellybean Green, Pop Tone Orange Fizz, Pop Tone Black Licorice, Pop Tone Hot Fudge, Pop Tone Red Hot, Bright Silver Foil, and Rubber Ducky Yellow cardstock; Bazzill Marble cardstock, American Crafts POW! Cricket glitter paper STAMPS: Stampin’ Up Happy & Heartfelt stamp set INK: Memento Bamboo Leaves ink DIES/PUNCHES: Cyndy G SVG Fishing Twist Card SVG cut file, Spellbinders 3-in-1 Corner Notch Punch ACCESSORIES: Cricut Explore Air 2, My Sweet Petunia Precision Glue Press, Bearly Art Precision Craft Glue, Stampendous Red Dot Sparklers, Mini MISTI, Scrapbook Adhesives Thin 3D Foam Squares and 3D Foam Squares
I hope you’ve enjoyed seeing this project and will link up with us this time! Thanks so much for stopping by today – we’ll see you next time! ;)
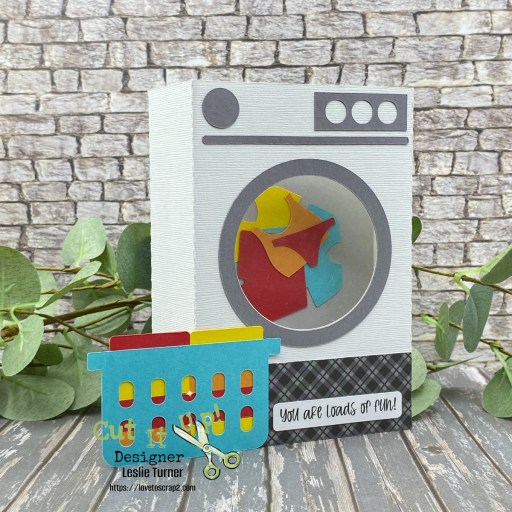
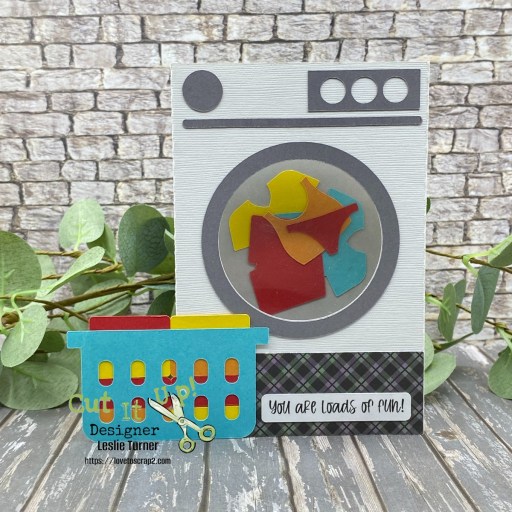
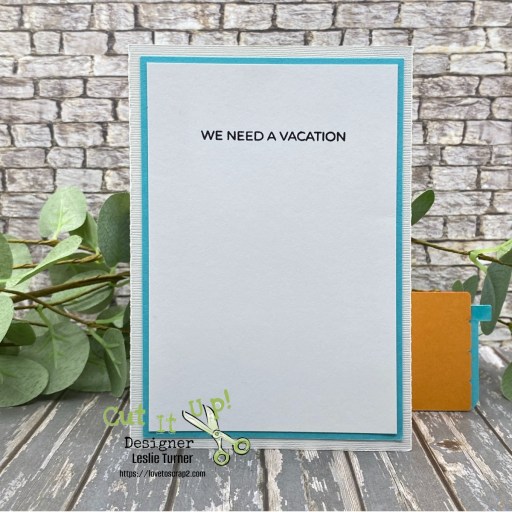
Hey everybody! Well, another Friday has rolled around – are you ready for a fun weekend? Our new challenge is live this morning over at Cut It Up Challenges and I’m delighted to share my DT inspiration project for #357 – Friendship! Does the laundry seem to be never ending at your house, too? I thought this fun card was a terrific way to tell a friend that she’s loads of fun but it’s time for a vacation! Needless to say, I chuckled once or twice while putting this one together! Those tiny pieces of clothing just cracked me up!
Let me side-track for a minute. A fun game has been added to our challenges. The Cut It Up Challenges owner is aiming to boost Followers to 1000. So every person who submits a project into the gallery of the challenge going on when 1000 Followers is reached will be entered into a random drawing to win a box of crafty goodies. And she is willing to ship internationally! So pop over to follow and play… you never know, you just might be the random winner of some crafty goodies! Hope to see you there!
Using my Cricut Explore Air 2 and the Lori Whitlock Washing Machine Box Card SVG cut file, I cut all the pieces from CutCardStock Wedding Cake 12×12, Lessebo Granite Gray, Dolphin Gray, Pop Tone Blue Raspberry, Pop Tone Red Hot, Pop Tone Orange Fizz, Pop Tone Lemon Drop and Classic Crest 80# Solar White cardstock, along with a gray and white plaid from the Doodlebug Design Plaid-Polka Dot Rainbow Petite Prints 6×6 Paper Pad. This was a fun one to put together! I added a piece of acetate over the front aperture to give it a more realistic vibe, which necessitated another panel to sandwich the acetate between. The front sentiment was printed on the Cricut.
I added the back panel for another sentiment, and cut it from 80# Solar White cardstock. The sentiment is from the Trinity Stamps Summertime Sentiments stamp set, stamped in Versafine Onyx Black ink. Just thought this turned out SO cute!
Affiliate links are used in this post at no cost to you – I really appreciate your support!
Products used: CARDSTOCK/PAPER: CutCardStock Wedding Cake 12×12, Lessebo Granite Gray, Dolphin Gray, Pop Tone Blue Raspberry, Pop Tone Red Hot, Pop Tone Orange Fizz, Pop Tone Lemon Drop and Classic Crest 80# Solar White cardstock; Doodlebug Design Plaid-Polka Dot Rainbow Petite Prints 6×6 Paper Pad STAMPS: Trinity Stamps Summertime Sentiments stamp set INK: Versafine Onyx Black ink DIES/PUNCHES: Lori Whitlock Washing Machine Box Card SVG cut file, Love From Lizi Stitched Circle Nested Cutting Dies ACCESSORIES: Cricut Explore Air 2, Fiskars 12″ ProCision Rotary Bypass Paper Trimmer, My Sweet Petunia Precision Glue Press, Bearly Art Precision Craft Glue, Keep It Simple Shaker Basics Foam Adhesive & Acetate Sheets, Mini MISTI, Big Shot
I hope you’ve enjoyed seeing this project and will link up with us this time! Thanks so much for stopping by today – we’ll see you next time! ;)