
Hi friends! A big giant WELCOME to the CutCardStock blog‘s Fall-oween Blog Hop going on this weekend (September 18th and 19th), starting at 7:00 AM Central Time today and ending at 11:55 PM Central Time tomorrow! Affiliate links are used in this post at no cost to you. I really appreciate your support! This is going to be fun, so COME HOP WITH US!

AND there is a $40 CutCardStock gift card up for grabs! Woo-hoo!
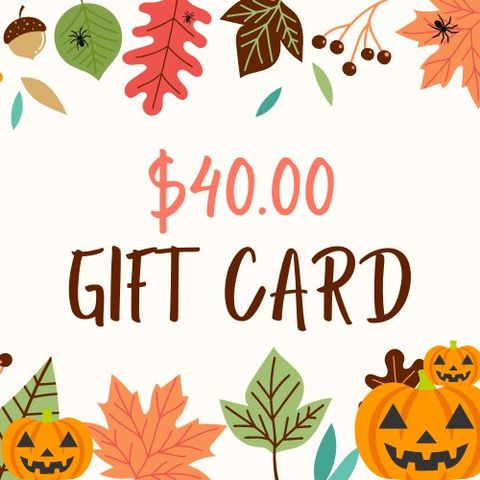
The winner will be randomly selected via number generator and announced on Monday, September 20th, on the CutCardstock blog and Facebook page! To be eligible for the $40 gift card, you must comment at each stop along the hop (good for ONE gift card entry) or upload a Fall or Halloween project using CutCardStock products (good for TWO gift card entries). We would absolutely LOVE IT if you link up a project with us, PLUS it will increase your chances to win the gift card! ;)
= = = = = = = = = = = = = = = =
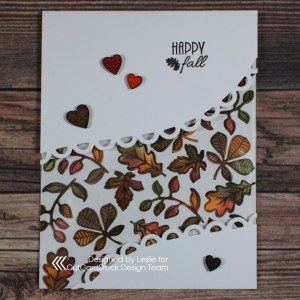
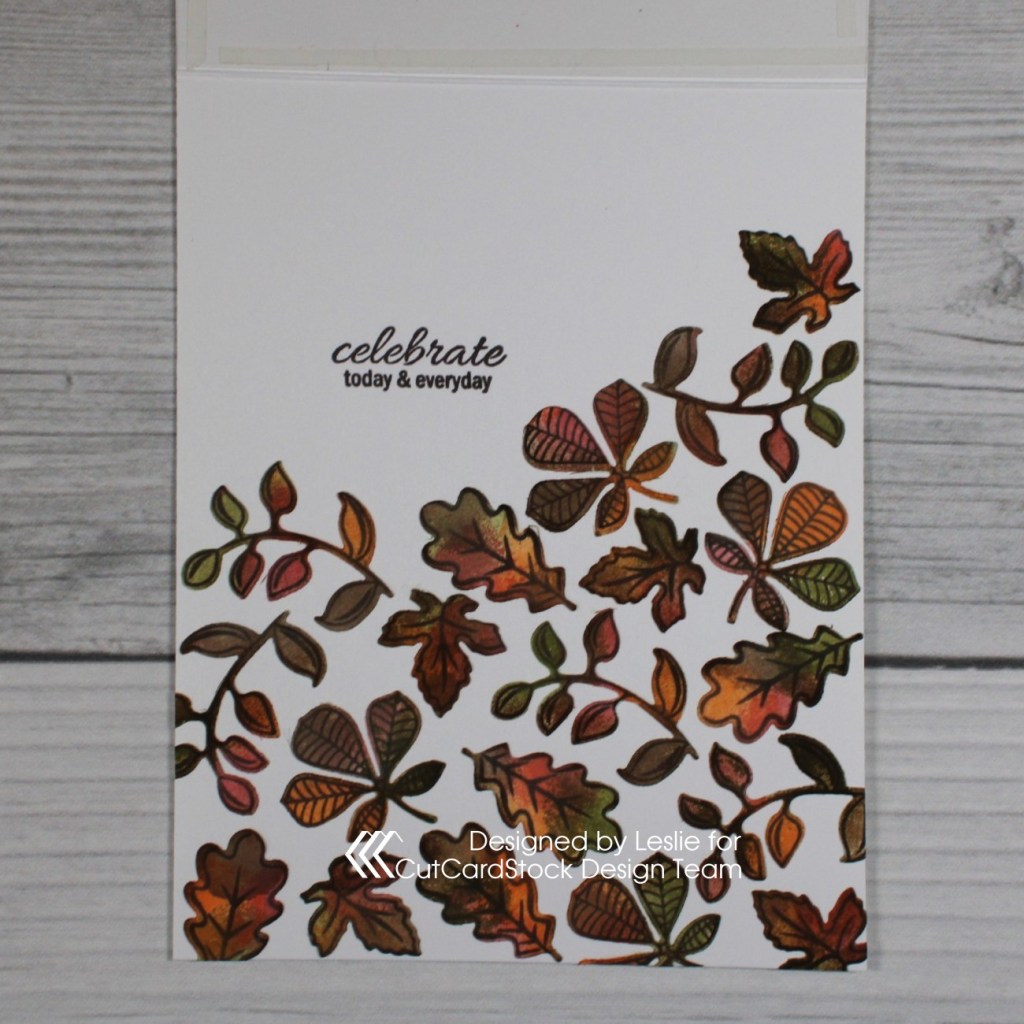
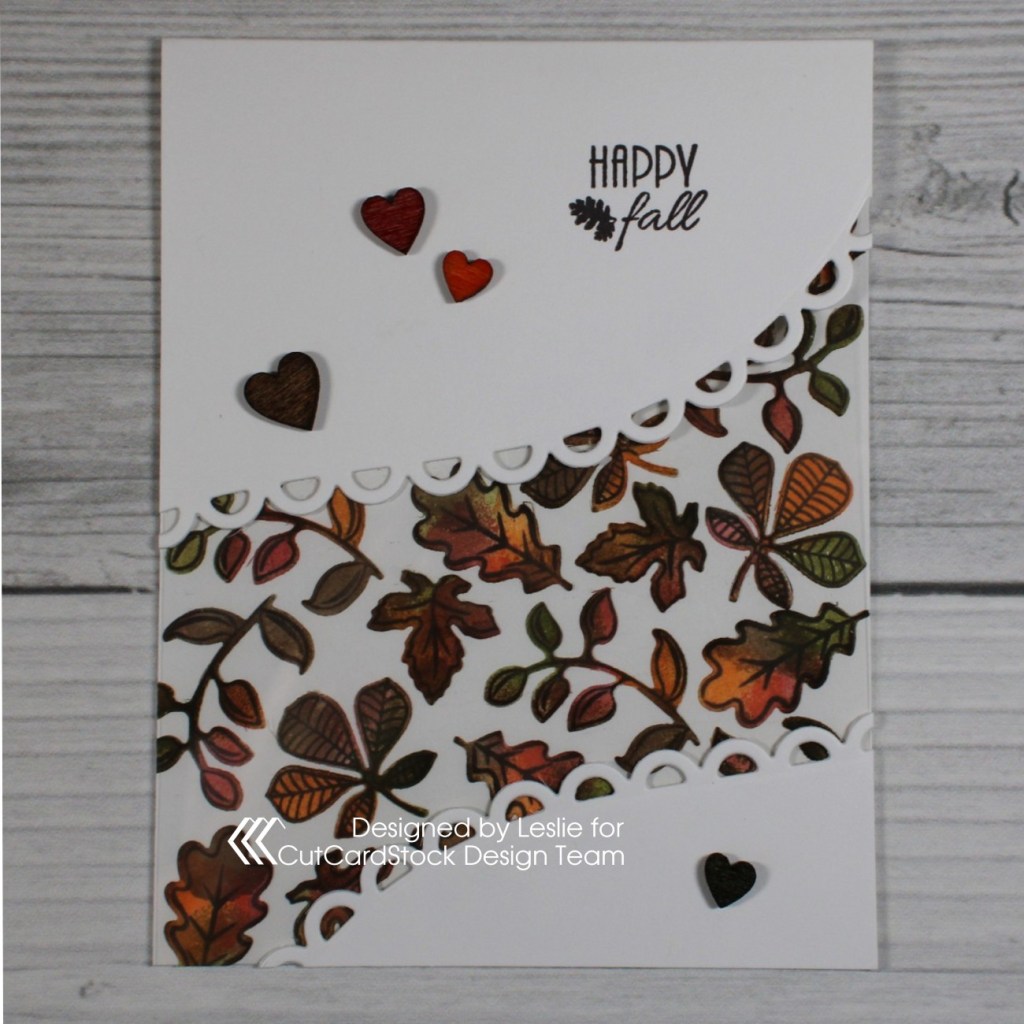
Now, let me side-track you for a minute or three to share my pretty Fall card featuring a Neenah Classic Crest Solar White 110# cardstock card base with an acetate panel. Both the 110# and 80# weight Neenah Classic Solar White cardstock are staples in my studio. I create most of my projects with this amazing cardstock and don’t ever see myself without it!
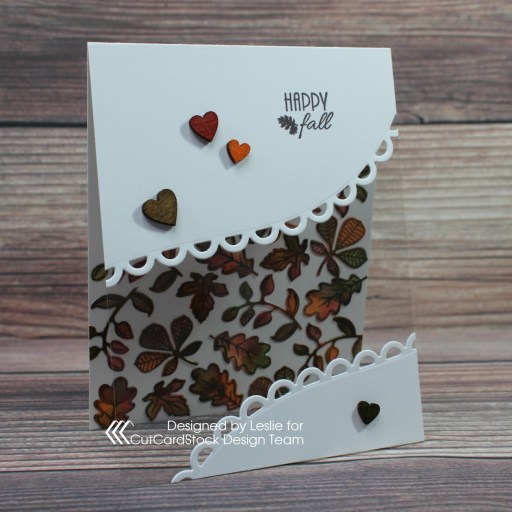
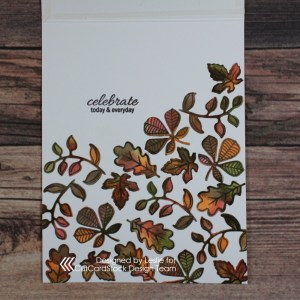
Acetate panel cards are so fun to create and this was a super easy one. All those leaves seen through the acetate were cut from Neenah Classic Crest Solar White 110# cardstock as well, and adhered directly to the inside of the card base.
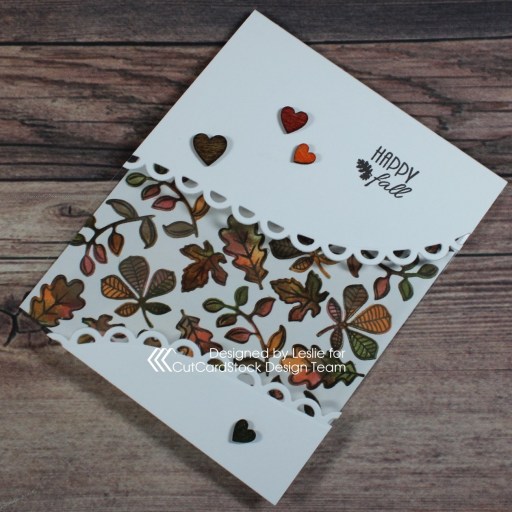
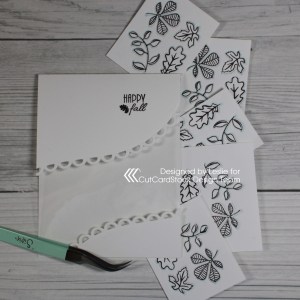
Here is a quick tutorial showing you my process for making this card. All you need is a good sturdy card base cut from Neenah Classic Crest Solar White 110# cardstock, a piece of acetate, and an edge die – which can be curved or straight, plain or scalloped. Doesn’t get much easier! ;)

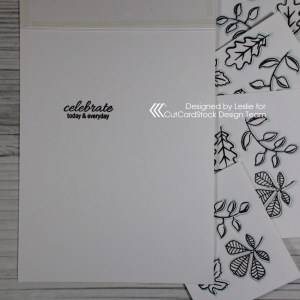
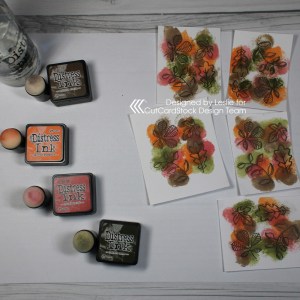
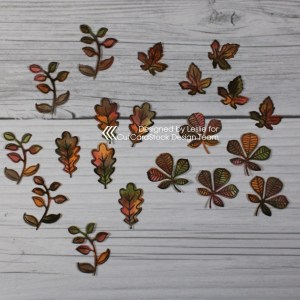
Cut a section out of the front flap of the card base with the edge die, adhere the acetate to the back side of the flap and adhere the bottom portion of the front flap to the front of the acetate. Stamp the front and inside sentiments in brown ink. Using the Prickley Pear Stamps Fall Leaves Stamp Set and coordinating Prickley Pear Stamps Leaf Die Set, stamp several sets of leaves in brown ink and die cut them, keeping the leaves in the negative spaces by putting small strips of washi tape on the back side of the panels.
Ink the leaves with carved pumpkin, fired brick, forest moss, walnut stain distress inks. Once dry, remove the washi tape from the back side of the panels and remove the die cuts.
Adhere the die cuts randomly to the inside of the card base being sure to cover all areas visible through the acetate.
Ink several wood veneer heart embellishments with the same distress ink colors and adhere to the front of the card base.
CutCardStock products used:
Neenah Classic Crest Solar White 110# cardstock
Other products used:
Stamps: Prickley Pear Stamps Fall Leaves Stamp Set
Ink: Memento Espresso Truffle ink; Ranger distress ink- carved pumpkin, fired brick, forest moss, walnut stain
Dies/Punches: Your Next Stamp Curved Scallop Edge Die, Prickley Pear Stamps Leaf Die Set
Accessories: Bearly Art precision craft glue, MISTI stamp tool, Big Shot, Spiegelmom Scraps Wood Veneer Rustic Hearts
= = = = = = = = = = = = = = = =
Okay, let’s get back to the hop! Here is the complete list of stops:
- CutCardStock
- Janet Trieschman
- Janet Axtman
- Maureen Ruangchamneil
- Jennifer Kotas
- Leslie Turner –>you’re here!<–
- Judy VanZandt
- Judy Markowitz
- CutCardStock – C’mon, you know you want to link up! The linky tool is at the end of the post on the CutCardstock blog so that’s where you’ll want to head to link up your project – each upload is worth two entries for the gift card! Two entries per person!
You should have arrived here from Jennifer’s blog and your next stop is Judy V’s blog! I hope you are enjoying the hop and seeing all the fun Halloween projects! If you get lost along the way or if you landed here in the middle of the hop somehow and want to join in the fun, be sure to head on over to the CutCardstock blog to read all the details and start from the beginning!
In closing, I hope you’ve enjoyed seeing my Halloween card and you’re inspired to get crafty AND hop with us AND link up a Halloween-themed project! Be sure to check out all the awesome cardstock and other goodies at CutCardStock (adhesives, labels, stickers, pens, watercolors and ribbon to name a few). And head on over to the CutCardStock Facebook Page for lots of crafty inspiration! Thanks so much for stopping by today – we’ll see you next time!
Scrappy hugs,

