Flying by with a Halloween HI (two-fer)

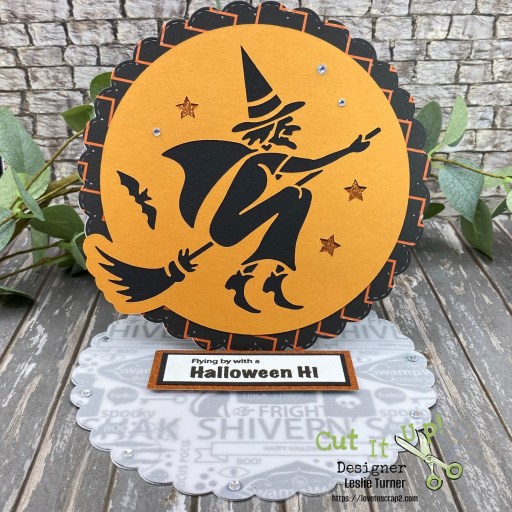
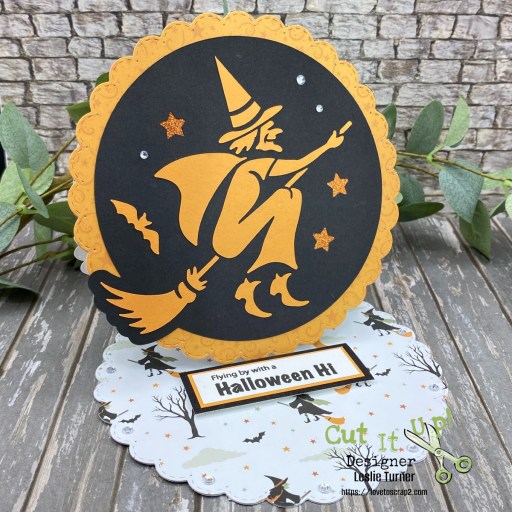
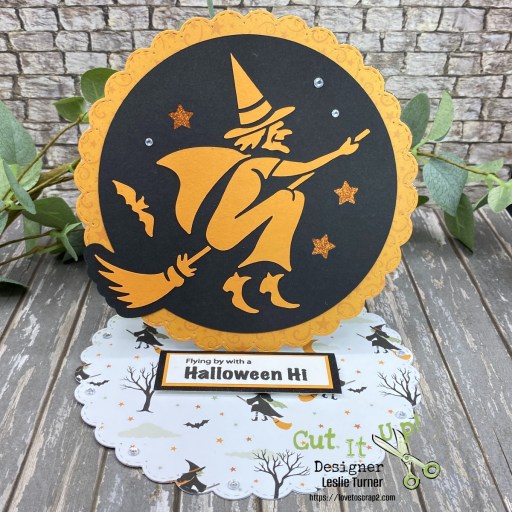
Hey everybody! I hope you’re having a good week and have something fun planned this weekend! Our new challenge is live this morning over at Cut It Up Challenges and I’m delighted to share my inspiration project for #365 – Orange & Black! I created a circular easel card which turned into a ‘two-fer’ using the SVG Cuts Vintage Witch SVG cut file. One card is made with the regular cut file design and the other is made with the negative space pieces left on the mat which I held in place with Press ‘N Seal. Why not get two super cute cards out of the deal, right?!
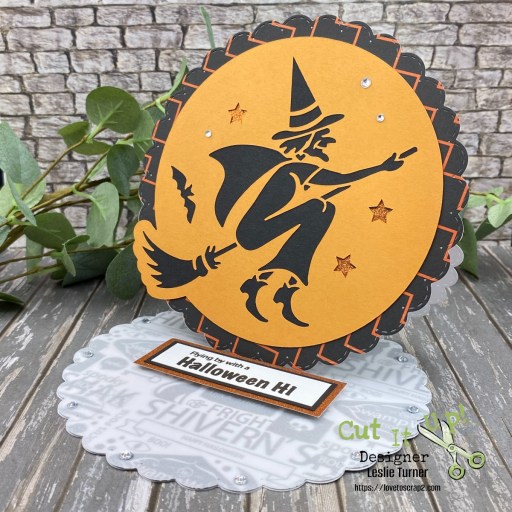
Using my Cricut Explore Air 2 and the SVG Cuts Vintage Witch SVG cut file, I cut the focal image pieces from Pop Tone Orange Fizz and Pop Tone Black Licorice cardstock. I peeled the orange layer off the mat and held the negative space pieces in place with Press ‘N Seal to use for the second card. Next, I cut the card base from CutCardStock Cougar 100# Smooth White cardstock along with layering panels from prints in the American Crafts Halloween 6×6 paper pad, all using the KIS Cuts: Nested Stitched Scallop Circles. I grabbed my Stampin’ Up! 3/4″ circle punch and punched three circles from Celebration Warehouse Non-Shedding Orange Glitter cardstock to place behind the star apertures. I added a few clear gemstones to the background which completed the upper portion.

I felt like the bottom portion was a little too busy so I cut an additional scalloped circle from CutCardStock Glama Natural Translucent Clear Vellum which toned it down a good bit. I stamped the sentiment from the Prickley Pear Stamps Bats stamp set, trimmed it and layered it on Pop Tone Black Licorice and the Orange Glitter cardstock. I popped it up on Scrapbook Adhesives Crafty Foam Tape to use as the stopper. Card #1 is complete, now on to card #2!
I cut a second card base from CutCardStock Cougar 100# Smooth White cardstock along with layering panels from prints in the Echo Park Spooky Collection Kit. I cut the plain background from the cut file a second time from the black cardstock, applied wet glue to the back of all the negative pieces on the Press ‘N Seal and adhered them in place. Once again, I punched three circles from Celebration Warehouse Non-Shedding Orange Glitter cardstock to place behind the star apertures, and added a few clear gemstones to the background which completed the upper portion.
As before, I stamped the sentiment from the Prickley Pear Stamps Bats stamp set, trimmed it and layered it on Pop Tone Orange Fizz and the Black Glitter cardstock. I popped it up on Scrapbook Adhesives Crafty Foam Tape to use as the stopper. These turned out so stinkin’ cute and they were so easy!
Sharing this pair of cards in the following challenges:
1. https://avenue613.blogspot.com/2026/09/september-2026-anything-goes-w-optional.html
2. https://cardz4galz.blogspot.com/2026/09/285-fantasy-faairies-goblins-dragons-etc.html
3. https://craftygalscornerchallenges.blogspot.com/2026/09/challenge-280-anything-goes-woptional.html
4. https://lovetocraftchallengeblog.blogspot.com/2026/09/ltccb-94-and-ltccb-93-winner-and-top.html

Affiliate links are used in this post at no cost to you – I really appreciate your support! 

Products used:
CARDSTOCK/PAPER: CutCardStock Cougar Smooth 100# White, Pop Tone Black Licorice and Pop Tone Orange Fizz cardstock, and Glama Natural Translucent Clear Vellum; Celebration Warehouse Non-Shedding Orange Glitter and Non-Shedding Black Glitter cardstock; American Crafts Halloween 6×6 paper pad, Echo Park Spooky Collection Kit
STAMPS: Prickley Pear Stamps Bats stamp set
INK: Versafine Onyx Black ink
DIES/PUNCHES: SVG Cuts Vintage Witch SVG cut file; KIS Cuts: Nested Stitched Scallop Circles; Stampin’ Up! 3/4″ circle punch
ACCESSORIES: Cricut Explore Air 2, Spellbinders 12×12 Scoring Board, Bearly Art Precision Craft Glue; Scrapbook Adhesives E-Z Runner Permanent Strips, Adhesive Dots Micro, and Crafty Foam Tape; Mini MISTI, Big Shot, clear gemstones

I hope you’ve enjoyed seeing this project and will link up with us this time! Thanks so much for stopping by today – we’ll see you next time! ;)

Scrappy hugs,

Flying by with a Halloween Hi

Hey everybody! Happy Sunday – I hope you’re having a great weekend! I’m nearing the bottom of the pile of Pajama Crafter Stamps projects that I created prior to leaving the team at the end of February and hadn’t yet showcased. Only a few more after this one! I created a clean and simple Halloween card featuring the Prickley Pear Stamps Bats stamp set and coordinating Bat die. This is almost a one-layer card and I love how it turned out – a good ol’ black and orange color combo with a tiny pop of yellow and purple!

The A2 size card base was cut from Neenah Classic Crest Solar White cardstock and the bottom right corner rounded. I stamped the two smaller bats from the Bats stamp set in Memento Tuxedo Black ink directly on the card front as well as the sentiment in Memento Morocco ink. I stamped the larger bat on a Solar White scrap and cut it with the coordinating Bat die. You can barely see it, but I used a Sharpie Neon Yellow Ultra Fine Point Marker to color the windows on the haunted house on the bat. I popped the bat up on foam dimensionals and added a few Eyelet Outlet 3mm purple gemstones. Super easy design!

Affiliate links are used in this post at no cost to you – I really appreciate your support!

Pajama Crafter Stamps products used:
Prickley Pear Stamps Bats stamp set
Prickley Pear Stamps Bat die

Other products used:
CARDSTOCK/PAPER: Neenah Classic Crest 80# Solar White cardstock
INK: Memento Tuxedo Black and Morocco inks; Sharpie Neon Yellow Ultra Fine Point Marker
DIES/PUNCHES: Kadomaru Pro Corner Rounder
ACCESSORIES: Tonic Studios 12″ Guillotine Paper Trimmer, Bearly Art precision craft glue, MISTI stamp tool, Big Shot, Stampin’ Up Dimensionals, Eyelet Outlet 3mm purple gemstones

I hope you’ve enjoyed this project! Be sure to check out all the awesome stamps, dies and other goodies at Pajama Crafter Stamps which is the new home of the Prickley Pear Stamps brand and the Pajama Crafter Stamps line! Keep up with news and sales by following Pajama Crafter Stamps on Facebook, Instagram and Pinterest, and join Pajama Crafter Stamps & Friends for lots of fun crafty ideas and to share your creativity! And finally, be sure to visit the Pajama Crafter Stamps blog and sign up for the newsletter to stay in touch! Thanks so much for stopping by today – we’ll see you next time! ;)

Scrappy hugs,

Flying by with a Halloween HI

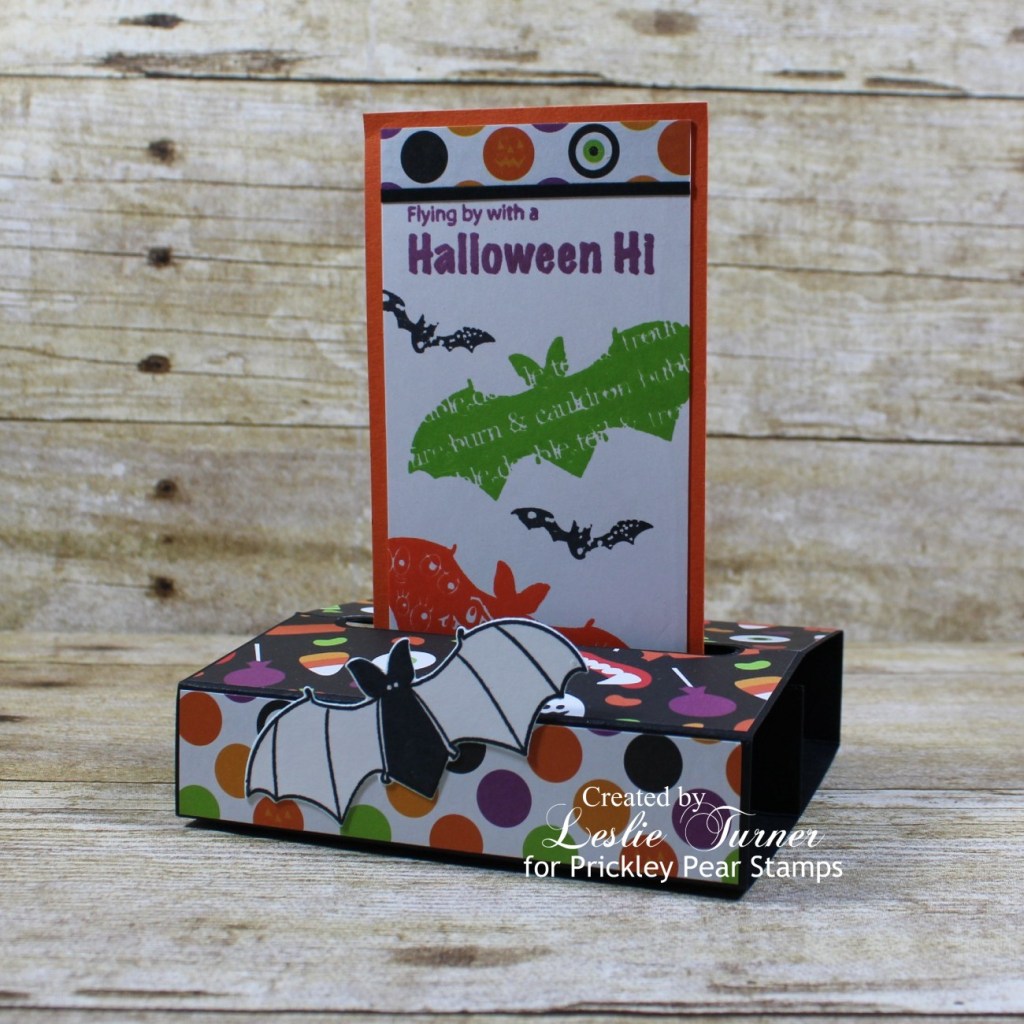
Hi everybody! Happy Tuesday to you – I hope your week has started off nicely! Affiliate links are used in this post at no cost to you – I really appreciate your support! I’m back up on the Prickley Pear Stamps blog today with another Halloween card! It’s that time of year, you know! ;) I created a fun fold using the super adorable Bats stamp set, Bats 2 stamp set and coordinating Bat die. I’ve made several of these free standing pop-up cards in the past and they are definitely fun and pack a huge punch. I dug into one of my favorite paper pads for coordinating papers in the traditional Halloween colors!

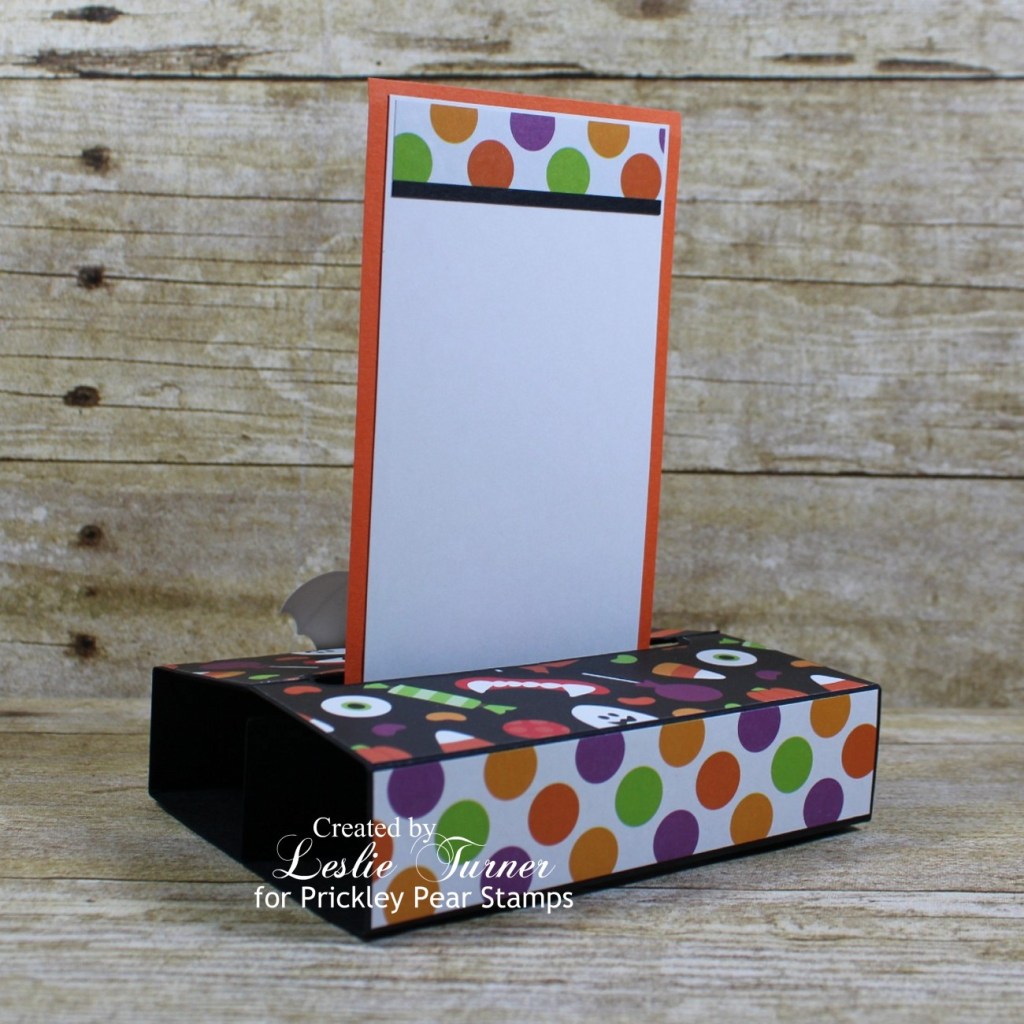
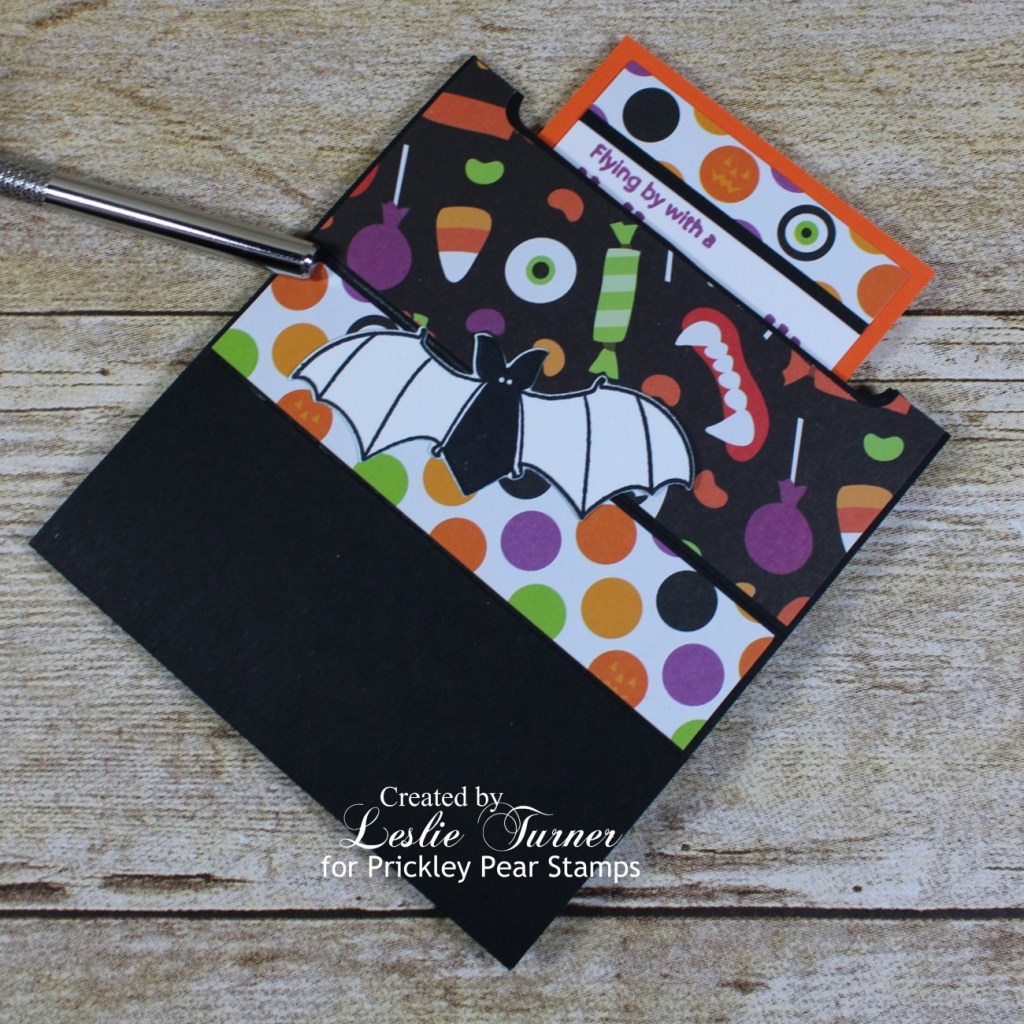
I cut the card base from CutCardStock Basis Black cardstock and adhered patterned paper layers cut from The Paper Studio Four Seasons and Everything In Between -2- paper pad. I cut the stand-up portion of the card from CutCardStock Basis Orange cardstock (which they no longer carry, unfortunately) and a layering panel from Neenah Classic Crest Solar White 80# cardstock which I embellished with leftover pieces of the patterned paper. Using the Bats stamp set and Bats 2 stamp set, I stamped a sentiment and some bats in purple, green, black and orange inks. I stamped a separate bat on Neenah Classic Crest Solar White 110# cardstock in black ink, cut it with the coordinating Bat die and adhered it to the front of the box portion of the card.

I cut the back panel from Neenah Classic Crest 80# Solar White cardstock and embellished it with a leftover piece of the patterned paper. I left this panel blank for a custom message and signature.

And one more look… super fun card in traditional Halloween colors! Love, love, love these bat stamps and die!

Prickley Pear Stamps products used:
Bats stamp set
Bats 2 stamp set
Bat die

Other products used:
Cardstock/Paper: CutCardStock Basis Black cardstock, CutCardStock Basis Orange cardstock, Neenah Classic Crest 80# Solar White cardstock, The Paper Studio Four Seasons and Everything In Between -2- paper pad
Ink: Memento Tuxedo Black ink; Catherine Pooler Orange Twist, Lime Rickey and Sugared Lavender inks
Dies/Punches: Stampin’ Up Slot Punch
Accessories: Tonic Studios 12″ Guillotine Paper Trimmer, MISTI stamp tool, Big Shot, Bearly Art precision craft glue

I hope you’ve enjoyed this project! Be sure to check out all the awesome stamps and dies at Prickley Pear Stamps! If you’d like to save 10% on anything on the site when you shop at Prickley Pear Stamps, use the coupon code LESLIE10 at checkout! And be sure to ‘like’ and ‘follow’ the Prickley Pear Stamps Facebook page to keep up with news and sales, and join Prickley Pear Pals (the fan group) for lots of fun crafty ideas and to share your creativity! And finally, we’d love to see you visit the Prickley Pear Stamps blog that’s in the process of being revived and become a Follower! Hope to see you there! Thanks so much for stopping by today – we’ll see you next time! ;)

Scrappy hugs,
lesliesig