Squeeze the Day

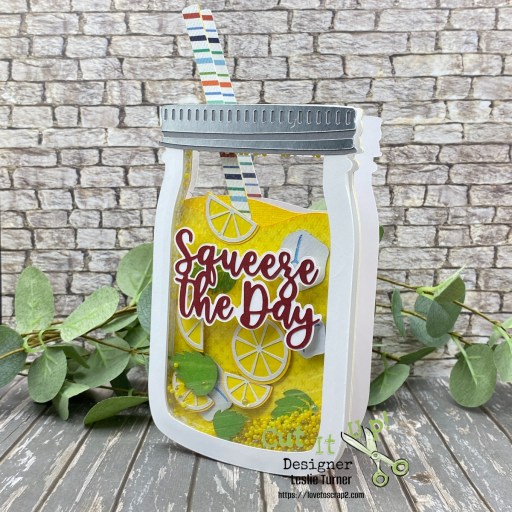
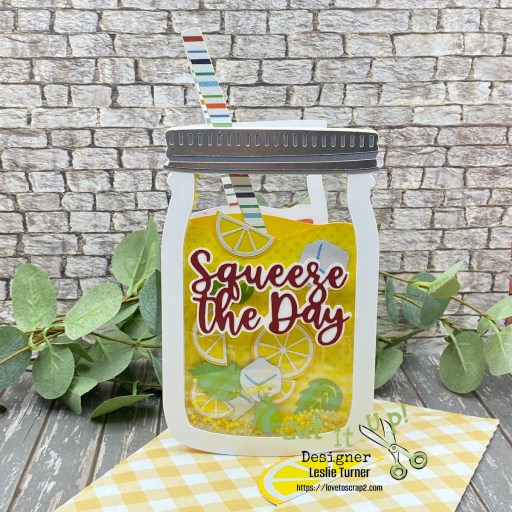
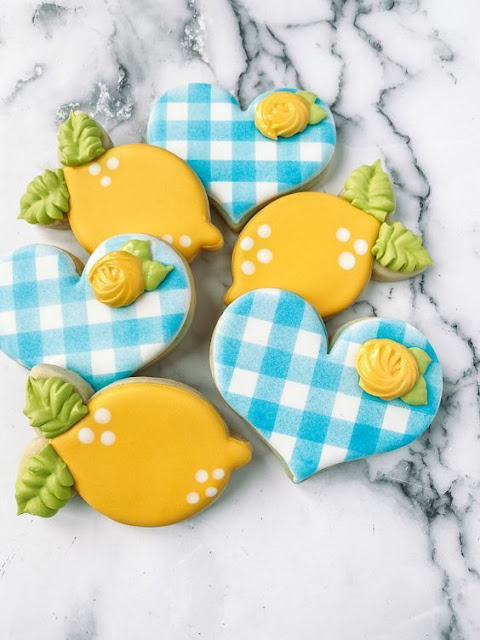
Hi friends! Well, another Friday has rolled around and we’re now into the first week of August. How is that even possible?! Our new challenge is live this morning over at Cut It Up Challenges and I’m thrilled to share my DT inspiration project for #362 – Add A Sentiment. I used the Dreaming Tree Lemonade Shaker SVG cut file and although it took a little more work to assemble, it was an absolute delight to make. I LOVE shaker cards (and shaped cards), so this was definitely a win-win! And I love the fact that this one has die cut pieces mixed in with the shaker bits!

Using my Cricut Explore Air 2 and the Dreaming Tree Lemonade Shaker Card SVG cut file, I cut all the pieces from CutCardStock Basis Dark Red, Lessebo Granite Gray, Granny Smith, Bazzill Peach, Blue Hydrangea, Pop Tone Lemon Drop, Bright Silver Foil, Stardream Metallic Pluto, Rubber Ducky Yellow, and Cougar 100# Smooth White and 80# Smooth White cardstock, as well as a couple patterned papers from the Carta Bella Beach Party Collection Kit. I cut the envelope from a gingham print in the Simple Stories Wood & Gingham Basics 12×12 paper pad.

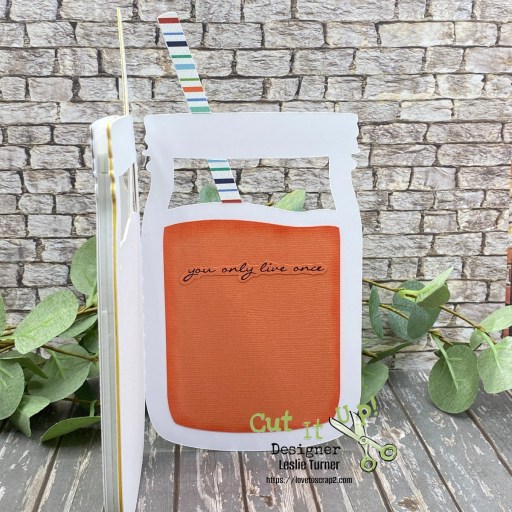
Here’s a shot of the inside, and admittedly I’m not thrilled with it. I got interrupted and when I came back to my craft table, I absent-mindedly adhered the panel before I stamped the sentiment (from the Hero Arts To Seize or Not To Seize stamp set). *sigh* So I ended up stamping it in Versafine Onyx Black ink on a scrap piece of the peach cardstock and fussy cutting it. All crafters blunder from time to time (bahahaha), right?! All in all, though, it’s really a fun card and I love how it turned out!

Sharing in the following challenges:
1. https://hereisaplacetostart.blogspot.com/2026/08/challenge-202608-anything-goes.html
2. https://cardsgalorechallenges.blogspot.com/2026/08/august-crafts-galore-encore-challenge.html
3. https://lilredwagon.blogspot.com/2026/08/little-red-wagon-challenge-870-card.html
4. https://mixitupchallenge.blogspot.com/2026/07/miucb-84-anything-goes-optional-shape.html
5. https://cinspirations.blogspot.com/2026/08/august-challenge-anything-goes.html
6. https://wordartwednesday.blogspot.com/2026/08/anything-goes-764-765.html

Affiliate links are used in this post at no cost to you – I really appreciate your support! 

Products used:
CARDSTOCK/PAPER: CutCardStock Basis Dark Red, Lessebo Granite Gray, Granny Smith, Bazzill Peach, Blue Hydrangea, Pop Tone Lemon Drop, Bright Silver Foil, Stardream Metallic Pluto, Rubber Ducky Yellow, and Cougar 100# Smooth White and 80# Smooth White cardstock; Carta Bella Beach Party Collection Kit, Simple Stories Wood & Gingham Basics 12×12 paper pad
STAMPS: Hero Arts To Seize or Not To Seize stamp set
INK: Versafine Onyx Black ink
DIES/PUNCHES: Dreaming Tree Lemonade Shaker Card SVG cut file
ACCESSORIES: Cricut Explore Air 2, Bearly Art Precision Craft Glue, Grafix Crystal Clear Craft Plastic, Mini MISTI; Scrapbook Adhesives 3D Foam Strips, Thin 3D Foam Squares and Crafty Power Tape; Keep It Simple Sprinkles (all 2mm Beads)- Yellow Caviar Glass, Matte Sunshine Yellow, Matte Yellow and Clear Caviar Glass

I hope you’ve enjoyed seeing this project and will link up with us this time! Thanks so much for stopping by today – we’ll see you next time! ;)

Scrappy hugs,

Celebrating America

Howdy, peeps – I hope your week has started off nicely! I have one last Independence day project for ScrapbookingStore to share that I created with items in the July 2026 Scrapbook Kit! Our nation’s 250th birthday celebration just wouldn’t be complete without a shaker card with red, white and blue star sequins, right?! I created a full-face shaker using leftover cellophane packaging which is so much easier to work with and lays flatter than traditional acetate. This shaker card features a trimmed journaling card, a paper strip, and stickers from this month’s kit, all adhered to a 4″ x 6″ flat card base.

I cut a 4” x 6” postcard size flat card base from Classic Crest 110# Solar White cardstock. I formed a shaker pocket with leftover packaging cellophane adhered to the back-side edges of a trimmed journaling card from the kit. I added the red, white and blue star sequins (from the Keep It Simple Back To Basics Sprinkles line), sealed the pocket, and adhered the shaker to the postcard base. I added a sentiment sticker from the sticker sheet which completed the shaker front. 

For the back, I added a paper strip to the bottom along with a few more stickers (banner, stars and a sentiment) from the sticker sheet. What a delightful shaker card… the grand finale of projects made with this amazing kit! ;)

Sharing in the following challenges:
1. https://hereisaplacetostart.blogspot.com/2026/07/challenge-202607-anything-goes-wopt.html
2. https://wordartwednesday.blogspot.com/2026/07/anything-goes-weeks-760-761.html

Affiliate links are used in this post at no cost to you – I really appreciate your support!

ScrapbookingStore products:
July 2026 Scrapbook Kit – Simple Stories simple Vintage Land of the Free 12×12 Collection Kit (paper/journaling card and stickers)

Other products used:
CARDSTOCK/PAPER: Classic Crest 110# Solar White cardstock
ACCESSORIES: Stampin’ Up! Paper Trimmer, My Sweet Petunia Precision Glue Press, Bearly Art Precision Craft Glue, clear cellophane packaging, Scrapbook Adhesives Crafty Power Tape 81 ft, Keep It Simple Sequins RWB Stars

I hope you’ve enjoyed today’s project and you’re thinking about all the fun you could have with this month’s kit… you really ought to think about joining the Subscription Club! Be sure to Follow us on Facebook, Instagram, Pinterest and YouTube for lots of crafty inspiration! And if you do decide to join the Subscription Club, join our ScrapbookingStore Club Member Group on Facebook for more inspiration and to share your projects! Thanks so much for stopping by today – we’ll see you next time!

Scrappy hugs,

dream BIG little one

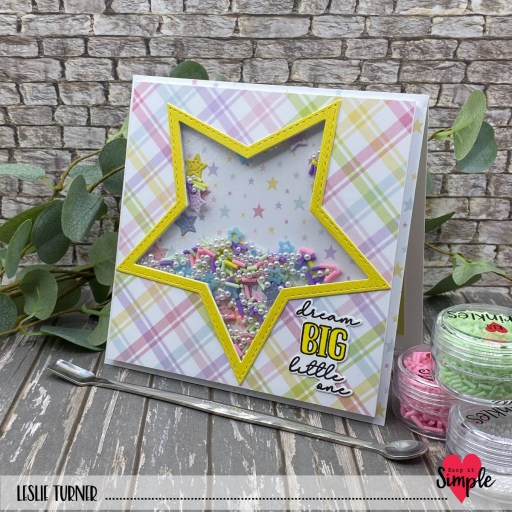
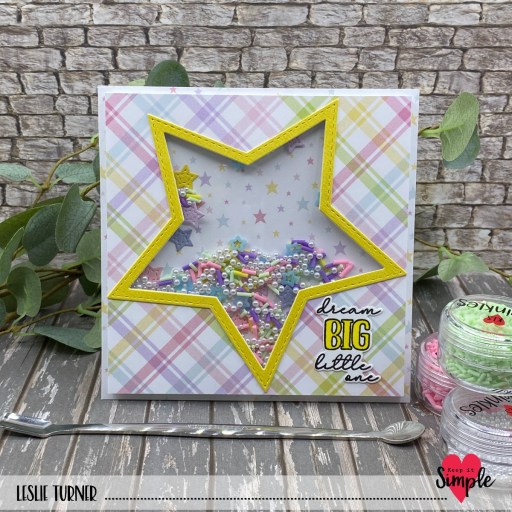
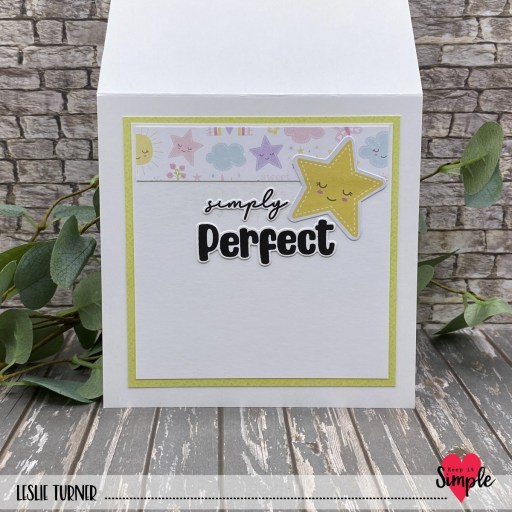
Hi friends, happy weekend! I hope you’re having a great one! I’m delighted to share a Keep It Simple DT inspiration project with you today… a super cute star shaker card featuring our new KIS Cuts: Stitched Stars dies, an assortment of 12×12 papers from our Back To Basics line, Little Dreamer 6×9 papers and die cut pieces, Floral Baby Land Babies stamps and dies, and some pretty Sprinkles! To say this was FUN is an understatement… who doesn’t love a shaker card?!

I cut the top-folding square card base from Classic Crest 110# Solar White cardstock along with layering panels from two coordinating prints in the Little Dreamer 6×9 Collection Pack. Using a Stitched Star die, I cut an aperture into the plaid panel. I then cut a frame from a paper in the Lemon 12×12 Collection Pack using that same die and one slightly larger.

I used adhesive strips and acetate to create the shaker, filling it with beads and polymer clay Sprinkles. I also cut a bunch of tiny stars (using the smallest Stitched Star die) from green, pink, yellow, lilac and blue papers in the 12×12 Collection Packs listed below which I included in the shaker filler. Lastly, stamped a sentiment from the Floral Baby Land Babies Collection stamps in Versafine Onyx Black ink and cut it with the coordinating Floral Baby Outline Die.

I cut the inside panel from 80# Solar White and embellished it with a strip of paper from the Little Dreamer 6×9 Collection Pack. I stamped another sentiment from the Floral Baby Land Babies Collection stamps and cut it with the coordinating die. The final step was adding a star die cut from the Little Dreamer Die Cut Pieces. Love, love, love how this turned out!

Sharing in the following challenges:
1. https://giveacrafteracookie.blogspot.com/2026/05/cookie-challenge-216-may-lemony-sweet.html

2. https://lovetocraftchallengeblog.blogspot.com/2026/05/ltccb-92-and-ltccb-91-winner-and-top.html
3. https://lovetoscrapchallengeblog.blogspot.com/2026/05/ltscb-179-anything-goes-ltscb-178.html
4. https://mixitupchallenge.blogspot.com/2026/05/miucb-83-anything-goes-optional-stamp.html
5. https://paper-rocks-scissors.blogspot.com/2026/05/may-16-challenge.html (paper and cardstock)
6. https://creativecrafterschallenge.blogspot.com/2026/05/challenge-100.html

Keep It Simple products used:
KIS Cuts: Stitched Stars dies
Little Dreamer 6×9 Collection Pack
Little Dreamer Die Cut Pieces
Back To Basics 12×12 Lime Collection Pack
Back To Basics 12×12 Rose Collection Pack
Back To Basics 12×12 Lemon Collection Pack
Back To Basics 12×12 Lilac Collection Pack
Back To Basics 12×12 Royal Collection Pack
Floral Baby Land Babies Collection Stamps
Floral Baby Land Babies Outline Dies
Adhesive Basics Foam Adhesive Squares & Strips
Shaker Basics Foam Adhesive & Acetate Sheets
Sprinkles Beads 2mm Pearls
Sprinkles Beads 3mm Pearls
Sprinkles Polymer Clay Baby Blue Stars
Sprinkles Polymer Clay Mint
Sprinkles Polymer Clay Purple
Sprinkles Polymer Clay Pink
Sprinkles Polymer Clay Lemon

Affiliate links are used in this post at no cost to you – I really appreciate your support!

Other products used:
CARDSTOCK/PAPER: Classic Crest 110# and 80# Solar White cardstock
INK: Versafine Onyx Black ink, Sharpie Ultra Fine Point Marker- Yellow
ACCESSORIES: Fiskars 12″ ProCision Rotary Bypass Paper Trimmer, Spellbinders 12×12 Scoring Board, My Sweet Petunia Precision Glue Press, Bearly Art Precision Craft Glue, TapeRunner Retractable Double-Sided Adhesive Tape, Mini MISTI, Big Shot, Scrapbook Adhesives Crafty Power Tape 81ft

I hope you’ve loved seeing this project as much as I loved creating it and you’re inspired to get crafty! Be sure to check out ALL the fun goodies in the Keep It Simple online store! Save 10% on your entire order when you shop online using code LoveToScrap2 at checkout! There is no minimum purchase requirement and no usage limits, AND it combines with product, order, and shipping discounts! Is that cool, or what?! Be sure to Follow us on Facebook, Instagram, and Pinterest for lots of crafty inspiration! Thanks so much for stopping by today – we’ll see you next time!

Scrappy hugs,

Happy Birthday shaker

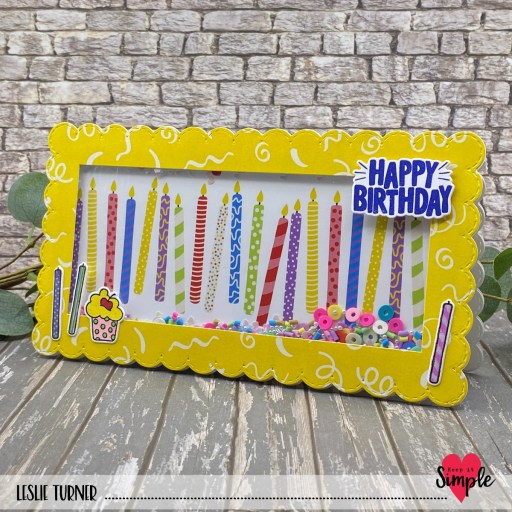
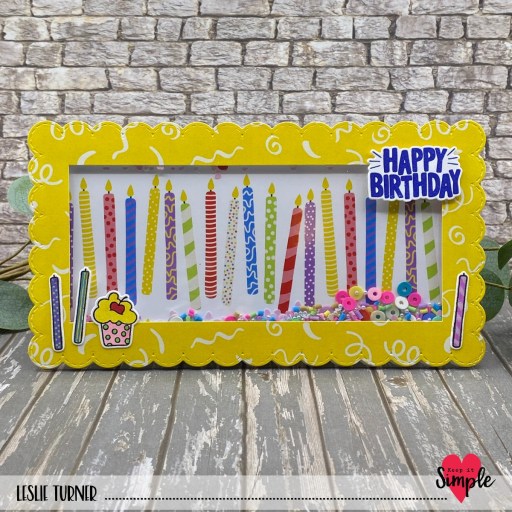
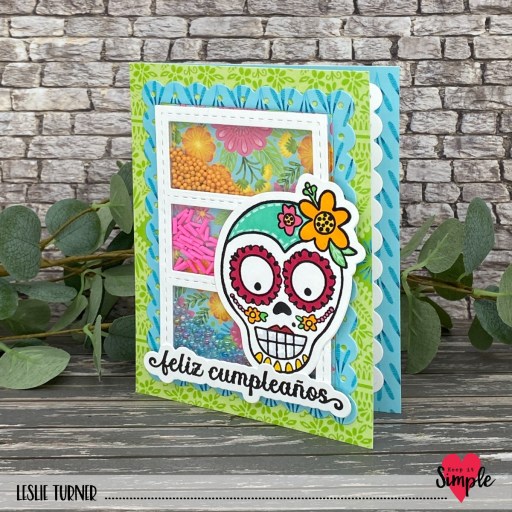
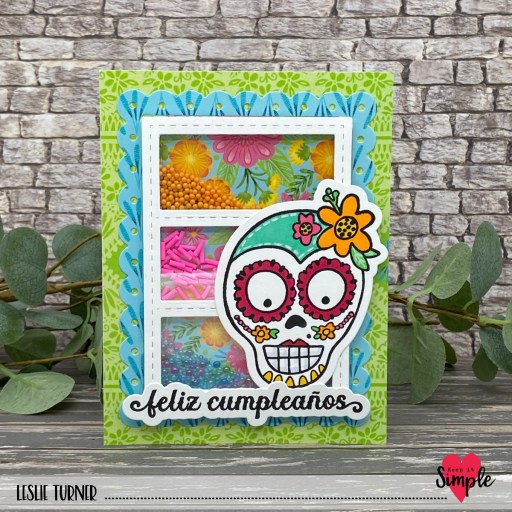
Howdy peeps, happy Friday! I hope you have something fun planned this weekend! I’m delighted to share a Keep It Simple DT inspiration project with you today featuring our new KIS Cuts Nested Stitched Scallop Squares and KIS Cuts Nested Stitched Scallop Rectangles. I also used papers, stamps and dies from our Happy Birthday collection and a variety of shaker bits from our Sprinkles line to make this super cute birthday shaker! I mean, come on, who doesn’t love a shaker card?!

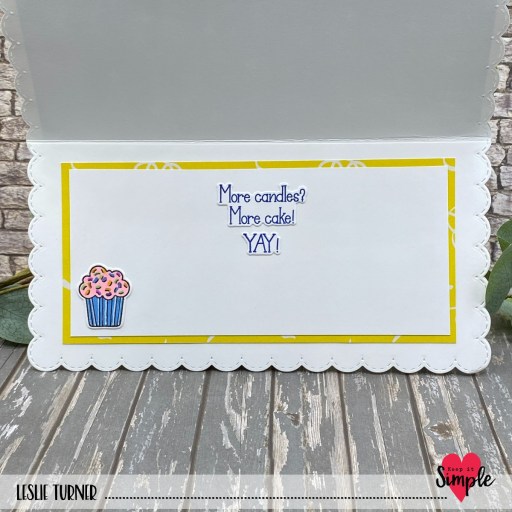
Our new nested stitched scallop dies are large, so I pulled out my oversized die cutting machine and cut a large scallop square (from the KIS Cuts Nested Stitched Scallop Squares) from Solar White cardstock, scored it, and folded it in half. I grabbed a scallop rectangle die from the KIS Cuts Nested Stitched Scallop Rectangles and cut two from coordinating prints in the Happy Birthday collection. I cut a rectangular aperture in the yellow one with a Back To Basics Nested Stitched Rectangles Die and made a shaker.

I used acetate and foam strips from our Back To Basics line along with Polymer Clay Mini Pastel Confetti, Polymer Clay Rainbow Mix Hollow Circles, Sequins Arctic Hearts, and 2mm Beads Pearls for the shaker mix. I stamped a sentiment and several images from the Happy Birthday Collection Stamps, colored the images with a variety of markers, and cut them with the coordinating Outline Dies.

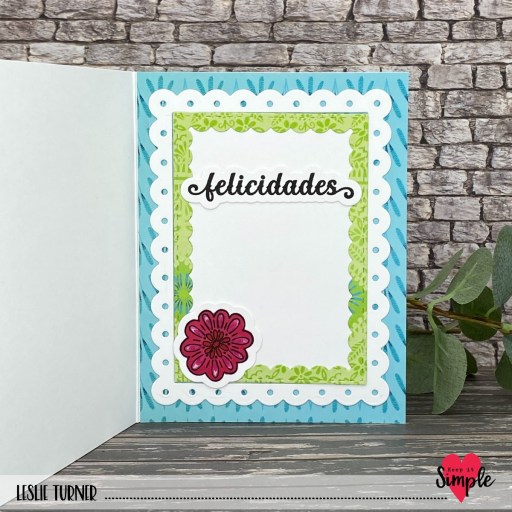
I cut the inside panels from Solar White and the same yellow print used on the front, and added stamped and die cut sentiments and an image colored with markers. Such a fun card to make!

Sharing in the following challenges:
1. https://cutitupchallenges.blogspot.com/2026/04/cut-it-up-challenge-353-for-babies-or.html
2. https://cardsgalorechallenges.blogspot.com/2026/04/april-2026-challenge-146-crafts-galore.html
3. https://mixitupchallenge.blogspot.com/2026/03/miucb-82-anything-goes-optional-die.html
4. https://paper-rocks-scissors.blogspot.com/2026/04/april-15-challenge.html (paper and cardstock + scissors to cut foam tape for shaker)
5. https://tuesdaytaggers.blogspot.com/2026/03/make-it-cute.html

Keep It Simple products used:
KIS Cuts Nested Stitched Scallop Squares
KIS Cuts Nested Stitched Scallop Rectangles
Back To Basics Nested Stitched Rectangles Dies
Happy Birthday 12×12 Collection Pack
Happy Birthday Collection Stamps
Happy Birthday Outline Dies
Back To Basics Shaker Basics Acetate & Foam Sheets
Back To Basics Adhesive Basics Squares & Strips
Sprinkles- Polymer Clay Mini Pastel Confetti
Sprinkles- Polymer Clay Rainbow Mix Hollow Circles
Sprinkles- Sequins Arctic Hearts
Sprinkles- 2mm Beads Pearls

Affiliate links are used in this post at no cost to you – I really appreciate your support!

Other products used:
CARDSTOCK/PAPER: Classic Crest 80# Solar White cardstock
INK: Catherine Pooler Suede Shoes Ink, Memento Tuxedo Black Ink, Versafine Onyx Black Ink, White Sharpie Paint Pen; Copic Ciao Alcohol Markers- R29, RV21; Copic Kirarina Wink Purple, Orange, White Pearl, Sky Blue, Lime Green, Violet, Dandelion
ACCESSORIES: Fiskars 12″ ProCision Rotary Bypass Paper Trimmer, Spellbinders 12×12 Scoring Board, My Sweet Petunia Precision Glue Press, Bearly Art Precision Craft Glue, Mini MISTI, Big Shot, Vevor Large Die Cutting Machine, Scrapbook Adhesives E-Z Runner Permanent Strips

I hope you’ve loved seeing this project as much as I loved creating it and you’re inspired to get crafty! Be sure to check out ALL the fun goodies in the Keep It Simple online store! Save 10% on your entire order when you shop online using code LoveToScrap2 at checkout! There is no minimum purchase requirement and no usage limits, AND it combines with product, order, and shipping discounts! Is that cool, or what?! Be sure to Follow us on Facebook, Instagram, and Pinterest for lots of crafty inspiration! Thanks so much for stopping by today – we’ll see you next time!

Scrappy hugs,
Bee you tiful

Hey everybody – hope you’re having a Terrific Tuesday! I’ve popped in to share one more booth sample I created for Keep It Simple. I’ve made several shaped cards and a fun fold featuring some of our older die sets used with some of our newer collections, and posted the other four a few days ago, pointing everyone to the KIS Crafty Tips & Tricks feature on Instagram last weekend to commemorate National Craft Month in March.

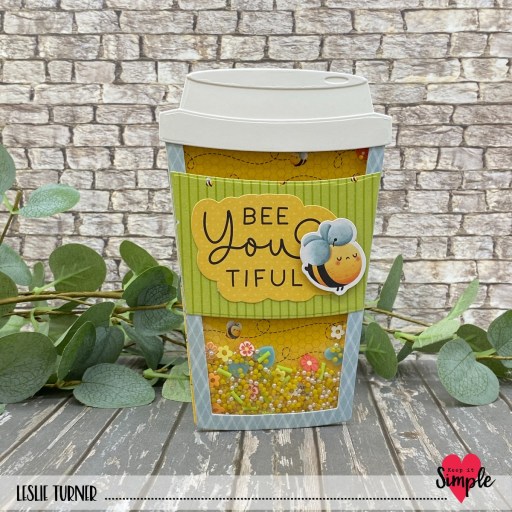
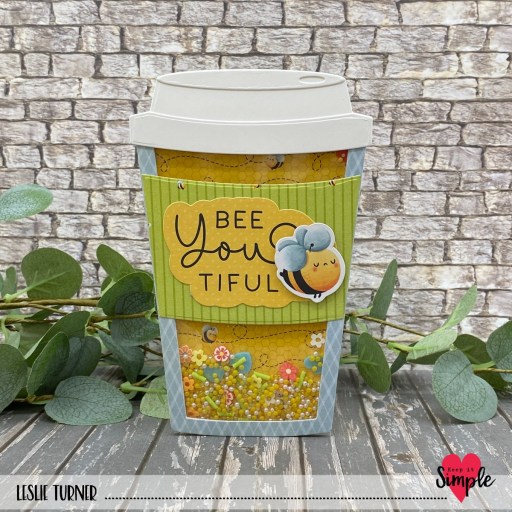
So this last sample is a shaker (who doesn’t love shaker cards?!) and it features our KIS Cuts Freshly Brewed dies along with papers and die cut pieces from the Life Is Sweet collection. Today is the last day of National Craft Month and this card, along with several other shaker projects my fellow DT members made, is being used in the shaker Crafty Tips & Tricks feature on Instagram. Be sure to check it out – there’s a whole lotta fun in all of our shaker projects!

I cut the card base from 110# Solar White along with all the other pieces for this shaped shaker card from assorted prints in the Life Is Sweet 6×9 Collection Pack using the KIS Cuts Freshly Brewed dies. I grabbed some die cuts from the Life Is Sweet Die Cut Pieces to embellish the card. To create the shaker, I used acetate from our Shaker Basics line, foam strips from our Adhesive Basics line, and a variety of Sprinkles for the shaker mix.

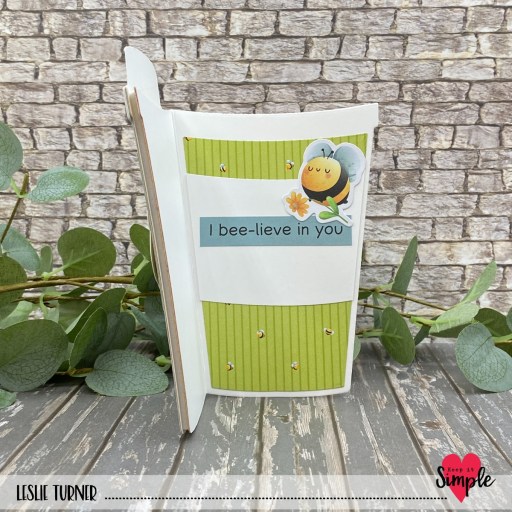
I embellished the inside with a couple more pieces cut with the Freshly Brewed dies a couple more die cut pieces. So stinkin’ cute I can’t even stand it! LOVE how this turned out!

Sharing in the following challenges:
1. https://lovetoscrapchallengeblog.blogspot.com/2026/03/ltscb-178-anything-goes-ltscb-177.html
2. https://mixitupchallenge.blogspot.com/2026/03/miucb-82-anything-goes-optional-die.html
3. https://tuesdaytaggers.blogspot.com/2026/03/make-it-cute.html

Keep It Simple products used:
KIS Cuts Freshly Brewed dies
Life Is Sweet 6×9 Collection Pack
Life Is Sweet Die Cut Pieces
Back To Basics Shaker Basics Foam Adhesive & Acetate Sheets
Back To Basics Adhesive Basics Foam Adhesive Squares & Strips
Sprinkles 2mm Beads Matte Sunshine Yellow
Sprinkles 2mm Beads Yellow Caviar Glass
Sprinkles 2mm Beads Pearls
Sprinkles Polymer Clay Spring Flower Mix
Sprinkles Polymer Clay Colorful Flowers
Sprinkles Polymer Clay Light Green
Sprinkles Polymer Clay Baby Blue Hearts

Affiliate links are used in this post at no cost to you – I really appreciate your support!

Other products used:
CARDSTOCK/PAPER: Classic Crest 110# Solar White cardstock
ACCESSORIES: Fiskars 12″ ProCision Rotary Bypass Paper Trimmer, Spellbinders 12×12 Scoring Board, My Sweet Petunia Precision Glue Press, Bearly Art Precision Craft Glue, Big Shot

I hope you’ve loved seeing this project as much as I loved creating it and you’re inspired to get crafty! Be sure to check out ALL the fun goodies in the Keep It Simple online store! Save 10% on your entire order when you shop online using code LoveToScrap2 at checkout! There is no minimum purchase requirement and no usage limits, AND it combines with product, order, and shipping discounts! Is that cool, or what?! Be sure to Follow us on Facebook, Instagram, and Pinterest for lots of crafty inspiration! Thanks so much for stopping by today – we’ll see you next time!

Scrappy hugs,
sew happy

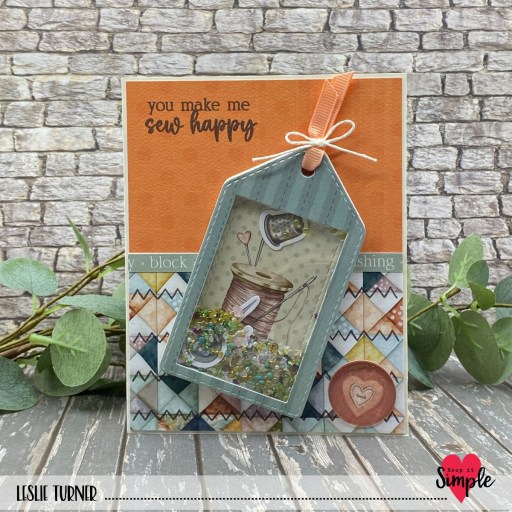
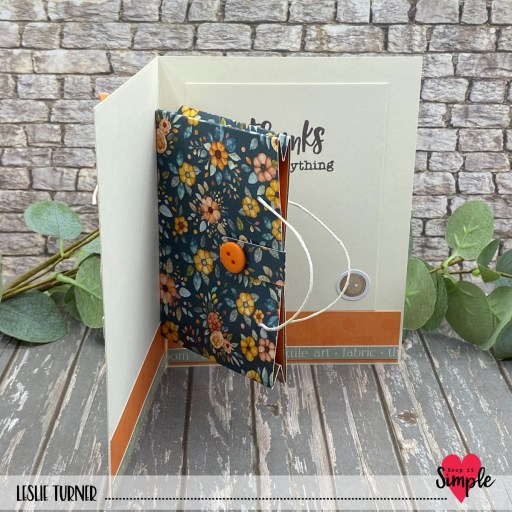
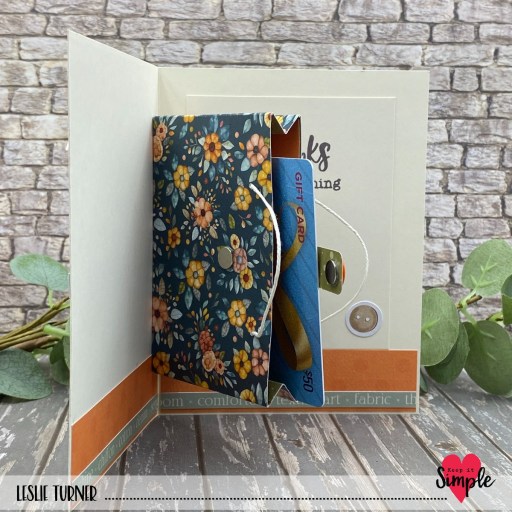
Hey everybody, happy Monday! Everybody hates Mondays and it’s the LAST one you’ll have to wake up to go to work on this year! I’m thrilled to share this particular project for Keep It Simple because it features TWO really fun elements. There’s a shaker tag on the front and a pop-up gift bag on the inside! Yep, a gift bag that holds a gift card (or cash or even a small folded card)! It’s been 5-1/2 years since I made one of these (post is HERE if you want to see it) and I added a closure to this gift bag which I didn’t do on the last one. But how cute is this?! I used papers, stamps and die cut pieces from our Cheerful Cottage collection (LOVE!), along with our Shaker Tag Dies and papers from our Back To Basics Mango 12×12 Collection Pack.

I cut the card base from Neenah Classic Crest Natural White Recycled cardstock along with layering panels from prints in the Cheerful Cottage and Back To Basics Mango 12×12 Collection Packs. To make the tag for the front, I used our KIS Cuts Tags #1 and Cheerful Cottage papers and die cut pieces, along with Back To Basics Adhesive Basics Squares & Strips, Back To Basics Shaker Basics Foam & Acetate Sheets and Back To Basics Mango Ribbon (tied with Lawn Fawn white hemp twine). I used Sprinkles (Rivers Edge Metallic Crush and Yellow Caviar Glass Beads) and a few die cut pieces for the shaker bits.

I used faux stitching and sentiment stamps from the Cheerful Cottage collection, a sentiment border from the bonus cut-apart sheet, and a Back To Basics Epoxy Circle on the front. I totally love shakers and this tag shaker is really fun!

I fashioned the pop-up gift bag on the inside from a floral print in the Cheerful Cottage collection, using Lawn Fawn white hemp twine for the handles, and embellished the magnet closure with a Crafty Girls button. I stamped a sentiment from the Back To Basics Thank You Sentiments Stamp Set in brown ink and embellished the panel with a button die cut piece, and this completed the inside.

I totally LOVE how this turned out! Now you can see why I was so excited to share this card with you!

Keep It Simple products used:
KIS Cuts Tags #1
Back To Basics Mango 12×12 Collection Pack
Cheerful Cottage 12×12 Collection Pack
Cheerful Cottage Collection Stamps
Cheerful Cottage Die Cut Pieces
Back To Basics Thank You Sentiments Stamp Set
Back To Basics Epoxy Circles
Back To Basics Adhesive Basics Squares & Strips
Back To Basics Shaker Basics Foam & Acetate Sheets
Back To Basics Mango Ribbon
Crafty Girls Buttons
Sprinkles- Rivers Edge Metallic Crush
Sprinkles- Yellow Caviar Glass 2mm Beads

Affiliate links are used in this post at no cost to you – I really appreciate your support!

Other products used:
CARDSTOCK/PAPER: Neenah Classic Crest Classic Natural White Recycled cardstock
INK: Memento Espresso Truffle ink
DIES/PUNCHES: Kadomaru Pro Corner Rounder, 1/16″ hole punch, WRMK Crop-A-Dile II Big Bite
ACCESSORIES: Fiskars 12″ ProCision Rotary Bypass Paper Trimmer, Spellbinders 12×12 Scoring Board, My Sweet Petunia Precision Glue Press, Bearly Art precision craft glue, TapeRunner Retractable Tape Runner, Mini MISTI, Big Shot, small disc magnet, Ranger Distress Collage Medium, Lawn Fawn White Hemp Twine

I hope you’ve loved seeing this project as much as I loved creating it and you’re inspired to get crafty! Be sure to check out ALL the fun goodies in the Keep It Simple online store! Save 10% on your entire order when you shop online using code LoveToScrap2 at checkout! There is no minimum purchase requirement and no usage limits, AND it combines with product, order, and shipping discounts! Is that cool, or what?! Be sure to Follow us on Facebook, Instagram, and Pinterest for lots of crafty inspiration! Thanks so much for stopping by today – we’ll see you next time!

Scrappy hugs,
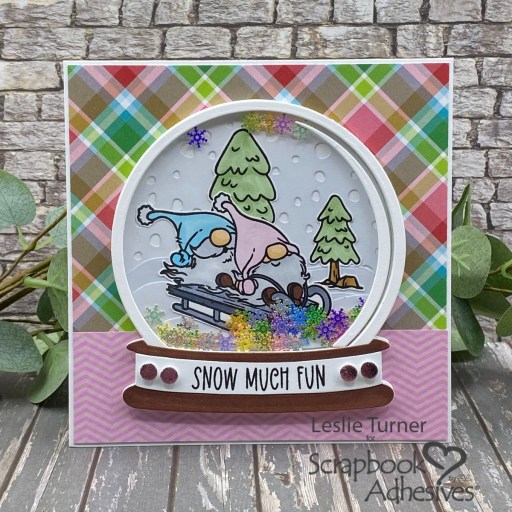
Snow Much Fun shaker

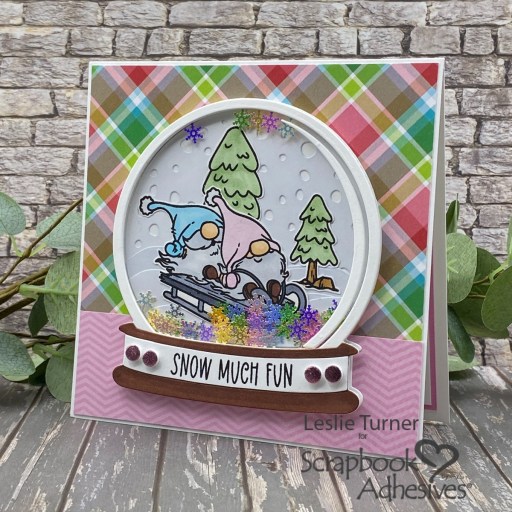
Howdy peeps! I hope my friends in the States had a beautiful Thanksgiving; otherwise, wishing a great weekend ahead for everybody! I’m up on the Scrapbook Adhesives By 3L blog today sharing a tutorial for making a Winter/Christmas-themed snowglobe shaker card in non-traditional pastel colors. The Scrapbook Adhesives design team was invited to collaborate with Trinity Stamps. How fun is that?! I used some of their dies and stamps, and of course, lots of amazing Scrapbook Adhesives products to put it all together!

I won’t go into a huge amount of detail here so be sure to check out my post on the Scrapbook Adhesives blog if want to see how I made this fun card. The 5-1/4″ square base was cut from Neenah Classic Crest 110# Solar White along with patterned papers from the My Favorite Things cheerful Plaid and Sweet Celebration 6×6 paper pads. I used the Trinity Stamps Snowglobe Card die set and Sledding Fun stamp set, and my shaker bits are iridescent snowflakes from Eyelet Outlet.

I brought this card to life by using the E-Z Runner Grand Permanent Strips, E-Z Dots, 3D Foam Strips, Crafty Foam Tape, 3D Foam Circles, Dual Tip Glue Pen, and Metallic Pastel Colors Transfer Foil Sheets – all from Scrapbook Adhesives. The finishing touch was adding some embellishments to the sentiment strip that I created using the ‘Wear Your Adhesive on the Outside’ technique.

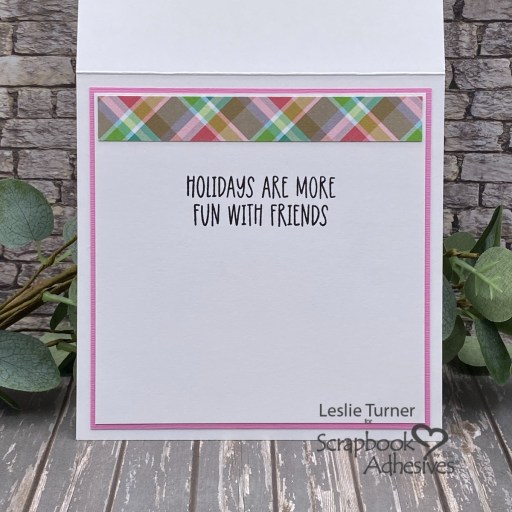
I cut the inside panel from 80# Solar White and embellished it with a strip of the pastel plaid used on the front. I stamped another sentiment from the Trinity Stamps Sledding Fun stamp set, and layered the panel on CutCardStock Pink Tutu cardstock.

Products used:
Scrapbook Adhesives by 3L®
E-Z Runner Grand Permanent Strips Refillable Dispenser
E-Z Dots Permanent Dispenser
3D Foam Strips
Crafty Foam Tape White 54ft.
3D Foam Circles White Mix
Metallic Transfer Foil Sheets Pastel Colors

HomeHobby™ by 3L
Dual Tip Glue Pen

Affiliate links are used in this post at no cost to you – I really appreciate your support!

Trinity Stamps products used:
Snowglobe Card Die Set
Sledding Fun Stamp Set

Other products used:
CARDSTOCK/PAPER: Neenah Classic Crest 110# and 80# Solar White cardstock, CutCardStock Pink Tutu cardstock, My Favorite Things Cheerful Plaid and Sweet Celebration 6×6 paper pads
INK: Catherine Pooler Tranquil ink, Memento Tuxedo Black ink, Versafine Onyx Black ink; Copic Ciao alcohol markers- V000, B00, G21, E00/21/29/35, C0/1/5/7
ACCESSORIES: Fiskars 12″ ProCision Rotary Bypass Paper Trimmer, Big Shot, Mini MISTI, Eyelet Outlet Snowflake Sequins

I hope you’ve enjoyed this project and you’re inspired to get your crafty supplies out and play! Be sure to check out the awesome array of adhesives and other craft supplies Scrapbook Adhesives By 3L has to offer! And be sure to follow us on FacebookPinterestInstagram and Twitter for lots of crafty inspiration! And if you haven’t yet subscribed to our YouTube Channel, be sure to do that, too, for even more inspiration! Thanks so much for stopping by today – we’ll see you next time! 

Scrappy hugs,

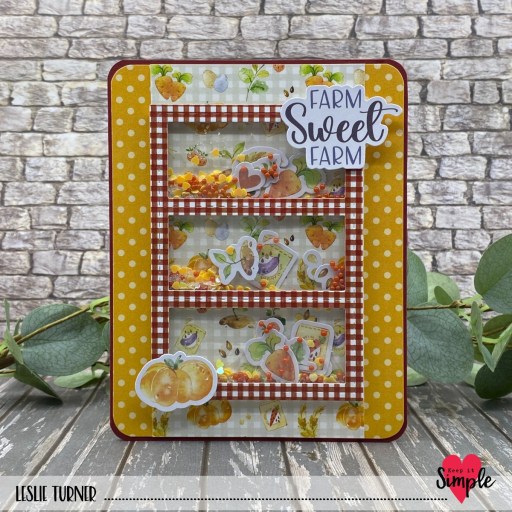
Farm Sweet Farm

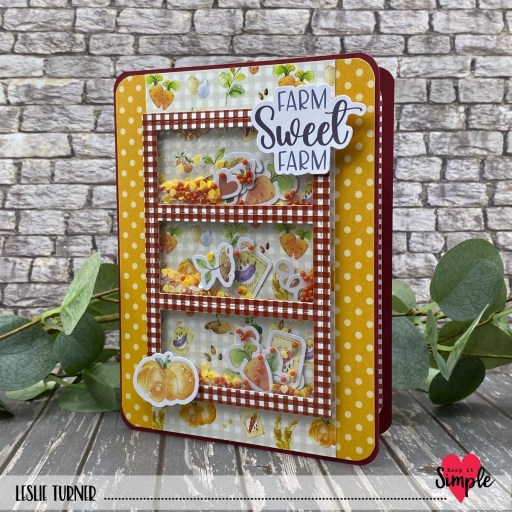
Hey everybody, happy Monday! – I hope you had a good weekend! We thought we were going to get some snow but it never happened. It’s been nice and chilly, though… just how we like it! I have a super cute Keep It Simple DT inspiration project to share today – a shaker card featuring papers and die cut pieces from our new Barnyard Bliss collection, along with our Shaker Frames A2 Frames #2, some of our foam, acetate and adhesive squares, and a variety of shaker bits from our Sprinkles line! Y’all, this is one of THE cutest collections ever!

I cut a side-folding A2 size card base from CutCardStock Basis Dark Red cardstock along with layering panels and a shaker frame from coordinating prints from the Barnyard Bliss collection. Of course, I used foam and acetate from our Back To Basics Shaker Basics which I filled with Snow White Fine Crushed Glass, Dandelion Hearts Sequins and Matte Dark Orange 2mm Beads from our Sprinkles line. I also threw in some small die cut pieces from the Barnyard Bliss collection and used a couple to embellish the front.

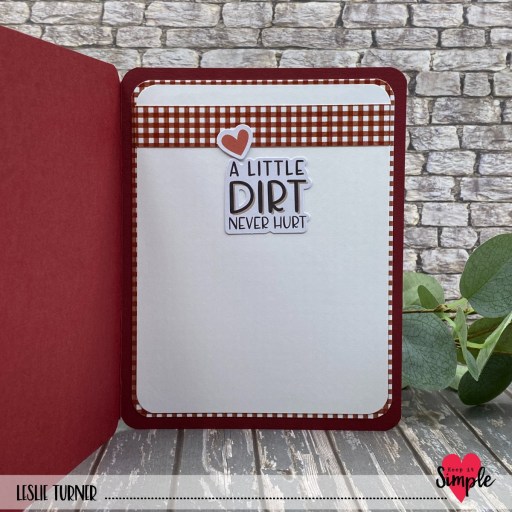
I cut the inside panel from Neenah Classic Crest 80# Solar White cardstock and embellished it with a patterned paper strip and a couple more Barnyard Bliss die cut pieces, popping the heart up on a foam square from our Adhesive Basics Squares & Strips.

Keep It Simple products used:
Barnyard Bliss 6×9 Collection Pack
Barnyard Bliss Die Cut Pieces
Shaker Frames A2 Frames #2
Back To Basics Shaker Basics Foam & Acetate Sheets
Back To Basics Adhesive Basics Squares & Strips
Sprinkles- Snow White Fine Crushed Glass
Sprinkles- Dandelion Hearts Sequins
Sprinkles- Matte Dark Orange 2mm Beads

Affiliate links are used in this post at no cost to you – I really appreciate your support!

Other products used:
CARDSTOCK/PAPER: CutCardStock Basis Dark Red cardstock, Neenah Classic Crest 80# Solar White cardstock
DIES/PUNCHES: Kadomaru Pro Corner Rounder
ACCESSORIES: Fiskars 12″ ProCision Rotary Bypass Paper Trimmer, Spellbinders 12×12 Scoring Board, My Sweet Petunia Precision Glue Press, Bearly Art precision craft glue, Big Shot, Scrapbook Adhesives E-Z Runner Micro Permanent Strips and Thin 3D Foam Squares

I hope you’ve loved seeing this project as much as I loved creating it and you’re inspired to get crafty! Be sure to check out ALL the fun goodies in the Keep It Simple online store! Save 10% on your entire order when you shop online using code LoveToScrap2 at checkout! There is no minimum purchase requirement and no usage limits, AND it combines with product, order, and shipping discounts! Is that cool, or what?! Be sure to Follow us on Facebook, Instagram, and Pinterest for lots of crafty inspiration! Thanks so much for stopping by today – we’ll see you next time!

Scrappy hugs,

hello sweet friend

Hey everybody, Happy Weekend! I hope you’re doing something fun and having some awesome Spring weather! Our weather this time of year is glorious… still a tad chilly overnight (but not bad) and warm and sunny during the day! I’m delighted to share a Keep It Simple DT inspiration project with you today. This pretty shaker card features our KIS Shaker Frames A2 Frames #7 which was released in February along with our Rainbow Builder dies and sentiment stamps. And of course, I just HAD to use a variety of our papers in all the rainbow colors and our 2mm and 3mm Sprinkles pearls! I sure do love me a shaker card, and I totally feel like this one would cheer up a friend!

I cut a top-folding card base and shaker frame (using the KIS Shaker Frames A2 Frames #7) from Neenah Classic Crest 110# Solar White cardstock. I pulled out the new Back to Basics Black & White 6×9 Collection Pack and cut the frame again so I could use the outer scalloped portion. Then the fun began… cutting the frame seven more times from papers in our Back To Basics Ruby, Mango, Lemon, Jade, Royal, Lilac and Rose 12×12 Collection Packs. This gave me lots of leftover pieces to build more rainbows!

I created the shaker with a panel of acetate and narrow strips of foam using our Back To Basics Shaker Basics-Foam Adhesive & Acetate Sheets, then filled it with our 2mm and 3mm Sprinkles Pearls. I stamped a sentiment from our Sunshine & Rainbows Sentiment Stamps in Catherine Pooler Twilight ink and cut it with a Back To Basics Stitched Oval Nested Die.

I grabbed the outer portion of the frame that I had cut previously from the Back To Basics Ruby 12×12 Collection Pack to use as the base of the inside panel. I added a rectangle cut from 80# Solar White using a Stitched Rectangle Nested Die and stamped an additional sentiment from the Sunshine & Rainbows Sentiment Stamps in the gray ink. Love, love, love!

Keep It Simple products used:
KIS Shaker Frames A2 Frames #7
Back To Basics Black & White 6×9 Collection Pack
Back To Basics Ruby 12×12 Collection Pack
Back To Basics Mango 12×12 Collection Pack
Back To Basics Lemon 12×12 Collection Pack
Back To Basics Jade 12×12 Collection Pack
Back To Basics Royal 12×12 Collection Pack
Back To Basics Lilac 12×12 Collection Pack
Back To Basics Rose 12×12 Collection Pack
Sprinkles- 2mm Pearls
Sprinkles- 3mm Pearls
Back To Basics Stitched Ovals Nested Dies
Back To Basics Stitched Rectangles Nested Dies
Sunshine & Rainbows Sentiment Stamps
Back To Basics Shaker Basics-Foam Adhesive & Acetate Sheets

Affiliate links are used in this post at no cost to you – I really appreciate your support!

Other products used:
CARDSTOCK/PAPER: Neenah Classic Crest 110# and 80# Solar White cardstock
INK: Catherine Pooler Twilight ink
ACCESSORIES: Fiskars 12″ ProCision Rotary Bypass Paper Trimmer, Bearly Art precision craft glue, My Sweet Petunia Precision Glue Press, Mini MISTI, Big Shot, Scor-Tape 1/8″, Scrapbook Adhesives Crafty Power Tape 54 ft, Scrapbook Adhesives Thin 3D Foam Squares

I hope you’ve loved seeing this project as much as I loved creating it and you’re inspired to get crafty! Be sure to check out ALL the fun goodies in the Keep It Simple online store! Save 10% on your entire order when you shop online using code LoveToScrap2 at checkout! There is no minimum purchase requirement and no usage limits, AND it combines with product, order, and shipping discounts! Is that cool, or what?! Be sure to Follow us on Facebook, Instagram, and Pinterest for lots of crafty inspiration! Thanks so much for stopping by today – we’ll see you next time!

Scrappy hugs,

Jelly Bean Shaker

Hi friends, Happy Tuesday! Are you gearing up for Easter – making any fun Easter crafts or planning to travel? We have no special plans (other than rejoicing in His resurrection) and I’ve made a few more whimsical Easter-themed cards that I’ll be sharing. This super cute jelly bean shaker that I created for Brutus Monroe features our amazing Jelly Bean stencil, Pink Flamingo Velveteen Glaze, Hip Hop Hooray stamps and chipboard, and our Occasional Greetings stamps. I also used a pre-scored card base and a variety of our cardstock to make the striped background. So much fun contained in one card, lol!
I started by creating an acetate panel of pink jelly beans using our Jelly Bean Mixed Media Stencil with Pink Flamingo Velveteen Glaze, a spatula and Deco Foil Stencil Pal on my 12″ Ranger-Wendy Vecchi Make Art Stay-tion. I let this dry overnight and then trimmed it to fit behind a frame cut from our Not Your Mamas cardstock using two Love From Lizi Stitched Rectangle Nested Cutting Dies. Next, I added a variety of different width strips of our Sea, Poison Apple, Aubergine and Rouge cardstock to a panel of Perfect Blend cardstock using an adhesive sheet, trimmed it down for the background panel, and adhered it to the front of a pre-scored card base.

The next step was adding the shaker mix created with several varieties of Keep It Simple Sprinkles. I always tend to over-stuff my shakers but I did a pretty good job on this one… leaving enough room to shake, shake, shake! I used the Hip Hop Hooray stamps and chipboard companion along with our Raven ink to create the adorable row of bunnies on the front which I colored with a variety of markers and attached with thin adhesive foam squares.

I cut the inside panel from Perfect Blend cardstock and embellished it with another frame cut from Sea cardstock. I stamped a sentiment from the Occasional Greetings stamp set in Raven ink, which completed the card. I totally love how this turned out!

Affiliate links are used in this post at no cost to you – I really appreciate your support!

Brutus Monroe products used:
BRU 3243 Jelly Bean Mixed Media Stencil
BRU 3641 Pink Flamingo Velveteen Glaze
BRU 3690 Heat Resistant Clear Acetate
BRU 8956 Hip Hop Hooray Stamp Set
BRU 9581 Hip Hop Hooray Chipboard Companions
BRU 5144 Pre-Scored A2 Card Bases
BRU 4013 Perfect Blend Cardstock
BRU 5529 Sea Cardstock
BRU 5505 Poison Apple Cardstock
BRU 5536 Aubergine Cardstock
BRU 6533 Rouge Cardstock
BRU 9494 Not Your Mamas Cardstock
BRU 2543 Raven Detail 2×2 Ink
BRU 9306 Occasional Greetings Stamp Set

Other products used:
INK: Copic Ciao alcohol marker- R000 Cherry White; Bic Mark-It fine point markers- Yellow Blaze Pink Flamingo, Fandango Pink, Sunset Orange, Blue Skies Blue and Tiki Hut Tan
DIES/PUNCHES: Love From Lizi Stitched Rectangle Nested Cutting Dies
ACCESSORIES: Fiskars 12″ ProCision Rotary Bypass Paper Trimmer, Bearly Art precision craft glue, My Sweet Petunia Precision Glue Press, MISTI stamp tool, Big Shot, spatula, Deco Foil Stencil Pal, Ranger-Wendy Vecchi 12″ Make Art Stay-tion, Scor-Tape 1/4″, Scrapbook Adhesives Adhesive Sheets, EK Tools Powder Tool, Scrapbook Adhesives 3D Foam Strips; Keep It Simple Paper Crafts Sprinkles- Beads-2mm Pearls, Polymer Clay-Light Green Sprinkles, Polymer Clay-Magenta Sprinkles, Polymer Clay-Eggplant Dots, Polymer Clay Spring Flower Mix, Beads-2mm Green Caviar Glass and Beads-2mm Purple Caviar Glass; Scrapbook Adhesives Thin 3D Foam Squares

I hope you’ve enjoyed seeing this project and you’re inspired to get your craft on! Be sure to check out all the amazing stamps and dies, pigments and mists, cardstock and tools (just to name a few) at Brutus Monroe! And if you happen to have a sweet tooth and like to munch while you craft (like I do, lol), check out Scoozie’s Confections & Curiosities! OMG, I’m hooked! ;) Follow us on Facebook, Instagram and YouTube for tons of crafty inspiration! And come on over and join our Fan Club Facebook Group to share your crafty makes using our products! Thanks so much for stopping by today – we’ll see you next time!

Scrappy hugs,