April Showers Bring May Flowers

Hey everybody! Happy Saturday! Betcha thought it would never get here, lol! Honestly, the time is flying by! I’m back this morning with another ScrapbookingStore DT inspiration project created with the March 2023 Scrapbook Kit with Upgrades that I shared on social media but had to wait until our internet was restored to blog it. I really like the coordinating journaling cards, stickers and papers in the March collection because I can make a card in no time. There are journaling cards and stickers for just about every sheet of patterned paper in the kit! Who doesn’t love that?!

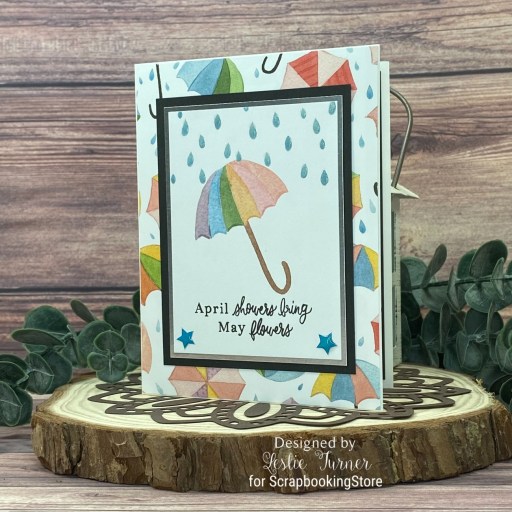
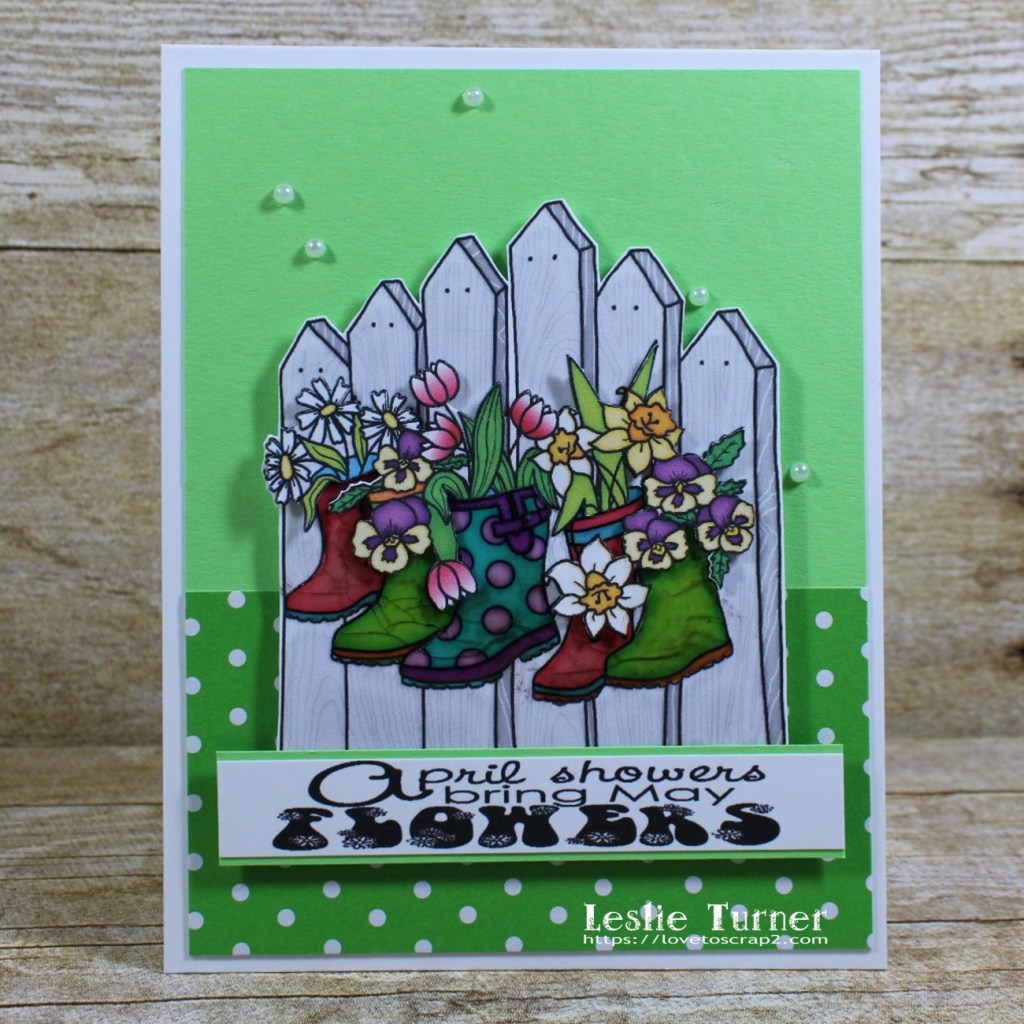
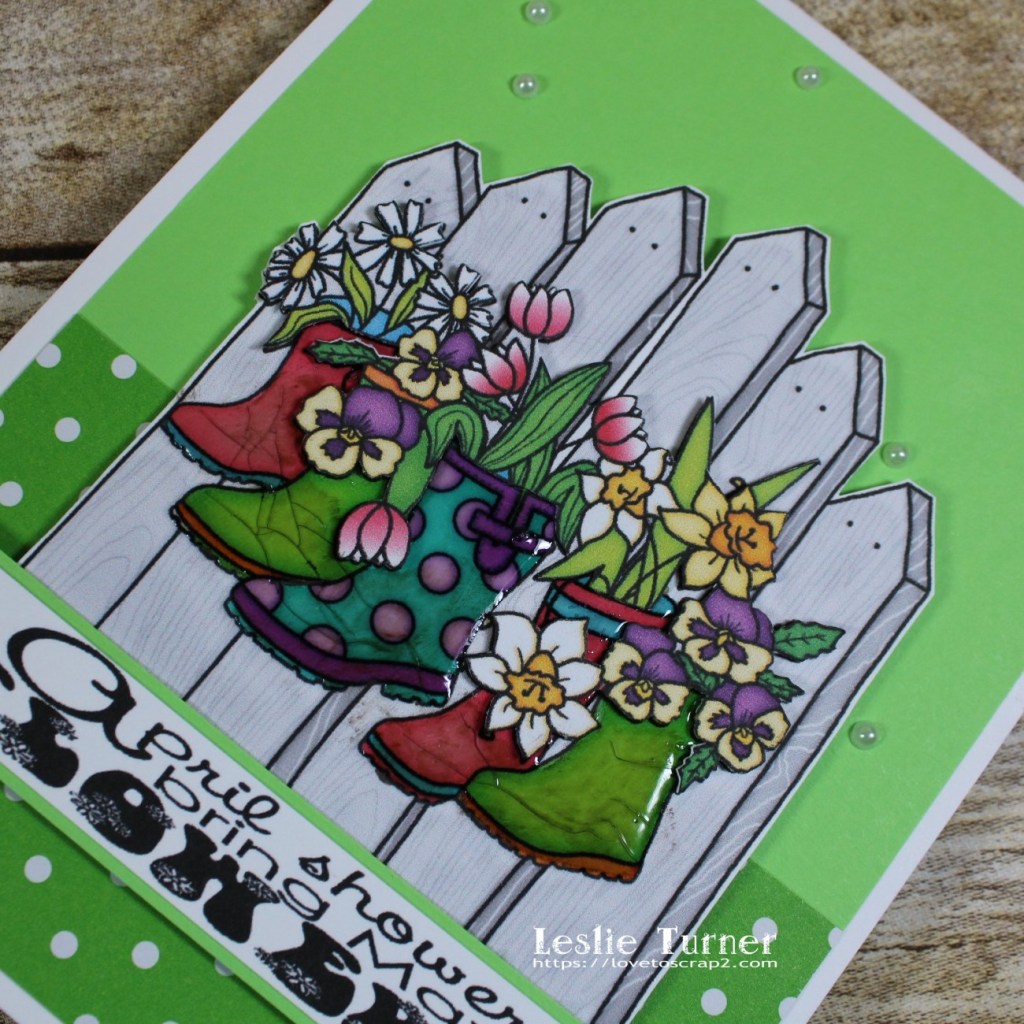
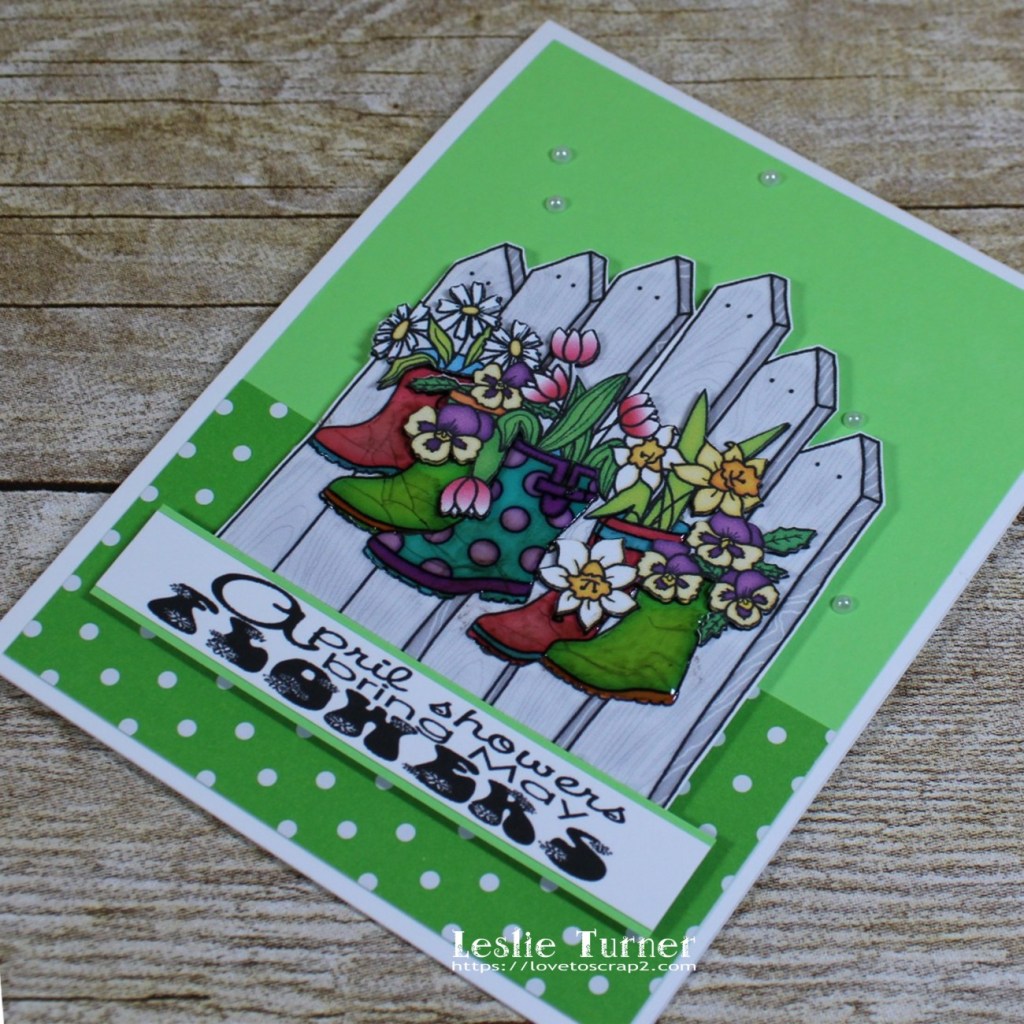
I cut a standard A2 sized side-folding card base from Neenah Classic Crest 110# Solar White cardstock along with a layering panel from the matching patterned paper in the kit, and layering panels from CutCardStock Bright Silver Foil and Pop Tone Black Licorice cardstock. I trimmed the journaling card, layered the panels together, and adhered them to the card front. I added a couple star epoxy stickers from the upgrades and applied Glossy Accents to the raindrops for a little interest.

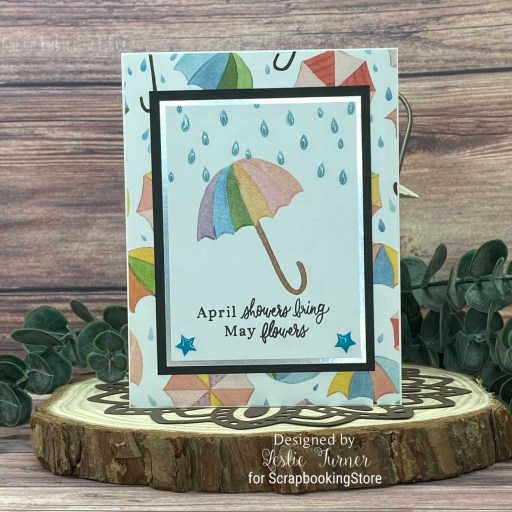
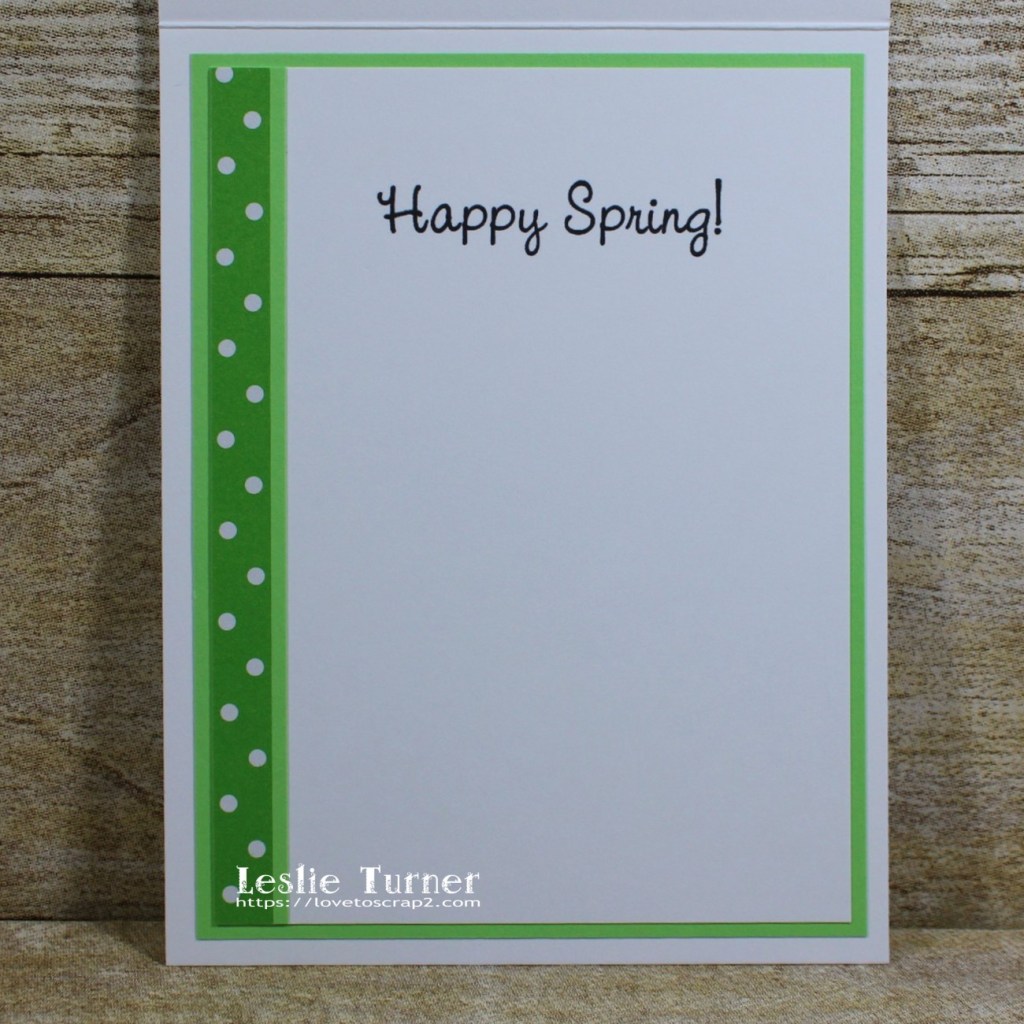
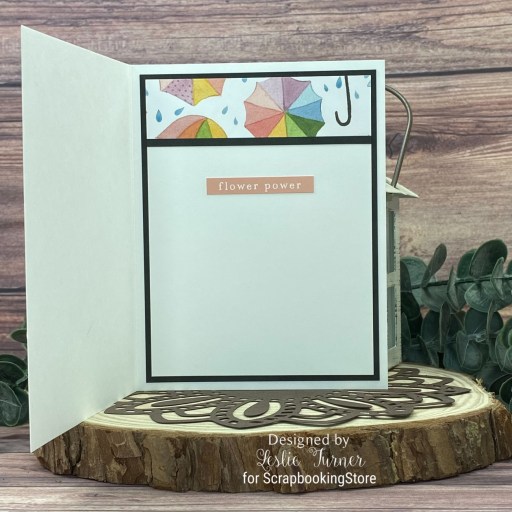
I cut the inside panel from 80# Solar White cardstock and embellished it with a wide strip of the patterned paper and a narrow strip of the Pop Tone Black Licorice cardstock used on the front. I added a sentiment sticker from the sticker sheet, which completed the card. Easy peasy!

Affiliate links are used in this post at no cost to you – I really appreciate your support!

ScrapbookingStore products used:
March 2023 Scrapbook Kit with Upgrades

Other products used:
Cardstock/Paper: Neenah Classic 110# and 80# Solar White cardstock, CutCardStock Pop Tone Black Licorice and Bright Silver Foil cardstock Accessories: Tonic Studios 12” Guillotine Paper Trimmer, Art Glitter Dries Clear adhesive, Tombow Mono permanent adhesive, Glossy Accents

I hope you’ve enjoyed today’s project and you’re thinking about all the fun you could have with this kit… you really ought to think about joining the Subscription Club! Be sure to Follow us on Facebook, Instagram, Pinterest and YouTube for lots of crafty inspiration! And if you do decide to join the Subscription Club, join our ScrapbookingStore Club Member Group on Facebook for more inspiration and to share your projects! Thanks so much for stopping by today – we’ll see you next time!

Scrappy hugs,

April showers bring May flowers

Hey, everybody! Hope your Monday went without a hitch and you’re all geared up for Tuesday! ;) Affiliate links are used in this post at no cost to you. I really appreciate your support! Before the evening gets away from me I wanted to share a card I whipped up this morning for The Outlawz Sunday Songs and Rhymes Challenge where the theme is ‘Rain Rain Go Away.’ I’ve had the most perfect digi set featuring rain boots in my stash for a number of years, and have only used it once, so out it came for this challenge! And I’m stoked that I was able to make the rain boots look worn and muddy, lol! ;)

I cut a standard A2 top-folding card base from Neenah Classic Crest 110# Solar White cardstock along with a layering panel from CutCardStock Basis 80# Light Lime cardstock and a strip from Colorbok green Seeing Dots cardstock that I adhered to the bottom of the light green layer and then adhered the panel to the card base. Using the ‘Bloom Where You Are Planted’ digital set from Imagine That digis by Kris, I printed front and inside sentiments along with two pre-colored images on Neenah Classic Crest 80# Solar White cardstock and fussy cut one of them, leaving just a tiny white edge, and then fussy cutting just the flowers on the second one. I adhered the fence and sentiment to the background panel with foam strips.

I covered the rain boots in Glossy Accents and let them dry for about 45 minutes and twisted the cardstock so it would crack. This technique is similar to the shattered glass technique where you twist clear embossing to get a cracked appearance. I’ve never tried it with Glossy Accents and was super stoked that it worked! I let it dry another 15-20 minutes and then rubbed a good bit of brown ink over the boots (and a little on the fence) so it would get down into the cracks and make them look muddy. I adhered the fussy-cut layer of flowers on 1mm thick foam squares for just a little dimension. The finishing touch was adding several tiny white flat-back pearls.

I cut the inside panel from Neenah Classic Crest 80# Solar White cardstock on which I had printed the sentiment, embellished it with strips of green dotted and light green cardstock, and layered it on the green cardstock.

And one more peek… love, love, love how this turned out! I was so happy I remembered I had this digital set in my digital images! I really prefer to stamp with rubber/clear stamps so I don’t use digis that often anymore. And I was double-happy that I was able to make the rain boots look worn and muddy! Score! ;)

Products used:
Cardstock/Paper: Neenah Classic Crest 110# and 80# Solar White cardstock, CutCardStock Basis 80# Light Lime cardstock, Colorbok green Seeing Dots cardstock
Ink: Memento Rich Cocoa ink
Stamps: Imagine That digis by Kris ‘Bloom Where You Are Planted’ digi set
Accessories: Tonic Studios 12″ Guillotine Paper Trimmer, Bearly Art precision craft glue, Glossy Accents, Darice double-sided adhesive strips, 1mm thick double-sided adhesive squares, Darice tiny white flat-back pearls

I hope you’ve enjoyed this project and will come over and join in all the fun at The Outlawz Challenges! Lots of fun going on! Thanks so much for stopping by today – we’ll see you next time! ;)

Scrappy hugs,
lesliesig