9/27/25 Weekly Favorite at Splitcoast Stampers!
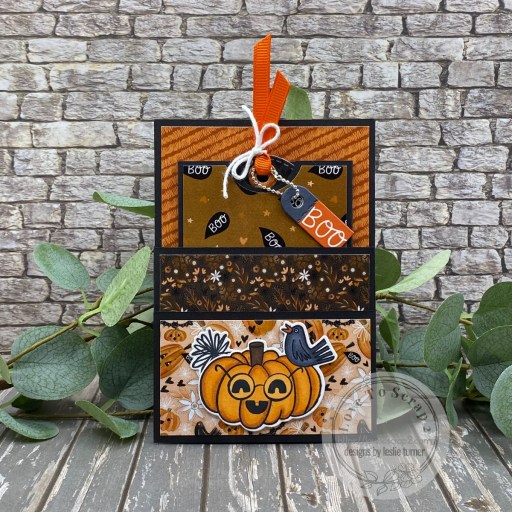
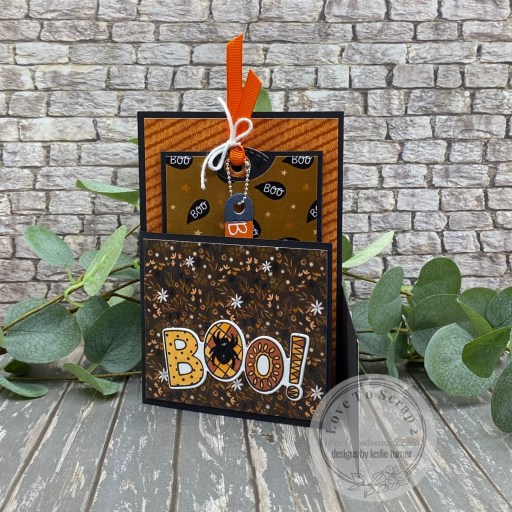
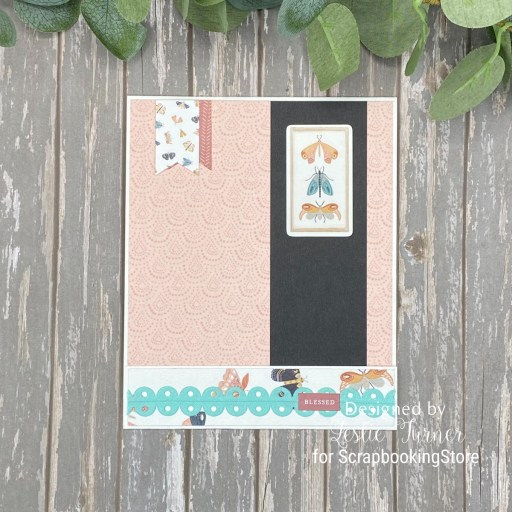
Hey everybody, a very happy Wednesday to you – I hope you’re having a great week! Have you ever heard of a hidden gate fold card? I hadn’t heard of this one until recently, so (of course) I had to make it! I’m up on the Love From Lizi blog with a tutorial for this fun fold featuring papers, dies, stamps and an assortment of embellishments from our October release (and some already in the store). I think you’re really going to like this card!
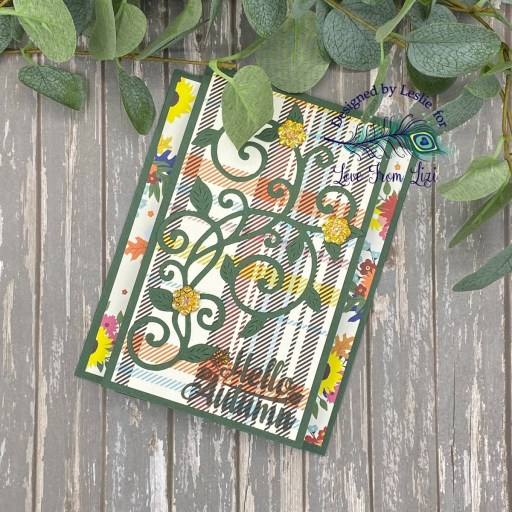
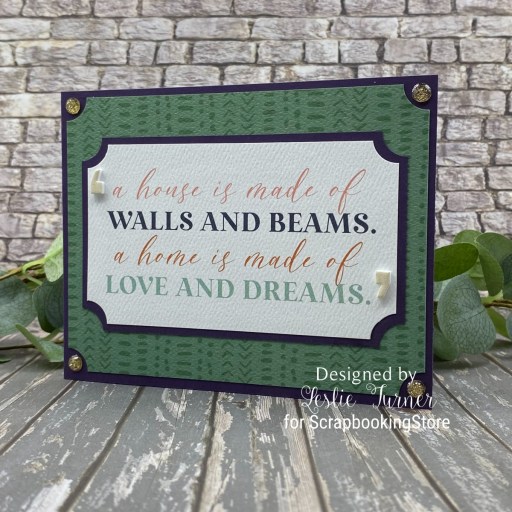
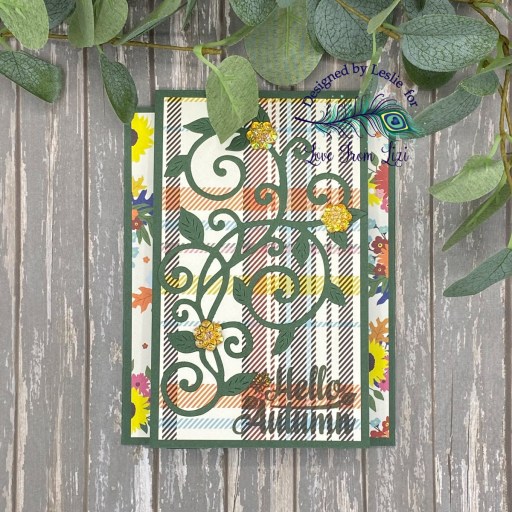
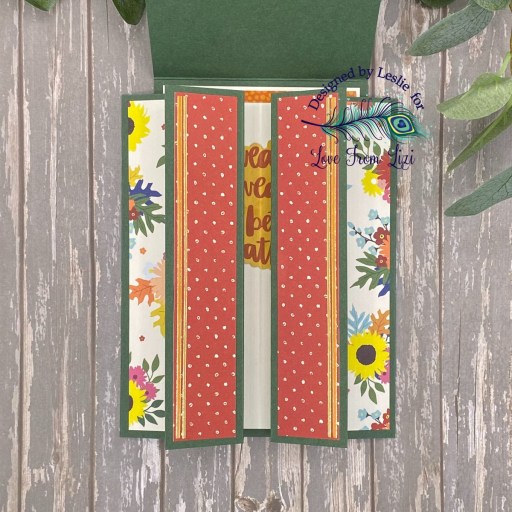
I cut the card base and top-folding element from CutCardStock Lessebo Moss Green cardstock along with layering panels from assorted papers in the A Spot of Autumn 6×6 Paper Pack. I stamped a sentiment from the Hello Autumn/Fall Stamp Set in Memento Northern Pine ink, and added a vine/leaf die cut embellished with Sunkissed Aurora Blooms from September 2025 Super Kit.
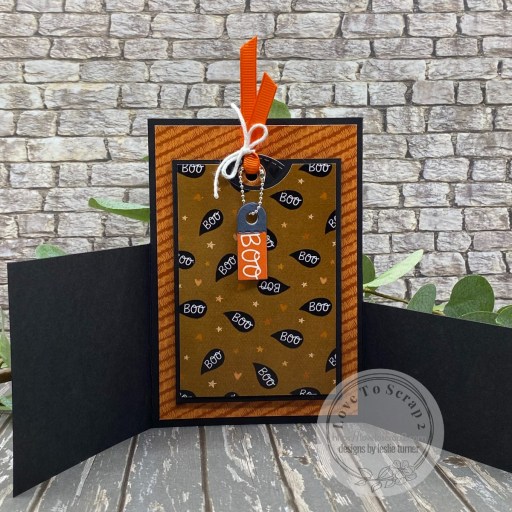
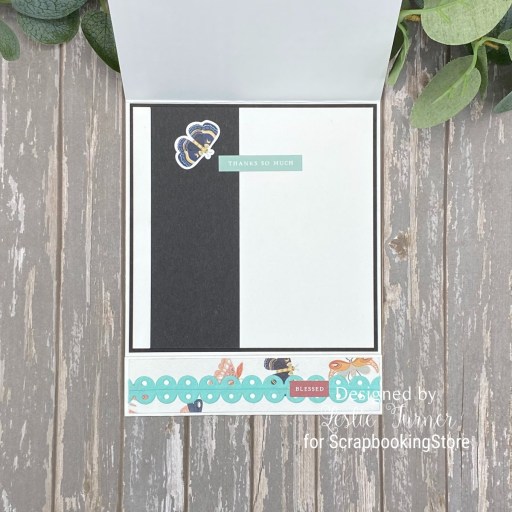
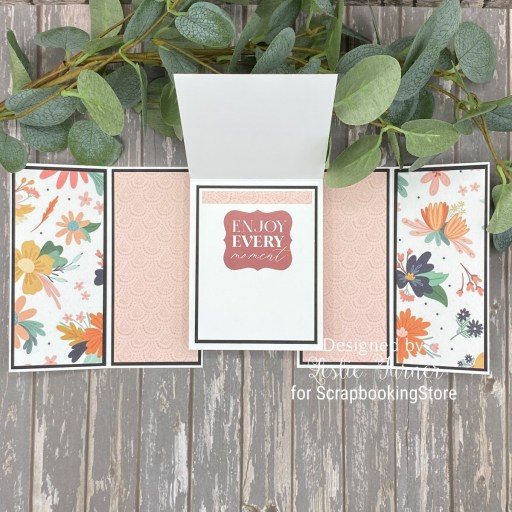
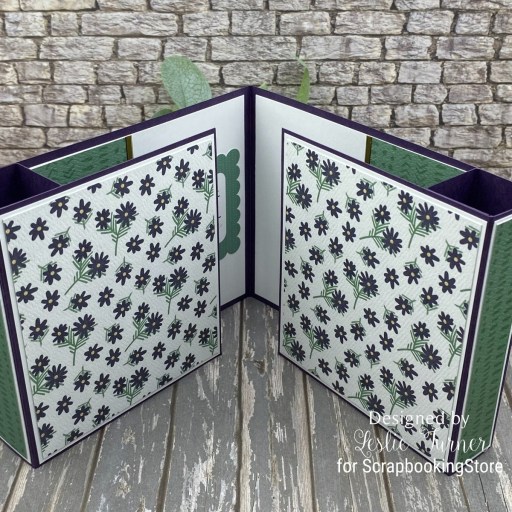
Here is a shot of the card opening up. I added some Orange with Gold Trim Peel-Offs to the narrow flaps.
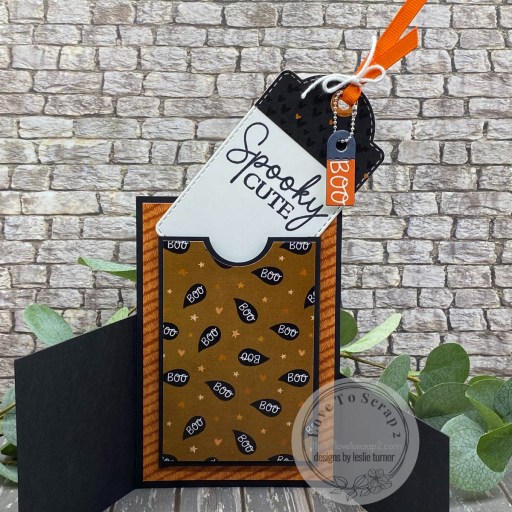
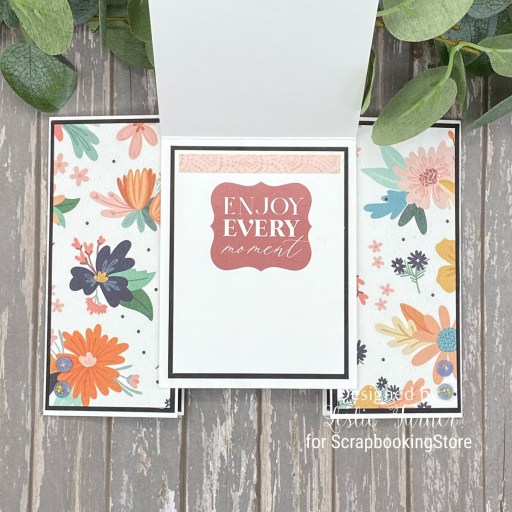
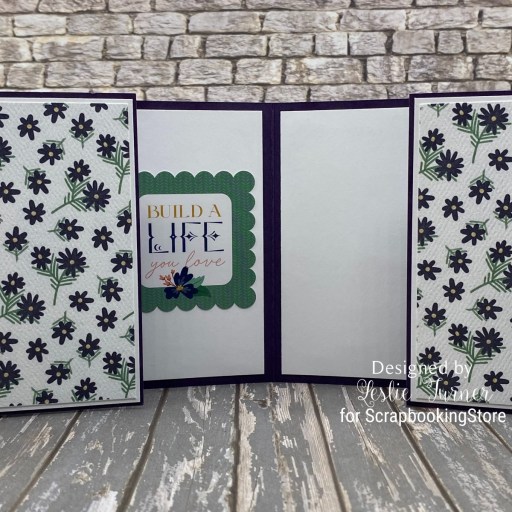
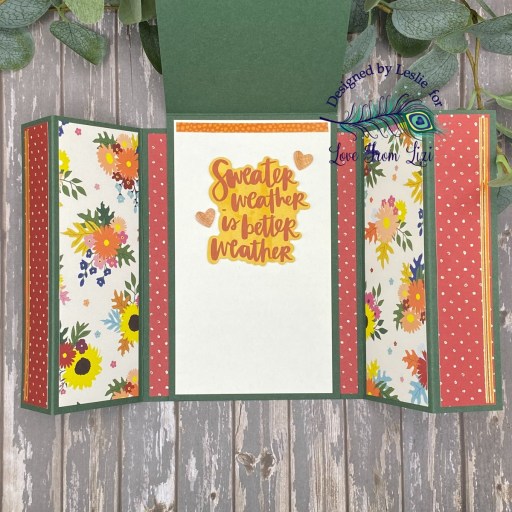
And here is a shot of the card completely open. I cut the inside sentiment panel from Neenah Classic Crest Solar White cardstock and embellished it with a strip from the Clear Vinyl Sentiments Pack and a sentiment and hearts from the Puffy Sentiments. I totally enjoyed making this card and see more of them in my future, lol!
Love From Lizi products used:
A Spot of Autumn 6×6 Paper Pack
Autumn Breeze Flourish Steel Cutting Die
A Spot of Autumn Stamp and Stencil
A Spot of Autumn Thicker Stickers
A Spot of Autumn Mini Stickers
Pin Stripe Tangerine Orange with Gold Finish Peel-Off Stickers
Sunkissed Aurora Blooms (from September 2025 Super Kit)
Affiliate links are used in this post at no cost to you – I really appreciate your support!
Other products used:
CARDSTOCK/PAPER: CutCardStock Lessebo Moss Green cardstock, Neenah Classic Crest 80# Solar White cardstock
INK: Memento Northern Pine ink; Copic Ciao YR23 Yellow Ochre Alcohol Marker
ACCESSORIES: Fiskars 12″ ProCision Rotary Bypass Paper Trimmer, Spellbinders 12×12 Scoring Board, My Sweet Petunia Precision Glue Press, Bearly Art precision craft glue, MISTI stamp tool, Big Shot, Scrapbook Adhesives E-Z Runner Permanent Strips
I hope you’ve enjoyed seeing this project and you’re inspired to get crafty! Be sure to join our Facebook Group and Follow us on Instagram and YouTube for lots of crafty inspiration! Thanks so much for stopping by today – we’ll see you next time!
Scrappy hugs,