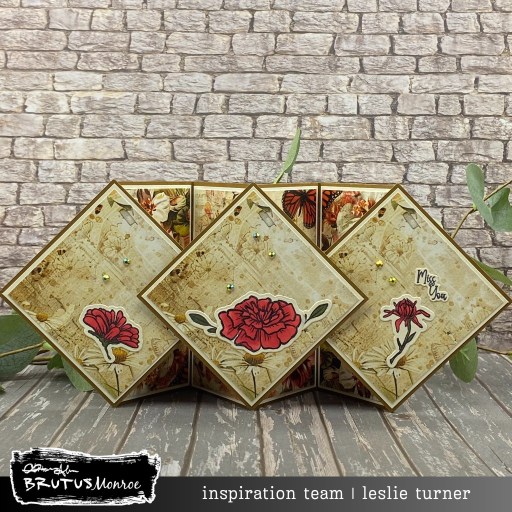
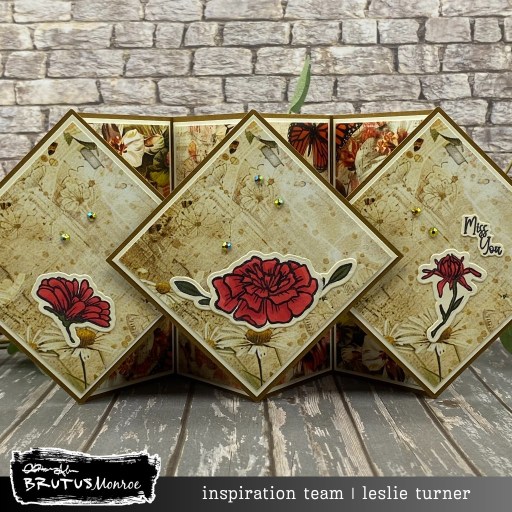
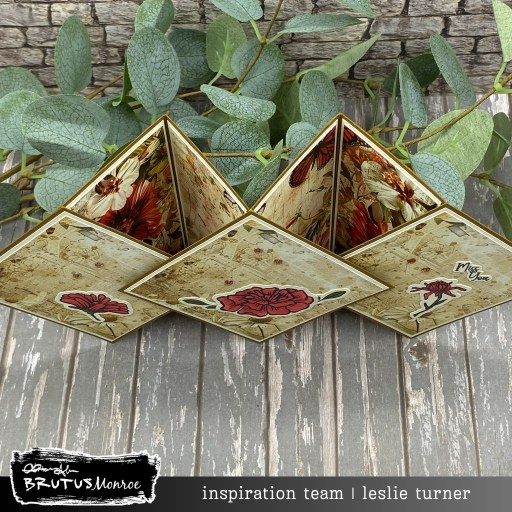
Hey everybody, Happy Friday – I hope you’ve had a great week! I’m thrilled to share a Brutus Monroe DT inspiration project today featuring the super adorable Snow Much Stamp and Coordinating Die which I paired with our Brown Butter cardstock and Winter Wings paper. [Note: I also used our Love Letters paper for one of the elements which is out of stock at Brutus Monroe but is in stock at A Cherry On Top.] It’s never too early to start on those Christmas cards, and this pop-out Z-fold showcases these Christmas products in such a fun way! This is an amazing fold!

I cut the card base and shaped pieces from our Brown Butter cardstock along with layering panels from coordinating prints in the Winter Wings 6×6 Paper Collection. I stamped the snowman from our Snow Much Stamp Set in Raven ink on CutCardStock Basis 110# Natural cardstock and colored it with an assortment of markers in my stash. I cut him with the Snow Much Coordinating Die and made him the star of the show on the front panel. I added a Keep It Simple Clementine Enamel Heart along with several of our Red Shift Flat Back Crystals, which completed the card front.

I cut the one shaped element on the inside (peeking out from behind the three on the front) from the Love Letters 6×6 Paper Collection that I mentioned above. I stamped a sentiment from the Snow Much Stamp Set in Raven ink and colored the tiny heart with a red marker.


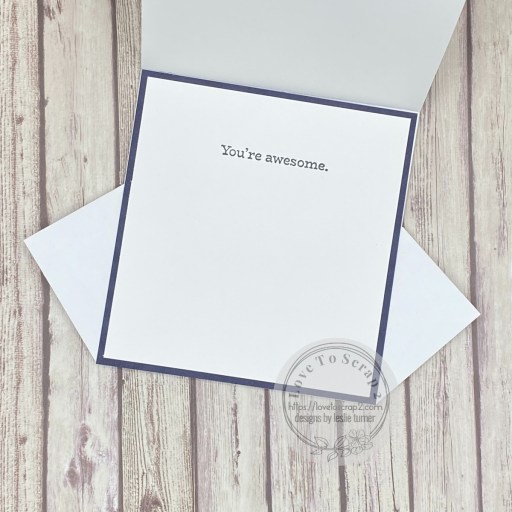
I finished off the back with a panel of CutCardStock Basis 80# Natural. I embellished it with a leftover strip of the Winter Wings paper and stamped another sentiment from the Snow Much Stamp Set. I’ve also included a shot from overhead so you can see the construction of this fold. It definitely is a fun one!


Affiliate links are used in this post at no cost to you – I really appreciate your support!
Brutus Monroe products used:
BRU 3570 Snow Much Stamp Set
BRU 9902 Snow Much Coordinating Die
BRU 7288 Brown Butter Cardstock
BRU 2812 Winter Wings 6×6 Paper Collection
BRU 6874 Love Letters 6×6 Paper Collection (see note in first paragraph)
BRU 2543 Raven Detail 2×2 Ink
BRU 2345 Red Shift Flat Back Crystals
Other products used:
CARDSTOCK/PAPER: CutCardStock Basis 110# and 80# Natural cardstock
INK: Bic Mark-It markers- Rambunctious Red, Honey Brown and Tuxedo Black; Sharpie Ultra Fine Point marker- Orange
ACCESSORIES: Fiskars 12″ ProCision Rotary Bypass Paper Trimmer, Bearly Art precision craft glue, My Sweet Petunia Precision Glue Press, MISTI stamp tool, Big Shot, Keep It Simple Clementine Enamel Shapes, Trinity Pick Up Stick
I hope you’ve enjoyed seeing this project and you’re inspired to get your craft on! Be sure to check out all the amazing stamps and dies, pigments and mists, cardstock and tools (just to name a few) at Brutus Monroe! And if you happen to have a sweet tooth and like to munch while you craft (like I do, lol), check out Scoozie’s Confections & Curiosities! OMG, I’m hooked! ;) Follow us on Facebook, Instagram and YouTube for tons of crafty inspiration! And come on over and join our Fan Club Facebook Group to share your crafty makes using our products! Thanks so much for stopping by today – we’ll see you next time!
Scrappy hugs,