Hi friends – I hope you’re having a great week! I’m popping in today with an assortment of Christmas cards that we sent out this year. After moving in May, I still have boxes (and more boxes, lol) of cards stored in a closet, and didn’t really want to go through them to decide which ones to send to which person or family. That daunting task is looming overhead anyway because I will be donating most (or all) of them… hopefully by this summer.
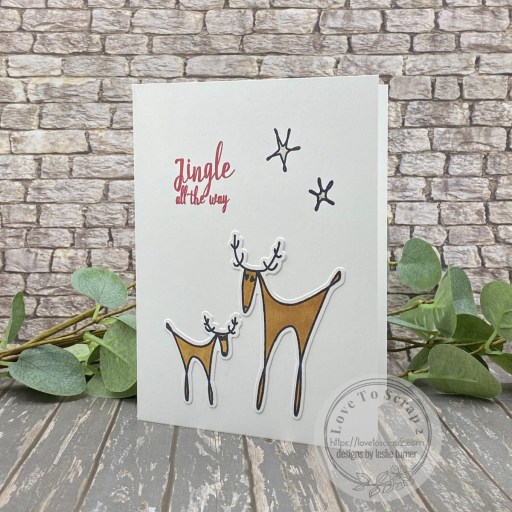
I typically set different ones aside as I make them throughout the year to save for certain people on my list, but I didn’t do that this year. I ended up making a large batch of a simple whimsical deer design that worked up pretty quickly doing the assembly line thing (lol) with some of my favorite STAMPlorations stamps and dies.
Affiliate links are used in this post (for all these cards) at no cost to you – I really appreciate your support!
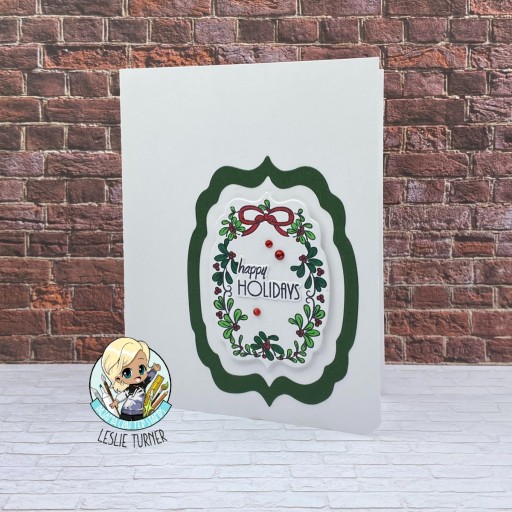
Jingle all the way
Products used:
CARDSTOCK/PAPER: Neenah Classic Crest 80# Solar White cardstock
STAMPS: STAMPlorations Christmas Reindeer Stamps
INK: Memento Tuxedo Black and Rhubarb Stalk Inks; Copic Ciao Alcohol Markers- E35 and R29; Sakura Clear Star Gelly Roll Pen
DIES/PUNCHES: STAMPlorations Christmas Reindeer Dies, Kadomaru Pro Corner Rounder
ACCESSORIES: Fiskars 12″ ProCision Rotary Bypass Paper Trimmer, Spellbinders 12×12 Scoring Board, My Sweet Petunia Precision Glue Press, Bearly Art Precision Craft Glue, MISTI Stamp Tool, Big Shot
******************************
I played with my Cricut one afternoon and made several special cards for our kids and one of my daughter’s friends using awesome Cyndy G SVG, Simply Crafty SVGs and My Scrap Chick SVG cut files.
Warm Winter Wishes
Products used:
CARDSTOCK/PAPER: Cougar Smooth 100# White cardstock; CutCardStock Lessebo Coffee Bean, Pop Tone Black Licorice, Pop Tone Jellybean Green, and Pop Tone Orange Fizz cardstock; American Crafts POW! Rouge Glitter paper
STAMPS:
INK: Cricut Black Glitter .08 mm Gel Pen (for sentiment on the back)
DIES/PUNCHES: Cyndy G SVG Snowman Slice Card SVG Cut File, Cricut Design Space Warm Winter Wishes Sentiment
ACCESSORIES: Cricut Explore Air 2, My Sweet Petunia Precision Glue Press, Bearly Art Precision Craft Glue, Scrapbook Adhesives Foam Squares
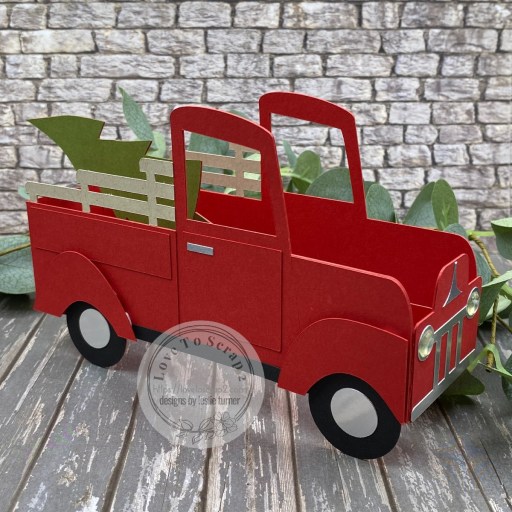
Merry Christmas
Products used:
CARDSTOCK/PAPER: CutCardStock 12×12 Red Pepper, Pop Tone Black Licorice, Pop Tone Jellybean Green, Desert Storm, and Bright Silver Foil cardstock; Neenah Classic Crest 80# Solar White cardstock
INK: Cricut Silver Metallic 1.0 mm Pen (for sentiment on back)
DIES/PUNCHES: Simply Craft SVGs Christmas Tree Delivery Box Card SVG Cut File, Cricut Merry Christmas Sentiment
ACCESSORIES: Cricut Explore Air 2, My Sweet Petunia Precision Glue Press, Bearly Art Precision Craft Glue, Scrapbook Adhesives 3D Foam Squares, Keep It Simple Back To Basics Clear Enamel Dots and Back To Basics Ruby Enamel Dots
12/13/25 Weekly Favorite at Splitcoast Stampers (favorited by three fellow crafters)!

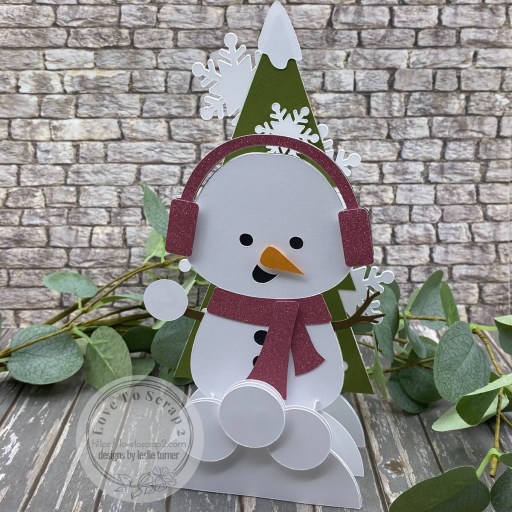
Merry Christmas from your Flaky Friends
Products used:
CARDSTOCK/PAPER: Neenah Classic Crest 80# Solar White cardstock, Pop Tone Black Licorice and Blue Hydrangea cardstock; Craft Perfect Sweet Sorbet 6×6 Double-Sided Patterned Paper
DIES/PUNCHES: My Scrap Chick Snowman Easel Card SVG Cut File
ACCESSORIES: Cricut Explore Air 2, My Sweet Petunia Precision Glue Press, Bearly Art Precision Craft Glue, American Crafts Adhesive Foam Tabs
******************************
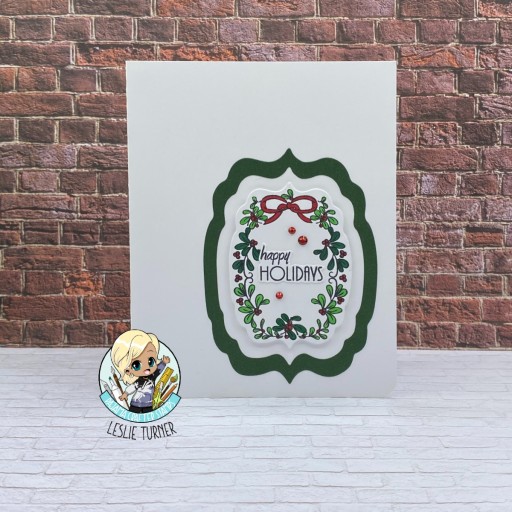
Then another afternoon I sat and stamped several one-layer cards using my MISTIs and two more favorite STAMPlorations stamp sets (Layered Mistletoe and Layered Poinsettias).
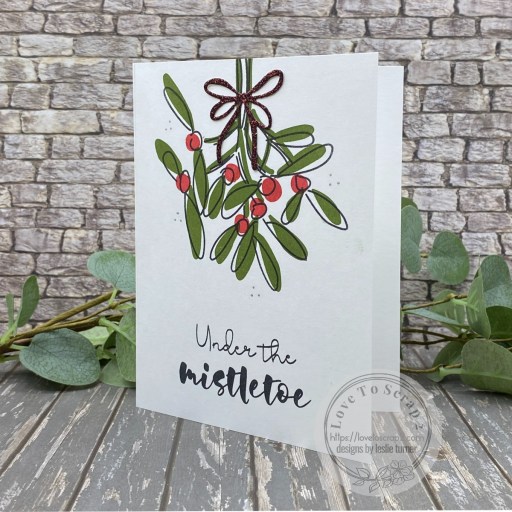
Under the mistletoe
Products used:
CARDSTOCK/PAPER: Neenah Classic Crest 110# Pre-Folded Card Base, Celebration Warehouse Dark Red Wine Non-Shedding Glitter cardstock
STAMPS: STAMPlorations Layered Mistletoe Stamps
INK: Catherine Pooler Rockin’ Red and Eucalyptus Inks; Versafine Onyx Black Ink, Posca Silver Paint Pen
DIES/PUNCHES: Scrapbook.com Bow Toppers Shape Dies
ACCESSORIES: My Sweet Petunia Precision Glue Press, Bearly Art Precision Craft Glue, MISTI Stamp Tool, Big Shot
12/13/25 CAS Favorite at Splitcoast Stampers!
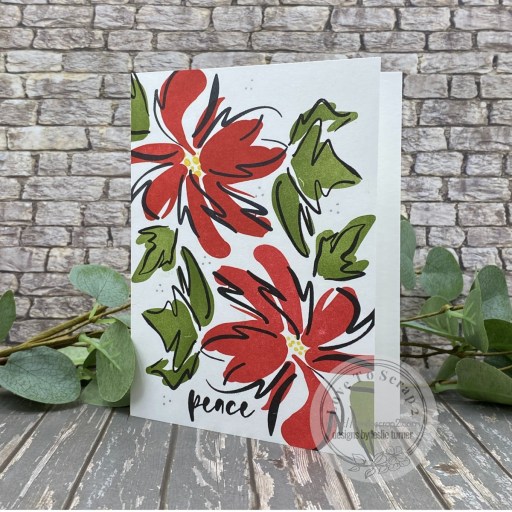
peace
Products used:
CARDSTOCK/PAPER: Neenah Classic Crest 110# Pre-Folded Card Base
STAMPS: STAMPlorations Layered Poinsettias Stamps
INK: Catherine Pooler Rockin’ Red, Eucalyptus and Shea Butter Inks; Versafine Onyx Black Ink, Posca Silver Paint Pen
ACCESSORIES: My Sweet Petunia Precision Glue Press, Bearly Art Precision Craft Glue, Mini MISTI, MISTI Stamp Tool
******************************
A fun time was had by all and I thought I’d share these – totally love how they all turned out! No inside or back shots this time, but I did list the products used for each one if you’re interested. I hope you’ve enjoyed seeing them! Thanks so much for stopping by today – we’ll see you next time! ;)
Scrappy hugs,