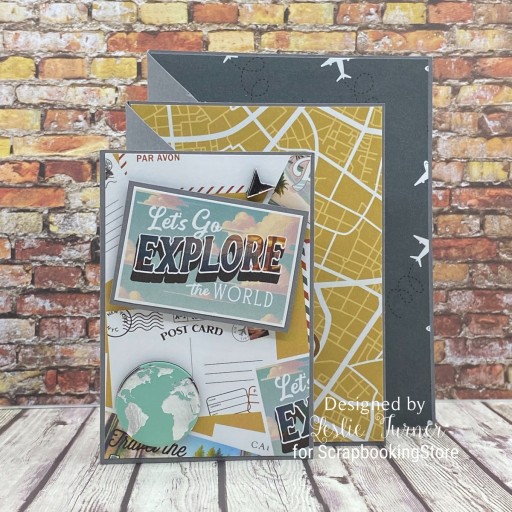
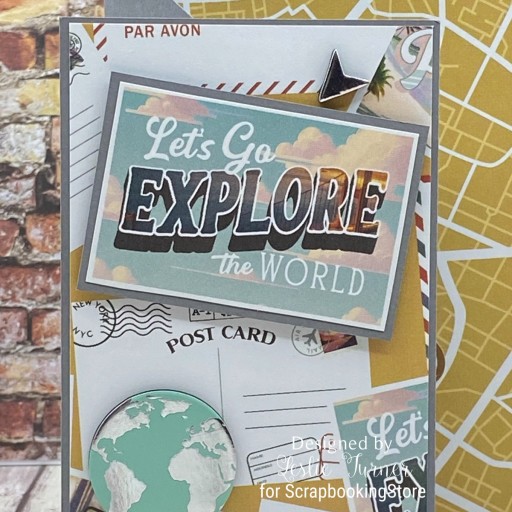
Hi friends! Happy weekend to you! I have another awesome ScrapbookingStore DT inspiration project to share with you today created with the super fun June 2024 Scrapbook Kit with Upgrades. Even though I don’t care much about traveling anymore in my old age, I totally love creating travel-themed projects, and this accordion card was no exception. It was downright enjoyable from the creation of the card base and accordion element to all of the embellishing, and it’s an easy one! As with the other projects I’ve created so far with this month’s collection, I have instructions HERE in the Freebies section of my blog if you’re interested in learning how to make this card.

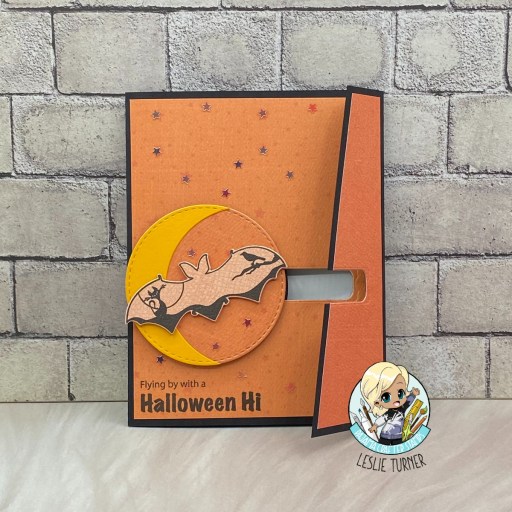
I cut the card base from CutCardStock Basis Dark Red cardstock along with the front layering panel and inside accordion layer from coordinating papers in the kit. I embellished the front with a tag from the paper pack and a sticker from the sticker sheet, added some ribbon from Really Reasonable Ribbon, and popped the tag up on foam strips. I added several elements from the upgrades which completed the front.

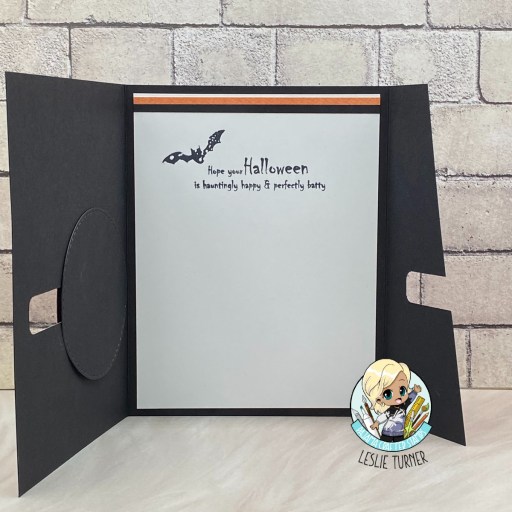
I used circle punches in my stash and alpha stickers from the sticker sheet to create the inside sentiment. I added a signature panel cut from Neenah Classic Crest Solar White that I embellished with an additional sticker from the sticker sheet.

Affiliate links are used in this post at no cost to you – I really appreciate your support!
ScrapbookingStore products used:
June 2024 Scrapbook Kit with Upgrades:
Echo Park Let’s Take The Trip Collection Kit
Upgrades: Echo Park Let’s Take The Trip Titles & Phrases Die Cut Pieces
American Crafts Thickers red glitter foam alpha stickers
The Paper Studio La Petites Dimensional Stickers
Other products used:
CARDSTOCK/PAPER: CutCardStock Basis Dark Red cardstock, Neenah Classic Crest 80# Solar White cardstock
DIES/PUNCHES: Stampin’ Up 1-3/4″ and 1/4″ circle punches, Fiskars 1-1/2″ circle punch
ACCESSORIES: Cricut Paper Trimmer, Elmer’s Craft Bond Tape Runner, Bearly Art precision craft glue, 1″ and 1/2″ double-sided foam strips, ribbon from Really Reasonable Ribbon
I hope you’ve enjoyed today’s project and you’re thinking about all the fun you could have with this month’s kit… you really ought to think about joining the Subscription Club! Be sure to Follow us on Facebook, Instagram, Pinterest and YouTube for lots of crafty inspiration! And if you do decide to join the Subscription Club, join our ScrapbookingStore Club Member Group on Facebook for more inspiration and to share your projects! Thanks so much for stopping by today – we’ll see you next time!
Scrappy hugs,