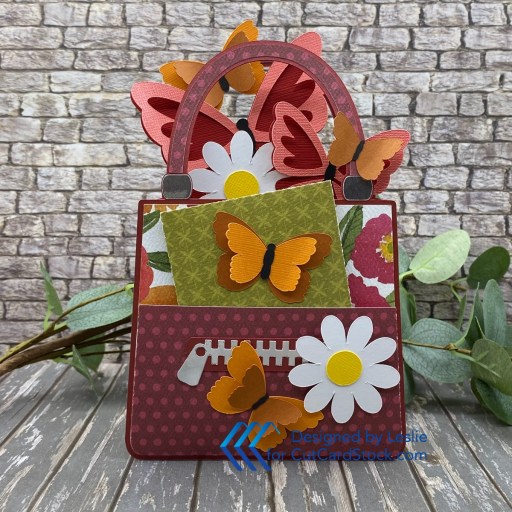
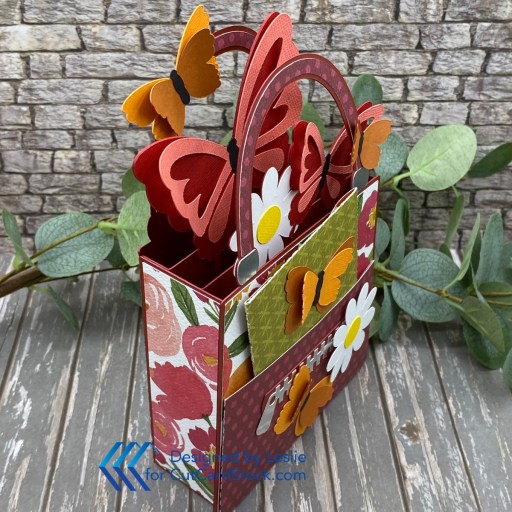
Hey everybody, happy Tuesday and welcome to November ALREADY! Woo-hoo, we’re that much closer to Christmas! For a while there I had lots of playtime in with my Cricut and cut a bunch of cut files that I totally enjoyed assembling. I’m sharing one of those on the CutCardStock blog today which includes a tutorial. Since childhood, I’ve had a shoe and purse fetish (gee, go figure) which spilled over into my crafting as I got older. I dearly love making paper shoes and purses, and this one will go into my paper purse collection. I used quite a variety of our cardstock which I have listed below. The Basis Dark Orange I used is no longer carried on the website but any dark orange cardstock would work.
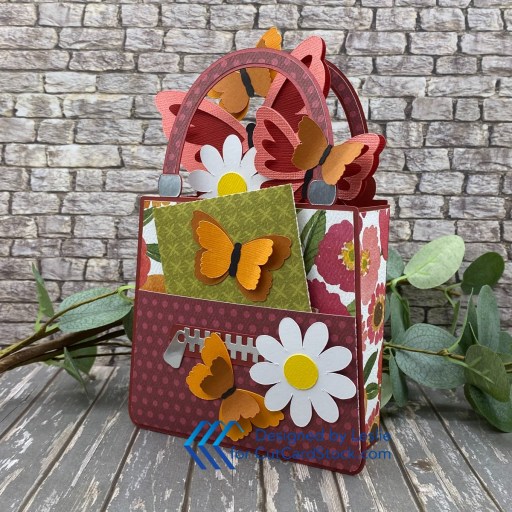
Using the My Scrap Chick Purse Full of Butterflies SVG cut file with my Cricut Explore Air 2, I cut the purse base, handles and inserts from Stardream Metallic Mars because it’s good and sturdy. I cut the butterflies, flowers, and purse hardware from the other cardstock on the list. The patterned papers I used on the purse, pocket, handles and envelope are from the Carta Bella Flora No. 6 Collection Kit. The envelope that gets tucked into the pocket can hold a gift card, cash, a handwritten note or a small card. I really enjoyed assembling this!
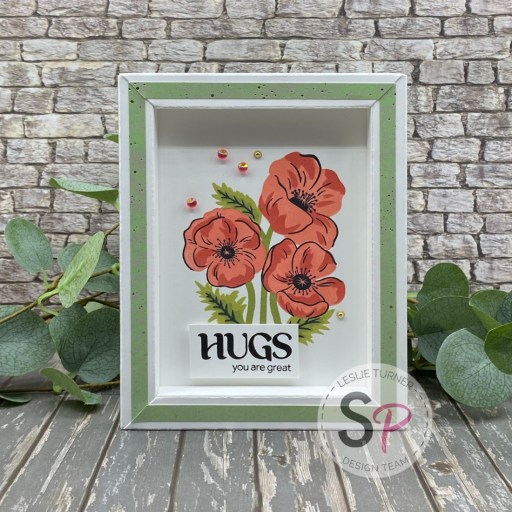
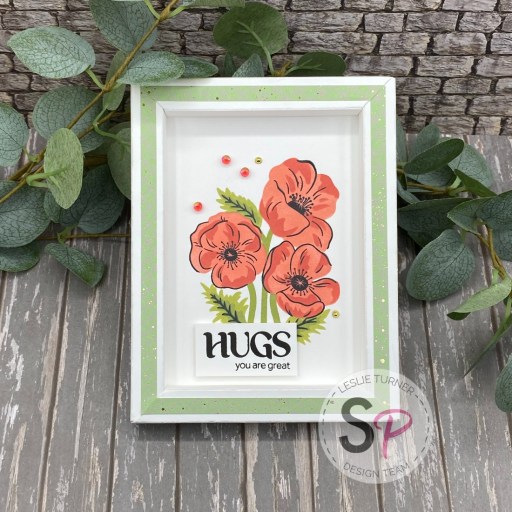
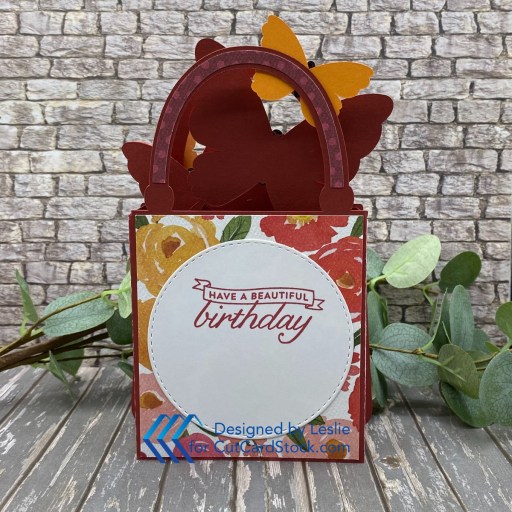
I added a die cut circle (cut from Solar White cardstock with a Love From Lizi Stitched Circle die) to the back of the purse. I stamped a sentiment from the Stampin’ Up Birthday Blossoms stamp set in Memento Rhubarb Stalk ink. I’ve included an angled overhead shot to you can see the construction of this box card. Be sure to see my tutorial on the CutCardStock blog if you want a little more detailed instruction. This was definitely a fun one!
Affiliate links are used in this post at no cost to you – I really appreciate your support!
CutCardStock products used:
Stardream Metallic Mars cardstock
Lessebo White cardstock
Pop Tone Black Licorice cardstock
Flamingo cardstock
Bright Silver Foil cardstock
Rubber Ducky cardstock
Orange Zest cardstock
Tartan Red cardstock
Basis Dark Orange cardstock (no longer carried but any dark orange cardstock would work)
Neenah Classic Crest 80# Solar White cardstock
Other products used:
PAPER: Carta Bella Flora No. 6 Collection Kit
STAMPS: Stampin’ Up Birthday Blossoms stamp set
INK: Memento Rhubarb Stalk ink
DIES/PUNCHES: My Scrap Chick Purse Full of Butterflies SVG cut file, Love From Lizi Stitched Circle Nested Cutting Dies
ACCESSORIES: Cricut Explore Air 2, My Sweet Petunia Precision Glue Press, Bearly Art precision craft glue, Mini MISTI, Big Shot, Scrapbook Adhesives Thin 3D Foam Squares
I hope you’ve enjoyed today’s project and you’re inspired to get crafty! Be sure to check out all the awesome cardstock and other goodies at CutCardStock (adhesives, labels, stickers, pens, watercolors and ribbon to name a few). And head on over to the CutCardStock Facebook Page and for more inspiration! Also, be sure to join our Creating with CutCardStock Facebook Group for even more crafty inspiration! Thanks so much for stopping by today – we’ll see you next time!
Scrappy hugs,