Sending Love

Hi friends! Happy Fri-YAY! Well, every day is like a Friday when you’re retired! And the days just start running together and I may or may not even know what day of the week it is! Bahahaha! Affiliate links are used in this post at no cost to you. I really appreciate your support! I’m back this morning with the final sample that I created for the Prickley Pear Stamps Spring 2021 Release! I used the sweet Praying For You stamp set to create a sympathy card. I know I’ve mentioned before that making sympathy cards has always been difficult for me but having the perfect stamp set does make it a little easier!

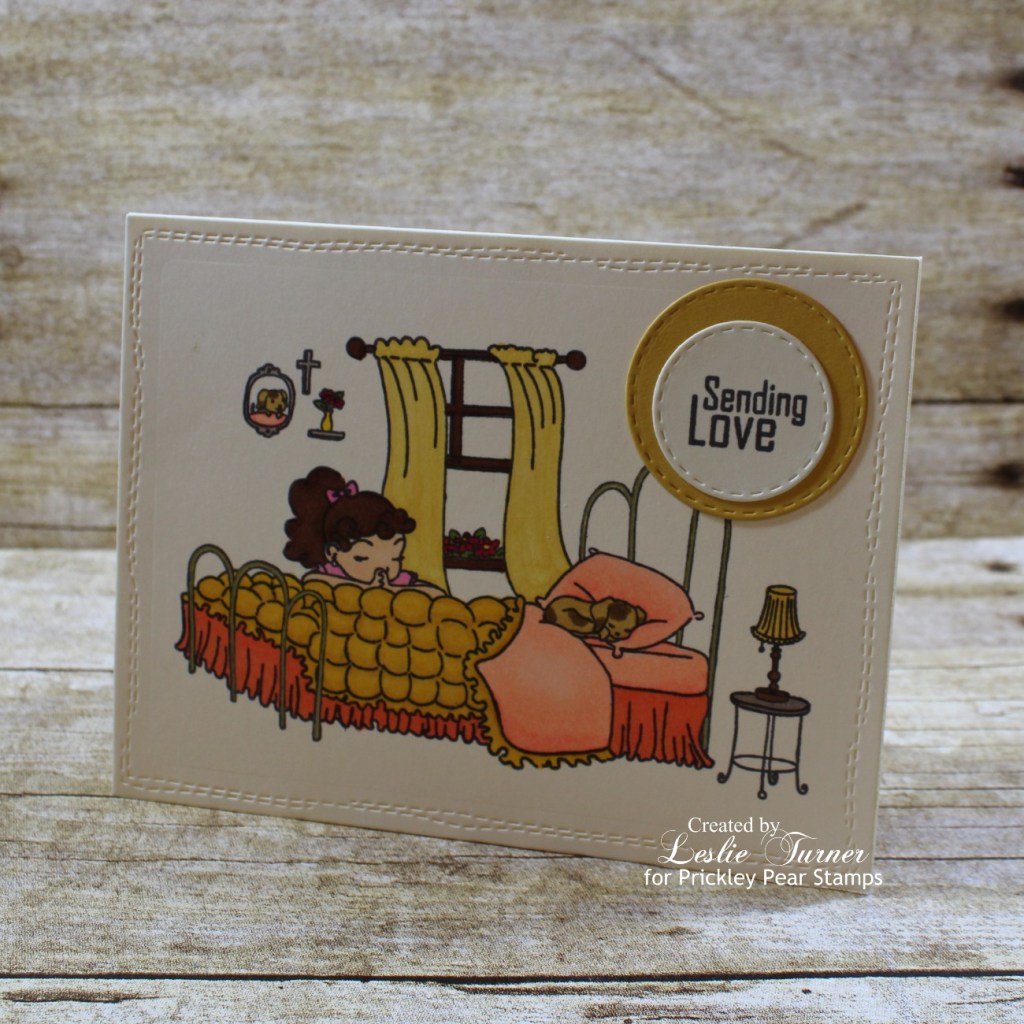
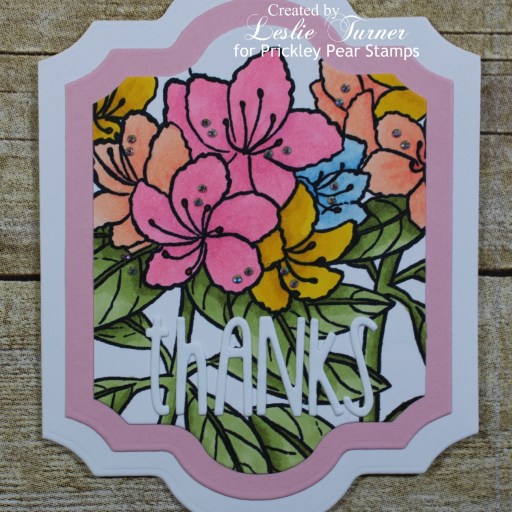
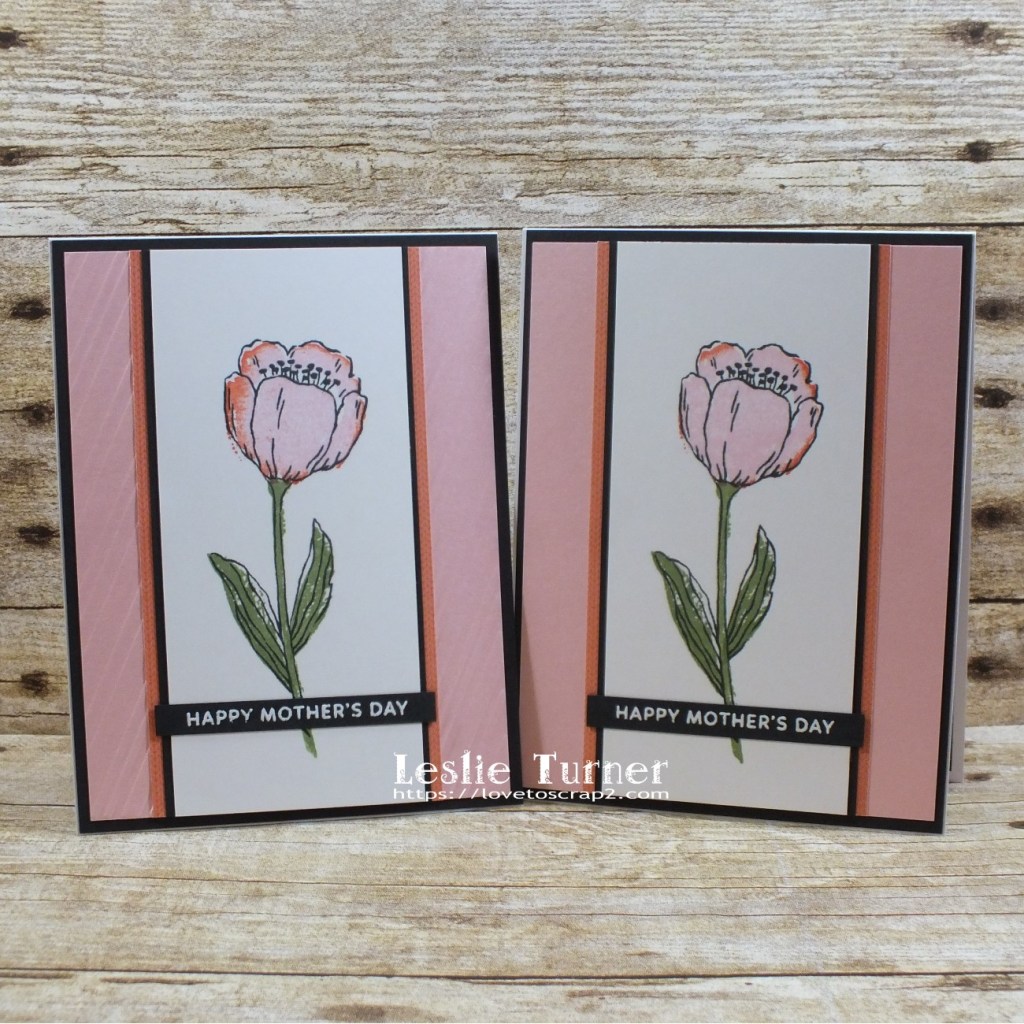
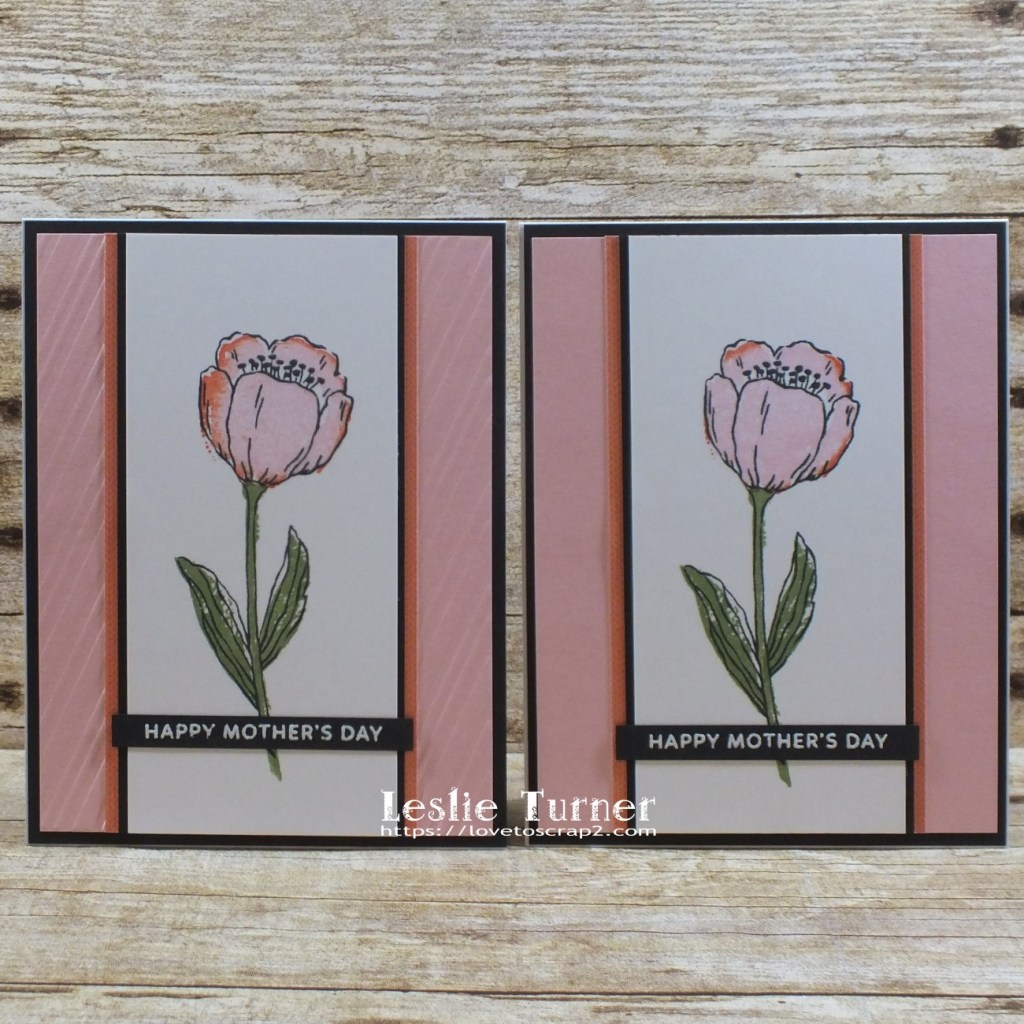
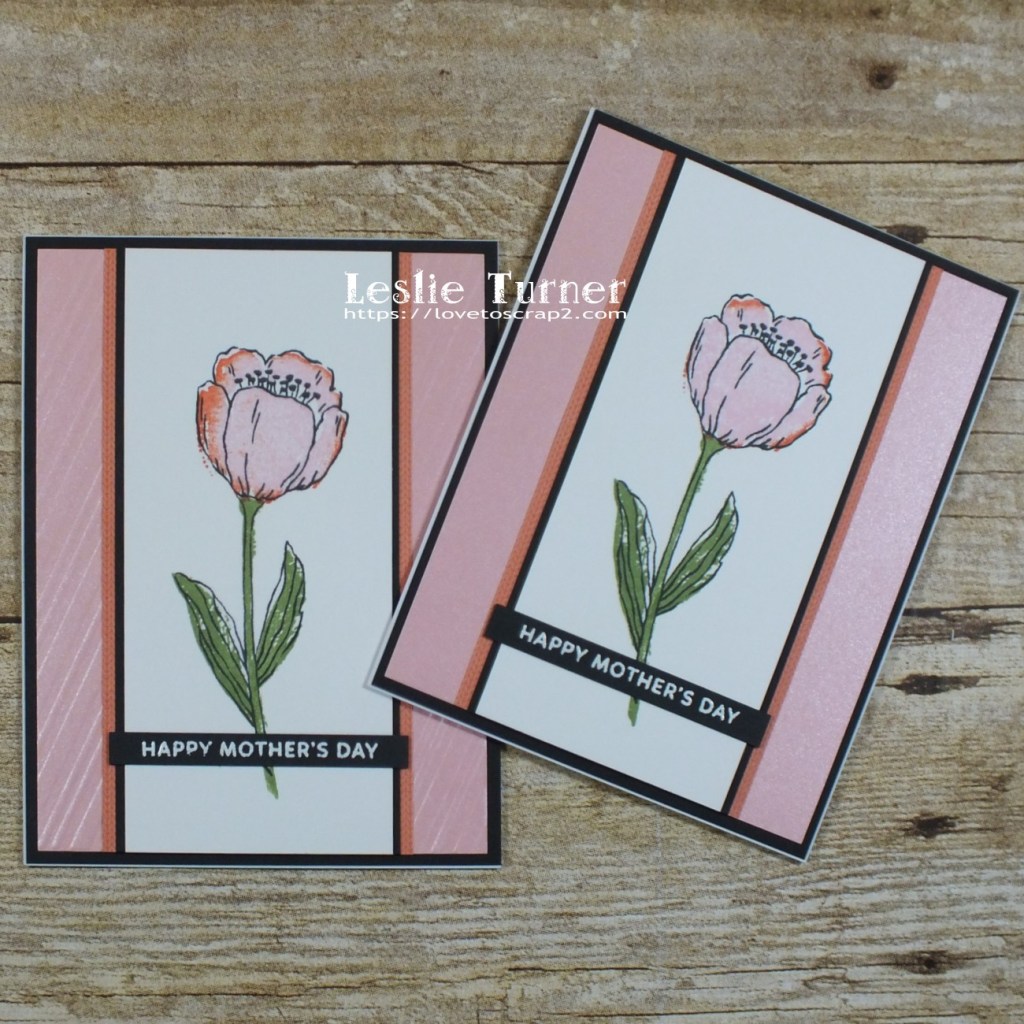
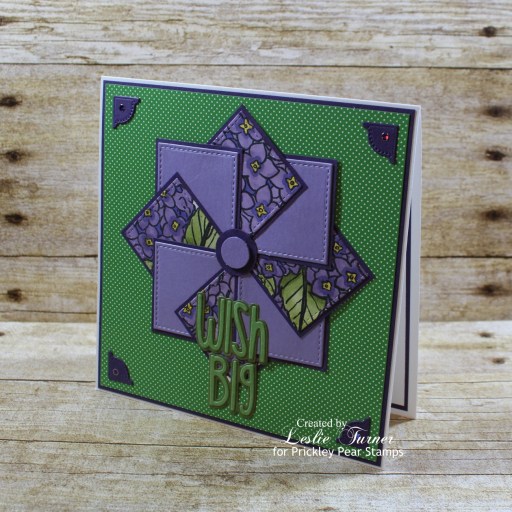
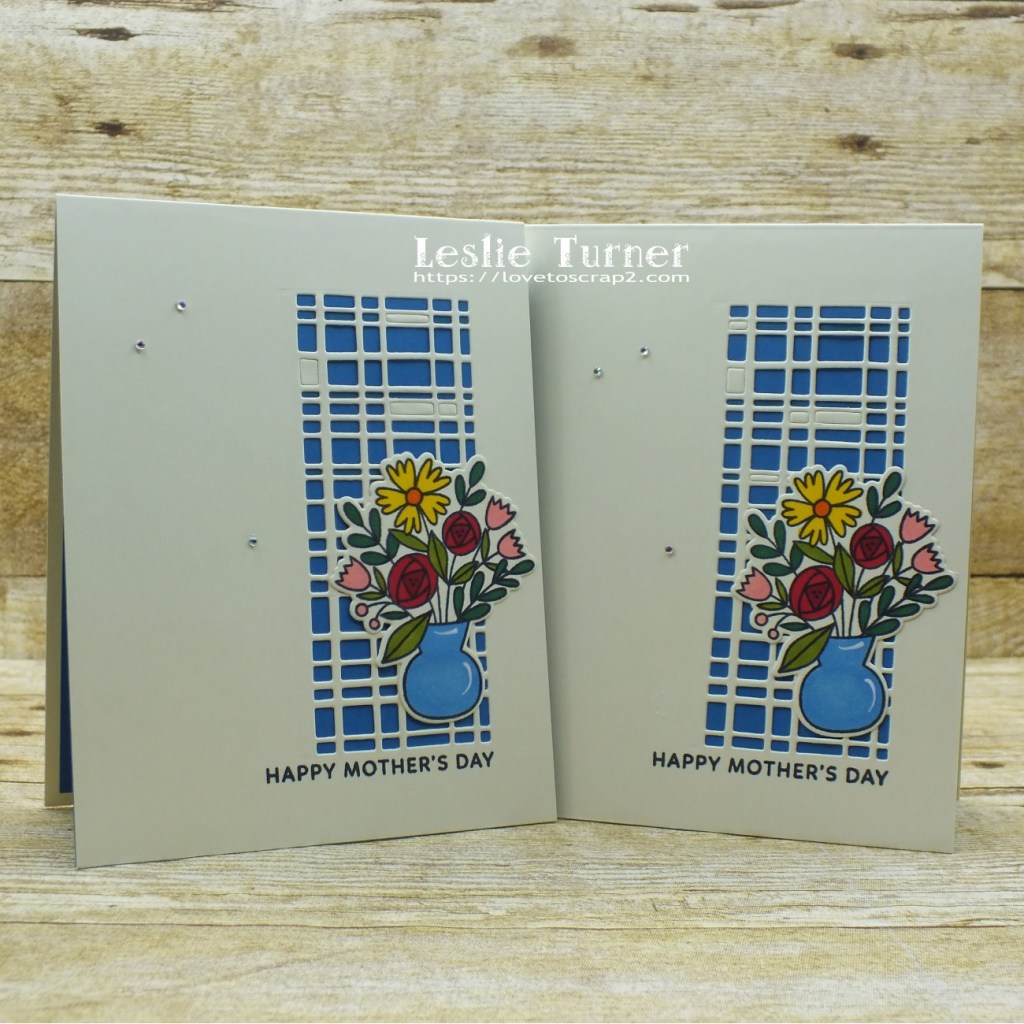
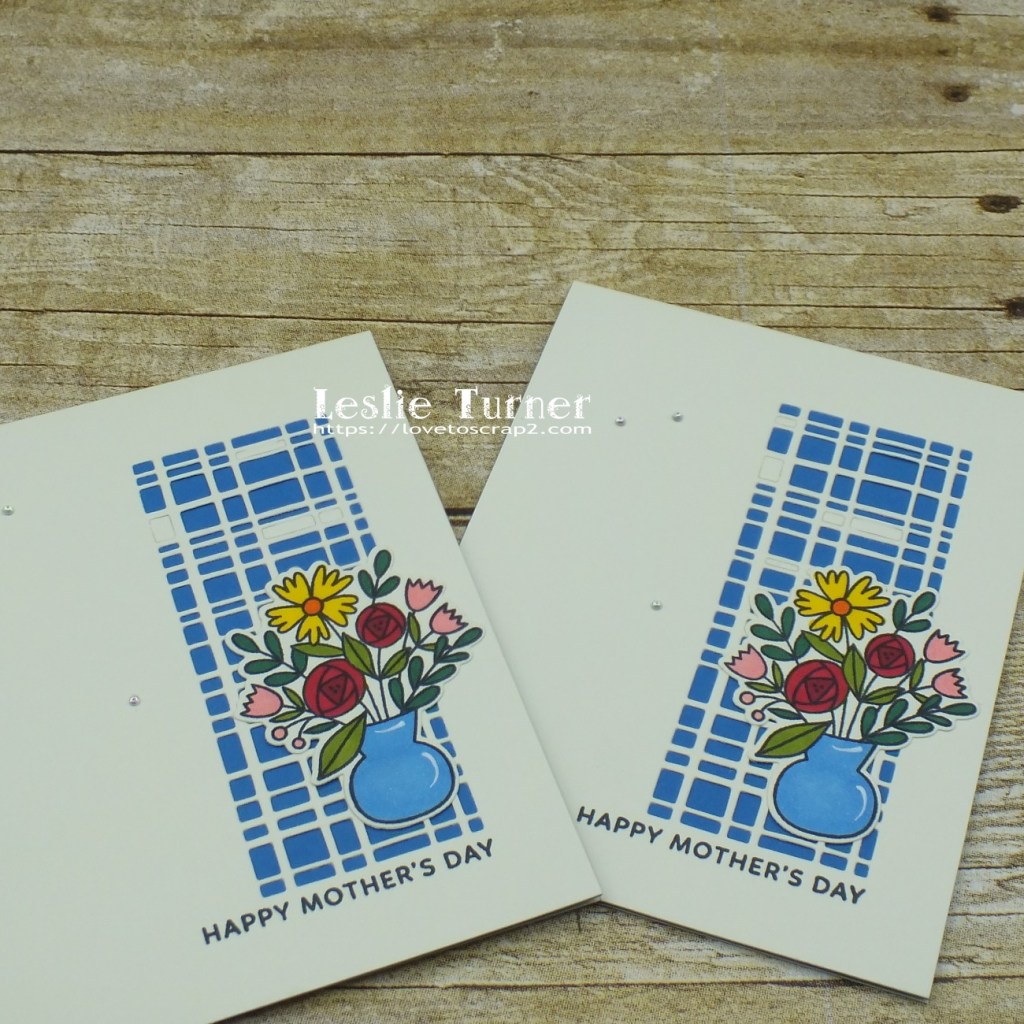
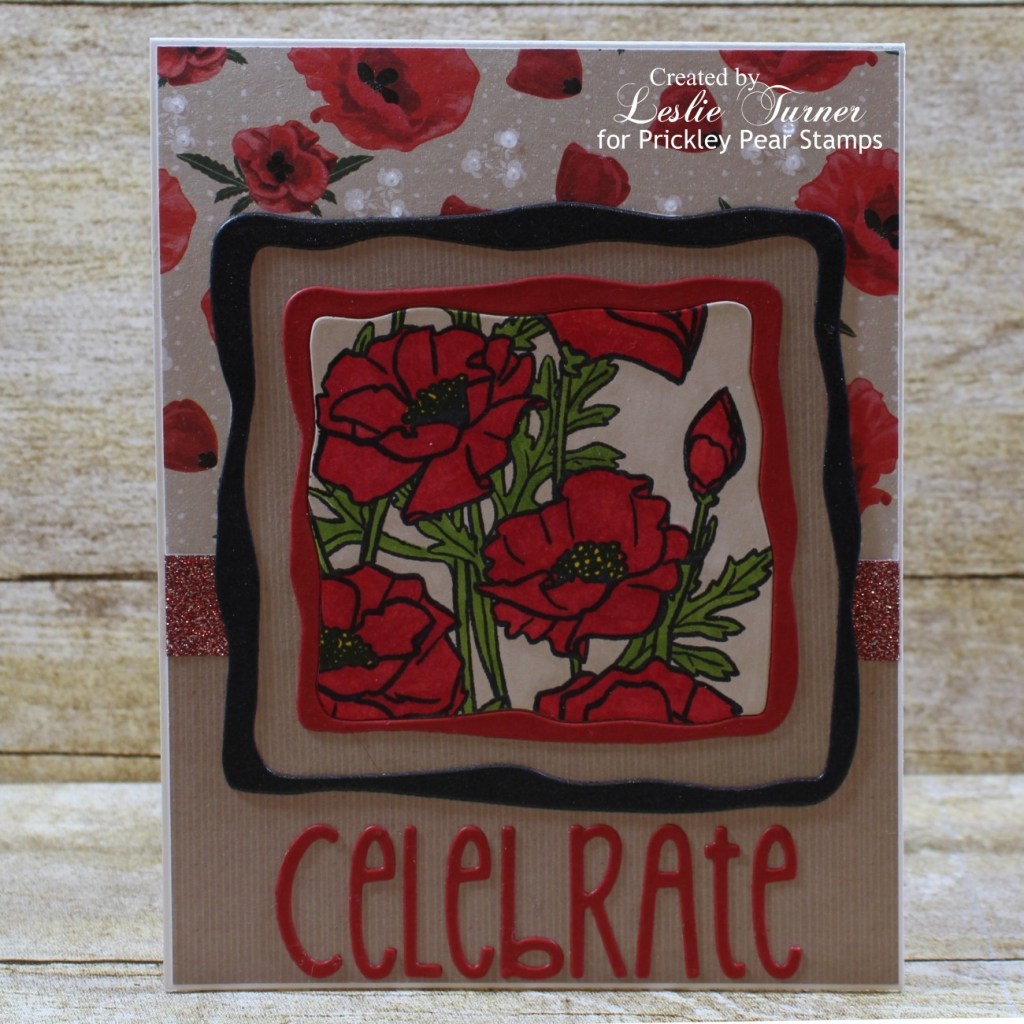
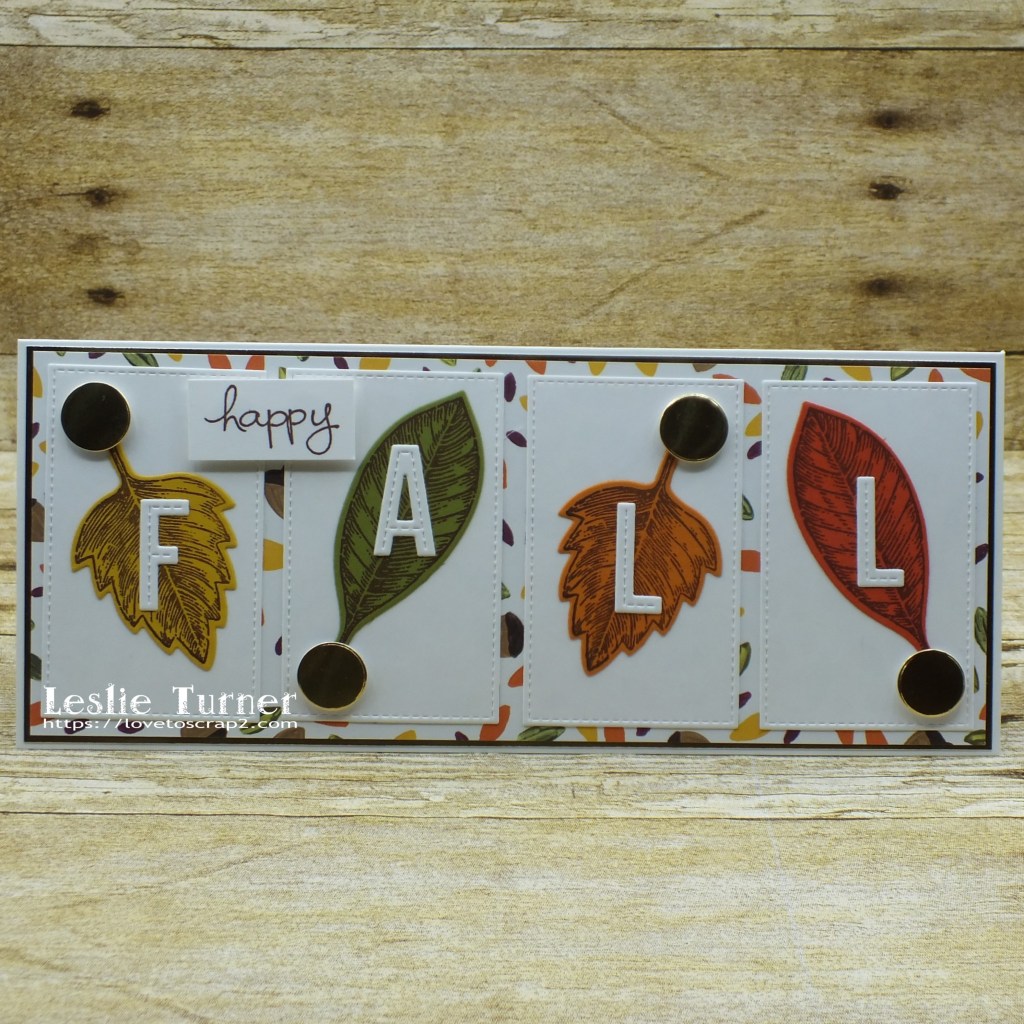
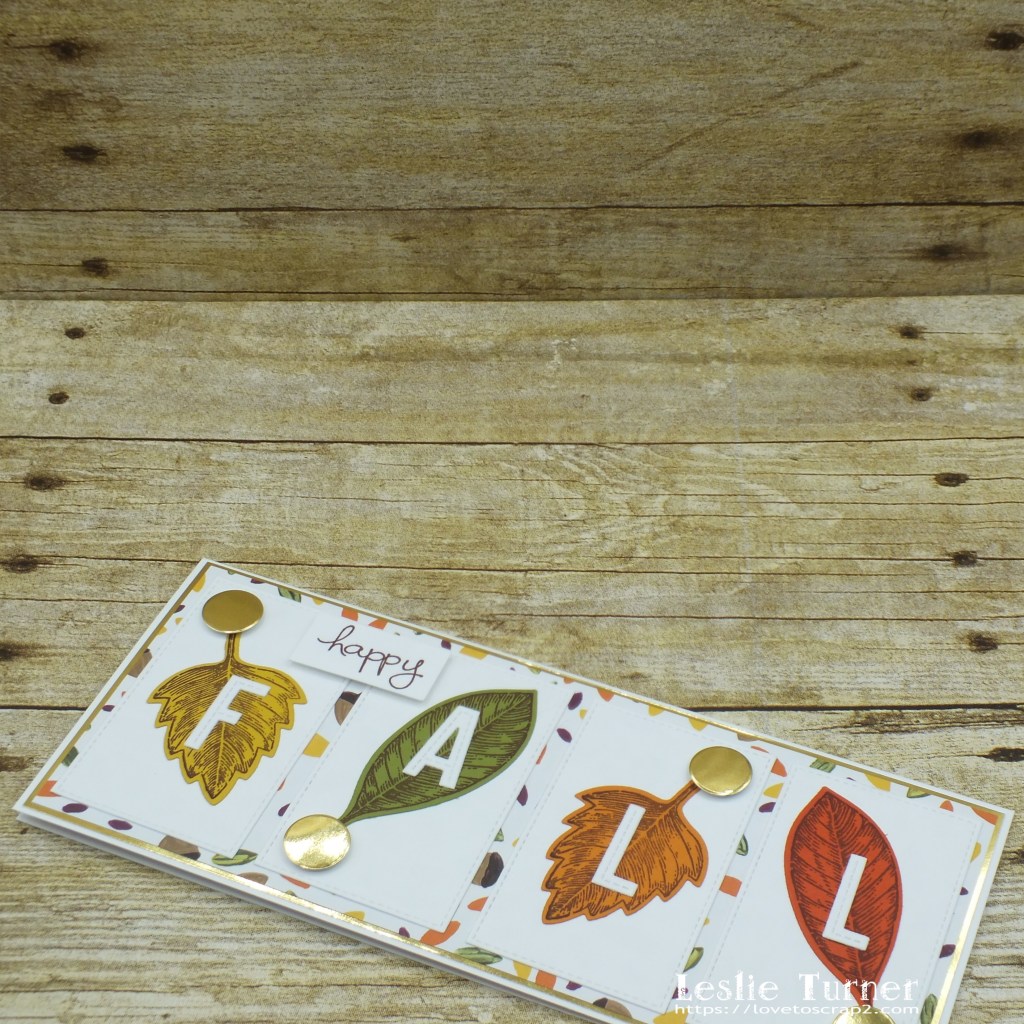
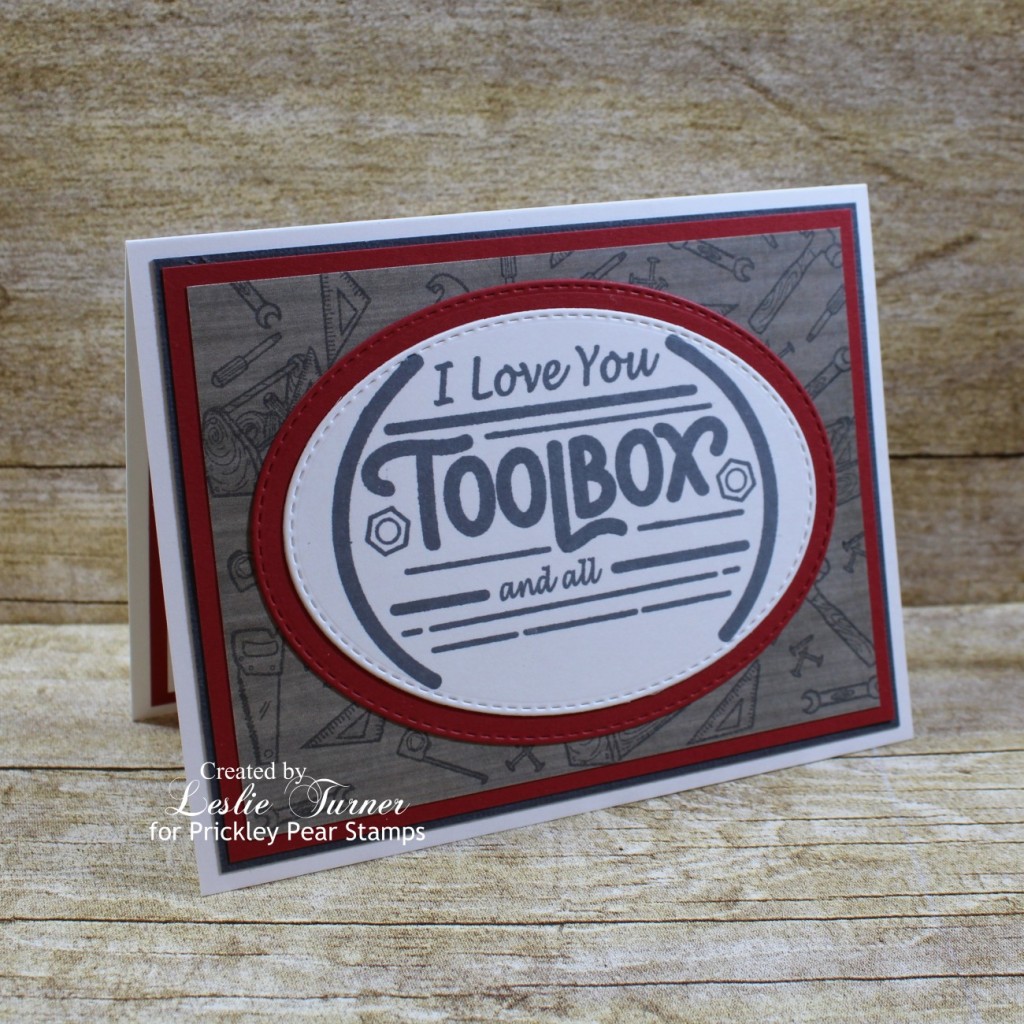
I cut a standard A2 size top-folding landscape card base from Neenah Classic Crest 80# Baronial Ivory cardstock along with a layering panel that I ran through the Gemini Junior with a CUTplorations Crazy Double Running Stitch Rectangle Nesting Die. I stamped the Praying For You image in dark brown ink, colored it with alcohol markers, and adhered it to the card base. I stamped the sentiment in brown ink, cut it with a stitched circle die and layered it on a slightly larger yellow stitched circle die cut.

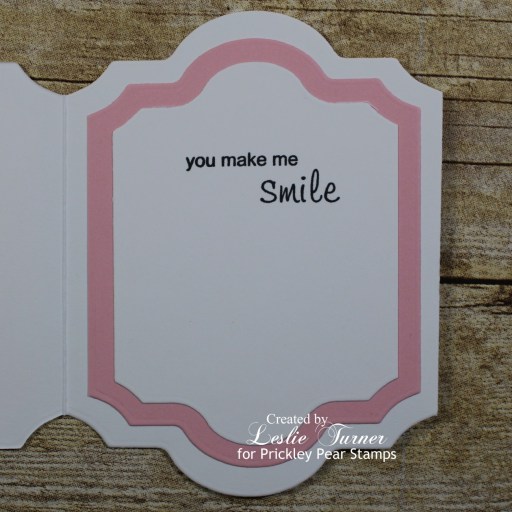
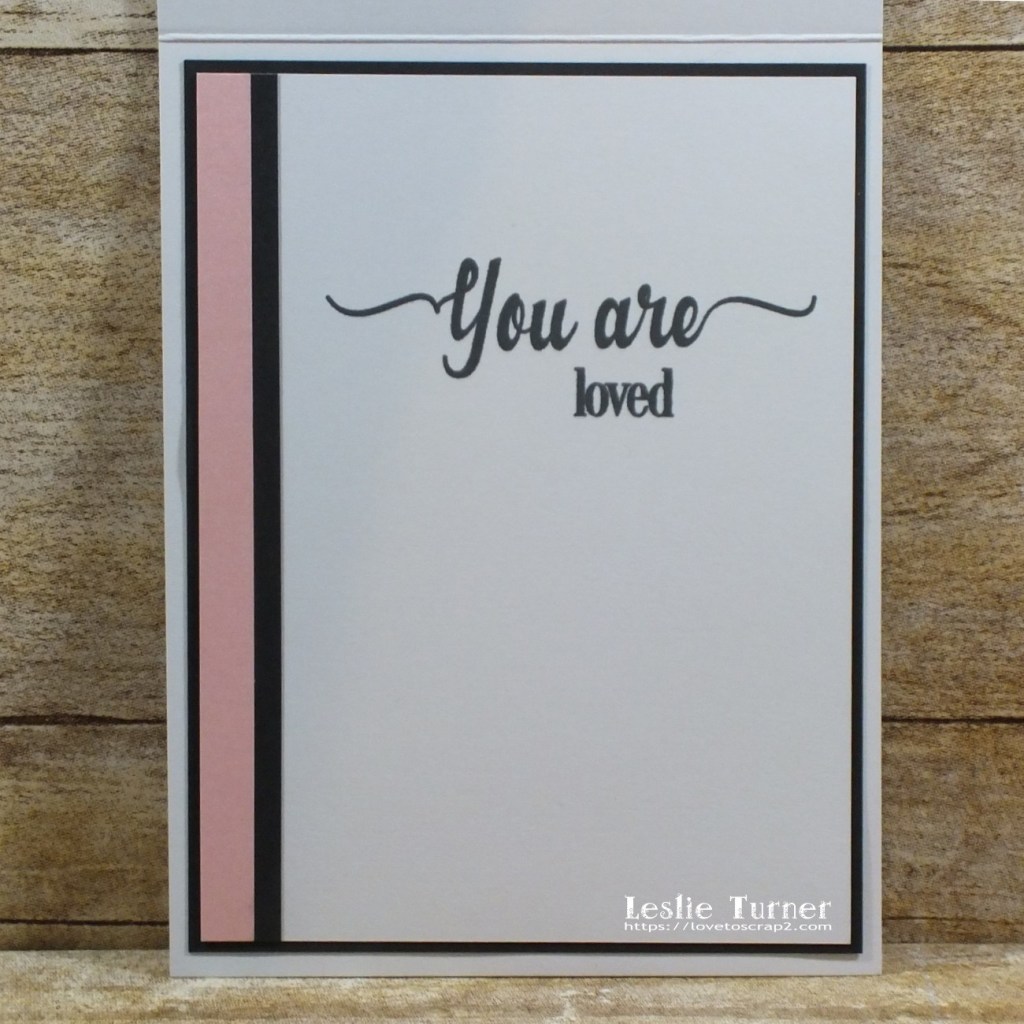
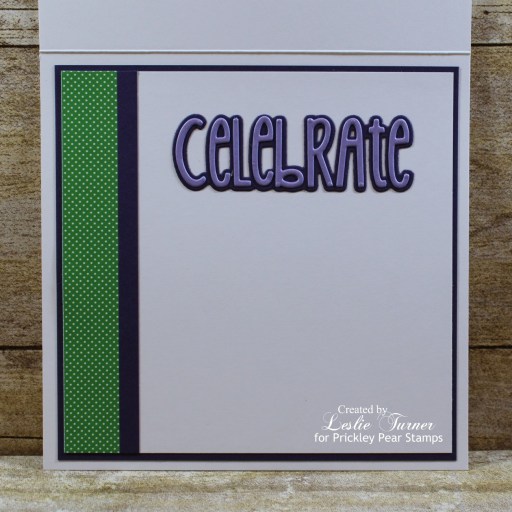
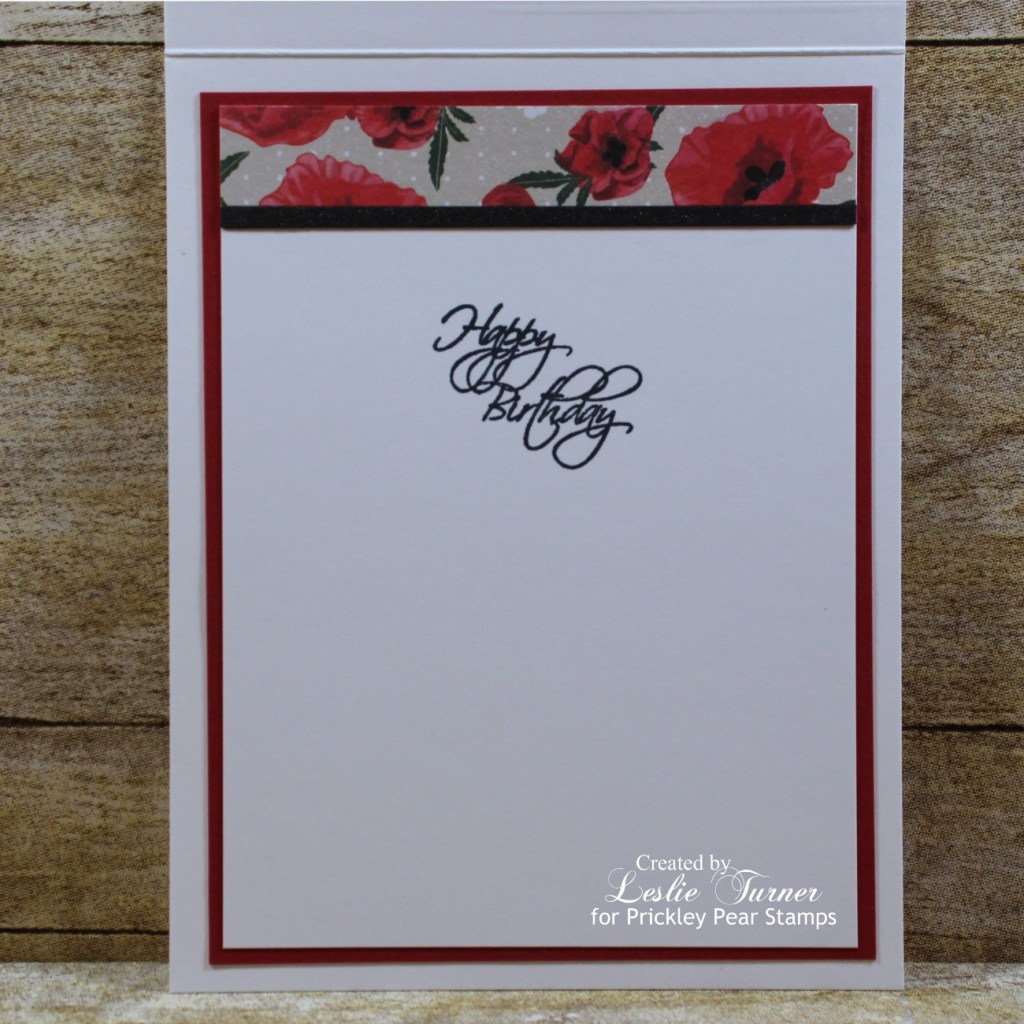
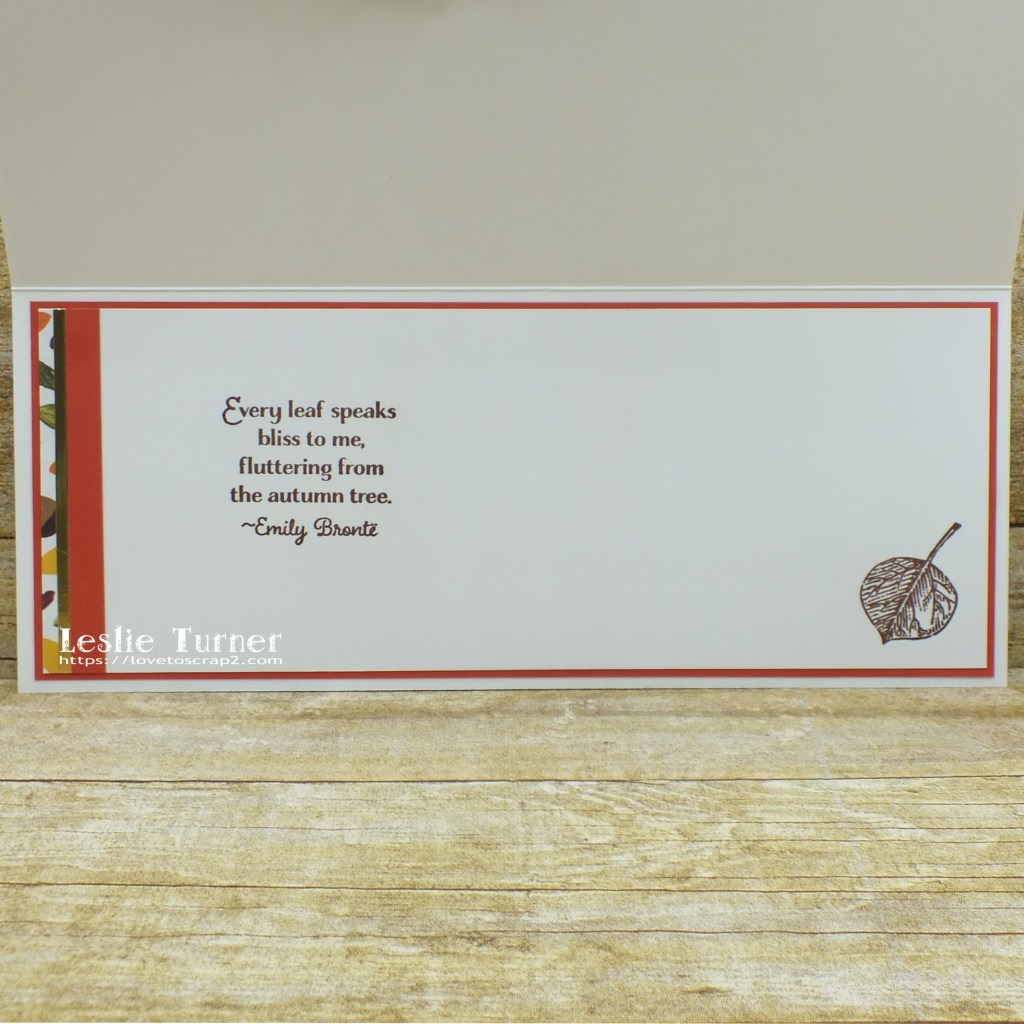
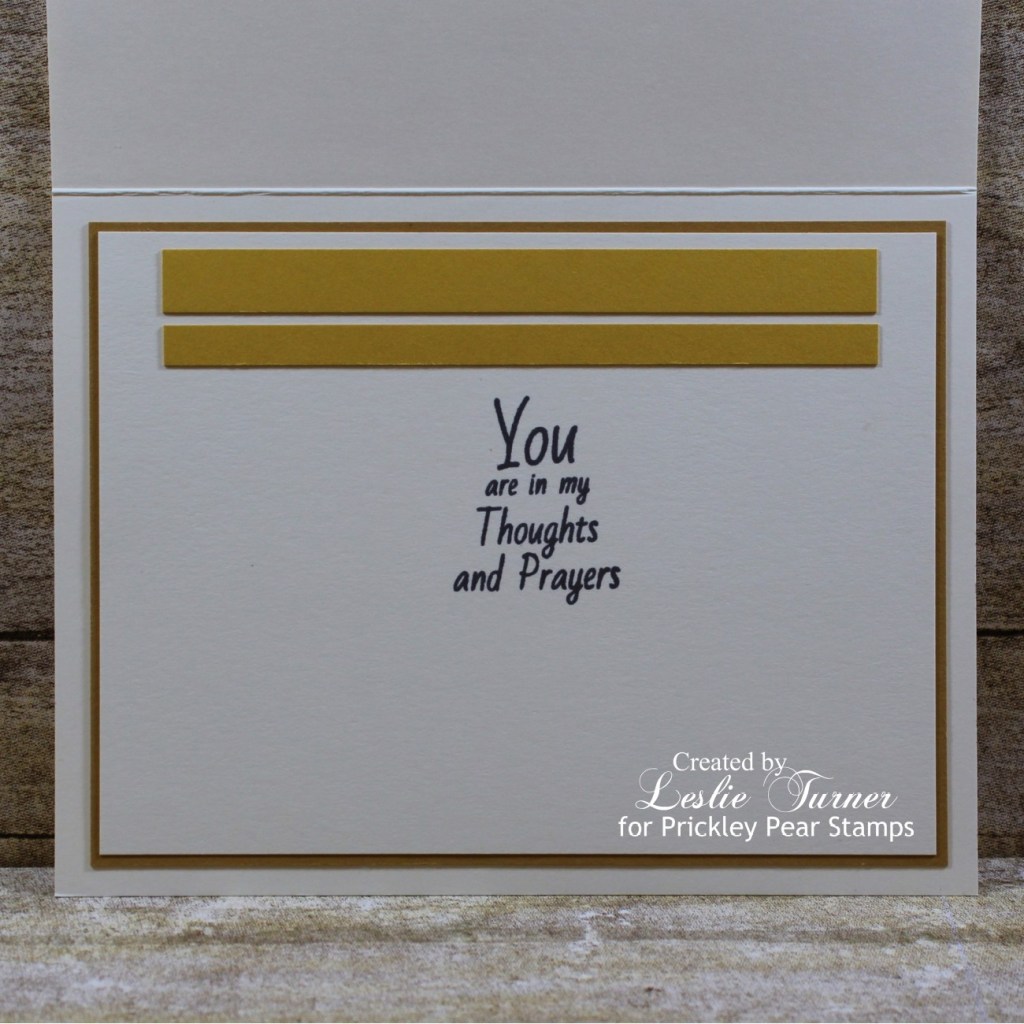
I cut the inside panel from Neenah Classic Crest 80# Baronial Ivory cardstock and embellished it with strips of yellow cardstock, stamped the sentiment in brown ink and layered the panel on slightly darker yellow cardstock.

Prickley Pear Stamps products used:
Praying For You stamp set

Other products used:
Cardstock/Paper: Neenah Classic Crest 80# Baronial Ivory cardstock, Stampin’ Up Crushed Curry and Delightful Dijon cardstock
Ink: Memento Espresso Truffle ink; Nuvo alcohol markers- Coral Reef Collection, Rich Reds Collection, Ombre Collection, Fragrant Oranges Collection, Sunshine Yellow Collection, Honey Amber Collection, Irish Clover Collection, Flamingo Pinks Collection, Natural Browns Collection, Fair Skin Tones, Pebble Beach Collection; Pentel Slicci Gold pen
Dies/Punches: Memory Box Stitched Circle Layers, CUTplorations Crazy Double Running Stitch Rectangle Nesting Dies
Accessories: Tonic Studios 12″ Guillotine Paper Trimmer, MISTI stamp tool, Gemini Junior, Scotch ATG, Bearly Art precision craft glue

I hope you’ve enjoyed this project! Be sure to check out all the awesome stamps and dies at Prickley Pear Stamps! If you’d like to save 10% on anything on the site when you shop at Prickley Pear Stamps, use the coupon code LESLIE10 at checkout! And be sure to ‘like’ and ‘follow’ the Prickley Pear Stamps Facebook page to keep up with news and sales, and join Prickley Pear Pals (the fan group) for lots of fun crafty ideas and to share your creativity! And finally, we’d love to see you visit the Prickley Pear Stamps blog that’s in the process of being revived and become a Follower! Hope to see you there! Thanks so much for stopping by today – we’ll see you next time! ;)

Scrappy hugs,
lesliesig

BOAT (Break Out Another Thousand)

Hi everyone! Happy Friday! I hope you’ve had a great week and have something fun planned this weekend! Just stay safe! Affiliate links are used in this post at no cost to you. I really appreciate your support! I’m delighted to be back on the Dies R Us Inspiration Blog today with another awesome DT inspiration project! I created a fun masculine card for that boat lover which features the amazing Twisted Rope Background Die from Tutti Designs! I love this die – it makes the BEST masculine cards!

The standard A2 size landscape top-folding card base was cut from CutCardStock Twine 80# cardstock along with layering panels cut from CutCardStock Basis Navy 80# cardstock and CutCardStock Basis Red 80# cardstock. I die cut the Twisted Rope Background from the twine cardstock and adhered it to the navy panel with spray adhesive (the fastest and easiest way I’ve found to adhere ‘lacy’ type die cuts) and then adhered the panel to the red layer. I layered the sentiment on red cardstock and adhered it to the front panel, and added a red anchor brad before adhering the piece to the card base.

I cut the inside panel from CutCardStock Twine 80# cardstock and embellished it with strips of the navy, red and twine cardstock (for a tone-on-tone look), stamped the sentiment in blue ink, and layered the panel on navy and then red cardstock.

Dies R Us products used:
Tutti Designs Twisted Rope Background Die

Other products used:
Cardstock/Paper: CutCardStock Twine 80# cardstock, CutCardStock Basis Navy 80# cardstock, CutCardStock Basis Red 80# cardstock
Stamps: The Project Bin Anchors Away stamp set
Ink: Memento Paris Dusk ink
Accessories: Tonic Studios 12″ Guillotine Paper Trimmer, Big Shot, Elmer’s Craft Bond Spray Adhesive, Bearly Art precision craft glue, MISTI stamp tool, Eyelet Outlet Anchor Brads

I hope you’ve enjoyed today’s project! Be sure to check out all the fun goodies at the Dies R Us store! They not only sell dies… they also carry stamps, embossing tools and supplies, all kinds of craft supplies, slimline products and even Yupo paper! Be sure to join in the fun going on over at the Dies R Us Challenge Blog – there’s a new challenge theme posted on the 1st and 15th of each month and one lucky random winner will receive a gift voucher prize to the Dies R Us store! And be sure to ‘like’ and ‘follow’ Dies R Us Facebook Page for lots of creative inspiration and to keep up with the latest news! Thanks so much for stopping by today – we’ll see you next time! ;)

Scrappy hugs,
lesliesig

thanks shaped card

Hi everybody! Hope you are having a fabulous week and enjoying some wonderful Spring weather! It couldn’t be any more beautiful here than it has been for the past several weeks! In fact, I almost feel guilty for spending time in my studio, lol! Affiliate links are used in this post at no cost to you. I really appreciate your support! I’ve popped in this morning to share another sample that I created for the Prickley Pear Stamps Spring 2021 Release! I used the stunning Sketched Florals – Azalea stamp set for this pretty shaped thank you card. I absolutely love shaped cards and this is one of my favorites!

I stamped the image on Neenah Classic Crest 80# Solar White cardstock, colored it with alcohol markers, and cut a front layering panel from it. I then cut the card base from Neenah Classic Crest 80# Solar White cardstock along with a layering panel from CutCardStock Basis 80# Pink cardstock. I adhered the layers together and then to the card base, and added a sentiment cut from Neenah Classic Crest 80# Solar White cardstock using the CUTplorations Skinny Sentiments die set. The finishing touch was adding iridescent gemstones to the flowers.

I cut the inside panel from Neenah Classic Crest 80# Solar White cardstock as well, stamped a sentiment from the Blobby Flowers 2 stamp set in black ink and layered the panel on another CutCardStock Basis 80# Pink cardstock layer.

Prickley Pear Stamps products used:
Sketched Florals – Azalea stamp set
Blobby Flowers 2 stamp set

Other products used:
Cardstock/Paper: Neenah Classic Crest 80# Solar White cardstock, CutCardStock Basis 80# Pink cardstock
Ink: Memento Tuxedo Black ink; Nuvo alcohol markers- Coral Reef Collection, Ombre Collection, Honey Amber Collection, Sunshine Yellow Collection, Organic Greens Collection, Marina Blues Collection, Flamingo Pinks Collection; Faber-Castell Pitt Artist (fine point) Orange Glaze pen
Dies/Punches: Crafter’s Companion Ruth Create-A-Card die set, CUTplorations Skinny Sentiments
Accessories: Bearly Art precision craft glue, MISTI stamp tool, Big Shot, Tonic Studios 12″ Guillotine Paper Trimmer, ScraPerfect iridescent gemstones

I hope you’ve enjoyed this project! Be sure to check out all the awesome stamps and dies at Prickley Pear Stamps! If you’d like to save 10% on anything on the site when you shop at Prickley Pear Stamps, use the coupon code LESLIE10 at checkout! And be sure to ‘like’ and ‘follow’ the Prickley Pear Stamps Facebook page to keep up with news and sales, and join Prickley Pear Pals (the fan group) for lots of fun crafty ideas and to share your creativity! And finally, we’d love to see you visit the Prickley Pear Stamps blog that’s in the process of being revived and become a Follower! Hope to see you there! Thanks so much for stopping by today – we’ll see you next time! ;)

Scrappy hugs,
lesliesig

Happy Mother’s Day Pair

Hi friends! A big ole’ Happy Hump Day to you! I hope you’re having some wonderful Spring weather where you are! It is absolutely gorgeous where we are! Affiliate links are used in this post at no cost to you. I really appreciate your support! I have a pair of Mother’s Day cards to share in my series and these have a unique color combo of pink and orange which I wouldn’t typically think to pair together, but they turned out really pretty! I actually created four of these – two with dry embossed side panels, one with plain side panels and one with glitter side panels – but only took photos of these two. I got interrupted and when I returned to my studio, I forgot all about taking pics of the other two, lol! That’s how this old brain works! Bahahaha!

Think assembly line, as I was making four of these cards although two of them aren’t pictured. I stamped the Concord and 9th Painted Tulip image on four Neenah Classic Crest 80# Solar White cardstock panels using the ‘rock and roll’ technique for the flower head. I think that’s what it’s called… it’s been years and years since I’ve done it. I stamped the flower head first in pink ink, cleaned the stamp and inked just the edge of the flower head again in orange ink by rocking and rolling the ink pad around the outside edge of the stamp. It’s a very cool technique and comes out different every time. I then stamped the stem and leaves on each panel and set them aside while I stamped the Happy Mother’s Day sentiment four times on CutCardStock Pop-Tone Black Licorice cardstock, heat embossed them with Hero Arts White embossing powder and cut them into strips.

I cut standard A2 top-folding card bases from Neenah Classic Crest 110# Solar White cardstock along with layering panels cut from CutCardStock Pop-Tone Black Licorice cardstock, Stampin’ Up Sweater Weather DSP, DCWV Glitter and Foil Washi Tape Stack (not pictured), and Paper Accents Pink Pearlized cardstock. I ran four of the Pink Pearlized cardstock side panels through the Big Shot with the Cuttlebug Candy Cane Stripes embossing folder and then assembled the front panels and added the sentiment strips.

I cut the inside panels from Neenah Classic Crest 80# Solar White cardstock and embellished three with the Pink Pearlized cardstock and one with pink glitter washi tape (not pictured) along with a narrow strip of CutCardStock Pop-Tone Black Licorice cardstock on all. I stamped the same sentiment inside all four and layered the panels on the black cardstock.

And one more look at these two… I’m really kicking myself for spacing out and forgetting to take pics of the other two. But that’s what happens when I get interrupted, lol! I really love how they turned out!

Products used:
Cardstock/Paper: Neenah Classic Crest 110# and 80# Solar White cardstock, CutCardStock Pop-Tone Black Licorice cardstock, Paper Accents Pink Pearlized cardstock, DCWV Glitter and Foil Washi Tape Stack (not pictured), American Crafts White cardstock, Stampin’ Up Sweater Weather DSP
Stamps: Concord and 9th Painted Tulip stamp set, Inspired By Stamping You Are stamp set
Ink: Memento Tuxedo Black, Bamboo Leaves, Angel Pink and Morocco ink; Versamark
Accessories: MISTI stamp tool, Cuttlebug Candy Cane Stripes embossing folder, Big Shot, Tonic Studios 12″ Guillotine Paper Trimmer, Hero Arts White embossing powder

I hope you’ve enjoyed seeing two more cards from my Mother’s Day card series! Thanks so much for stopping by today – we’ll see you next time! ;)

Scrappy hugs,
lesliesig

wish big

Hi friends! Hope you are having a fabulous week! I just can’t believe how fast they are flying by! Mom always said the older we get, the faster the time flies. And boy, she was so right! Affiliate links are used in this post at no cost to you. I really appreciate your support! I’ve popped in this morning to share another sample that I created for the Prickley Pear Stamps Spring 2021 Release! I used the absolutely gorgeous Sketched Florals – Hydrangea for my first-ever pinwheel card! My two tutorial folders combined are about 6″ thick and full of ideas and inspiration that I’ve been collecting for years, and I’m not sure why I haven’t tried one of these because it was super easy and turned out great! And I absolutely LOVE a purple and green color combo!

binary comment

I cut a 5-1/2″ square top-folding card base from Neenah Classic Crest Solar White 110# cardstock along with layering panels from CutCardStock Basis 80# Dark Purple cardstock and green swiss dot patterned paper. I stamped the image from the Sketched Florals – Hydrangea stamp set on Solar White cardstock, colored it with alcohol markers and then cut four stitched squares out of it using My Favorite Things Stitched Square STAX Die-namics. Using the same die, I cut four stitched squares from CutCardStock Stardream Metallic Amethyst cardstock, and then cut eight slightly larger squares from CutCardStock Basis Dark Purple cardstock. I layered the eight stitched square die cuts on the dark purple cardstock squares and arranged them in the pinwheel pattern using pieces of washi tape so I’d have wiggle room if needed. Once the arrangement was good, I adhered them onto the layered background and then adhered the background piece to the card base. I punched 1/2″ and 3/4″ circles from the amethyst and dark purple cardstock and adhered them to the center of the pinwheel. Using the CUTplorations Skinny Sentiments, I die cut the sentiment from CutCardStock Pop Tone Gumdrop Green cardstock and CutCardStock Pop Tone Jellybean Green cardstock, and adhered it to the bottom of the pinwheel. The finishing touch was the addition of die cut corners embellished with violet Dot Sparklers.

binary comment

I cut the inside panel from Neenah Classic Crest 80# Solar White cardstock and embellished it with strips of the green swiss dot paper used on the front and a narrow strip of CutCardStock Basis Dark Purple cardstock, added another CUTplorations Skinny Sentiment cut from the dark purple and amethyst cardstock, and layered the panel on the dark purple cardstock.

binary comment

Prickley Pear Stamps products used:
Sketched Florals – Hydrangea

Other products used:
Cardstock/Paper: Neenah Classic Crest 110# and 80# Solar White cardstock, CutCardStock Stardream Metallic Amethyst cardstock, CutCardStock Basis Dark Purple cardstock, CutCardStock Pop Tone Gumdrop Green cardstock, CutCardStock Pop Tone Jellybean Green cardstock, Doodlebug Design Swiss Dot Rainbow Petite Prints 6×6 paper pad
Ink: Memento Tuxedo Black ink; Nuvo alcohol markers- Sunshine Yellow Collection, Organic Greens Collection, Royal Purples Collection, Palma Violets Collection
Dies/Punches: My Favorite Things Stitched Square STAX Die-namics, CUTplorations Skinny Sentiments, JustRite A2 Card Front Basics die set, Stampin’ Up 1/2″ and 3/4″ Circle Punches
Accessories: Bearly Art precision craft glue, Tonic Studios 12″ Guillotine Paper Trimmer, MISTI stamp tool, Big Shot, Stampendous Violet Dot Sparklers

I hope you’ve enjoyed this project! Be sure to check out all the awesome stamps and dies at Prickley Pear Stamps! If you’d like to save 10% on anything on the site when you shop at Prickley Pear Stamps, use the coupon code LESLIE10 at checkout! And be sure to ‘like’ and ‘follow’ the Prickley Pear Stamps Facebook page to keep up with news and sales, and join Prickley Pear Pals (the fan group) for lots of fun crafty ideas and to share your creativity! And finally, we’d love to see you visit the Prickley Pear Stamps blog that’s in the process of being revived and become a Follower! Hope to see you there! Thanks so much for stopping by today – we’ll see you next time! ;)

Scrappy hugs,
lesliesig

Mother’s Day Bouquets

8/17/22 CAS Weekly Favorite at Splitcoast Stampers!

Hi everybody! I have a couple more commissioned Mother’s Day cards to share this afternoon which I scheduled a good piece out from this morning’s post. We’re out of pocket for a couple days and I didn’t want you to get bored, lol! Affiliate links are used in this post at no cost to you. I really appreciate your support! I created these two cards the same day as the Mother’s Day Wreath card that I shared a couple weeks ago since I had the Sizzix Festive Repeat Thinlits out. I really love the effect the apertures have on the front of a card!

I cut a standard A2 top-folding card base from Neenah Classic Crest Baronial Ivory 80# cardstock and ran the bases through the Big Shot with one of the dies from the Sizzix Festive Repeat Thinlits set, leaving a few of the tiny bits in the apertures (as I did with the Mother’s Day Wreath card) for a little interest. I backed the apertures with a panel of blue cardstock and added a stamped, colored and die cut vase of flowers from the Pretty Pink Posh Mother’s Day stamp set to each card front. I stamped the sentiment in black ink and added a few tiny iridescent gemstones to finish off the card fronts.

I cut the inside panels from Neenah Classic Crest Baronial Ivory 80# cardstock, stamped a Clearly Besotted sentiment (two different ones) on each one in black ink and layered the panels on the blue cardstock. Kept the insides very simple.

And one more peek… so loving how these turned out! The lady who commissioned me to make all these Mother’s Day cards to sell in her store said these two were among the first ones bought up by the customers, lol! ;)

Products used:
Cardstock/Paper: Neenah Classic Crest Baronial Ivory 80# cardstock, Stampin’ Up Pacific Point cardstock
Stamps: Pretty Pink Posh Mother’s Day stamp set, Clearly Besotted One In A Million stamp set
Ink: Memento Tuxedo Black ink; Nuvo alcohol markers- 379, 381, 405, 427, 449, 450, 451, 393, 415, 416; Posca white paint pen
Dies/Punches: Pretty Pink Posh Mother’s Day die set, Sizzix Festive Repeat Thinlits
Accessories: Tonic Studios 12″ Guillotine Paper Trimmer, Big Shot, MISTI stamp tool, Scotch ATG, Bearly Art precision craft glue, Darice iridescent gemstones

I hope you’ve enjoyed seeing these cards and you’re not getting too awfully tired of seeing Mother’s Day cards – I still have a few more to share but I’ll spread ’em out! Thanks so much for stopping by today – we’ll see you next time! ;)

Scrappy hugs,
lesliesig

Hey Beautiful, Happy Birthday

Hi everybody! Happy Tuesday and I hope, if you’re still in the working world, that your Monday was fantastic! Affiliate links are used in this post at no cost to you. I really appreciate your support! I have a very cool hybrid card sample to share with you this morning that I created for the Prickley Pear Stamps Spring 2021 Release! I used the stunning Sketched Florals – Wisteria stamp set to create this unique birthday card! I’ve created a variety of acetate-front cards over the years and always enjoy making them, and this is one that I created a duplicate of for a friend who is going through a hard time.

This card, although I’m thrilled with how it turned out, was very hard to photograph to get the full gist of what it looks like. I cut a standard A2 size top-folding card base from Neenah Classic Crest Solar White 110# cardstock and Grafix Craft Plastic. I stamped the image from the Sketched Florals – Wisteria stamp set on the Solar White panel and colored it with alcohol markers and an almost-dried-out fine point Pitt Artist pen. I’ve had this set of fine point Pitts for over five years, I’m sure, and I’m down to four now because they are drying out. Wah-wah. After assembling the card base, I used the CUTplorations ‘beautiful’ Word Die to die cut the sentiment from CutCardStock Basis 80# Dark Purple cardstock and adhered it to the acetate. I stamped a partial sentiment (the word Hey) from one of the sentiments in the Magical Enchanted Day stamp set, die cut it with a small oval scalloped die and adhered it just above the ‘beautiful’ die cut. This completed the front. For the ‘inside’, I created a digital sentiment on the computer, trimmed it into a narrow strip, and adhered it across the bottom so it was hidden behind the ‘beautiful’ die cut – which you can’t really see too well in these photos. I couldn’t take a lying-flat shot because the lights in the lightbox made the acetate shine, lol!

I embellished the back of the card with a strip of Prima patterned paper and a narrow strip of CutCardStock Basis 80# Dark Purple cardstock, and stamped another sentiment from the Magical Enchanted Day stamp set in dark purple ink. Really loving how this turned out!

Prickley Pear Stamps products used:
Sketched Florals – Wisteria stamp set
Magical Enchanted Day stamp set

Other products used:
Cardstock/Paper: Neenah Classic Crest 110# Solar White cardstock, CutCardStock Basis 80# Dark Purple cardstock, Prima Meadow Lark 6×6 Collection
Ink: Memento Elderberry ink; Nuvo alcohol markers- 416, 434, 436, 439, 441; Faber-Castell Pitt Artist Pen fine point May Green
Dies/Punches: CUTplorations ‘beautiful’ Word Die, Spellbinders Lacy Ovals die
Accessories: Grafix Craft Plastic, Bearly Art precision craft glue, Big Shot, MISTI stamp tool, Tonic Studios 12″ Guillotine Paper Trimmer

I hope you’ve enjoyed this project! Be sure to check out all the awesome stamps and dies at Prickley Pear Stamps! If you’d like to save 10% on anything on the site when you shop at Prickley Pear Stamps, use the coupon code LESLIE10 at checkout! And be sure to ‘like’ and ‘follow’ the Prickley Pear Stamps Facebook page to keep up with news and sales, and join Prickley Pear Pals (the fan group) for lots of fun crafty ideas and to share your creativity! And finally, we’d love to see you visit the Prickley Pear Stamps blog that’s in the process of being revived and become a Follower! Hope to see you there! Thanks so much for stopping by today – we’ll see you next time! ;)

Scrappy hugs,
lesliesig

celebrate

Happy Monday, everybody! The weekend sure went by fast, and here’s to a wonderful week ahead for all of you! Affiliate links are used in this post at no cost to you. I really appreciate your support! The fun over at Prickley Pear Stamps is still going strong so I’m back this morning to share another sample I created for the Spring 2021 Release! I used the oh so gorgeous Sketched Florals – Poppy stamp set to create this pretty birthday card! I thought the patterned papers complimented the image beautifully!

I cut a standard A2 size top-folding card base from Neenah Classic Crest Solar White 110# cardstock along with some coordinating patterned paper layers. Unfortunately I received a defective stamp so I only had a portion of the image to work with, but I didn’t let that stop me. I cut the portion I was able to use with a die from the Wacky Waves Nesting Dies, colored it with alcohol markers, and built the focal image with patterned paper, CutCardStock Basis 80# Red cardstock and CutCardStock Curious Metallic 111# Night cardstock wacky waves die cuts. I placed the die cut sentiment from CUTplorations Skinny Sentiments, cut from the red cardstock, beneath the focal image. The final touch were tiny dots of Nuvo Morning Dew Crystal Drops on the front panel. Despite the defective stamp issue, I love how this turned out!

I cut the inside panel from Neenah Classic Crest 80# Solar White cardstock and embellished it with strips of the poppy patterned paper and CutCardStock Curious Metallic 111# Night cardstock used on the front, stamped the sentiment from the Prickley Pear Stamps Scalloped Oval 4-Floral stamp set in black ink, and layered the panel on CutCardStock Basis 80# Red cardstock.

Prickley Pear Stamps products used:
Sketched Florals – Poppy stamp set
Wacky Waves Nesting Dies
Scalloped Oval 4-Floral stamp set

Other products used:
Cardstock/Paper: Neenah Classic Crest 110# and 80# Solar White cardstock, CutCardStock Basis 80# Red cardstock, CutCardStock Curious Metallic 111# Night cardstock, Crafter’s Companion Verity Rose and Floral Delight 6×6 paper pads
Ink: Memento Tuxedo Black ink; Nuvo alcohol markers- 379, 392, 405, 416; Spectrum Noir alcohol marker- BG3
Dies/Punches: CUTplorations Skinny Sentiments
Accessories: MISTI stamp tool, Big Shot, Bearly Art precision craft glue, Eyelet Outlet Red Glitter Washi Tape, Nuvo Morning Dew Crystal Drops

I hope you’ve enjoyed this project! Be sure to check out all the awesome stamps and dies at Prickley Pear Stamps! If you’d like to save 10% on anything on the site when you shop at Prickley Pear Stamps, use the coupon code LESLIE10 at checkout! And be sure to ‘like’ and ‘follow’ the Prickley Pear Stamps Facebook page to keep up with news and sales, and join Prickley Pear Pals (the fan group) for lots of fun crafty ideas and to share your creativity! And finally, we’d love to see you visit the Prickley Pear Stamps blog that’s in the process of being revived and become a Follower! Hope to see you there! Thanks so much for stopping by today – we’ll see you next time! ;)

Scrappy hugs,
lesliesig

happy FALL

Hi friends! I hope you had a fabulous weekend – they sure go by fast, don’t they?! Several weeks ago I shared that I’m guest designing over the next three months for Make The Cards Challenge and I’m back to share another inspiration project! Affiliate links are used in this post at no cost to you. I really appreciate your support! I created this pretty Fall slimline card for MTCC #17 – Color Challenge! Fall is my favorite time of the year because of the colors, the crisp cool weather, and the wonderful sights, sounds and smells!

This graphic screams Fall to me with this gorgeous color palette, so that’s the direction I went! No brainer! ;)

I created my preferred slimline card base size of 9″ x 3-3/4″ (because it fits so nicely in a #10 business envelope) from Neenah Classic Crest 110# Solar White cardstock and layering panels from a pretty leaf patterned paper and gold foil cardstock. I die cut stitched rectangles and stitched alphabet letters from Neenah Classic Crest 80# Solar White cardstock along with leaves stamped in brown ink on the four colors of cardstock. The round gold foil cardstock elements were negative space leftovers from another project that I had out on my desk thinking that I might use them on another project, and Voila! They came in pretty handy for this card! ;) Once everything was assembled and adhered in place, I stamped ‘happy’ in brown ink on a scrap of white cardstock, trimmed it and adhered it in the upper left quadrant.

I cut the inside panel from Neenah Classic Crest 80# Solar White cardstock and embellished it with strips of patterned paper and cardstock, stamped the sentiment and leaf in brown ink and layered the panel on dark orange cardstock.

And one more peek… such a fun challenge with an amazingly gorgeous color palette!

Products used:
Cardstock/Paper: Neenah Classic Crest Solar White cardstock, CutCardStock Adobo textured 4×6 cardstock, Stampin’ Up Crushed Curry, Old Olive and Pumpkin Pie cardstock; Hygloss Gold Foil cardstock, Stampin’ Up Into the Woods DSP
Stamps: Stampin’ Up Vintage Leaves, Lighthearted Leaves and endless Birthday Wishes stamp sets
Ink: Memento Rich Cocoa ink
Dies/Punches: My Favorite Things Stitched Rectangle STAX Set 1 Die-namics and In Stitches Alphabet Die-namics, Stampin’ Up Vintage Leaves die set
Accessories: Tombow Mono permanent adhesive, Bearly Art precision craft glue, Big Shot, MISTI stamp tool, Tonic Studios 12″ Guillotine Paper Trimmer

I hope you’ve enjoyed today’s project and will link up with us this week! We can’t wait to see your project using these gorgeous colors! Thanks so much for stopping by today – we’ll see you next time! ;)

Scrappy hugs,
lesliesig

Toolbox Love

Howdy peeps! I hope you’re having a fabulous weekend! We have gotten some much-needed rain but it has passed and left us with gorgeous blue skies! So absolutely no complaints here! Affiliate links are used in this post at no cost to you. I really appreciate your support! I’m back this morning to share a masculine card sample I created for the Prickley Pear Stamps Spring 2021 Release using the super cool I Love You Toolbox And All stamp set which I paired with the Tools Background stamp for a fabulous Valentine!

I cut a standard A2 size top-folding landscape card base from Neenah Classic Crest 110# Solar White cardstock along with layers from CutCardStock Basis 80# Red cardstock and CutCardStock 80# Shadow Gray cardstock, and a woodgrain patterned paper panel on which I stamped the various tools from the Tools Background stamp in gray ink. I stamped the bold sentiment from the I Love You Toolbox And All stamp set on a scrap piece of Solar white cardstock in gray ink, cut it with a stitched oval die and layered it on a slightly larger Basis Red stitched oval die cut.

I cut the inside panel from Neenah Classic Crest 80# Solar White cardstock and embellished it with strips of the stamped tools background, CutCardStock Basis 80# Red cardstock and CutCardStock 80# Shadow Gray cardstock. I stamped the sentiment in gray ink and layered the panel on Basis Red cardstock.

Prickley Pear Stamps products used:
I Love You Toolbox And All stamp set
Tools Background stamp

Other products used:
Cardstock/Paper: Neenah Classic Crest 110# and 80# Solar White cardstock, CutCardStock Basis 80# Red cardstock, CutCardStock 80# Shadow Gray cardstock, My Mind’s Eye Tangerine 6×6 paper pad
Ink: Memento Gray Flannel ink
Dies/Punches: Memory Box Stitched Oval Layers
Accessories: Scotch ATG, Bearly Art precision craft glue, MISTI stamp tool, Big Shot, Tonic Studios 12″ Guillotine Paper Trimmer

I hope you’ve enjoyed this project! Be sure to check out all the awesome stamps and dies at Prickley Pear Stamps! If you’d like to save 10% on anything on the site when you shop at Prickley Pear Stamps, use the coupon code LESLIE10 at checkout! And be sure to ‘like’ and ‘follow’ the Prickley Pear Stamps Facebook page to keep up with news and sales, and join Prickley Pear Pals (the fan group) for lots of fun crafty ideas and to share your creativity! And finally, we’d love to see you visit the Prickley Pear Stamps blog that’s in the process of being revived and become a Follower! Hope to see you there! Thanks so much for stopping by today – we’ll see you next time! ;)

Scrappy hugs,
lesliesig