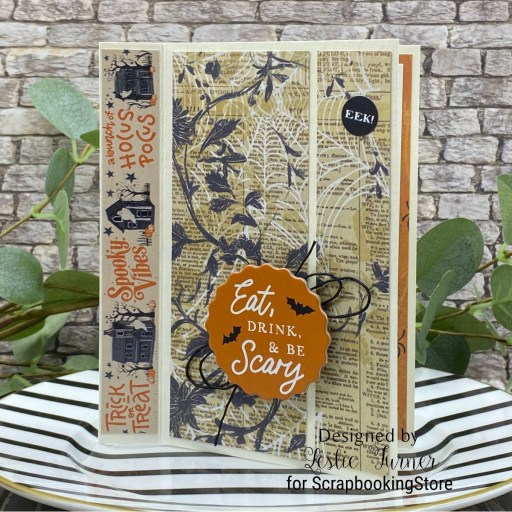
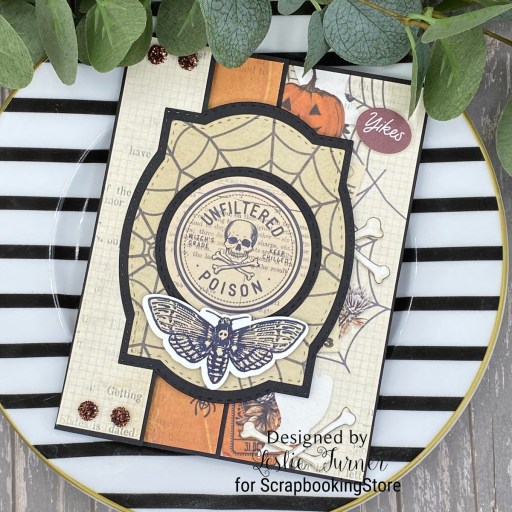
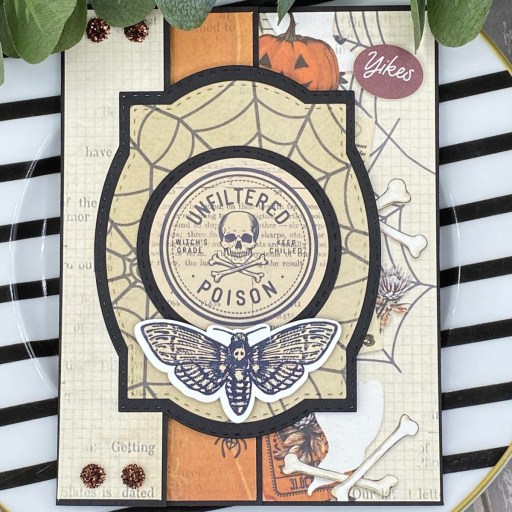
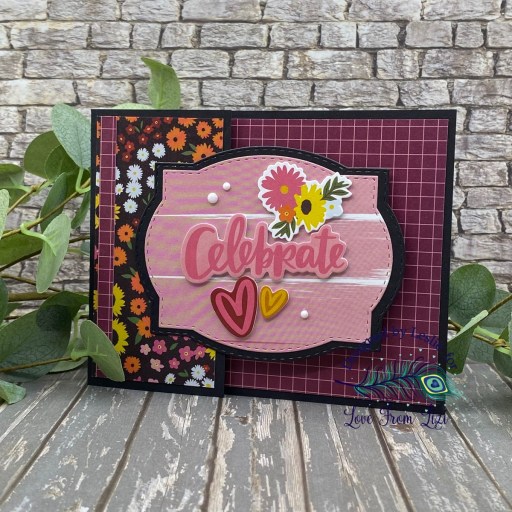
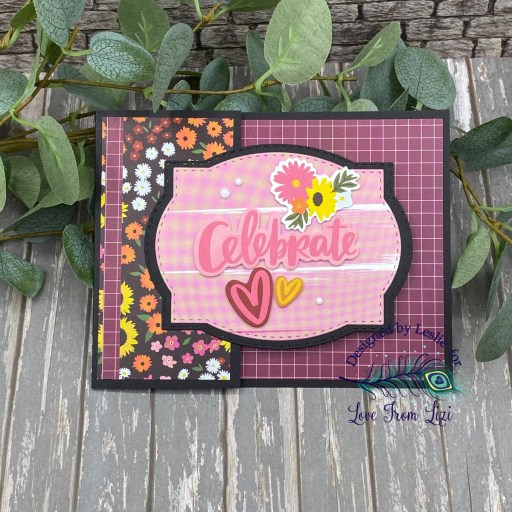
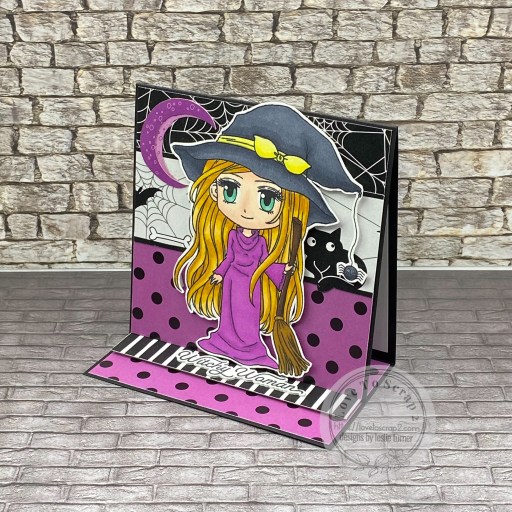
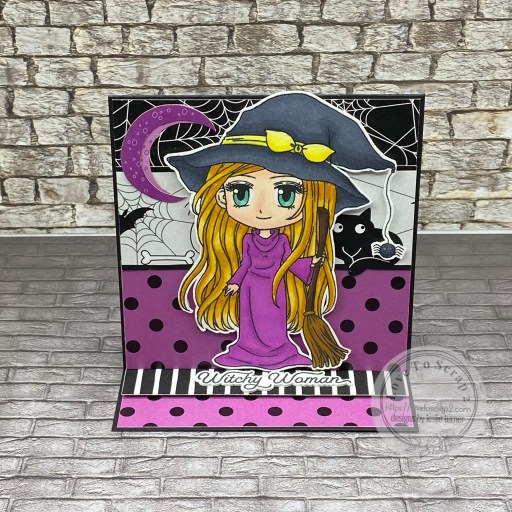
Howdy peeps! I hope you’re having a great weekend – I’ve had my nose buried in my crafting. So what else is new?! Bahahaha! Our weather has been cooling off for several weeks now and it’s just glorious. I’m always happy when we no longer need the A/C. I have a fun ScrapbookingStore DT inspiration project to share with you today created with items in the October 2025 Scrapbook Kit with Upgrades. I made a circle pop-out card which turned out so cute because it’s so simple. I’ve had handwritten instructions in my tutorial folder for quite some time although I don’t remember where I initially saw it. I just recently caught a glimpse of it on Connie Stewart’s YouTube channel HERE which reminded me that it’s on my long list of folds I want to try, so I made it! I hope you enjoy it.
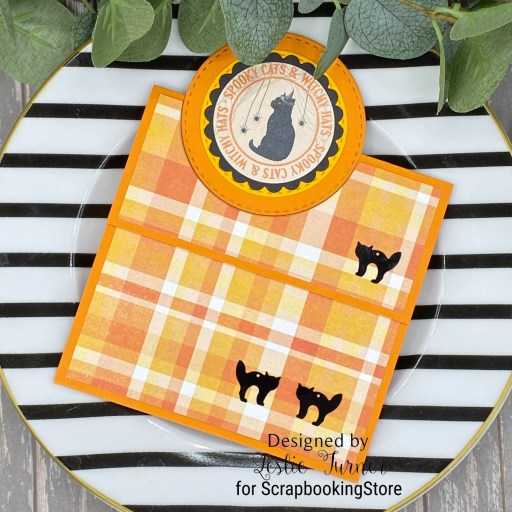
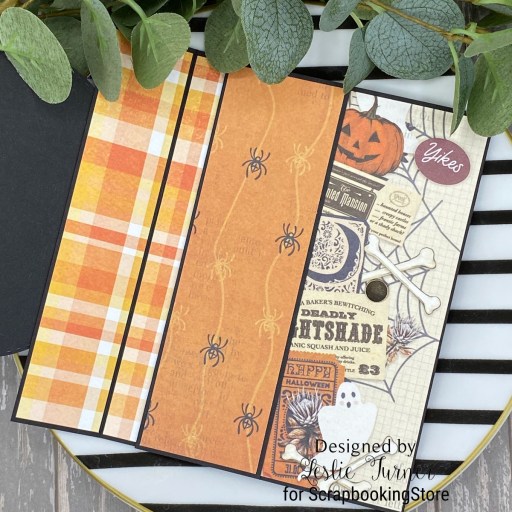
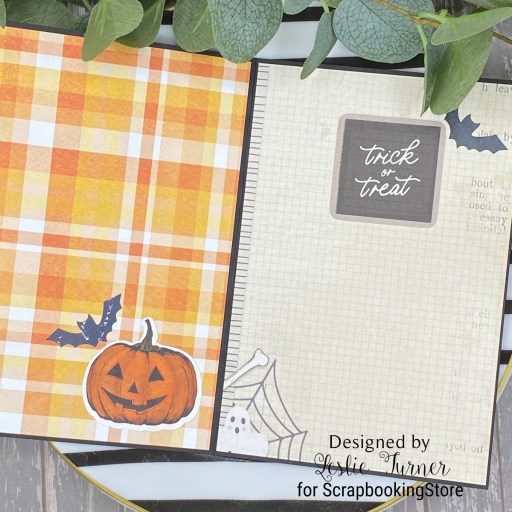
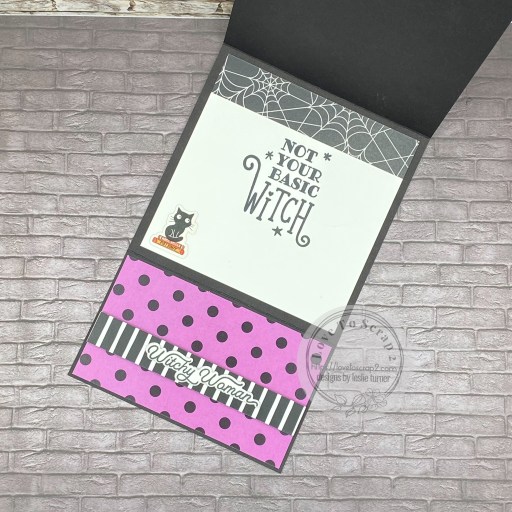
I cut the card base and stitched circle die cuts (using the Love From Lizi Stitched Circle Nested Cutting Dies) from CutCardStock Lessebo Brick Orange cardstock. I also cut a smaller stitched circle (using the same Love From Lizi die set) from Lessebo Sunset Orange and a scalloped circle using a Spellbinders Standard Scalloped Circles Small die to layer the sentiment sticker on. Then I cut layering panels from a super cute plaid print in the Photo Play Halloween Junque Collection Pack. I remembered I had some black cat sequins in my stash so I added a few of them to tie in the black cat on the sentiment.
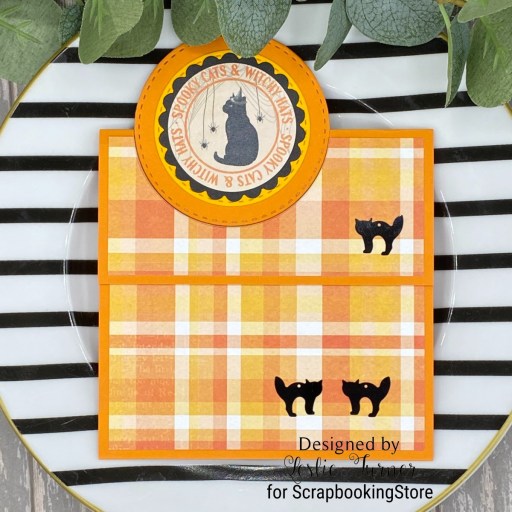
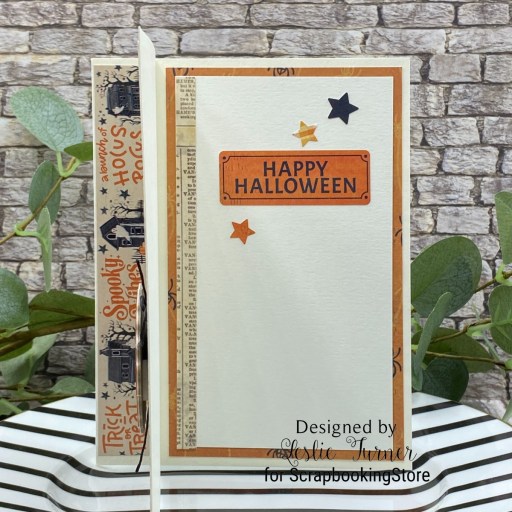
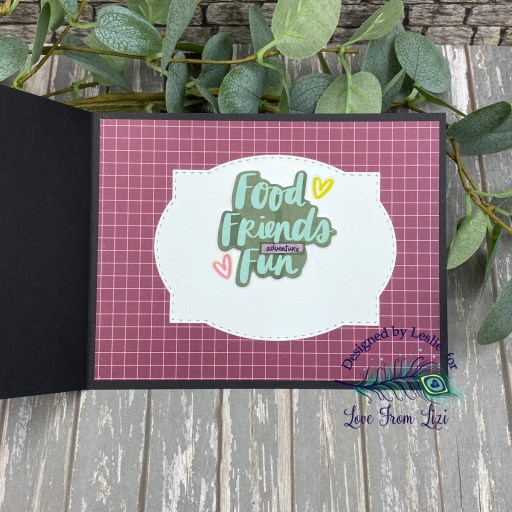
I cut the inside panel from CutCardStock Basis 80# Natural cardstock and embellished it with a strip of another print in the collection. I added another sentiment sticker from the sticker sheet and added another black cat sequin, and BOOM, the card was finished. Love how it turned out!

Affiliate links are used in this post at no cost to you – I really appreciate your support!
ScrapbookingStore products:
October 2025 Scrapbook Kit with Upgrades:
Photo Play Halloween Junque Collection Pack
Upgrades: Carta Bella Halloween Chipboard Accents
Carta Bella Halloween Frames & Tags
Ranger Hocus Pocus Distress Mica Stain
Other products used:
CARDSTOCK/PAPER: CutCardStock Lessebo Brick Orange, Lessebo Sunset Orange, Pop Tone Black Licorice and Basis 80# Natural cardstock
DIES/PUNCHES: Love From Lizi Stitched Circle Nested Cutting Dies, Spellbinders Standard Scalloped Circles Small dies
ACCESSORIES: Fiskars 12″ ProCision Rotary Bypass Paper Trimmer, Spellbinders 12×12 Scoring Board, My Sweet Petunia Precision Glue Press, Bearly Art precision craft glue, Big Shot, Scrapbook Adhesives E-Z Runner Grand Permanent Strips, velcro circle, black cat sequins from stash
I hope you’ve enjoyed today’s project and you’re thinking about all the fun you could have with this month’s kit… you really ought to think about joining the Subscription Club! Be sure to Follow us on Facebook, Instagram, Pinterest and YouTube for lots of crafty inspiration! And if you do decide to join the Subscription Club, join our ScrapbookingStore Club Member Group on Facebook for more inspiration and to share your projects! Thanks so much for stopping by today – we’ll see you next time!
Scrappy hugs,