‘Tis the Season

11/25/21 Top Pick of the Week at The Outlawz Twist Thursday Challenge!

Hi friends! Happy Monday! I’ll be leaving later this morning to see my cardiologist for a follow-up visit and to get another echocardiogram to see if my ejection fraction has improved since having the heart attack in August. The ejection fraction is a measurement showing how much blood the heart pumps, so wish me luck… it was low back in August so I’m praying it has improved. UPDATE: My ejection fraction has returned to normal, and my overall cardiac function is normal! AND our little rescue kitten, Fogg, is still doing great! Good news all the way around! ;) Affiliate links are used in this post at no cost to you – I really appreciate your support! I have one more card to share that I’ve created for The Outlawz Challenges. I feel really good to have been able to play in some of their challenges this month. ;) I’m entering this card into The Outlawz Twisted Thursday Challenge and this is Sponsor Appreciation Week 3, Anything Goes with optional twist of Hot or Cold (using two hot or two cold colors). Technically, I’m not playing the twist as I’ve used one hot and one cold color on my mini slimline Christmas card.

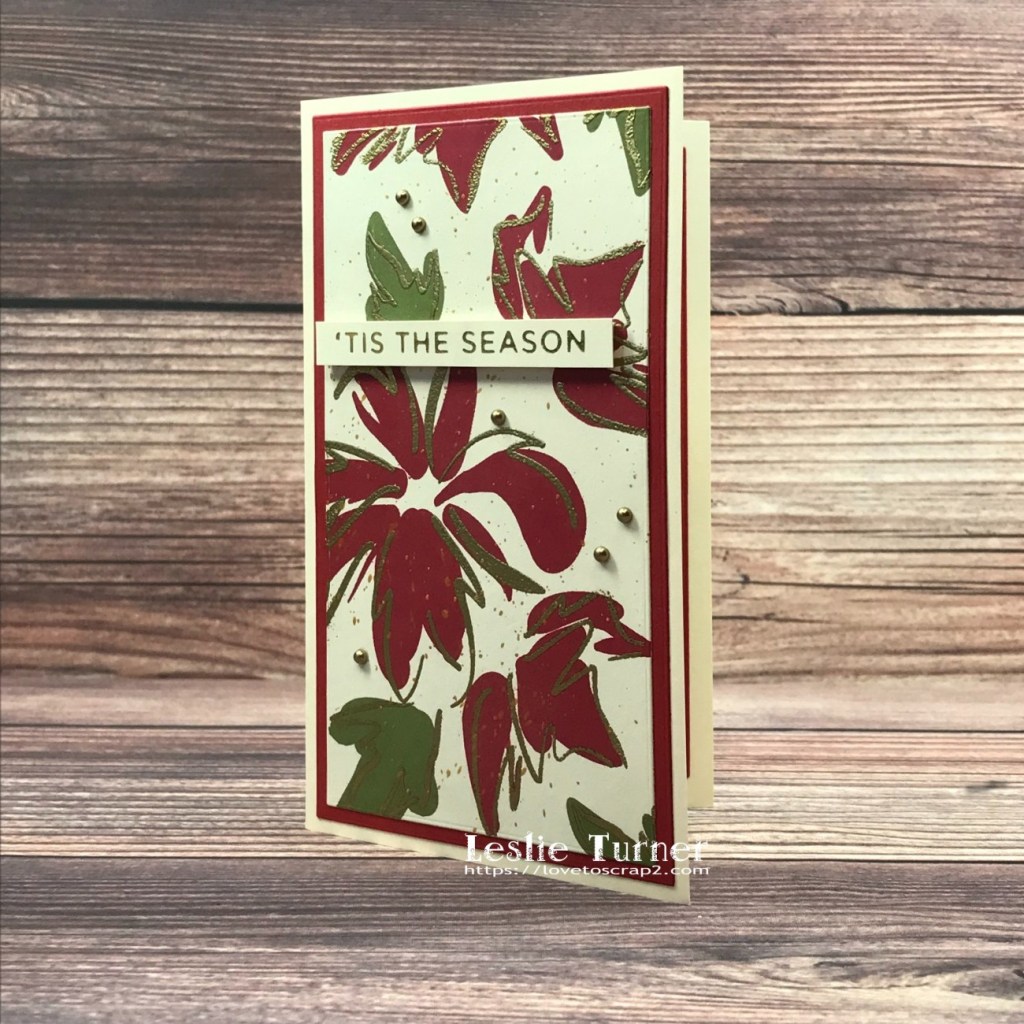
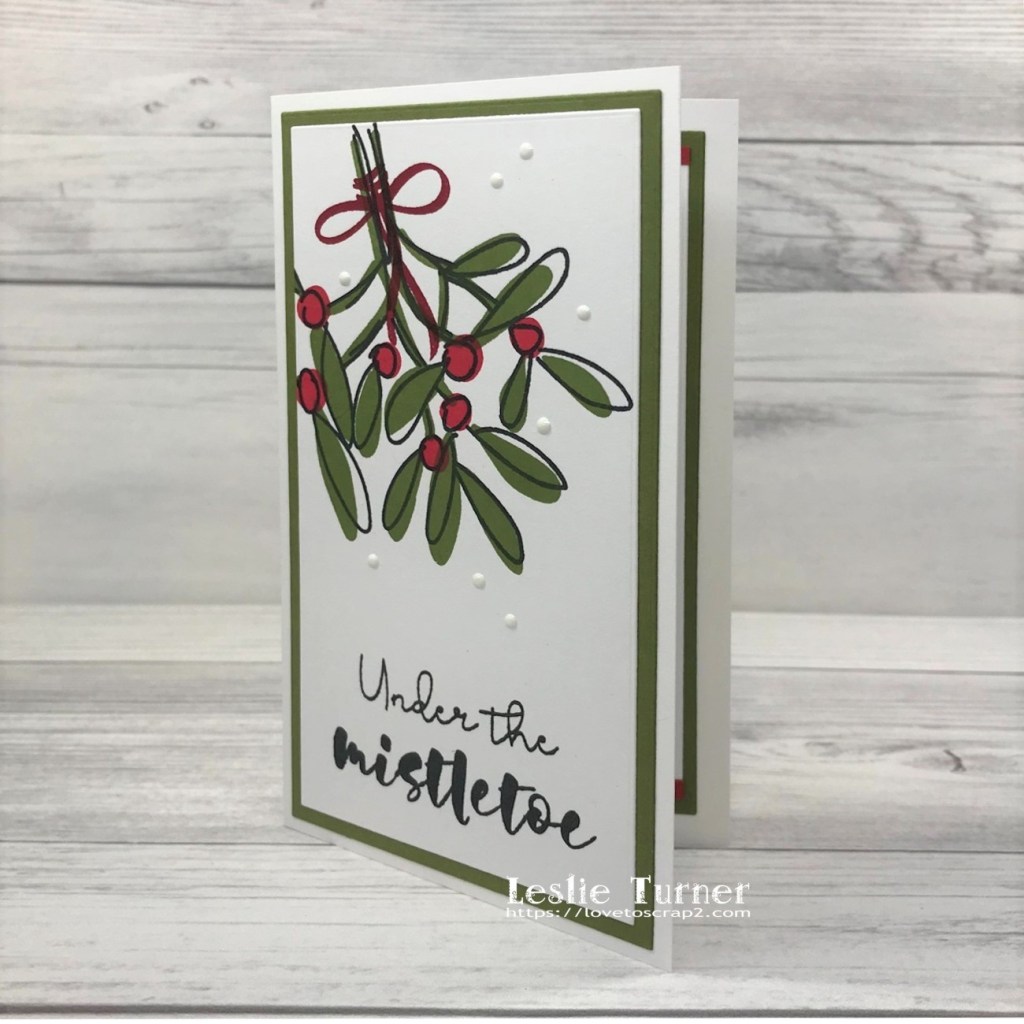
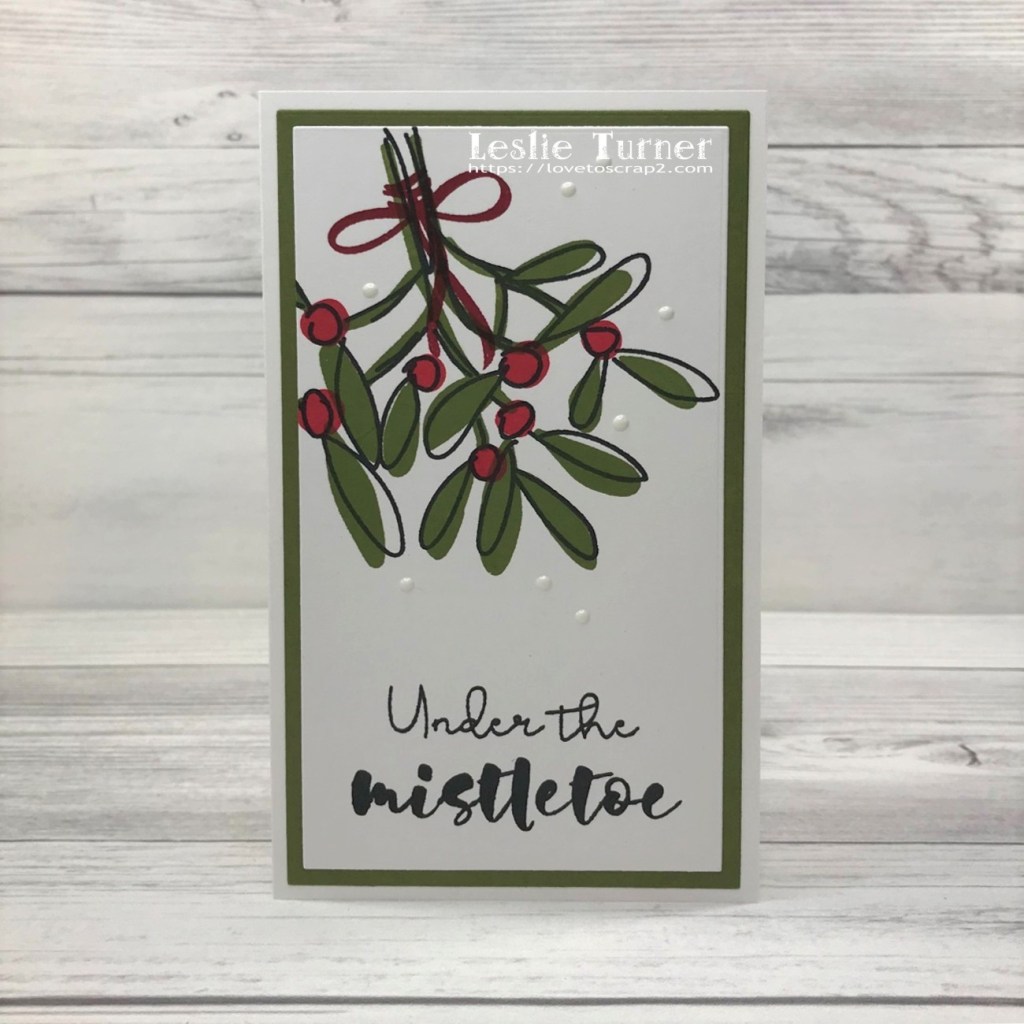
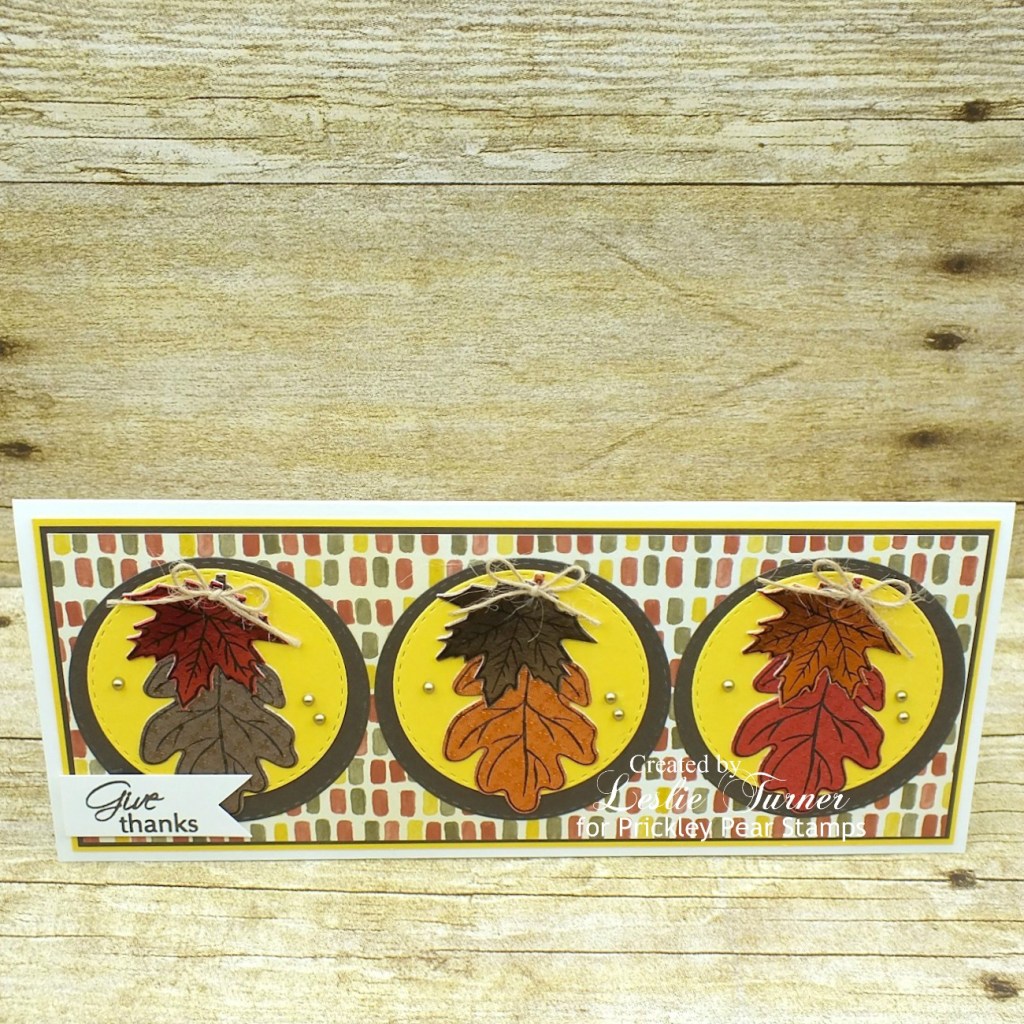
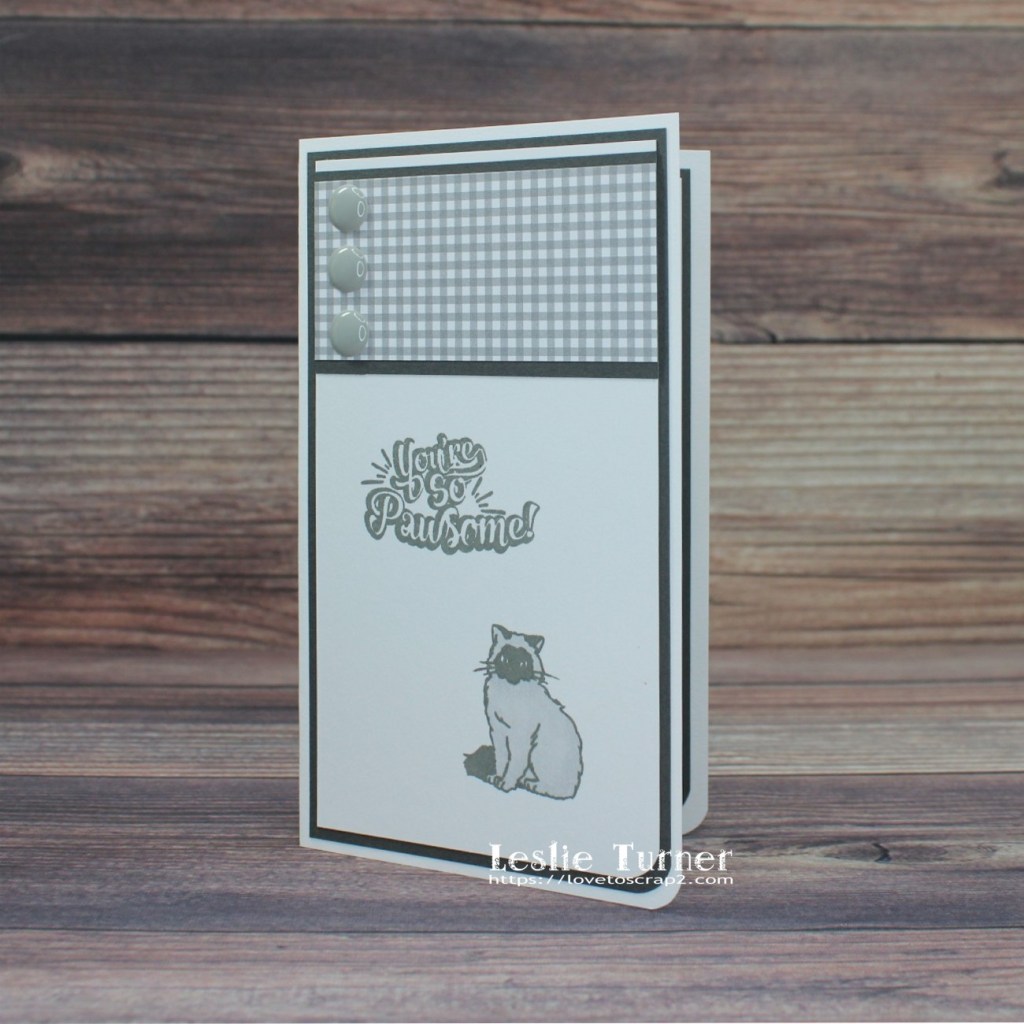
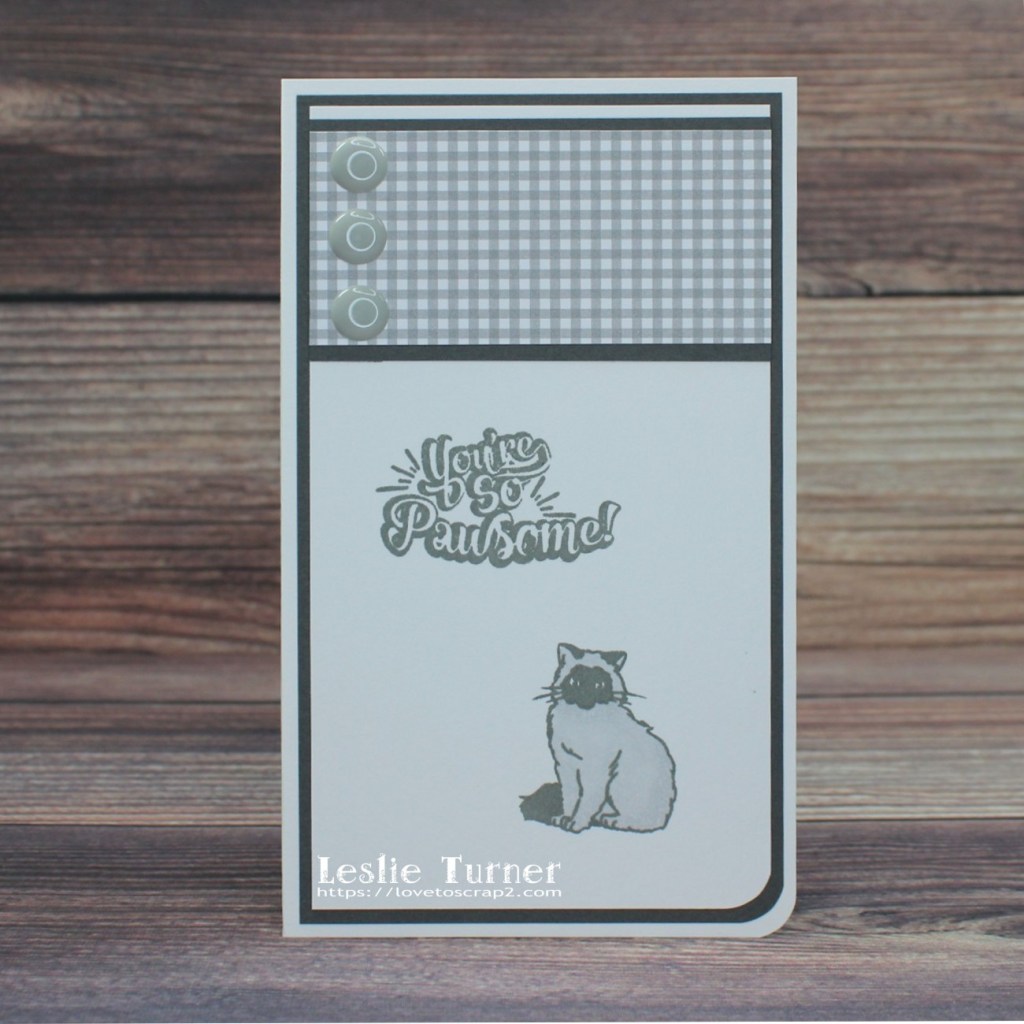
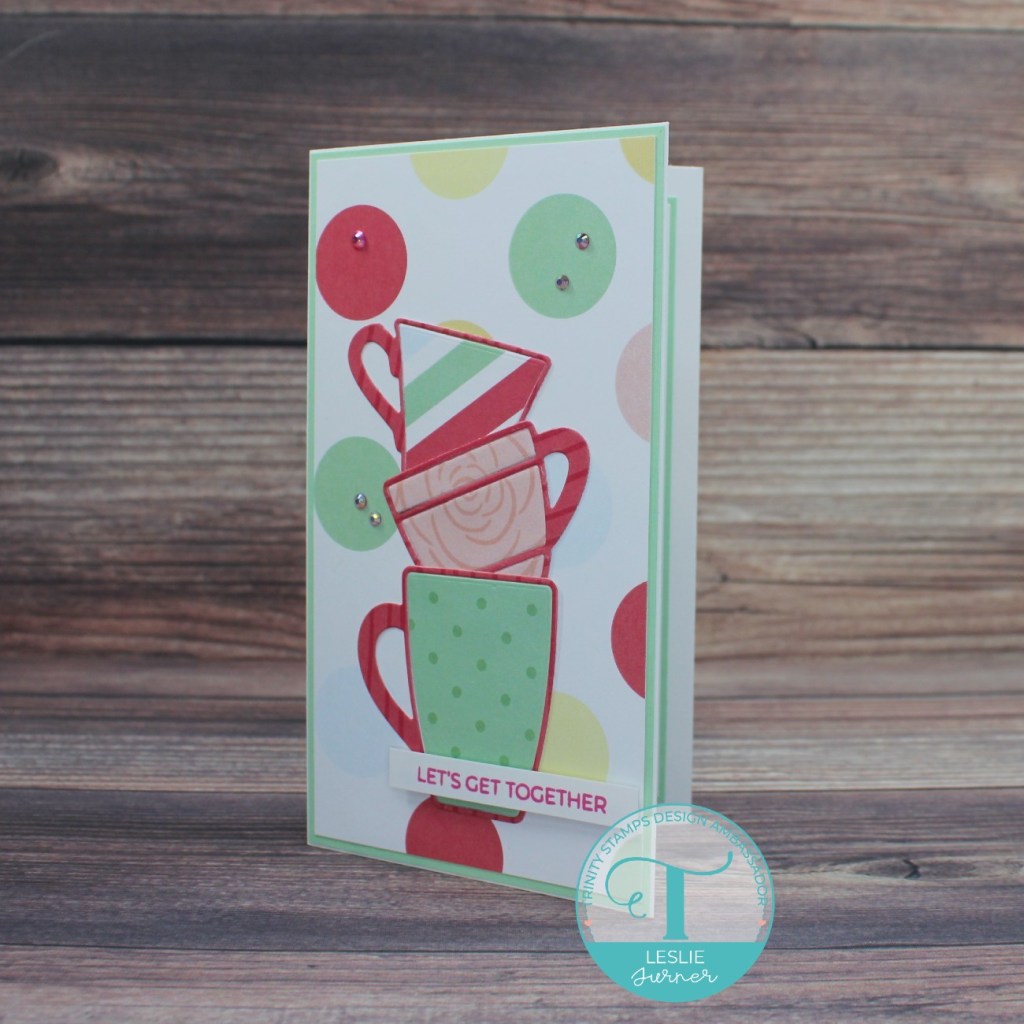
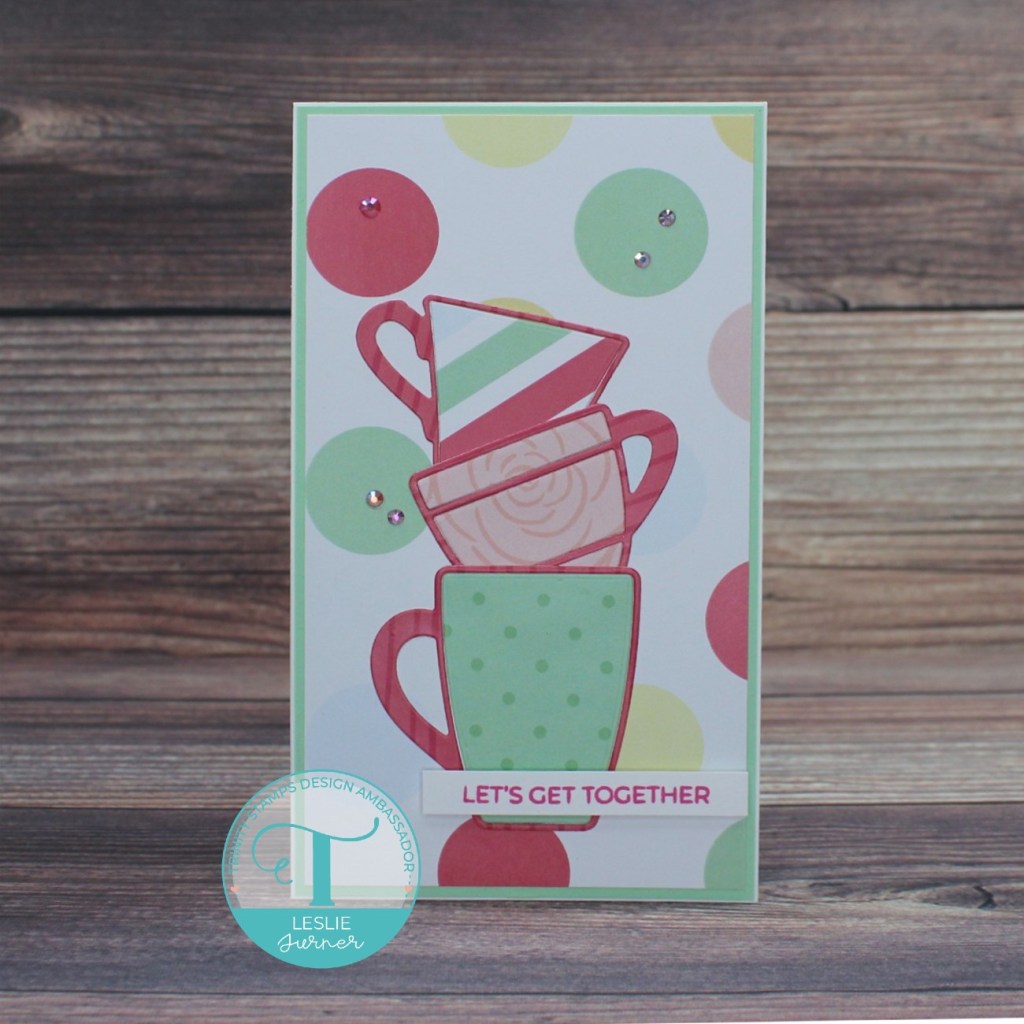
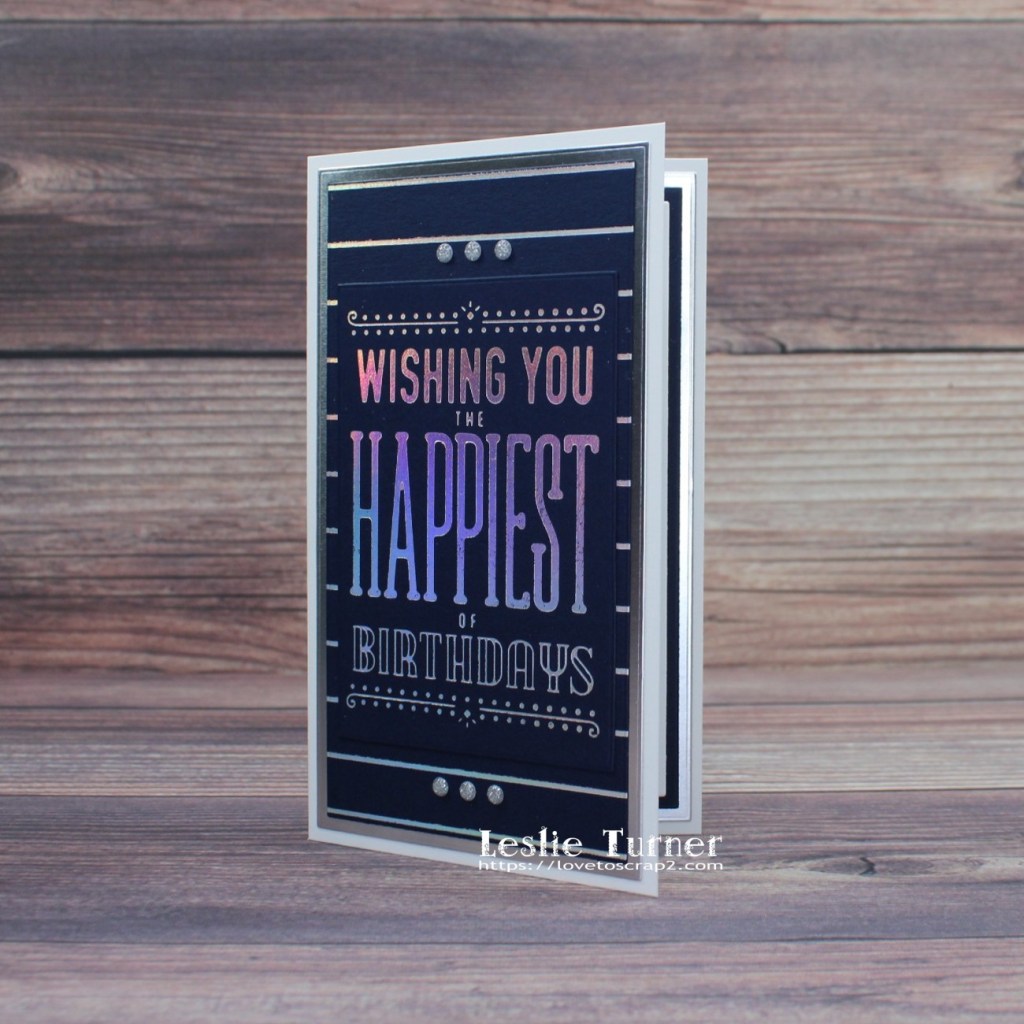
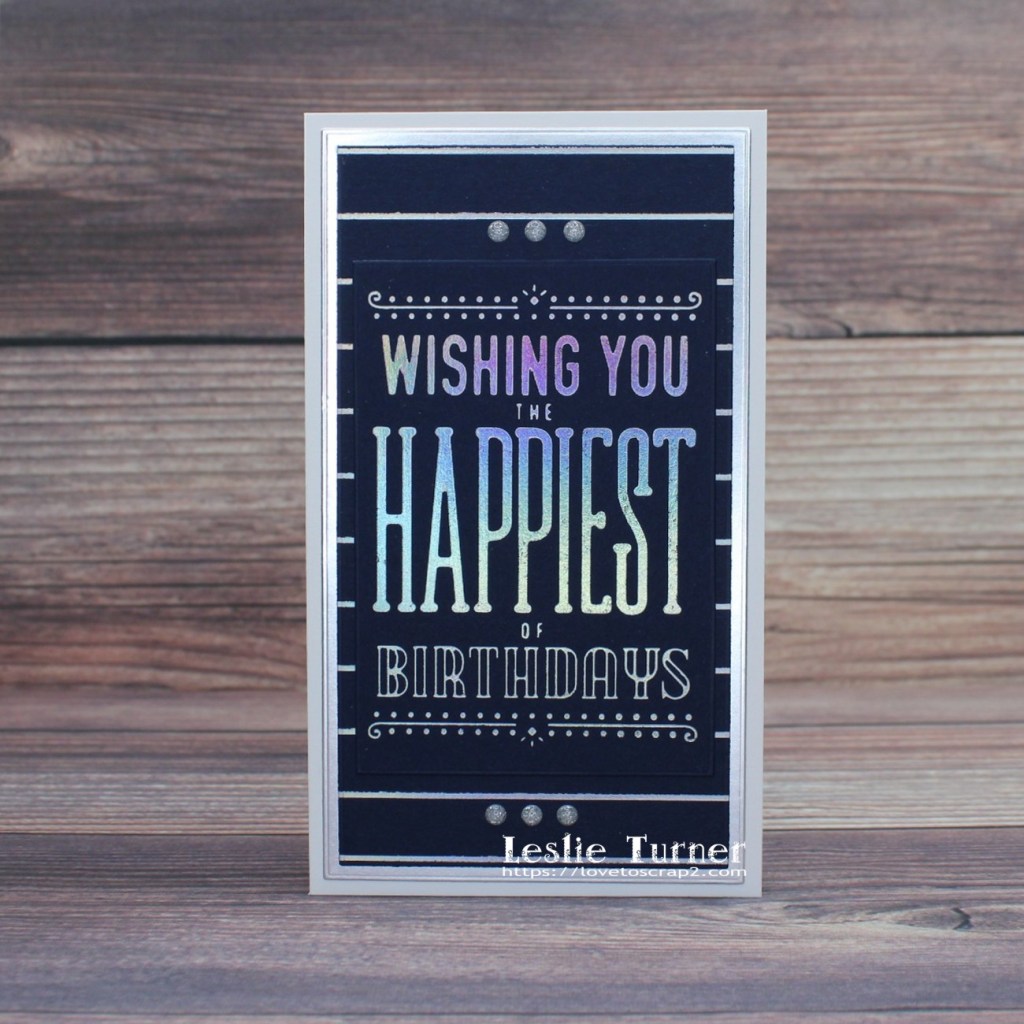
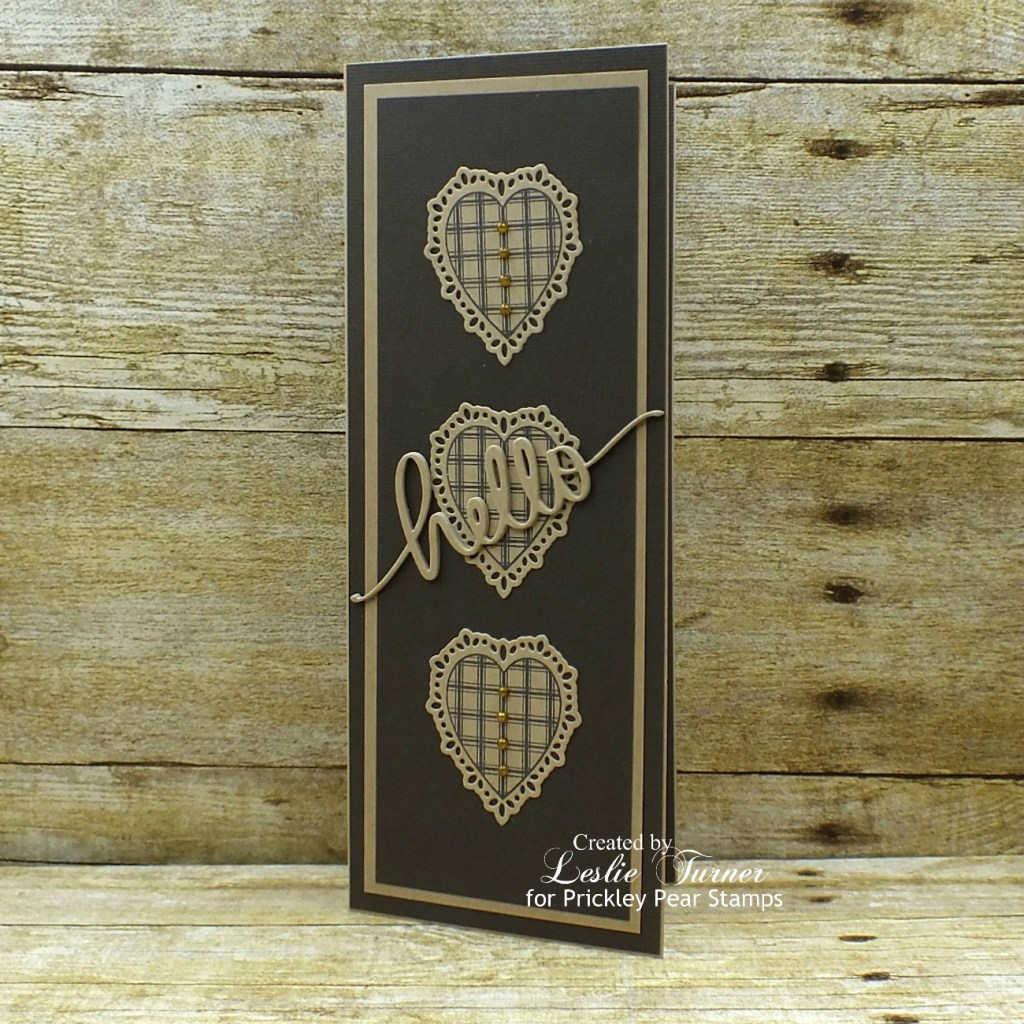
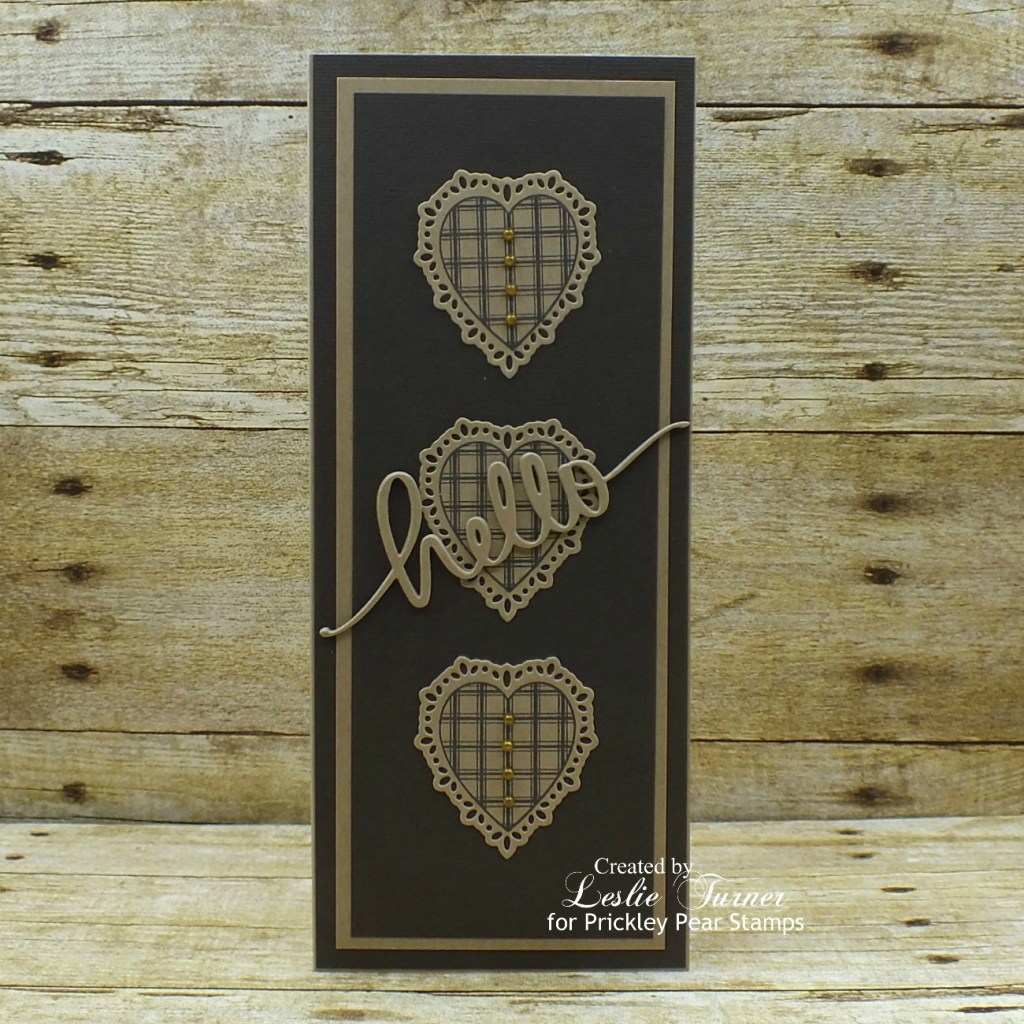
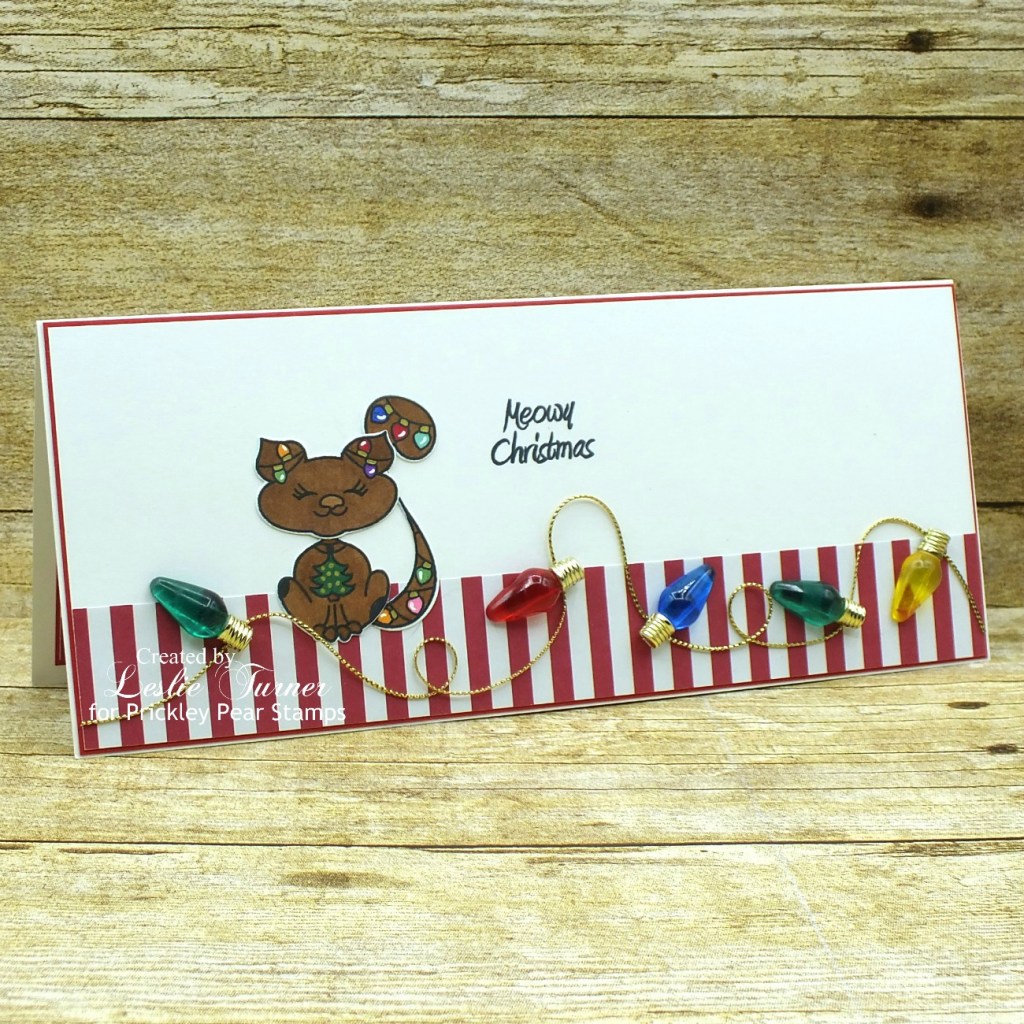
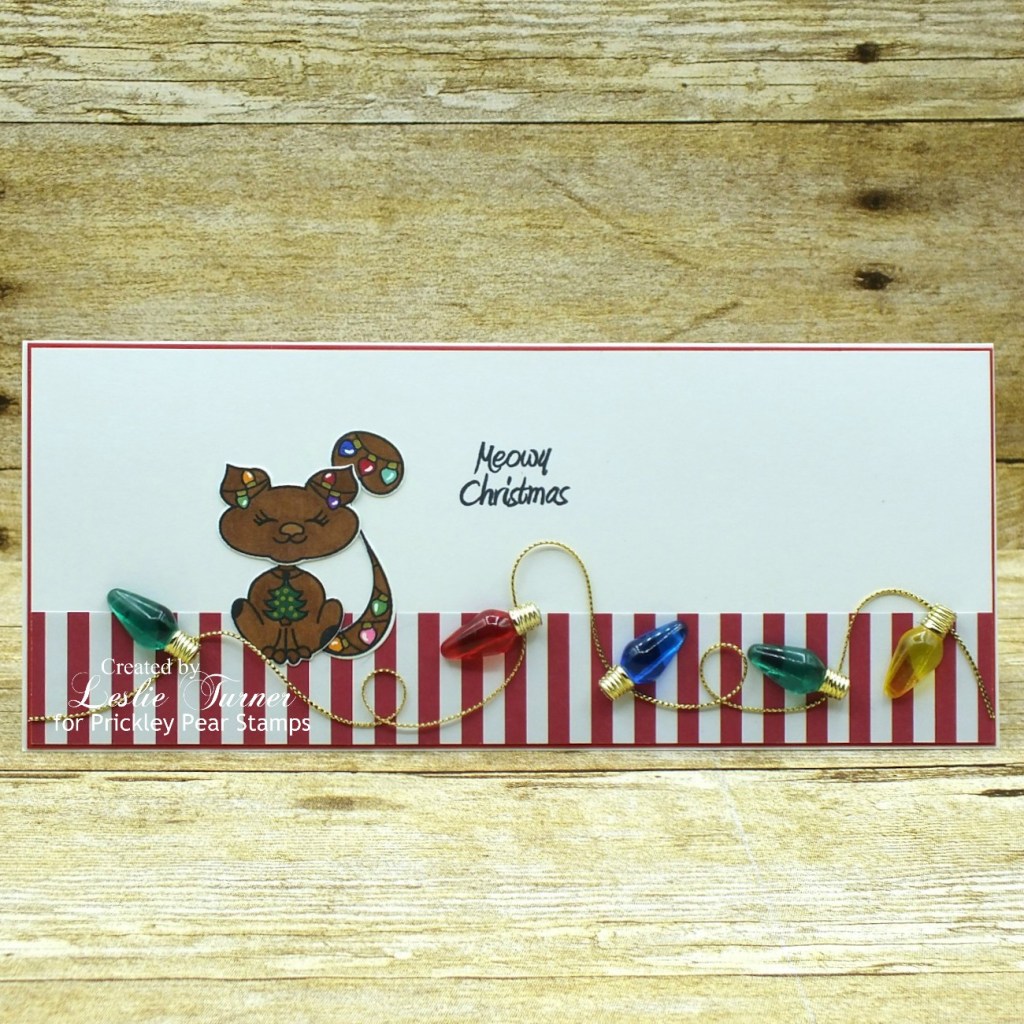
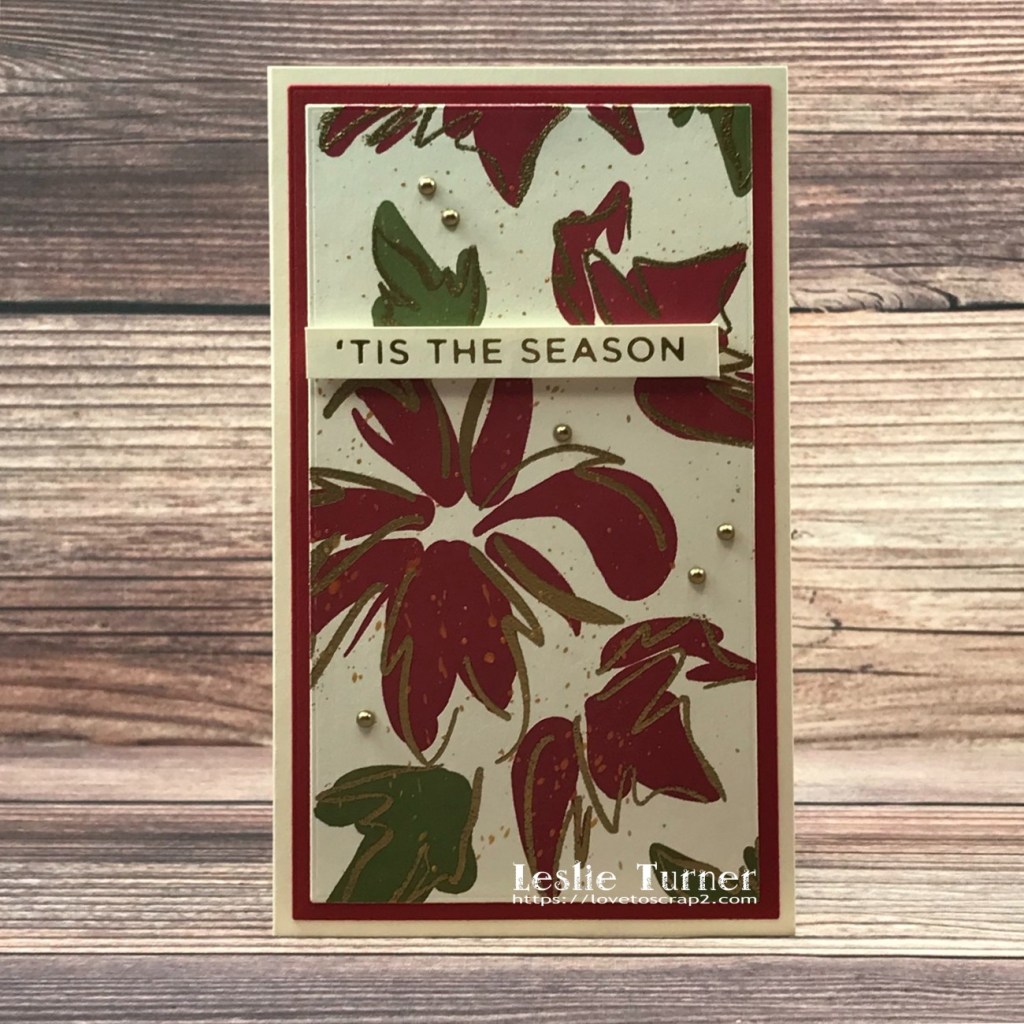
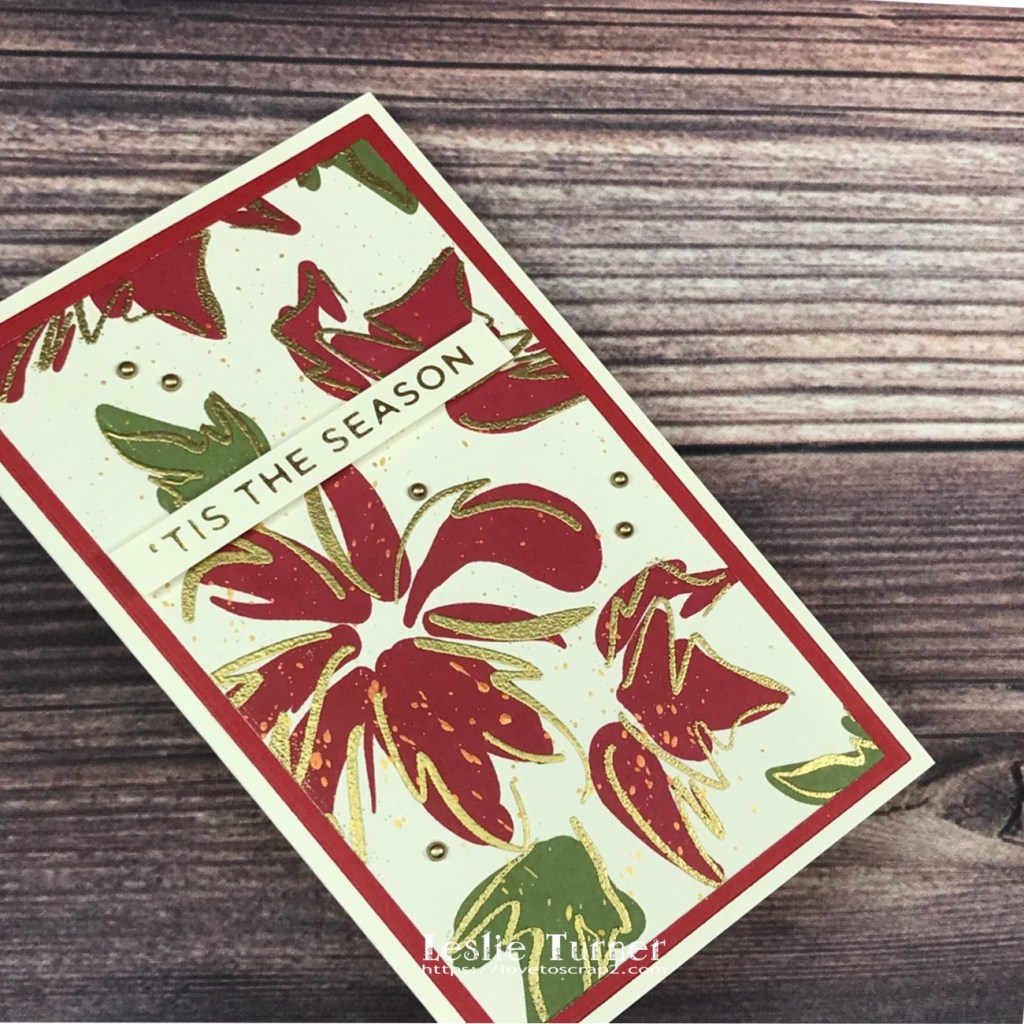
I cut a mini slimline card base and a layering panel from Neenah Classic Crest Baronial Ivory cardstock along with a layering panel from CutCardStock Basis Red cardstock using theWaffle Flower Mini Slimline Layers die set. I stamped the whimsical poinsettia background in red and green ink using the STAMPlorations Layered Poinsettias stamp set. I stamped the outlines in Versamark and heat embossed them in Ranger super fine detail gold embossing powder. I mixed gold acrylic paint with a tiny bit of water and splattered it with a fan brush over the background. I added a sentiment created with the Holiday Sentiments Series 2 Glimmer hot foil plate & die set and some gold pearls to finish the front.

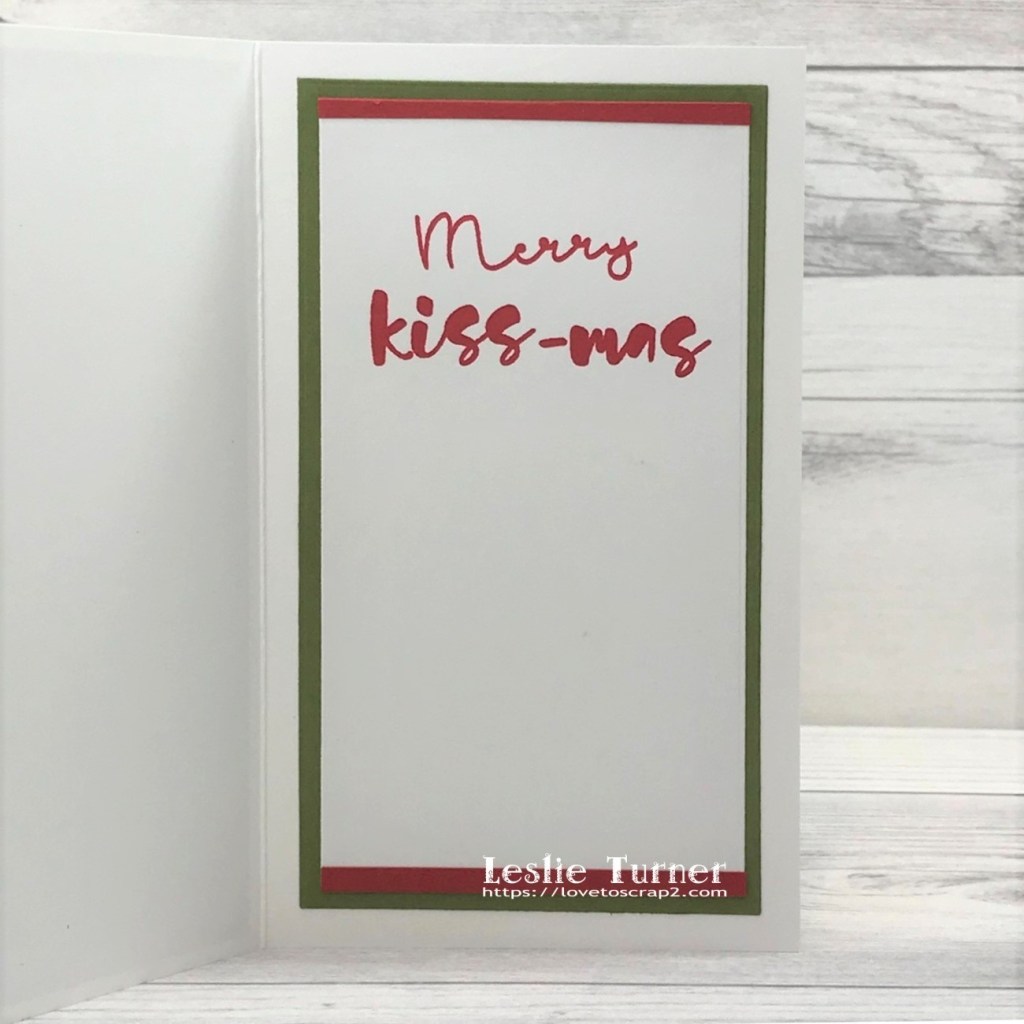
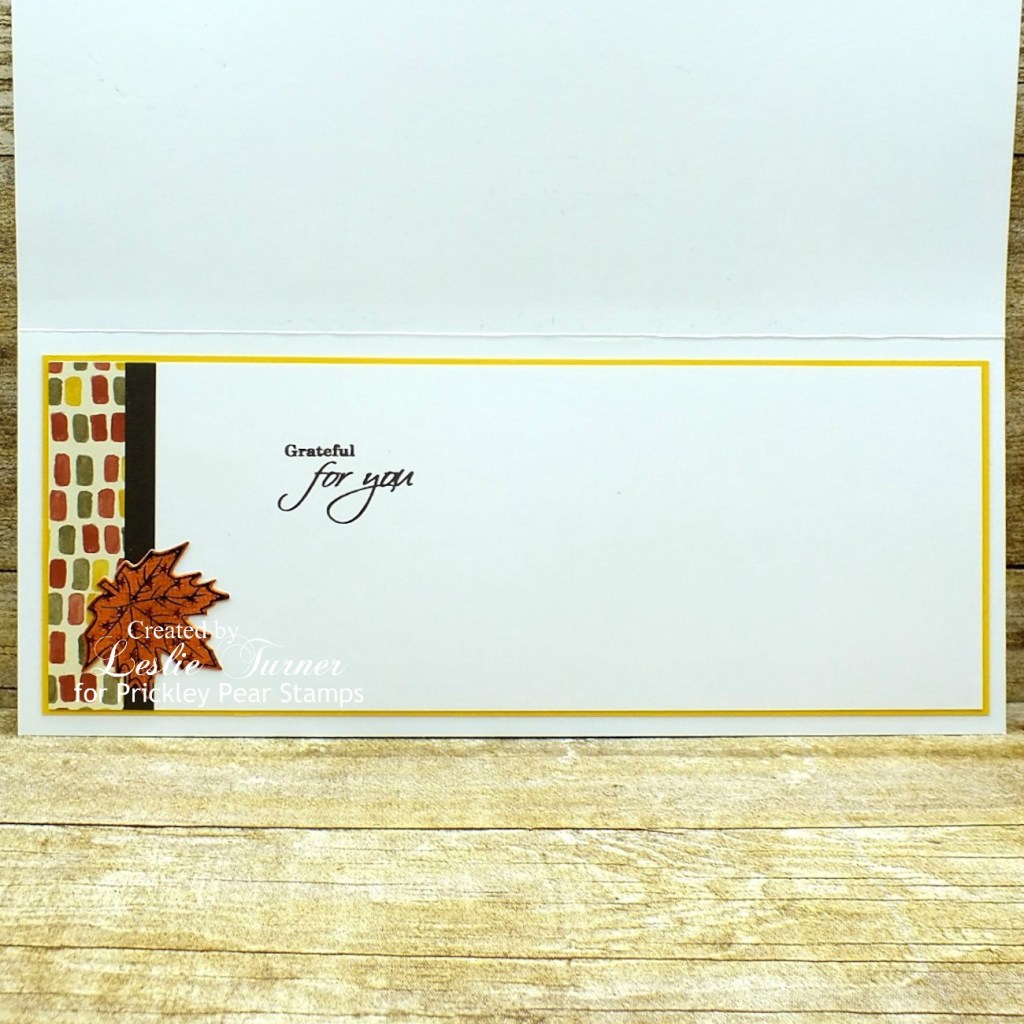
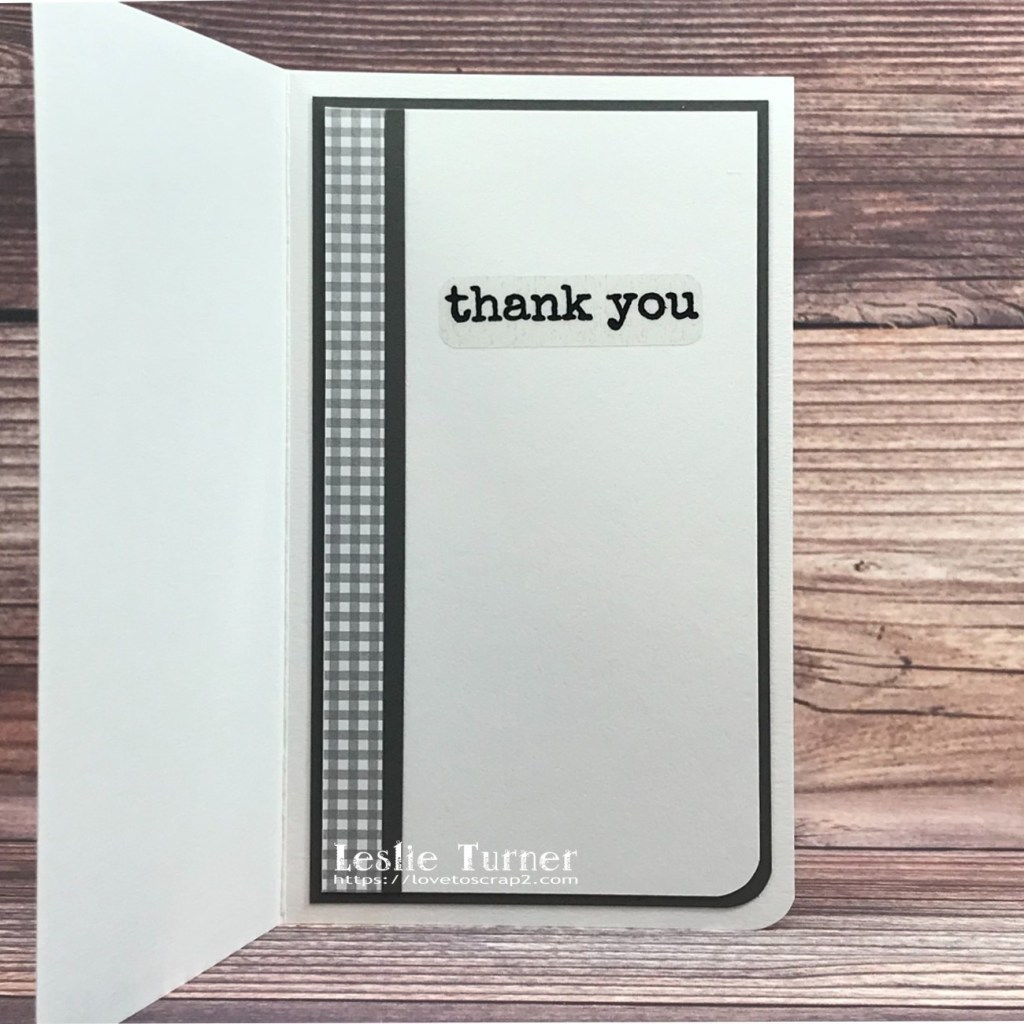
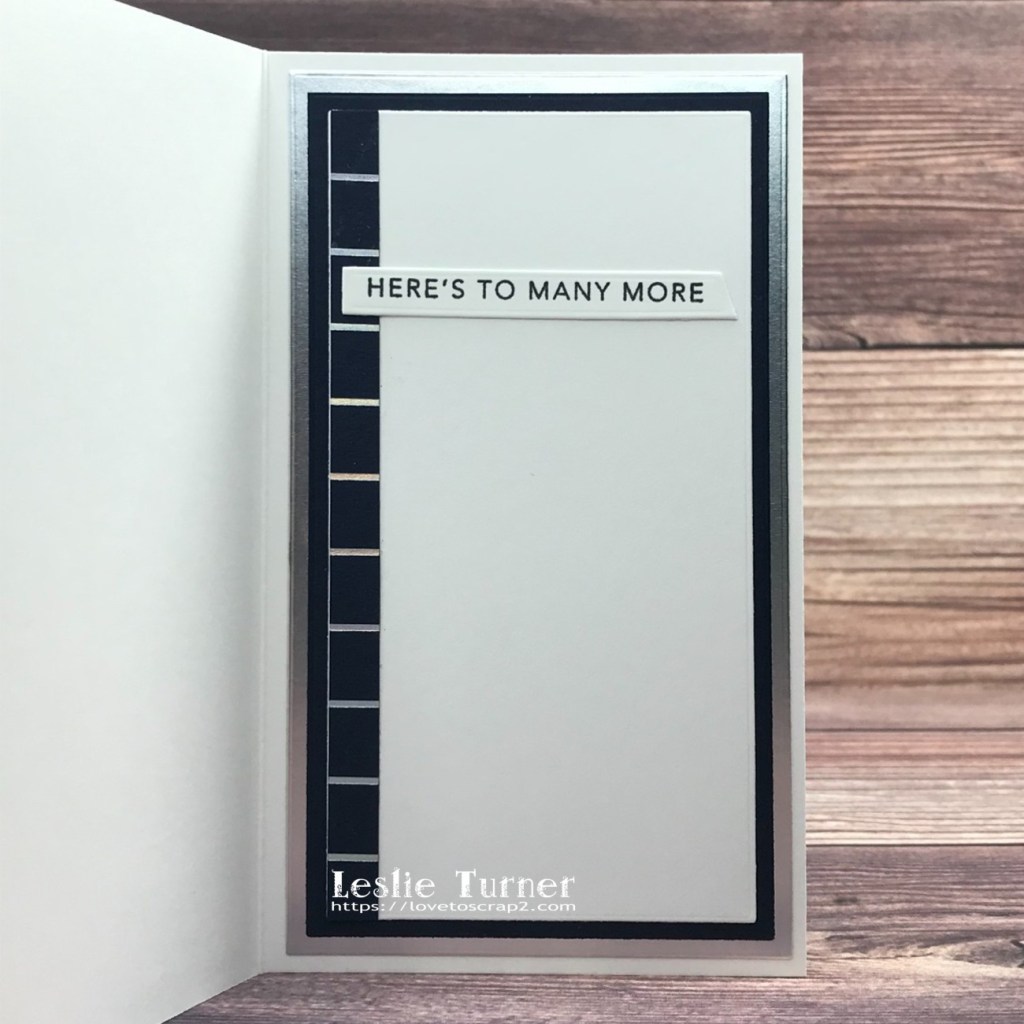
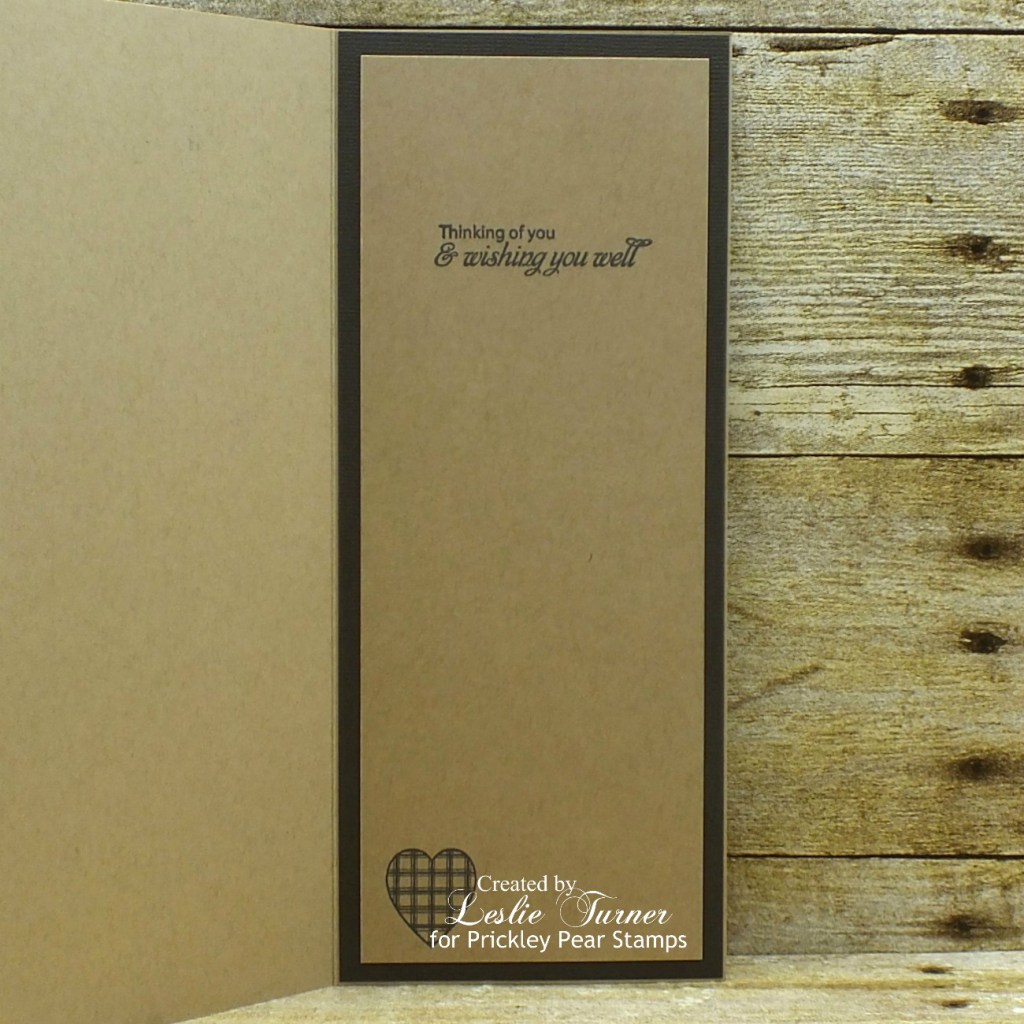
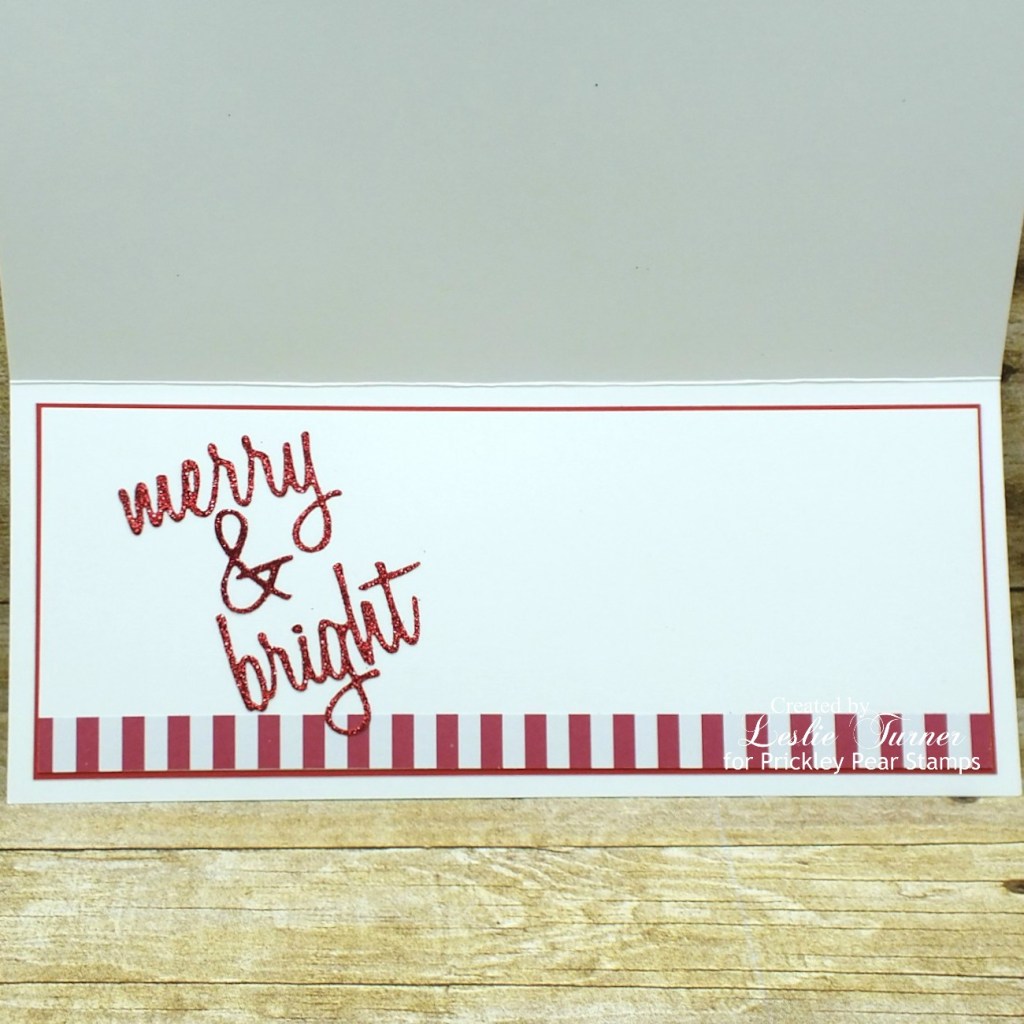
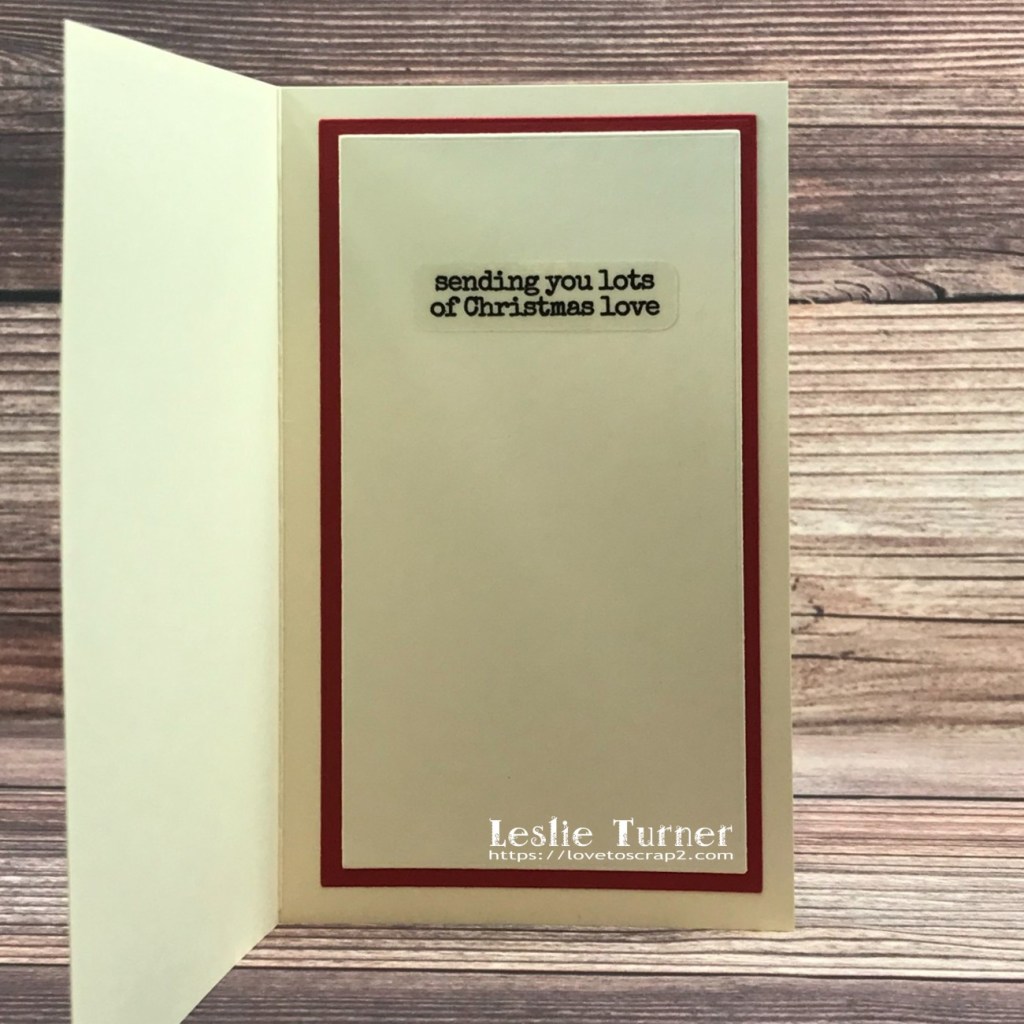
I cut the inside panel from Neenah Classic Crest Baronial Ivory cardstock along with a layering panel from CutCardStock Basis Red cardstock using the Waffle Flower Mini Slimline Layers dies and adhered them together, and then affixed a STAMPlorations Merry Everything Clear Sticker.

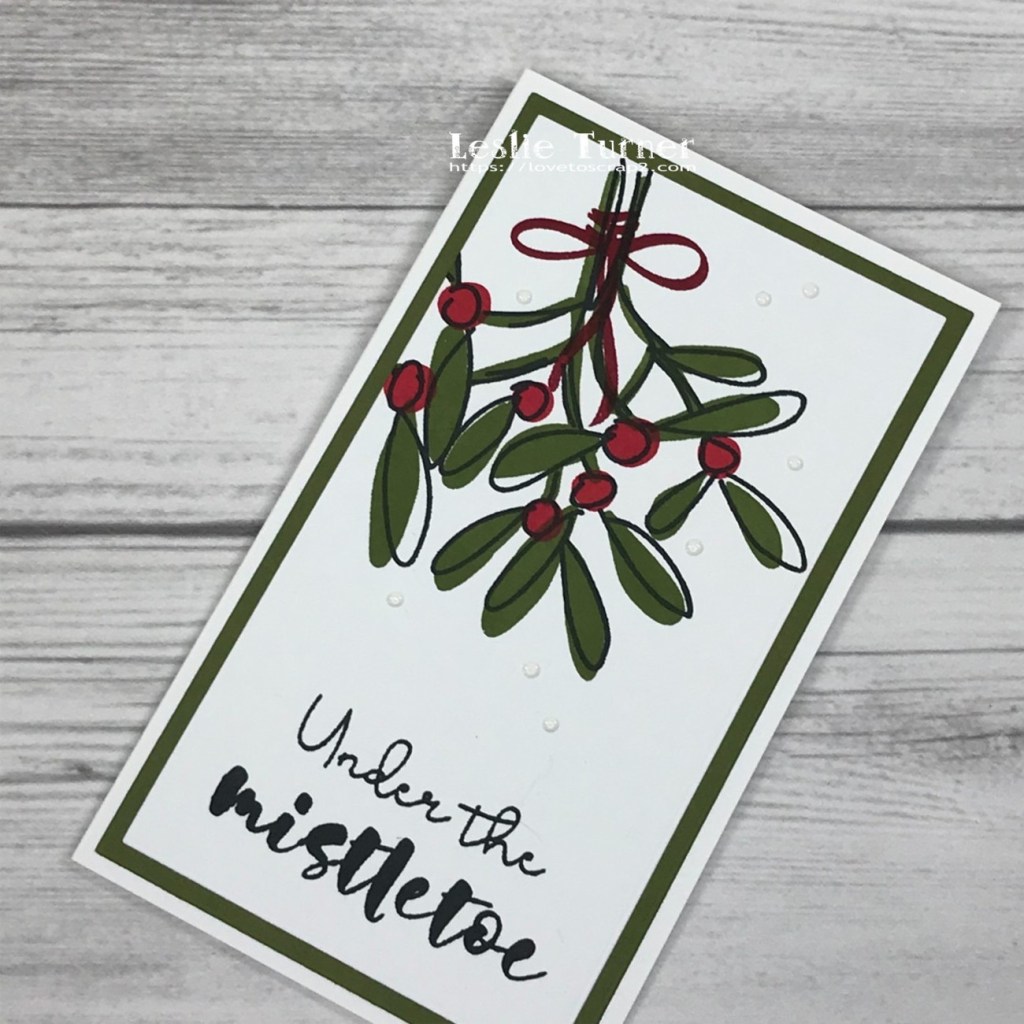
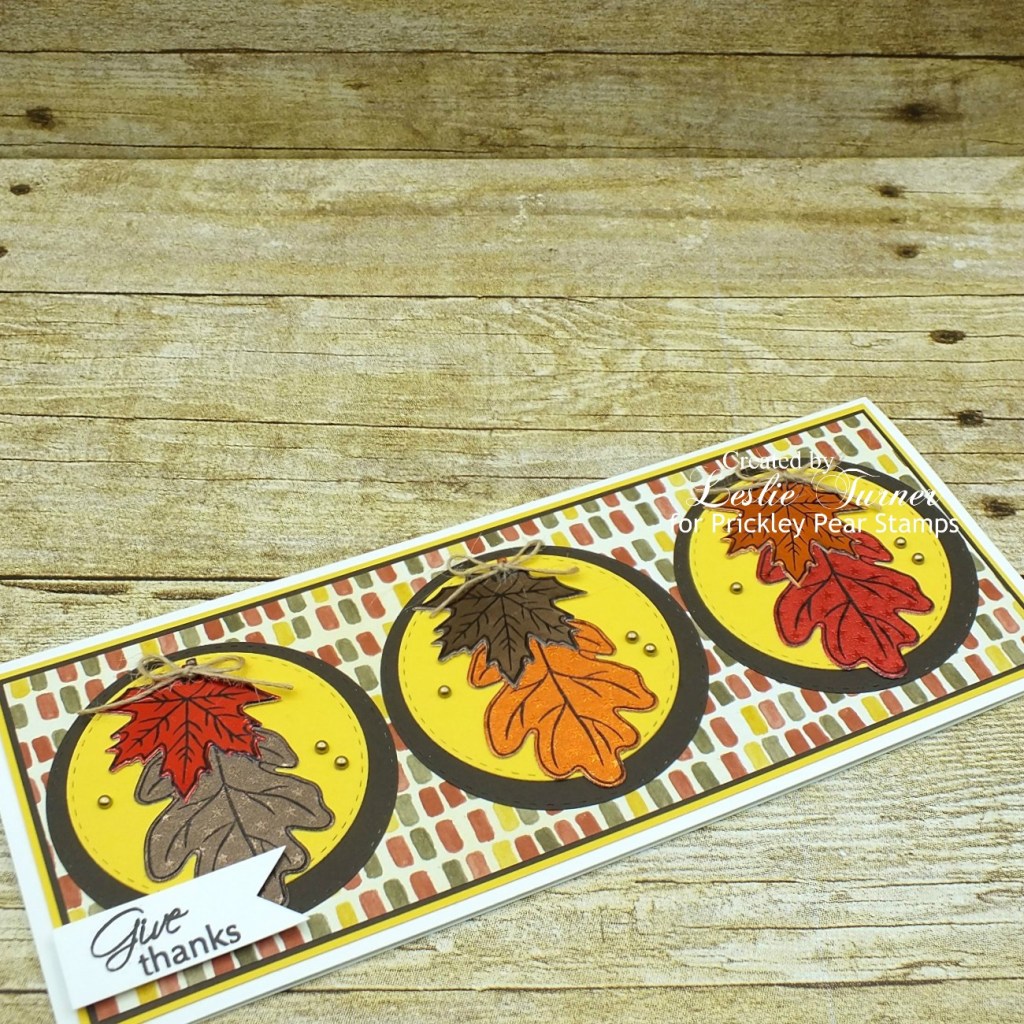
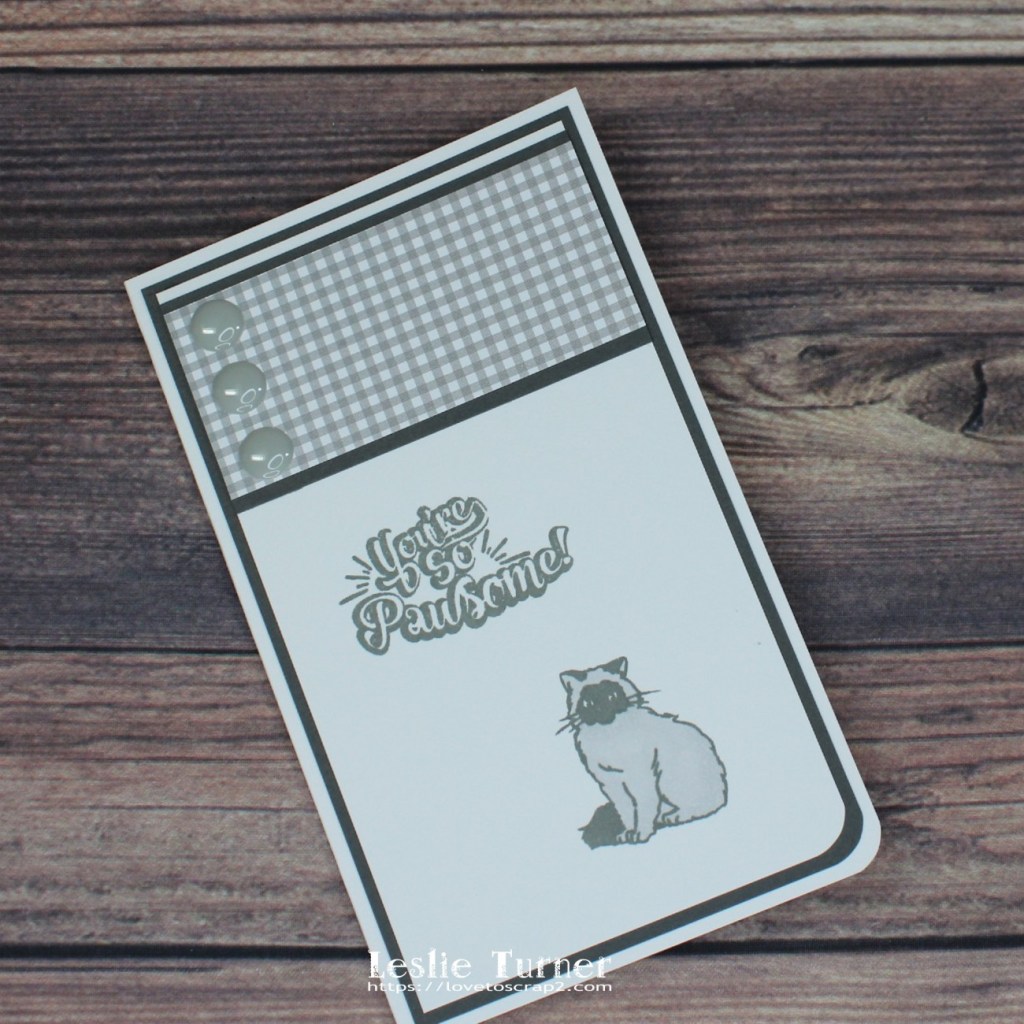
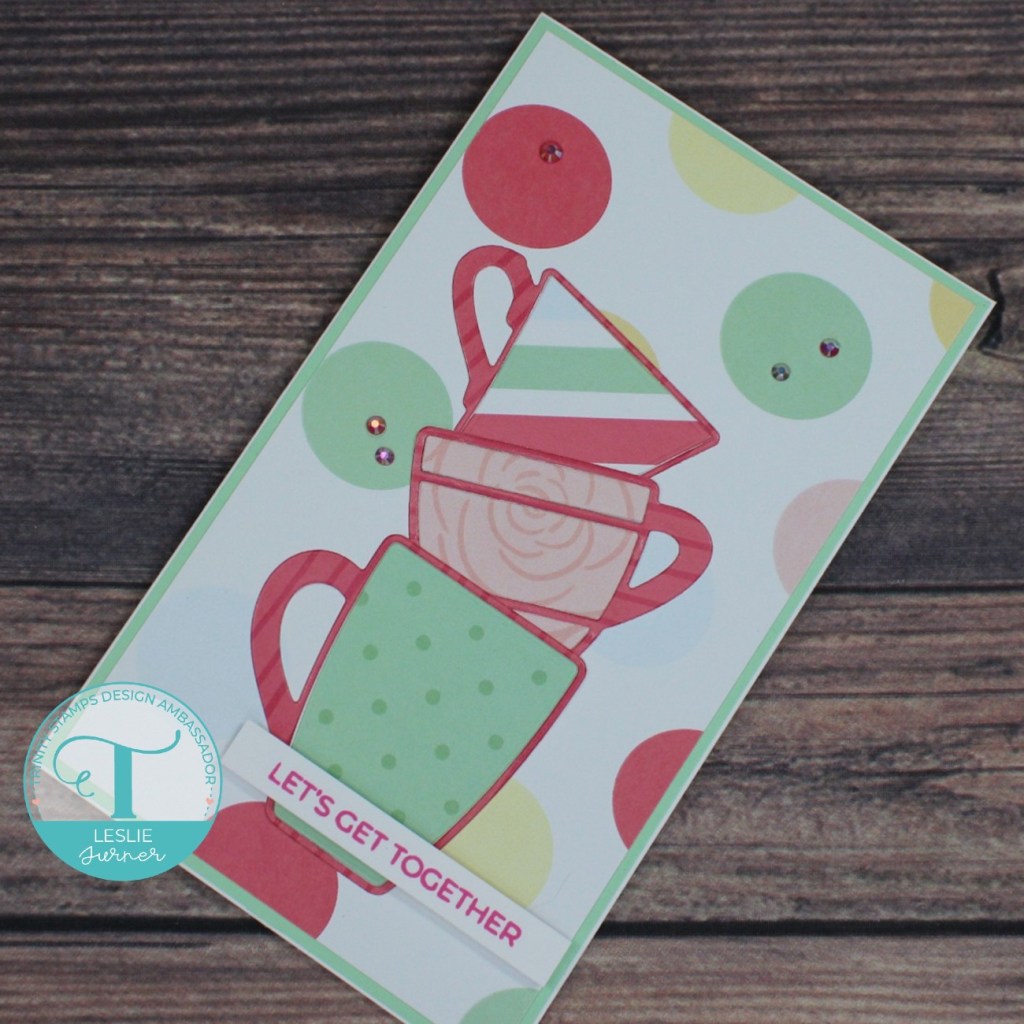
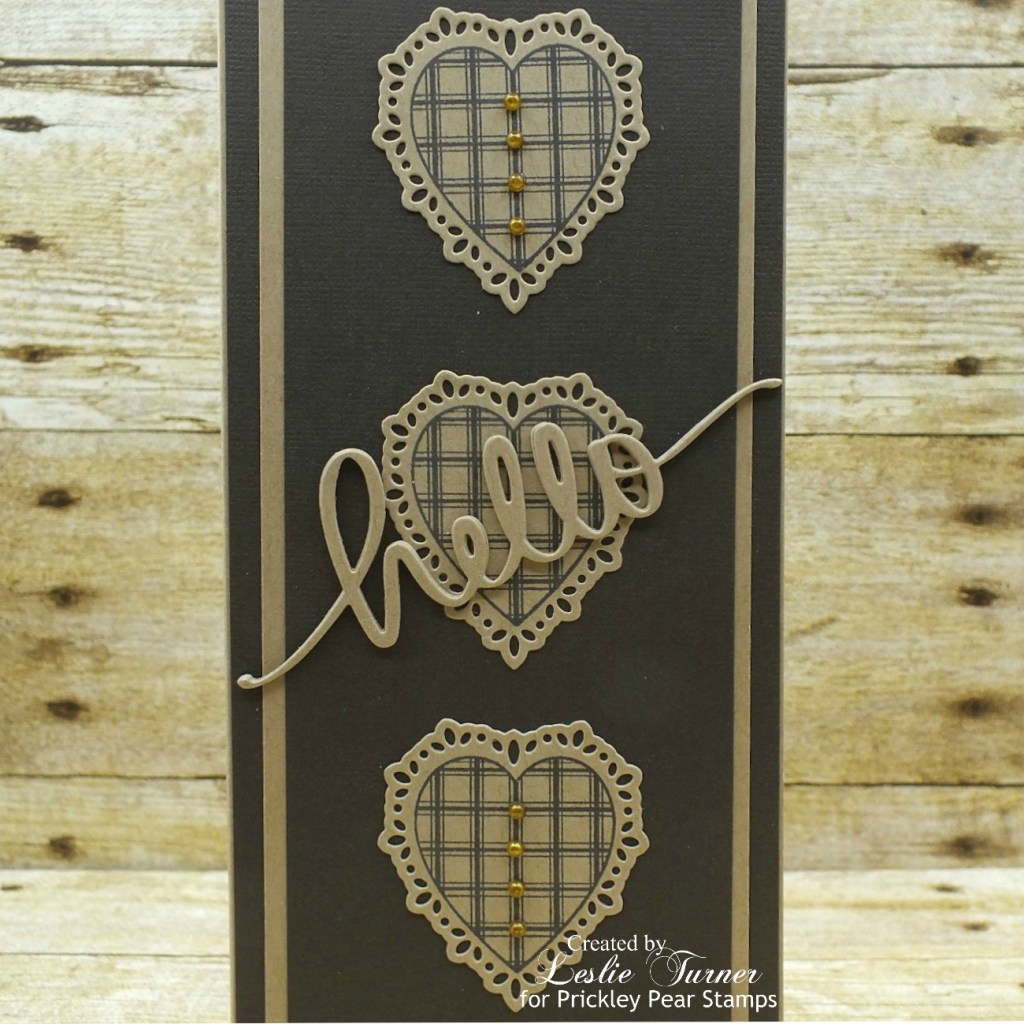
And one more look… so loving how this turned out! I haven’t seen a layered stamp set from STAMPlorations yet that I haven’t just loved!

Sharing in these additional challenges:
1. A Perfect Time To Craft: #11 – Anything Goes
2. ABC Christmas Challenge: W is for Whimsical
3. Christmas Crafts All Year ‘Round: Something that starts with U, V and/or W (whimsical)
4. Classic Design Challenge: #11 – Anything Goes
5. Creative Inspirations: Wonderful Winter/Feeling Festive
6. Dragonfly Dreams: November – Christmas/Winter
7. Little Red Wagon: #628 – No Patterned Paper
8. My Time To Craft: #470 – Texture
9. Simon Says Stamp Wednesday Challenge: Make Your Own Background
10. The Corrosive Challenge: #11 – November Anything Goes
11. The Outlawz Festive Fridays Challenge: Christmas theme

Products used:
Cardstock/Paper: Neenah Classic Crest Baronial Ivory cardstock, CutCardStock Basis Red cardstock
Stamps: STAMPlorations Layered Poinsettias stamp set
Ink: Catherine Pooler Rouge and Eucalyptus inks, Versamark
Dies/Punches: Waffle Flower Mini Slimline Layers die set
Accessories: Tonic Studios 12″ Guillotine Paper Trimmer, MISTI stamp tool, Big Shot, Bearly Art precision craft glue, Ranger super fine detail gold embossing powder, Liquitex gold acrylic paint, Spellbinders Holiday Sentiments Series 2 Glimmer hot foil plate & die set, Darice double-sided adhesive foam strips, Flourish with a Bling gold pearls, STAMPlorations Merry Everything Clear Stickers

I hope you’ve enjoyed this project and will come over and join in all the fun at The Outlawz Challenges! Lots of fun going on! Thanks so much for stopping by today – we’ll see you next time! ;)

Scrappy hugs,
lesliesig

Under the Mistletoe

12/1/21 Top Pick at ABC Christmas Challenge!

Hi friends! I hope you are having a wonderful Saturday! I started mine off taking photos in my studio, so you know I’m having a good one! Affiliate links are used in this post at no cost to you – I really appreciate your support! I’m one of those who makes extra cards all year long, in a variety of themes, and stash them away until I need them. Oftentimes, they’ll either be used for challenges that arise or for random design team projects if I happen to change my other mind (since I typically work way ahead on DT projects), lol. I’m sharing this card in The Outlawz Monday Greetings Challenge where our sponsor is Twinkle Lane Designs and the challenge is to Add Buttons and/or Bows. This sprig of mistletoe is ‘tied’ together with a bow, so win-win!

I cut a mini slimline card base from Neenah Classic Crest Solar White cardstock and layering panels using the Waffle Flower Mini Slimline Layers die set cut from Neenah Classic Crest Solar White cardstock and CutCardStock Pop-Tone Jellybean Green cardstock. Using black, green and two different red inks, I stamped the mistletoe, bow and sentiment (all from the STAMPlorations Layered Mistletoe stamp set) on the white cardstock layering panel. I adhered the panels together and then to the card base. I added several dots of white gloss Crystal Drops to finish the front panel.

I die cut the inside panel from Neenah Classic Crest Solar White cardstock and embellished it with narrow strips of CutCardStock Basis Red cardstock at the top and bottom of the panel, stamped the sentiment in red ink, and layered the panel on a die cut panel cut from CutCardStock Pop-Tone Jellybean Green cardstock.

And one more peek… so loving how this turned out! I’m in love with all of STAMPlorations’ layered stamp sets! The whimsical nature of the images is just so fun!

Sharing in the following challenges:
1. A Perfect Time To Craft: #11 – Anything Goes
2. ABC Christmas Challenge: W is for Whimsical
3. Aud Sentiments Challenge Blog: #288 – Anything Goes + A Sentiment
4. Classic Design Challenge: #11 – Anything Goes
5. Crafty Catz: #573 – Anything Goes with optional Add Some Metal
6. Creative Inspirations Challenge Blog: November – Wonderful Winter/Feeling Festive
7. Dragonfly Dreams: November – Christmas/Winter
8. Sweet Stampers Challenge Blog: #62 – Christmas
9. The Corrosive Challenge: #11 – November Anything Goes

Products used:
Cardstock/Paper: Neenah Classic Crest Solar White cardstock, CutCardStock Pop-Tone Jellybean Green cardstock, CutCardStock Basis Red cardstock
Stamps: STAMPlorations Layered Mistletoe stamp set
Ink: Catherine Pooler Midnight, Eucalyptus, Rockin’ Red and Cranberry Fizz inks
Dies/Punches:  Waffle Flower Mini Slimline Layers die set
Accessories: Tonic Studios 12″ Guillotine Paper Trimmer, MISTI stamp tool, Big Shot, Bearly Art precision craft glue, Nuvo White Gloss Crystal Drops

I hope you’ve enjoyed this project and will come over and join in all the fun at The Outlawz Challenges! Lots of fun going on! Thanks so much for stopping by today – we’ll see you next time! ;)

Scrappy hugs,
lesliesig

Give thanks

Hi friends! Happy Monday – I hope you had a great weekend! They sure do go by fast! Affiliate links are used in this post at no cost to you. I really appreciate your support! Our new challenge is live this morning over at Love To Craft Challenge Blog and I’m thrilled to share my DT inspiration project for LTCCB #64 – November Anything Goes! Fall is in full swing so here’s a pretty slimline chock full of Fall colors using Prickley Pear Stamps Oak & Maple Leaf stamp set and coordinating Prickley Pear Stamps Oak & Maple Leaf die set! OMGosh, they are gorgeous! Prickley Pear Stamps also carries Rinea Foiled Paper Autumn Variety Pack that I used for these leaves.

I cut a top-folding slimline card base measuring 9″ x 3-3/4″ from Neenah Classic Crest 110# Solar White cardstock. This is my go-to size because it fits perfectly in a #10 business size envelope which the slimline was designed to fit in, and still allows for some dimension. I cut layers from Stampin’ Up patterned paper, Darice textured brown cardstock and CutCardStock Camomile cardstock for the front, layered them together and adhered the panel to the front of the card base. I die cut three stitched circles from CutCardStock Camomile cardstock and three slightly larger stitched circles from the textured brown cardstock, layered them together in three sets, offsetting the yellow circles toward the top, and adhered them to the front panel. I adhered small foiled paper squares to white cardstock and die cut a variety of oak and maple leaves in different colors using the Prickley Pear Stamps Oak & Maple Leaf die set, and layered two on each set of circles. I added twine bows and flat-back pearls to each set of circles. I stamped a sentiment in brown ink on white cardstock, trimmed it and flagged one end, and adhered it to the front with foam pads.

I cut a panel for the inside from Neenah Classic Crest 80# Solar White cardstock and embellished it with leftover strips of patterned paper and the textured brown cardstock used on the front, stamped the sentiment in brown ink, and layered the panel on CutCardStock Camomile cardstock. I had a leftover die cut foiled maple leaf which I adhered to the bottom left corner of the panel.

And one more look… the colors in this angled shot show up much better than in any of the other photos I took. Very happy with how this turned out!

Sharing in the following challenges:
1. A Bit More Time To Craft Extra Challenge: November Anything Goes
2. A Perfect Time To Craft Challenge: #11 November – Anything Goes
3. Classic Design Challenge Blog: #11 November – Anything Goes
4. Jan’s Digi Stamps Challenges: November – Anything Goes
5. The Crafting Challenge: November – Stitching (Real or Faux) (stitched circle die cuts)
6. Your Scrapbook Place: November – Anything Goes

Products used:
Cardstock/Paper: Neenah Classic Crest 110# and 80# Solar White cardstock, CutCardStock Camomile cardstock, Darice textured brown cardstock, Rinea Foiled Paper Autumn Variety Pack, Stampin’ Up Color Me Autumn DSP
Stamps: Prickley Pear Stamps Oak & Maple Leaf stamp set
Ink: StazOn Jet Black ink, Ranger ground espresso archival ink
Dies/Punches: Prickley Pear Stamps Oak & Maple Leaf die set, Memory Box Stitched Circle Layers dies, EK Success 3/4″ square punch (to flag one end of the sentiment)
Accessories: Tonic Studios 12″ Guillotine Paper Trimmer, Tombow Mono permanent adhesive, Bearly Art precision craft glue, Gemini Junior, MISTI stamp tool, Studios Blackbird twine, Flourish With A Bling gold flat-back pearls

I hope you’ve enjoyed this project and will link up an ‘anything goes’ project with us this month! We’d love to see what you’re working on! Thanks so much for stopping by today – we’ll see you next time! ;)

Scrappy hugs,
lesliesig

Friends we will always be

Hi friends! Happy Friday! I hope you’ve had a fabulous week and you have something fun planned this weekend! Today is Day 5 of the 2021 Cat Lovers Hop and I have one last project to share! This has been a totally FUN week and I’m so glad I participated again this year! Affiliate links are used in this post at no cost to you – I really appreciate your support! The Hop is going on until tomorrow, the 30th, but there will be some extra days left open for participants to finish posting their projects and to finish commenting. Be sure to come over and join us! A huge shout-out to Janis for organizing another successful Cat Lovers Hop – I can’t wait until next year’s, lol! And to all of those who participated this year, good luck in all the prize draws!

I created an adorable cat and dog friendship mini slimline card. I am loving clean and simple more and more every day. I used to be so intimidated by CAS and used tons of layers, but no more! And I’m not sure what has overcome me but I just can’t get enough of the mini slims! They are so stinkin’ cute and so fun to create! I’m loving the 3-1/2″ x 6″ size because they are legal to mail at the post office whereas the 3″ x 6″ size is not. And I used my new Waffle Flower Mini Slimline Layers die set to cut the layers for this one! Makes these mini slimlines so easy to create! ;)

I cut a mini slimline card base from CutCardStock Basis White cardstock along with a layering panel from CutCardStock Basis Light Brown cardstock using the Waffle Flower Mini Slimline Layers die set and a strip of patterned paper from the Crafter’s Companion Just For Men Urban Collection for the bottom of the panel. I added narrow light brown and white strips to the top of the patterned paper panel for a little interest. I stamped a sentiment from the Prickley Pear Stamps Blobby Flowers stamp set in the lower right corner in brown ink. Using the Impression Obsession Mini Critters die set, I die cut the cat and dog from white cardstock and colored them with alcohol markers, and added them to the card front. The finishing touch was adding several brown enamel dots.

I cut the inside panel from CutCardStock Basis White cardstock along with a slightly larger panel from CutCardStock Basis Light Brown cardstock using the Waffle Flower Mini Slimline Layers die set. I embellished the white panel with a strip of patterned paper from the Crafter’s Companion Just For Men Urban Collection that I used on the front and a narrow strip of the light brown cardstock, stamped the sentiment from the Prickley Pear Stamps Blobby Flowers 2 stamp set in brown ink, and layered the panels together.

And one more peek… this card turned out so cute! I love the cat and dog friendship theme, lol! They should be friends! ;)

Products used:
Cardstock/Paper: CutCardStock Basis White cardstock, CutCardStock Basis Light Brown cardstock, Crafter’s Companion Just For Men Urban Collection 6×6 paper pad
Stamps: Prickley Pear Stamps Blobby Flowers stamp set, Prickley Pear Stamps Blobby Flowers 2 stamp set
Ink: Arteza alcohol markers- BK00, BR74/77; Catherine Pooler Icing On The Cake ink
Dies/Punches: Waffle Flower Mini Slimline Layers die set, Impression Obsession Little Critters die set
Accessories: Tonic Studios 12″ Guillotine Paper Trimmer, Big Shot, MISTI stamp tool, Eyelet Outlet Brown Enamel Dots

I hope you’ve enjoyed today’s project and you’ll consider joining us! Pop over to the 2021 Cat Lovers Hop to get all the details! Thanks so much for stopping by today – we’ll see you next time! ;)

Scrappy hugs,
lesliesig

You’re So Pawsome!

Hi friends! It’s Hump Day and it’s Day 3 of the 2021 Cat Lovers Hop and I’ve popped in this morning with fun cat-themed mini slim thank you card! Affiliate links are used in this post at no cost to you – I really appreciate your support! The Hop is going on until the 30th, so if you’re a fellow cat lover, come join us! There’s a lot of fun and games to join in every day, and Janis has lined up some pretty amazing prizes to give away at the end!

I’ve been on a mini slimline kick lately so I created a CAS thank you card in a gray and white color combo featuring a pretty Siamese-looking kitty. I actually got a set of mini slimline layers dies a couple weeks ago but didn’t use them for this card because I rounded the bottom right corner and I just didn’t want to do that with die layers. The 3-1/2″ x 6″ mini slim size is legal to mail at the post office whereas the 3″ x 6″ mini slim size is not, so I’ve been making my card bases the slightly larger width and the layer dies are not as readily found as the 3″ x 6″ size which makes no sense to me. Whoever started the 3″ x 6″ size mini slim trend didn’t do their homework, lol!

I cut a 3-1/2″ x 6″ side-folding mini slimline card base and layering panel from CutCardStock Basis White cardstock along with a layering panel from CutCardStock Basis Gray cardstock and strip from Hot Off The Press light gray gingham paper, rounding the bottom right corner of the card base and layering panels. I stamped the cat image and sentiment in light gray ink and colored the cat with a lighter gray alcohol marker. I adhered a layered strip across the top of the white panel and added gray enamel dots.

I cut the inside panel from CutCardStock Basis White cardstock and embellished it with strips cut from CutCardStock Basis Gray cardstock and light gray gingham paper, added a CRAFTplorations Just Thank You Clear Sticker sentiment and layered the panel on the gray cardstock.

And one more peek… such an adorable kitty thank you! Love the clean and simple!

Products used:
Cardstock/Paper: CutCardStock Basis White cardstock, CutCardStock Basis Gray cardstock, Hot Off The Press Gingham #2 double-sided 6×6 papers
Stamps: STAMPlorations Purrfectly Pawsome stamp set
Ink: Catherine Pooler Twilight ink; Arteza alcohol marker- CG08
Dies/Punches: Kadomaru Pro Corner Rounder
Accessories: Tonic Studios 12″ Guillotine Paper Trimmer, MISTI stamp tool, Bearly Art precision craft glue, Eyelet Outlet Gray Enamel Dots, CRAFTplorations Just Thank You Clear Stickers

I hope you’ve enjoyed today’s project and you’ll consider joining us! Pop over to the 2021 Cat Lovers Hop to get all the details! Thanks so much for stopping by today – we’ll see you next time! ;)

Scrappy hugs,
lesliesig

Let’s Get Together

Hi everybody! I hope you’re having a good weekend and maybe getting a little crafting in?! We are having some beautiful weather considering we’ve already had our first snow, but it’s pretty chilly in the northern part of the state. Affiliate links are used in this post at no cost to you – I really appreciate your support! I have a fun Trinity Stamps Ambassador inspiration project to share this morning featuring the free cup dies that are tucked into Trinity Stamps orders. They are so adorable and I thought stacking them on a mini slimline would be perfect! I’ve had this card made for a couple weeks and I kind of wish I had waited until this past week to make it after receiving my mini slimline layers die set! Oh well… ;)

I cut the 3-1/2″ x 6″ mini slimline card base from Neenah Classic Crest 110# Solar White cardstock along with layering panels cut from CutCardStock Pop-tone Spearmint cardstock and patterned paper from the Summer Blooms Floral Papercrafting Kit which I adhered together and then adhered to the card base. I die cut the three cups from other patterned papers in the kit and adhered them to the card front in stacked fashion. I stamped the sentiment from the A Sentiment For (Almost) Everything stamp set, trimmed it and adhered it to the card front with an adhesive double-sided foam strip. The finishing touch was adding gemstones from the Trinity Stamps Morganite Muse Embellishment Mix using the Trinity Stamps Pick-Up Stick (which is a lifesaver!).

I cut the inside panel from Neenah Classic Crest 80# Solar White cardstock along with a layering panel from CutCardStock Pop-tone Spearmint cardstock. I embellished the white panel with pattern paper and cardstock strips, stamped a sentiment from the same stamp set in pink ink, and adhered the panel to the green layer and then to the card base.

And one more look… I’m digging mini slimline cards these days and really love how this turned out with the stacked cups!

Trinity Stamps products used:
Patterned papers from the Summer Blooms Floral Papercrafting Kit
A Sentiment For (Almost) Everything stamp set
Trinity Stamps cups dies (free with orders)
Trinity Stamps Morganite Muse Embellishment Mix,
Trinity Stamps Pick-Up Stick

Other products used:
Cardstock/Paper: Neenah Classic Crest 110# and 80# Solar White cardstock, CutCardStock Pop-tone Spearmint cardstock
Ink: Memento Rose Bud ink
Accessories: Tonic Studios 12″ Guillotine Paper Trimmer, Bearly Art precision craft glue, MISTI stamp tool, Big Shot, Darice adhesive double-sided foam strips

I hope you’ve enjoyed today’s project and you’re inspired to get those craft supplies out to play! Be sure to check out all the amazing stamps, dies and other goodies at Trinity Stamps! And head on over to the Trinity Stamps Facebook Page for loads of inspiration! And while you’re at it, join the Trinity Stamps Facebook community group to connect with other Trinity Stamps fans! Thanks so much for stopping by today – we’ll see you next time!

Scrappy hugs,
lesliesig

Wishing You the Happiest of Birthdays

Happy Saturday, friends! I’m chomping at the bit to post a couple cards I created with my slightly early birthday present… a Glimmer Hot Foil Machine! I received it toward the end of September and all I’ve had a chance to create is a pile of sentiments – and I haven’t even used any of them on my projects, lol! What’s wrong with that picture?! Affiliate links are used in this post at no cost to you. I really appreciate your support! This machine is so much fun and I know I’ll be using it a lot. I read a bunch of reviews right after I ordered it and was kind of nervous about how seemingly difficult other crafters found it to be. I’m proud to say that I haven’t had any trouble whatsoever – I followed the instructions in the user manual and everything has turned out very nicely. I have noticed, though, that I have to be careful handling the foiled panels or the foil can get knicked up. This also happens with laminator-foiled projects as well.

I cut a 3-1/2″ x 6″ mini slimline card base from Neenah Classic Crest 110# Solar White cardstock. Using the Glimmer Hot Foil Machine and Silver Holographic Foil, I created a background with the Skinny Stripe Background Glimmer Plate on CutCardStock Basis Navy cardstock, as well as the focal element using the Happiest Birthday Glimmer Plate on the navy cardstock for a tone-on-tone look. Using the Waffle Flower Mini Slimline Layers die set, I die cut layers from silver metallic foil cardstock and the striped foil background, and adhered them to the card base. I adhered the foiled focal element and several silver glitter enamel dots to complete the front. Great masculine card!

Using the Waffle Flower Mini Slimline Layers die set, I die cut inside layers from silver metallic foil cardstock, CutCardStock Basis Navy cardstock and Neenah Classic Crest 80# Solar White cardstock. I embellished the white panel with a leftover strip cut from the striped foil background on the front and adhered the layers together and then to the card base. I added a stamped and die cut sentiment strip to complete the card.

And one more peek… I’m really loving the foil machine and plates, and see lots more foiled projects in my future!

Products used:
Cardstock/Paper: Neenah Classic Crest 110# and 80# Solar White cardstock, CutCardStock Basis Navy cardstock, Hygloss Silver Metallic Foil cardstock
Stamps: Taylored Expressions Simple Strips – Birthday stamp set
Ink: Memento Tuxedo Black ink
Dies/Punches: Waffle Flower Mini Slimline Layers die set, Taylored Expressions Simple Strips – Asymmetrical die set
Accessories: Tonic Studios 12″ Guillotine Paper Trimmer; Spellbinders Glimmer Hot Foil Machine, Glimmer Holographic Silver Foil, Happiest Birthday Glimmer Plate, Skinny Stripe Background Glimmer Plate; Big Shot, MISTI stamp tool, Bearly Art precision craft glue, Eyelet Outlet Silver Glitter Enamel Dots

I hope you’ve enjoyed seeing this foiled project! Thanks so much for stopping by today – we’ll see you next time! ;)

Scrappy hugs,
lesliesig

Get your train rollin’

Hi everyone! A very Happy Saturday to you – I hope you’ve had a great week! October is probably my favorite month of the entire year and I can’t believe it’s here already! Yay for my birthday and Yay for Fall! ;) Affiliate links are used in this post at no cost to you. I really appreciate your support! I’m stoked to be back on the Eyelet Outlet blog today with another awesome DT inspiration project! I created a mini slimline for a super sweet little boy who turned one a few days ago! This was such a fun card and features our Train Mix Brads and Sun & Cloud Brads. I semi-CASEd the sentiment on one of my own designs from several years ago where I used a tractor.

I cut a mini slimline landscape top-folding card base from Neenah Classic Crest Solar White 110# cardstock along with a layering panel from CutCardStock Basis Blue cardstock. I printed the front and inside sentiments on a piece of Neenah Classic Crest Solar White 80# cardstock and trimmed them down to be slightly smaller than the blue panels. Let me interrupt for a PSA: The typical mini slimline is 3″ x 6″, however, I decided going forward that I’ll make mini slimlines 3-1/2″ x 6″ which will be the legal size for mailing. ;) I hand-drew the train track across the white panel with a black alcohol marker, added Train Mix Brads and Sun & Cloud Brads, and adhered the panels to the card base. The final touch was drawing a little ‘smoke’ coming from the locomotive with a light gray alcohol marker.

As mentioned above, I printed the front and inside sentiments on Neenah Classic Crest 80# Solar White cardstock and trimmed the panels down slightly smaller than the blue layering panels. I embellished the white sentiment panel with strips cut from CutCardStock Basis Green cardstock, CutCardStock Pop-Tone Wild Cherry cardstock and CutCardStock Pop-Tone Lemon Drop cardstock, added an additional Train Mix Brad, and layered the panel on CutCardStock Basis Blue cardstock.

And one more look… such a fun card! I absolutely love these little train brads!

Eyelet Outlet products used:
Train Mix Brads
Sun & Cloud Brads

Other products used:
Cardstock/Paper: Neenah Classic Crest 110# and 80# Solar White cardstock, CutCardStock Basis Blue cardstock, CutCardStock Basis Green cardstock, CutCardStock Pop-Tone Wild Cherry cardstock, CutCardStock Pop-Tone Lemon Drop cardstock
Ink: Arteza alcohol markers- BK00, CG08
Accessories: Tonic Studios 12″ Guillotine Paper Trimmer, Bearly Art precision craft glue, Ranger Distress Collage Medium

I hope you’ve enjoyed today’s project! Be sure to check out all the fun goodies at Eyelet Outlet! I can already see you drooling, lol! Be sure to ‘like’ and ‘follow’ Eyelet Outlet Facebook Page to keep up with news and sales, and while you’re at it, join the Eyelet Outlet Fans Facebook group for lots of creative inspiration! Thanks so much for stopping by today – we’ll see you next time! ;)

Scrappy hugs,
lesliesig

Meowy Christmas slimline

Howdy, everybody! I’m having the hardest time wrapping my head around the fact that we’re three-quarters of the way through 2021 already! Affiliate links are used in this post at no cost to you. I really appreciate your support! Our newest challenge is live over at Merry Little Christmas Challenge Blog and I’m stoked to share my DT inspiration project for MLCCB #38 – September Anything Christmas Goes! I used the Prickley Pear Stamps Build A Cat 2 clear stamp set and coordinating Build A Cat die set to create an adorable CAS Christmas card featuring a festive kitty and several flat-back Christmas bulbs on gold cord.

I’ve had these bulbs in my Christmas craft stash for years and when I came across them while digging, I decided I needed to use them! NBUS (never before used schtuff) for sure, lol! I created a 9″ x 3-3/4″ slimline card base along with a white panel for the front from Neenah Classic Crest 110# Solar White cardstock which I embellished with a strip of Canvas Corp red and white striped paper and layered on American Crafts Crimson cardstock. I stamped the sentiment on the panel and the cat on a scrap of Neenah Classic Crest 80# Solar White cardstock. I colored the cat and tail with alcohol markers, cut them with the coordinating dies and adhered them together. I adhered the cat to the panel, then the bulbs and gold cord to complete the card front.

I cut the inside panel from Neenah Classic Crest 80# Solar White cardstock, embellished it with a strip of the red and white paper and a red glitter die cut sentiment, and layered the panel on red cardstock.

And one more peek… this was such a fun card to create! So happy I ‘found’ the Christmas bulbs in the Christmas craft stash!

Products used:
Cardstock/Paper: Neenah Classic Crest 110# and 80# Solar White cardstock, American Crafts Crimson cardstock, The Paper Studio Four Seasons and Everything In Between -2- paper pad, Stampin’ Up Red Glimmer paper
Stamps: Prickley Pear Stamps Build A Cat 2 clear stamp set
Ink: Memento Tuxedo Black ink; Nuvo alcohol markers- Aquamarine Collection, Rich Reds Collection, Fragrant Oranges Collection, Woodland Greens Collection, Indigo Ink Collection, Royal Purples Collection, Flamingo Pinks Collection, Natural Browns Collection; Pentel Slicci Gold pen, POSCA white paint marker
Dies/Punches: Prickley Pear Stamps Build A Cat die set, Tim Holtz Holiday Words: Script die
Accessories: Tonic Studios 12″ Guillotine Paper Trimmer, Tombow Mono permanent adhesive, Bearly Art precision craft glue, Darice mini flat-back Christmas bulbs

I hope you’ve enjoyed seeing this slimline card and will link up a Christmas project with us this month! We can’t wait to see what you create! Thanks so much for stopping by today – we’ll see you again soon! ;)

Scrappy hugs,
lesliesig

hello

Hi everyone! Happy Hump Day – I hope you’re having a great week with some lovely weather where you are! Affiliate links are used in this post at no cost to you. I really appreciate your support! It’s time for a new challenge over at Mix It Up Challenge Blog and I’m thrilled to share my DT inspiration project with you for MIUCB #53 – Anything Goes + Monochrome! Our challenges are always ‘anything goes’ and we offer a technique twist each month to inspire you! This month the twist is monochrome – but the twist is never required to play! I created a pretty ‘thinking of you’ slimline card in brown and tan using Prickley Pear Stamps Heart Key Crown stamp set and Hearts 2 stamp set and coordinating Heart Key Crown die set, along with an all-time favorite hello script die from Mama Elephant.

I jumped on the slimline wagon last Summer but I’ll admit that I am a bit of a rebel when it comes to size, lol! I always create a 9″ x 3-3/4″ card base because I think it fits better in a #10 business envelope. I created a side-folding portrait card base from CutCardStock Twine cardstock along with several additional layering panels from Darice textured brown cardstock and CutCardStock Twine cardstock. Using the Prickley Pear Stamps Heart Key Crown stamp set, I stamped the hearts in brown ink on the twine cardstock and used the coordinating Heart Key Crown die set to cut them.

I arranged the three stamped and die cut hearts on the front and added the die cut sentiment to the front of the middle heart at an angle. I colored several white flat-back pearls with an alcohol marker (did you know you could do that?!) to match the monochrome scheme.

I cut the inside panel from CutCardStock Twine cardstock and kept it fairly simple by just stamping a heart and the sentiment from the Hearts 2 stamp set on the panel in brown ink and layering the panel on brown cardstock, leaving a wide border.

And one more look… I really like how this slimline turned out! Always loving a monochrome color scheme, too!

Cardstock/Paper: CutCardStock Twine cardstock, Darice brown textured cardstock
Stamps: Prickley Pear Stamps Heart Key Crown stamp set and Hearts 2 stamp set
Ink: Memento Espresso Truffle ink; Nuvo alcohol marker- 466 (Honey Amber Collection) used to color the pearls
Dies/Punches: Prickley Pear Stamps Heart Key Crown die set, Mama Elephant hello script die
Accessories: Tonic Studios 12″ Guillotine Paper Trimmer, Tombow Mono permanent adhesive, Bearly Art precision craft glue, MISTI stamp tool, Gemini Junior, Darice small white flat-back pearls

I hope you’ve enjoyed this project and will link up with us this month! All of our challenges are ‘anything goes’ and we offer a technique twist each month to inspire you! We’d love to see either ‘anything goes’ or a monochrome project… you choose! Thanks so much for stopping by today – we’ll see you next time! ;)

Scrappy hugs,
lesliesig