thanks

Hello, my crafty friends! I’m very happy to share that I’m guest designing over at Scrapping4fun Challenges again! One of my cards was featured a few weeks back and the lovely Rachelle asked me to be a guest designer in an upcoming challenge, so here I am! And I’m stoked to share my GD project for Challenge #103 – Winter Wonderland!

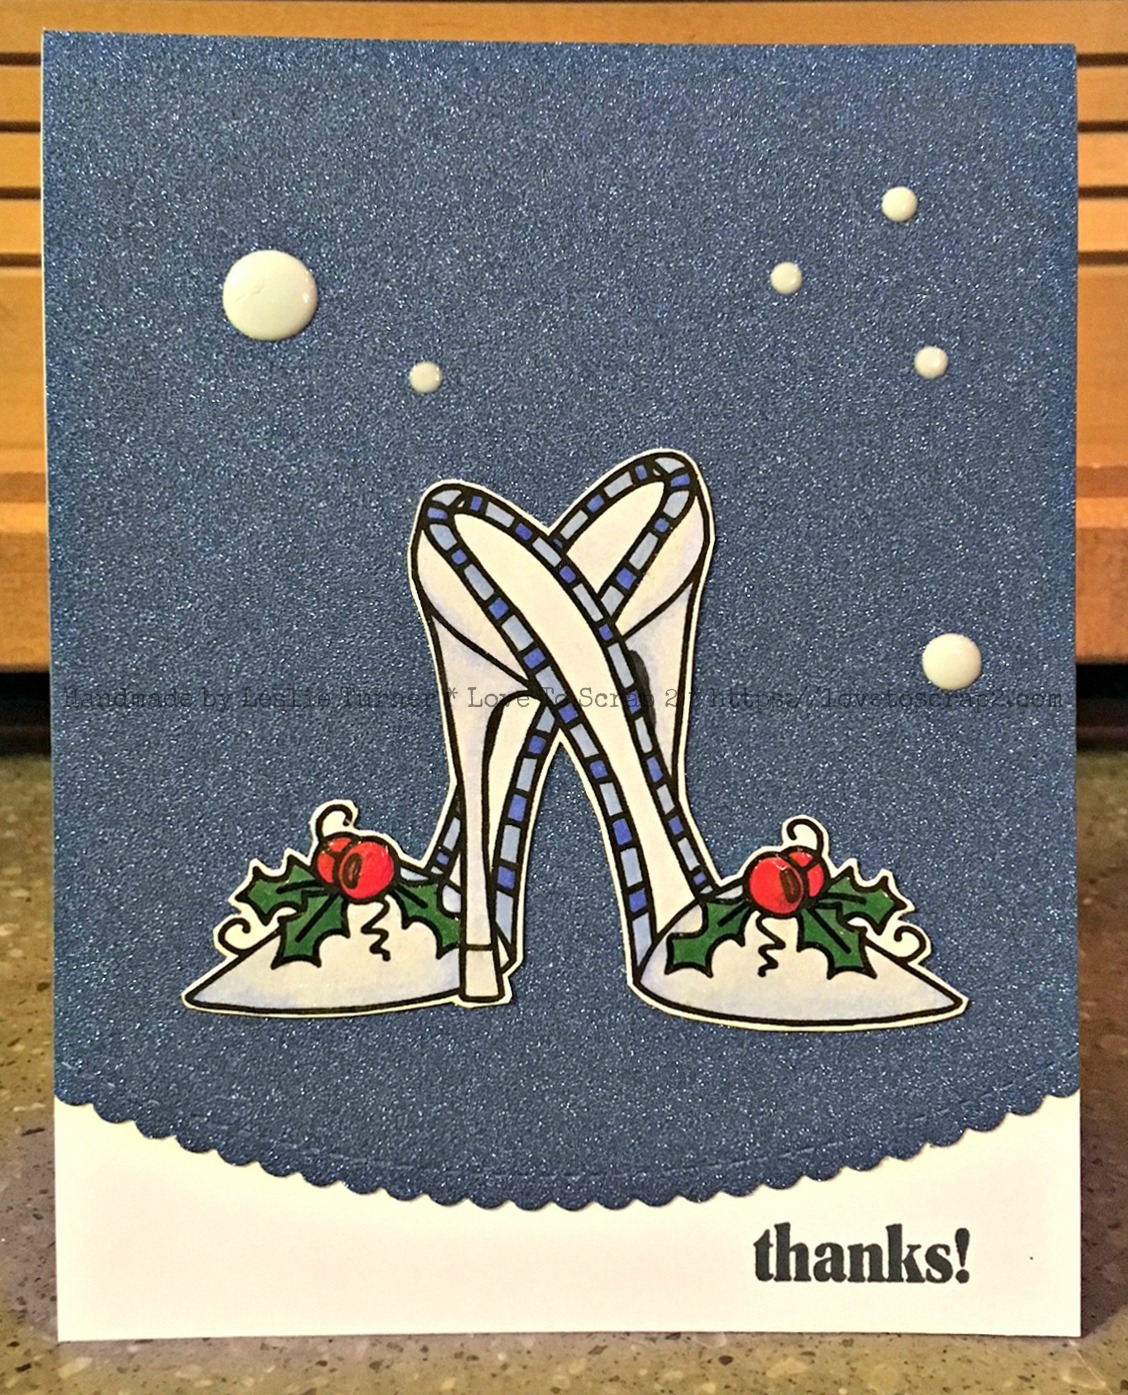
My inspiration came from the the gorgeous shades of blue in the inspiration photo. I immediately thought of “Winter Blues” and created a glittery blue thank you card. One can never have too many thank you cards in their stash, especially around the holidays. The shoe image I used is called Christmas Heels from Bugaboo Digi Stamps and I’ve had it in my stash for several years. I have a (slightly huge) shoe fetish and I have just about every one of Jodie’s shoe images, lol! I love them!

2017_10280004a

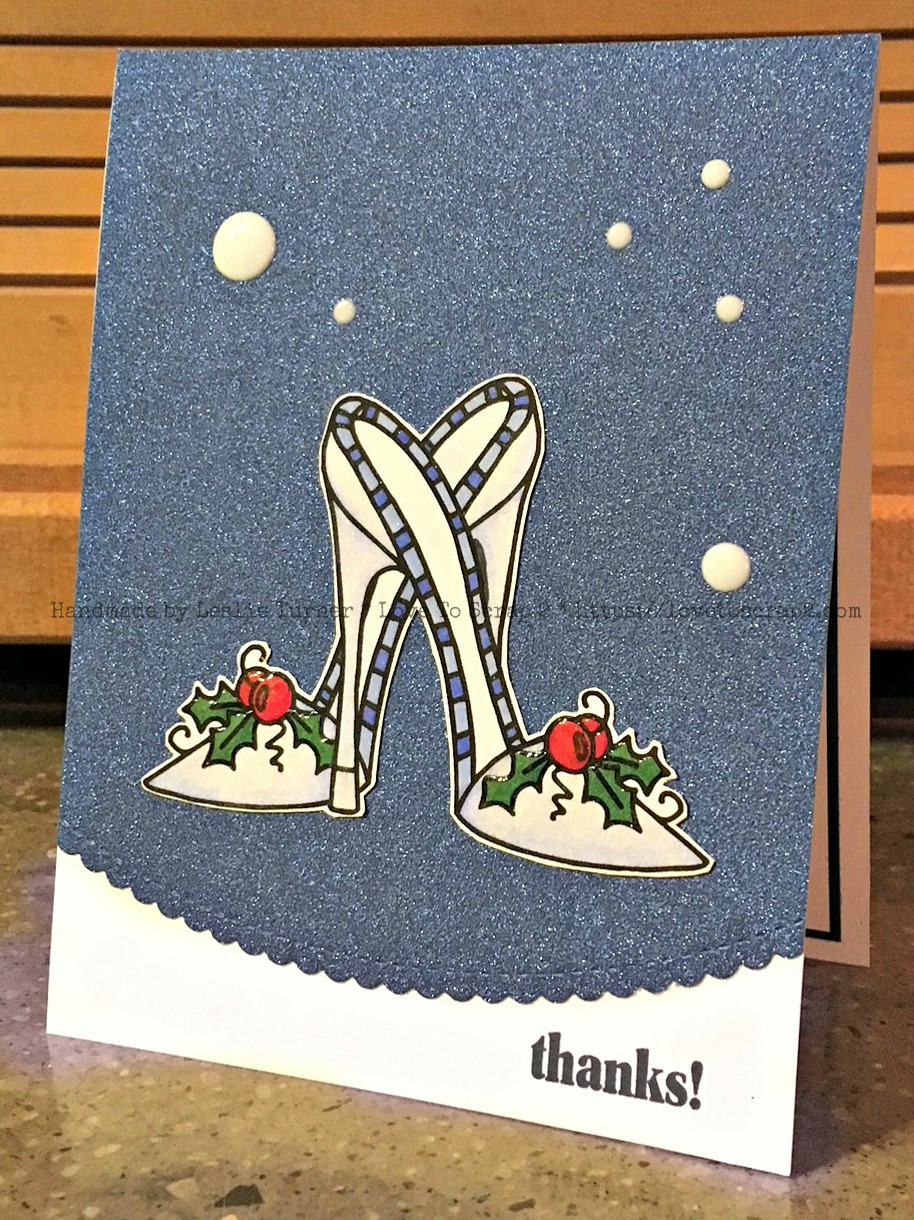
I colored the shoe with Spectrum Noir markers and fussy cut it. I cut a piece of blue glitter paper the size of the card base and cut the bottom off with a stitched scallop edge die to expose the white card base beneath. I used some Inspired by Stamping stamp sets for the front and inside. I stamped the front sentiment in the lower right corner of the card base and added some very light blue Crystal Drops. Super easy and super fun! :D

2017_10280005a

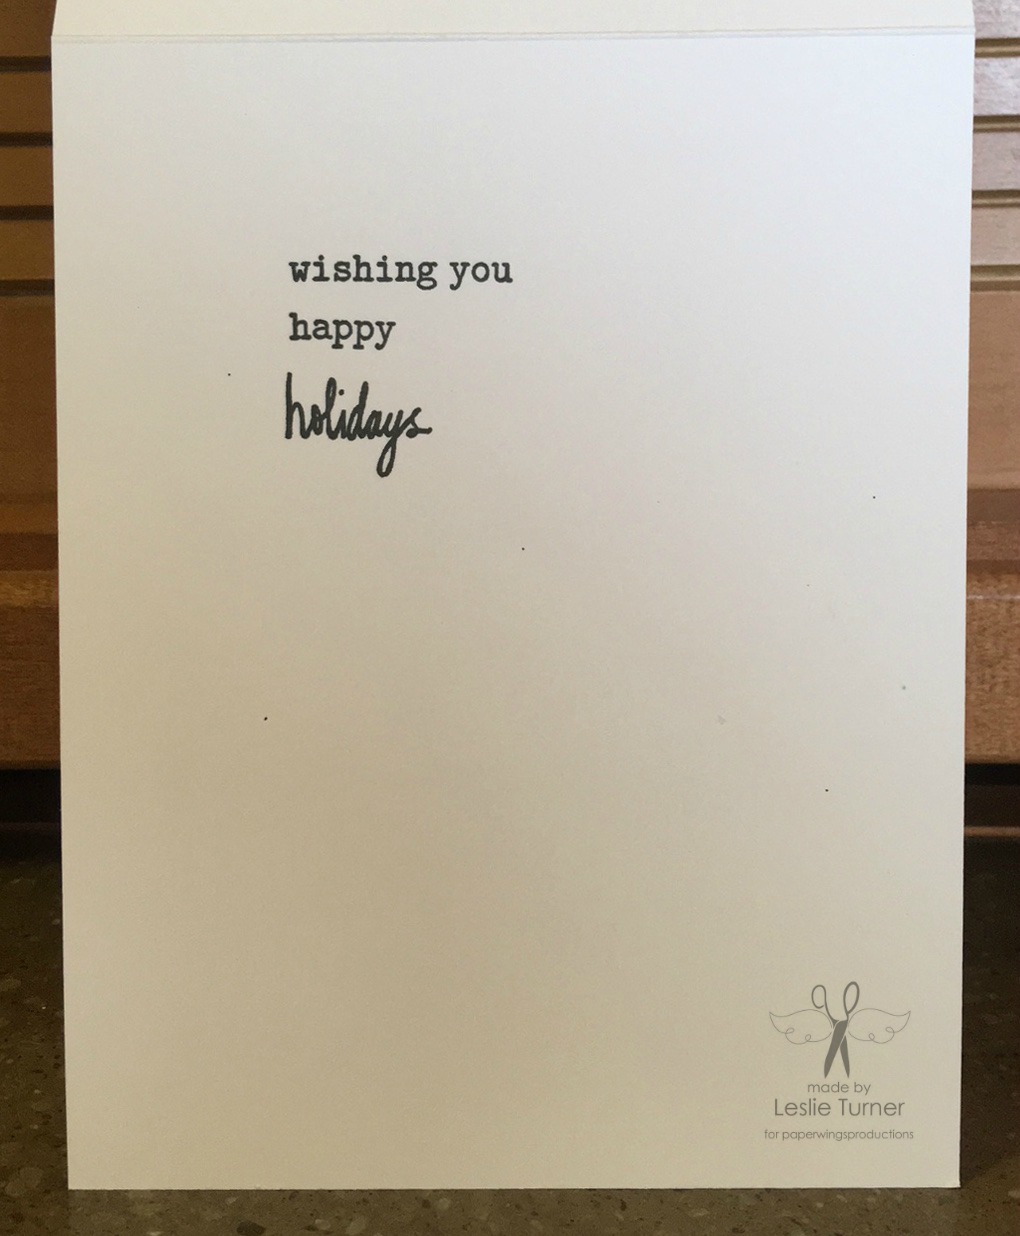
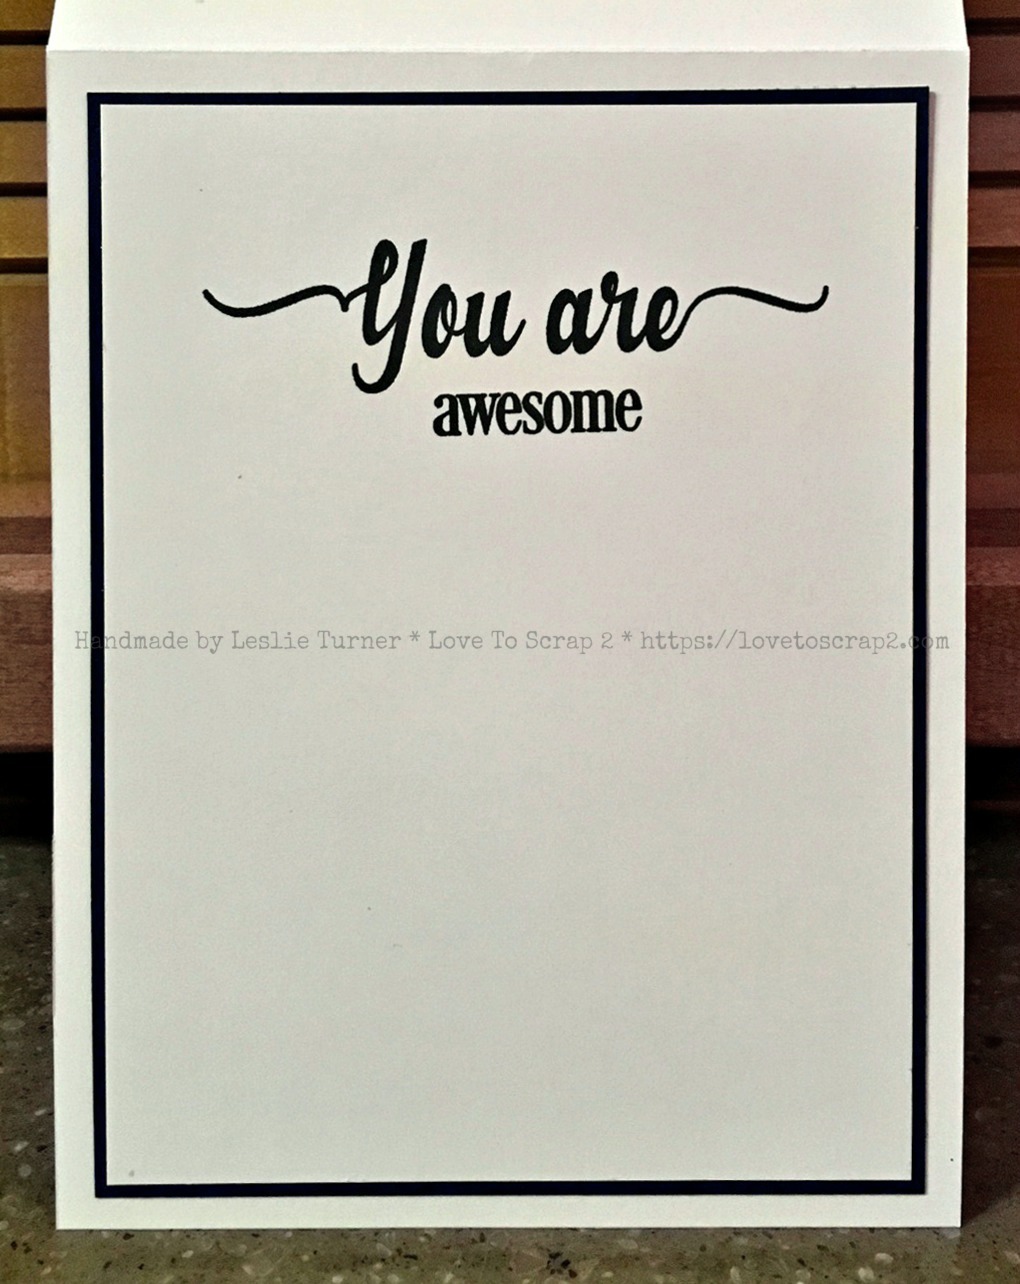
I kept the inside fairly simple with just a stamped sentiment on a layered panel. I’m really diggin’ how this turned out, lol!

2017_10280006a

Products used:
Cardstock/Paper: Stampin’ Up Whisper White and Night of Navy cardstock, DCWV Glitzy Glitter cardstock
Stamps: Inspired by Stamping Teeny Tiny Greetings and You Are stamp sets
Ink: Spectrum Noir- JG1, JG5, DR5, TB2, TB3, TB4, TB5; Spectrum Noir Crystal Clear Sparkle Overlay Marker, Memento Tuxedo Black ink
Dies/Punches: My Favorite Things Stitched Scallop Basic Edges die
Accessories:  Tim Holtz Stamp Platform, Nuvo Duck Egg Blue Crystal Drops, Glossy Accents

I hope you’ve enjoyed today’s project and will link up a Winter Wonderland project with us this time! We’d love to see what you create! Thanks so much for stopping by today and we’ll see you next time! ;)

Scrappy hugs,
lesliesig

Hero Arts Merry Christmas

Hi everyone! Happy Thursday – hope you’re having a great week! I’m posting on the a2z Scrapbooking blog today and I’m happy to share a DT inspiration project using the amazing Hero Arts Holiday Ornaments Stamp & Cut and the Hero Arts Christmas Messages stamp set! I created another Christmas card for my growing pile, lol! I really love this time of year!

I cut some green glitter paper with a stitched rectangle die for the background and adhered it on some white fun foam. The gold border on the bottom is the negative space leftover from a scalloped border that I plan to use on another project. I thought the negative space yielded some cool interest.

2017_11050004a

I stamped the ornament from the Hero Arts Holiday Ornaments Stamp & Cut set, embossed it in gold and cut it with the coordinating die. I used a red artist pitt pen to color in the open areas. I stamped the mistletoe and bow (also from the Holiday Ornaments Stamp & Cut set) on white cardstock and cut them with the coordinating dies. Finally, I stamped the sentiment (another stamp from the Holiday Ornaments Stamp & Cut set) on white cardstock, embossed it in gold and cut it with a fishtail sentiment strip die. I attached the ornament with gold cord, adhered the rest of the elements to the background, and then attached the background to the card base.

2017_11050005a

For the inside, I stamped a simple greeting from the Hero Arts Christmas Messages stamp set on a layered panel.

2017_11050006a

I’d love to enter this sparkly Christmas card into the following challenges:
A Bit More Time To Craft Extra November Challenge
Crafty Hazelnut’s Christmas Challenge Extra for November
Creative Inspirations Challenge Blog: #283 – Sparkle
House of Cards: November Challenge – Holiday and/or Colors
The Crafty Addicts: #42 – Anything Goes/Christmas

a2z products used:
Hero Arts Holiday Ornaments Stamp & Cut
Hero Arts Christmas Messages stamp set
Hero Arts Gold Embossing Powder
Versamark

Other products used:
Cardstock/Paper: Stampin’ Up Thick and regular Whisper White and Emerald Envy cardstock, DCWV Glitzy Glitter Stack, Marco’s Venicelux Gold Metallic cardstock
Ink: Memento Rhubarb Stalk and Cottage Ivy ink, Faber Castell Deep Scarlet Red Pitt Pen
Dies/Punches: My Favorite Things Die-namics Essential Fishtail Sentiment Strips and Mni Scallop Rectangle STAX dies, Sizzix Borders die
Accessories:  Tim Holtz Stamp Platform, White Fun Foam

I hope you’ve enjoyed this card and will link up a project with us! Our challenge is Winter this month and we’d love to see what you create! Remember that we’ve changed our rules a bit and participants are no longer required to use Hero Arts products to enter our challenges. Each month we feature a ‘Digi of the Month’ which will be the prize offered to our randomly-chosen challenge winner, and this month it is Vintage Travel Digital Kit. And to sweeten the pot, if you are the randomly-chosen winner and you have used Hero Arts products on your project, you’ll ALSO win a $20 gift certificate to the store! Be sure to check out all the amazing crafty goodies in the a2z Scrapbooking storeAND if you use the code Leslie15 you’ll get 15% off your order of $25 or more! Thanks so much for stopping by today – we’ll see you soon!

Scrappy hugs,
lesliesig

hello Gorgeous

Hi everyone! Happy Hump Day! Today is my post day on the Paper Wings Productions blog and I’m excited to share a DT inspiration project using the Vintage Domino Melange, Vintage Melange and Sayings and Sentiments stamp sets. I created a fun accordion style birthday book with a twine bow closure.

2017_09150001a

I cut the accordion base from kraft cardstock. I then cut the cover pieces and all the background pieces with a stitched rectangle die. I stamped the large flourish from the Vintage Melange stamp set on the front and back covers in brown ink. The front and inside sentiments are both from the Sayings and Sentiments stamp set. I heat embossed the front sentiment in gold, cut the two words apart and affixed them to the front above and below the twine line.

2017_09150002a

I stamped all nine domino-sized images from the Vintage Domino Melange stamp set on kraft cardstock and colored each with Spectrum Noir markers in a very basic fashion. I cut each image with a slightly smaller stitched rectangle die, layered each one onto a brown die cut and then adhered them to the accordion base. The birthday sentiment on the last panel is also from the Sayings and Sentiments stamp set, and is small enough to leave room to sign the book! ;)

2017_09150003a

Here are closer shots of the images. What a super fun project – and I’m thrilled with how it turned out!

2017_09150004a
2017_09150005a

Paper Wings Productions products used:
Vintage Domino Melange stamp set
Vintage Melange stamp set
Sayings and Sentiments stamp set

Other products used:
Cardstock/Paper: Stampin’ Up Early Espresso cardstock, Marco’s Brown Bag cardstock
Ink: Memento Rich Cocoa ink, Versamark; Spectrum Noir- DR1, DR2, FS9, )R2, BT5, DG3, CT4, PL4, TN7
Dies/Punches: Memory Box Stitched Rectangle Layers dies
Accessories: Tim Holtz Stamp Platform, Studios Blackbird Natural Twine, Ranger Super Fine Detail Gold embossing powder

I hope you’ve enjoyed today’s project! Be sure to check out all the fun stamps and other goodies at Paper Wings Productions! Thanks so much for stopping by today – we’ll see you next time!

Scrappy hugs,
lesliesig

Inspirational Coasters (set of 4)

Hi everyone! We’re almost a week into November – can you believe it?! The jolly little man in the red suit will be sliding down chimneys before we know it! Today is my Mixed Up Magazine post day and I’m super stoked to share an inspiration project using 50s Ladies and Enjoy Your Thoughts Words  Mixed Up Merchandise Printables! With Christmas in mind, I created an awesome set of 4 inspirational coasters that I think will make a wonderful gift!

This is considered a teaser post… I’m sharing only one photo of my finished project here on my blog, so jump on over to Mixed Up Magazine to see more photos and details on how I created these awesome coasters! And while you’re there, why not click over to pick up a mag subscription?! It’s always filled with amazing project tutorials that I know you’ll enjoy and find very inspiring! UPDATE: Mixed Up Magazine has apparently undergone some changes and their blog has moved, meaning our tutorial posts have been deleted and these links may no longer be viable. I’ve added a few extra close-up pics of these coasters below. ;)

2017_10190008aa

Totally loving how these turned out! Here are close-up shots of each one…

2017_10190004a2017_10190005a2017_10190006a2017_10190007a

Mixed Up Merchandise Printables used:
50s Ladies
Enjoy Your Thoughts Words

Other products used:
Cardstock/Paper: Stampin’ Up Whisper White cardstock
Ink: Spectrum Noir- TN4, BP6, LG5, CT4, BT5, PP4, FS7; Memento Tuxedo Black ink
Accessories: Darice slate coasters, Liquitex Black Gesso, Ranger Multi Medium Matte, The Crafter’s Workshop Mini Harlequin Stencil, Liquitex White and Silver Acrylic Paint, Avery labels

I hope you’ve enjoyed today’s project! Be sure to check out all the fun Printables for your mixed media and collage projects at the Mixed Up Merchandise store! Thanks so much for stopping by today – we’ll see you next time!

Scrappy hugs,
lesliesig

traditions for Paper Wings Productions November Blog Hop

Hi everyone! Happy Friday and WELCOME to the Paper Wings Productions Design Team Blog Hop & Giveaway! If you’ve arrived here from the Paper Wings Productions blog, then you’re in the right place. If you’re just stopping by for a visit, please click HERE to start from the beginning.

Now that Halloween is over, we start thinking about the holidays. What holidays do you and your family celebrate? One way to make the holidays special is to create your own decorations and greetings. Our design team has come up with projects with the theme “home for the holidays”. We hope you will hop through the projects and find inspiration for your own holiday projects. If you complete the hop, you will be eligible to win an awesome prize!

25-dollar-store-credit

The prize is a $25.00 gift certificate to the Paper Wings Productions online store!

For a chance to win all you need to do is:
—be a follower of the Paper Wings Productions blog
—visit each of the participating designer’s blogs and leave a comment
—come back and leave us a comment on the Paper Wings Productions blog telling us you’ve completed the hop

To increase your chances of winning, “Like” our Facebook page and/or invite your friends to the hop. Be sure to leave a separate comment for each of your additional entries. We will announce the winner on the Paper Wings Productions blog on Tuesday, November 7th!

**********

Okay, let me side-track you for a minute or three to showcase my projects! I’m still adding to my pile of Christmas cards – my plan is to have them all finished and ready to mail by December 1st and that’s only a month away! I created a pair of  ‘traditions’ Christmas cards using almost all of the sentiments in the Say It- Winter Greetings Clear Stamp Set  and a few sentiments from the Mix It Up Clear Stamp Set which just happens to be on sale right now!

2017_11020001a

These were fun and really easy. I arranged all the sentiments in a collage fashion on my Tim Holtz Stamp Platform and stamped them on a quarter-sheet of cardstock. I duplicated a few of the sentiments to fill in ‘holes’ and then trimmed the edges and cut the piece in two.

2017_11020002a

I layered the stamped collage pieces on red glitter paper and then two layers of torn vellum, and adhered them to the front of the card bases along with the holly sprays.

2017_11020002a

I embellished the holly with red Crystal Drops.

2017_11020003a

The inside is the same on both cards, which I kept very simple with just a stamped sentiment using stamps from the Mix It Up Clear Stamp Set. I’m tickled with how these turned out!

2017_11020005a

Thanks for allowing me to share my project! Now be sure to head on over to Veronica’s blog next!

Here is the complete line up just in case you get lost along the way:
Paper Wings Productions
Leslie (you’re here!)
Veronica
Larissa
Ashley
Dana
Paper Wings Productions

THANKS SO MUCH FOR JOINING US TODAY!
&
Let Your Creativity Take Flight!

**********

I’d love to enter this set of cards into the following challenges:
Creative Inspirations Challenge Blog: #283 – Sparkle

Paper Wings Productions products used:
Say It- Winter Greetings Clear Stamp Set
Mix It Up Clear Stamp Set

Other products used:
Cardstock/Paper:  Stampin’ Up Thick and regular Whisper White cardstock, Stampin’ Up Garden Green cardstock, Stampin’ Up Red Glimmer Paper, Vellum
Ink: Memento Tuxedo Black ink
Dies/Punches: Creative Expressions Holly Sprays dies
Accessories: Tim Holtz Stamp Platform, Nuvo Autumn Red Crystal Drops

I hope you’ve enjoyed today’s project! Be sure to check out all the fun stamps and other goodies at Paper Wings Productions! Thanks so much for stopping by today – we’ll see you next time!

Scrappy hugs,
lesliesig

Thank you beary much.

Hello, crafty friends! I’m happy to share that I’m guest designing for Crafty Catz this month! The theme this week is Anything Goes with a twist of Bear-tastic so I pulled out my Stampin’ Up Baby Bear stamp set to create this adorable thank you card. This multi-step stamp set is one of my favorites because this bear is so stinkin’ cute! I could just squeeze it, lol! ;)

2017_10280007a

I had a ball making this. I was in a purple kind of mood and this card just made me smile. I used purple glitter paper. I gave this sweet girl bear a purple pearl necklace and decorated the background with purple die cuts and bling.

2017_10280008a

I left the inside blank to write a custom sentiment. I’m really loving how this turned out!

2017_10280009a

Products used:
Cardstock/Paper: Spectrum Noir Ultra Smooth Premium White cardstock, Marco’s Wild Pansy Grass Cloth cardstock, DCWV Glitzy Pastels Stack, Doodlebug Design dot-grid-daisy-stripe Rainbow Petite Prints
Stamps: Stampin’ Up Baby Bear stamp set
Ink: Ranger Pumice Stone, Hickory Smoke and Black Soot Distress Ink
Dies/Punches: Sizzix Mixed Media die, Memory Box Stitched Circle Layers dies, Spellbinders A2 Matting Basics A & B dies, Sizzix Borders die
Accessories: Tim Holtz Stamp Platform, White fun foam, Stampin’ Up Rhinestones, Doodlebug Designs flat-back pearls, Nuvo Violet Galaxy Crystal Drops

I hope you’ve enjoyed this project and will link up a bear project with us this week! Thanks so much for stopping by and we’ll see you soon! ;)

Scrappy hugs,
lesliesig

TIME tag

Hi everyone! A very Happy November 1st to you all! I just can’t believe it! It’s time for another fun challenge over at Mix It Up Challenge Blog and I’m super stoked to share my DT inspiration project for MIUCB #7 – Anything Goes + Stenciling! Just a reminder that all of our challenges are Anything Goes with an optional technique twist thrown in to get your mojo rockin’ – you don’t have to play the twist to join in the fun!

I created a fabulous mixed media tag using the ‘reverse image’ portion of a stencil. I sat one afternoon and made a bunch of stenciled backgrounds with various mediums to see which one I liked best to use for this challenge. On one of the backgrounds, I used distress grit paste over The Crafter’s Workshop Mini Time Travel Stencil, and when the paste dried I put the stencil back on it and sprayed Tsukineko Pewter Shimmer Spray over it, which looked pretty cool. So instead of washing the Shimmer Spray off the stencil, I laid a piece of watercolor paper down on it to soak up the residual spray. THAT looked even cooler, lol, so that’s the piece I decided to use for this tag!

DSCF3863

There are a lot of elements to take in… inked corrugated cardboard, inked Tim Holtz Snippets Ephemera, a Bo Bunny Timepiece Laser Cut Chipboard piece covered in several layers of Ranger Liquid Platinum Embossing Powder, an inked Funkie Junkie Boutique Clothespin, Basic Grey Metal Studs, lace and ribbon scraps, and some Wild Orchid Crafts fabric flower trim.

DSCF3864

I stamped the sentiment in Walnut Stain distress ink using the Stampin’ Up Labeler Alphabet stamp set (which I absolutely love), and splattered both gold and silver irRESISTible Pico Embellisher along with the last tiny bit of pewter shimmer spray.

DSCF3865

I love picking out all the elements to use on mixed media pieces, but my favorite part is putting it all together and watching it all come to life!

DSCF3866
DSCF3867

Proud to enter this tag into the following challenges:
Crafts Galore Encore Challenges: November Anything Goes
Cropstop Blog: #33 – October Challenge

Products used:
Cardstock/Paper: Tim Holtz Distress Tag, Ranger Watercolor Paper, Kraft Corrugated Paper
Stamps: Stampin’ Up Labeler Alphabet stamp set
Ink: Ranger Walnut Stain Distress Ink, Versamark, Tsukineko Pewter Shimmer Spray, Silver and Gold irRESISTible Pico Embellisher
Accessories:  The Crafter’s Workshop Mini Time Travel Stencil, Ranger Liquid Platinum Embossing Powder, Tim Holtz Snippets Ephemera, Bo Bunny Timepiece Laser Cut Chipboard, Funkie Junkie Boutique Clothespin, Basic Grey Metal Studs, Wild Orchid Crafts fabric flower trim, Tim Holtz Stamp Platform

I hope you’ve enjoyed this tag and will link up a project with us this month! Thanks so much for stopping by today and we’ll see you soon! ;)

Scrappy hugs,
lesliesig

Best Wishes

Hi everyone! Happy Hump Day! Thanks for hanging in there with me this morning as I showcase all my first-of-the-month projects, lol! A new challenge has launched over at Love To Scrap Challenge Blog and I’m happy to share my DT inspiration project for LTSCB #103 – Anything Goes! We are being sponsored this month by Limited Runs Stamps, Star Stampz and Little Blue Button Stamps so come on over and play with us for a chance to win a prize!

I chose the absolutely adorable Panda Balloon digi from Star Stampz for my birthday card. I stuck with a basically neutral color scheme with just a pop of color on this semi-CAS card.

2017_10280001a

I used some of my favorite stitched dies to cut some coordinating papers which I angled underneath the layered image. I added a few rhinestones and some Nuvo Crystal Drops, and called her pretty, lol! Very happy with how this turned out!

2017_10280002a

I kept the inside fairly simple as I usually do, and just stamped a sentiment on the inside panel and layered it on black cardstock.

2017_10280003a

Products used:
Cardstock/Paper: Stampin’ Up Thick Whisper White and Basic Black cardstock, Doodlebug Design dot-grid-daisy-stripe rainbow petite prints paper
Stamps: Star Stampz Panda Balloon digital image, Pretty Pink Posh Everyday Greetings stamp set
Ink: FS6, BT2, BT4, IG4, GB1, GB3, GB4, GB11; Memento Tuxedo Black ink
Dies/Punches: Memory Box Stitched Rectangle Layers die, Cottage Cutz Double Stitched Rectangle dies
Accessories:  Tim Holtz Stamp Platform, Stampin’ Up Rhinestones, Nuvo Ebony Black Crystal Drops

I hope you’ve enjoyed my project and will consider linking up with us this month! It’s ‘anything goes’ and we know you those! Thanks so much for stopping by today and we’ll see you soon! ;)

Scrappy hugs,
lesliesig

Wishing you holiday cheer

Hello, crafty peeps! I’m just sitting here shaking my head at how fast this year is passing by! My mom always used to say ‘the older you get the faster the time flies.’ She sure was right. A new challenge has launched this morning over at Love To Craft Challenge Blog and I’m happy to share my DT inspiration project for LTCCB #16 – November Anything Goes! I love a traditional Christmas color palette!

2017_04300010a

I used Stampin’ Up stamps, ink, cardstock and papers for this project. I cut a couple narrow strips from scraps of the green and red diagonal striped paper and adhered them together in a ‘V’ fashion to coordinate with the Washi tape stamp I used on the inside. I adhered a few circle die cuts on the center line and then stamped the focal image with a few random stars that I colored with clear Wink of Stella.

2017_04300011a

I kept the inside fairly simple with the stamped Washi tape and the sentiment. Really love how this turned out!

2017_04300012a

I’d love to enter this fun card into the following challenges:
A Bit More Time To Craft Extra November Challenge
Crafts Galore Encore Challenges: November Anything Goes
Crafty Hazelnut’s Christmas Challenge Extra for November
House of Cards: November Challenge – Holiday and/or Colors
The Crafty Addicts: #42 – Anything Goes/Christmas

Products used:
Cardstock/Paper: Stampin’ Up Early Espresso and Whisper White cardstock; Stampin’ Up Cherry Cobbler and Pear Pizzazz DSP scraps
Stamps: Stampin’ Up Mingle All The Way, Tin of Tags and Tape It stamp sets
Ink: Stampin’ Up Cherry Cobbler and Pear Pizzazz ink
Dies/Punches: Stampin’ Up 3/4″ and 1/2″ Circle Punches
Accessories:  Stampendous Red Dot Sparklers, clear Wink of Stella

I hope you’ve enjoyed today’s project and will link up with us this month! We’d love to see what you’re working on! Thanks so much for stopping by today – we’ll see you again soon! ;)

Scrappy hugs,
lesliesig

Meowy Christmas

Hi everyone! Well, it’s November 1st and that means a few posts from me this morning, lol! I’m guest designing again this month over at Your Scrapbook Place and I’m stoked to share my GD inspiration project for the November Anything Goes challenge going live this morning! I created a fun sparkly meowy Christmas card! Hubby and I are ‘crazy cat people’ and this image is one of my favorites from The East Wind which is this month’s sponsor! Come on over and play with us!

2017_10280010a

I used my favorite stitched dies and angled the die cuts. I attached the focal image with tiny staples and added some Dot Sparklers in each corner.

2017_102800011a

I pulled out the fun Snow Marker for the pom-poms on his collar which added some great dimension!

2017_102800012a

I had the purrfect stamp set in my stash to go with this image, so I put it to good use, lol! Love how this turned out!

2017_102800013a

I’d love to enter this purrfect little card into the following challenges:
A Bit More Time To Craft Extra November Challenge
Crafts Galore Encore Challenges: November Anything Goes
Crafty Hazelnut’s Christmas Challenge Extra for November
Creative Inspirations Challenge Blog: #283 – Sparkle
House of Cards: November Challenge – Holiday and/or Colors
The Crafty Addicts: #42 – Anything Goes/Christmas

Products used:
Cardstock/Paper: Stampin’ Up Thick Whisper White and Basic Black cardstock, Stampin’ Up Red Glimmer Paper
Stamps: The East Wind’s Meowy Christmas digital image, Simon Says Stamp Meowy Christmas stamp set
Ink: Spectrum Noir- DR2, FS8; Spectrum Aqua- Bud Green and Sunflower; Memento Tuxedo Black ink
Dies/Punches: Memory Box Stitched Rectangle Layers dies
Accessories:  Tim Holtz Tiny Attacher, Marvy Uchida Snow Marker, clear Wink of Stella, Stampendous Red Dot Sparklers

I hope you’ve enjoyed today’s project and will consider linking up with us this month! Be sure to check out all the fun images at The East Wind store! Thanks so much for stopping by and we’ll see you real soon! ;)

Scrappy hugs,
lesliesig