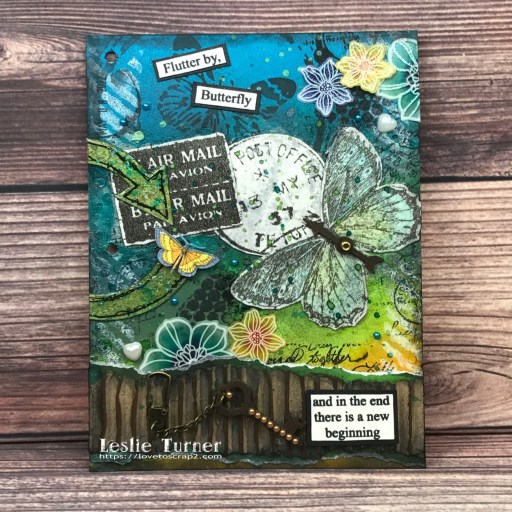
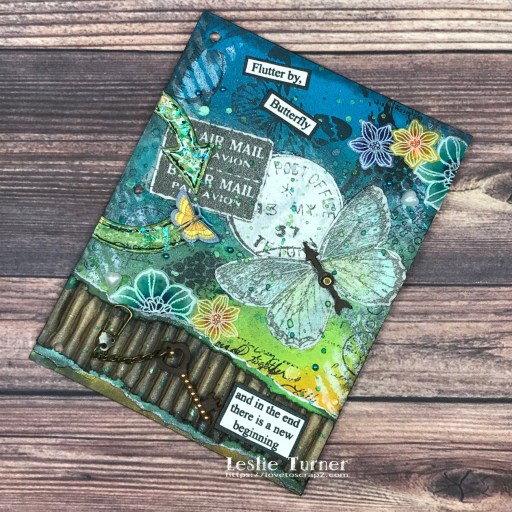
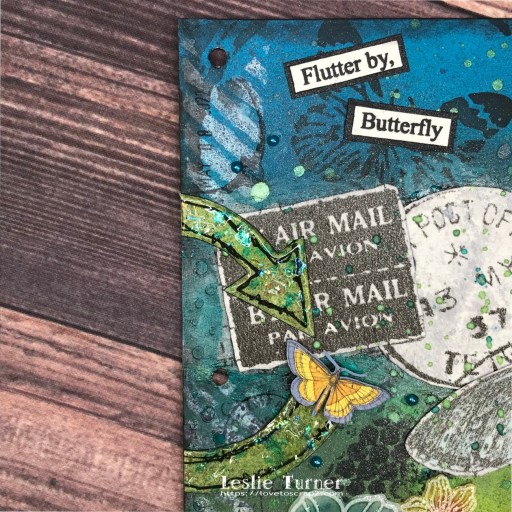
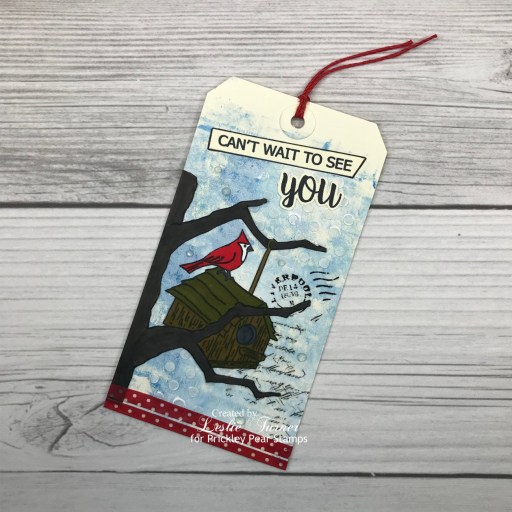
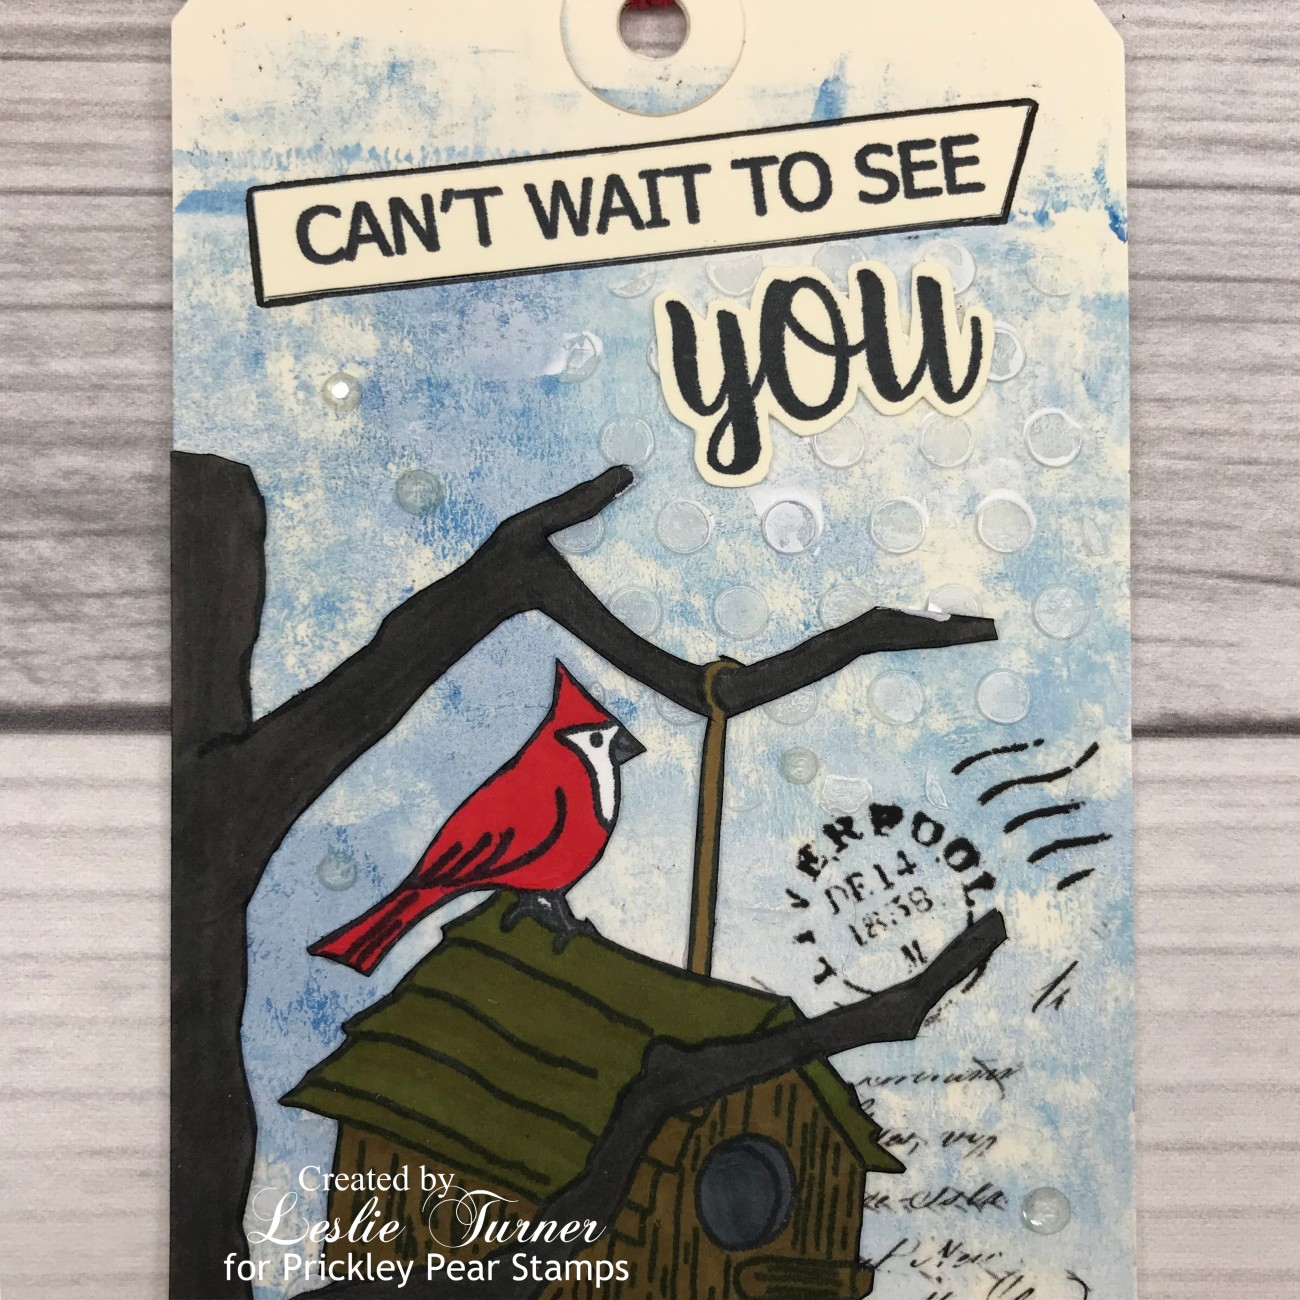
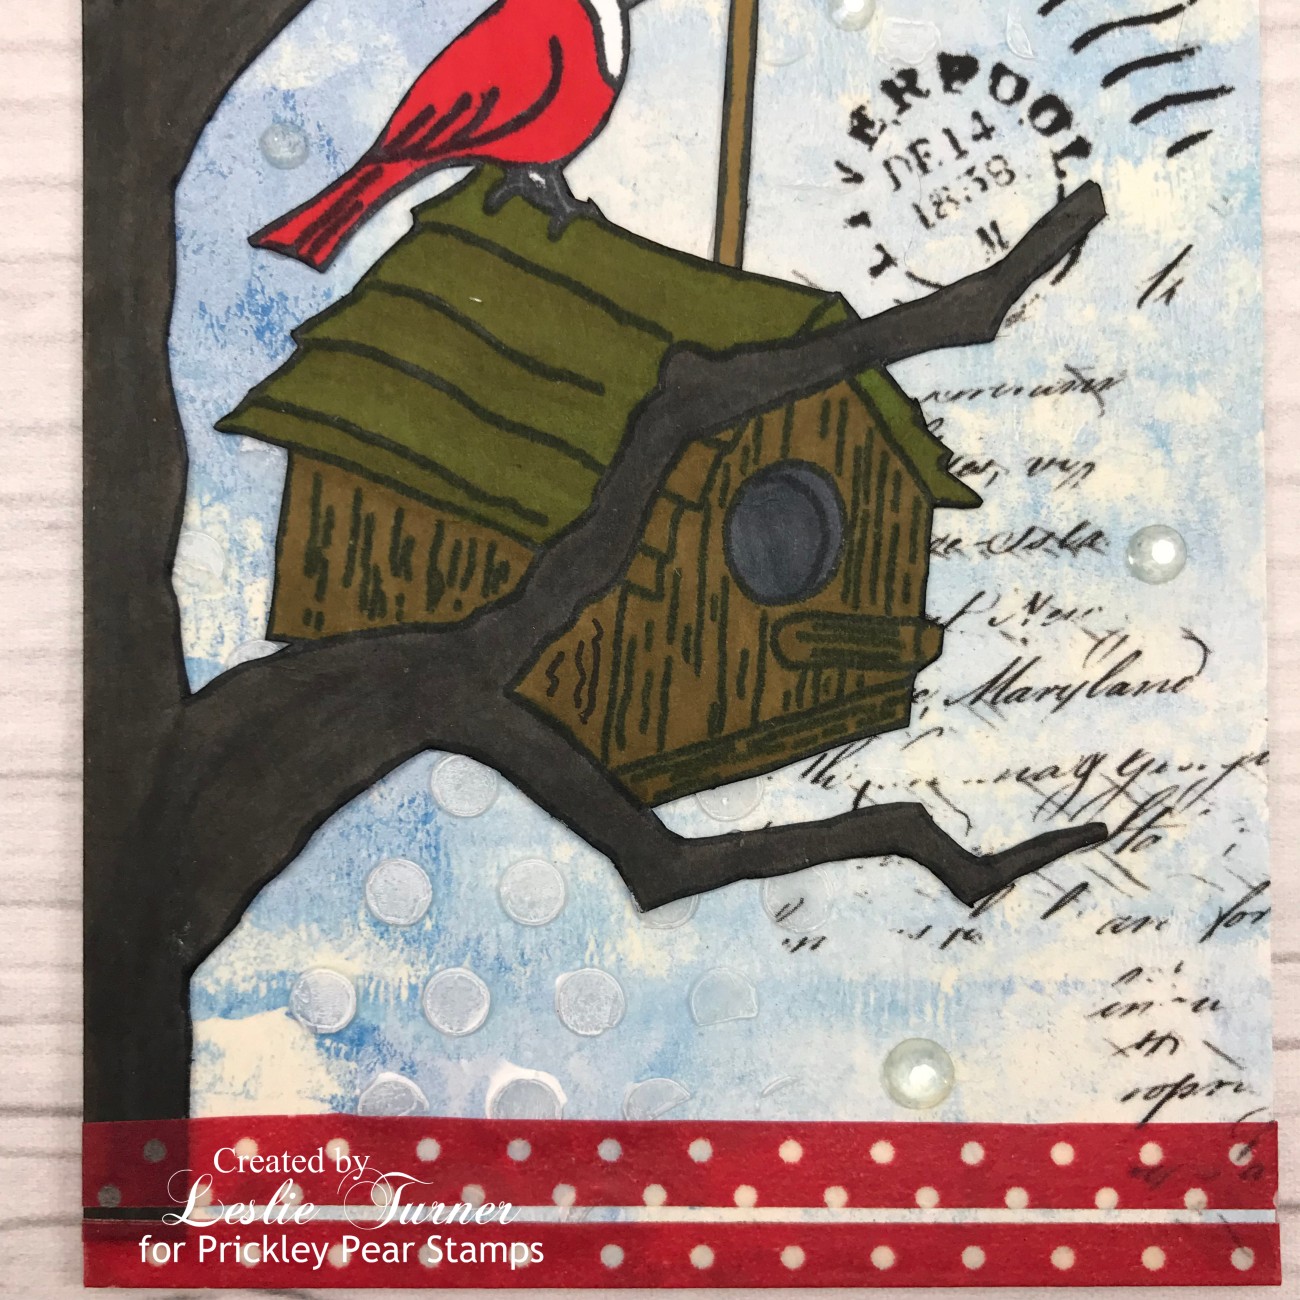
Hi friends, Happy Friday! I hope you have something fun planned this weekend. I’m thrilled to share a Brutus Monroe DT inspiration project today featuring some fun products from our June release. I did a little bit of mixed media using our Fishing You and Underwater Friendship stamp sets, Make Waves and Coral Reef chipboard, along with Tinsel Blue, Peacock and Wheat Chroma Mists. This is a friendship card and not a birthday card, and the little mermaid in the Fishing You stamp set is holding a birthday cake, so I covered it up with a fish from the Buttons Galore & More Aquarium Flatbackz Embellishments. How’s that for thinking outside the box?!
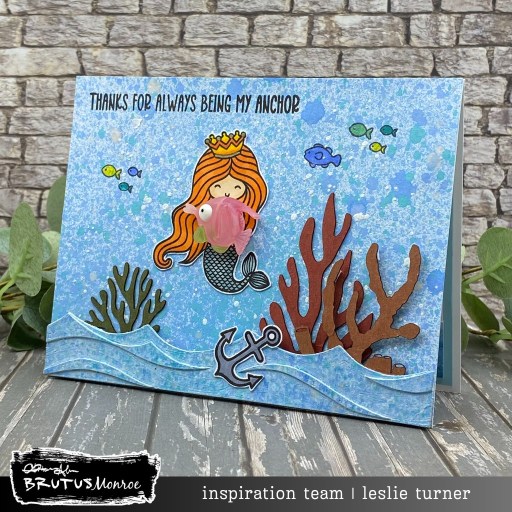
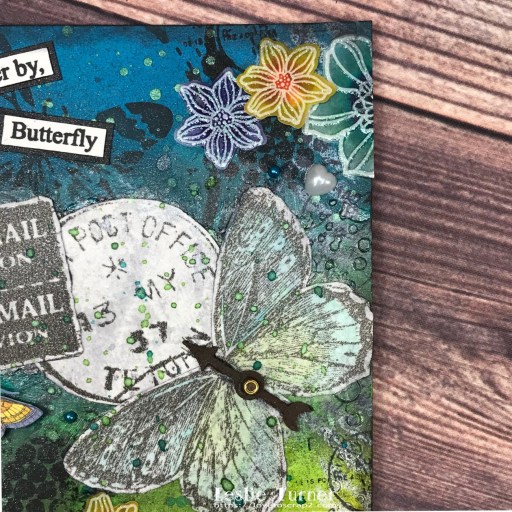
I started by spritzing a panel of Not Your Mamas cardstock and a wave panel from the Make Waves chipboard with Tinsel Blue, Peacock and Wheat Chroma Mists. I grabbed some coral pieces from the Coral Reef chipboard and colored them with alcohol markers. I stamped the mermaid from the Fishing You stamp set and the anchor from the Underwater Friendship stamp set in Raven ink on Perfect Blend cardstock and colored them with alcohol markers.
Once the background panel was completely dry, I stamped the sentiment from the Underwater Friendship stamp set directly on the panel in the upper left corner in Raven ink. Next, I stamped the little fishes from the Fishing You stamp set directly on the panel and colored them with Sharpie markers to get good coverage through the Chroma Mists. I assembled the card, popping the wave panel up on foam tape and tucking the coral pieces in behind it.
I grabbed a resin fish from the Buttons Galore & More Aquarium Flatbackz Embellishments and adhered it over the birthday cake that the mermaid is holding. The finishing touch was adhering the anchor from the Underwater Friendship stamp set at the bottom.
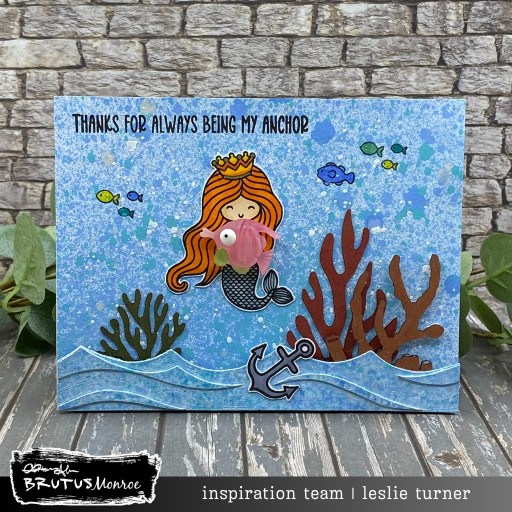
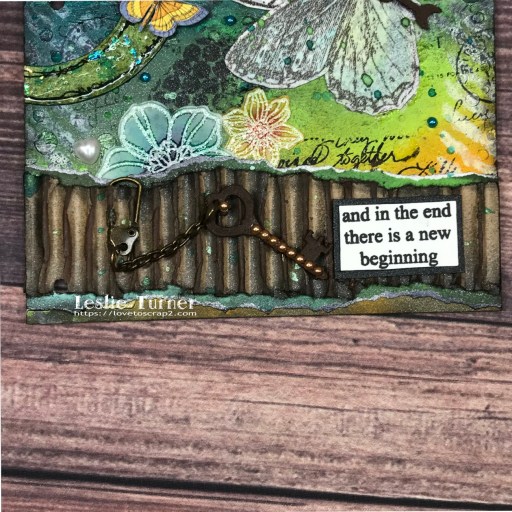
I cut the inside panel from Perfect Blend cardstock, stamped a sentiment from the Underwater Friendship stamp set in Raven ink, and layered the panel on Sea cardstock.

Affiliate links are used in this post at no cost to you – I really appreciate your support!
Brutus Monroe products used:
BRU 9144-2 Fishing You Stamp Set
BRU 8613 Underwater Friendship Stamp Set
BRU 8995 Make Waves Chipboard
BRU 1374-2 Coral Reef Chipboard
BRU 8206 Tinsel Blue Chroma Mist
BRU 1367 Peacock Chroma Mist
BRU 6037 Wheat Chroma Mist
FBZ 108 Buttons Galore & More Aquarium Flatbackz Embellishments
BRU 2828-2 A2 Card Bases
BRU 4013 Perfect Blend Cardstock
BRU 9494 Not Your Mamas Cardstock
BRU 5529 Sea Cardstock
BRU 2543 Raven 2×2 Detail Ink
Other products used:
INK: EK Tools Gold Dual Tip Pen; Copic Ciao alcohol markers- R22 Light Prawn, R35 Coral, YR68 Orange, Y08 Acid Yellow, E21 Soft Sun, BG72 Ice Ocean, G94 Grayish Olive, C5 Cool Gray; Sharpie Ultra Fine Point markers- blue, teal, lime green, yellow
ACCESSORIES: Fiskars 12″ ProCision Rotary Bypass Paper Trimmer, Bearly Art precision craft glue, My Sweet Petunia Precision Glue Press, MISTI stamp tool, Liquitex White Gesso, Ranger Distress Collage Medium, Spellbinders Detail Scissors, Scrapbook Adhesives Crafty Foam Tape
I hope you’ve enjoyed seeing this project and you’re inspired to get your craft on! Be sure to check out all the amazing stamps and dies, pigments and mists, cardstock and tools (just to name a few) at Brutus Monroe! Follow us on Facebook, Instagram and YouTube for tons of crafty inspiration! And come on over and join our Fan Club Facebook Group to share your crafty makes using our products! Thanks so much for stopping by today – we’ll see you next time!
Scrappy hugs,