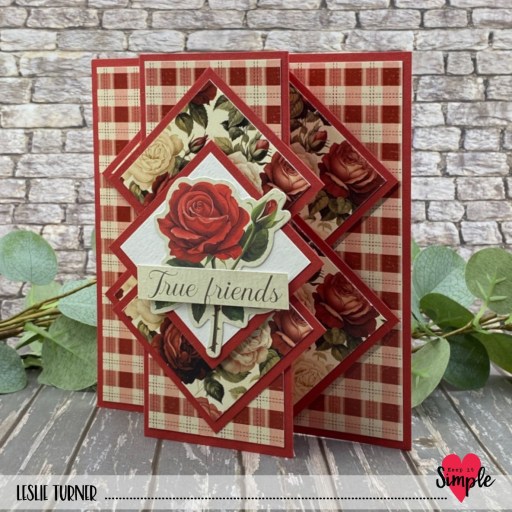
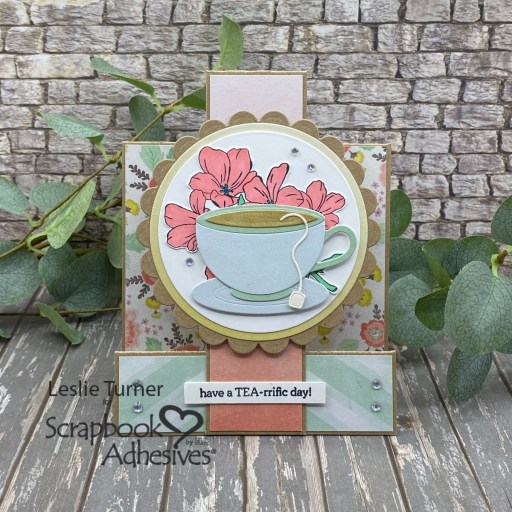
Hey everybody, happy Tuesday! I hope you’re having a great week! I’m delighted to share a Scrapbook Adhesives By 3L DT inspiration project with you today, created with a few of my essential ‘go-to’ adhesives. This faux narrow panel step card is such an easy and fun card to put together, and really packs a punch. I feel like this chilly January weather calls for a warm cuppa, so that’s the direction I went! I have several of the Altenew Mini Delights stamp and die bundles in my stash and thought this one was perfect for this TEA-riffic friendship card.
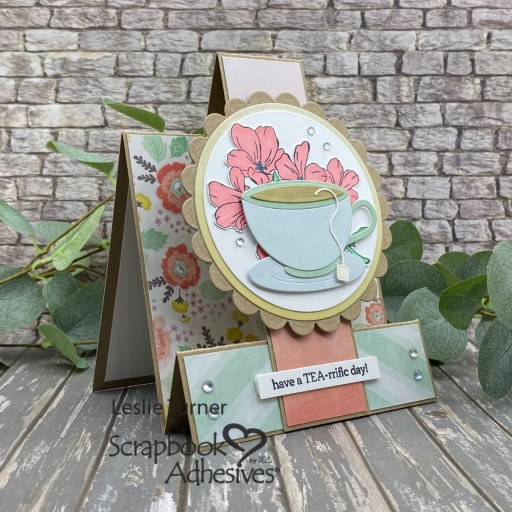
I used Spellbinders Standard Circles (Small and Large) and Classic Scalloped Circles (Large) dies to create the focal element background, using the E-Z Runner Permanent Strips Refillable Dispenser to assemble it. Then I added the stamped flowers and tea cup die cuts from the Altenew Afternoon Delights (Mini Delight) Stamps and Dies, using the Dual Tip Glue Pen and Thin 3D Foam Squares White Mix for assembly.
I cut the card base and faux narrow panel from CutCardStock Glama Kraft cardstock along with layering panels from Neenah Classic Crest Recycled Natural White cardstock and coordinating prints in the We R Memory Keepers Chalkboard 6×6 paper pad. I used the E-Z Runner Permanent Strips Refillable Dispenser to put these pieces together. I adhered the focal element to the card base with 3D Foam Squares White Mix, and then added a stamped sentiment (using the 3D Foam Squares) and some clear iridescent gemstones which completed the card front.
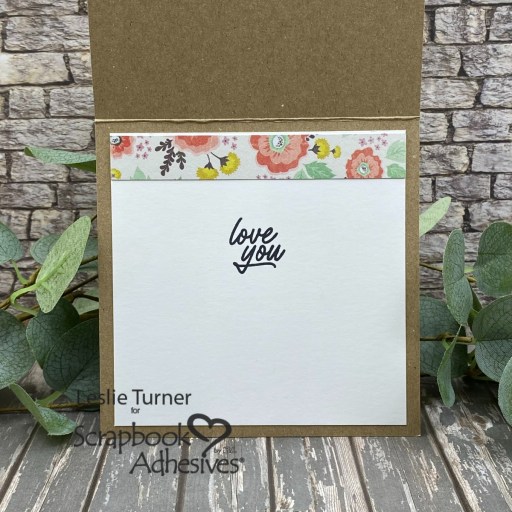
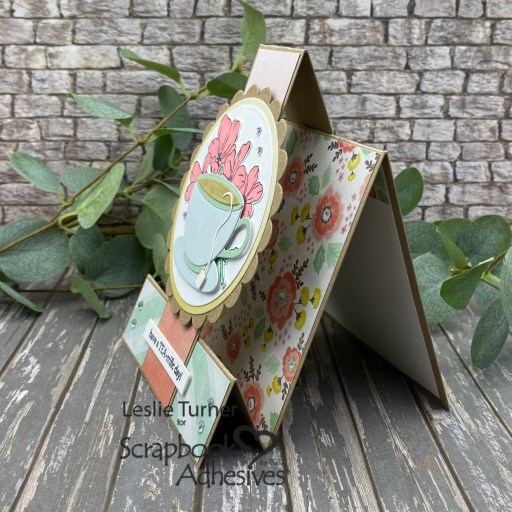
I cut the inside panel from Neenah Classic Crest Solar White cardstock and embellished it with a leftover strip of patterned paper used on the front. I stamped another sentiment and that completed the inside. I’ve included a side angle shot so you can see the fun construction. This is a great card that can be tailored to literally any occasion!
Sharing in the following challenges:
1. https://avenue613.blogspot.com/2026/01/january-2026-anything-goes-w-optional.html (no twist)
2. https://altenew.com/blogs/paper-crafting-inspiration-and-tips/january-2026-inspiration-challenge-1
3. https://cardz4galz.blogspot.com/2026/01/268-add-pink-flowers.html
4. https://fabnfunkychallenges.blogspot.com/2026/01/challenge-629-going-round-in-circles.html
5. https://lovetocraftchallengeblog.blogspot.com/2026/01/ltccb-90-anything-goes-and-ltccb-89.html
6. https://lovetoscrapchallengeblog.blogspot.com/2026/01/ltscb-177-anything-goes-ltscb-176.html
7. https://mixitupchallenge.blogspot.com/2026/01/muicb-81-anything-goes-optional-use.html (no twist)
Products used:
Scrapbook Adhesives by 3L®
E-Z Runner Permanent Strips Refillable Dispenser
3D Foam Squares White Mix
Thin 3D Foam Squares White Mix
HomeHobby™ by 3L
Dual Tip Glue Pen
Affiliate links are used in this post at no cost to you – I really appreciate your support!
Other products used:
CARDSTOCK/PAPER: CutCardStock Glama Kraft cardstock, Neenah Classic Crest Recycled Natural White cardstock, Neenah Classic Crest 80# Solar White cardstock, We R Memory Keepers Chalkboard 6×6 Paper Pad
STAMPS: Altenew Mini Delight: Afternoon Delights Stamps
INK: Memento Tuxedo Black ink, Bic Mark-It fine Point Peach Parfait marker; Sharpie Ultra Fine Point Markers- light green and medium teal; Copic Ciao Y28 alcohol marker
DIES/PUNCHES: Altenew Mini Delight: Afternoon Delights Dies, Spellbinders Standard Circles Small and Large, Spellbinders Classic Scalloped Circles Large
ACCESSORIES: Fiskars 12″ ProCision Rotary Bypass Paper Trimmer, Mini MISTI, Big Shot, Spellbinders Detail Scissors, clear iridescent gemstones
I hope you’ve enjoyed this project and you’re inspired to get your crafty supplies out and play! Be sure to check out the awesome array of adhesives and other craft supplies Scrapbook Adhesives By 3L has to offer! And be sure to follow us on Facebook, Pinterest, Instagram and Twitter for lots of crafty inspiration! And if you haven’t yet subscribed to our YouTube Channel, be sure to do that, too, for even more inspiration! Thanks so much for stopping by today – we’ll see you next time!
Scrappy hugs,