Hey everybody! With all the challenge blogs closing down lately, I’m happy to share that there’s a brand new Christmas challenge coming to town on May 1, 2023!
Christmas BINGO Challenges is an all-crafts Christmas challenge blog welcoming all types of handmade Christmas creations all year long using the featured Christmas BINGO Card.
There will be a BINGO Card featured in each challenge and you will be required to use at least three items in any column under the B, I, N, G or O on your Christmas project. Note: This is not your typical BINGO card where you go up/down, left/right and diagonally. To make this more fun, you can only go up and down using the columns! And there is a FREE space on each column which you are welcome to utilize (or not)!
There’s a DT Call also! ;) More info available HERE.
Be sure to stop by and Follow us! Also sign up to get new posts by email while you’re there! Thanks so much and we’ll see you again soon!
I die cut the easel card base from Neenah Classic Crest 110# Solar White cardstock and the layering panels from the Gnome Collection Pack 6×6 Double-Sided Cardstock. I selected a light blue cardstock from the Royal Collection Pack 6×6 Double-Sided Cardstock which I tore to create a puddle of water. Then I added the gnome, cleaning supplies and sentiment from the Die Cut Pieces, and added some Royal Enamel Dots. I tied a blue twine bow on the sentiment which completed the card front.
For the back, I die cut layering panels from Neenah Classic Crest 80# Solar White cardstock and the Gnome Collection Pack, then fussy cut the sentiment from a card in the Die Cut Pieces. Isn’t that sentiment a hoot?! Love how this turned out!
I hope you’ve loved seeing this project as much as I loved creating it, and you’re inspired to get crafty! Be sure to check out ALL the fun goodies in the Keep It Simple store such as paper, stamps, die cuts, ephemera, washi tape and enamel dots to name just a few! You’ll go nuts! Be sure to Follow us on Facebook, Instagram, and Pinterest for lots of crafty inspiration! Thanks so much for stopping by today – we’ll see you next time!
2/12/23 Rising Star at A Place To Start! 2/18/23 Top Rocker at 613 Avenue Create!
Hi everyone! We’ve made it through another week and it’s Friday again! I have an awesome CutCardStock DT inspiration project to share with you today featuring our Basis Natural, Glama Brown Kraft, Kale Green and Bright Gold Foil cardstock. I’ve been in love with the Taylored Expressions Create-In-Quads Layering Stencils since I discovered them last year, and used the Mistletoe set for this project. Grab some cardstock, four inks and blending brushes, and BOOM, you have four focal panels with very little effort! And they don’t even need embellishments! Imagine that! ;)
I cut two top-folding and two side-folding standard A2 card bases from Basis Natural cardstock along with four layering panels from Kale Green cardstock and one layering panel from Bright Gold Foil. I created the four focal panels on Glama Brown Kraft cardstock using the Taylored Expressions Mistletoe Layering Stencils, Ranger peeled paint, pine needles, festive berries and candied apple distress inks, and blending brushes.
The front and inside sentiments are all from Taylored Expressions In & Out Christmas stamp set and all stamped in Memento Bamboo Leaves ink. I stamped two of the front sentiments directly on the focal panels and the other two on Basis Natural cardstock scraps, trimming one of them and using a My Favorite Things Stitched Mini Scallop Square STAX to die cut the other one. Here are angled, frontal and inside shots of each. Love how they turned out!
Other products used: Stamps: Taylored Expressions In & Out Christmas stamp set Ink: Ranger distress inks- peeled paint, pine needles, festive berries and candied apple; Memento Bamboo Leaves ink Dies/Punches: My Favorite Things Stitched Mini Scallop Square STAX Accessories: Tonic Studios 12″ Guillotine Paper Trimmer, Taylored Expressions Create-In-Quads Mistletoe layering stencils, Big Shot, MISTI stamp tool
I hope you’ve enjoyed today’s project and you’re inspired to get crafty! Be sure to check out all the awesome cardstock and other goodies at CutCardStock (adhesives, labels, stickers, pens, watercolors and ribbon to name a few). And head on over to the CutCardStock Facebook Page for more inspiration! Thanks so much for stopping by today – we’ll see you next time!
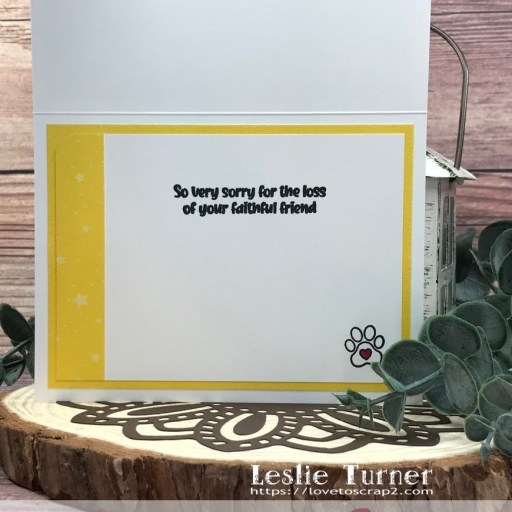
Hi friends! I hope you’re having a great week – the weekend is once again upon us! Our new challenge is live this morning over at Ally’s Angels and I’m happy to share my DT inspiration project for Challenge #67. Sympathy cards in general are not easy for me but we all need them for humans and for pets from time to time. One of the new releases over at Kat Scrappiness several months ago (just after we had to put our Milo to rest) included the Rainbow Bridge stamp set which I fell in love with. I created this card for a young man who lost his pup.
I cut a standard A2 size top-folding landscape card base from Neenah Classic Crest 110# Solar White cardstock along with layering panels from Keep It Simple Lemon 12×12 Collection Pack and 80# Solar White cardstock. I rounded two of the corners on the Solar White layering panel and stamped the rainbow bridge image in Memento Tuxedo Black ink. I stamped it again in Versamark (over top the black) and heat embossed it in Hero Arts clear embossing powder. I colored the image with alcohol markers and fussy cut the pup to adhere on the bridge. I stamped a sentiment from the stamp set in black ink and the halo in Delicata Golden Glitz ink. I added a little shimmer to the angel pup’s wings with a Sakura Clear Star Gelly Roll pen.
I cut the inside panel from 80# Solar White cardstock and embellished it with a strip of patterned paper from the Keep It Simple Lemon 12×12 Collection Pack. I stamped another sentiment and a paw print (from the same stamp set) in black ink.
I hope you’ve enjoyed seeing this project and will link up with us this month! We’d love to see what you create! Thanks so much for stopping by today – we’ll see you next time! ;)
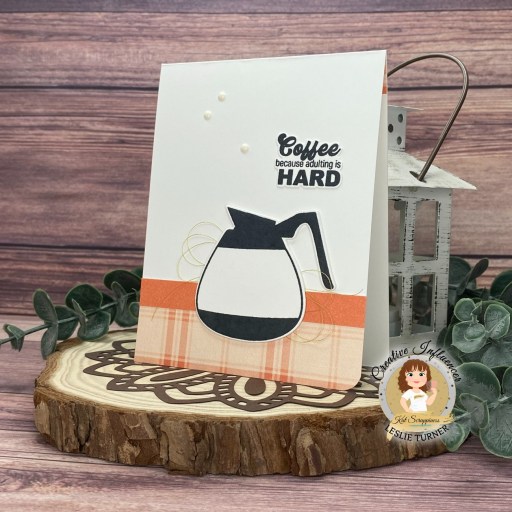
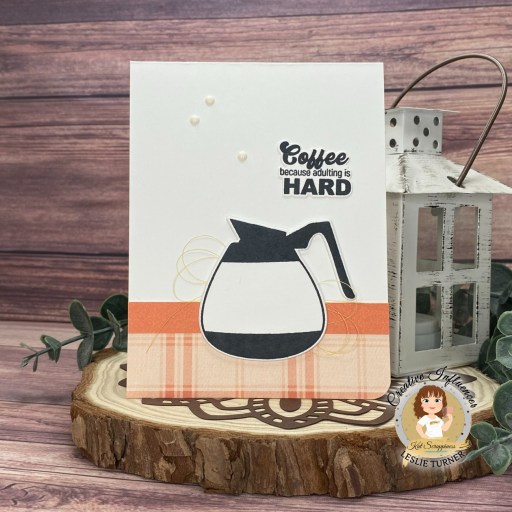
Hey everybody! Happy Hump Day – I hope you’re having a good week! I’ve popped in this morning to share another Kat Scrappiness Creative Influencer inspiration project. I created a clean and simple note card for that coffee lover featuring the Perk Up Stamp Set and Perk Up Coordinating Dies! This card, as simple as it is, was so much fun and made me giggle the entire time it took me to make it!
I cut a standard A2 size top-folding card base from Neenah Classic Crest 110# Solar White cardstock and rounded the bottom right corner. I cut strips of patterned paper from the Keep It Simple Mango 12×12 Collection Pack and adhered them to the bottom of the card front. I stamped the coffee pot and sentiment in Memento Tuxedo Black ink on Solar White cardstock and cut them with the coordinating dies. I cut two more coffee pots and adhered them together for a little dimension. I adhered several loops of Coats and Clark gold sewing thread to the back side of the coffee pot element and then adhered it to the card base. The finishing touch was adding several Eyelet Outlet white enamel dots.
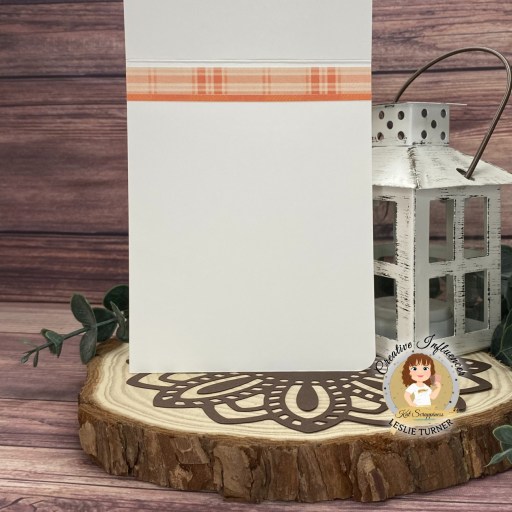
I embellished the inside flap with narrow strips of the patterned paper used on the front. Since this is a note card, I left the inside blank with plenty of room to write custom message.
Other products used: Cardstock/Paper: Neenah Classic Crest 110# Solar White cardstock, Keep It Simple Mango 12×12 Collection Pack Ink: Memento Tuxedo Black ink Dies/Punches: Kadomaru Pro Corner Rounder Accessories: Tonic Studios 12″ Guillotine Paper Trimmer, Art Glitter Dries Clear adhesive, Tape Runner, MISTI stamping tool, Big Shot, Coats & Clark Gold Sewing Thread, Eyelet Outlet White Enamel Dots
I hope you’ve enjoyed this project and I’ve inspired you to get crafty! Be sure to check out all the amazing stuff in the Kat Scrappiness store… there’s some of just about everything you’ll need to get your craft on, I promise! Be sure to Follow us on Facebook, Instagram, Pinterest and YouTube for tons of crafty inspiration! And we’d love it if you’d join the Kat Scrappiness Insiders and Stamping Enablers Facebook Groups for lots of fun crafty ideas and to share your creativity! Thanks so much for stopping by today – we’ll see you next time!
2/12/23 CAS Weekly Favorite at Splitcoast Stampers!
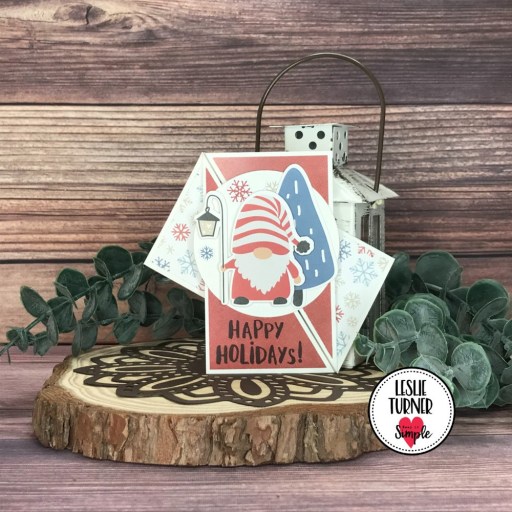
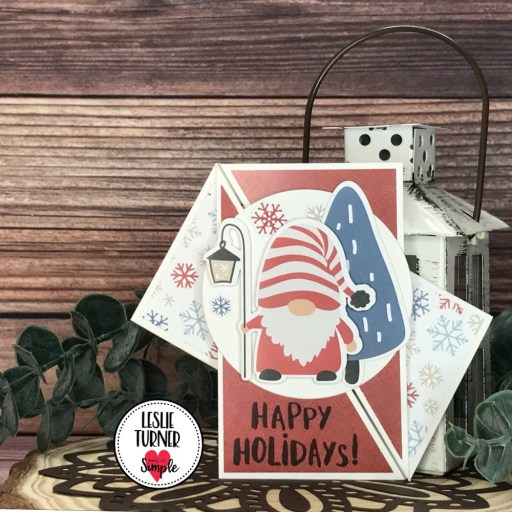
Hey everybody! Happy Tuesday! I’m delighted to share another Keep It Simple DT inspiration project with you today! You know I love me some fun folds, and I’ve created a twisted gate fold featuring a variety of products from the Scandinavian Christmas collection! I used papers from the 6×9 Cardstock Pack and 6×9 Collection Pack, Gnomes Die Cut Pieces and Gnomes Stamps! You know I love gnomes, too! ;)
I cut the card base from CutCardStock Basis White cardstock and layering panels from papers in the 6×9 Cardstock Pack and 6×9 Collection Pack. I die cut a circle using a Spellbinders Classic Circles die to use as the base for the focal element that I created with die cuts from the Gnomes Die Cut Pieces. I stamped a sentiment from the Gnomes Stamps in Memento Tuxedo Black ink.
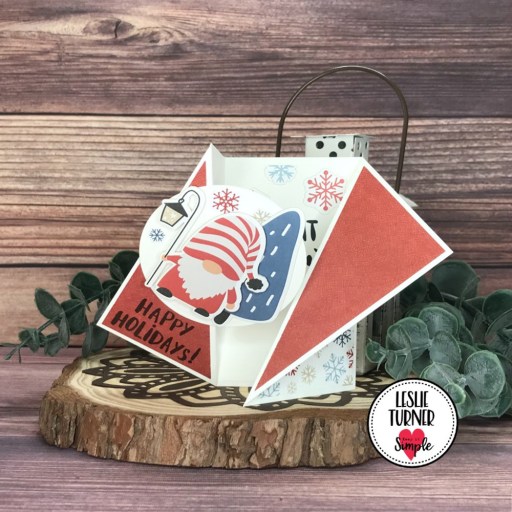
Here’s a shot of the card partly opened.
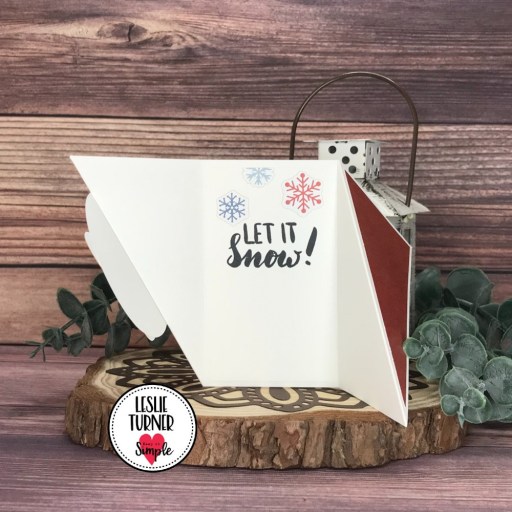
I stamped another sentiment on the inside from the Gnomes Stamps in black ink and added some snowflake die cuts from the Gnomes Die Cut Pieces.
I hope you’ve loved seeing this project as much as I loved creating it, and you’re inspired to get crafty! Be sure to check out ALL the fun goodies in the Keep It Simple store such as paper, stamps, die cuts, ephemera, washi tape and enamel dots to name just a few! You’ll go crazy! Be sure to Follow us on Facebook, Instagram, and Pinterest for lots of crafty inspiration! Thanks so much for stopping by today – we’ll see you next time!
Hey everybody! I hope you’re having a wonderful weekend! Yesterday was pretty amazing here in southwestern Colorado – it was in the 40s and the sun was out all day melting some of the snow! I believe today will be another gorgeous day! I have a pretty half flap inspirational card to share created with an assortment of products from the Keep It Simple Clementine Bundle! I’m SO in love with this bundle – it has two paper packs (one with a die cut chipboard sheet), sticker sheet, puffy stickers, pearls rhinestones, buttons, enamel shapes and washi tape – enough crafty goodies to create a huge array of projects! Seriously, you need to check it out!
I cut a standard A2 size half flap card base from Neenah Classic Crest 80# Solar White cardstock along with an assortment of strips and panels from papers in the Keep It Simple Clementine Collection 12×12 Paper Pack, Flip Sides 12×12 Paper Pack. I embellished the panels with die cuts from the Die Cut Printed Chipboard, stickers from the 12×12 Sticker Sheet, a Puffy Sticker and Rhinestones.
I cut the inside panel from CutCardStock Stardream Metallic Aquamarine cardstock and added a sticker from the 12×12 Sticker Sheet which completed the card.
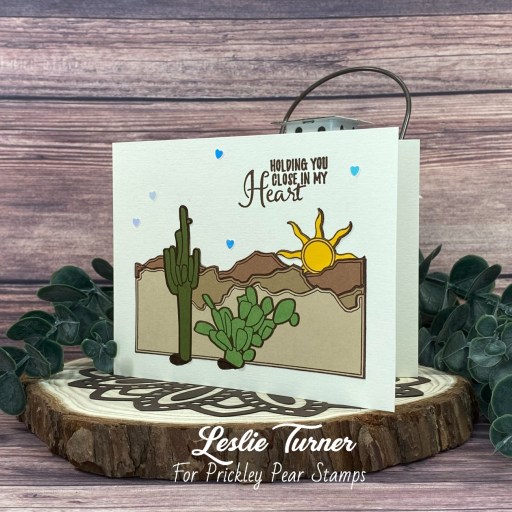
Hi friends! Well, we busted through another week and it’s Saturday again! But that’s not a bad thing, is it?! I’m back up on the Prickley Pear Stamps blog today with another card featuring the oh-so-gorgeous Brighter Days Ahead stamp set which I absolutely love! Besides the amazing focal image, there are tons of sentiments. A couple days ago I shared a paper-pieced card created with it, so I colored the image on this one with alcohol markers. It’s difficult trying to achieve texture with markers but I think I did okay! ;)
I cut a standard A2 size side-folding card from CutCardStock 110# Basis Natural cardstock and rounded the bottom right corner. I stamped the image in Memento Rich Cocoa ink on 80# Basis Natural and masked the lower right corner of the image. I traced the rounded corner of the card base onto the image, and colored it with alcohol markers. I stamped the sentiment and added several flat sequins which completed the card.
Other products used: Cardstock/Paper: CutCardStock 110# Basis Natural cardstock Ink: Memento Rich Cocoa ink (pad and marker); Arteza alcohol markers- BR41/43/44/51, YG22/45, Y22 Dies/Punches: Kadomaru Pro Corner Rounder Accessories: Tonic Studios 12″ Guillotine Paper Trimmer, Art Glitter Dries Clear adhesive, MISTI stamp tool, Picket Fence Studios Spiked Cider Sequin Mix
I hope you’ve enjoyed this project! Be sure to check out all the awesome stamps and dies at Prickley Pear Stamps! Save 10% on anything on the site when you shop at Prickley Pear Stamps by using coupon code LESLIE10 at checkout! And be sure to ‘like’ and ‘follow’ the Prickley Pear Stamps Facebook page to keep up with news and sales, and join Prickley Pear Pals (the fan group) for lots of fun crafty ideas and to share your creativity! And finally, we’d love to see you visit the Prickley Pear Stamps blog and become a Follower! Hope to see you there! Thanks so much for stopping by today – we’ll see you next time! ;)
2/28/23 Stand Out Creation at Scrapping4fun Challenges!
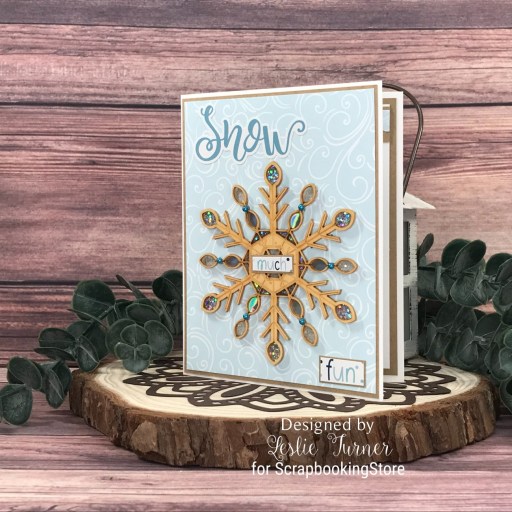
Hi friends! Dang, this week has flown by! It’s Friday already which is a good thing for all the working folks! I’m delighted to be back to share one more ScrapbookingStore DT inspiration project with you created with the amazing 2023 Scrapbook Kit with Upgrades! The upgrades in these monthly kits are always just as amazing as the papers and coordinating sticker sheets. In addition to the paper and stickers, I was excited to use the large snowflake element in this month’s kit upgrades to create a fun Winter-themed card.
I cut a standard A2 size side-folding card base from Neenah Classic Crest 110# Solar White cardstock along with layering panels from a patterned paper in the kit and CutCardStock Twine cardstock. I adhered a sentiment sticker from the sticker sheet in the upper left corner and then adhered the large snowflake from the upgrades to the card front. I cut two words from a tag on the sticker sheet, adhered them to trimmed scraps of twine cardstock, and adhered them to the card front. I added Eyelet Outlet 3mm blue pearls to the six shorter arms of the snowflake for a little interest.
I cut the inside panel from 80# Solar White cardstock and embellished it with a scalloped strip from the sticker sheet and a strip of CutCardStock Twine cardstock. I adhered a sentiment sticker and a polar bear sticker from the sticker sheet, which completed the card.
I hope you’ve enjoyed today’s project and you’re thinking about all the fun you could have with this month’s kit… you really ought to think about joining the Subscription Club! Be sure to Follow us on Facebook, Instagram, Pinterest and YouTube for lots of crafty inspiration! And if you do decide to join the Subscription Club, join our ScrapbookingStore Club Member Group on Facebook for more inspiration and to share your projects! Thanks so much for stopping by today – we’ll see you next time!
Hey everybody! I hope you’re having a fabulous week! I’m up on the Prickley Pear Stamps blog today with a beautiful uplifting card created with stamps from the gorgeous Brighter Days Ahead stamp set. I did quite a bit of paper piecing with colored cardstock on this CAS-ish card and I wish you could run your fingers over it and feel all the texture! I love how it turned out!
I cut a standard A2 size side-folding card base from CutCardStock 110# Basis Natural cardstock. I stamped the focal image on the card base in Memento Rich Cocoa ink and then six more times – once on CutCardStock Basis Gold, Basis Light Brown, Sandcastle, Ginger Snap, Pop Tone Jellybean Green and Pop Tone Gumdrop Green cardstock. Then the fun began fussy cutting each element or section and adhering them to the card base. I stamped the sentiment and added several Eyelet Outlet tiny heart sequins which completed the card.
I hope you’ve enjoyed this project! Be sure to check out all the awesome stamps and dies at Prickley Pear Stamps! Save 10% on anything on the site when you shop at Prickley Pear Stamps by using coupon code LESLIE10 at checkout! And be sure to ‘like’ and ‘follow’ the Prickley Pear Stamps Facebook page to keep up with news and sales, and join Prickley Pear Pals (the fan group) for lots of fun crafty ideas and to share your creativity! And finally, we’d love to see you visit the Prickley Pear Stamps blog and become a Follower! Hope to see you there! Thanks so much for stopping by today – we’ll see you next time! ;)