Gnome Sweet Gnome

Hey everybody, happy Friday! Can you believe it’s the first Friday of the last month of the year?! Just like the last several, this year has flown by! Our new challenge is live this morning over at Creative Creases and I’m delighted to share my DT inspiration project for Challenge #110. This is my last post as a Creative Creases designer and I sure have enjoyed myself this year! I love the Match Book line over at Art Impressions and have quite a few of them. Believe it or not, I still have a few in my stash that I haven’t made AND there are some fairly new ones on the Ai website that I haven’t added to my stash yet. I’m such a sucker for gnomes and really had fun with this one!

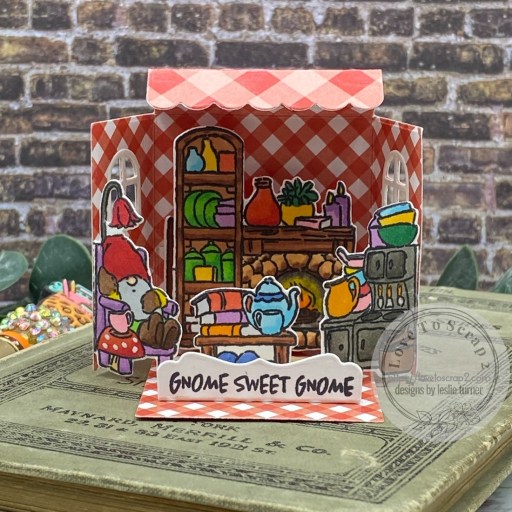
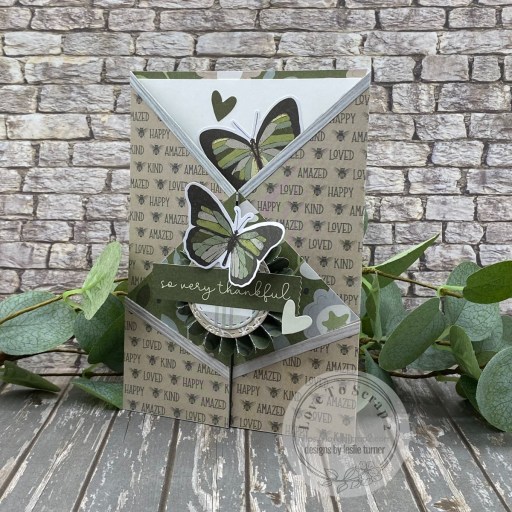
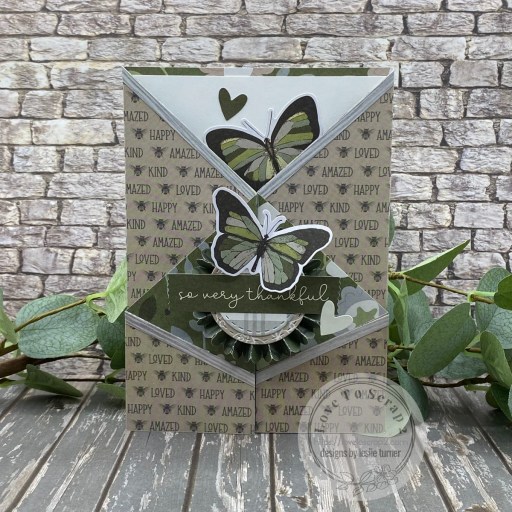
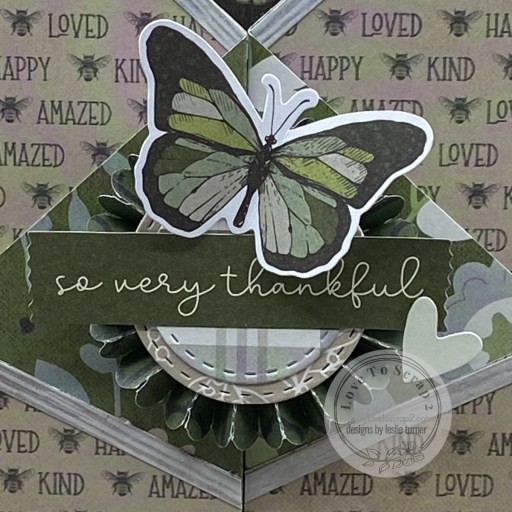
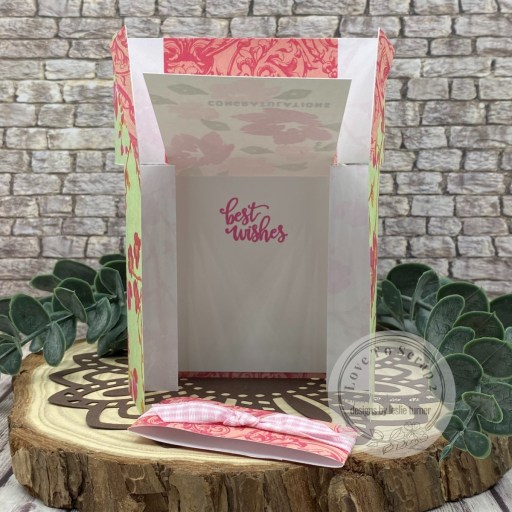
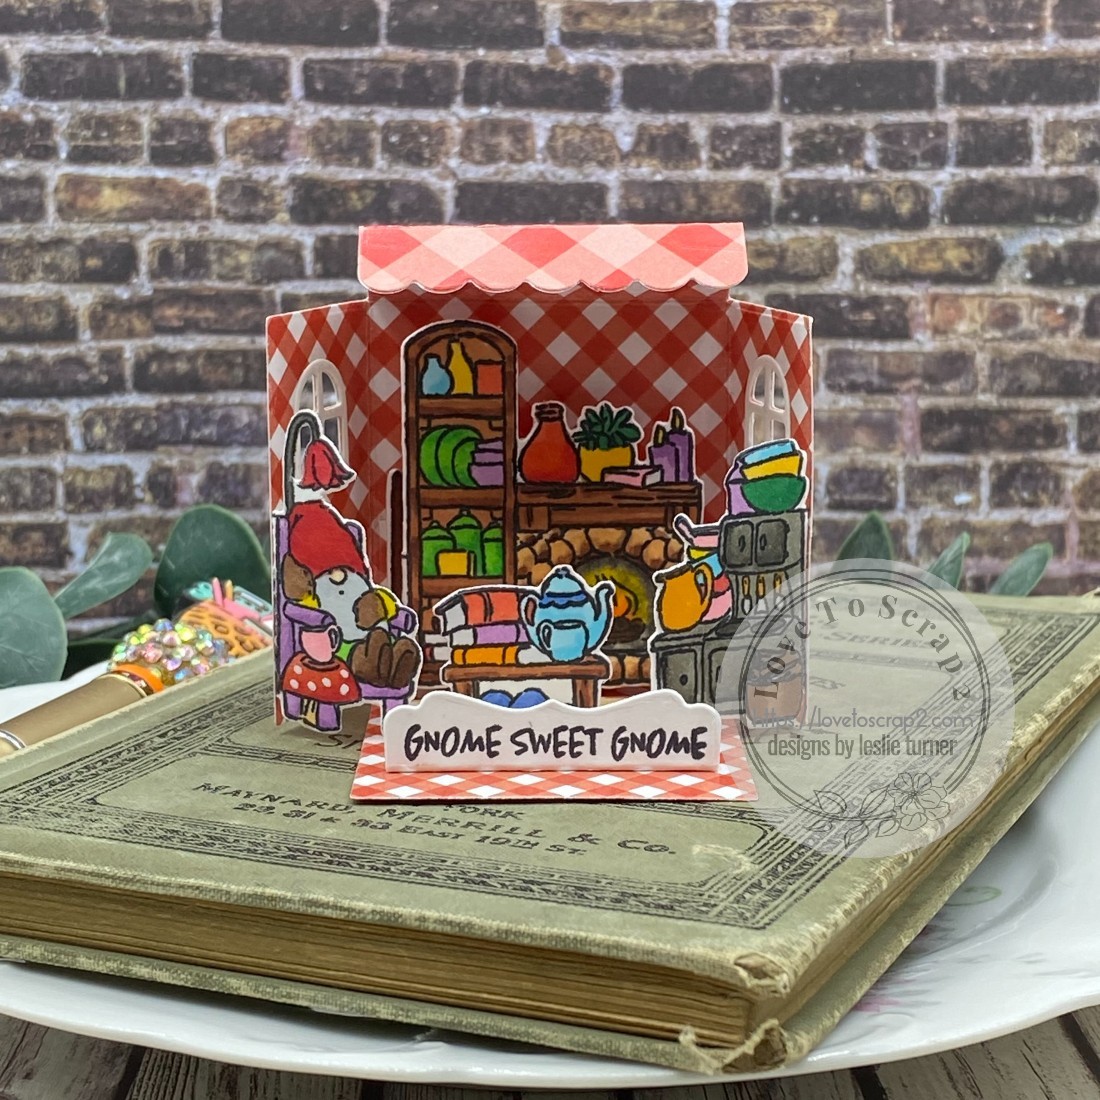
Using the Art Impressions Match Book Template dies, I cut the base from Waffle Flower Gingham paper. I stamped all the components in Memento Tuxedo Black ink on Neenah Classic Crest 80# Solar White cardstock using the Art Impressions Gnome Home Match Book stamps. I colored them with Copic Ciao alcohol markers and cut them with the included dies.

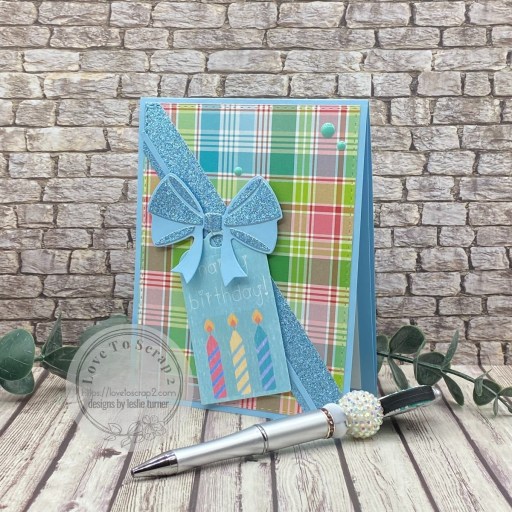
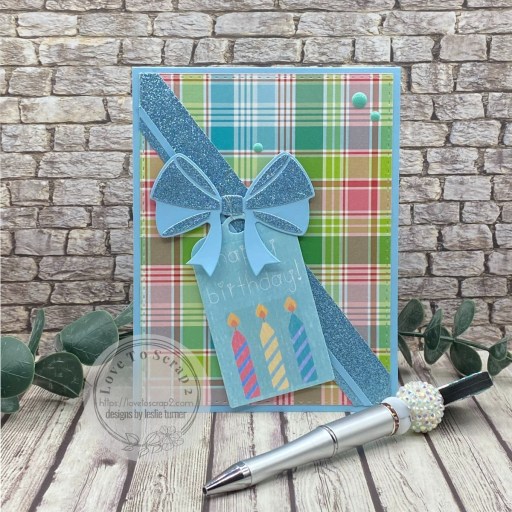
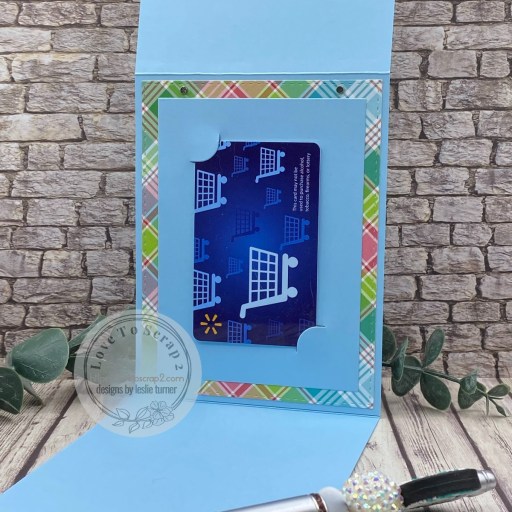
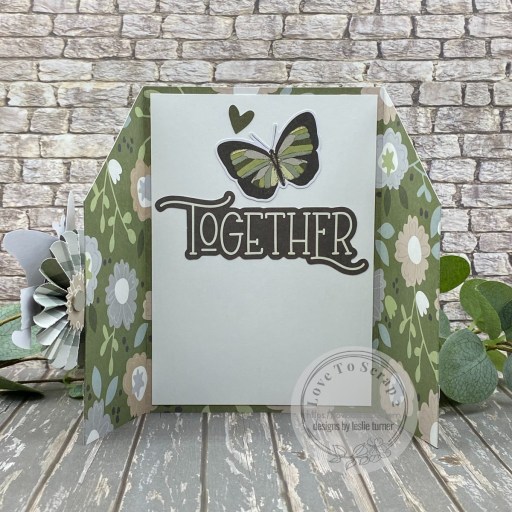
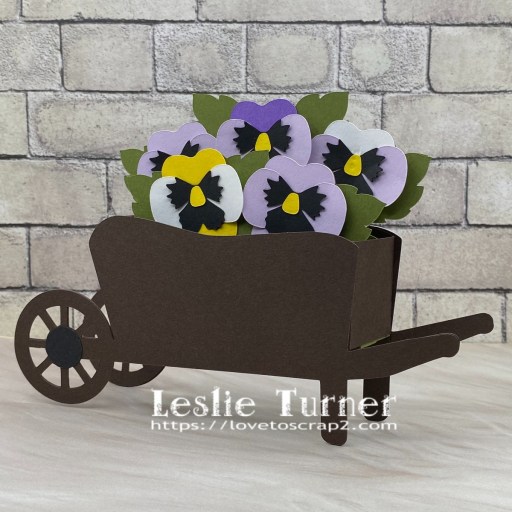
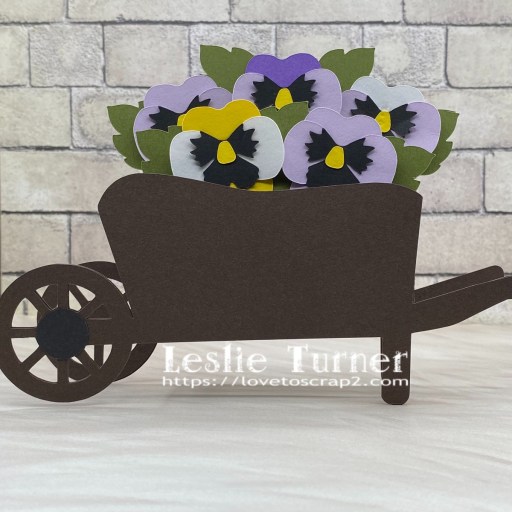
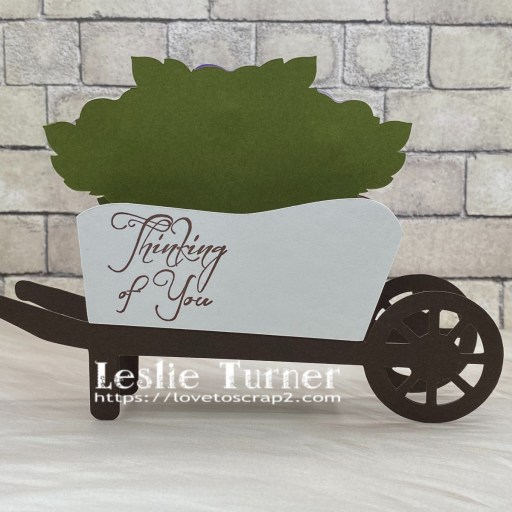
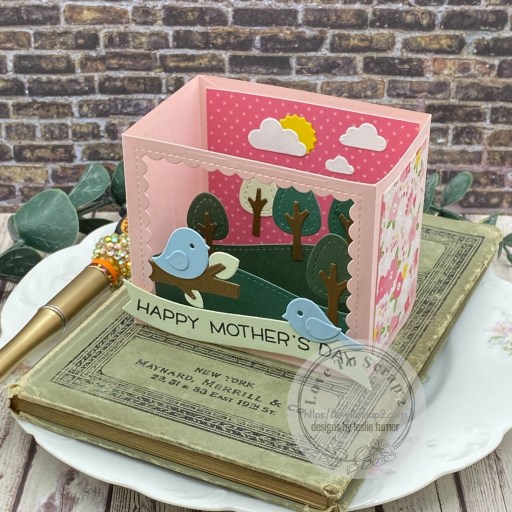
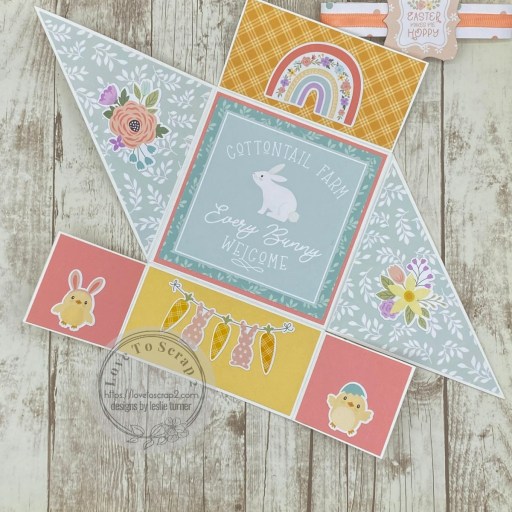
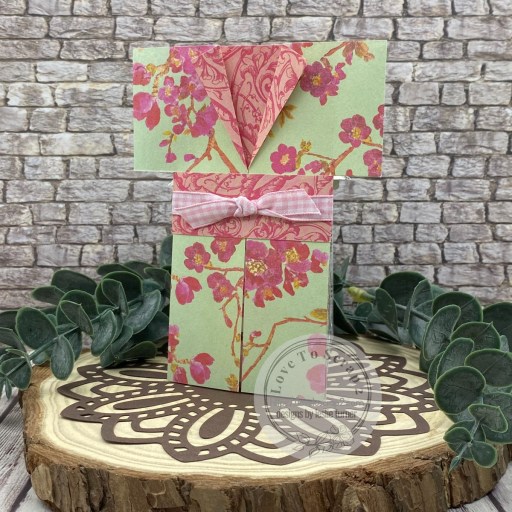
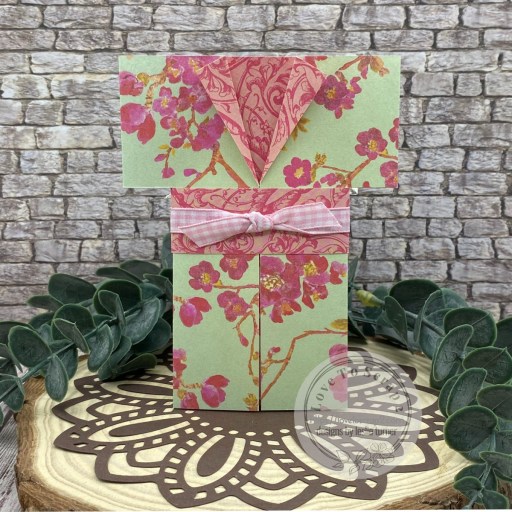
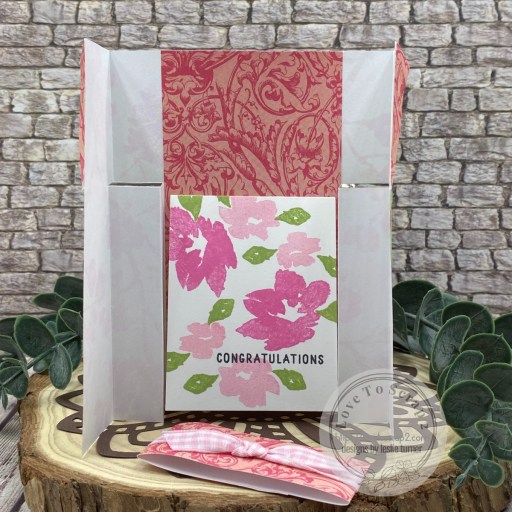
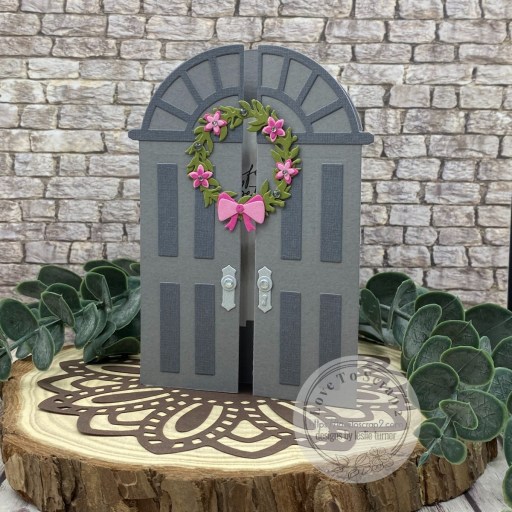
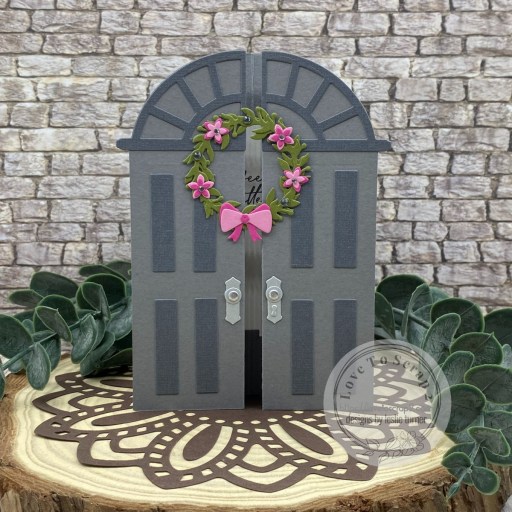
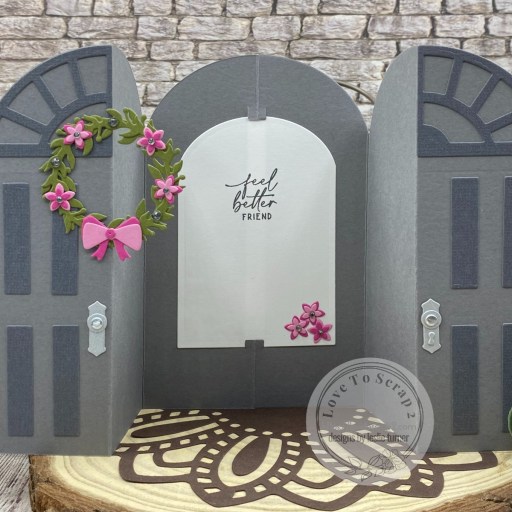
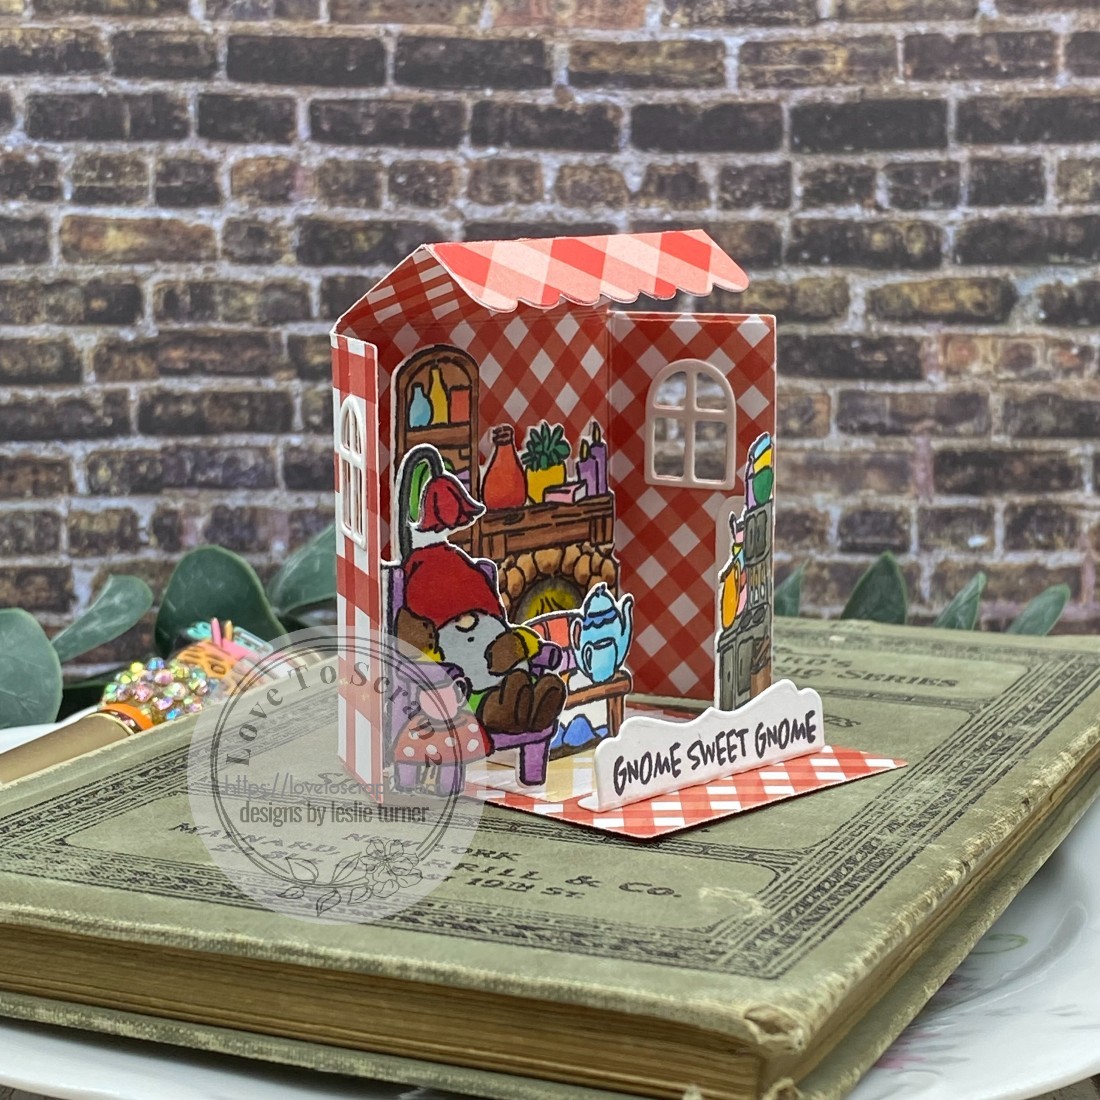
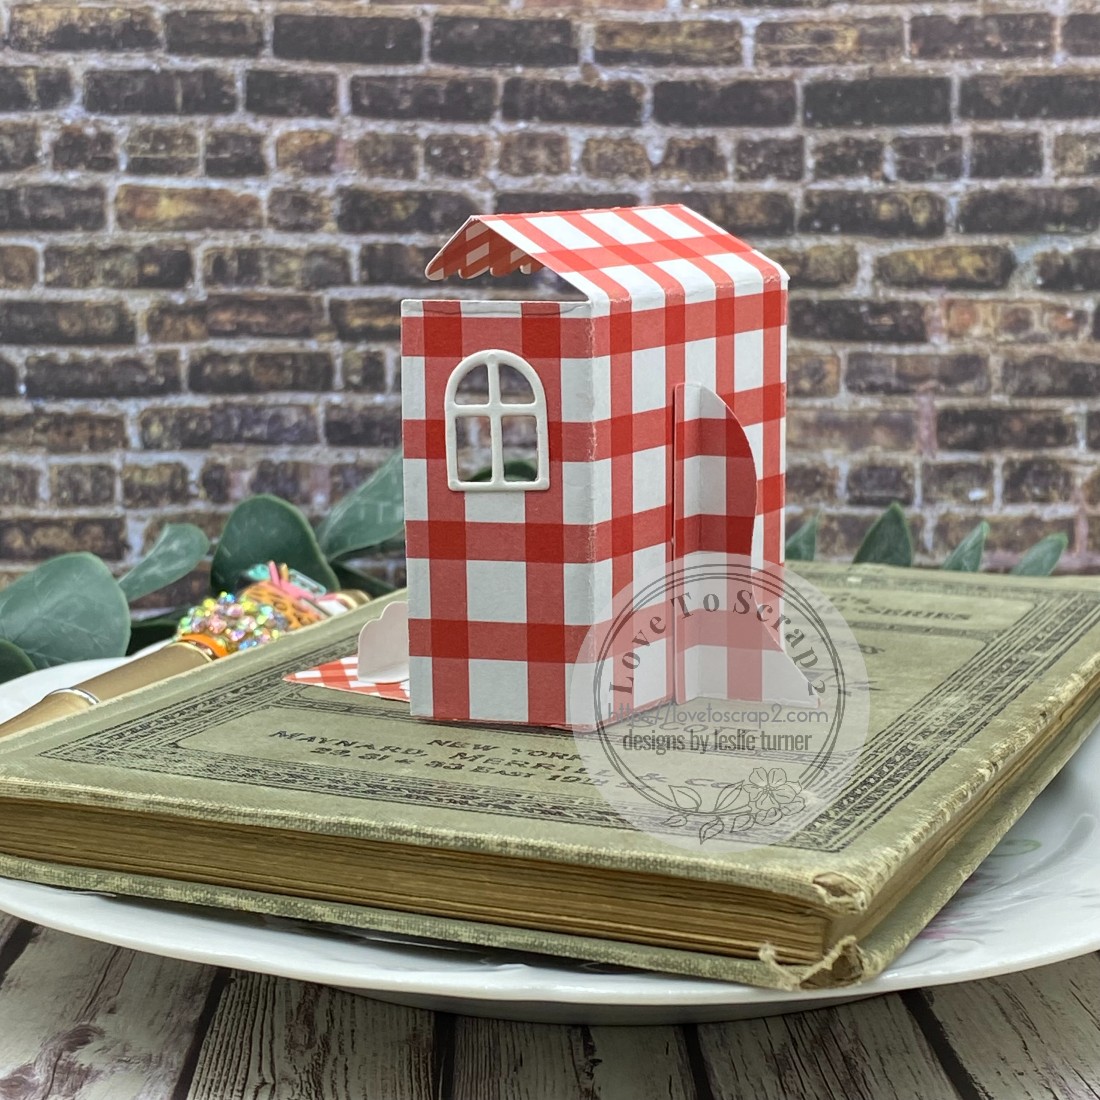
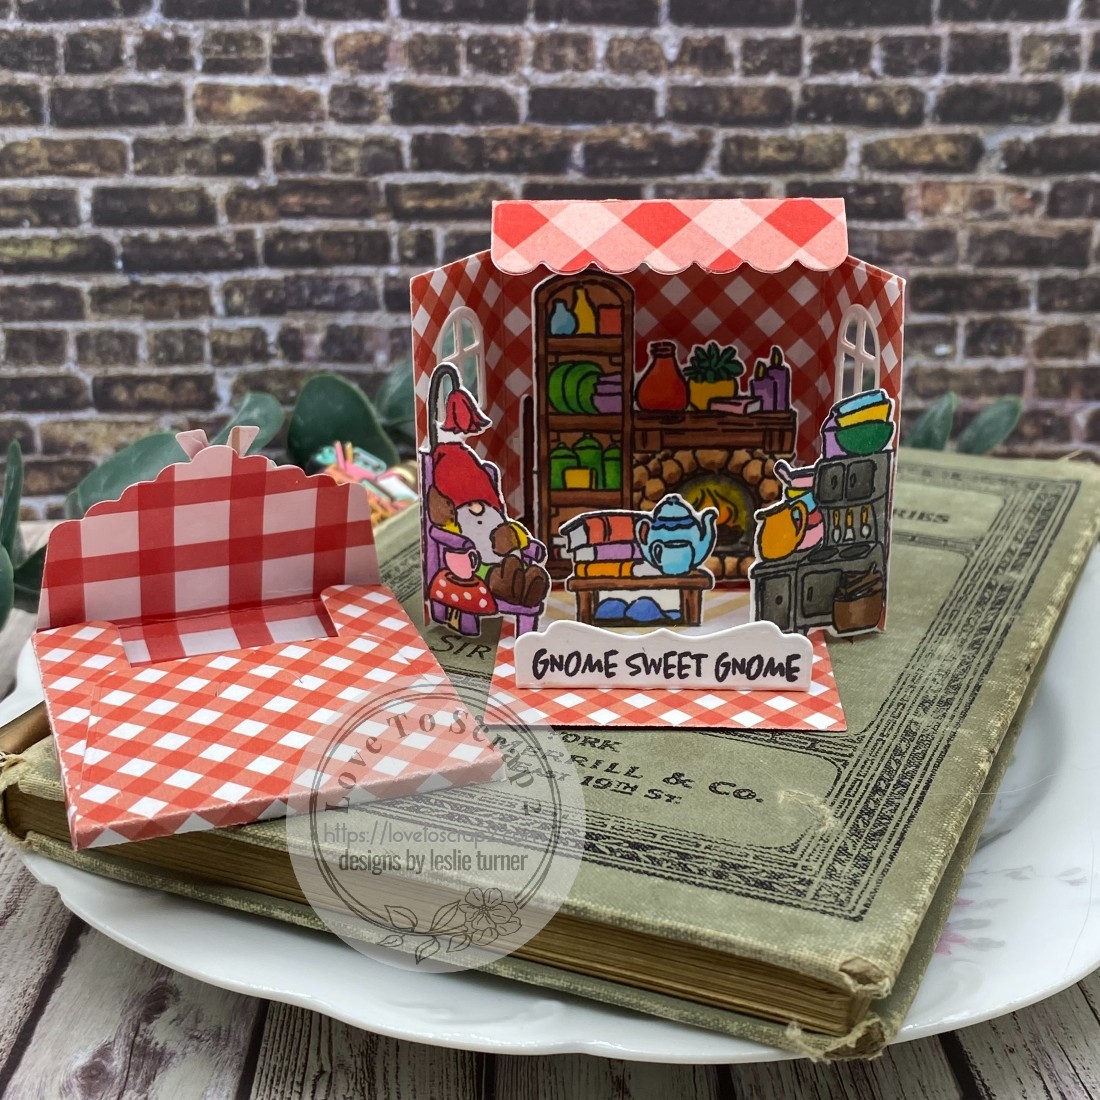
As I always say, the assembly is the most fun and it was very rewarding seeing this adorable little scene come together! Here are some angled shots along with one showing the teeny tiny envelope (cut with the Art Impressions Match Book Envelope dies).

Affiliate links are used in this post at no cost to you – I really appreciate your support! 

Products used:
CARDSTOCK/PAPER: Neenah Classic Crest 80# Solar White cardstock, Waffle Flower Gingham Double-Sided Patterned Paper Pad
STAMPS: Art Impressions Gnome Home Match Book stamps
INK: Memento Tuxedo Black ink; Copic Ciao alcohol markers- Boo/23, BG01, YG06, G05/17, Y08/35, YR16, RV21, V12/15, R14/29/35, C-1, E00/15/18/21/25/29, W-2/5/7
DIES/PUNCHES: Art Impressions Gnome Home Match Book dies, Match Book Template Dies and Match Book Envelope dies
ACCESSORIES: My Sweet Petunia Precision Glue Press, Bearly Art precision craft glue, MISTI stamp tool, Big Shot

I hope you’ve enjoyed seeing this project and will link up with us this time! Thanks so much for stopping by today – we’ll see you next time! ;)

Scrappy hugs,

Happy Birthday tri-fold

Howdy peeps, happy first Friday in November! Only a few more weeks until the big guy in the red suit will be here! Our new challenge is live this morning over at Creative Creases and I’m thrilled to share my DT inspiration project for Challenge #109. If you’re a fellow fun fold fanatic, come on over and play with us! I took a break from holiday crafting and have a birthday tri-fold to share. This isn’t your normal tri-fold… it boasts a hidden space for a gift card! I used a few Emily Moore Designs products for this – Gift Card Holder with a Bow Die, Birthday Tags (free digital download), Card Sentiment Dies and Birthday Sentiments Stamp Set.

I cut the two pieces for the card base from CutCardStock Lessebo Salt Water Blue cardstock along with layering panels from the My Favorite Things Cheerful Plaid paper pad. I used the Salt Water Blue and Celebration Warehouse Light Blue glitter cardstock to create the angled stripe and the bow (using the Emily Moore Designs Gift Card Holder with a Bow Die). I downloaded the Birthday Tags from the Emily Moore Designs site and used the blue one with the candles for the focal on the front.

The magic is on the inside… it looks like a regular sentiment panel with a stamped sentiment from the Emily Moore Designs Birthday Sentiments Stamp Set which I embellished with a strip of plaid paper used on the front. There are tiny disc magnets keeping the flap closed. When the flap is pulled down, an area for a gift card is revealed (cut from Salt Water Blue cardstock using the Emily Moore Designs Card Sentiment Dies) which I embellished with more of the plaid paper. How stinkin’ fun is this?!

Affiliate links are used in this post at no cost to you – I really appreciate your support! 

Products used:
CARDSTOCK/PAPER: CutCardStock Lessebo Salt Water Blue cardstock, Neenah Classic Crest 80# Solar White cardstock, Celebration Warehouse Light Blue Non-Shedding Glitter cardstock, My Favorite Things cheerful Plaid 6×6 Paper Pad, Emily Moore Designs Birthday Tags (free digital download)
STAMPS: Emily Moore Designs Birthday Sentiments Stamp Set
INK: Memento Tuxedo Black ink
DIES/PUNCHES: Emily Moore Designs Gift Card Holder with a Bow Die and Card Sentiment Dies
ACCESSORIES: Fiskars 12″ ProCision Rotary Bypass Paper Trimmer, Spellbinders 12×12 Scoring Board, My Sweet Petunia Precision Glue Press, Bearly Art precision craft glue, MISTI stamp tool, Big Shot, tiny disc magnets, Scrapbook Adhesives Thin 3D Foam Squares and 3D Foam Squares, Freckled Fawn Enamel Dots

I hope you’ve enjoyed seeing this project and will link up with us this time! Thanks so much for stopping by today – we’ll see you next time! ;)

Scrappy hugs,

so very thankful

Hey everybody – I hope you’ve had a great week and have something fun planned this weekend! Our new challenge is live this morning over at Creative Creases and I’m super stoked to share my DT inspiration project for Challenge #107. Come on over and play with us – we LOVE fun folds and we’d love to see yours! I created an oldie but goodie angled gate fold which is always a fun one to make. There are soooo many gate fold varieties out there and it’s been a while since I’ve made one like this. Of course, they are always the most fun made with double sided paper… and as you can well imagine, I have a ton of that! The papers, cardstock stickers and ephemera are all from the Simple Stories The Simple Life Collection Kit.

Cut the card base at 5-1/2″ x 12″ from your choice of double-sided paper and score it at 2″, 4″, 8″ and 10″. Measure down 4″ from the top edge on both the left and right sides and make a light pencil mark. Cut the left side diagonally from the first score line down to the pencil mark, and the right side from the fourth score line down to the pencil mark. Mountain-valley-valley-mountain fold on the four score lines with the valley score lines meeting in the middle. Most people stop at this point but I added two additional diagonal panels to the bottom. I also added narrow strips of coordinating paper to the diagonal edges for a little interest.

I created a rosette focal using my Sizzix-Tim Holtz Mini Paper Rosettes die and added two circles cut with the Love From Lizi Stitched Circle Nested Cutting dies, a sentiment, heart, and butterfly from the ephemera. The final touch on the front was adding a small disc magnet on the back of the rosette to keep the card closed.

I cut the inside panel from Neenah Classic Crest 80# Solar White cardstock and embellished it with two cardstock stickers and a heart from the ephemera. Love, love, love how this turned out!

Affiliate links are used in this post at no cost to you – I really appreciate your support! 

Products used:
CARDSTOCK/PAPER: Neenah Classic Crest 80# Solar White cardstock, Simple Stories The Simple Life papers and cardstock stickers, and Bits & Pieces ephemera
DIES/PUNCHES: Sizzix-Tim Holtz Alterations Mini Paper Rosettes die, Love From Lizi Stitched Circle Nested Cutting Dies
ACCESSORIES: Fiskars 12″ ProCision Rotary Bypass Paper Trimmer, My Sweet Petunia Precision Glue Press, Bearly Art Precision Craft Glue, Big Shot, Ranger Distress Collage Medium, Scrapbook Adhesives E-Z Runner Permanent Strips

I hope you’ve enjoyed seeing this project and will link up with us this time! Thanks so much for stopping by today – we’ll see you next time! ;)

Scrappy hugs,

Thinking of You

Hi friends, it’s Friday (again) and I hope you have something fabulous planned this weekend. I just can’t believe how fast the days, weeks and months are flying by! Our new challenge is live this morning over at Creative Creases and I’m thrilled to share my DT inspiration project for Challenge #106. I love pansies and I really enjoyed putting this card together. I made it a while back for a friend battling cancer and I’m not even sure she received it. I had sent her several cards and never got a response about any of them, so I just don’t know. If she did get it, I hope she enjoyed it as much as I enjoyed making it. ;)

Using the Wheelbarrow Box Card cut file from Cyndy G SVG, I cut all the pieces from CutCardStock Pop Tone Hot Fudge, Pop Tone Black Licorice, Pop Tone Grapesicle, Pop Tone Lemon Drop, Pop Tone Sweet Tooth, Pop Tone Grape Jelly and Pop Tone Jellybean Green cardstock. In looking back, I wish I had used a woodgrain stamp on the background. I will definitely do that the next time I use this cut file.

Here’s a shot of the back. I stamped a sentiment from The Cat’s Pajamas Simply Stacked Sentiments stamp set in Memento Rich Cocoa ink. Easy peasy and sure packs a punch!

Affiliate links are used in this post at no cost to you – I really appreciate your support! 

Products used:
CARDSTOCK/PAPER: CutCardStock Pop Tone Hot Fudge, Pop Tone Black Licorice, Pop Tone Grapesicle, Pop Tone Lemon Drop, Pop Tone Sweet Tooth, Pop Tone Grape Jelly and Pop Tone Jellybean Green cardstock
STAMPS: The Cat’s Pajamas Simply Stacked Sentiments stamp set
INK: Memento Rich Cocoa ink
DIES/PUNCHES: Cyndy G SVG Wheelbarrow Box Card SVG cut file
ACCESSORIES: Scan N Cut SDX 125e, Bearly Art precision craft glue, MISTI stamp tool

I hope you’ve enjoyed seeing this project and will link up your fun fold with us this month! We’d love to see what you’re working on! Thanks so much for stopping by today – we’ll see you next time! ;)

Scrappy hugs,

Thanks

Hey everybody, happy Friday! If you’re in the States, I hope you’re having a wonderful July 4th holiday and you’re looking forward to lots of fun this long weekend! Our new challenge is live this morning over at Creative Creases Challenge and I’m delighted to share my DT inspiration project for Challenge #105. I am an absolute FIEND when it comes to fun folds. What’s wrong with me?! I don’t even care about making a normal A2 card anymore. This tri-fold hidden door fun fold is a delight to make and really packs a punch. This is the second one of these I’ve made – I saw it on Pinterest a while back and it led me to several different videos so it’s an easy one to find.

I cut the card base and flaps from CutCardStock Lessebo Blossom Pink cardstock along with layering panels from coordinating prints in the Melissa Frances 5th Avenue 6×6 paper pad and Neenah Classic Crest Solar White cardstock. I used stamps from the Stampin’ Up Hand-Penned Petals and Charming Sentiments stamp sets along with the coordinating dies. These images and sentiments were stamped in Versafine Onyx Black ink, Catherine Poole Mint To Be and Pixie Dust inks, and Memento Angel Pink and Bamboo Leaves inks. I added a little bow made from Keep It Simple Back To Basics Jade Ribbon, tied with my little wooden bow maker.

I embellished all the panels with either stamped or die cut florals. Totally LOVE how this turned out! It’s a fun one that you know you need to try! ;)

Affiliate links are used in this post at no cost to you – I really appreciate your support! 

Products used:
CARDSTOCK/PAPER: CutCardStock Lessebo Blossom Pink cardstock, Neenah Classic Crest Solar White cardstock, Melissa Frances 5th Avenue 6×6 paper pad
STAMPS: Stampin’ Up Hand-Penned Petals stamp set, Stampin’ Up Charming Sentiments stamp set
INK: Versafine Onyx Black ink; Catherine Poole Mint To Be and Pixie Dust inks; Memento Angel Pink and Bamboo Leaves inks; Bic Mark-It Fine Point marker- Margarita Green
DIES/PUNCHES: Stampin’ Up Penned Flowers dies, Stampin’ Up Sentiment Silhouettes dies
ACCESSORIES: Fiskars 12″ ProCision Rotary Bypass Paper Trimmer, Bearly Art precision craft glue, My Sweet Petunia Precision Glue Press, Mini MISTI, Big Shot, Scrapbook Adhesives 3D Foam Squares, Scrapbook Adhesives E-Z Runner Permanent Strips, Keep It Simple Back To Basics Jade Ribbon, small wooden bow maker, Nuvo Crystal Drops Liquid Mercury

I hope you’ve enjoyed seeing this project and will link up with us this time! We would love to see what kind of fun folds you’re working on! Thanks so much for stopping by today – we’ll see you next time! ;)

Scrappy hugs,

Happy Mother’s Day window card

Howdy peeps, I hope you’re having a great week! They sure are going by at a rapid rate these days. Our new challenge is live this morning over at Creative Creases and I’m delighted to share this Mother’s Day window card with you for Challenge #103. I used quite a few Lawn Fawn products (papers, dies and stamps) along with a boatload of Lessebo cardstock from CutCardStock. I totally love how this turned out!

I pulled out the Lawn Fawn Center Picture Window Card Dies, Shadow Box Card Dies, Shadow Box Ocean Add-On Dies, and Shadow Box Park Add-On Dies, and commenced to cutting all the pieces from CutCardStock Lessebo cardstock and the Lawn Fawn Spring Fling paper pack. I always say the most fun is assembling these kinds of projects, and this was definitely no exception. I had a ball! I used the Lawn Fawn Happy Happy Happy stamp set for the front sentiment which I stamped in Memento Tuxedo Black ink.

I added a panel to the back cut from Lessebo White cardstock and stamped a sentiment from the Stampin’ Up Happy & Heartfelt stamp set, which completed the card. I’ve also included an overhead shot of the card so you can see how stinkin’ cute it is! ;)

Affiliate links are used in this post at no cost to you – I really appreciate your support! 

Products used:
CARDSTOCK/PAPER: CutCardStock Lessebo Blossom Pink, Lessebo Hunter Green, Lessebo Moss Green, Lessebo Sweet Mint, Lessebo Coffee Bean, Lessebo Arctic Blue, Lessebo White, and Lessebo Sunflower Yellow cardstock; Lawn Fawn Spring Fling 6×6 Petite Paper Pack
STAMPS: Lawn Fawn Happy Happy Happy Stamp Set; Stampin’ Up Happy & Heartfelt Stamp Set
INK: Memento Tuxedo Black ink
DIES/PUNCHES: Lawn Fawn Center Picture Window Card Dies, Shadow Box Card Dies, Shadow Box Ocean Add-On Dies, Shadow Box Park Add-On Dies
ACCESSORIES: Fiskars 12″ ProCision Rotary Bypass Paper Trimmer, Bearly Art precision craft glue, MISTI stamp tool, Big Shot, Stampin’ Up Mini Dimensionals

I hope you’ve enjoyed seeing this project and will link up with us this time! Thanks so much for stopping by today – we’ll see you next time! ;)

Scrappy hugs,

Easter Makes Me Hoppy

Hi friends, a very happy Friday to you all! I hope you’re having a great week. Our new challenge is live this morning over at Creative Creases Challenge and I’m delighted to share my fun fold for Challenge #102. I created a six fold card and boy, oh boy, I see more of these in my future! My inspiration came from one of my most favorite sites, Splitcoast Stampers, and the tutorial is HERE if you’re interested in learning how to make this. It looks daunting but I promise you it’s is not. The sky is the limit as far as occasion, holiday, color palette, etc. It’s a super fun one, for sure!

I cut the card base from Neenah Classic Crest 80# Solar White cardstock, along with layering panels from an assortment of papers in the Echo Park It’s Easter Time Collection Kit.

I embellished all the sections with stickers from the sticker sheet, and used a chipboard phrase along with Keep It Simple Mango ribbon on the belly band.

And here’s one final shot of the card completely open. How stinkin’ fun is this?!

Affiliate links are used in this post at no cost to you – I really appreciate your support! 

Products used:
CARDSTOCK/PAPER: Neenah Classic Crest 80# Solar White cardstock, Echo Park It’s Easter Time Collection Kit (papers, stickers and chipboard phrase)
ACCESSORIES: Cricut Paper Trimmer, Bearly Art precision craft glue, My Sweet Petunia Precision Glue Press

I hope you’ve enjoyed seeing this project and will link up with us this time! We can’t wait to see your fun fold! Thanks so much for stopping by today – we’ll see you again soon! ;)

Scrappy hugs,

Congratulations Kimono Card

Hi friends, Happy Friday! I hope you’ve had a great first week of March! Our new challenge is live this morning over at Creative Creases and I’m thrilled to share my DT inspiration project for Challenge #101, where we always want to see your fun folds! I turned this awesome little kimono card into a congrats card, and I love how it turned out! I’ve made a few of these over the years, finding my original inspiration from THIS tutorial over at Splitcoast Stampers. This fold is super easy and really packs a punch – and it’s great for just about any occasion.

I cut the card base and sash from coordinating prints in the Colorbok Delilah 12×12 Designer Paper Pad, cutting and folding the kimono as per the tutorial. I added pink gingham ribbon from the Keep It Simple Ruby Ribbon Pack to the sash.

I cut the mini card on the inside from Neenah Classic Crest 80# Solar White cardstock, and stamped the floral images and sentiment in Memento Tuxedo Black, Rose Bud and Bamboo Leaves inks along with Catherine Pooler It’s A Girl ink. The florals and front sentiment are from the Stampin’ Up Hand-Penned Petals stamp set, and the inside sentiment is from the Stampin’ Up Artistically Inked stamp set.

Affiliate links are used in this post at no cost to you – I really appreciate your support! 

Products used:
CARDSTOCK/PAPER: Colorbok Delilah 12×12 Designer Paper, Neenah Classic Crest 80# Solar White cardstock
STAMPS: Stampin’ Up Hand-Penned Petals and Artistically Inked stamp sets
INK: Memento Tuxedo Black, Rose Bud and Bamboo Leaves inks; Catherine Pooler It’s A Girl ink
ACCESSORIES: Fiskars 12″ ProCision Rotary Bypass Paper Trimmer, Bearly Art precision craft glue, MISTI stamp tool, Keep It Simple Ruby Ribbon Pack

I hope you’ve enjoyed seeing this project and will link up with us this month! Thanks so much for stopping by today – we’ll see you next time! ;)

Scrappy hugs,

new level of wonderful

Hey everybody, Happy Friday! I hope you’re having an awesome week! Our new challenge is live this morning over at Creative Creases and I’m thrilled to share my DT inspiration project for Challenge #100. I created a 3-tier pull-up card featuring papers from Craft Consortium and ephemera from STAMPlorations, and I totally love how it turned out! This fold has been around for many years (and it has been some time since I made one) and I had forgotten how much fun it is! My inspiration came from an older video HERE (although there are others on YouTube) if you’d like to learn how to make it.

I cut the pieces from CutCardStock Basis 80# White 12×12 cardstock along with layering panels from Craft Consortium Ink Drops-Candy 6×6 papers. I assembled the card while watching Dawn’s video and then gathered an assortment of STAMPlorations Bloom Burst ephemera which I used to embellish the tiers.

I stamped a sentiment from the Stampin’ Up Celebrate Sunflowers stamp set on a scrap piece of Basis White in Memento Tuxedo Black ink, cut it with the coordinating Sunflowers die set, and popped it up on adhesive foam strips. The finishing touch was adding several iridescent gemstones.

Affiliate links are used in this post at no cost to you – I really appreciate your support! 

Products used:
CARDSTOCK/PAPER: CutCardStock Basis 80# White 12×12 cardstock, Craft Consortium Ink Drops-Candy 6×6 paper pad
STAMPS: Stampin’ Up Celebrate Sunflowers stamp set
INK: Memento Tuxedo Black ink
DIES/PUNCHES: Stampin’ Up Sunflowers die set
ACCESSORIES: Fiskars 12″ ProCision Rotary Bypass Paper Trimmer, Bearly Art precision craft glue, My Sweet Petunia Precision Glue Press, MISTI stamp tool, Big Shot, STAMPlorations Bloom Burst ephemera, 1/4″ double-sided foam strips, iridescent gemstones

I hope you’ve enjoyed seeing this project and will link up with us this time! Thanks so much for stopping by today – we’ll see you next time! ;)

Scrappy hugs,

feel better friend

Hey everybody, Happy New Year! Wishing you all a happy, healthy and prosperous 2025! My daughter, my firstborn, is 41 today and I don’t know how that’s possible because I’m only 29. Bahahaha! I’ve been busting at the seams to blab that I have joined the Creative Creases Challenge DT this year, and I couldn’t be more excited! You know how I love me some fun folds and this opportunity is right up my alley. This is the only challenge team I’m on now (the other five are product teams) and I’m really looking forward to sharing some fun folds. These challenges have historically been every other week on Fridays, and this year Debbie has changed the schedule to monthly challenges to give everyone more time, so come on over and play with us! Challenge #99 is live this morning and I’ve created a get well card for my debut project using the Sizzix Door Fold-A-Long Thinlits. This is a super easy card that really packs a punch and can be tailored to any season or occasion.

All the cardstock I used is from CutCardStock. I cut the card base and door accents from Lessebo Granite Gray and Shadow Gray, and the door handles from Bright Silver Foil and Stardream Metallic Silver. Next, I cut the wreath from Pop Tone Jellybean Green and flowers from Raspberry Ice and Pink Tutu cardstock. I added tiny gray gemstones to the center of each flower. The wreath can be made in any color combination for any season or occasion. So fun!

I cut the inside panel from Lessebo White cardstock and stamped a sentiment from the Stampin’ Up Hand-Penned Petals in Catherine Pooler Black Jack ink. I added a few more pink flowers, and the card was complete.

Affiliate links are used in this post at no cost to you – I really appreciate your support! 

Products used:
CARDSTOCK/PAPER: CutCardStock Lessebo Granite Gray, Shadow Gray, Bright Silver Foil, Stardream Metallic Silver, Pop Tone Jellybean Green, Raspberry Ice, Pink Tutu and Lessebo White
STAMPS: Stampin’ Up Hand-Penned Petals
INK: Catherine Pooler Black Jack ink
DIES/PUNCHES: Sizzix Door Fold-A-Long Thinlits
ACCESSORIES: Fiskars 12″ ProCision Rotary Bypass Paper Trimmer, Bearly Art precision craft glue, MISTI stamp tool, Big Shot, Darice tiny gray gemstones

I hope you’ve enjoyed seeing this fun fold card and will link up YOUR fun fold with us this time! Thanks so much for stopping by today – we’ll see you next time! ;)

Scrappy hugs,