
03/01/26 Front Porch Winner at 613 Avenue Create!
02/23/26 Top 3 Winner at Make My Monday Challenge Blog!
01/21/26 Top Rocker at 613 Avenue Create!
Hey everybody, happy weekend! I hope you’re not too frozen where you are, lol! I’m up on the Scrapbook Adhesives By 3L blog today sharing a tutorial for making a snowflake shadow box. I love making Winter-themed pieces of decor to display on the mantel or side table, and this frosty creation was so perfect for the cold weather we’ve been having! I employed the “Wear Your Adhesive on the Outside” technique for these snowflakes and circle embellishments using our 3D Foam Snowflakes and Metallic Transfer Foil Sheets Celebrate Colors (also Pastel Colors and Nature Colors), and put it all together with E-Z Runner Permanent Strips Refillable Dispenser, Thin 3D Foam Squares Black Mix and Dual Tip Glue Pen. I have to say this – if you haven’t tried the “Wear Your Adhesive on the Outside” technique, you need to!
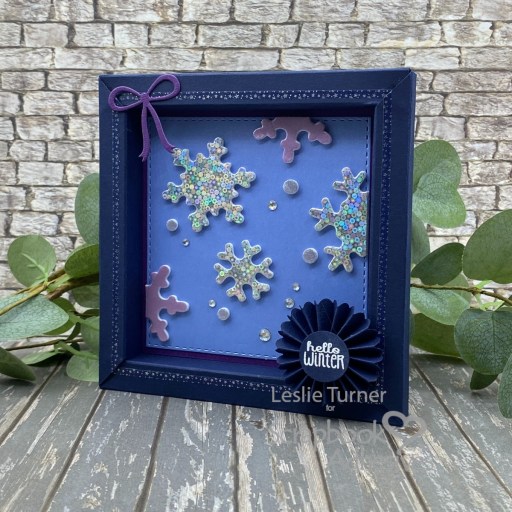
I used the We R Makers Shadow Box Punch Board to make the 5″ x 5″ shadow box (from CutCardStock Basis Navy) and added some MAMBI skinny washi tape to the front for a little interest. I used a Love From Lizi Stitched Square Nested Cutting Die to cut the focal panel from CutCardStock Stardream Metallic Vista and layered it on CutCardStock Plum.
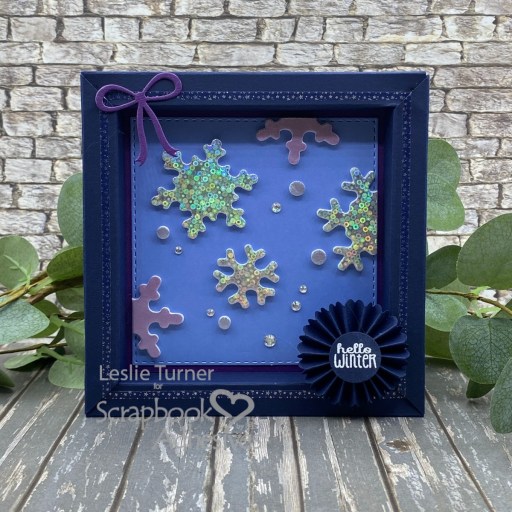
As mentioned above, I employed the “Wear Your Adhesive on the Outside” technique for three snowflakes using our 3D Foam Snowflakes and Metallic Transfer Foil Sheets Celebrate Colors (in Silver) and one snowflake using Metallic Transfer Foil Sheets Pastel Colors (in purple) which I cut in half. I added four circles which I made with the same technique using circles from the 3D Foam Snowflakes and Metallic Transfer Foil Sheets Nature Colors (in gray).
I used the Coco & Reno Mini Tag Flip Cutting Dies to cut a bow from the Plum cardstock and to cut a rosette from the Basis Navy cardstock. Oddly, there was not a corresponding circle die for the center of the rosette so I used a Stampin’ Up 1/2″ circle punch to punch a circle to adhere to the center. The sentiment is from Prickley Pear Stamps Winter Truck stamp set which I heat embossed using Brutus Monroe Clear Embossing Ink and Alabaster Embossing Powder and punched with a Stampin’ Up 3/4″ circle punch.
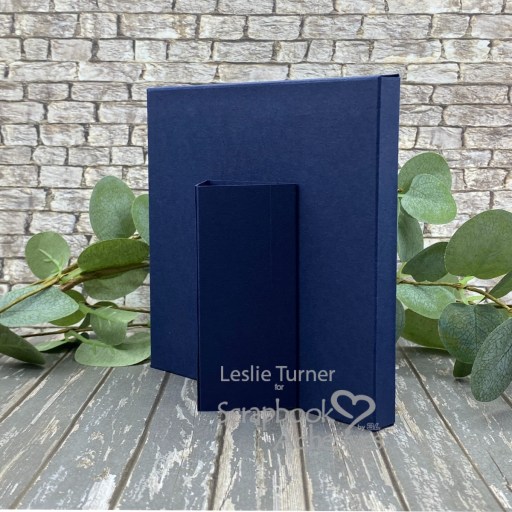
I made a simple triangular shaped tube which I adhered to the back so the shadow box would stand for display. I really love how this turned out!
Sharing in the following challenges:
1. https://avenue613.blogspot.com/2026/02/february-2026-anything-goes-w-optional.html
2. https://mmmchallengeblog.blogspot.com/2026/02/271-use-2-dies.html (bow, rosette)
Products used:
Scrapbook Adhesives by 3L®
E-Z Runner® Permanent Strips Refillable Dispenser
Thin 3D Foam Squares Black Mix
3D Foam Snowflakes
Metallic Transfer Foil Sheets Celebrate Colors
Metallic Transfer Foil Sheets Pastel Colors
Metallic Transfer Foil Sheets Nature Colors
HomeHobby™ by 3L
Dual Tip Glue Pen
Affiliate links are used in this post at no cost to you – I really appreciate your support!
Other products used:
Cardstock: CutCardStock Basis 12×12 Navy, Plum and Stardream Metallic Vista
Stamps: Prickley Pear Stamps Winter Truck
Ink: Brutus Monroe Clear Embossing Ink and Alabaster Embossing Powder
Dies/Punches: Love From Lizi Stitched Square Nested Cutting Dies, Coco & Reno Mini Tag Flip Cutting Dies, Stampin’ Up 1/2″ and 3/4″ Circle Punches
Accessories: Fiskars 12″ ProCision Rotary Bypass Paper Trimmer, We R Makers Shadow Box Punch Board, MAMBI skinny washi tape, Mini MISTI, Big Shot, clear iridescent gemstones
I hope you’ve enjoyed this project and you’re inspired to get your crafty supplies out and play! Be sure to check out the awesome array of adhesives and other craft supplies Scrapbook Adhesives By 3L has to offer! And be sure to follow us on Facebook, Pinterest, Instagram and Twitter for lots of crafty inspiration! And if you haven’t yet subscribed to our YouTube Channel, be sure to do that, too, for even more inspiration! Thanks so much for stopping by today – we’ll see you next time!
Scrappy hugs,

