Lucky

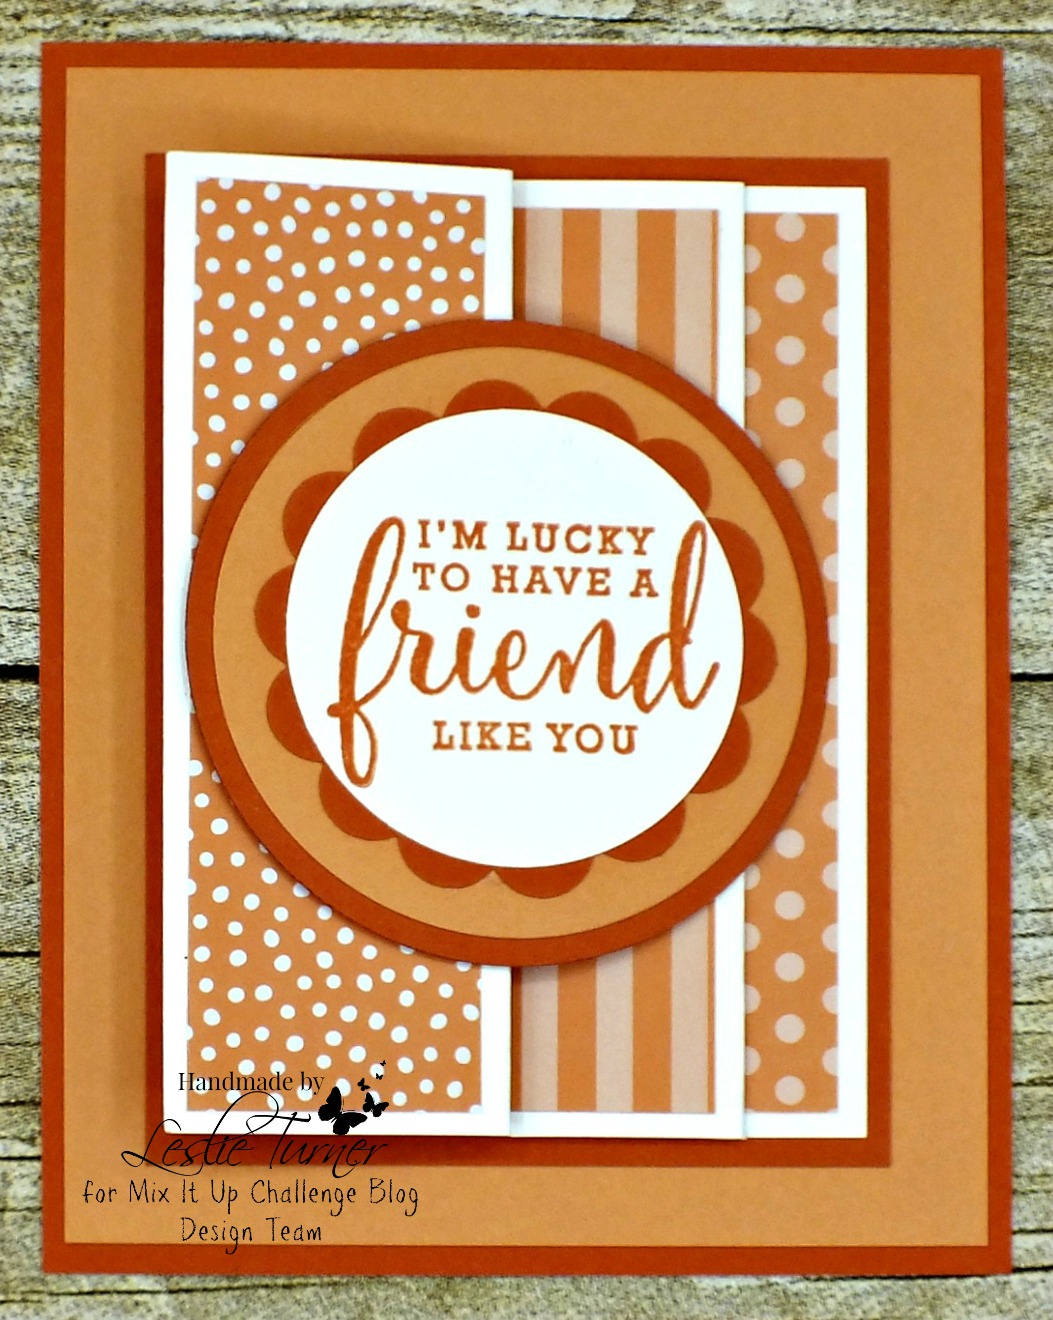
Hey everybody! Happy Thursday – I hope you’re having a great week. I’m stoked to share a Keep It Simple DT inspiration project with you today created our new Back to Basics 6×9 Lime Collection Pack! OMGosh, I totally love this color. Green (in any variation) has been my all-time favorite color since I can remember, so I thoroughly enjoyed making this. I’ve created quite a few of this version of a triple fold over the years and decided to give this one a little ‘faux’ twist by adhering the second flap down to the card base, thus giving it the ‘faux’ look of a triple fold. I thought that added a little more fun to an already fun design. And of course, these die cuts from our Lucky Day Collection make it even more fun… along with my handmade pom-pom on his hat! ;)

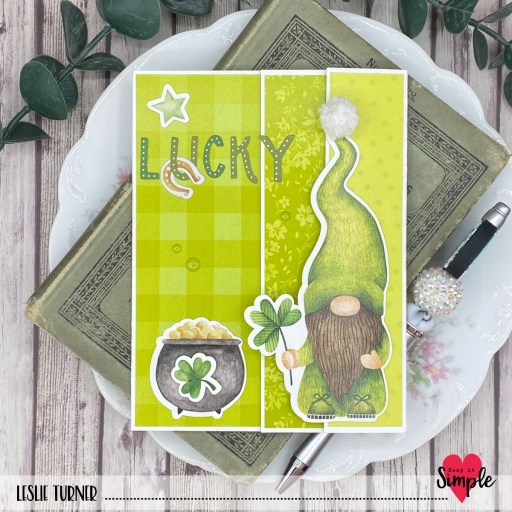
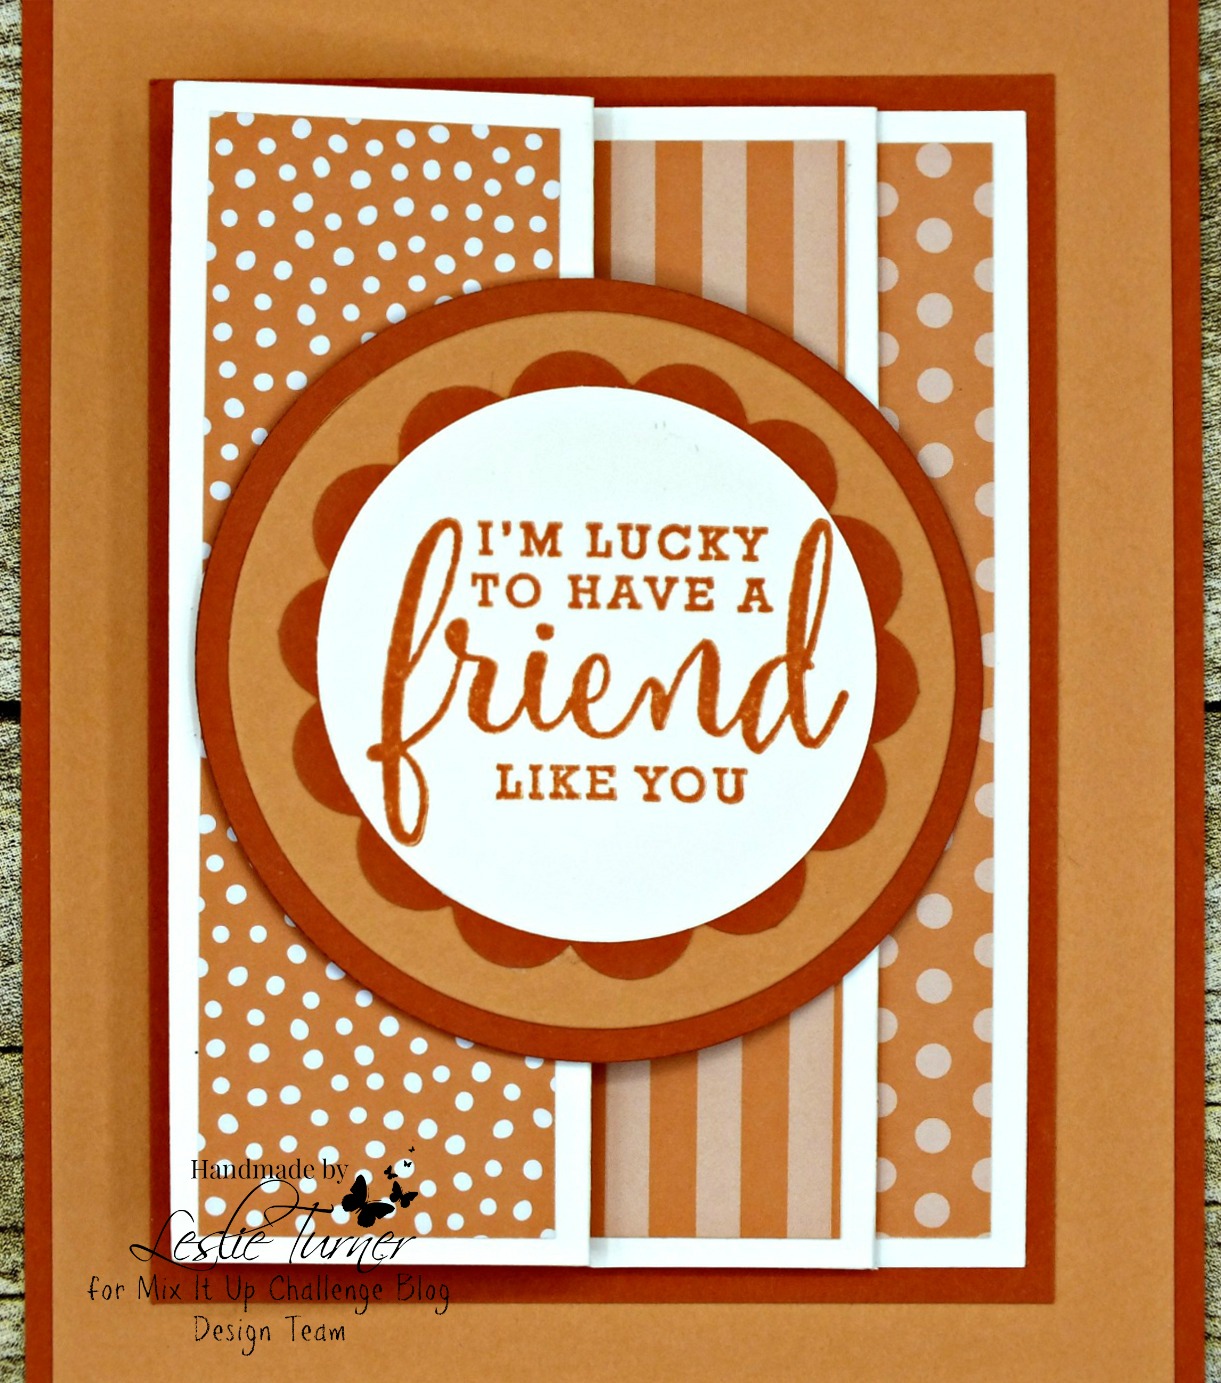
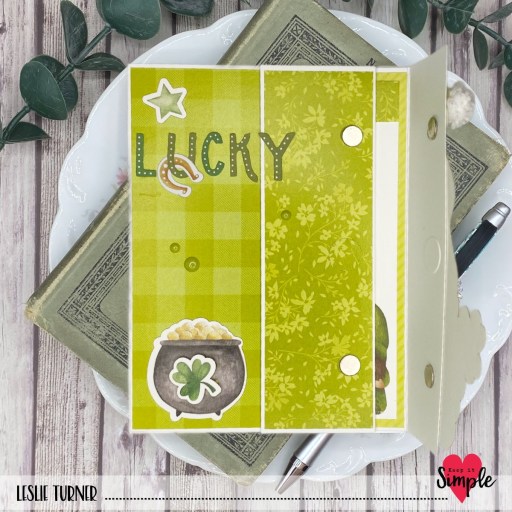
I cut the 5-1/2″ x 11″ card base from Neenah Classic Crest 110# Solar White cardstock and scored it at 1-3/4″, 5-1/2″ and 9-3/4″ on the lone side. I folded the base in half and then folded the two remaining score lines toward the left. Working from left to right, I cut a 3-1/2″ x 5-1/4″ panel from a plaid print in the Lucky Day 6×9 Collection Pack and adhered it to the left side. Next, I cut a 1-1/2″ x 5-1/4″ panel from a floral print and adhered it to the second flap, and then adhered that flap down to the card base with thin adhesive foam squares.

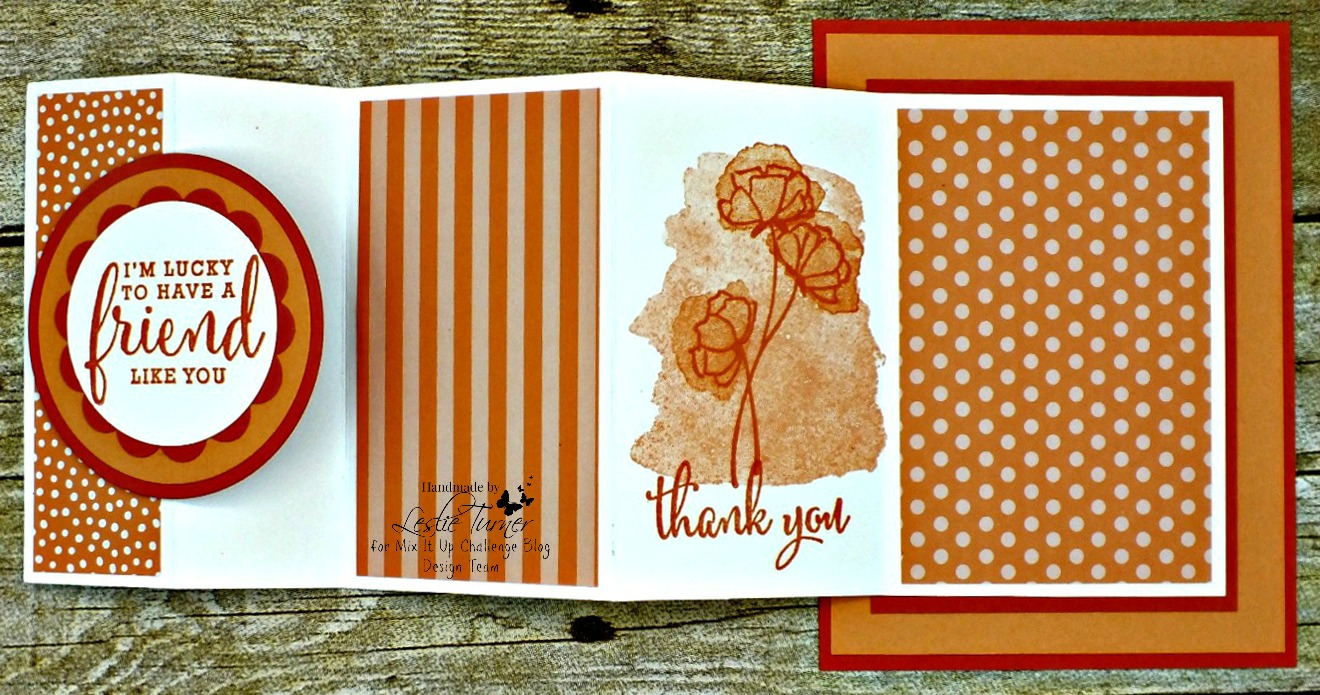
Finally, I cut a 1″ x 5-1/4″ panel from a dotted print and adhered it to the right-hand flap. I added two disc magnets to keep the card closed, and with the card closed, I embellished the front with an assortment of die cut pieces from the Lucky Day Collection. I made a pom-pom from white yarn using a thin skewer and adhered it to the top of his hat. The final step was adding several Back To Basics Lime Enamel Dots.

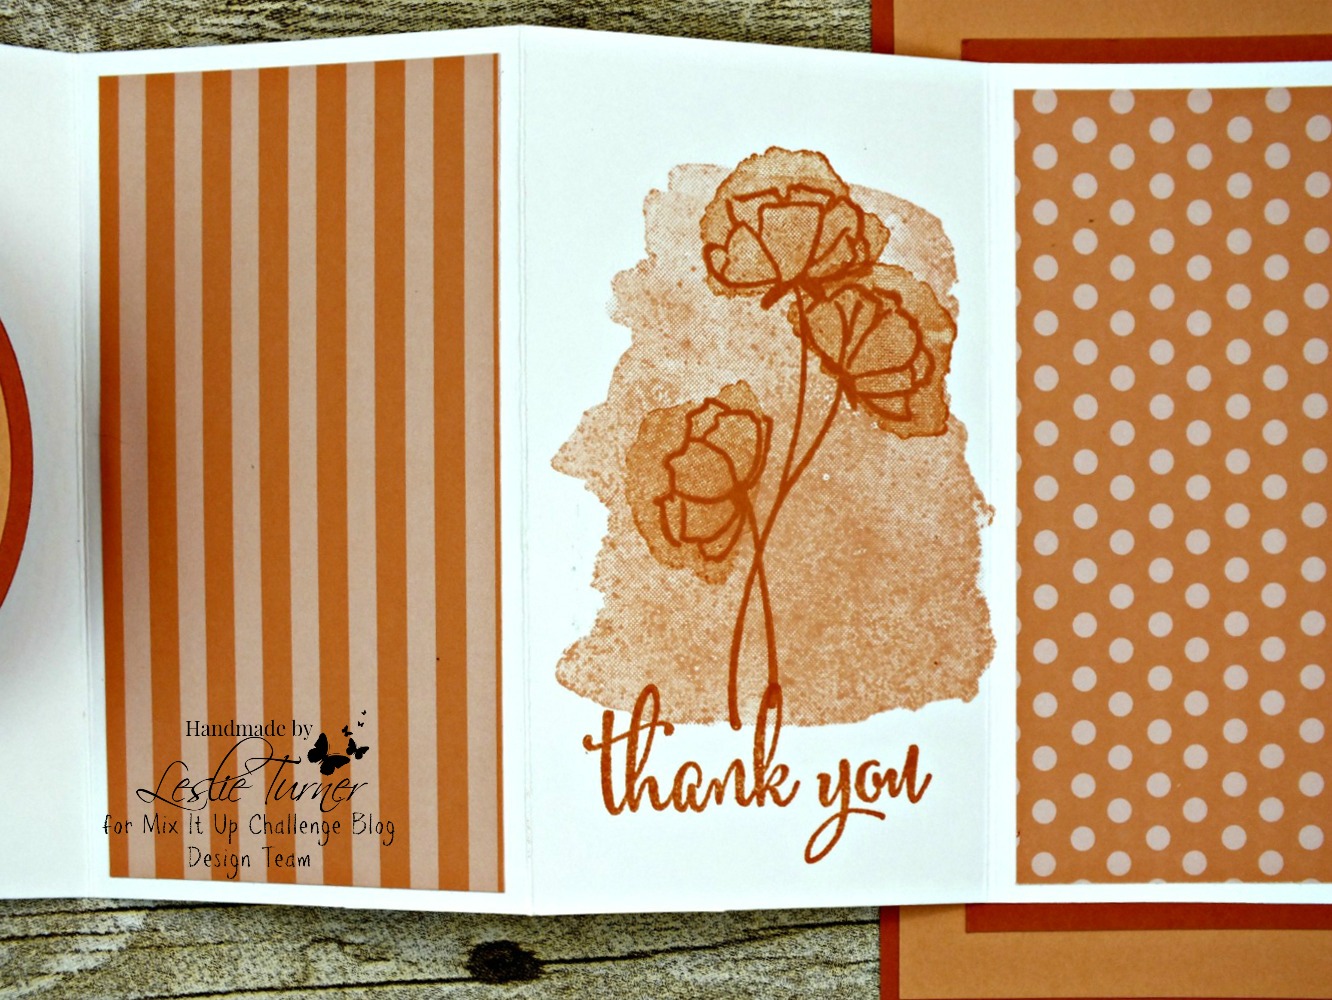
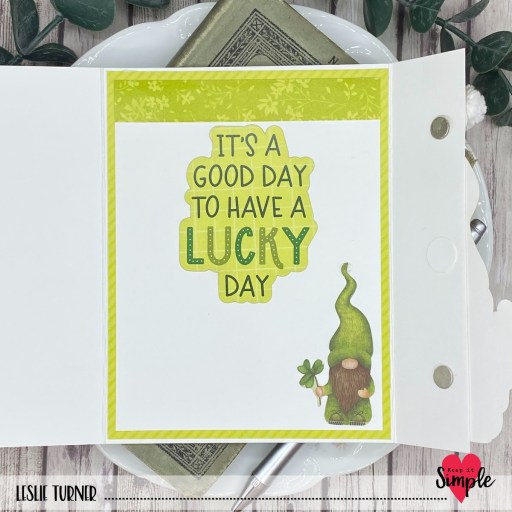
I cut the 4″ x 5-1/4″ inside panel from 80# Solar White cardstock and embellished it with a leftover strip of the floral paper used on the front. I added a sentiment and a tiny gnome, also from the die cut pieces, and layered the panel on another print from the Lucky Day Collection.

Keep It Simple products used:
Back to Basics 6×9 Lime Collection Pack
Back To Basics Lime Enamel Dots
Lucky Day Die Cut Pieces
Lucky Day Lucky Phrases Die Cut Pieces
Lucky Day Title Die Cut Pieces

Affiliate links are used in this post at no cost to you – I really appreciate your support!

Other products used:
CARDSTOCK/PAPER: Neenah Classic Crest 110# and 80# Solar White cardstock
ACCESSORIES: Fiskars 12″ ProCision Rotary Bypass Paper Trimmer, Bearly Art precision craft glue, My Sweet Petunia Precision Glue Press, Scrapbook Adhesives Thin 3D Foam Squares (white variety), white yarn, skewer, small disc magnets, Stampin’ Up Mini Dimensionals

I hope you’ve loved seeing this project as much as I loved creating it and you’re inspired to get crafty! Be sure to check out ALL the fun goodies in the Keep It Simple online store! Save 10% on your entire order when you shop online using code LoveToScrap2 at checkout! There is no minimum purchase requirement and no usage limits, AND it combines with product, order, and shipping discounts! Is that cool, or what?! Be sure to Follow us on Facebook, Instagram, and Pinterest for lots of crafty inspiration! Thanks so much for stopping by today – we’ll see you next time!

Scrappy hugs,

lucky

Hey everybody, Happy Wednesday! I hope your week is going well! I’m delighted to share one more Keep It Simple DT inspiration project created with the adorable Lucky Day Collection. This was an extra project I made (sometimes I can’t help myself) and even though St. Patty’s Day is long past, I wanted to show it off. Collage style cards are so fun to make, layer after layer, and I love how this one turned out!

The landscape side-folding A2 size card base was cut from Neenah Classic Crest 110# Solar White cardstock along with a frame and layering panel from coordinating papers in the Lucky Day 6×9 Collection Pack. I used the Stitched Rectangles Nested Dies to make the frame and popped it up on double-sided foam strips. Then the fun began… I chose a bunch of die cuts from the Lucky Phrases and Lucky Day Die Cut Pieces and began layering them, gluing some flat and adding foam squares behind some. When I was finished, I added several Jade Enamel Dots which completed the card front.

I cut the inside panel from 80# Solar White cardstock and embellished it with another coordinating print from the 6×9 Collection Pack and more die cuts and phrases.

Keep It Simple products used:
Lucky Day 6×9 Collection Pack
Lucky Day Lucky Phrases Die Cut Pieces
Lucky Day Die Cut Pieces
Back To Basics Stitched Rectangles Nested Dies
Back To Basics Jade Enamel Dots

Affiliate links are used in this post at no cost to you – I really appreciate your support!

Other products used:
CARDSTOCK/PAPER: Neenah Classic Crest 110# and 80# Solar White cardstock
ACCESSORIES: Fiskars 12″ ProCision Rotary Bypass Paper Trimmer, Elmer’s Craft Bond Tape Runner, Bearly Art precision craft glue, Big Shot, 1″ and 1/4″ double-sided foam strips, Scrapbook Adhesives 3D Foam Squares (small white)

I hope you’ve loved seeing this project as much as I loved creating it and you’re inspired to get crafty! Be sure to check out ALL the fun goodies in the Keep It Simple online store! Save 10% on your entire order when you shop online using code LoveToScrap2 at checkout! There is no minimum purchase requirement and no usage limits, AND it combines with product, order, and shipping discounts! Is that cool, or what?! Be sure to Follow us on Facebook, Instagram, and Pinterest for lots of crafty inspiration! Thanks so much for stopping by today – we’ll see you next time!

Scrappy hugs,

Lucky

Hi everyone! It’s October 1st and Monday and quite a busy morning! A new challenge is live this morning over at Mix It Up Challenge Blog and I’m proud to share my DT inspiration project for MIUCB #16 – Anything Goes + Monochrome! Our challenges are always Anything Goes and we’d absolutely love to see you play the technique twist – this month it would be a monochrome project in variations of any color!

I really love fun folds and am always on the hunt for new ones. My inspiration for this friendship card came from my friend Dawn who created a fold-out panel card HERE. I absolutely fell in love with this fold and just had to try it! Love how it turned out!

Leslie

I got some new Stampin’ Up designer series paper a while back and settled on several patterned papers from that collection along with some contrasting cardstock for this card. I stamped a sentiment, punched it with a circle punch and layered it on a scalloped die cut and two more circle die cuts.

2018_07100009a

I stamped an image and sentiment in the fold out panel.

2018_07100010a

Here’s a shot of the fold out panel completely open.

2018_07100011a

I stamped a sentiment on the back as well. Such a fun card!

2018_07100012a

Products used:
Cardstock/Paper: Stampin’ Up Whisper White, Tangerine Tango and Grapefruit Grove cardstock, Stampin’ Up Grapefruit Grove 6×6 DSP
Stamps: Stampin’ Up Love What You Do and Thankful Life stamp sets
Ink: Stampin’ Up Tangerine Tango and Grapefruit Grove ink
Dies/Punches: Stampin’ Up 2″ circle punch, EK Success 2-1/4″ circle punch
Accessories:  Tim Holtz Stamp Platform

Proud to enter this monochrome fun fold into the following challenges:
A Bit More Time To Craft Challenge: #77 – Anything Goes
A Perfect Time To Craft Challenge: #10 – October Anything Goes
Always Fun Challenges: #78 – Dies & Punches
Cardz 4 Galz: #81 – What’s New (new fun fold technique)
Crafts Galore Encore Challenge Blog: #56 – October Anything Goes
Craftyhazelnut’s Patterned Paper October Challenge
Lemon Shortbread Challenge Blog: #77 – Anything Goes
Monochrome Magic: #15 – Monochrome or Monochrome w/ Twist of Add a Bow (no twist)
Not Just Cards: Anything Goes
Pearly Sparkles Challenge Blog: #33 – Anything Goes
The Creative Crafters: #8 – Anything Goes
Word Art Wednesday: Weeks #354/355 – Anything Goes
World Wide Open Design Team Challenge: #9 – Anything Goes

I hope you’ve enjoyed today’s project and will link up a project with us this month! Remember, all of our challenges are anything goes with an optional technique twist to inspire you… the twist is not required to play! Thanks so much for hanging with me this morning – we’ll see you again soon! ;)

Scrappy hugs,
lesliesig