Autumn Greetings

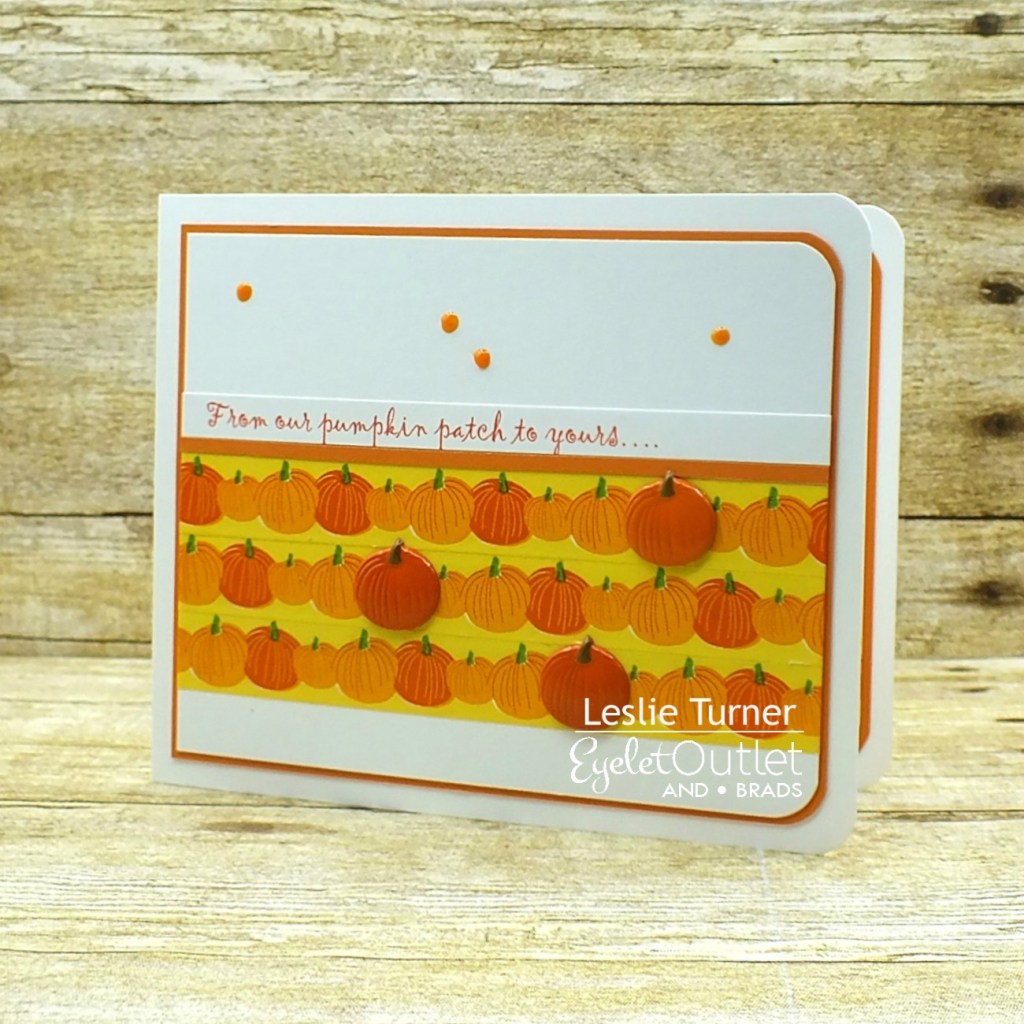
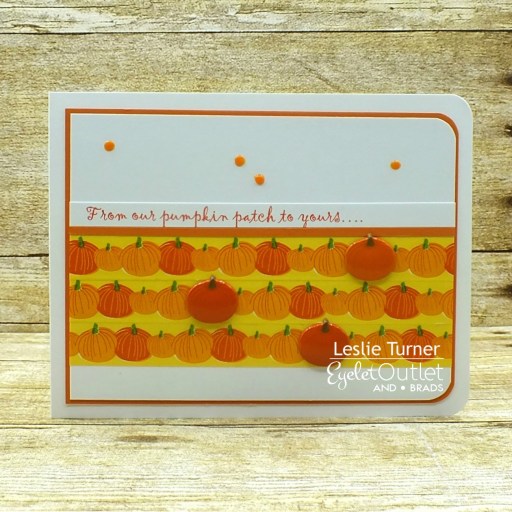
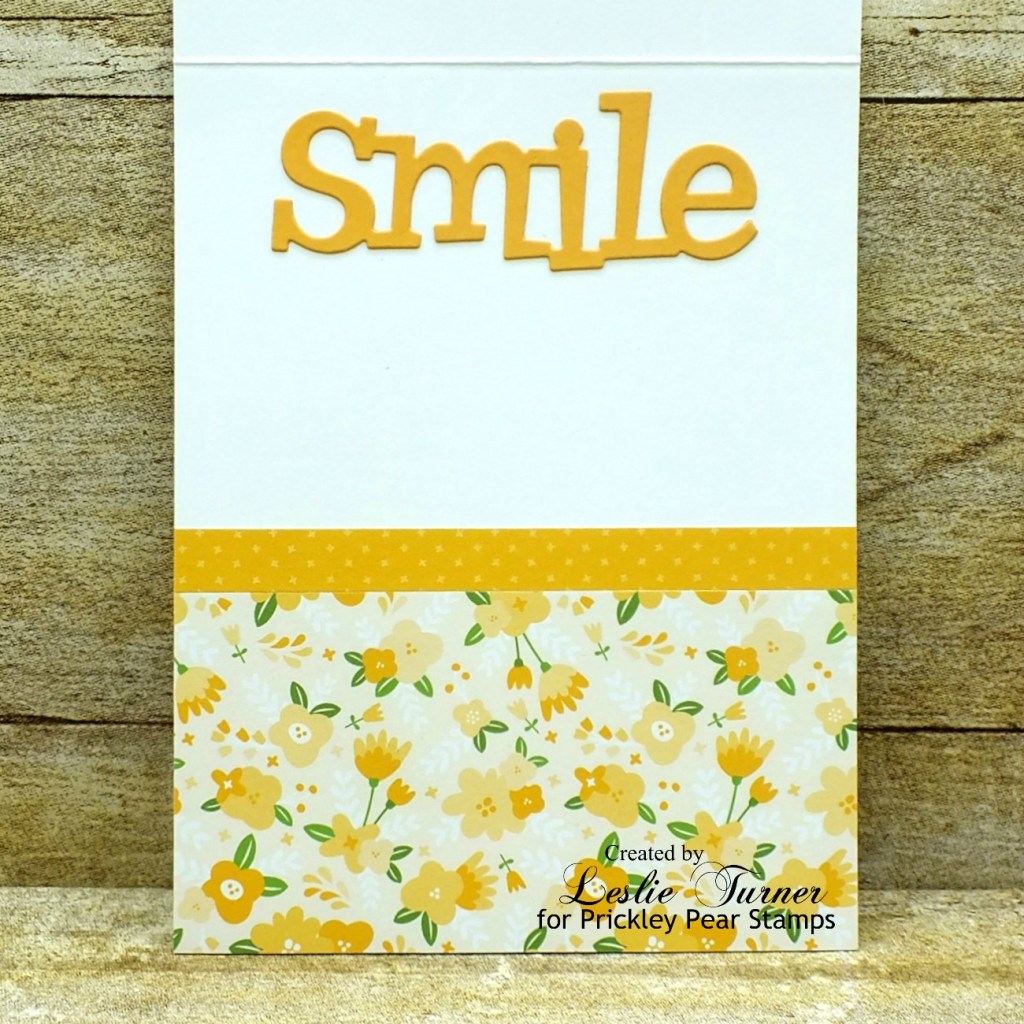
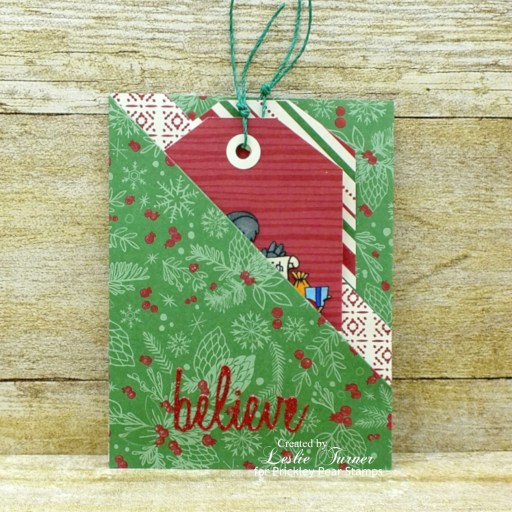
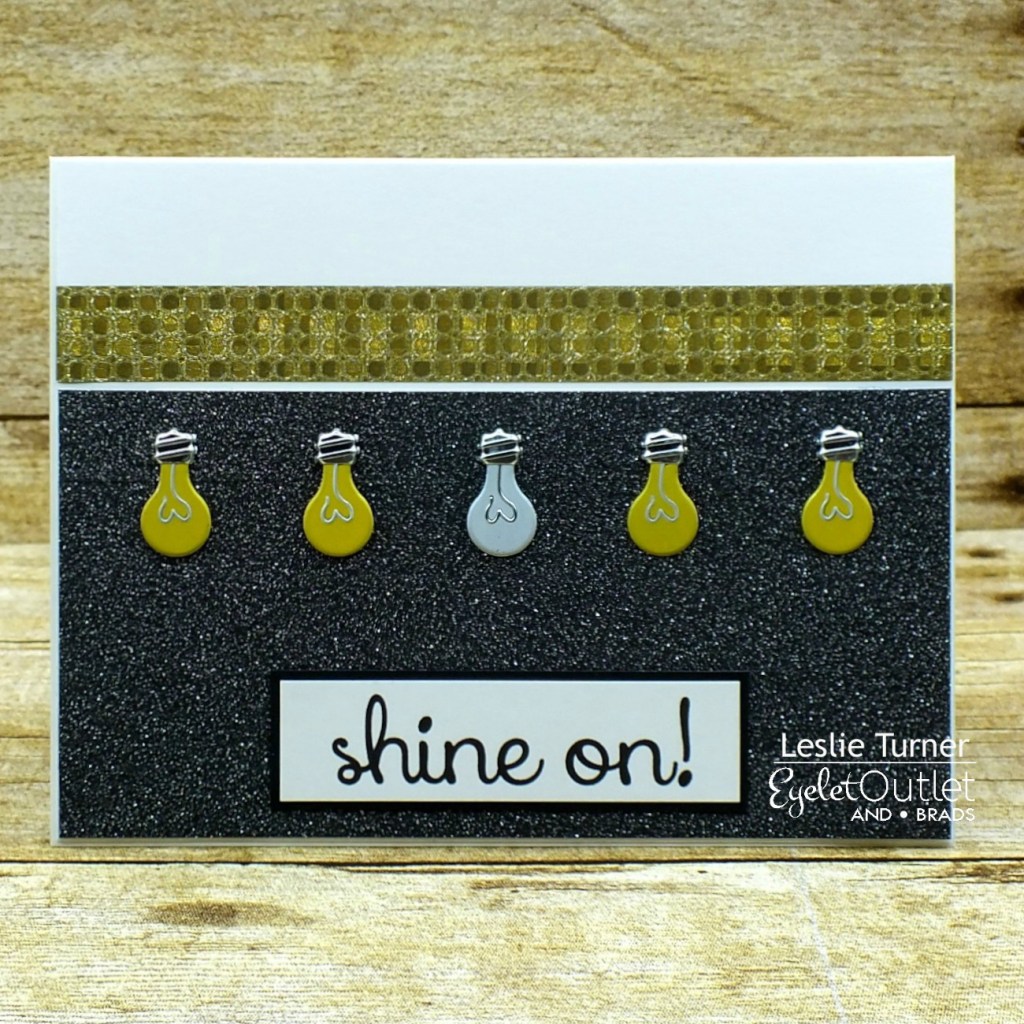
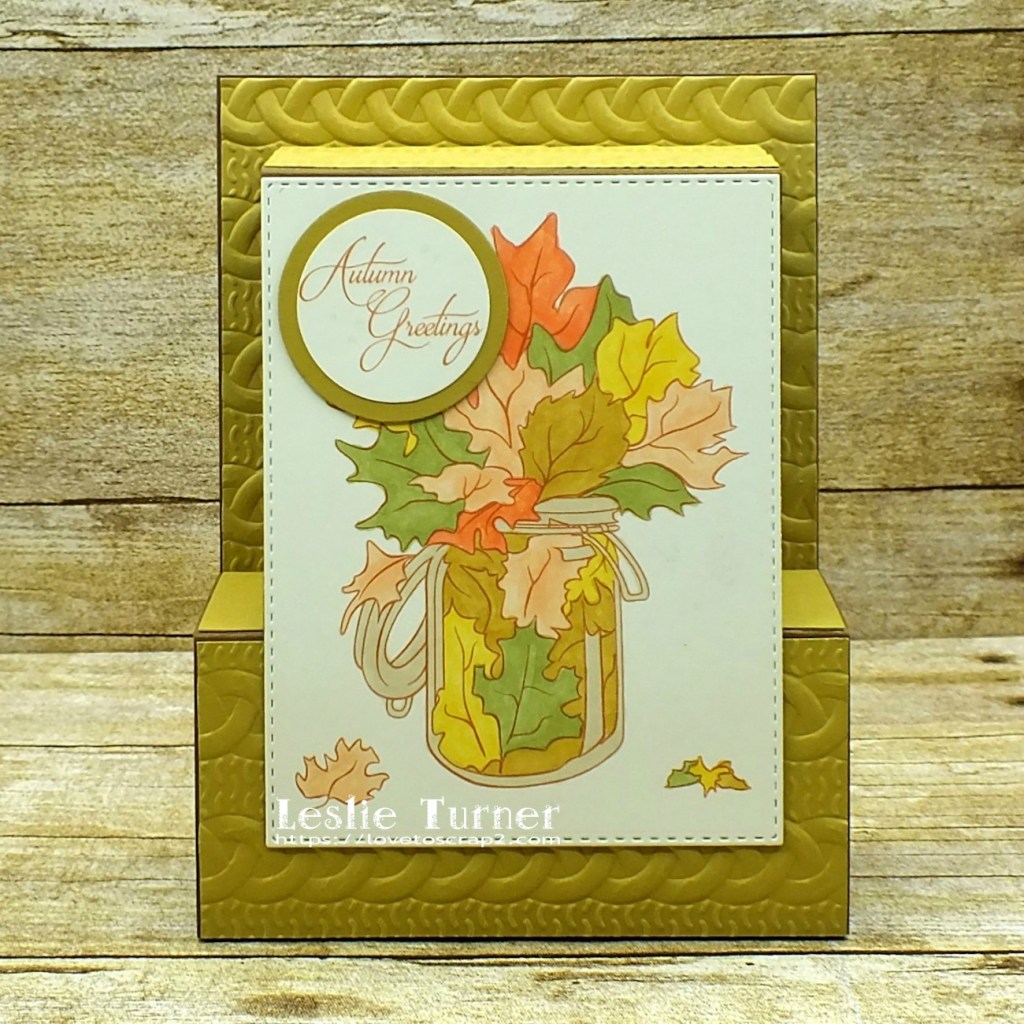
Happy Saturday, everyone! I hope you have something fun planned for the weekend! I have so much to do my head is spinning, lol! I’m going to start by sharing a couple cards I created for The Outlawz Challenges, so stay tuned for one more post after this one. I created a front step card using Jan’s Digi Stamps Signs of Autumn digital stamp set. This set is gorgeous and the front step card is one of my new favorite fun folds, so it’s a win-win as far as I’m concerned! I’m entering this Autumn/Fall card into the Twisted Thursday – Anything Goes w/ optional Embossing challenge that’s going on.

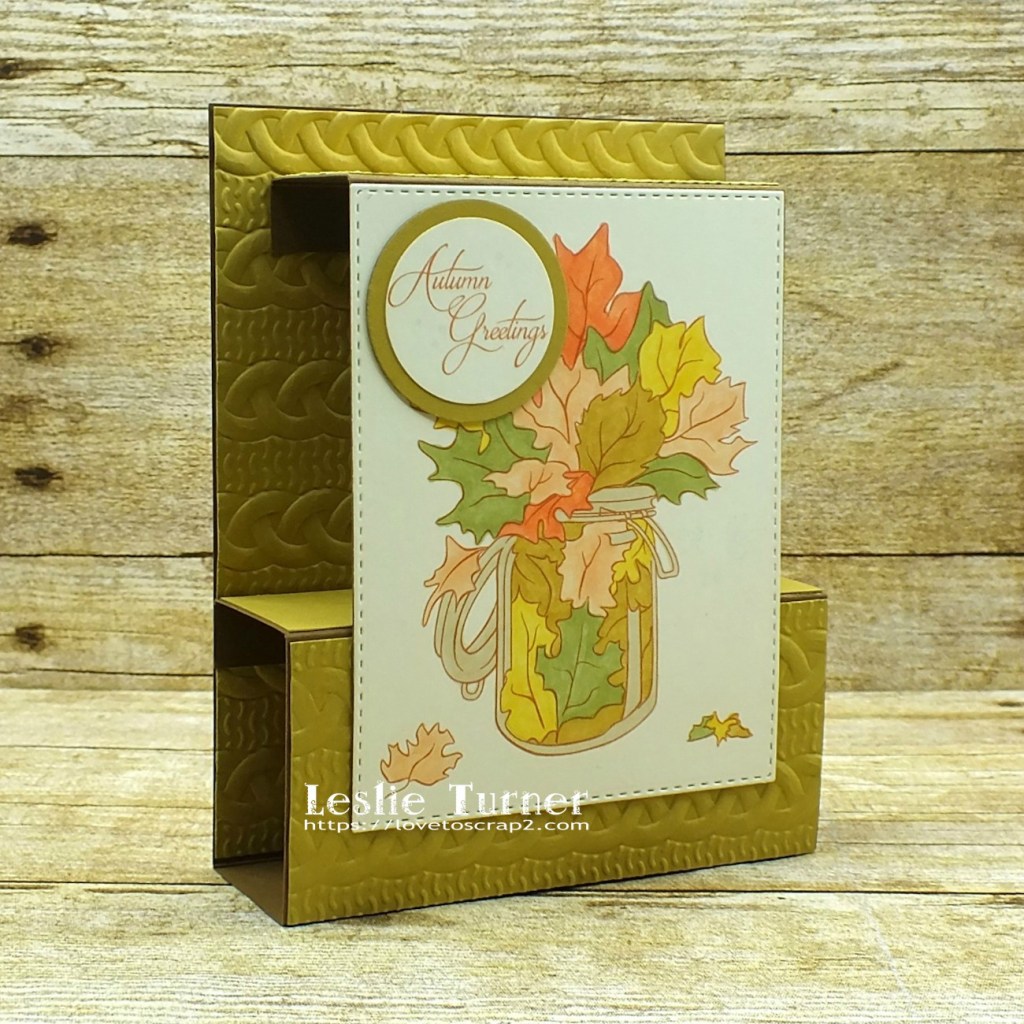
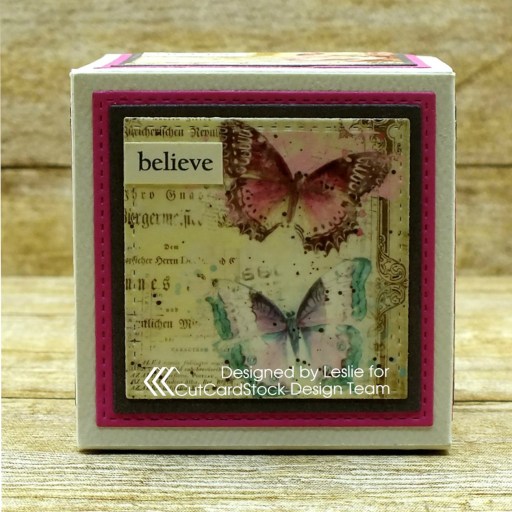
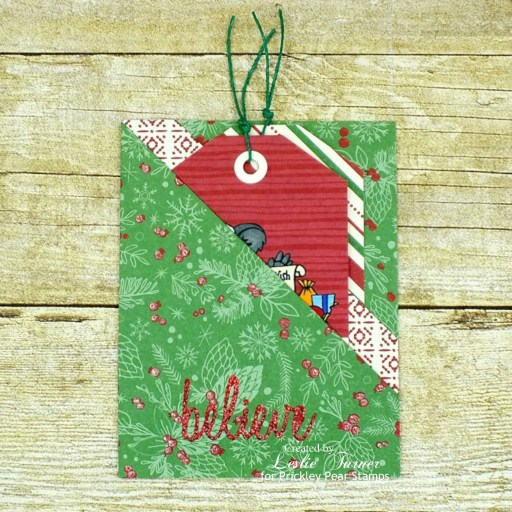
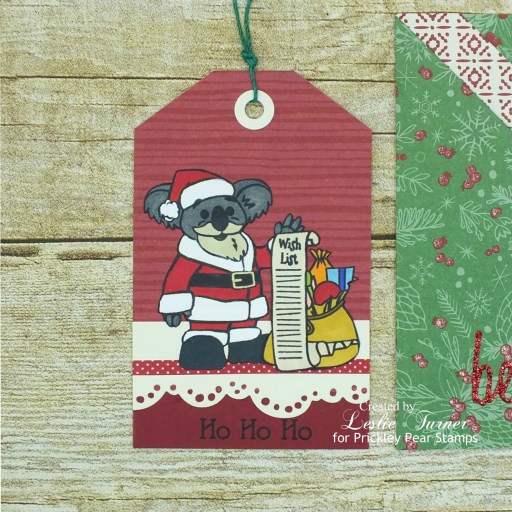
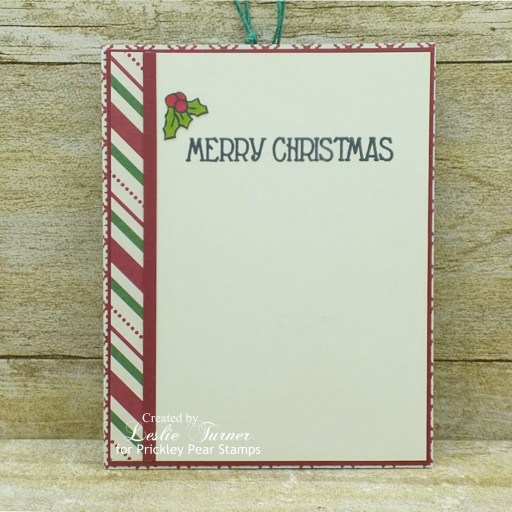
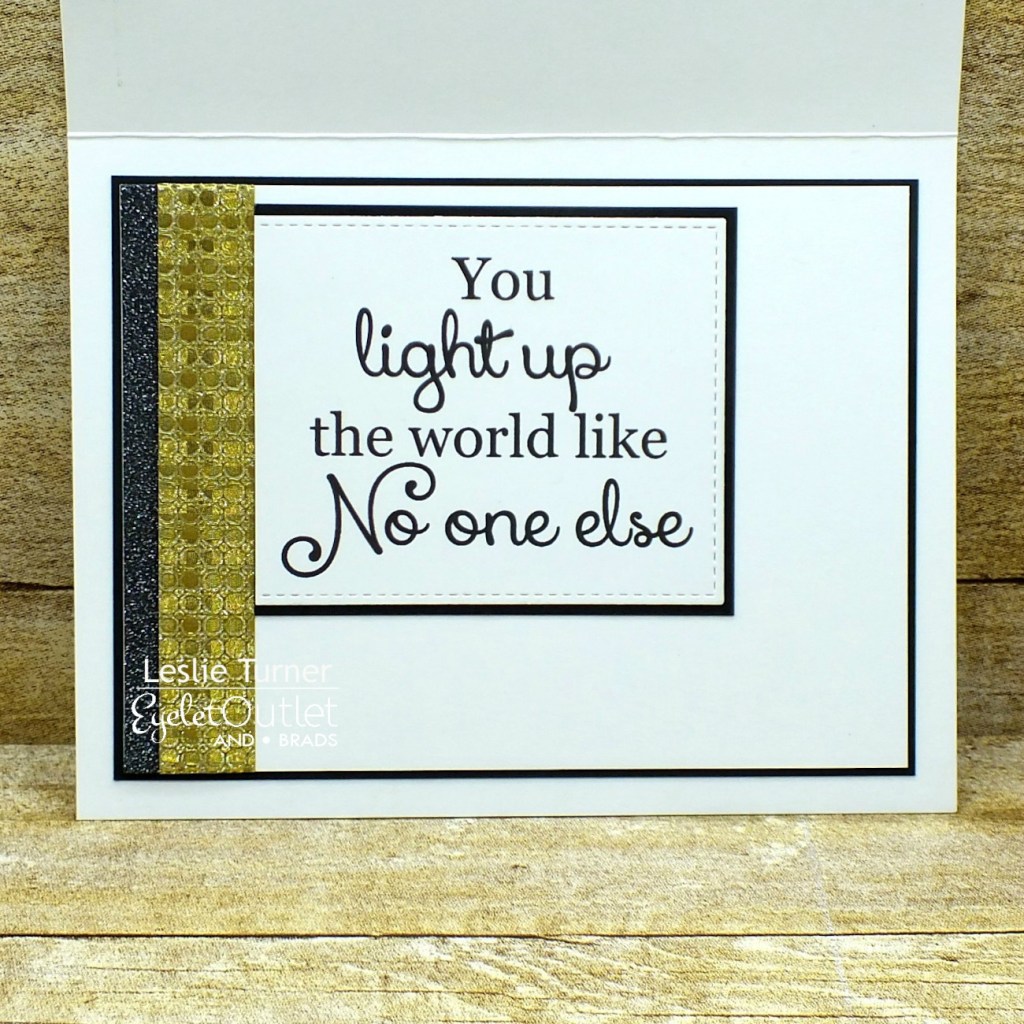
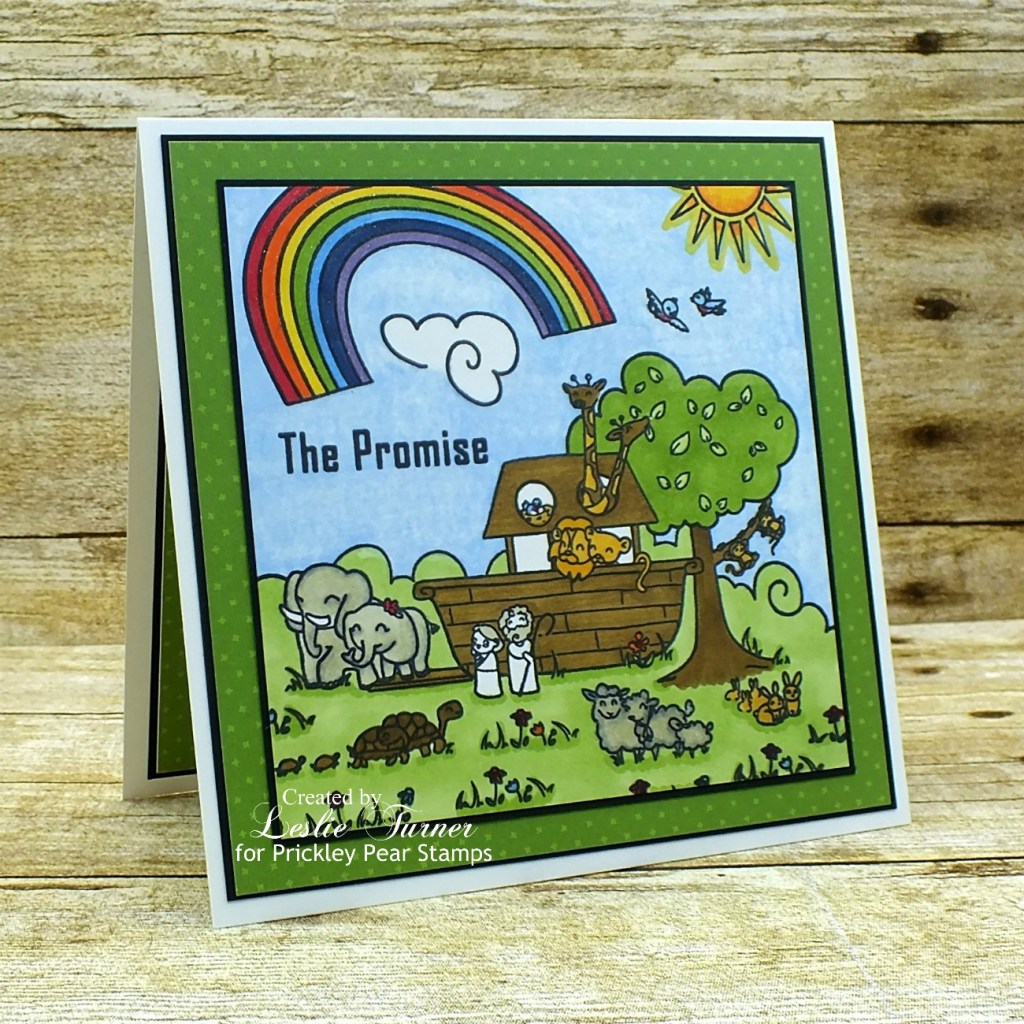
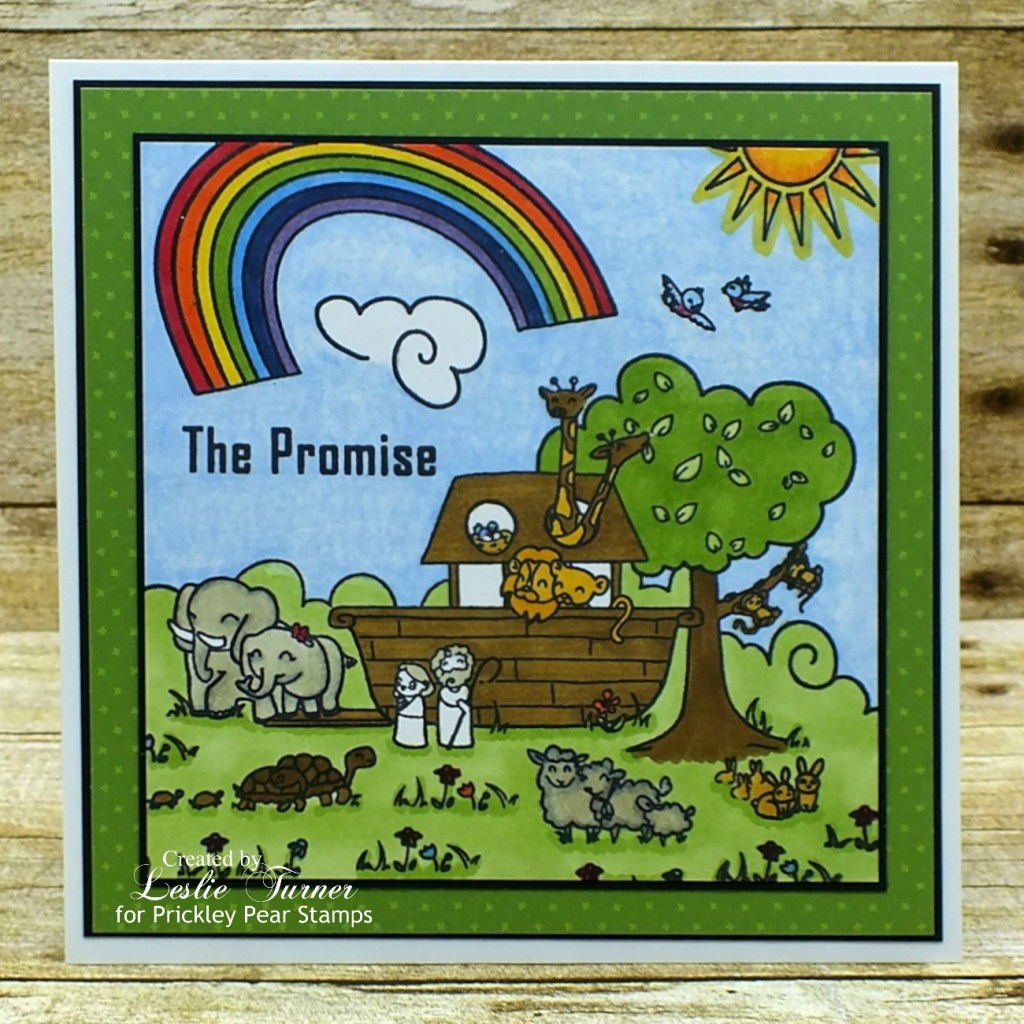
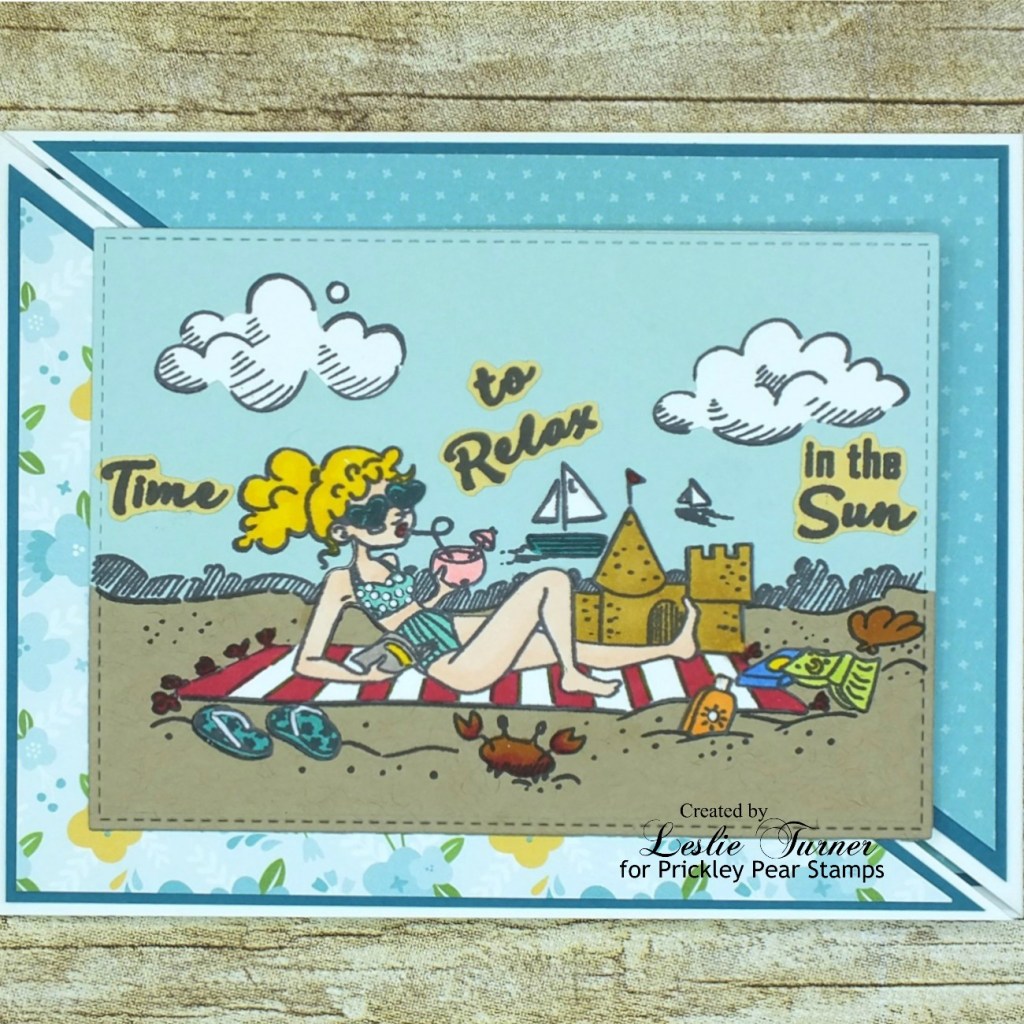
I printed the digital stamp and both sentiments in brown and let them sit in my studio for several days. I have found that allowing digital images printed on an inkjet printer to sit for a few days makes coloring with alcohol markers cleaner and the ink doesn’t smear. Heat setting the digis with a heat tool works also and speeds up the process if you’re in a hurry. ;) I cut the focal image with a stitched rectangle die, cut one of the sentiments into a rectangular panel, and punched the second sentiment with a circle punch. I created the card base from a nice medium tone brown cardstock and then cut the layers from a golden yellow cardstock which I embossed with a cable knit embossing folder. Love how this came together! ;)

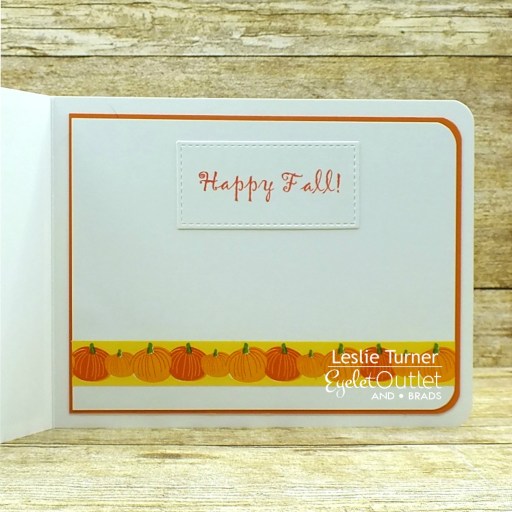
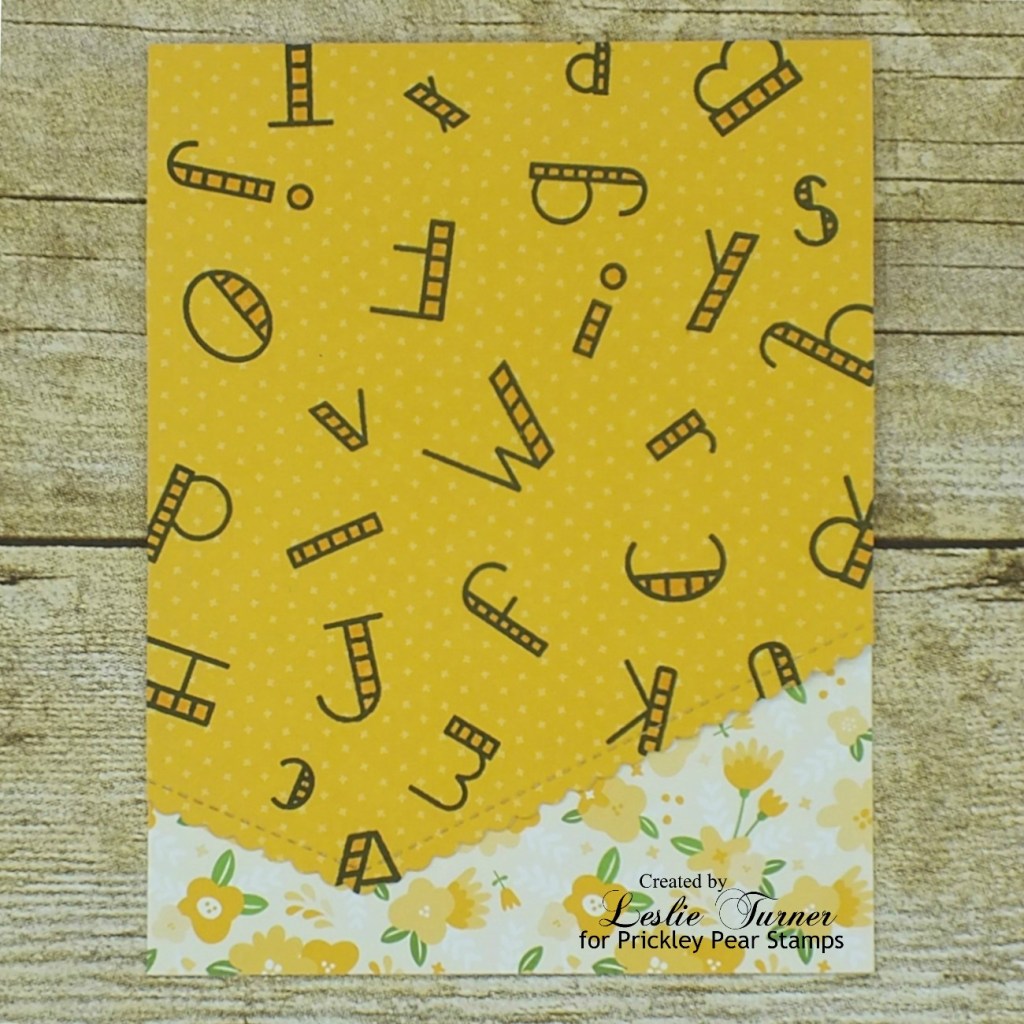
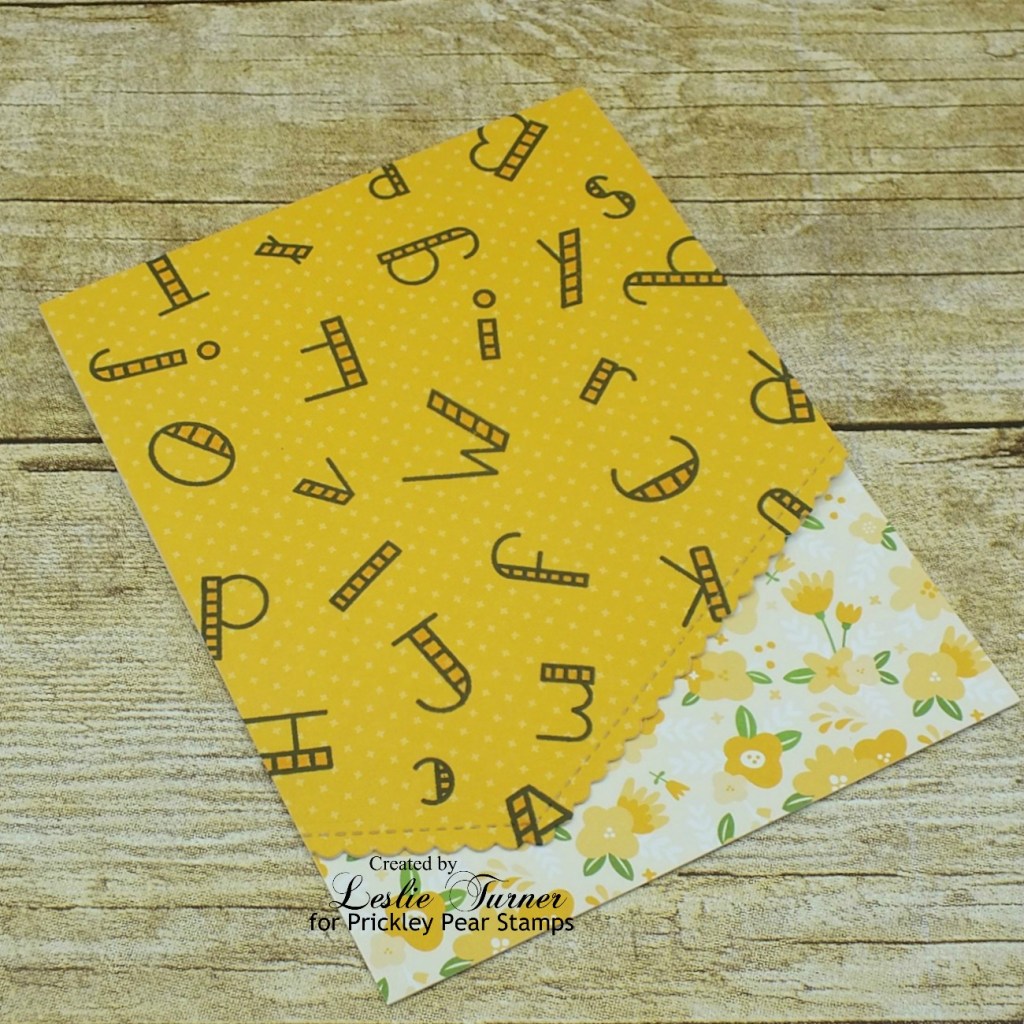
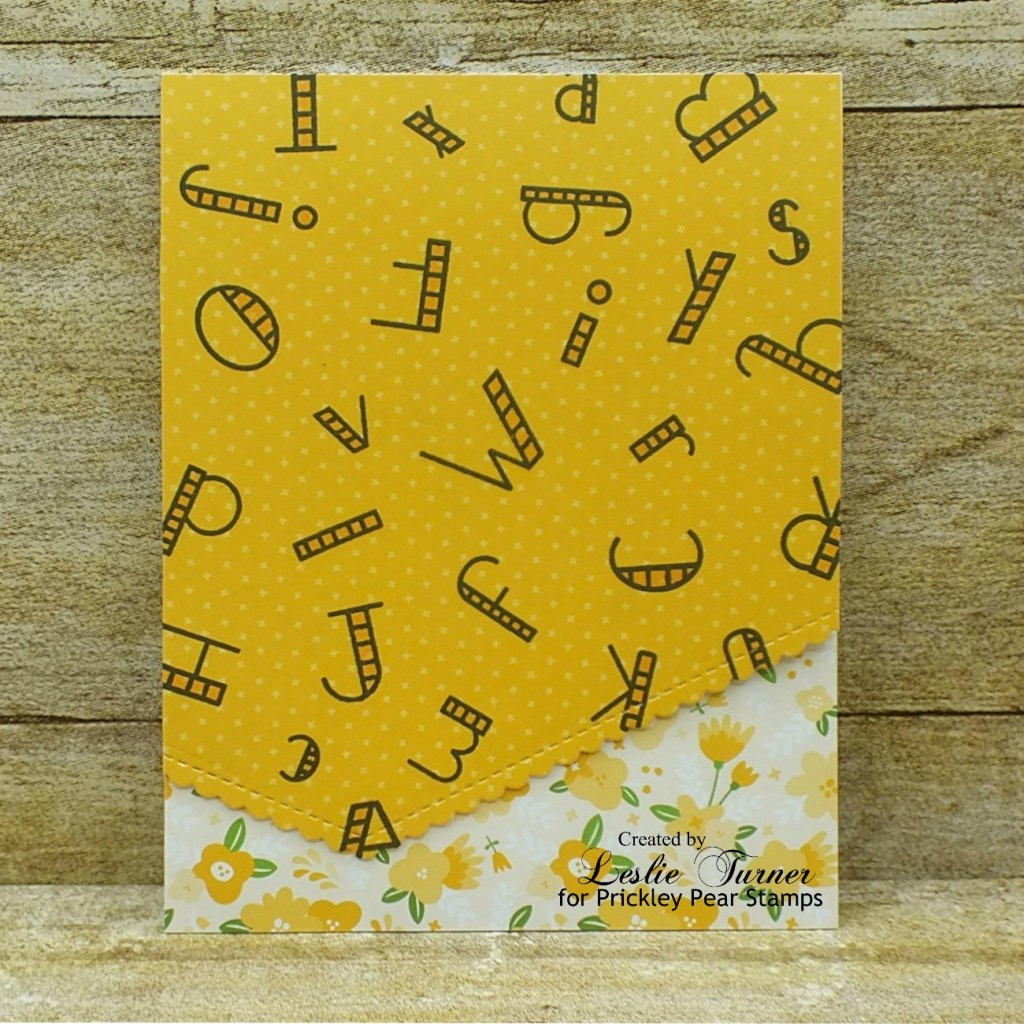
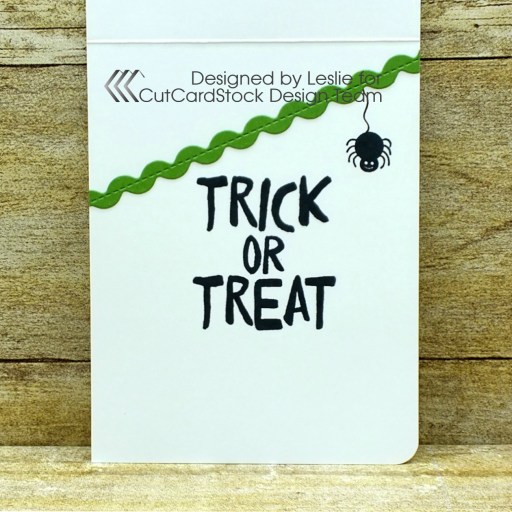
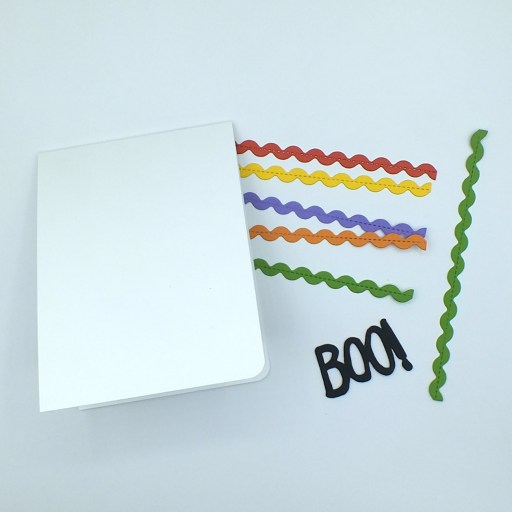
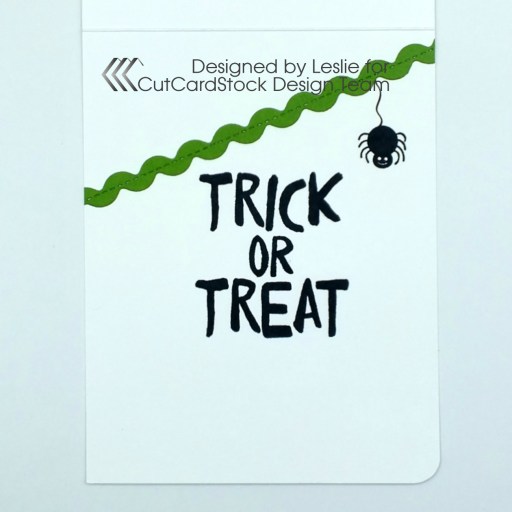
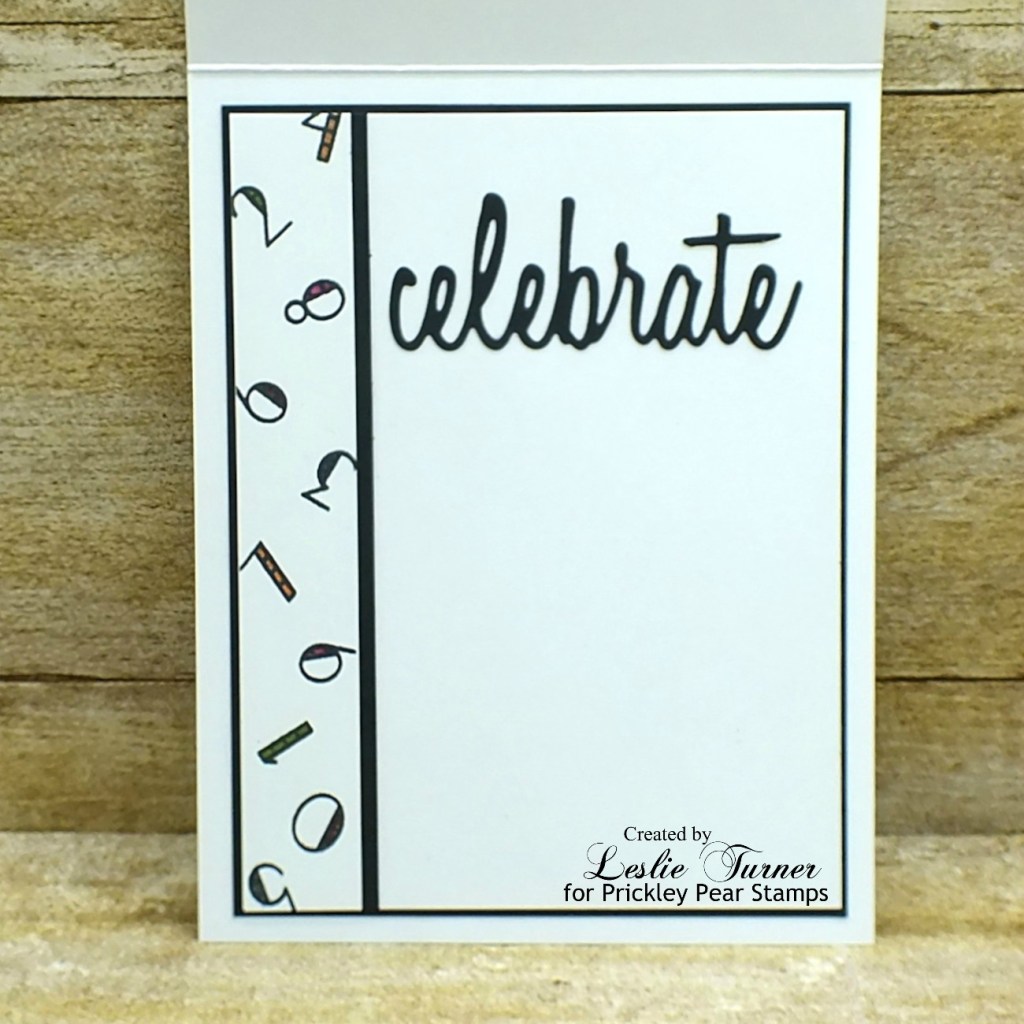
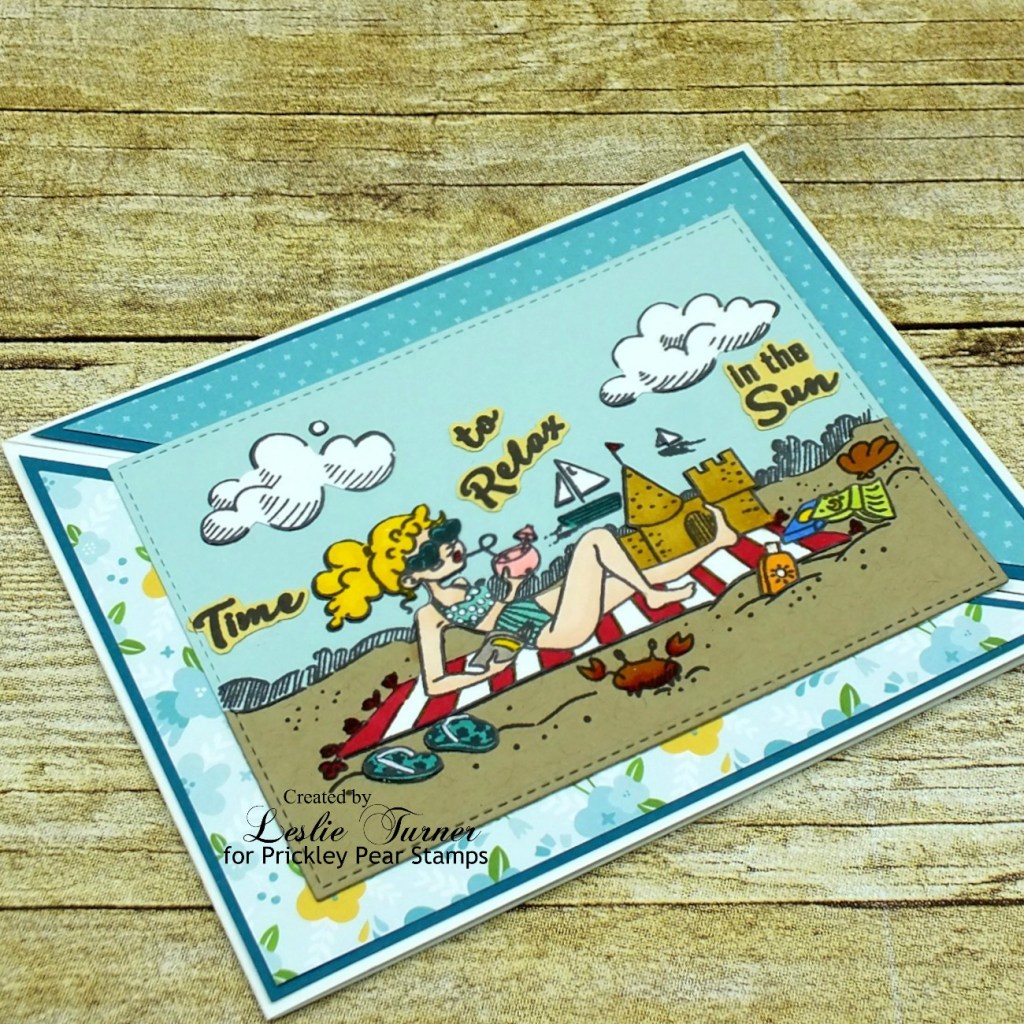
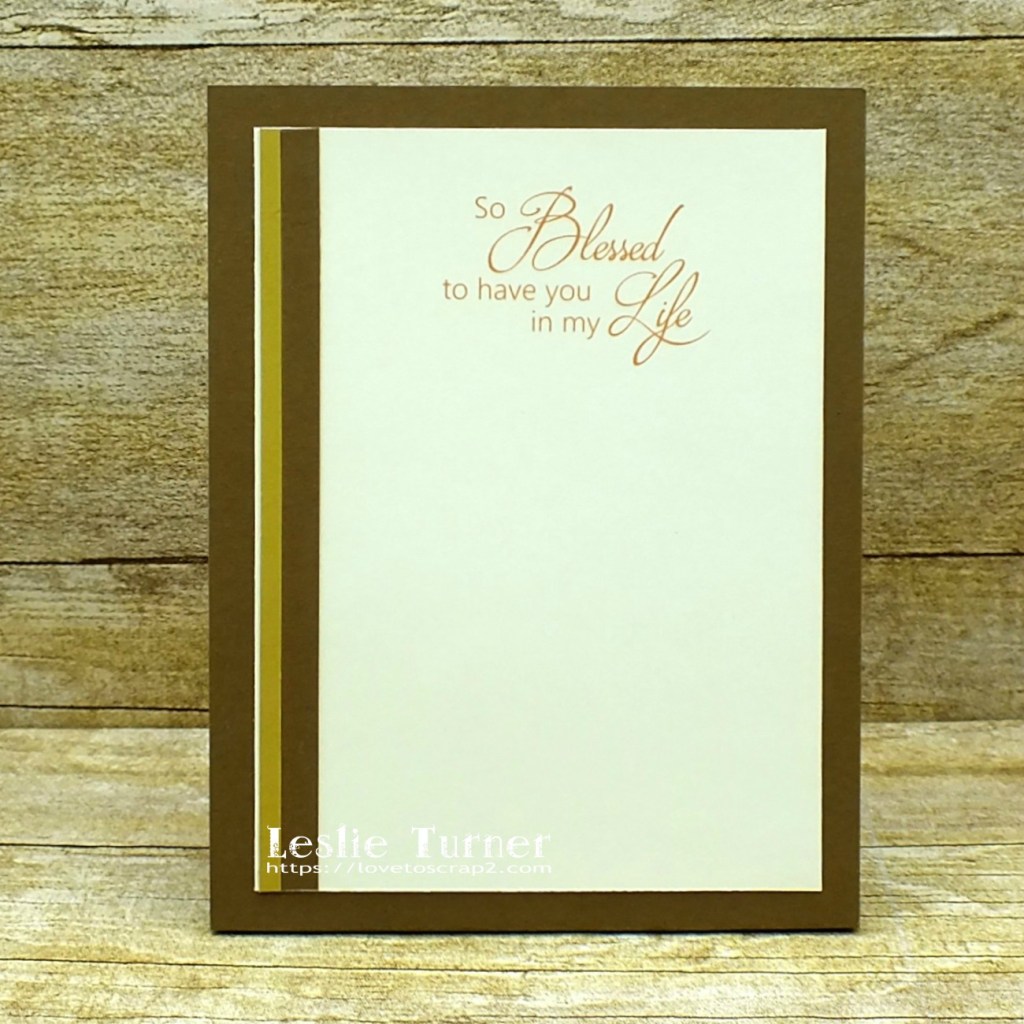
I embellished the back sentiment panel with a couple cardstock strips.

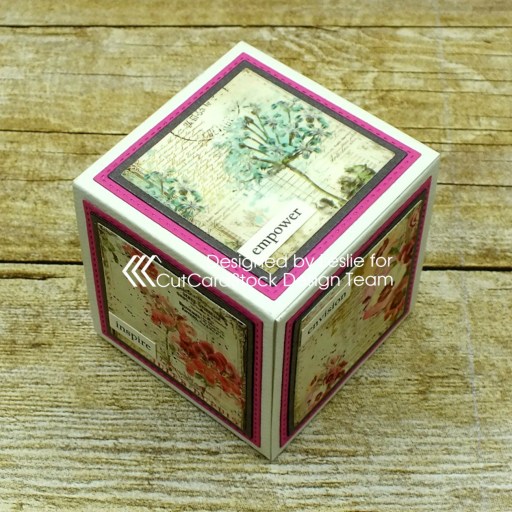
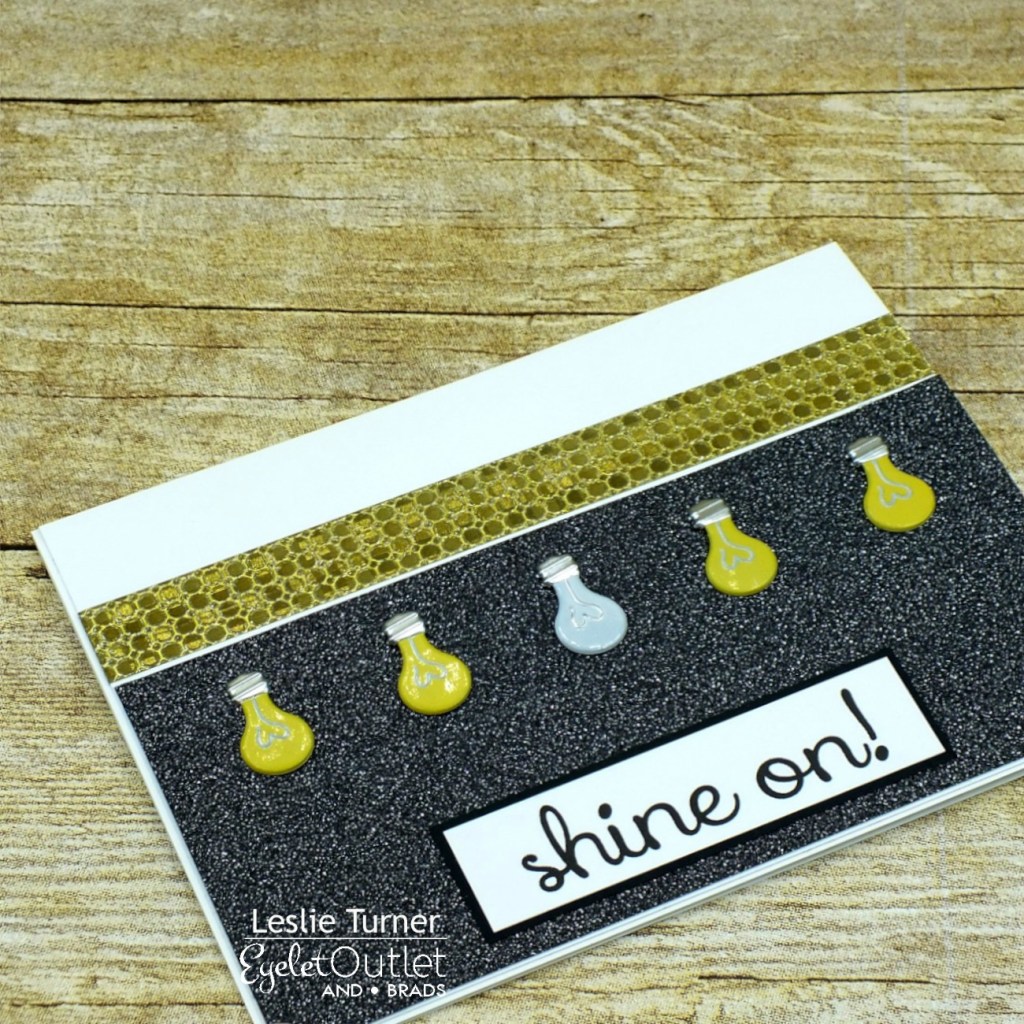
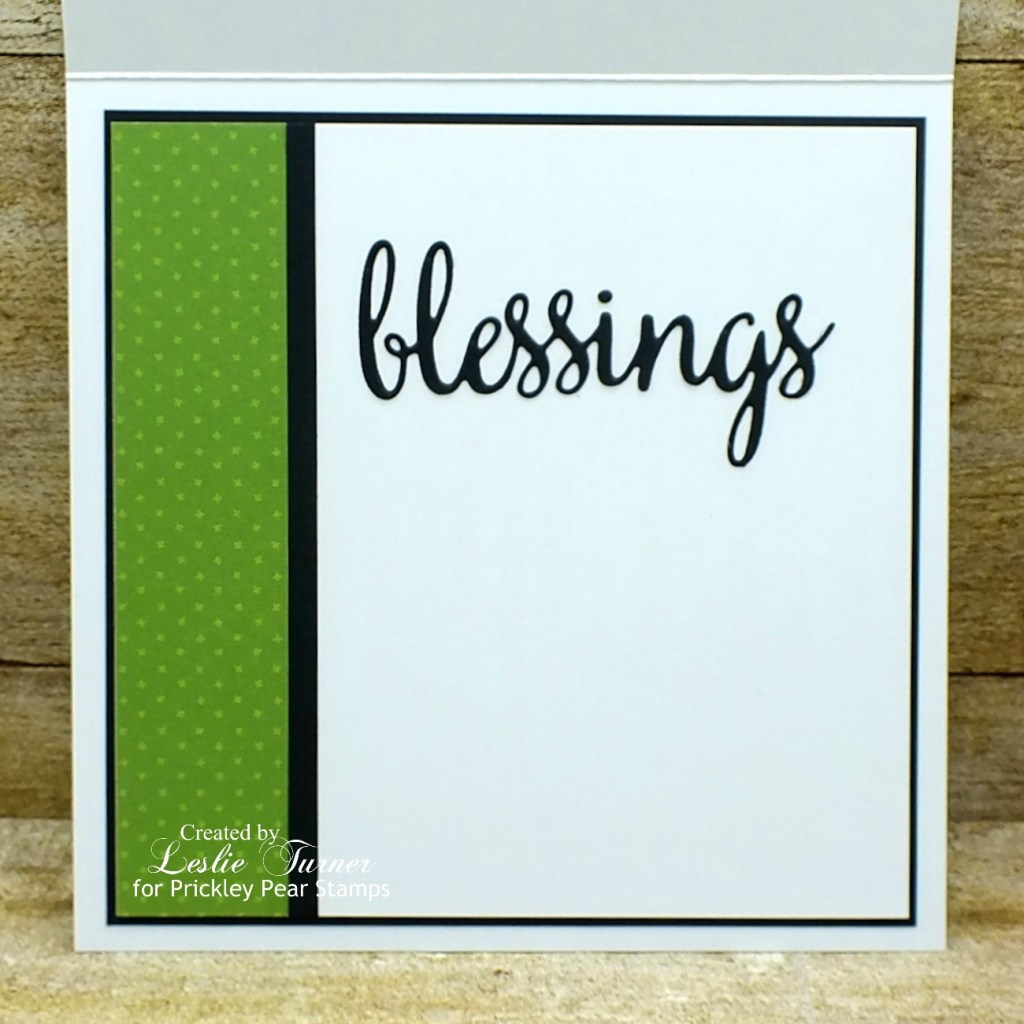
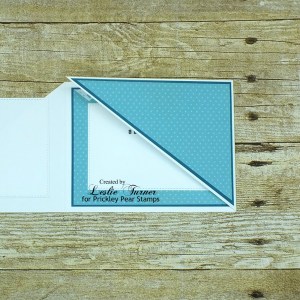
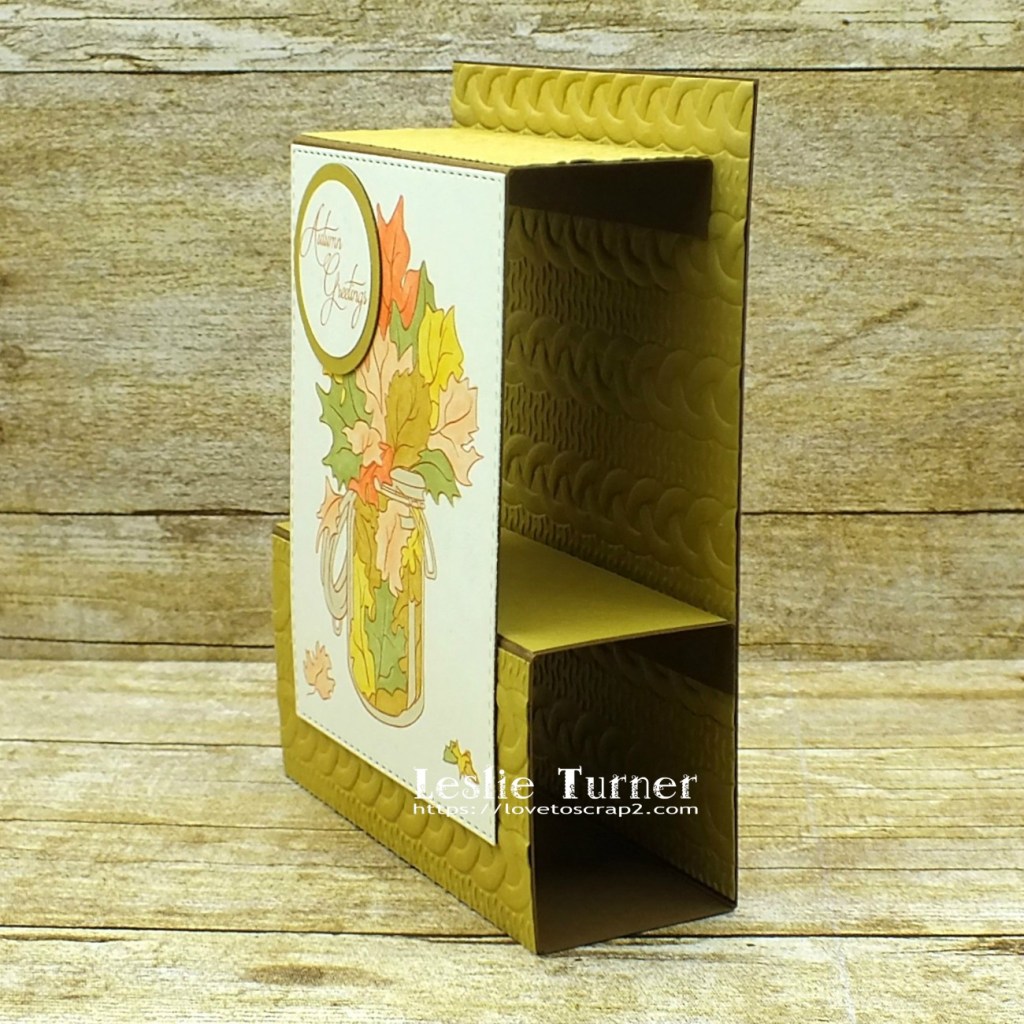
And one more look… such a cool construction that packs a powerful punch and folds flat for mailing! No wonder it’s one of my new favs! ;)

Sharing in the following challenges:
1. Aud Sentiments Challenge Blog: #262 – Halloween/Fall Sentiment
2. Cardz 4 Galz: #133 – Fall/Autumn (no Halloween)
3. Crafty Friends Challenge Blog: #147 – Embossing
4. Creative Moments: #201 – Anything Goes
5. Double D Challenges: October – WHAT Does It Mean To You?
6. Lil Patch of Crafty Friends: #144 – Anything Goes
7. Scrapping4fun Challenges: #178 – Autumn
8. Sparkles Monthly Challenge: #133 – Autumn
9. Sweet Stampers Challenge Blog: #49 – Autumn or Halloween
10. The Sisterhood of Crafters: Lots of Layers

Products used:
Cardstock/Paper: Neenah Classic Crest Baronial Ivory cardstock, Papertrey Ink Honey Nut and Saffron Spice cardstock
Stamps: Jan’s Digi Stamps Signs of Autumn digital stamp set
Ink: Nuvo alcohol markers- 403, 409, 392, 479, 475, 495
Dies/Punches: Memory Box Stitched Rectangle Layers, Stampin’ Up 1-1/4″ circle punch, Fiskars 1-1/2″ circle punch
Accessories: Bearly Art precision craft glue, Crafter’s Companion adhesive, Stampin’ Up Cable Knit Textured Impressions embossing folder, Gemini Junior

I hope you’ve enjoyed this project and will come join us in The Outlawz Challenges! Lots of fun going on! Thanks so much for stopping by – we’ll see you next time!

Scrappy hugs,
lesliesig

From our pumpkin patch to yours…

Hi everyone! Are you having any of this cooler weather where you are? Fall has finally arrived here – it’s my favorite time of year and I’m loving every minute of it! I’m happy to be back on the Eyelet Outlet blog today with another awesome DT inspiration project! I created a fun Fall card featuring a couple of our awesome pumpkin products! ‘Tis the season for everything pumpkin, lol!

I created a side-folding A2 card base and rounded the right upper and lower corners. I created a pumpkin patch on the front panel with three strips of Pumpkin Washi Tape and then added three Pumpkin Brads. I added a thin strip of orange cardstock across the top of the pumpkin patch and then added a computer-generated sentiment strip. I layered the panel on orange cardstock and added some Crystal Drops.

I rounded the right upper and lower corners of the inside panel, added a strip of Pumpkin Washi Tape and adhered the computer-generated sentiment that I cut with a stitched rectangle die. I layered the panel on the orange cardstock.

And one more peek… I absolutely LOVE these brads with this washi tape – the pumpkins match perfectly!

Sharing in the following challenges:
1. Aud Sentiments Challenge Blog: #262 – Halloween/Fall Sentiment
2. Cardz 4 Galz: #133 – Fall/Autumn (no Halloween)
3. Creative Moments: #201 – Anything Goes
4. Double D Challenges: October – WHAT Does It Mean To You?
5. Sparkles Monthly Challenge: #133 – Autumn
6. Sweet Stampers Challenge Blog: #49 – Autumn or Halloween

Eyelet Outlet products used:
Pumpkin Washi Tape
Pumpkin Brads

Other products used:
Cardstock/Paper: Neenah Classic Crest Solar White cardstock, Papertrey Ink Orange Zest cardstock
Dies/Punches: My Favorite Things Stitched Rectangle STAX die, Kadomaru Pro corner rounder
Accessories: Tombow Mono permanent adhesive, Bearly Art precision craft glue, Nuvo Ripened Pumpkin Crystal Drops

I hope you’ve enjoyed today’s project! Be sure to check out all the fun goodies at Eyelet Outlet! I can already see you drooling, lol! Be sure to ‘like’ and ‘follow’ Eyelet Outlet Facebook Page to keep up with news and sales, and while you’re at it, join the Eyelet Outlet Fans Facebook group for lots of creative inspiration! Thanks so much for stopping by today – we’ll see you next time! ;)

Scrappy hugs,
lesliesig

Motivational Artist Trading Cube

11/1/20 Top 3 at Lil Patch of Crafty Friends Challenge Blog!

Hi everyone! Happy Hump Day! I’m stoked to be back on the CutCardStock blog today with an awesome DT inspiration project featuring more of the Royal Sundance cardstock that was included in our Designer’s Pack – which happens to be on sale this month so be sure to get some! Affiliate links are used in this post at no cost to you. I really appreciate your support! I created a motivational ATC (artist trading CUBE) with a different word on each of the six sides! This will be an awesome addition to my desk showing a different ‘motivational’ side each day! ;)

This is the second artist trading cube I’ve made and they are so much fun! I’m sharing my template with you today so you can make your own! A 2-1/2″ cube fits perfectly on an 8-1/2″ x 11″ sheet of cardstock: On long side score at 1/2″, 3″, 5-1/2″, 8″, and 10-1/2″. Rotate cardstock to short side and score at 1/2″, 2-1/2″ (down to fourth horizontal score line), 3″, 5-1/2″, 6″ (down to fourth horizontal score line) and 8″. Using the photo below as a reference, remove the outer-most sections from cube base. Miter the corners of all tabs. The pencil lines in the photo represent the score lines and the thick black lines represent the cut lines.

I cut my cube base from Royal Sundance Felt Natural cardstock which is nice and sturdy, and an excellent choice of cardstock for an artist trading cube. Each side has three layers, so I die cut six stitched squares from Pop-Tone Razzleberry cardstock, six squares from Curious Metallic Chestnut cardstock, and six stitched floral squares (extra wide Washi Tape on Classic Crest Baronial Ivory cardstock used here) and layered them together so I had one for each side. I typed the motivational words on the computer on Baronial Ivory, trimmed them, and applied one to each layered square.

Let me share a tip – you want to decorate the sides BEFORE assembling the cube with glue. When adhering the layered squares to the six sides of the cube base, be sure to place them in proper orientation (up, down or sideways) so viewing is seamless. It’s easiest to ‘dry assemble’ the cube (without adhering) and mark the orientation prior to adhering each square. I put a small pencil number in the center which was covered up later when adhering the layered squares. When you have everything the way you want it, assemble the cube, tucking in the tabs and adhering one tab at a time. Here are shots of each of the sides:

And one more peek… so loving how this turned out! As with the rest of my ATCs (cards, coins and cube), I won’t trade, lol!

Sharing in the following challenges:
1. A Perfect Time To Craft Open Challenge: #10-2020 – Anything Goes
2. Classic Design Challenge: #10 – Anything Goes
3. Lil Patch of Crafty Friends: #144 – Anything Goes
4. Pammie’s Inky Pinkies Challenge: #2042 – Anything Goes
5. The Creative Crafters: #33 – Anything Goes
6. The Paper Funday Challenges: #22 – Anything Goes w/ optional Halloween

CutCardStock products used:
Classic Crest Baronial Ivory 80# cardstock
Curious Metallic Chestnut 111# cardstock
Pop-Tone Razzleberry 65# cardstock
Royal Sundance Felt Natural 110# cardstock

Other products used:
Dies/Punches: My Favorite Things Die-namics Stitched Square STAX dies, Spellbinders Classic Squares Large die
Accessories: Eyelet Outlet Extra Wide Butterfly & Flowers Washi Tape, Bearly Art precision craft glue

I hope you’ve enjoyed today’s project and you’re inspired to get crafty! Be sure to check out all the awesome cardstock and other goodies at CutCardStock (adhesives, labels, stickers, pens, watercolors and ribbon to name a few). And head on over to the CutCardStock Facebook Page for more inspiration! Thanks so much for stopping by today – we’ll see you next time!

Scrappy hugs,
lesliesig

Dotted/Floral Smile

Hello again, peeps! I’m back today with my last Prickley Pear Stamps sample in this batch! Whew, I’ve been busy over the past few months and it feels good to have showcased them all! This fun bi-level card was created with the absolutely adorable Emma Uppercase Alphabet Letters and Emma Lowercase Alphabet Letters clear stamp sets! These stamp sets were designed for Prickley Pear Stamps by a sweet 17-year-old young lady, and I think she did a fine job! They are so fun and versatile!

I created a standard top-fold A2 card base, adhered yellow dotted paper to the front flap and chopped it off with a stitched scallop edge die. I stamped upper and lower case alphabet letters randomly all over the front flap and colored the small segments in with a yellow alcohol marker.

I embellished the bottom portion of the inside flap with a coordinating floral paper and a leftover strip of the dotted paper used on the front, and then added a die cut sentiment.

And one more peek… this is so stinkin’ cute I can’t stand it! It’s rare that I create a card without a front sentiment, but with the die cut sentiment inside, it can be used for a variety of occasions – and I like that!

Sharing in the following challenges:
1. Pammie’s Inky Pinkies Challenge: #2042 – Anything Goes
2. Paperbabe Stamps: #130 – Anything Goes

Products used:
Cardstock/Paper: Papertrey Ink Bright Buttercup cardstock, Lawn Fawn Spring Fling 6×6 paper pad
Stamps: Prickley Pear Stamps Emma Uppercase Alphabet Letters and Emma Lowercase Alphabet Letters clear stamp sets
Ink: Nuvo alcohol marker 475
Dies/Punches: My Favorite Things Die-namics Stitched Scallop Basic Edges die, The Cat’s Pajamas Smile die
Accessories:  Tombow Mono permanent adhesive, MISTI stamp tool, Gemini Junior

I hope you’ve enjoyed this project! Be sure to check out all the awesome stamps and dies at Prickley Pear Stamps! If you’d like to save 10% on anything on the site when you shop at Prickley Pear Stamps, use the coupon code LESLIE10 at checkout! And be sure to ‘like’ and ‘follow’ the Prickley Pear Stamps Facebook page to keep up with news and sales, and join Prickley Pear Pals (the fan group) for lots of fun crafty ideas and to share your creativity! And finally, we’d love to see you visit the Prickley Pear Stamps blog that’s in the process of being revived and become a Follower! Hope to see you there! Thanks so much for stopping by today – we’ll see you next time! ;)

Scrappy hugs,
lesliesig

believe

Hello, my friends! A very happy Tuesday to you! I have a super fun card to share with you today – another website sample I created for Prickley Pear Stamps! This one is a tag card with diagonal double pockets! My inspiration came from… you guessed it… another Splitcoast Stampers newsletter outlining this tutorial HERE. You know me – I’m a total fun fold geek, always on the look-out for another one to try! I used the adorable Santa Koala and Mrs Claus clear stamp set for the tags on this card.

I used some pretty double-sided Christmas paper from my stash to create the card base, and added a red glitter die cut sentiment to the front. I cut two tags from ivory cardstock and embellished them with more of the papers from the same Christmas paper pack. I stamped the images on white cardstock, colored them with alcohol markers, and fussy cut them all. The coordinating dies weren’t available yet when I was gifted this stamp set, but they are now! I adhered the stamped and cut images to the tags, stamped a sentiment at the bottom of each tag and added some green crafter’s cord.

This card does not open, so I cut a panel for the back, embellished it with a coordinating paper and a thin strip of red cardstock, and stamped the sentiment in black ink. I had one leftover stamped and cut element so I adhered it to the panel and layered the panel on red cardstock.

And one more peek… so happy with how this turned out! These koalas are so stinkin’ cute I can’t stand it! ;)

Sharing in the following challenges:
1. Crafty Cardmakers: #265 – Create A Tag
2. Pammie’s Inky Pinkies Challenge: #2042 – Anything Goes
3. Paperbabe Stamps: #130 – Anything Goes
4. The Paper Funday Challenges: #22 – Anything Goes w/ optional Halloween
5. The Sisterhood of Crafters: Lots of Layers
6. World Wide Open Design Team Challenge Blog: #10 – Anything Goes

Products used:
Cardstock/Paper: Neenah Classic Crest Baronial Ivory and Solar White cardstock, Stampin’ Up Cherry Cobbler cardstock, Stampin’ Up This Christmas Specialty DSP, Stampin’ Up red Glimmer paper
Stamps: Prickley Pear Stamps Santa Koala and Mrs Claus stamp set
Ink: Memento Tuxedo Black ink (pad and marker); Nuvo alcohol markers- 412, 487, 489, 391, 495, 451, 479, 466, 427, 430, 379, black; Posca white paint marker, Pentel Slicci Gold pen, Sakura White Gelly Roll pen, Sakura Clear Star Gelly Roll pen
Dies/Punches: Tim Holtz Holiday Words: Script die, Magnolia Doohickeys Tilda Lace die, Stampin’ Up 1/2″ circle punch, regular hole punch
Accessories: Tombow Mono permanent adhesive, Bearly Art precision craft glue, MISTI stamp tool, Gemini Junior, Stampin’ Up red/white dotted skinny Washi Tape, Glossy Accents, Hemptique green Crafter’s Cord

I hope you’ve enjoyed this project! Be sure to check out all the awesome stamps and dies at Prickley Pear Stamps! If you’d like to save 10% on anything on the site when you shop at Prickley Pear Stamps, use the coupon code LESLIE10 at checkout! And be sure to ‘like’ and ‘follow’ the Prickley Pear Stamps Facebook page to keep up with news and sales, and join Prickley Pear Pals (the fan group) for lots of fun crafty ideas and to share your creativity! And finally, we’d love to see you visit the Prickley Pear Stamps blog that’s in the process of being revived and become a Follower! Hope to see you there! Thanks so much for stopping by today – we’ll see you next time! ;)

Scrappy hugs,
lesliesig

BOO! for CutCardStock Happy Halloween Blog Hop!

Hi friends! A big giant WELCOME to the CutCardStock blog‘s Happy Halloween Blog Hop going on October 17th and 18th – starting at 7:00 AM Central Time today and ending at 11:55 PM Central Time tomorrow! Affiliate links are used in this post at no cost to you. I really appreciate your support! SO COME HOP WITH US!

Woot-woot! There is a $40 CutCardStock gift card up for grabs!

The winner will be randomly selected via number generator and announced on Monday, October 19th, on the CutCardstock blog and Facebook page! To be eligible for the $40 gift card, you must comment at each stop along the hop (good for ONE gift card entry) or upload a Halloween-themed project using CutCardStock products (good for TWO gift card entries). We would absolutely LOVE IT if you link up a project with us, PLUS it will increase your chances to win the gift card! ;)

=  =  =  =  =  =  =  =  =  =  =  =  =  =  =  =

Now, let me side-track you for a minute or three to share my CAS card featuring Classic Crest Solar White cardstock along with Camomile cardstock, Granny Smith Apple Green cardstock, Pop-Tone Black Licorice cardstock, Pop-Tone Grape Jelly cardstock and Pop-Tone Orange Fizz cardstock. This is a super simple design that came together pretty quickly!

Did you ever have ric rac sewn on your clothes when you were younger?! I sure did – and I still love it! I used several fun dies along with some stamping to create this fun card.

Here is a quick tutorial showing you my process for making this awesome card. I started by cutting a standard A2 size top-folding card base from Classic Crest Solar White cardstock, and rounded the bottom right corner. I cut ric rac die cuts from Camomile cardstock, Granny Smith Apple Green cardstock, Pop-Tone Grape Jelly cardstock and Pop-Tone Orange Fizz cardstock. I cut four BOO! die cuts from Pop-Tone Black Licorice cardstock and layered them on top of each other for a little dimension. I cut one additional ric rac die cut from Granny Smith Apple Green cardstock to use on the inside.

I adhered the ric rac die cuts to the front of the card base at an angle and then trimmed the edges. I adhered the BOO! layered die cuts in the lower right corner and small gemstones in the Halloween colors above the ric rac die cuts. I stamped and die cut a skull (an after-thought and not shown in the photo above) and popped it up on dimensionals on top of the ric rac die cuts.

For the inside, I adhered the remaining ric rac die cut at the same angle as those on the front, and then stamped the sentiment and the spider in black ink.

Sharing in the following challenges:
1. 613 Avenue Create: October Anything Goes w/ optional Winged Things
2. Aud Sentiments Challenge Blog: #262 – Halloween/Fall Sentiment
3. Crafty Calendar Challenge: October Challenge – Halloween
4. Crafty Gals Corner: #212 – Halloween Colors
5. International Art & Soul: #94 – Halloween
6. My Time To Craft: #443 – Halloween or Cats
7. The Paper Funday Challenges: #22 – Anything Goes w/ optional Halloween
8. Through the Purple Haze: #172 – Halloween Fun
9. Try It On Tuesday: Halloween Time
10. Two Old Bats Halloween Challenge: Jump Start w/ Anything Goes

CutCardStock products used:
Classic Crest Solar White 110# cardstock
Camomile 80# cardstock
Granny Smith Apple Green 80# cardstock
Pop-Tone Black Licorice 65# cardstock
Pop-Tone Grape Jelly 65# cardstock
Pop-Tone Orange Fizz 65# cardstock

Other products used:
Stamps: Stampin’ Up Howl-o-ween Treat stamp set
Ink: Memento Tuxedo Black ink, Copic black multi-liner pen
Dies/Punches: My Favorite Things Die-namics Stitched Ric Rac die, Stampin’ Up Boo To You Framelits
Accessories: Bearly Art precision craft glue, Big Shot, MISTI stamp tool, Darice orange, black, purple, green and yellow gemstones

=  =  =  =  =  =  =  =  =  =  =  =  =  =  =  =

Okay, let’s get back to the hop! Here is the complete list of stops:

1. CutCardstock blog
2. Teri
3. Raechelle
4. Crystal
5. Judy M
6. Maureen
7. Leslie >>> you’re here! <<<
8. Judy V
9. Janet A
10. CutCardStock blog… C’mon, you know you want to link up! The linky tool is at the end of the post on the CutCardstock blog so that’s where you’ll want to head to link up your project – each upload is worth two entries for the gift card! Two entries per person!

You should have arrived here from Maureen‘s blog and your next stop is Judy V‘s blog! I hope you are enjoying the hop and seeing all the fun Halloween projects! If you get lost along the way or if you landed here in the middle of the hop somehow and want to join in the fun, be sure to head on over to the CutCardstock blog to read all the details and start from the beginning!

In closing, I hope you’ve enjoyed seeing my Halloween card and you’re inspired to get crafty AND hop with us AND link up a Halloween-themed project! Be sure to check out all the awesome cardstock and other goodies at CutCardStock (adhesives, labels, stickers, pens, watercolors and ribbon to name a few). And head on over to the CutCardStock Facebook Page for lots of crafty inspiration! Thanks so much for stopping by today – we’ll see you next time!

Scrappy hugs,
lesliesig

Shine On!

Happy Saturday, y’all! I’m delighted to be back on the Eyelet Outlet blog today with another awesome DT inspiration project! I created a fun card featuring a bold digital sentiment from my stash that works perfectly with these brads and washi tape! And this card could be used for a variety of occasions… love it when that happens!

I created a top fold landscape card base and then cut a panel that was just a tad smaller than the card base. I applied Glitter Black Washi Tape on two-thirds of the panel (from the bottom up) and then added one strip of Glitter Gold Dots Washi Tape slightly above it. I added five Light Bulb Brads in a row and evenly spaced across the top of the black glittered portion, then attached the panel to the card base. I printed the digital sentiment, trimmed it and layered it on black cardstock, then adhered it to the bottom center of the panel.

I embellished the inside panel with strips of Glitter Black Washi Tape and Glitter Gold Dots Washi Tape used on the front. I printed the inside sentiment (from the same digi set), cut it with a stitched rectangle die and layered it on black cardstock. I trimmed off the left side and adhered it up against the gold washi tape strip, then layered the entire panel on black cardstock.

And one more peek… what an awesome card! The glitter washi tape and the light bulb brads, along with the digital sentiments, sure make a statement!

Sharing in the following challenges:
1. Creative Inspirations: October Anything Goes
2. Let’s Craft and Create: #164 – Anything Goes w/ optional Paper Strips Instead of Ribbon (no twist)

Eyelet Outlet products used:
Glitter Black Washi Tape
Glitter Gold Dots Washi Tape
Light Bulb Brads

Other products used:
Cardstock/Paper: Neenah Classic Crest Solar White cardstock, American Crafts Black cardstock
Stamps: Bugaboo You Light Up My Life digital set
Dies/Punches: Memory Box Stitched Rectangle Layer STAX die
Accessories:  Tombow Mono permanent adhesive, Bearly Art precision craft glue,

I hope you’ve enjoyed today’s project! Be sure to check out all the fun goodies at Eyelet Outlet! I can already see you drooling, lol! Be sure to ‘like’ and ‘follow’ Eyelet Outlet Facebook Page to keep up with news and sales, and while you’re at it, join the Eyelet Outlet Fans Facebook group for lots of creative inspiration! Thanks so much for stopping by today – we’ll see you next time! ;)

Scrappy hugs,
lesliesig

hb2u

Hello again, my friends! How’s the weather where you are? It has turned out to be a little chilly here today but I LOVE it – I’m so ready for cooler weather! I’ve popped back on this afternoon to share another website sample I created for Prickley Pear Stamps using the super cute Emma Numbers and Emma Lowercase Alphabet Letters clear stamp sets. OMGoodness, the possibilities with these stamps are endless!

I created this card in a timeless classic color combo of black and white with just a pop of color here and there. There are three sizes of numbers in the Emma Numbers stamp set, and I used all three sizes to create the background. I colored the open areas with my drying-up fine point Faber-Castell Pitt Artist Pens and added a touch of Clear Star shimmer. Using the Emma Lowercase Alphabet Letters stamp set, I created the sentiment element using a couple circle punches and a scalloped circle die. The finishing touch was the addition of a few small iridescent gemstones.

I embellished the inside panel with a narrow panel of stamped and colored numbers, a thin strip of black cardstock and a die cut sentiment, and layered the panel on black cardstock.

And another look… totally loving how this turned out! I did re-do the sentiment element because the original rectangular one I made just didn’t look right. The circular one made all the difference in the world! ;)

Sharing in the following challenges:
1. Creative Inspirations: October Anything Goes
2. Let’s Craft and Create: #164 – Anything Goes w/ optional Paper Strips Instead of Ribbon (no twist)
3. Paperbabe Stamps: #130 – Anything Goes

Products used:
Cardstock/Paper: Neenah Classic Crest Solar White cardstock, American Crafts Black cardstock
Stamps: Prickley Pear Stamps Emma Numbers and Emma Lowercase Alphabet Letters clear stamp sets
Ink: Memento Tuxedo Black ink; Faber-Castell Pitt Artist Pens- Middle Purple Pink, Magenta, Orange Glaze, May Green and Indianthrene Blue; Sakura Clear Star Gelly Roll pen
Dies/Punches: Stampin’ Up 2″ and 1-3/4″ circle punches, Spellbinders Classic Scalloped Circles Small die, Tim Holtz Celebration Words: Script die
Accessories:  Tombow Mono permanent adhesive, Bearly Art precision craft glue, MISTI stamp tool, Gemini Junior, Darice iridescent gemstones

I hope you’ve enjoyed this project! Be sure to check out all the awesome stamps and dies at Prickley Pear Stamps! If you’d like to save 10% on anything on the site when you shop at Prickley Pear Stamps, use the coupon code LESLIE10 at checkout! And be sure to ‘like’ and ‘follow’ the Prickley Pear Stamps Facebook page to keep up with news and sales, and join Prickley Pear Pals (the fan group) for lots of fun crafty ideas and to share your creativity! And finally, we’d love to see you visit the Prickley Pear Stamps blog that’s in the process of being revived and become a Follower! Hope to see you there! Thanks so much for stopping by today – we’ll see you next time! ;)

Scrappy hugs,
lesliesig

The Promise

Howdy, everyone! Hope you’ve had a great week and you have some fun planned for this weekend! The weeks sure do seem to be flying by! I have another Prickley Pear Stamps website sample to share this morning. This sweet card was created with the super adorable Noah’s Ark clear stamp set. The main stamp is large and there are several smaller stamps to add details, and what a fun scene to color!

I stamped the large image in dark brown ink and trimmed the panel, then stamped the remaining images. I colored the scene with alcohol markers and layered the panel on dark brown cardstock. I cut a slightly larger panel from green dotted patterned paper and layered it on dark brown cardstock. I layered the panels together and adhered them to the card base.

I embellished the inside panel with a leftover strip of the green dotted patterned paper and dark brown cardstock used on the front, added a die cut sentiment, and layered the panel on dark brown cardstock.

And one more peek… I really love this stamp set and the message!

Sharing in the following challenges:
1. 2 Crafty Critter Crazies: #43 – Anything Goes
2. 613 Avenue Create: October Anything Goes w/ optional Winged Things (no twist)
3. Jan’s Digi Stamps Challenge: October Anything Goes
4. Moving Along With The Times: #123 – Animal(s) and/or Bird(s)

Products used:
Cardstock/Paper: Neenah Classic Crest Solar White cardstock, Papertrey Ink Dark Chocolate cardstock, Lawn Fawn Spring Fling 6×6 paper pad
Stamps: Prickley Pear Stamps Noah’s Ark clear stamp set
Ink: Memento Espresso Truffle ink; Nuvo alcohol markers- 389, 403, 404, 479, 466, 393, 379, 439, 427, 431, 412, 487, 489; Spectrum Noir alcohol markers- TB1, LG3
Dies/Punches: Hero Arts Blessings Stamp & Cut (die only)
Accessories:  Tombow Mono permanent adhesive, MISTI stamp tool, Gemini Junior

I hope you’ve enjoyed this project! Be sure to check out all the awesome stamps and dies at Prickley Pear Stamps! If you’d like to save 10% on anything on the site when you shop at Prickley Pear Stamps, use the coupon code LESLIE10 at checkout! And be sure to ‘like’ and ‘follow’ the Prickley Pear Stamps Facebook page to keep up with news and sales, and join Prickley Pear Pals (the fan group) for lots of fun crafty ideas and to share your creativity! And finally, we’d love to see you visit the Prickley Pear Stamps blog that’s in the process of being revived and become a Follower! Hope to see you there! Thanks so much for stopping by today – we’ll see you next time! ;)

Scrappy hugs,
lesliesig

Time to Relax in the Sun

Howdy, everyone! I hope you’re having a great day! I’m back again to share another fun fold sample I created for Prickley Pear Stamps. This one is a diagonal fold and I’ve used the super cute Play Date on the Beach clear stamp set. It’s been a long while since I created a diagonal fold and I had forgotten how fun they are!

And besides being a fun fold, this card is paper pieced which is an extra added fun touch! I layered a couple coordinating papers on darker cardstock to embellish the diagonal panels. I stamped the image on lighter cardstock, paper pieced the elements, then cut it with a stitched rectangle die.

Here are shots of the card opening up. I embellished the inside panel with the same coordinating papers used on the front, cut diagonally, with the prints reversed. I stamped the inside sentiment in black ink and layered the panel on the darker cardstock.

And one more peek… this is such a fun stamp! Who wouldn’t love to be invited to spend a day on the beach?!

Sharing in the following challenges:
1. 613 Avenue Create: October Anything Goes w/ optional Winged Things (no twist)
2. Creative Inspirations: October Anything Goes
3. Jan’s Digi Stamps Challenge: October Anything Goes
4. The Creative Crafters: #33 – Anything Goes
5. World Wide Open Design Team Challenge Blog: #10 – Anything Goes

Products used:
Cardstock/Paper: Neenah Classic Crest Solar White cardstock; Stampin’ Up So Saffron, Pool Party and Island Indigo cardstock; Lawn Fawn Spring Fling 6×6 paper pad
Stamps: Prickley Pear Stamps Play Day on the Beach clear stamp set
Ink: Memento Rich Cocoa ink, Spectrum Noir FS7; Nuvo alcohol markers- 363, 369, 410, 428, 497, 451, 479, 405, 379, 391, 389; Sakura White Gelly Roll pen
Dies/Punches: My Favorite Things Stitched Rectangles STAX dies
Accessories: Tombow Mono permanent adhesive, MISTI stamp tool, Gemini Junior

I hope you’ve enjoyed this project! Be sure to check out all the awesome stamps and dies at Prickley Pear Stamps! If you’d like to save 10% on anything on the site when you shop at Prickley Pear Stamps, use the coupon code LESLIE10 at checkout! And be sure to ‘like’ and ‘follow’ the Prickley Pear Stamps Facebook page to keep up with news and sales, and join Prickley Pear Pals (the fan group) for lots of fun crafty ideas and to share your creativity! And finally, we’d love to see you visit the Prickley Pear Stamps blog that’s in the process of being revived and become a Follower! Hope to see you there! Thanks so much for stopping by today – we’ll see you next time! ;)

Scrappy hugs,
lesliesig