season’s greetings

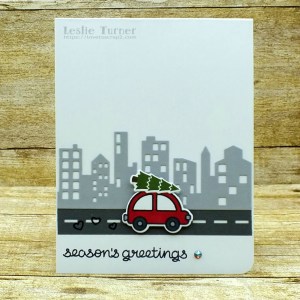
Happy Friday, friends! I hope you have a great day and a great weekend with something fun planned! Our new challenge is live over at Merry Little Christmas Challenge Blog and I’m super excited to share my DT inspiration project for MLCCB #39 – October Anything Christmas Goes! I created a pair of adorable cards that are almost identical – the only difference is what’s on top of the little car! I just had to use both of those elements! Some more older Lawn Fawn stamps and dies that I absolutely love!

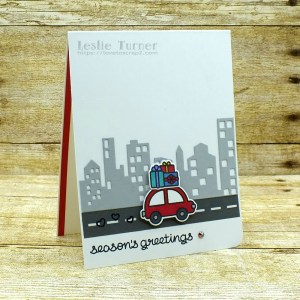
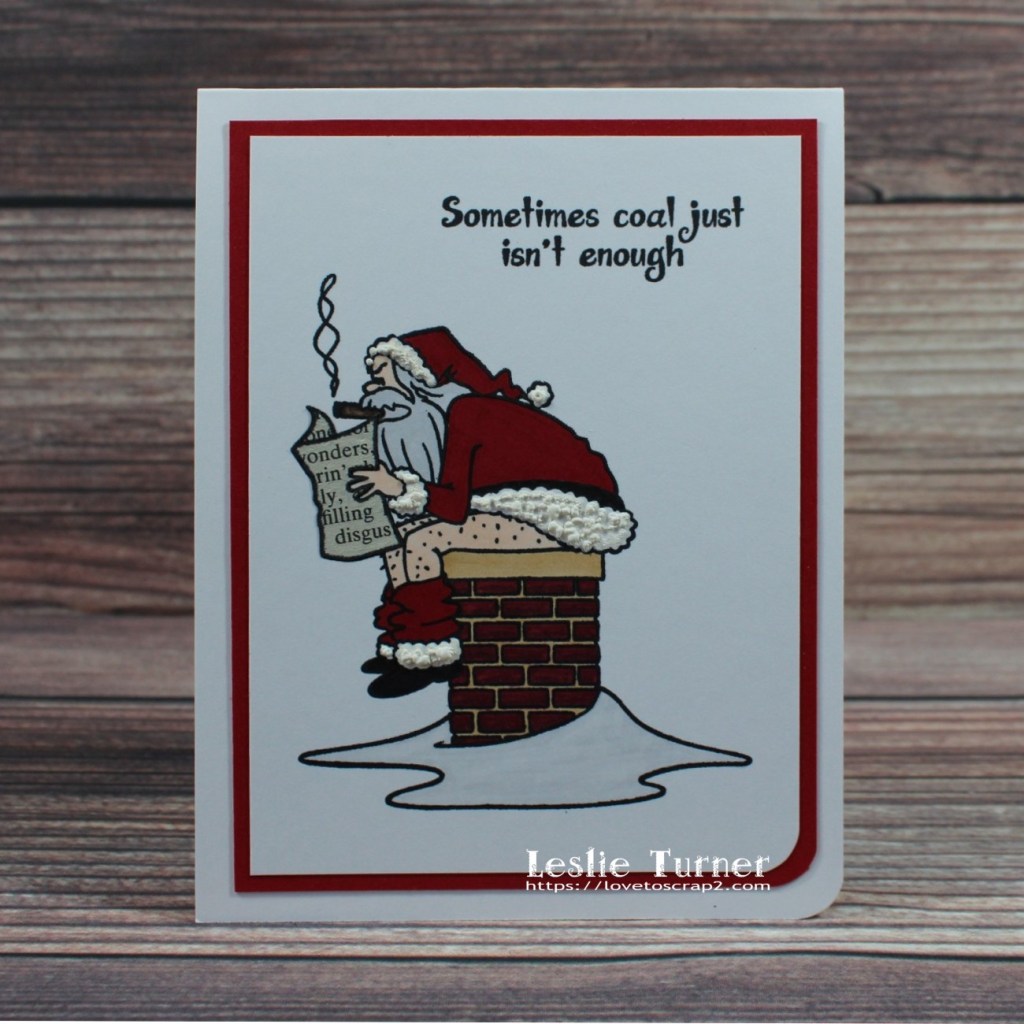
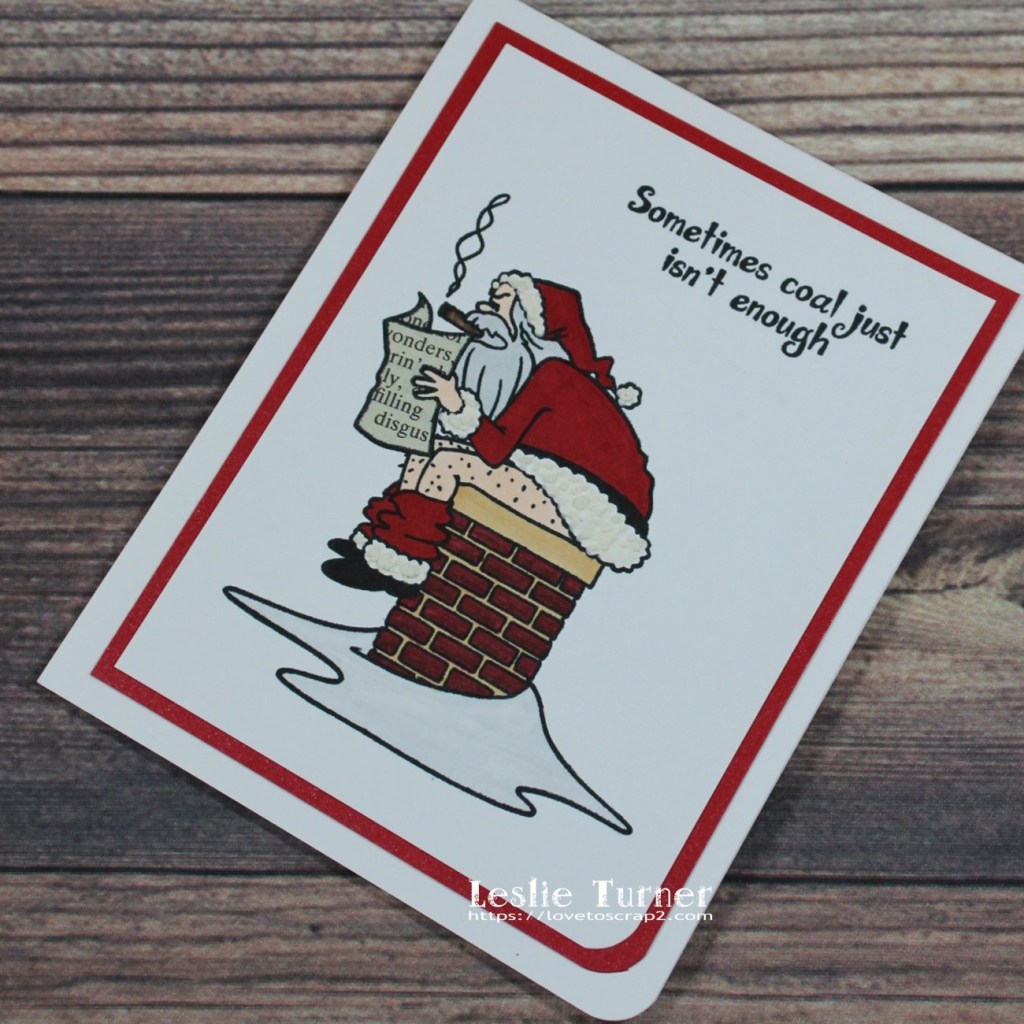
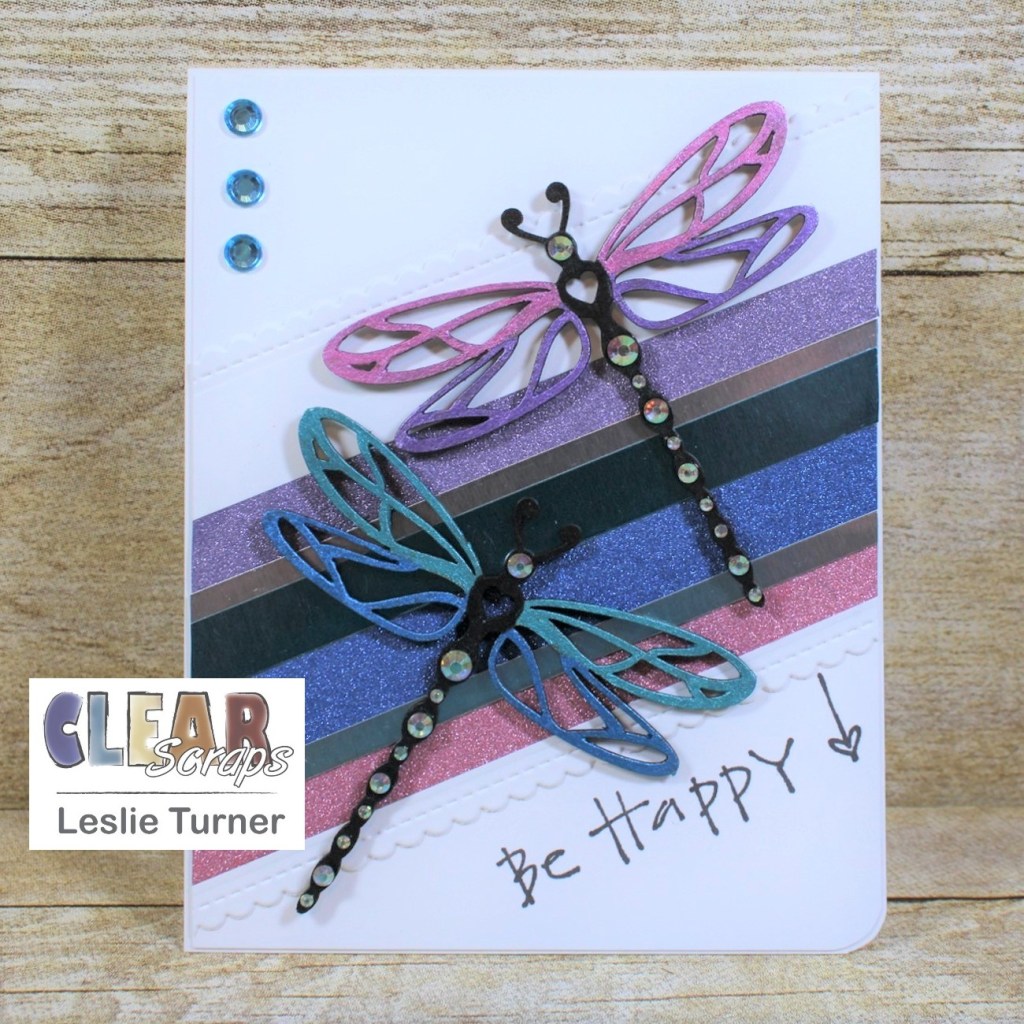
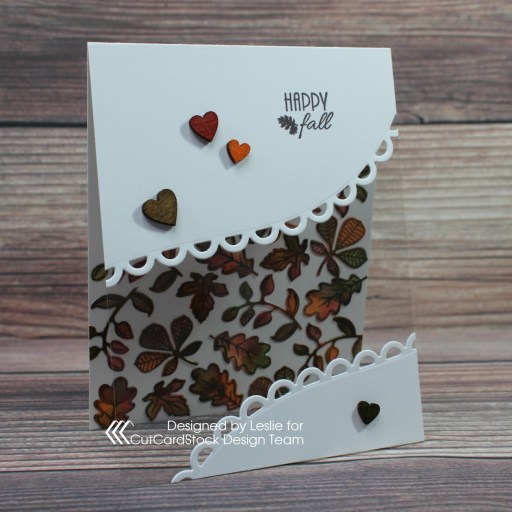
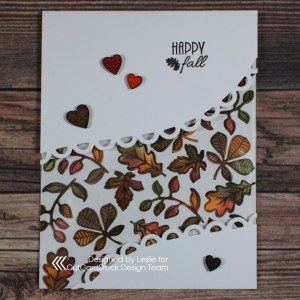
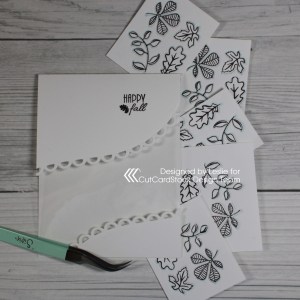
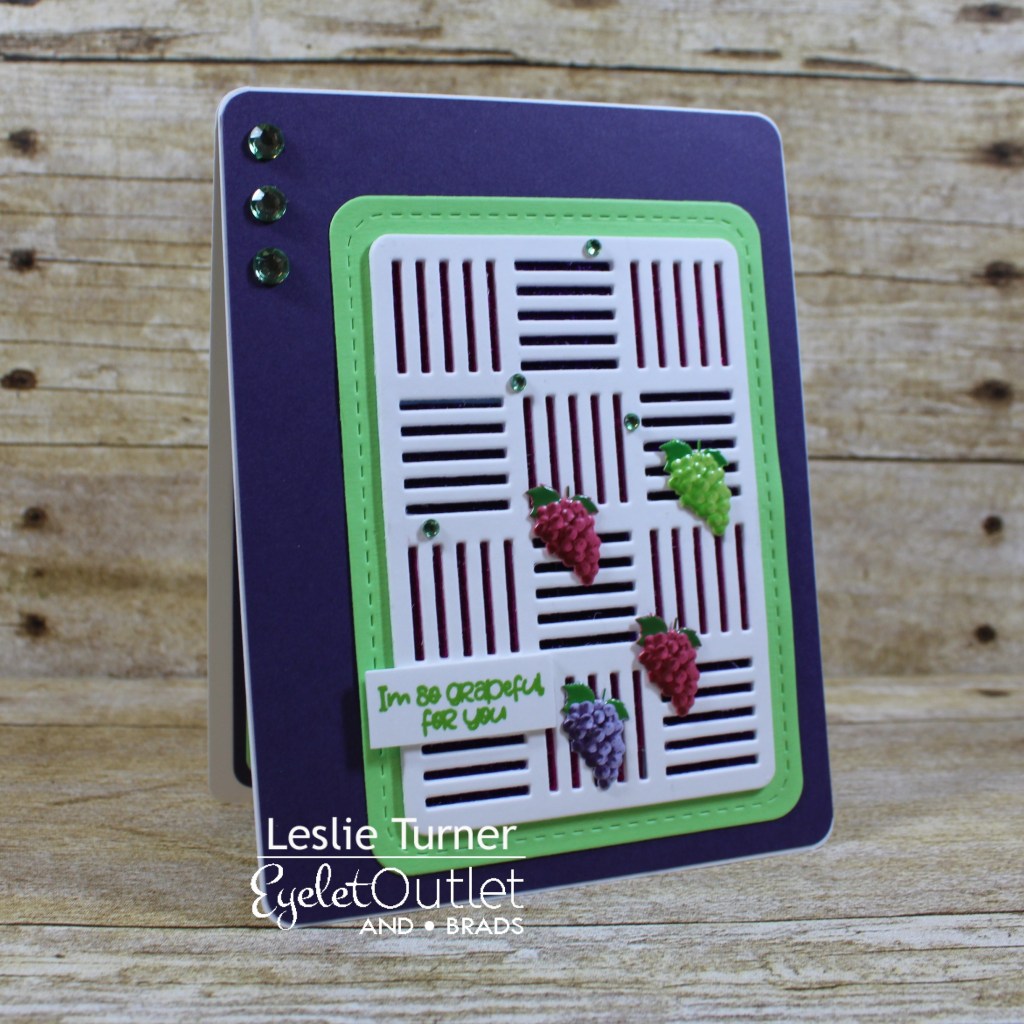
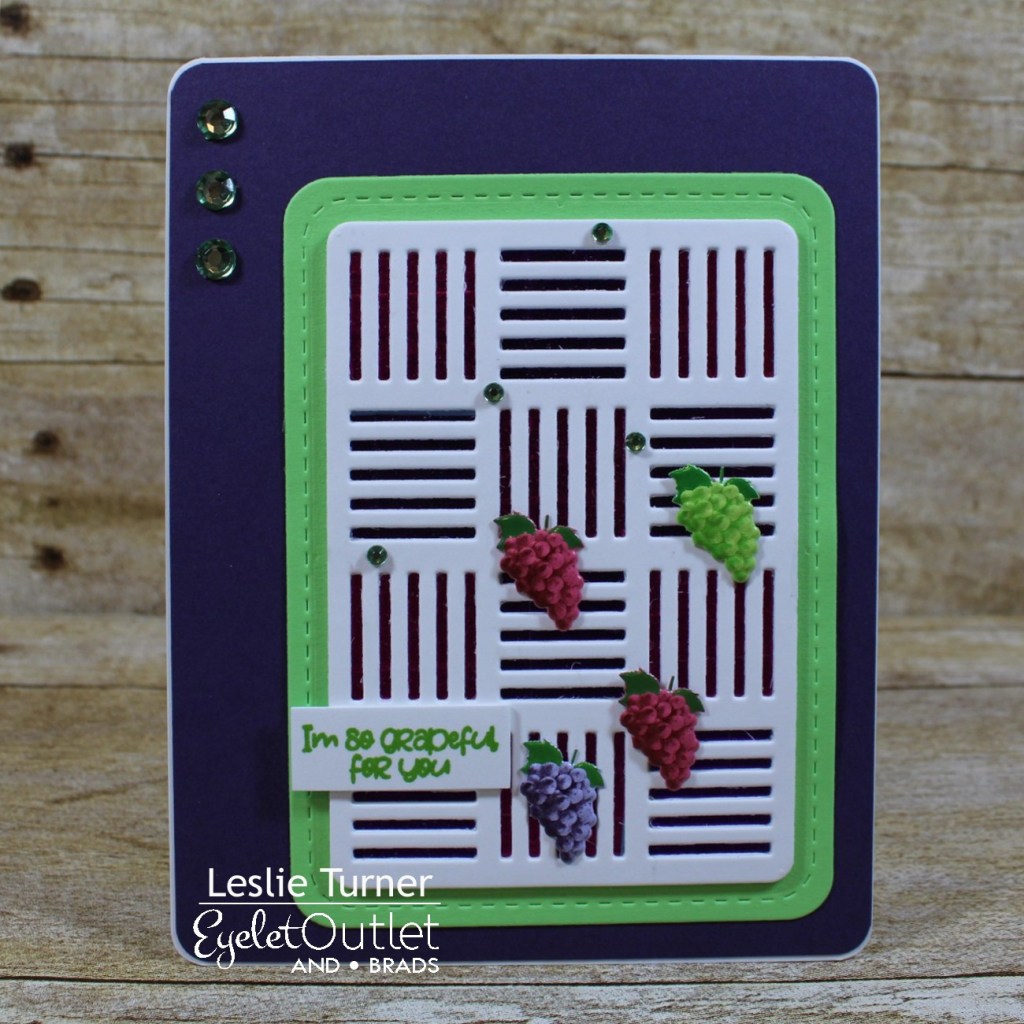
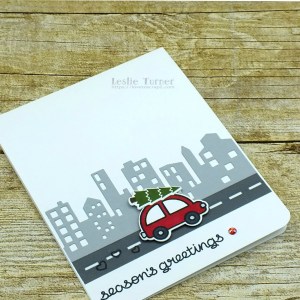
I created two standard A2 size top-fold card bases from Neenah Classic Crest 110# Solar White cardstock and rounded the lower right corner on each. I stamped the car twice and both of the elements on a scrap of Neenah Classic Crest Solar White cardstock, colored them with alcohol markers and cut them with the coordinating dies. I created the background on each card base with a strip of Eyelet Outlet Road Washi Tape and a Memory Box Cityscape cut from CutCardStock Dolphin cardstock. I stamped the exhaust hearts on the washi tape in Jet Black StazOn, adhered the elements to the top of each car, and adhered the cars to the road on dimensionals. I stamped the sentiment beneath the road and added a single iridescent gemstone on each.

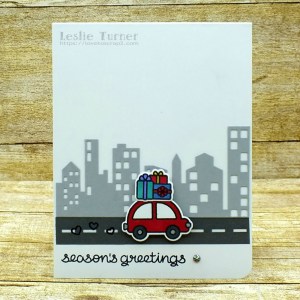
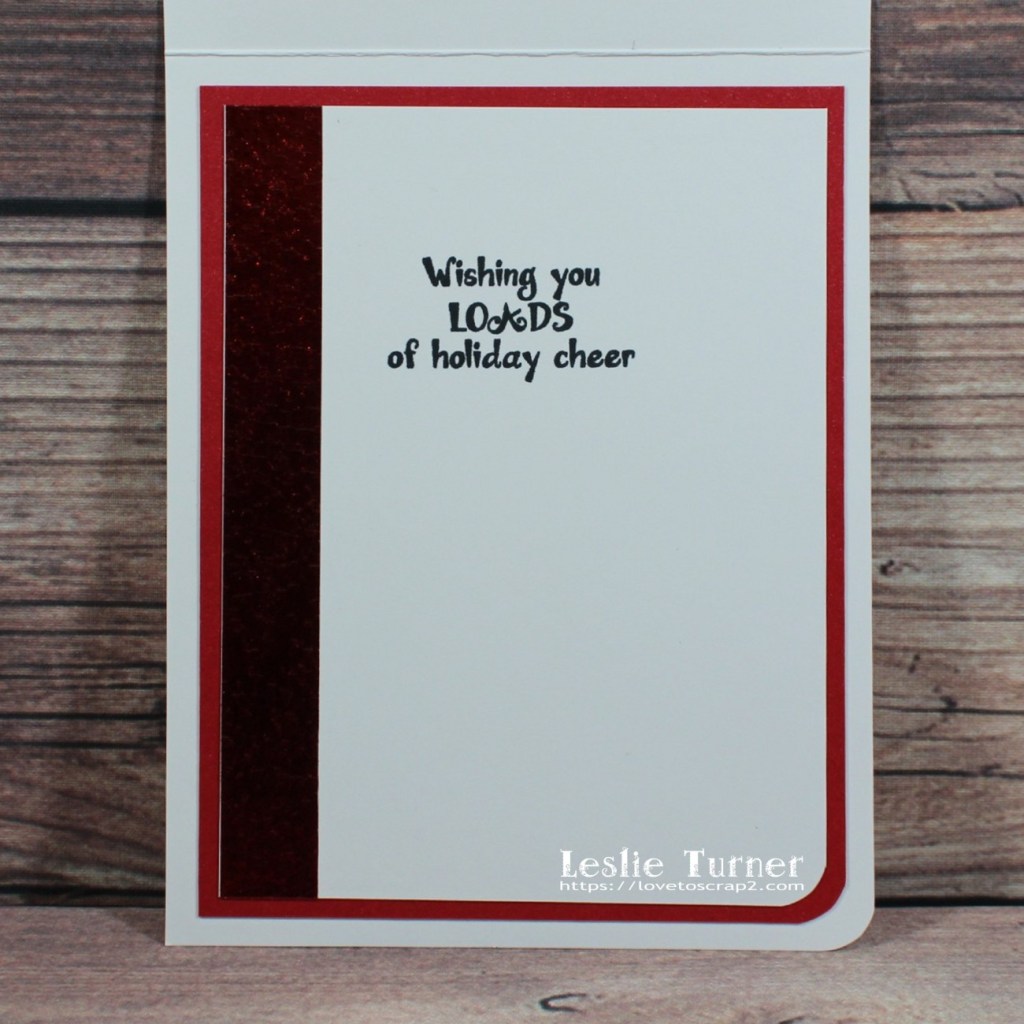
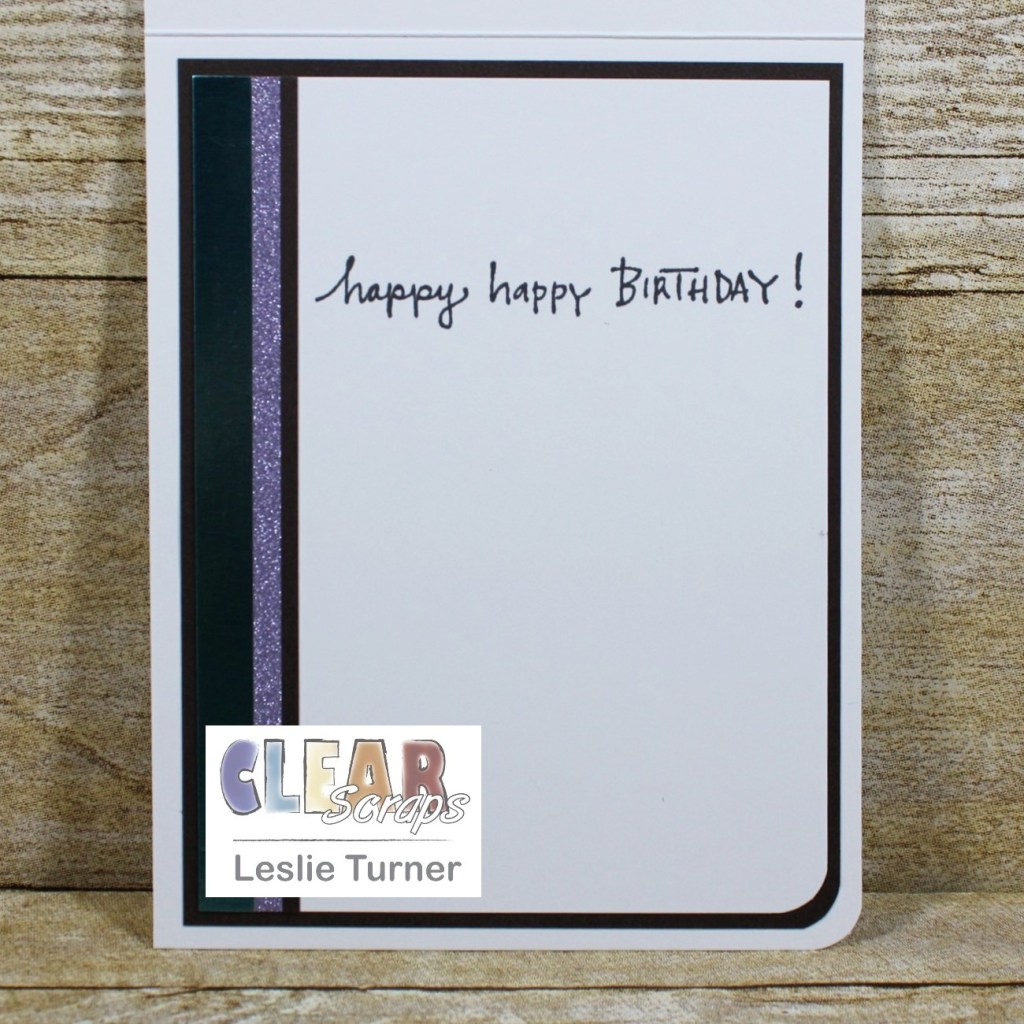
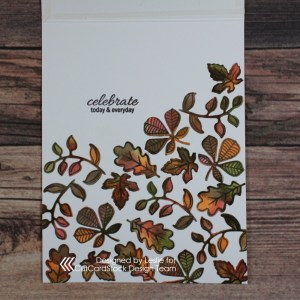
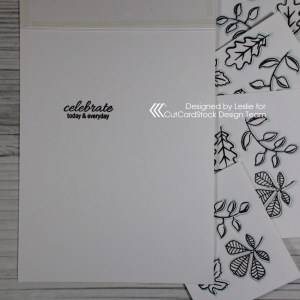
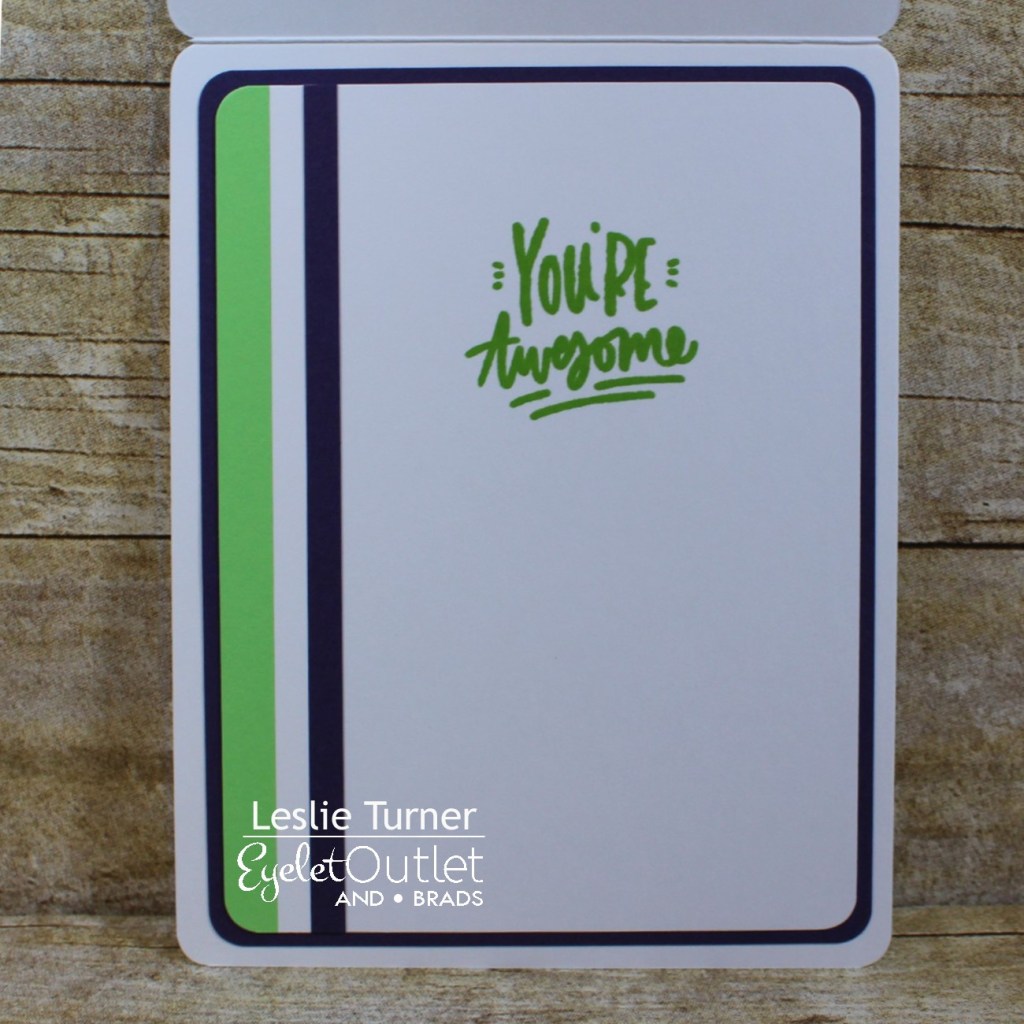
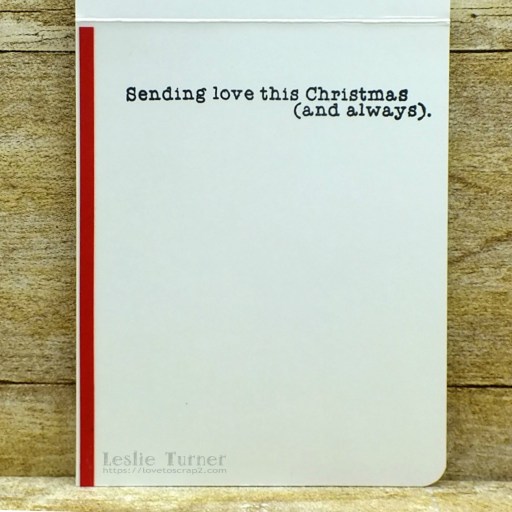
I stamped the sentiment in black ink and added a narrow red cardstock strip down the left side for a little interest. The inside is the same on both cards, and I used the Stampingbella gnome sentiments stamp set again… funny how the gnome sentiments are coming in so handy for non-gnome cards, lol!

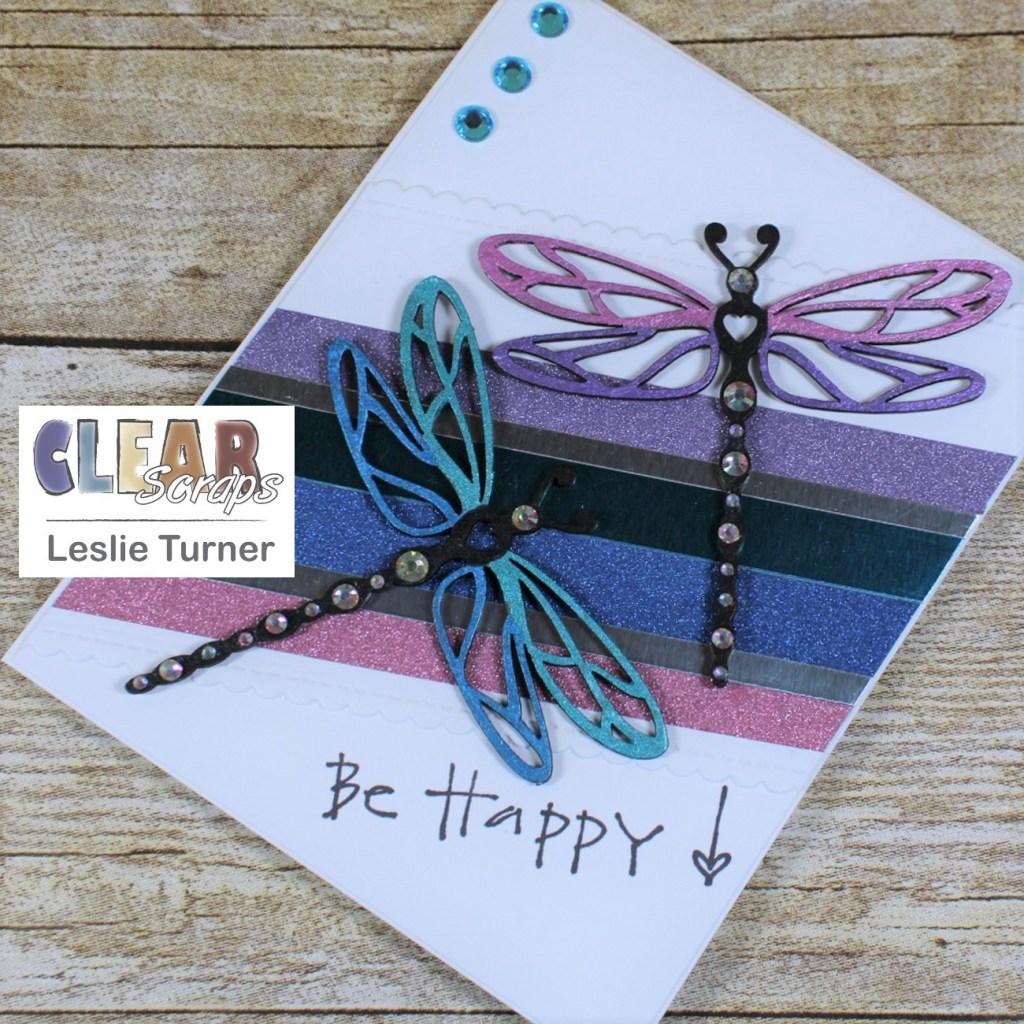
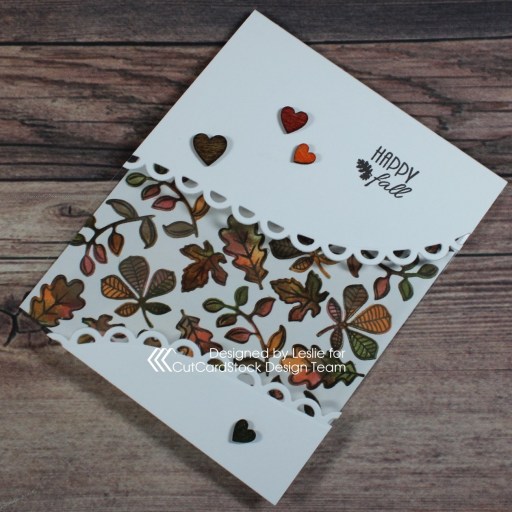
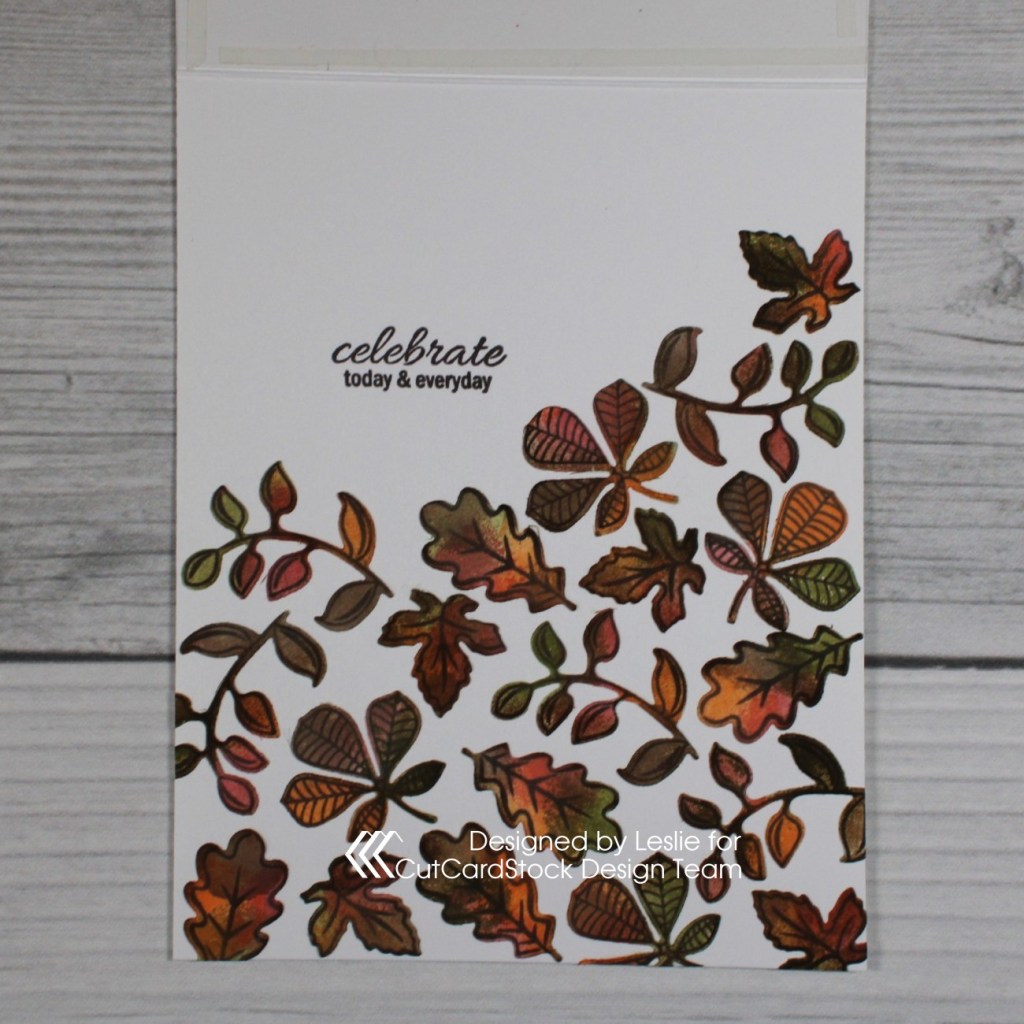
And one more peek at the pair… totally loving how these turned out! They are so stinkin’ cute I can’t stand it!

Products used:
Cardstock/Paper: Neenah Classic Crest Solar White cardstock, CutCardStock Dolphin cardstock, red cardstock scrap
Stamps: Lawn Fawn Home for the Holidays stamp set, Stampingbella Festive Gnome Sentiments stamp set
Ink: Memento Tuxedo Black ink, Ranger distress ink- black soot and peeled paint; Nuvo alcohol markers- Aquamarine Collection, Rich Reds Collection, Sunshine Yellow Collection, Marina Blues Collection, Palma Violets Collection, Natural Browns Collection, Stormy Greys Collection; Pentel Slicci Silver pen, StazOn Jet Black ink
Dies/Punches: Lawn Fawn Home for the Holidays die set, Memory Box Cityscape Nightline die, Kadomaru Pro corner rounder
Accessories: Tonic Studios 12″ Guillotine Paper Trimmer, Bearly Art precision craft glue, MISTI stamp tool, Gemini Junior, Stampin’ Up Dimensionals, Eyelet Outlet Road Washi Tape, ScraPerfect iridescent gemstone

I hope you’ve enjoyed seeing these cards and will link up a Christmas project with us this month! We’d love to see what you create! Thanks so much for stopping by today – we’ll see you again soon! ;)

Scrappy hugs,
lesliesig

Tequila bookmark

Hi everyone! Happy Friday – I can’t believe it’s the first day of October already! Where is the time going?! Our new challenge has launched over at Love To Scrap Challenge Blog and I’m thrilled to share my DT inspiration project for LTSCB #150 – Anything But A Card! We want to see anything you want to make for this challenge as long as it’s not a card! I created a fun bookmark using STAMPlorations Layered Citrus stamp set which is one of my favorites!

Using a plain white bookmark from my stash, I stamped the whimsical lemons randomly all over it. I stamped the first portion of the sentiment on a scrap piece of Neenah Classic Crest Solar White cardstock, trimmed it and adhered it to the top of the bookmark. I used glitter alpha letters for the word ‘lemons’ (all black letters except one which I colored yellow) and then stamped the rest of the sentiment from the stamp set in black ink. I made a hole reinforcement for the top with two circle punches and a scrap of white cardstock and added some narrow yellow ribbon. The final touch was the addition of a couple black enamel dots.

And one more look… such a fun project that is actually practical! ;)

Products used:
Cardstock/Paper: Darice white bookmark, Neenah Classic Crest Solar White cardstock scrap
Stamps: STAMPlorations Layered Citrus stamp set
Ink: Stampin’ Up So Saffron, Daffodil Delight and Crushed Curry ink; Memento Tuxedo Black ink; Nuvo alcohol markers- 404, 405
Dies/Punches: Stampin’ Up 1/4″ and 1/2″ circle punches
Accessories: Tim Holtz 8.5″ Guillotine Paper Trimmer, Bearly Art precision craft glue, MISTI stamp tool, Darice black and white glitter alpha stickers, Eyelet Outlet Black Enamel Dots, yellow ribbon scrap

I hope you’ve enjoyed today’s project and will link up a project with us this month that’s not a card! We’d love to see what you create! Thanks so much for stopping by today – we’ll see you again soon! ;)

Scrappy hugs,
lesliesig

Shabby Chic #keepsakes Box

Hey, everybody! A super Happy Thursday and last day of September to you! We are barreling right into October! My ring light came in and I used it with my Ott lights for these photos, and I love how they turned out. I’m super stoked to have finally found the happy medium! I’m thrilled to be back on the Clear Scraps blog today with another awesome DT inspiration project! I created a pretty shabby chic keepsakes box using the Acrylic Keepsake Box with a variety of texture papers and corrugated cardstock, dies and punches, paper flowers and pearls, and ribbon and twine! This was SO much fun! The sky is the limit with the fun you can have with these! ;)

Prior to assembly, I layered blue texture paper onto kraft cardstock for the four side panels which I adhered to the inside of each panel so the paper can be seen through the acrylic. The texture looks like cement on some of the pieces and peeling cardboard on the others. :) I also adhered kraft cardstock to the inside of the lid and blue texture paper to the inside bottom for a more finished look to the inside once it was assembled. I adhered vertical strips on the outside edges where the sides connect, and used a stitched border die on both sides of each strip for a little interest. Then I embellished each side with a horizontal strip of larger channel corrugated cardstock and then adhered die cut hearts embellished with punched gold foil circles, keeping the sides fairly simple with emphasis on the shabby papers. I adhered kraft cardstock to the outside bottom of the box, again for a more finished look.

I used smaller channel corrugated cardstock for the square on the lid which I embellished with punched gold foil circles, gold die cut flourishes, large paper flowers, pearls, and simple ribbon and twine bows for the chic part of the design. I dyed white seam binding to get just the right color blue I needed for the ribbon. This was messy inky fun and I actually remembered to put on gloves, lol! The finishing touch was adding #keepsakes die cuts in the lower right corner.

Clear Scraps products used:
Acrylic Keepsake Box

Other products used:
Cardstock/Paper: CutCardStock Basis 80# Navy cardstock, CutCardStock 80# Twine cardstock, corrugated cardstock, Hygloss gold foil cardstock, Paper Accents 120# kraft cardstock, The Paper Studio Entirely Textures 2 paper pad
Ink: Ranger Denim Adirondack Color Wash
Dies/Punches: Memory Box Stitched Heart Layers, Stampin’ Up 1/2″ circle punch, Lawn Fawn Stitched Borders, JustRite Stitched Oval and Vine dies, Sizzix Alphanumeric tiny Type Lower Thinlits
Accessories: Tonic Studios 12″ Guillotine Paper Trimmer, Bearly Art precision craft glue, Big Shot, Ranger Distress Collage Medium, Wild Orchid Crafts paper flowers, Hug Snug chalk white seam binding, Canvas Corp Jute Cord, Darice flat back pearls

I hope you’ve enjoyed today’s project and you’re inspired to get those craft supplies out to play! Be sure to check out all the amazing acrylic, wood and chipboard goodies at Clear Scraps… OMGoodness, you won’t be disappointed! And head on over to the Clear Scraps Facebook Page for lots of inspiration! And while you’re at it, join the Clear Scraps Facebook Creative Group to connect with other Clear Scraps fans! Thanks so much for stopping by today – we’ll see you next time!

Scrappy hugs,
lesliesig

Off-Color Christmas! ;)

Hi friends! I hope you are having an absolutely splendid week! It’s Hump Day and our feral dad will be headed to Neuterville early tomorrow morning! It’s so stressful getting ferals ready to go to the vet because they have to be trapped, they’re scared and get really irritated, they can’t be trapped too early because they need bathroom access, etc. etc. But feral mom is doing well with her one remaining kitten that’s now about three weeks old, and she’ll be getting spayed in mid-November. Then her baby will get spayed/neutered in March at six months. Hopefully, Lord willing, this will be the end of the feral business… “Ed, are you listening?!” Affiliate links are used in this post at no cost to you. I really appreciate your support! I have an off-color Christmas card to share this evening… one I made a couple weeks ago and laughed the entire time. ;) My online friend, Deborah, shared a card a while back that she created with this same Whimsy Stamps set, and I just howled. Of course, I HAD to have the stamp set, and while shopping, I found a couple other off-colored ones that I bought as well, lol!

I cut a standard A2 top-folding card base from Neenah Classic Crest Solar White cardstock along with a layering panel from CutCardStock Stardream Metallic Jupiter cardstock, and rounded the bottom right corner. I stamped the image and sentiment in black ink and colored the image with alcohol markers. I paper-pieced Santa’s newspaper with a piece of a page torn from an old paperback novel in my stash, and embellished his suit with Marvy Snow Marker.

I cut the inside panel from Neenah Classic Crest Solar White cardstock and embellished it with a strip of red foil washi tape, stamped the sentiment in black ink, and layered it on red cardstock.

And one more peek… I literally laugh out loud every time I look at this card! My apology to any and all who don’t see the humor! Bahahahaha!

Products used:
Cardstock/Paper: Neenah Classic Crest Solar White cardstock, CutCardStock Stardream Metallic Jupiter cardstock
Stamps: Whimsy Stamps Loads of Cheer stamp set
Ink: Memento Tuxedo Black ink, Arteza alcohol markers- BK00, CG08, BR52/66, YR39, R21/30
Dies/Punches: Kadomaru Pro Corner Rounder
Accessories: Tonic Studios 12″ Guillotine Paper Trimmer, Marvy Uchida Snow Marker, Bearly Art precision craft glue, MISTI stamp tool, Eyelet Outlet Red Foil Washi Tape, old paperback novel

I hope you’ve enjoyed seeing this project and I sure hope I haven’t offended anybody, lol! I have a warped sense of humor and this fits right in! Thanks so much for stopping by today – we’ll see you next time! ;)

Scrappy hugs,
lesliesig

Missing You

Hey everybody! Happy Tuesday – I hope your week has started off very nicely! We are enjoying some glorious temperatures out here in Colorado so that makes me happy! I’m stoked to be back on the CutCardStock blog today with an awesome DT inspiration project featuring more of our Autumn cardstock in brown, orange and gold colors, which is on sale this month so be sure to get some! I paired these beautiful colors with Natural cardstock. Affiliate links are used in this post at no cost to you. I really appreciate your support! You know how I love fun folds, and I’ve had this ‘M fold’ (also called a ‘W fold’) in my arsenal for some time so I thought I’d try it out. Of course, it was a fun one! :D

I cut the card base and strips for the inside from Basis Natural 110# cardstock, along with layering panels for the front from Basis Brown 80# cardstock, Basis Dark Orange 80# cardstock and Basis Natural 110# cardstock which I adhered together. I stamped the rose and sentiment in brown ink and colored the rose with alcohol markers. The finishing touch to the front of the card was the addition of several gemstones.

I cut layering panels and four small lacy squares for the inside from Curious Metallic Gold Leaf 92# cardstock, along with small layering squares from Basis Brown 80# cardstock, Basis Dark Orange 80# cardstock and Basis Natural 110# cardstock. I stamped different areas of the rose on the four natural squares and colored them with the same alcohol markers used on the front. I assembled the squares and adhered them to the scored strip. I adhered narrow strips across the top and stamped the inside sentiment in brown ink… my own twist I added to the design to make it mine. ;)

Here are shots showing the ‘M fold’ and inside of the card opened completely up.

And one more peek… totally loving how this turned out! These cardstock colors are ah-maaaazing!

CutCardStock products used:
Basis Natural 110# cardstock
Basis Brown 80# cardstock
Basis Dark Orange 80# cardstock
Curious Metallic Gold Leaf 92# cardstock

Other products used:
Stamps: Hero Florals Rose Stem stamp set
Ink: Catherine Pooler Icing On The Cake ink; Arteza alcohol markers- YR00, YG01
Dies/Punches: Spellbinders Lacy Squares die
Accessories: Tonic Studios 12″ Guillotine Paper Trimmer, MISTI stamp tool, Big Shot, Bearly Art precision craft glue, Trinity Stamps Topaz Twinkle Embellishment Mix, Trinity Stamps Pick Up Stick

I hope you’ve enjoyed today’s project and you’re inspired to get crafty! Be sure to check out all the awesome cardstock and other goodies at CutCardStock (adhesives, labels, stickers, pens, watercolors and ribbon to name a few). And head on over to the CutCardStock Facebook Page for more inspiration! Thanks so much for stopping by today – we’ll see you next time!

Scrappy hugs,
lesliesig

Breakfast ATCs

Hi everyone! A very Happy Saturday to you – I hope you’ve had a great week! We’ve been busy this week with human and feline doctor appointments. Cute story… As you probably already know, we are crazy cat people, and Ed is known as the “Cat Whisperer” (lol). Several weeks ago he brought a sweet little family of mom, dad and four six-month-old kittens to our back yard shed (and built an attached catio so they are protected from predators) that he rescued from an abandoned building. Mom has since given birth to four more kittens two weeks ago but three didn’t survive. So the four six-month-old females got spayed this week, dad has an appointment to get neutered next week (I’m sure he won’t be happy about that, lol), and mom will get spayed as soon as her remaining kitten is weaned. We are hopeful that they will stay in our back yard since this is where their food is. We have ten inside cats already so this is the best we can do for them. <3 Affiliate links are used in this post at no cost to you. I really appreciate your support! I’m happy to be back on the Eyelet Outlet blog today with another awesome DT inspiration project! I created a super fun set of four breakfast-themed ATCs (cards and coins) featuring our Breakfast Stamps and Bacon Egg & Toast Brads, along with Blue Jewel Bling, Clear Jewel Bling, Green Jewel Bling and Gray Enamel Dots! I absolutely LOVE coordinating stamps and brads! :D

I cut and punched the card and coin bases (two for each ATC) from Neenah Classic Crest Solar White 110# cardstock along with some patterned paper layers. I adhered the patterned paper layers to the bases to make the four ATCs, stamped the sentiments from Breakfast Stamps on each one, and added the Bacon Egg & Toast Brads. I then added Blue Jewel Bling, Clear Jewel Bling, Green Jewel Bling and Gray Enamel Dots and adhered the extra base on the back of each ATC for stability.

And one more look… totally loving how these turned out! I think I mentioned in my last post that I’m a real sucker for pun-y sentiments, so here we are again, lol! ;)

Eyelet Outlet products used:
Breakfast Stamps
Bacon Egg & Toast Brads
Blue Jewel Bling
Clear Jewel Bling
Green Jewel Bling
Gray Enamel Dots

Other products used:
Cardstock/Paper: Neenah Classic Crest 110# and 80# Solar White cardstock, CutCardStock Granny Smith cardstock, Simple Stories Wood & Gingham Basics 12×12 paper pad
Ink: Arteza alcohol marker- R05 (to color clear bling), Catherine Pooler Polished, Over Coffee and Sauna ink
Dies/Punches: Fiskars 2-1/2″ circle punch
Accessories: Tonic Studios 12″ Guillotine Paper Trimmer, Bearly Art precision craft glue, MISTI stamp tool

I hope you’ve enjoyed today’s project! Be sure to check out all the fun goodies at Eyelet Outlet! I can already see you drooling, lol! Be sure to ‘like’ and ‘follow’ Eyelet Outlet Facebook Page to keep up with news and sales, and while you’re at it, join the Eyelet Outlet Fans Facebook group for lots of creative inspiration! Thanks so much for stopping by today – we’ll see you next time! ;)

Scrappy hugs,
lesliesig

Random Acts of Kindness ATCs

Hi everyone! Woot-woot, another Friday has rolled around and it’ll be Christmas before we know it! I can’t wait! Our weather has cooled off out here in Colorado and we are loving life – the cooler climate is what attracted us nearly five years ago! Affiliate links are used in this post at no cost to you. I really appreciate your support! I’m delighted to be back on the Dies R Us Inspiration Blog today with another awesome DT inspiration project! I’ve been on an ATC kick again lately and created a set of RAK artist trading coins using the Memory Box Love Circle, Pinpoint Heart Circle, Cupid Circle, Peaceful Butterfly Circle and Jumping Bunny Circle to add to my growing collection! If you know me, you know I absolutely love all kinds of artist trading cards, coins and cubes, and I typically don’t trade them, lol! I’ve never made any ATCs with a random acts of kindness theme so I thought that would be different and fun, and these dies were just the ticket!

I die cut the Memory Box Love Circle, Pinpoint Heart Circle, Cupid Circle, Peaceful Butterfly Circle and Jumping Bunny Circle from CutCardStock Pop-Tone Cotton Candy cardstock, CutCardStock Raspberry Ice cardstock, CutCardStock Stardream Metallic Azalea cardstock, CutCardStock Dolphin cardstock, CutCardStock Stardream Metallic Amethyst cardstock and set them aside. I punched the coin bases from Neenah Classic Crest Solar White 110# cardstock, two per coin for stability, and also punched the background pieces from patterned paper and one from CutCardStock Basis Red cardstock. I adhered all the layers and elements, stamped a kindness sentiment on each one, and added gemstones.

And one more look at the set… absolutely loving these circle dies and the amazing ATCs created with them! ;)

Dies R Us products used:
Memory Box Love Circle
Memory Box Pinpoint Heart Circle
Memory Box Cupid Circle
Memory Box Peaceful Butterfly Circle
Memory Box Jumping Bunny Circle

Other products used:
Cardstock/Paper: Neenah Classic Crest 110# and 80# Solar White cardstock, CutCardStock Basis Red cardstock, CutCardStock Pop-Tone Cotton Candy cardstock, CutCardStock Raspberry Ice cardstock, CutCardStock Stardream Metallic Azalea cardstock, CutCardStock Dolphin cardstock, CutCardStock Stardream Metallic Amethyst cardstock, Doodlebug Designs Dot-Grid-Daisy-Stripe and Gingham-Linen Rainbow Petite Prints 6×6 paper pads, Lawn Fawn Spring Fling 6×6 petite paper pack
Stamps: Julie Nutting Make Kindness Happen stamp set
Ink: Memento Tuxedo Black ink
Dies/Punches: Fiskars 2-1/2″ circle punch, EK Success 2″ scallop circle punch, Stampin’ Up 2″ circle punch
Accessories: Big Shot, Bearly Arts precision craft glue, MISTI stamp tool, Darice assorted color tiny gemstones

I hope you’ve enjoyed today’s project! Be sure to check out all the fun goodies at the Dies R Us store! They not only sell dies… they also carry stamps, embossing tools and supplies, all kinds of craft supplies, slimline products and even Yupo paper! Be sure to join in the fun going on over at the Dies R Us Challenge Blog – there’s a new challenge theme posted on the 1st and 15th of each month and one lucky random winner will receive a gift voucher prize to the Dies R Us store! And be sure to ‘like’ and ‘follow’ Dies R Us Facebook Page for lots of creative inspiration and to keep up with the latest news! Thanks so much for stopping by today – we’ll see you next time! ;)

Scrappy hugs,
lesliesig

Be Happy!

Hey, everybody! Happy Monday to you! I hope you had a marvelous weekend and were able to do something fun! You know where I was… yep, you got it! In my studio doing what I love! And our weather is cooling off here and I’m loving life! I’m thrilled to be back on the Clear Scraps blog today with another awesome DT inspiration project! I created a pretty birthday card with two removable dragonfly magnets! The magnets were created with the Dragonflies Chipboard Embellishments and painted with some oh-so-gorgeous metal gloss paint in several colors. So between the dragonflies and the foiled and glitter cardstock, there’s a whole lot of shimmer going on! What a fun way to give a card and gift in one! Magnets are always a big hit no matter where they are placed – they are a constant reminder of who gifted them! 

I painted the bodies of the Dragonflies Chipboard Embellishments with brown chalk paint and then painted one set of dragonfly wings with turquoise and steel blue metal gloss paint, and the other set with magenta and violet metal gloss paint. I added iridescent gemstones to the bodies, and then adhered two tiny disc magnets on the back of each dragonfly with distress collage medium. For the card front, I cut a standard A2 size top-folding card base, a layering panel and two stitched scallop edges from white cardstock. I then cut strips in varying widths from purple and pink glitter cardstock as well as silver and teal foiled cardstock, and adhered the scalloped edges and strips to the layering panel in a diagonal fashion. I adhered the front panel to the card base and stamped the sentiment in brown ink. I finished the front with several blue gemstones in the upper left corner. 

Here are the dragonflies taken off the card front. The magnet backs are on the back side of the front flap of the card base, ‘disguised’ behind 1/2″ circles pressed into a foam mat to form cups and adhered to the magnets with distress collage medium.

I cut the inside layering panel from white cardstock and embellished it with strips of glitter and brown cardstock used on the front. I stamped the sentiment in brown ink as well, and layered the panel on brown cardstock to tie in the color of the dragonfly bodies.

And one more peek… so loving how this turned out! Love me some dragonflies!

Clear Scraps products used:
Dragonflies Chipboard Embellishments

Other products used:
Paper/Cardstock: Neenah Classic Crest 110# and 80# Solar White cardstock, CutCardStock Pop-Tone 65# Hot Fudge cardstock, DCWV Foiled Cardstock Stack, DCWV Glitzy Glitter Cardstock Stack, DCWV Glitzy Pastels Stack
Stamps: Paper Wings Productions Sayings and Sentiments stamp set
Ink: Memento Espresso Truffle ink
Dies/Punches: My Favorite Things Stitched Scallop Basic Edges dies, Kadomaru Pro corner rounder, Stampin’ Up 1/2″ circle punch
Accessories: Plaid Folkart Java chalk paint; Inka Gold Magenta, Steel Blue, Turquoise and Violet metal gloss paint; Bearly Art precision craft glue, ScraPerfect iridescent gemstones, Brutus Monroe small disc magnets, Eyelet Outlet blue gemstones

I hope you’ve enjoyed today’s project and you’re inspired to get those craft supplies out to play! Be sure to check out all the amazing acrylic, wood and chipboard goodies at Clear Scraps… OMGoodness, you won’t be disappointed! And head on over to the Clear Scraps Facebook Page for lots of inspiration! And while you’re at it, join the Clear Scraps Facebook Creative Group to connect with other Clear Scraps fans! Thanks so much for stopping by today – we’ll see you next time!

Scrappy hugs,
lesliesig

HAPPY fall for CutCardStock Fall-oween Blog Hop!

Hi friends! A big giant WELCOME to the CutCardStock blog‘s Fall-oween Blog Hop going on this weekend (September 18th and 19th), starting at 7:00 AM Central Time today and ending at 11:55 PM Central Time tomorrow! Affiliate links are used in this post at no cost to you. I really appreciate your support! This is going to be fun, so COME HOP WITH US!

AND there is a $40 CutCardStock gift card up for grabs! Woo-hoo!

The winner will be randomly selected via number generator and announced on Monday, September 20th, on the CutCardstock blog and Facebook page! To be eligible for the $40 gift card, you must comment at each stop along the hop (good for ONE gift card entry) or upload a Fall or Halloween project using CutCardStock products (good for TWO gift card entries). We would absolutely LOVE IT if you link up a project with us, PLUS it will increase your chances to win the gift card! ;)

=  =  =  =  =  =  =  =  =  =  =  =  =  =  =  =

Now, let me side-track you for a minute or three to share my pretty Fall card featuring a Neenah Classic Crest Solar White 110# cardstock card base with an acetate panel. Both the 110# and 80# weight Neenah Classic Solar White cardstock are staples in my studio. I create most of my projects with this amazing cardstock and don’t ever see myself without it!

Acetate panel cards are so fun to create and this was a super easy one. All those leaves seen through the acetate were cut from Neenah Classic Crest Solar White 110# cardstock as well, and adhered directly to the inside of the card base.

Here is a quick tutorial showing you my process for making this card. All you need is a good sturdy card base cut from Neenah Classic Crest Solar White 110# cardstock, a piece of acetate, and an edge die – which can be curved or straight, plain or scalloped. Doesn’t get much easier! ;)

Cut a section out of the front flap of the card base with the edge die, adhere the acetate to the back side of the flap and adhere the bottom portion of the front flap to the front of the acetate. Stamp the front and inside sentiments in brown ink. Using the Prickley Pear Stamps Fall Leaves Stamp Set and coordinating Prickley Pear Stamps Leaf Die Set, stamp several sets of leaves in brown ink and die cut them, keeping the leaves in the negative spaces by putting small strips of washi tape on the back side of the panels.

Ink the leaves with carved pumpkin, fired brick, forest moss, walnut stain distress inks. Once dry, remove the washi tape from the back side of the panels and remove the die cuts.

Adhere the die cuts randomly to the inside of the card base being sure to cover all areas visible through the acetate.

Ink several wood veneer heart embellishments with the same distress ink colors and adhere to the front of the card base.

CutCardStock products used:
Neenah Classic Crest Solar White 110# cardstock

Other products used:
Stamps: Prickley Pear Stamps Fall Leaves Stamp Set
Ink: Memento Espresso Truffle ink; Ranger distress ink- carved pumpkin, fired brick, forest moss, walnut stain
Dies/Punches: Your Next Stamp Curved Scallop Edge Die, Prickley Pear Stamps Leaf Die Set
Accessories: Bearly Art precision craft glue, MISTI stamp tool, Big Shot, Spiegelmom Scraps Wood Veneer Rustic Hearts

=  =  =  =  =  =  =  =  =  =  =  =  =  =  =  =

Okay, let’s get back to the hop! Here is the complete list of stops:

  1. CutCardStock
  2. Janet Trieschman
  3. Janet Axtman
  4. Maureen Ruangchamneil
  5. Jennifer Kotas
  6. Leslie Turner –>you’re here!<–
  7. Judy VanZandt
  8. Judy Markowitz
  9. CutCardStock – C’mon, you know you want to link up! The linky tool is at the end of the post on the CutCardstock blog so that’s where you’ll want to head to link up your project – each upload is worth two entries for the gift card! Two entries per person!

You should have arrived here from Jennifer’s blog and your next stop is Judy V’s blog! I hope you are enjoying the hop and seeing all the fun Halloween projects! If you get lost along the way or if you landed here in the middle of the hop somehow and want to join in the fun, be sure to head on over to the CutCardstock blog to read all the details and start from the beginning!

In closing, I hope you’ve enjoyed seeing my Halloween card and you’re inspired to get crafty AND hop with us AND link up a Halloween-themed project! Be sure to check out all the awesome cardstock and other goodies at CutCardStock (adhesives, labels, stickers, pens, watercolors and ribbon to name a few). And head on over to the CutCardStock Facebook Page for lots of crafty inspiration! Thanks so much for stopping by today – we’ll see you next time!

Scrappy hugs,
lesliesig

I’m so grapeful for you

Hi everyone! A very Happy Saturday to you – I hope you’ve had an awesome week! I can’t believe we’re on the downhill slope toward the end of September and we’ll soon be welcoming October! Affiliate links are used in this post at no cost to you. I really appreciate your support! I’m stoked to be back on the Eyelet Outlet blog today with another awesome DT inspiration project! I created a super fun friendship/thank you card featuring our Grape Brads, Purple Foil Washi Tape, Pink Foil Washi Tape and Green Jewel Bling! I’ve had this die in my stash for a minute and thought it would be fun to place the purple and pink foil washi tape beneath the dashed apertures to use as the background for the hanging clusters of grapes and fun sentiment! I’m such a sucker for pun-y sentiments, lol!

I cut a standard A2 size top-folding card base from Neenah Classic Crest Solar White 110# cardstock along with a layering panel from CutCardStock Basis Dark Purple cardstock, rounded all four corners, and adhered the purple panel to the card base. Using the mini cover plate die, I cut panels from CutCardStock Basis Light Lime cardstock and Neenah Classic Crest Solar White 80# cardstock. I placed strips of Purple Foil Washi Tape alternating with strips of Pink Foil Washi Tape on the green panel, and then adhered the white panel on top. I added several Grape Brads and adhered the piece to the card front. I added the sentiment and Green Jewel Bling to complete the front of the card.

I cut the inside panel from Neenah Classic Crest 80# Solar White cardstock and embellished it with strips of CutCardStock Basis Light Lime cardstock, Neenah Classic Crest 80# Solar White cardstock and CutCardStock Basis Dark Purple cardstock. I stamped the sentiment in green ink and layered the panel on the purple cardstock.

And one more look… really loving how this turned out! I’ve always loved a green and purple color combo, and the pop of pink on this one really sets it off! These grape brads are super fun!

Eyelet Outlet products used:
Grape Brads
Purple Foil Washi Tape
Pink Foil Washi Tape
Green Jewel Bling

Other products used:
Cardstock/Paper: Neenah Classic Crest 110# and 80# Solar White cardstock, CutCardStock Basis Dark Purple cardstock, CutCardStock Basis Light Lime cardstock
Stamps: PhotoPlay Fruits & Veggies stamp set, Brutus Monroe Super Sentimental stamp set
Ink: Catherine Poole Lime Rickey ink
Dies/Punches: Kadomaru Pro corner rounder, Catherine Pooler Just A Dash Mini Cover Plate
Accessories: Tonic Studios 12″ Guillotine Paper Trimmer, Bearly Art precision craft glue, MISTI stamp tool, Big Shot

I hope you’ve enjoyed today’s project! Be sure to check out all the fun goodies at Eyelet Outlet! I can already see you drooling, lol! Be sure to ‘like’ and ‘follow’ Eyelet Outlet Facebook Page to keep up with news and sales, and while you’re at it, join the Eyelet Outlet Fans Facebook group for lots of creative inspiration! Thanks so much for stopping by today – we’ll see you next time! ;)

Scrappy hugs,
lesliesig