You Rock!

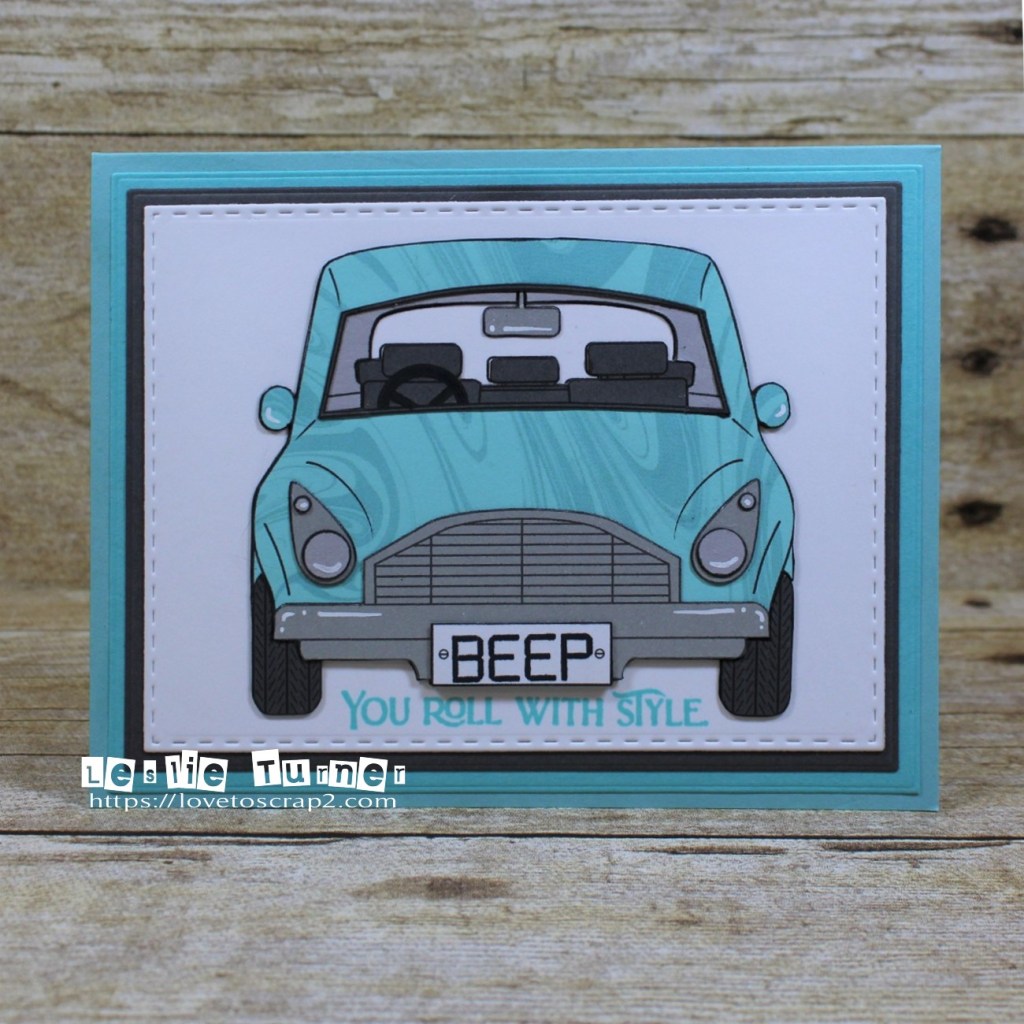
Hey everybody! Hope you’re having an amazing weekend! It’s been quiet here and I’ve gotten a little studio time in while hubby is tending to his garden. We are both in awe over his green thumbs! We had air fried green tomatoes for dinner last night and they were amazing! We have a friend who cans every Summer, and she and Ed have worked out an agreement where Ed shares garden produce with her which she cans and shares some back with us. Love it! ;) Affiliate links are used in this post at no cost to you. I really appreciate your support! Today I’m sharing a fun masculine birthday card I created for my musician son (who plays guitar and drums) that I’m entering into The Outlawz Monday Greetings Challenge. The theme is ‘Make It Masculine’ and this is perfect! The challenge ends tonight so I better get on the stick and get it entered! ;)

I used My Scrap Chick’s fun Rock Band Box Card cut file with my Scan N Cut. I cut all the pieces from CutCardStock Basis Light Brown cardstock, CutCardStock Basis Black cardstock, CutCardStock Basis Gold cardstock, Neenah Classic Crest Solar White cardstock, CutCardStock Curious Metallic White Gold cardstock, Hygloss Silver Foil cardstock and Hygloss Gold Foil cardstock. I stamped the front sentiment in black ink using The Project Bin Jukebox Birthday stamp set.

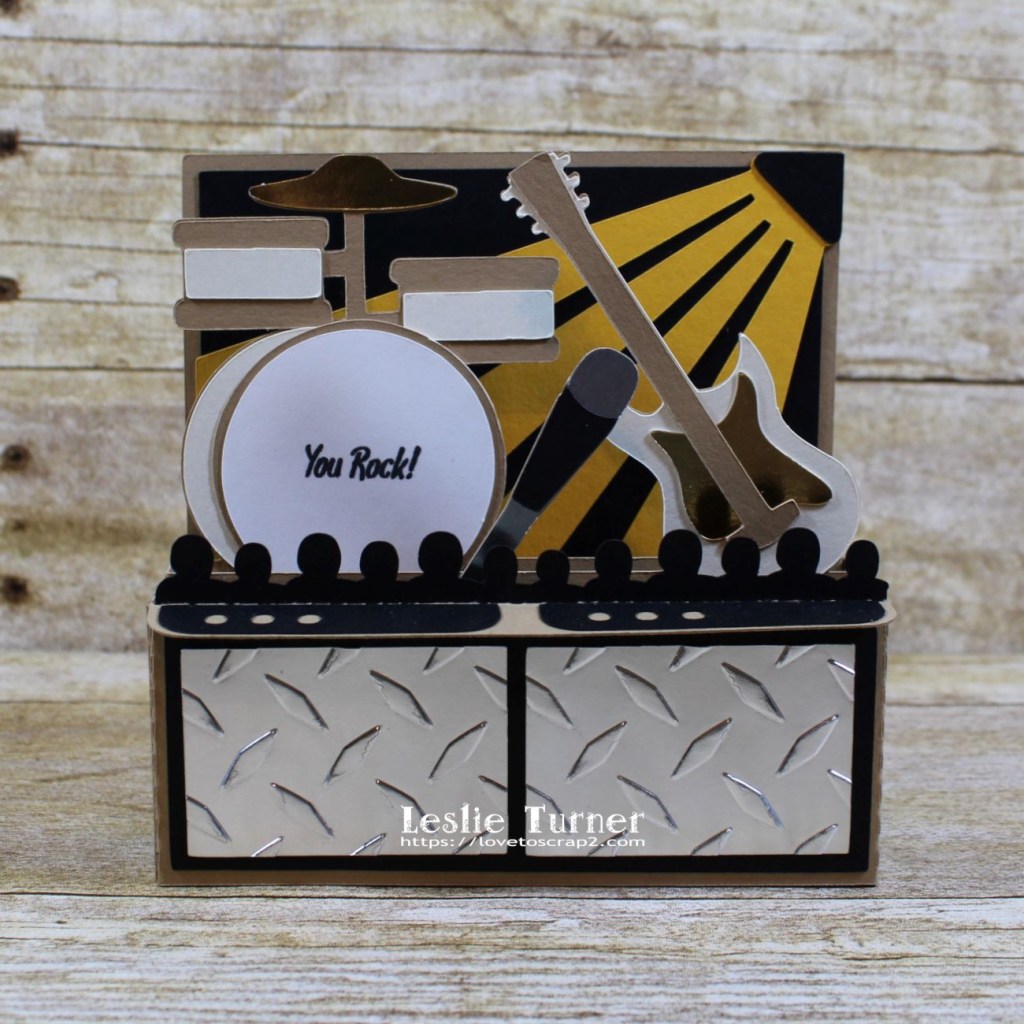
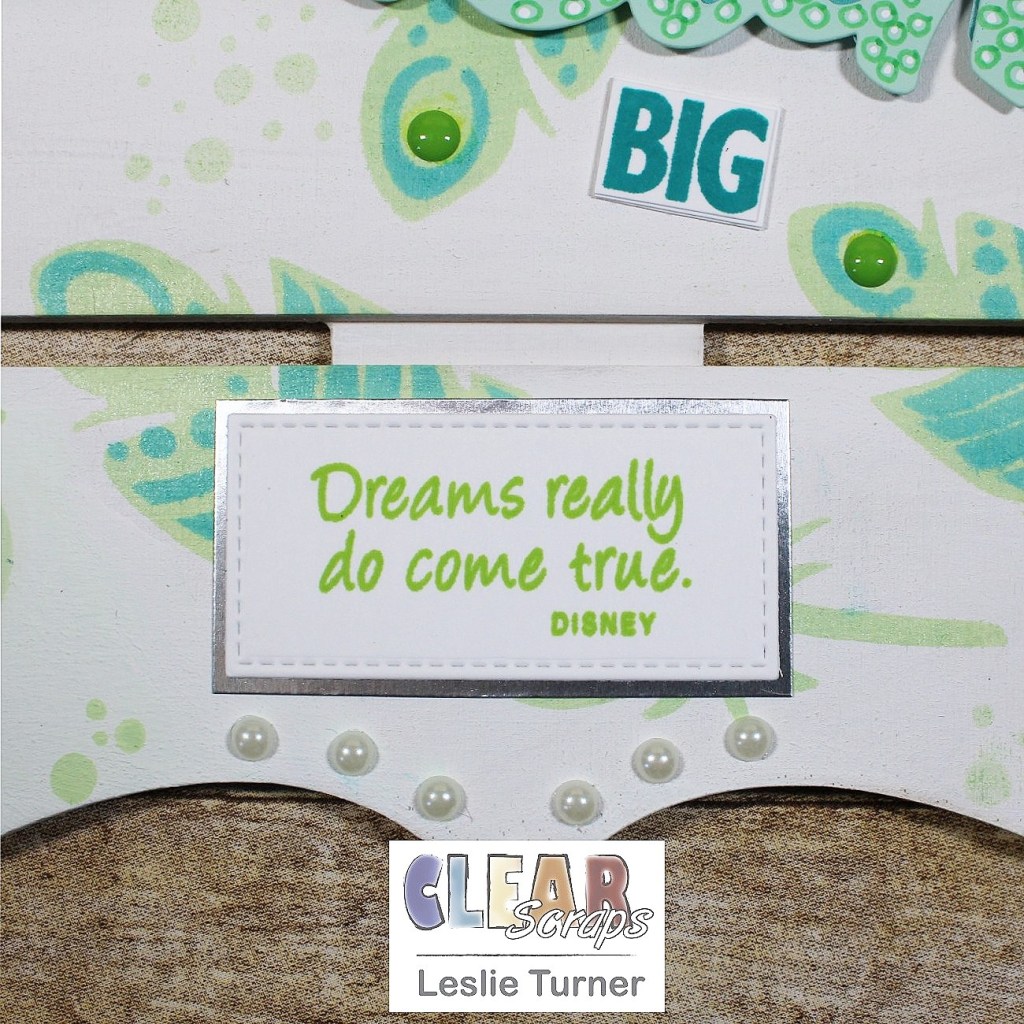
I stamped back sentiment using the Inspired By Stamping Little Phrases stamp set. L-O-V-E the bull horns! :D

And one more look… this was a blast putting together! Box cards are one of my all-time favorites because they always pack a punch and the recipients always love them! Plus they can be displayed for a long while after they are opened! ;)

Products used:
Cardstock/Paper: CutCardStock Basis Light Brown cardstock, CutCardStock Basis Black cardstock, CutCardStock Basis Gold cardstock, Neenah Classic Crest Solar White cardstock, CutCardStock Curious Metallic White Gold cardstock, Hygloss Silver Foil cardstock, Hygloss Gold Foil cardstock
Stamps: The Project Bin Jukebox Birthday stamp set, Inspired By Stamping Little Phrases stamp set
Ink: Memento Tuxedo Black ink
Dies/Punches: My Scrap Chick Rock Band Box Card cut file
Accessories: Brother Scan N Cut, Darice Diamond Plate embossing folder, Bearly Art precision craft glue

I hope you’ve enjoyed this project and will come over and join in all the fun at The Outlawz Challenges! Lots of fun going on! Thanks so much for stopping by today – we’ll see you next time! ;)

Scrappy hugs,
lesliesig

always be a unicorn

Hi everyone! A very Happy Saturday to you – I hope you’ve had a great week! This month is flying by just like all the rest, lol! Affiliate links are used in this post at no cost to you. I really appreciate your support! I’m stoked to be back on the Eyelet Outlet blog today with another awesome DT inspiration project! I created a sweet inspirational card featuring our Unicorn & Rainbow Brads, Striped Washi Tape and Clear Jewel Bling! I sure do love me some bright rainbow colors, and this was definitely a fun one! This washi tape sure makes a striking background! ;)

I cut a standard A2 size top-folding card base from Neenah Classic Crest Solar White 110# cardstock along with a layering panel that I covered with Striped Washi Tape and narrow strips of white cardstock, and adhered to the card base. Using the My Favorite Things Stitched Mini Scallop Rectangle STAX Die-namics, I cut one from Neenah Classic Crest 80# Solar White cardstock and a slightly larger one from CutCardStock Basis Dark Purple cardstock, and layered them together. I stamped the unicorn sentiment in pink ink, added Unicorn & Rainbow Brads along with Clear Jewel Bling, and adhered the piece to the background.

I cut the inside panel from Neenah Classic Crest 80# Solar White cardstock and embellished it with strips of Striped Washi Tape, CutCardStock Basis Dark Purple cardstock and Neenah Classic Crest 80# Solar White cardstock. I stamped the sentiment in pink ink and layered the panel on the dark purple cardstock.

And one more peek… so loving how this turned out! As I’ve said a hundred times before, I love bright colors and this washi tape makes an amazing background!

Eyelet Outlet products used:
Unicorn & Rainbow Brads
Striped Washi Tape
Clear Jewel Bling

Other products used:
Cardstock/Paper: Neenah Classic Crest 110# and 80# Solar White cardstock, CutCardStock Basis Dark Purple cardstock
Stamps: CAS-ual Fridays Stamps Be A Unicorn stamp set
Ink: Catherine Pooler Pucker Up ink
Dies/Punches: My Favorite Things Stitched Mini Scallop Rectangle STAX Die-namics
Accessories: Tonic Studios 12″ Guillotine Paper Trimmer, Bearly Art precision craft glue, Gemini Junior, MISTI stamp tool

I hope you’ve enjoyed today’s project! Be sure to check out all the fun goodies at Eyelet Outlet! I can already see you drooling, lol! Be sure to ‘like’ and ‘follow’ Eyelet Outlet Facebook Page to keep up with news and sales, and while you’re at it, join the Eyelet Outlet Fans Facebook group for lots of creative inspiration! Thanks so much for stopping by today – we’ll see you next time! ;)

Scrappy hugs,
lesliesig

Dream BIG Wall Hanging for Clear Scraps

Hey, everybody! Happy Hump Day – I hope you’re having a fantastic week! I’m super stoked to share my debut project as a new Clear Scraps design team member! Oh, the F-U-N I’m having! I’m up on the Clear Scraps blog today with a pretty piece of home decor – a Dream BIG wall hanging (very appropriate for this dream design gig!) created with the Deco Pallet Shape, 5×9 Feathers Layering Stencil, and small Dream Clear Word Title!

I started by sanding and painting the Deco Pallet Shape with white chalk paint. I added feathers randomly over the surface using the 5×9 Feathers Layering Stencil and distress inks, and then stamped clusters of small dots in green ink to fill in blank spaces. I then affixed a green enamel dot to the top of several feathers. I traced the small Dream clear word title backwards onto the back side of a piece of dotted patterned paper and fussy cut it. I painted the Dream word with light teal chalk paint, added whimsical dots and circles with white paint pen and green Sharpie for some interest, and adhered the patterned paper tracing behind it for a shadow effect. I adhered it to the pallet with double-sided foam circles, and then added the BIG stamped portion just beneath it with craft glue. I added white flat-back pearls to the top, bottom and sides of the pallet, and then fashioned a hanger from silver chain and looped green crafting cord through every other chain link. 

I created some cute little feather ‘charms’ to dangle from the top left – one silver embossed, one stamped in green and one stamped in teal – and all die cut and layered three times. I punched holes through each charm and added them to several extra chain links. 

I fashioned a double-loop bow from teal ribbon which I adhered to the top right with hot glue, and embellished it with a green crafting cord bow and paper flower.

The final addition to the piece was a sentiment stamped in green, die cut and layered on silver foil cardstock, which I adhered to the bottom center with glue.

Clear Scraps products used:
Deco Pallet Shape
5×9 Feathers Layering Stencil
Small Dream clear word title

Other products used:
Cardstock/Paper: Neenah Classic Crest Solar White 110# cardstock, Hygloss silver foil cardstock, Sunny Studio Polka-dot Parade 6×6 paper
Stamps: Dare2BArtzy Dream BIG stamp set, Altenew Happy Dreams stamp set
Ink: Ranger Twisted Citron and Peacock Feathers distress ink, Versamark, Posca white paint pen, Sharpie Lime ultra fine point pen
Dies/Punches: Dare2BArtzy Dream BIG die set, My Favorite Things Stitched Rectangle STAX Die-namics
Accessories: Plaid Folkart White Adirondack and Seaside Villa Chalk paint, Doodlebug Design Sprinkles Limeade assortment, MISTI stamp tool, Big Shot, SweetStamps fine detail silver embossing powder, Crop-A-Dile Big Bite, Bearly Art precision craft glue, Darice double-sided adhesive foam circles, Darice white flat-back pearls, 2″ square acrylic stamp block, eeBeads silver chain, hot glue gun, Really Reasonable Ribbon Silky Crush teal ribbon, Hemptique green hemp crafting cord, Wild Orchid Crafts paper flower

I hope you’ve enjoyed today’s project and you’re inspired to get those craft supplies out to play! Be sure to check out all the amazing acrylic, wood and chipboard goodies at Clear Scraps… OMGoodness, you won’t be disappointed! And head on over to the Clear Scraps Facebook Page for lots of inspiration! And while you’re at it, join the Clear Scraps Facebook Creative Group to connect with other Clear Scraps fans! Thanks so much for stopping by today – we’ll see you next time!

Scrappy hugs,
lesliesig

thanks for being a Jack of all trades

Hi everyone! A very Happy Saturday to you – I hope you’ve had a great week! Affiliate links are used in this post at no cost to you. I really appreciate your support! I’m stoked to be back on the Eyelet Outlet blog today with another awesome DT inspiration project! I created a fun thank you card for that guy (or gal) who just seems to be a jack of all trades and can fix or do anything! Gotta love the matching stamps, brads and washi tape! My dad was a jack of all trades type and it’s such a blessing to have someone in our lives nowadays with those same capabilities!

I cut a standard A2 size top-folding card base from Neenah Classic Crest Solar White 110# cardstock along with a layering panel from CutCardStock Basis 80# Black cardstock and a strip from Neenah Classic Crest Solar White 80# cardstock that I covered with Playing Card Washi Tape. Using the Playing Card Clear Stamps, I stamped the sentiment on a Solar White cardstock scrap, cut it with a stitched circle die, and layered it on a slightly larger CutCardStock Basis 80# Red cardstock stitched circle die cut. I adhered the strip to the black cardstock panel and then adhered the circular element. I affixed one Playing Card Brad to the center of the circular element, three more Playing Card Brads across the top of the black cardstock panel, and adhered the panel to the card base. The finishing touch was adding Red Jewel Bling.

I cut the inside panel from Neenah Classic Crest 80# Solar White cardstock and embellished it with strips of Playing Card Washi Tape and CutCardStock Basis 80# Black cardstock. I stamped the sentiment in black ink and layered the panel on CutCardStock Basis 80# Red cardstock.

And one more look… totally love the matching stamps, brads and washi tape! So fun!

Eyelet Outlet products used:
Playing Card Clear Stamps
Playing Card Brads
Playing Card Washi Tape
Red Jewel Bling

Other products used:
Cardstock/Paper: Neenah Classic Crest 110# and 80# Solar White cardstock, CutCardStock Basis 80# Black cardstock, CutCardStock Basis 80# Red cardstock
Stamps: Brutus Monroe Super Sentimental stamp set
Ink: Memento Tuxedo Black ink
Dies/Punches: Memory Box Stitched Circle Layers
Accessories: Tonic Studios 12″ Guillotine Paper Trimmer, Bearly Art precision craft glue, MISTI stamp tool, Big Shot

I hope you’ve enjoyed today’s project! Be sure to check out all the fun goodies at Eyelet Outlet! I can already see you drooling, lol! Be sure to ‘like’ and ‘follow’ Eyelet Outlet Facebook Page to keep up with news and sales, and while you’re at it, join the Eyelet Outlet Fans Facebook group for lots of creative inspiration! Thanks so much for stopping by today – we’ll see you next time! ;)

Scrappy hugs,
lesliesig

You roll with style

Hi friends! Well, it’s a beautiful Thursday here – not too warm and definitely not too cool! We are waking up to cooler temps more and more, which is a good indication that the warm weather won’t here too much longer! Yaaay! Affiliate links are used in this post at no cost to you. I really appreciate your support! I’ve popped in today in between everything else going on to share my inspiration project for The Outlawz Freebie/Progressive Challenge where TwinkleLaneDesigns is our sponsor and we were gifted the super cute New Car digital set to play with! I did lots of paper piecing for this masculine birthday card!

I cut a standard A2 top-folding landscape card base from CutCardStock Basis Aqua cardstock along with die cut rectangle layering panels from CutCardStock Pop-Tone 65# Raspberry cardstock, CutCardStock Basis 80# Gray cardstock and Neenah Classic Crest 80# Solar White cardstock. I printed the car image four times, once each on CutCardStock Basis 80# Gray cardstock, CutCardStock Stardream Metallic 105# Silver cardstock, CutCardStock 80# Dolphin cardstock and Bazzill Marble 6×6 cardstock, and proceeded to cut the different elements from the different colors and paper piecing it together. I love paper piecing… sometimes the fussy cutting is very calming brainless work, lol! I stamped BEEP on the license plate which I thought would add a whimsical touch to the kind of retro-looking car, then stamped the sentiment in the bottom center of the white stitched rectangle die cut, and adhered the car to the panel. Then I layered the rest of the die cut rectangle panels onto the card base. I added a few ‘touches’ with the white paint pen to complete the front.

I die cut the inside rectangle panel from Neenah Classic Crest Solar White cardstock and embellished it with patterned paper and cardstock strips, layered it on a dark gray rectangle die cut, and adhered it to the inside of the card base. I printed the inside sentiment from the digital set, cut it with a stitched rectangle die and cut the left side off for a little interest, and adhered it to the inside panel.

And one more look… such a great masculine card! I’m loving this image!

Products used:
Cardstock/Paper: Neenah Classic Crest 80# Solar White cardstock, CutCardStock Basis 80# Aqua cardstock, CutCardStock Pop-Tone 65# Raspberry cardstock, CutCardStock Basis 80# Gray cardstock, CutCardStock Stardream Metallic 105# Silver cardstock, CutCardStock 80# Dolphin cardstock, Bazzill Marble 6×6 cardstock
Stamps: The Project Bin Classic Man stamp set, Paper Smooches Boom Bots stamp set
Ink: Posca white paint pen, Memento Tuxedo Black ink (pad and marker), Catherine Pooler Cummberbund ink
Dies/Punches: JustRite Stitched A2 Banners and Rectangles dies, JustRite A2 Card Front Basics dies, Memory Box Stitched Rectangle Layers
Accessories: Tonic Studios 12″ Guillotine Paper Trimmer, Big Shot, Bearly Art precision craft glue, MISTI stamp tool,

I hope you’ve enjoyed this project and will come over and join in all the fun at The Outlawz Challenges! Lots of fun going on! Thanks so much for stopping by today – we’ll see you next time! ;)

Scrappy hugs,
lesliesig

thinking of you

Hi everyone! Happy Tuesday and a few days into another month! My sister’s birthday is in another few days and I’ve always said that once her birthday hits, it’s no time before Christmas is here! I’m stoked to be back on the CutCardStock blog today with an awesome DT inspiration project featuring ivory cardstock that’s on sale this month (along with white cardstock), so be sure to stock up! It’s timeless and a staple in my studio. I paired the ivory with some gorgeous shades of purple and a pop of green… one of my favorite color combos. Affiliate links are used in this post at no cost to you. I really appreciate your support! I created a pretty thinking of you card using the floating strips technique. I saw this technique done quite some time ago and had never tried it. I saw it in a recent Splitcoast Stampers newsletter HERE and was inspired to move it way up on the ‘to do’ list and give it a go. Not sure what I had been waiting for… it was so fun and yielded such a beautiful result!

I cut a standard A2 size top-folding card base from Neenah Classic Crest Baronial Ivory cardstock along with a layering panel from Royal Sundance Linen Ivory cardstock. I cut a slightly smaller panel from acetate along with strips from Pop-Tone Grapesicle cardstock, Stardream Metallic Amethyst, Stardream Metallic Fairway cardstock and Basis Dark Purple cardstock in varying widths which I adhered to the acetate, leaving a small space between each strip. I adhered the acetate panel to the front layering panel with adhesive foam strips and then adhered the piece to the card base. I stamped the sentiment from the Waffle Flower Essential Sentiments stamp set in purple ink and cut it with the coordinating Waffle Flower Essential Sentiments die, and layered it on several additional die cuts for some dimension. I adhered it to the bottom of the panel and added several ivory enamel dots to finish the front.

Here’s an angled view showing all the dimension of this floating strips technique. It’s very cool and I’ll definitely be making some more cards like this!

I cut the inside panel from Neenah Classic Crest Baronial Ivory cardstock and embellished it with strips cut from Stardream Metallic Amethyst, Stardream Metallic Fairway cardstock and Pop-Tone Grapesicle cardstock. I stamped the sentiment from the same Waffle Flower Essential Sentiments stamp set in purple ink and layered the panel on Basis Dark Purple cardstock.

And one more peek… I’m really loving how this turned out and I can’t wait to do this technique again! ;)

CutCardStock products used:
Neenah Classic Crest Baronial Ivory cardstock
Royal Sundance Linen Ivory cardstock
Pop-Tone Grapesicle cardstock
Stardream Metallic Amethyst
Stardream Metallic Fairway cardstock
Basis Dark Purple cardstock

Other products used:
Stamps: Waffle Flower Essential Sentiments stamp set
Ink: Catherine Pooler Grape Crush ink
Dies/Punches: Waffle Flower Essential Sentiments die set
Accessories: Tonic Studios 12″ Guillotine Paper Trimmer, Grafix Craft Plastic, Bearly Art precision craft glue, MISTI stamp tool, Gemini Junior, Darice Double-Sided Adhesive Foam Strips, Eyelet Outlet Ivory Enamel Dots

I hope you’ve enjoyed today’s project and you’re inspired to get crafty! Be sure to check out all the awesome cardstock and other goodies at CutCardStock (adhesives, labels, stickers, pens, watercolors and ribbon to name a few). And head on over to the CutCardStock Facebook Page for more inspiration! Thanks so much for stopping by today – we’ll see you next time!

Scrappy hugs,
lesliesig

You are fabulous

Hi everyone! Happy Sunday! I hope you’re having a wonderful weekend and it’s not too awfully hot where you are! Affiliate links are used in this post at no cost to you. I really appreciate your support! It’s time for another fun challenge over at Love To Craft Challenge Blog and I’m stoked to share my DT inspiration project for LTCCB #61 – August Anything Goes! I’m particularly excited about this post because it’s my first time trying the spotlight technique and I’m loving how it turned out! I actually went one step further and added an offset ‘reverse’ spotlight in the center of the spotlight which yielded a very cool effect, I think!

I’m in love with this My Favorite Things Poppies Background stamp which is perfect for this kind of technique. I cut a 5-1/2″ top-folding card base from Neenah Classic Crest Solar White cardstock. I stamped the background twice in black ink on Neenah Classic Crest Solar White cardstock and trimmed one of the stamped images to use for the background panel. I punched a 2-1/2″ circle and a 2″ circle from the second stamped image, colored the poppies and adhered the circles to the background panel, trimming the 2″ circle across the top so it was even with the edge of the panel. I layered the panel on CutCardStock Habanero Red cardstock, and adhered it to the front of the card base.

I decided I wanted to go one step further and add the ‘reverse’ spotlight (at least that’s what I’m calling it, lol) to the center of the spotlighted colored poppies, so I stamped the top portion of the background once more on Neenah Classic Crest Solar White cardstock. I punched 3/4″ circles from the center of the same two poppies and adhered them to the center of the colored circles.

I cut the inside panel from Neenah Classic Crest Solar White cardstock and embellished it with a leftover strip cut off of one of the stamped images along with a narrow strip of CutCardStock Habanero Red cardstock, stamped the sentiment in black ink, and layered the panel on red cardstock.

And one more peek… this was definitely a fun technique that I’m sure I’ll be doing again! Can’t believe I haven’t tried it before now!

Products used:
Cardstock/Paper: Neenah Classic Crest Solar White cardstock, CutCardStock Habanero Red cardstock
Stamps: My Favorite Things Poppies Background stamp; Inspired by Stamping You Are and Words of Wisdom II stamp sets
Ink: Dare 2B Artzy Totally Black ink; Nuvo alcohol markers- Rich Reds Collection, Woodland Greens Collection; Memento Tuxedo Black and Rhubarb Stalk ink
Dies/Punches: Fiskars 2-1/2″ circle punch; Stampin’ Up 2″ and 3/4″ circle punches
Accessories: Tonic Studios 12″ Guillotine Paper Trimmer, Tombow Mono permanent adhesive, Bearly Art precision craft glue

I hope you’ve enjoyed today’s project and will link up an ‘anything goes’ project with us this month! We’d love to see what you’re working on! Thanks so much for stopping by today – we’ll see you again spoon! ;)

Scrappy hugs,
lesliesig

season’s tweetings

Hi everyone! Top of the morning to you! I hope you are having an absolutely wonderful weekend! Affiliate links are used in this post at no cost to you. I really appreciate your support! It’s time for another fun challenge over at Merry Little Christmas Challenge Blog and I’m thrilled to share my DT inspiration project for MLCCB #37 – August Anything Christmas Goes! I created a clean and simple card featuring three of the most adorable little birds ever – and they are singing Christmas carols! These are older Lawn Fawn stamps and dies, and I just love them!

I created a standard A2 size top-fold card base from Neenah Classic Crest 110# Solar White cardstock and rounded the lower right corner. I stamped the birds, leaves and musical notes in black ink on a scrap of Neenah Classic Crest Solar White cardstock and colored them with alcohol markers, stamped the branch in brown ink, and cut them all with the coordinating dies. I adhered the branch and musical notes directly to the card base and popped the birds up on small dimensionals. I stamped the sentiment in black ink just beneath the branch and added a single iridescent gemstone for a little interest.

I stamped the inside sentiment (from a Stampingbella gnome sentiments stamp set of all things, lol!) in black ink and added a strip of light teal cardstock down the left side for a little interest.

And one more look… I’m so smitten with these little birds I can’t stand it! And I’m loving CAS more and more every day!

Products used:
Cardstock/Paper: Neenah Classic Crest 110# Solar White cardstock, GKD Ocean Mist cardstock scrap
Stamps: Lawn Fawn Winter Sparrows stamp set, Stampingbella Festive Gnome Sentiments stamp set
Ink: Memento Tuxedo Black and Rich Cocoa ink; Nuvo alcohol markers- Aquamarine Collection, Rich Reds Collection, Fragrant Oranges Collection, Irish Clover Collection, Marina Blues Collection, Palma Violets Collection
Dies/Punches: Lawn Fawn Winter Sparrows die set, Kadomaru Pro corner rounder
Accessories: Tonic Studios 12″ Guillotine Paper Trimmer, Bearly Art precision craft glue, MISTI stamp tool, Gemini Junior, Stampin’ Up Dimensionals, ScraPerfect iridescent gemstone

I hope you’ve enjoyed today’s project and will link up something you’re working on for Christmas! We can’t wait to see what it is! Thanks so much for stopping by today – we’ll see you again soon! ;)

Scrappy hugs,
lesliesig

Vintage Christmas Tags

Howdy, peeps! Happy first day of August! Time is going by so fast that it’ll be Christmas again before we know it! Affiliate links are used in this post at no cost to you. I really appreciate your support! It’s time for a new challenge over at Love To Scrap Challenge Blog and I’m stoked to share my DT inspiration project for LTSCB #148 – Old School! We’d love to see your old/vintage or back to school project! Seems I’m always in Christmas mode, so I created some hybrid vintage Christmas tags! I’ve been a fan of Free Vintage Digital Stamps for a number of years and had this adorable image in my arsenal so I decided to use it!

I resized and printed the digital image six times on Papertrey Ink Classic Kraft cardstock and cut them with a stitched banner die. I cut six slightly larger double-stitched rectangles from CutCardStock Pop-Tone Wild Cherry cardstock, adhered a die cut digital image to each one. Using the Prickley Pear Stamps Christmas Holiday Gift Tags stamp set, I stamped ‘To’ and ‘From’ on the back of each one in black ink. I created hole reinforcements from CutCardStock Pop-Tone Wild Cherry cardstock with 1/4″ and 1/2″ circle punches, and adhered one to the front and back of each tag. I added green hemp crafting cord and a tiny iridescent gemstone to the top of the tree on each tag.

And one more look at the set… aren’t these just adorable?! Gotta love vintage! ;)

Products used:
Cardstock/Paper: Papertrey Ink Classic Kraft cardstock, CutCardStock Pop-Tone Wild Cherry cardstock
Stamps: Free Vintage Digital Stamps Santa image, Prickley Pear Stamps Christmas Holiday Gift Tags stamp set
Ink: Memento Tuxedo Black ink
Dies/Punches: JustRite Stitched A2 Banners and Rectangles die set, Cottage Cutz Double-Stitched Rectangles die, Stampin’ Up 1/4″ and 1/2″ circle punches
Accessories: Tonic Studios 12″ Guillotine Paper Trimmer, Tombow Mono permanent adhesive, Bearly Art precision craft glue, Hemptique light green hemp crafting cord, Darice tiny iridescent gemstones

I hope you’ve enjoyed seeing these vintage Christmas tags and will link up an old/vintage or back to school project with us this month! We’d love to see what you create! Thanks so much for stopping by today – we’ll see you again soon! ;)

Scrappy hugs,
lesliesig

a true friend (set of 2 note cards)

Hi everyone! Happy Sunday! Can’t believe we’ve hit August already! Where has this year gone?! Affiliate links are used in this post at no cost to you. I really appreciate your support! Our new challenge is live over at Mix It Up Challenge Blog and I’m thrilled to share my DT inspiration project for MIUCB #52 – Anything Goes + Mixed Media! All of our challenges are ‘anything goes’ and we offer a technique twist each month to inspire you. The twist this month is mixed media and we’d love to see a project using more than one medium – but the twist is not required to play! I created a pair of friendship cards featuring a smooshed distress ink background layered on a panel of dry embossed stripes. I used the gorgeous Prickley Pear Stamps Heart Key Crown and Hearts 2 stamp sets along with their Heart Key Crown die set and the Cottage Cutz Double-Stitched Rectangle dies.

I created two standard A2 size top-folding card bases along with front panels from Neenah Classic Crest Solar White cardstock. I dry embossed the front panels and then die cut a double stitched rectangle from dark and medium teal cardstock along with a silver foil cardstock layering panel for each. I stamped a heart in dark and medium teal ink to match the cardstock and die cut them with the coordinating die. I set everything aside so I could work on the backgrounds. I laid down various colors of distress inks (peacock feathers, mowed lawn, salty ocean, bundled sage, chipped sapphire, pine needles and dusty concord) on my craft mat, spritzed with water in my Tim Holtz distress sprayer and smooshed the cold pressed watercolor paper around in it, drying with my heat tool between smooshes. When I was happy with the overall result, I spritzed a homemade mixture of white Perfect Pearls and Dr. Ph. Martin’s blue India ink in a Ranger Mini Mister to give the panel a slight shimmer. I then cut two double stitched rectangles from the inked panel using the next smaller double stitched rectangle die. I stamped the sentiment on each inked panel in Versamark and heat embossed them in white. I layered the die cuts onto the silver foil cardstock panel and adhered them to the card fronts. The final touch was adhering the die cut hearts and some small white flat back pearls. I’m a bit quirky and intended to offset the focal element on both of these cards but got interrupted by someone at the door and when I went back to my studio to finish putting the second card together, I totally forgot what I had done on the first one, lol! That’s how this old brain works… bahahaha!

I cut an inside panel for each card from Neenah Classic Crest Solar White cardstock, embellished each one with a thin strip of the cardstock used on the front and a scrap from the inked panel, and then layered each panel on silver foil cardstock. I left the inside blank on each to write a custom message.

One more peek at the pair… so happy with how these turned out! Loving these colors and beautiful stamps and dies!

Cardstock/Paper: Neenah Classic Crest Solar White cardstock, Arches Cold Pressed watercolor paper, Stampin’ Up Island Indigo and Bermuda Bay cardstock, Hygloss silver foil cardstock
Stamps: Prickley Pear Stamps Heart Key Crown stamp set and Prickley Pear Stamps Hearts 2 stamp set
Ink: Ranger distress ink- peacock feathers, mowed lawn, salty ocean, bundled sage, chipped sapphire, pine needles, dusty concord; homemade Perfect Pearls and Dr. Ph. Martin’s blue India ink; Versamark, Stampin’ Up Island Indigo and Bermuda Bay ink
Dies/Punches: Prickley Pear Stamps Heart Key Crown die set, Cottage Cutz Double-Stitched Rectangle dies
Accessories: Tonic Studios 12″ Guillotine Paper Trimmer, Tombow Mono permanent adhesive, Bearly Art precision craft glue, Tim Holtz distress sprayer, Ranger Mini Mister, MISTI stamp tool, Hero Arts White embossing powder, Gemini Junior, Darice Stripes embossing folder, Xyron Creative Station, Darice tiny white flat-back pearls

I hope you’ve enjoyed this project and will link up with us this month! Remember, all of our challenges are ‘anything goes’ and we offer a technique twist each month to inspire you! We’d love to see either ‘anything goes’ or a mixed media project – take your pick! Thanks so much for stopping by today – we’ll see you next time! ;)

Scrappy hugs,
lesliesig