Hi!

7/15/21 Top Pick of the Week at The Outlawz Twisted Thursday Challenge!

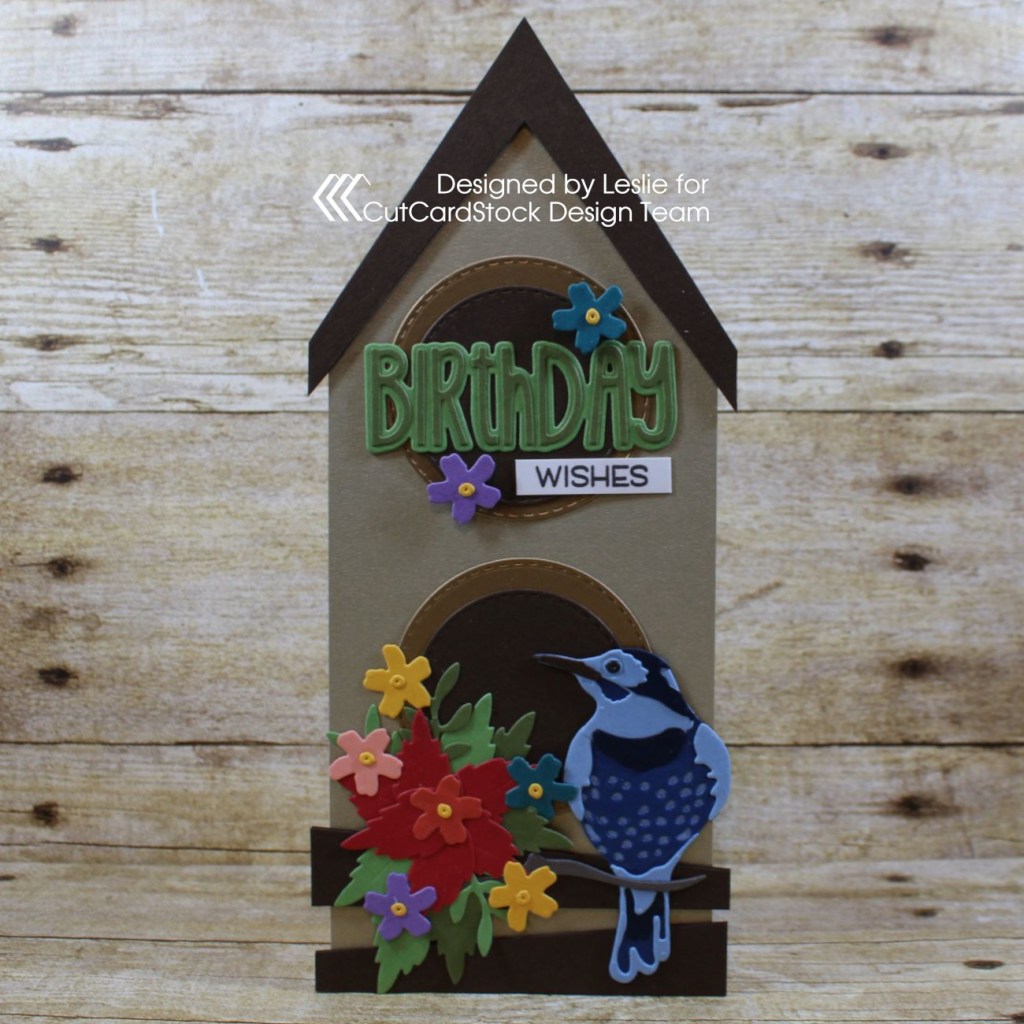
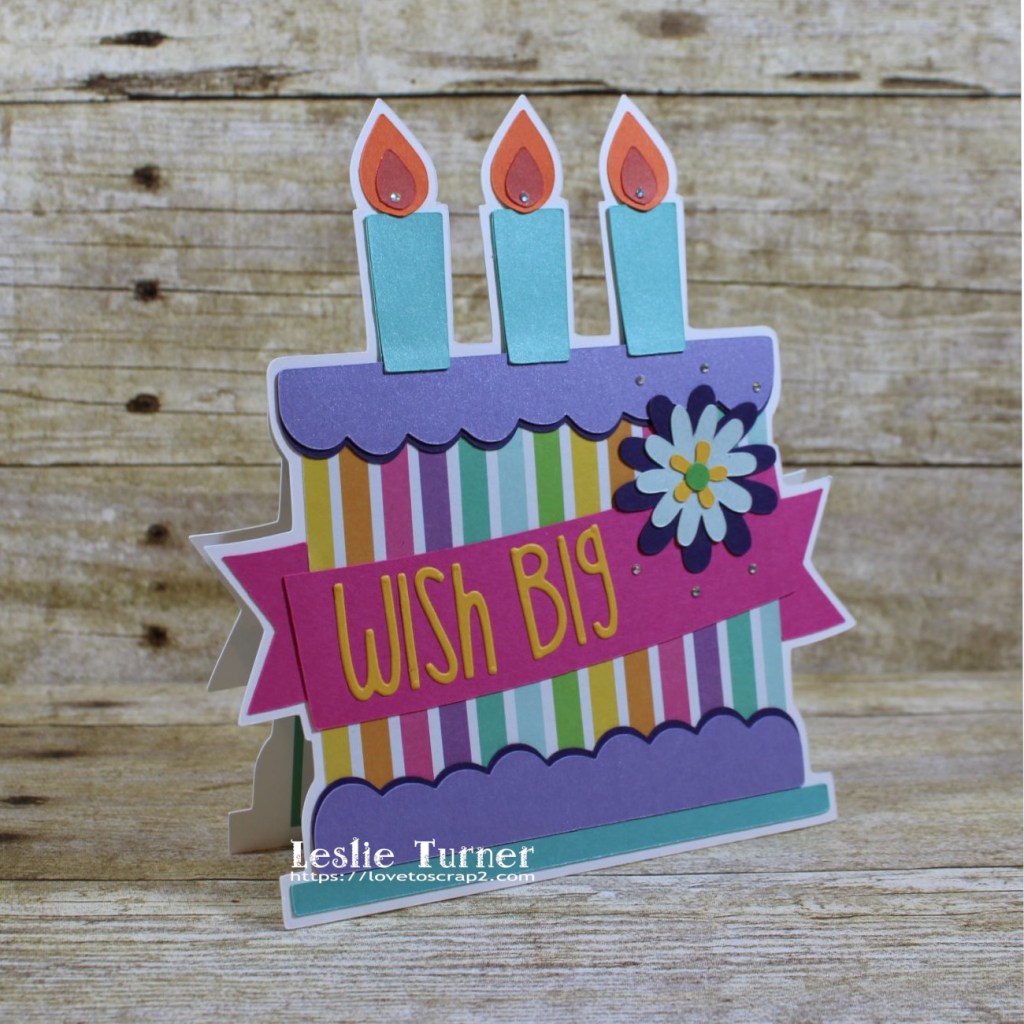
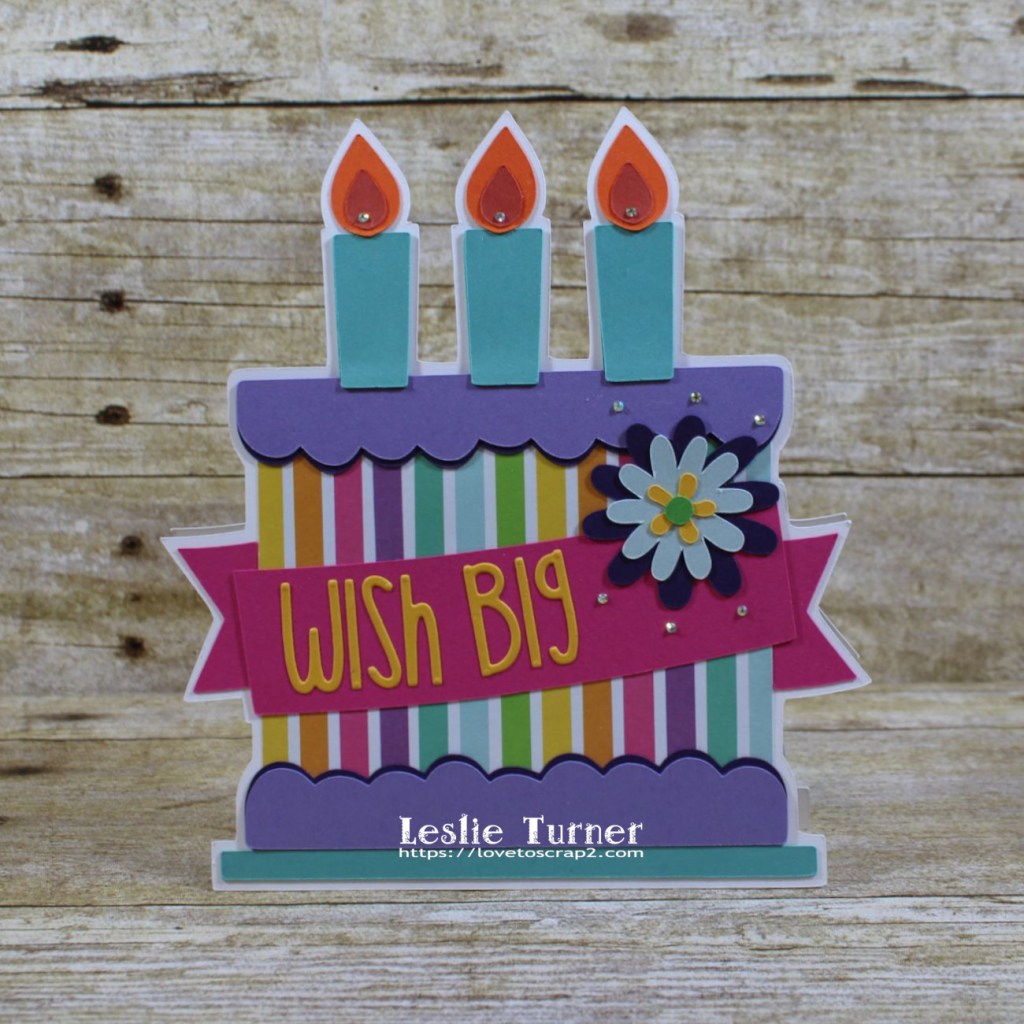
Hey everybody! Hope you’re having a great day! Thought I’d pop in this evening with one of the quickest cards I think I’ve ever made in all my years of crafting… took less than 30 minutes and looks like I spent hours on it! Affiliate links are used in this post at no cost to you. I really appreciate your support! I created this card for The Outlawz Twisted Thursday Challenge which is always Anything Goes with an optional twist – and this time the twist is to create a twisted easel card. Dr. Digi’s House of Stamps is our sponsor this month so come on over and play! It’s been a minute since I created a twisted easel card and I was surprised at how easy it came back to me. The fun (and fast) part about this card is that I already had the stamped and die cut background with flowers and the stamped gingham background in my rather large bin of pieces and parts and extra die cuts! Yesssss!

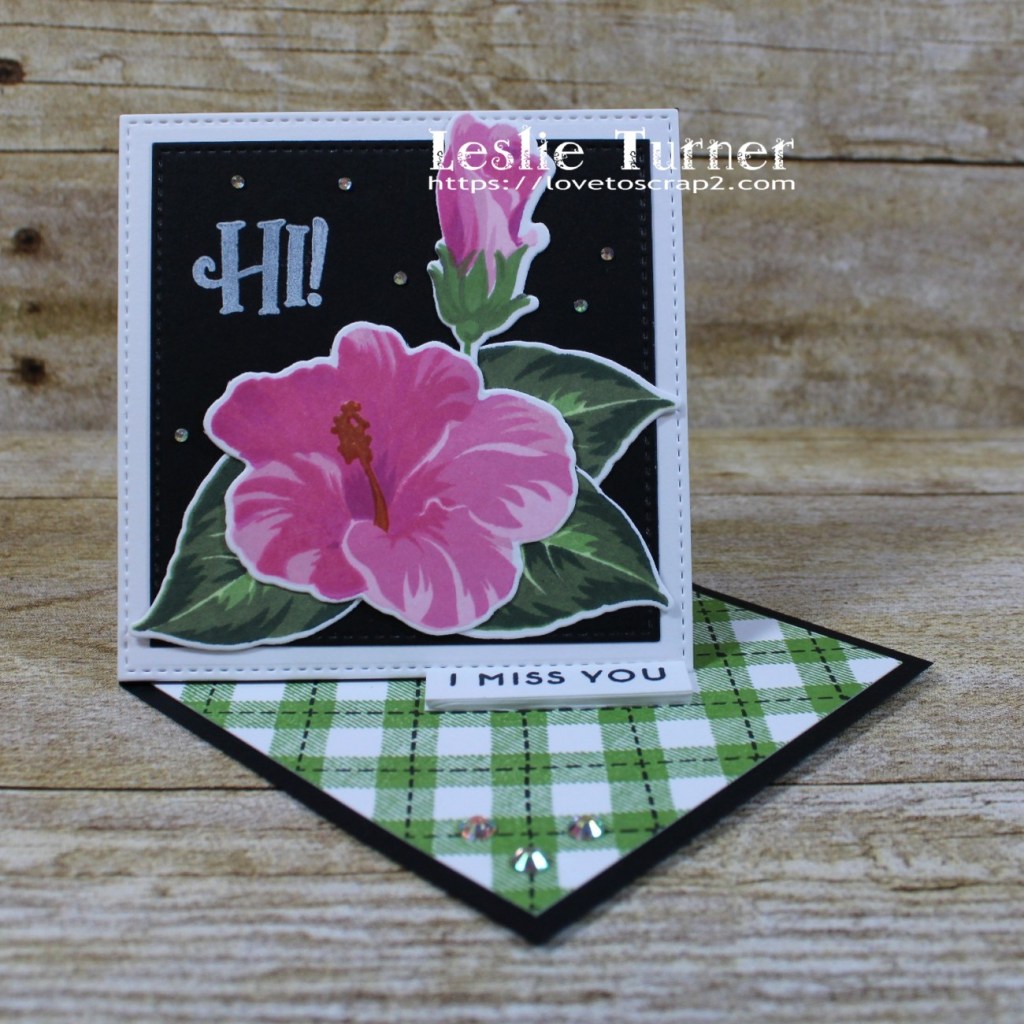
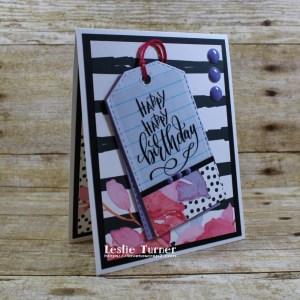
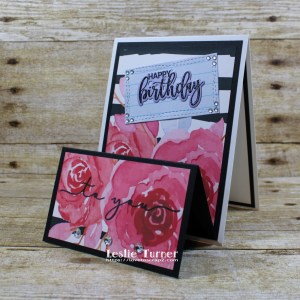
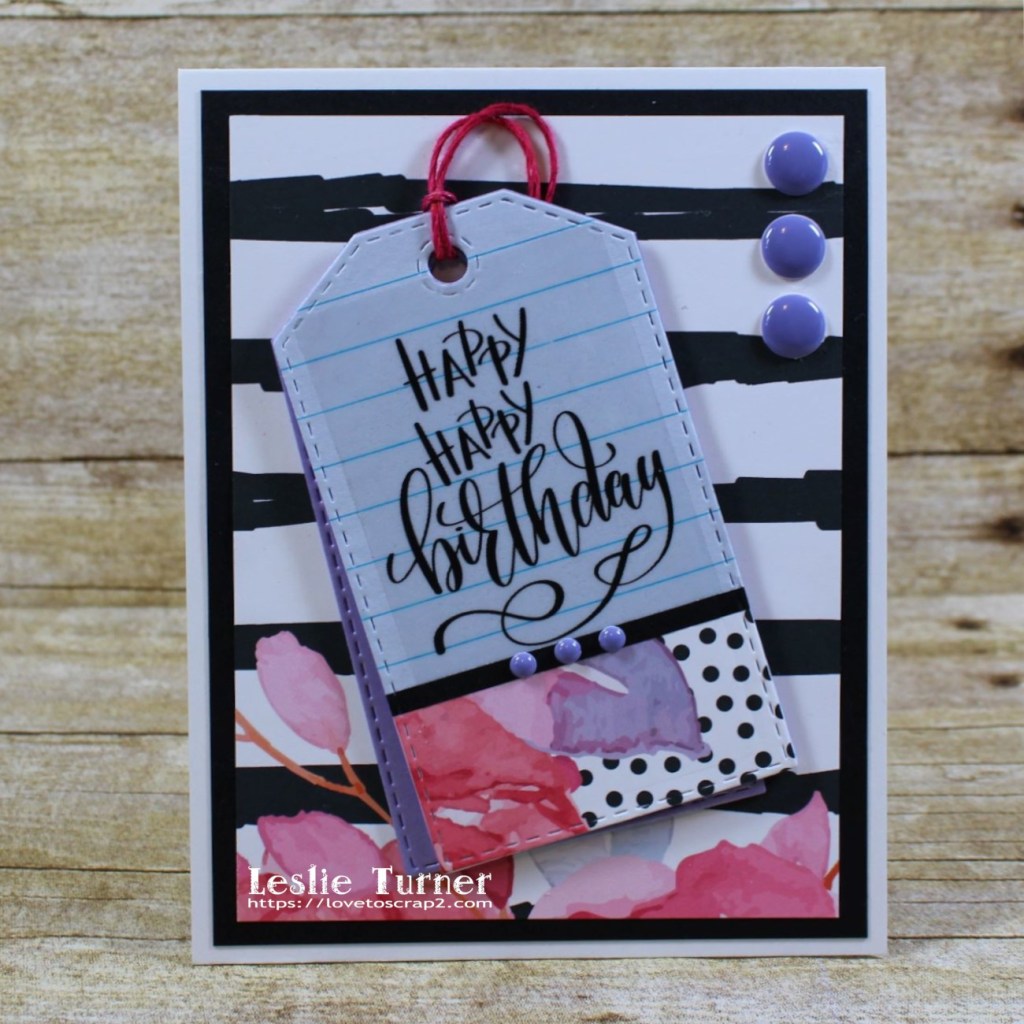
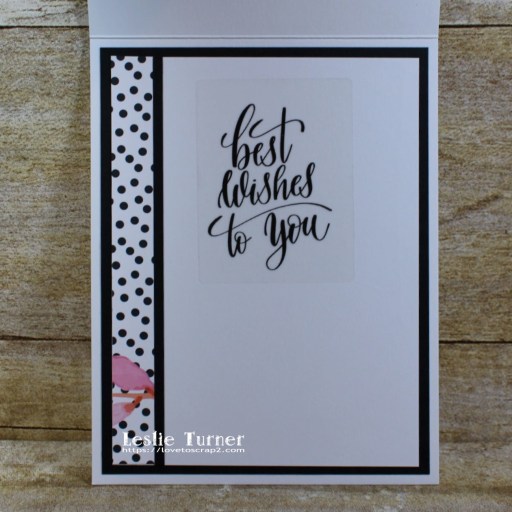
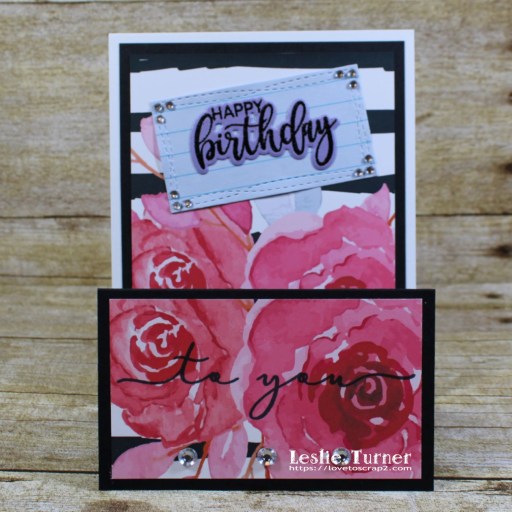
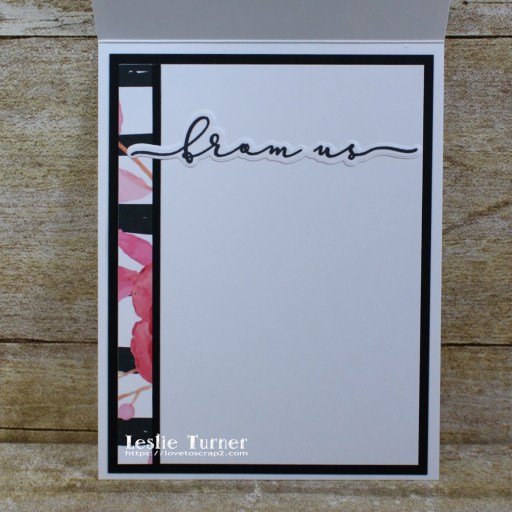
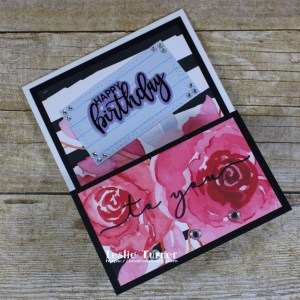
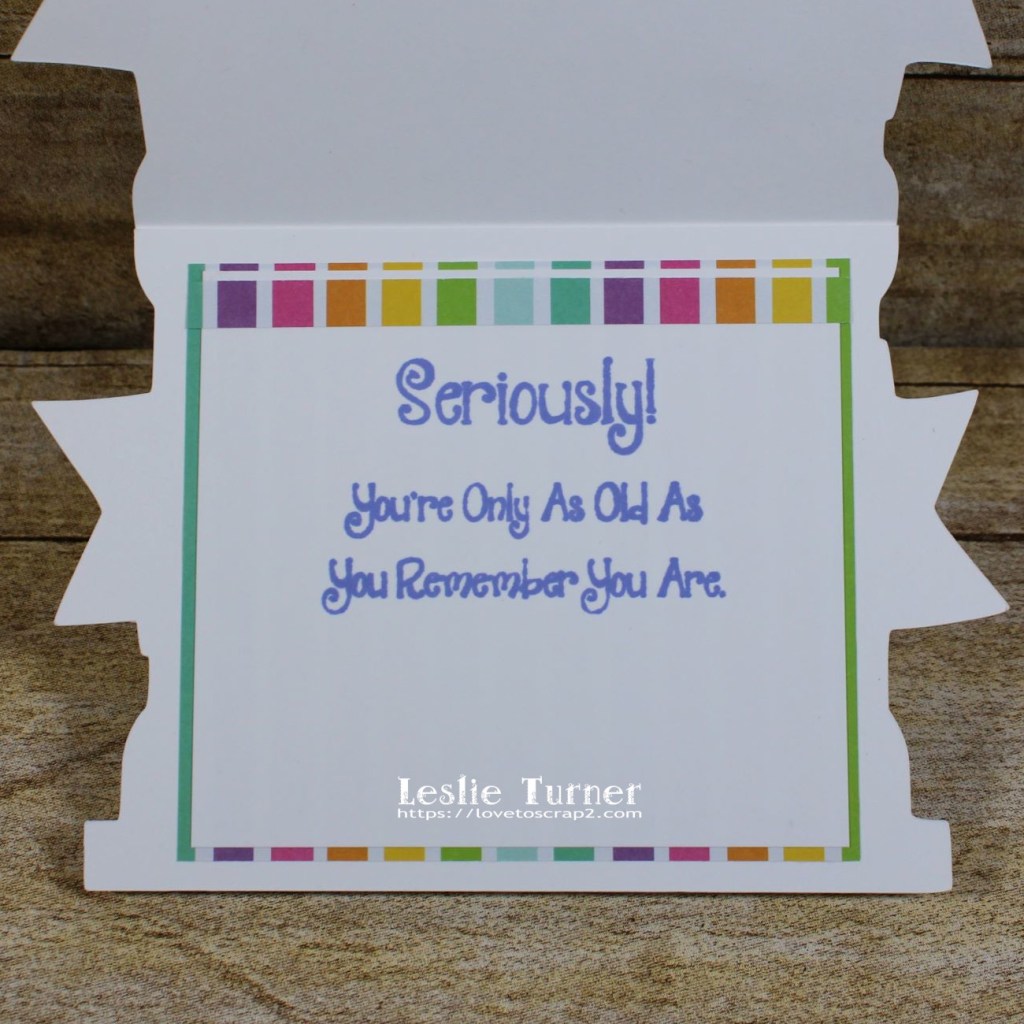
I cut the card base from CutCardStock Basis 80# Black cardstock and added the already-made upper and lower background panels. The upper panel was created with layered squares cut from Neenah Classic Crest 80# Solar White cardstock and CutCardStock Basis 80# Black cardstock using the My Favorite Things Stitched Square STAX Die-namics. I adhered flowers and leaves stamped with the Altenew Build-A-Flower Hibiscus stamp set and cut with the coordinating dies, stamped the Brutus Monroe Super Sentimental sentiment in Memento Luxe Wedding Dress ink, and added several tiny iridescent gemstones. The lower panel was one I stamped with the Concord and 9th Gingham Background stamp set back when I was still using Stampin’ Up ink. The stacked sentiment for the easel stop is from the Altenew Painted Butterflies stamp set. I added a few larger iridescent gemstones in one corner to complete the lower panel.

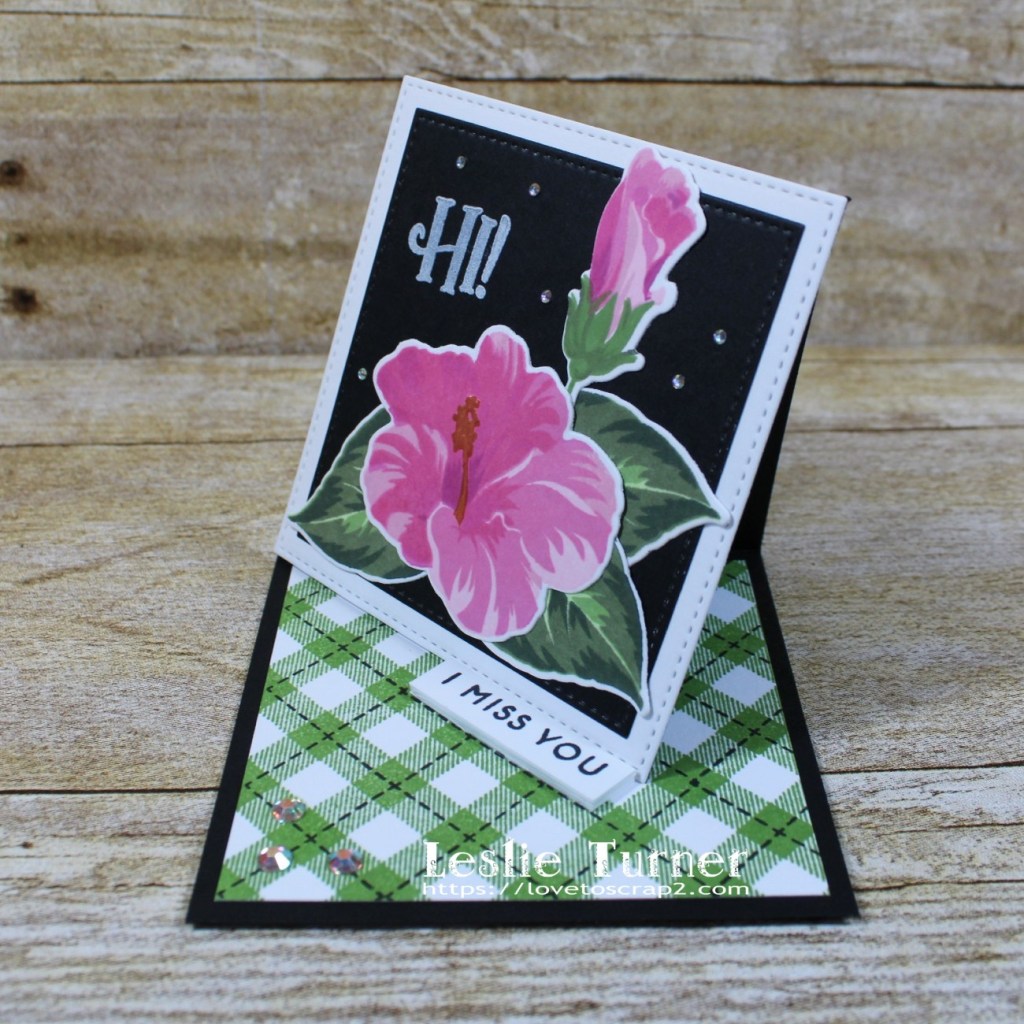
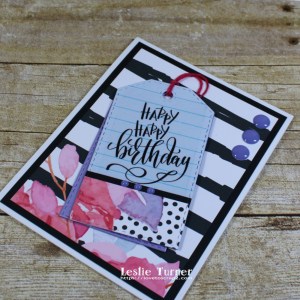
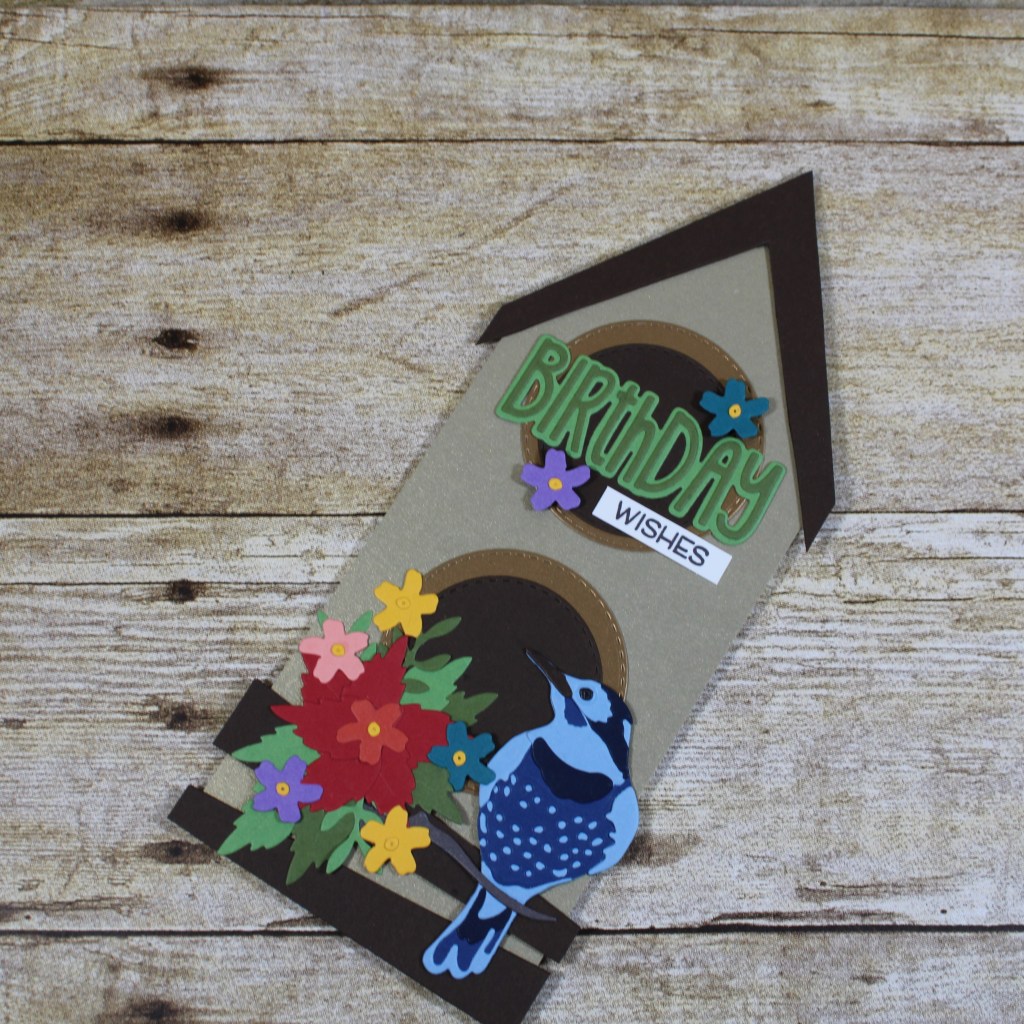
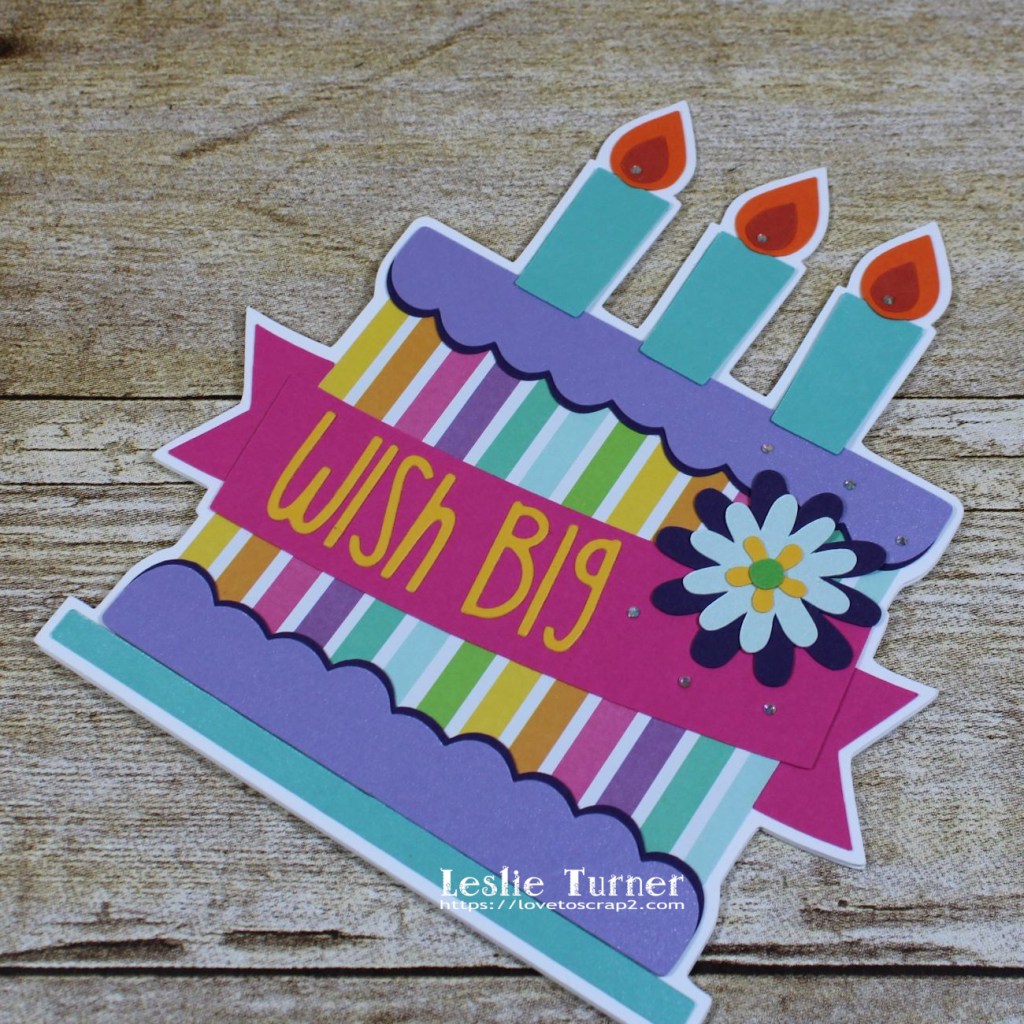
And one final look all folded up… so loving how this turned out! And I can’t believe how fast it worked up – that bin of extra pieces and parts sure paid off big time!

Products used:
Cardstock/Paper: CutCardStock Basis 80# Black cardstockNeenah Classic Crest 80# Solar White cardstock,
Stamps: Altenew Build-A-Flower Hibiscus stamp set, Concord and 9th Gingham Background stamp set, Brutus Monroe Super Sentimental stamp set, Altenew Painted Butterflies stamp set
Ink: Memento Angel Pink, Rose Bud, Lilac Posies, Potter’s Clay, New Sprout, Bamboo Leaves, Olive Grove, Northern Pine and Tuxedo Black ink; Memento Luxe Wedding Dress ink; Hero Arts Soft Pink, Bubble Gum, Ultra Pink and Just Rust ink; Stampin’ Up Wild Wasabi ink
Dies/Punches: My Favorite Things Stitched Square STAX Die-namics, Altenew Build-A-Flower Hibiscus die set
Accessories: Tonic Studios 12″ Guillotine Paper Trimmer, Tim Holtz 8.5″ Guillotine Paper Trimmer, Big Shot, MISTI stamp tool, Bearly Art precision craft glue, Crystal Katana Pick-Up Tool, ScraPerfect tiny iridescent gemstones

I hope you’ve enjoyed seeing this twisted easel card and will come over and join in all the fun at The Outlawz Challenges! Lots of fun going on! Thanks so much for stopping by today – we’ll see you next time! ;)

Scrappy hugs,
lesliesig

Pair of Birthday cards for The Outlawz

Hi friends! Top of the week to you! Well, another Tuesday has rolled around and at the rate we’re going, Christmas will be here before we know it! LOL, I see you rolling your eyes! ;) Affiliate links are used in this post at no cost to you. I really appreciate your support! A new Color Wheel challenge has started today over at The Outlawz Tuesday Color Challenge and our sponsor is Free Pretty Things For You so be sure to come on over and play! I created a pair of birthday cards using sponsor papers Girl Boss Black and White Floral Digital Delight Papers gifted to me, and OMGosh, these papers are beyond gorgeous! I see lots of projects using these in my future, lol!

For the Color Wheel challenge this fortnight, we are to choose one warm color and two cool colors from the color wheel below for our project, and there is no twist this time. I used pink from the warm side and purple and blue from the cool side for my cards.

Let’s look at the card with the tag first. I cut a standard A2 size top-folding card base from Neenah Classic Crest Solar White 110# cardstock along with a CutCardStock Basis 80# Black cardstock layer and a FPTFY Girl Boss Black and White Floral Digital Delight Paper layer which I adhered together and then adhered to the card base. I affixed a CRAFTplorations Happy Happy Clear Sticker to a sheet pulled from a light blue lined writing pad and used the CUTplorations Stitched Tags Nesting Dies to cut the first tag. I cut a second tag from CutCardStock Stardream Metallic 105# Amethyst cardstock and adhered it beneath the first one in a staggered fashion. I embellished the light blue tag with a strip of the digital paper and a narrow strip of the black cardstock, and added three small purple enamel dots. I dyed a piece of bamboo cord using Catherine Pooler Party Dress ink and once dry, I threaded it through the hole in the top of the tag and glued the ends to the back of the tag. I adhered the tag to the card front and added three more larger purple enamel dots.

I cut the inside panel from Neenah Classic Crest 80# Solar White cardstock and embellished it with strips of the digital paper and the black cardstock, added an additional CRAFTplorations Happy Happy Clear Sticker sentiment, and layered the panel on the black cardstock.

Okay, now let’s look at the double easel fun fold! I really do love this fold and it’s definitely up there in my top five favs! I cut a standard A2 size top-folding card base from Neenah Classic Crest Solar White 110# cardstock along with an additional A2 size folded panel from CutCardStock Basis 80# Black cardstock and two FPTFY Girl Boss Black and White Floral Digital Delight Paper layers, and adhered them together. Using the My Favorite Things Wonky Stitched Rectangle STAX Die-namics, I cut a rectangle and adhered it to the card front at an angle. I stamped a sentiment from the Waffle Flower Essential Sentiments stamp set in black ink, cut it with the coordinating Waffle Flower Essential Sentiments die set and adhered it to the light blue die cut. I added three tiny clear jewels to the corners of the die cut to complete that panel. On the bottom panel, I stamped the sentiment from the Waffle Flower Sentiment Additions stamp set in black ink and added several larger clear jewels to complete that panel.

I cut the inside panel for this card from Neenah Classic Crest 80# Solar White cardstock and embellished it with strips of the digital paper and the black cardstock, added a sentiment stamped from the Waffle Flower Sentiment Additions stamp set and cut with the coordinating Waffle Flower Sentiment Additions die set, and layered the panel on the black cardstock.

And one more look at the pair… I’m so smitten with this digital paper! Love, love, love!

Products used:
Cardstock/Paper: Neenah Classic Crest 110# and 80# Solar White cardstock, CutCardStock Basis 80# Black cardstock, CutCardStock Stardream Metallic 105# Amethyst cardstock, Free Pretty Things For You Girl Boss Black and White Floral Digital Delight Papers, light blue lined writing pad
Stamps: Waffle Flower Sentiment Additions stamp set, Waffle Flower Essential Sentiments stamp set
Ink: Catherine Pooler Party Dress ink, Memento Tuxedo Black ink
Dies/Punches: CUTplorations Stitched Tags Nesting Dies, Waffle Flower Sentiment Additions die set, Waffle Flower Essential Sentiments die set, My Favorite Things Wonky Stitched Rectangle STAX Die-namics
Accessories: Tonic Studios 12″ Guillotine Paper Trimmer, Bearly Art precision craft glue, CRAFTplorations Happy Happy Clear Stickers, Hemptique Bamboo Cord, Eyelet Outlet Purple Enamel Dots, MISTI stamp tool, Gemini Junior, Eyelet Outlet Clear Jewel Bling

I hope you’ve enjoyed this project and will come over and join in all the fun at The Outlawz Challenges! I hope you’ll link up a project this fortnight – we’d love to see what you do with this color challenge! And be sure to check out all the fun digital goodies over at Free Pretty Things For You! Thanks so much for stopping by – we’ll see you next time! ;)

Scrappy hugs,
lesliesig

Fin-tastic News!

Hi everyone! A very Happy Saturday to you – I hope you’ve had a great week! Affiliate links are used in this post at no cost to you. I really appreciate your support! I’m stoked to be back on the Eyelet Outlet blog today with another awesome DT inspiration project! I created a super cute new home card featuring our Fish Stamp Set and coordinating Fish Brads along with some Blue Enamel Dots!

I cut a standard A2 size top-folding card base from Neenah Classic Crest Solar White 110# cardstock along with a dark gray marble layer which I adhered to the card base. Using the My Favorite Things Fishbowl Die-namics, I cut the fishbowl and all the elements from CutCardStock Stardream Metallic Aquamarine cardstock, CutCardStock Basis 80# Aqua cardstock, CutCardStock Brown Bag 70# Kraft Paper, CutCardStock Pop-Tone 65# Gumdrop Green cardstock, CutCardStock Pop-Tone 65# Jellybean Green cardstock and assembled it. I added the Fish Brads and adhered the fishbowl to the card front. Using the Fish Stamp Set, I stamped the sentiment in black ink and added several Blue Enamel Dots to complete the card front.

I cut the inside panel from Neenah Classic Crest 80# Solar White cardstock and embellished it with horizontal strips of the gray marble cardstock, CutCardStock Basis 80# Aqua cardstock and CutCardStock Stardream Metallic Aquamarine cardstock, stamped the sentiment in turquoise and black ink, and layered the panel on the Basis Aqua cardstock.

And one more peek… so loving how this turned out! The coordinating stamps and brads are SO much fun to play with!

Sharing in the following challenges:
1. The Outlawz Saturday Paper A La Mode Challenge: Fur, Feathers or Fins

Eyelet Outlet products used:
Fish Stamp Set
Fish Brads
Blue Enamel Dots

Other products used:
Cardstock/Paper: Neenah Classic Crest 110# and 80# Solar White cardstock, CutCardStock Stardream Metallic Aquamarine cardstock, CutCardStock Basis 80# Aqua cardstock, CutCardStock Brown Bag 70# Kraft Paper, CutCardStock Pop-Tone 65# Gumdrop Green cardstock, CutCardStock Pop-Tone 65# Jellybean Green cardstock, Bazzill Marble 6×6 cardstock
Stamps: Inspired By Stamping Big Congrats stamp set
Ink: Nuvo alcohol markers- Ombre Collection, Honey Amber Collection; Memento Tuxedo Black ink, Catherine Pooler Cummberbund ink
Dies/Punches: My Favorite Things Fishbowl Die-namics
Accessories: Tonic Studios 12″ Guillotine Paper Trimmer, Gemini Junior, MISTI stamp tool, Bearly Arts precision craft glue, Darice Adhesive Foam Circles

I hope you’ve enjoyed today’s project! Be sure to check out all the fun goodies at Eyelet Outlet! I can already see you drooling, lol! Be sure to ‘like’ and ‘follow’ Eyelet Outlet Facebook Page to keep up with news and sales, and while you’re at it, join the Eyelet Outlet Fans Facebook group for lots of creative inspiration! Thanks so much for stopping by today – we’ll see you next time! ;)

Scrappy hugs,
lesliesig

Birthday Wishes slimline

Hi everyone! It’s Tuesday and I hope your week has started off nicely! Life is good here and I have absolutely no complaints! I’m stoked to be back on the CutCardStock blog today with an awesome DT inspiration project featuring some pretty gold cardstock (which is on sale this month so be sure to get some!) that I paired with lots of other cardstock. Affiliate links are used in this post at no cost to you. I really appreciate your support! I created a slimline birthday card featuring a gold two-story bird house with a blue bird and lots of colorful flowers!

This is my own design and I really didn’t measure anything… I just cut the dimensions of the bird house that fit my normal 9″ x 3-3/4″ slimline card base. So that means don’t get out your micrometer, lol! I cut the card base from Neenah Classic Crest Solar White 80# cardstock and a layering panel from Curious Metallic 92# Gold Leaf cardstock. I cut the roof and perches from Basis 80# Brown cardstock. Using Memory Box Stitched Circle Layers, I die cut the entrance holes from Stardream Metallic 105# Antique Gold cardstock and Basis 80# Brown cardstock. Using the set of Sizzix Bird Scene Thinlits, I die cut the bird from Basis 80# Navy cardstock, Basis 80# Medium Blue cardstock, Basis 80# Blue cardstock and Curious Metallic 111# Night cardstock, the branch from Curious Metallic 111# Chestnut cardstock, and the flowers and leaves from Basis 80# Coral Cardstock, Basis 80# Gold cardstock, Basis 80# Teal cardstock, Basis 80# Red cardstock, Pop-Tone 65# Tangy Orange cardstock, Pop-Tone 65# Gumdrop Green cardstock, Pop-Tone 65# Jellybean Green cardstock andPop-Tone 65# Grape Jelly cardstock. Using the CUTplorations Skinny Sentiments, I die cut the large portion of the sentiment from Pop-Tone 65# Gumdrop Green cardstock, Pop-Tone 65# Jellybean Green cardstock and stamped the remaining one word in brown ink, trimmed it and adhered it just beneath the die cut portion. I had several leftover flowers and adhered two of them with the sentiment.

I hand-cut the inside panel from Neenah Classic Crest Solar White 80# cardstock as well, embellished it with leftover strips of Pop-Tone 65# Jellybean Green cardstock and Curious Metallic 92# Gold Leaf cardstock, and layered it on the gold leaf cardstock (also hand-cut). I die cut the sentiment from a scrap piece of Stardream Metallic 105# Antique Gold cardstock and adhered the two remaining flowers to the bottom of the panel.

And one more peek… I’m so smitten I can’t stand it! I absolutely love the way this turned out, and having all these gorgeous colors of cardstock sure does help! I’ve had the Bird Scene Thinlits in my stash for a while and I knew they’d come in handy for just the right project! ;)

Sharing in the following challenges:
1. The Outlawz Saturday Paper A La Mode Challenge: Fur, Feathers or Fins

CutCardStock products used:
Curious Metallic 92# Gold Leaf cardstock
Neenah Classic Crest Solar White 80# cardstock
Basis 80# Brown cardstock
Stardream Metallic 105# Antique Gold cardstock
Basis 80# Navy cardstock
Basis 80# Medium Blue cardstock
Basis 80# Blue cardstock
Curious Metallic 111# Night cardstock
Curious Metallic 111# Chestnut cardstock
Basis 80# Coral Cardstock
Basis 80# Gold cardstock
Basis 80# Teal cardstock
Basis 80# Red cardstock
Pop-Tone 65# Tangy Orange cardstock
Pop-Tone 65# Gumdrop Green cardstock
Pop-Tone 65# Jellybean Green cardstock
Pop-Tone 65# Grape Jelly cardstock

Other products used:
Stamps: Lawn Fawn Happy Happy Happy stamp set
Ink: Memento Espresso Truffle ink
Dies/Punches: Memory Box Stitched Circle Layers, CUTplorations Skinny Sentiments, Sizzix Bird Scene Thinlits, Scrapbook.com Celebrate Word Die
Accessories: Tonic Studios 12″ Guillotine Paper Trimmer, Gemini Junior, MISTI stamp tool, Bearly Arts precision craft glue, Scrapbook.com 1/4″ Double-Sided Adhesive Roll, Darice Adhesive Foam Circles

I hope you’ve enjoyed today’s project and you’re inspired to get crafty! Be sure to check out all the awesome cardstock and other goodies at CutCardStock (adhesives, labels, stickers, pens, watercolors and ribbon to name a few). And head on over to the CutCardStock Facebook Page for more inspiration! Thanks so much for stopping by today – we’ll see you next time!

Scrappy hugs,
lesliesig

Pair of Happy Birthday To You cards

Happy Monday, everybody! Hope you have a great week coming up! This is my last guest designer post for Make the Cards Challenge, and I thank Jill and the rest of the gang for this fun guest gig! I’ve had a great time! Affiliate links are used in this post at no cost to you. I really appreciate your support! I’m thrilled to share my inspiration project for MTCC #23 – Sketch Challenge! Who doesn’t love a sketch, especially when it’s an awesome CAS sketch?!

I know I’ve mentioned previously (multiple times, lol) that I’m navigating more toward clean and simple these days than I ever have. This sketch really spoke to me so I decided to make a pair of cards that are the same on the front but have different sentiments inside.

I cut two standard size top folding A2 card bases from Neenah Classic Crest 110# Solar White cardstock and rounded the bottom right corner which I frequently like to do! I’m quirky like that, lol! I cut two stitched circles from CutCardStock Curious Metallic White Silver cardstock and adhered one to the bottom right quadrant of each card base. I stamped the hibiscus flowers, buds and leaves (two of each) on Neenah Classic Crest 110# Solar White cardstock as well, and adhered a set to the stitched circle die cut on each card base. I stamped the sentiment twice in purple ink on a scrap of white cardstock, trimmed them, and adhered one to each card.

As mentioned above, the inside sentiments are different on each card.

And one more peek… totally loving how these turned out! Super simple card design that could easily be mass produced for a set to give as a gift!

Products used:
Cardstock/Paper: Neenah Classic Crest 110# Solar White cardstock, CutCardStock Curious Metallic White Silver cardstock
Stamps: Altenew Build-A-Flower Hibiscus stamp set, Simon Says Stamp Birthday Messages stamp set
Ink: Memento New Sprout, Bamboo Leaves, Cottage Ivy, Olive Grove, Lulu Lavender, Sweet Plum, Grape Jelly, Elderberry, Lilac Posies and Peanut Brittle ink
Dies/Punches: Memory Box Stitched Circle Layers die, Altenew Build-A-Flower Hibiscus die set
Accessories: Tonic Studios 12″ Guillotine Paper Trimmer, Bearly Art precision craft glue, MISTI stamp tool, Big Shot

I hope you’ve enjoyed today’s project and will link up with us this week using our awesome sketch! We can’t wait to see what you create! Thanks so much for stopping by today – we’ll see you next time! ;)

Scrappy hugs,
lesliesig

Greetings from the Herd

Hi everyone! A very Happy Saturday to you – I hope you’ve had a great week! Affiliate links are used in this post at no cost to you. I really appreciate your support! I’m thrilled to be back on the Eyelet Outlet blog today with another awesome DT inspiration project! I created a fun tri-fold good luck/congratulations card featuring our Animal Stamp Set along with our Cow & Goat Brads, Pig & Sheep Brads, Horse/Pony Brads and Wide Sky Washi Tape!

I cut a standard A2 size side-folding card base from Neenah Classic Crest Solar White 110# cardstock along with a layering panel which I covered with Wide Sky Washi Tape and a green cardstock pasture. I added die cut grass and a hand-cut fence to keep the herd in, lol! ;) I added the Cow & Goat Brads, Pig & Sheep Brads, and Horse/Pony Brads to complete the front of the card.

I cut the inside panel from Neenah Classic Crest 80# Solar White cardstock along with a layering panel from CutCardStock Pop-Tone 65# Jellybean Green cardstock, and embellished it with a section of die cut grass, a green cardstock pasture and a cow brad. I stamped the sentiment in dark green ink and layered the panel on the jellybean green cardstock.

I cut a second white cardstock panel along with a folded panel from the jellybean cardstock (to fashion the third fold), stamped another sentiment in dark green ink and adhered the panel on the inside. This was a fun one!

Eyelet Outlet products used:
Animal Stamp Set
Cow & Goat Brads
Pig & Sheep Brads
Horse/Pony Brads
Wide Sky Washi Tape

Other products used:
Cardstock/Paper: Neenah Classic Crest 110# and 80# Solar White cardstock, CutCardStock Pop-Tone 65# Gumdrop Green cardstock, CutCardStock Pop-Tone 65# Jellybean Green cardstock, CutCardStock Basis 80# Brown cardstock
Stamps: Brutus Monroe Super Sentimental stamp set
Ink: Memento Espresso Truffle ink, Catherine Pooler Eucalyptus ink
Dies/Punches: The Cat’s Pajamas Grassy Patches die set
Accessories: Tonic Studios 12″ Guillotine Paper Trimmer, Gemini Junior, MISTI stamp tool, Bearly Arts precision craft glue

I hope you’ve enjoyed today’s project! Be sure to check out all the fun goodies at Eyelet Outlet! I can already see you drooling, lol! Be sure to ‘like’ and ‘follow’ Eyelet Outlet Facebook Page to keep up with news and sales, and while you’re at it, join the Eyelet Outlet Fans Facebook group for lots of creative inspiration! Thanks so much for stopping by today – we’ll see you next time! ;)

Scrappy hugs,
lesliesig

Christmas ATCs (Coins)

Hi everyone! Happy Friday! We are doing the happy dance out here in Colorado, as we’ve had a little bit of rain just about every day this week and we’re waking up to temps in the 50s. It’s absolutely wonderful! ;) Affiliate links are used in this post at no cost to you. I really appreciate your support! I’m delighted to be back on the Dies R Us Inspiration Blog today with another awesome DT inspiration project! I created a set of four Christmas Artist Trading Coins using several amazing Memory Box circle dies! Yep, if you know me, you know I’m an ATC fiend with a growing collection that I started several years ago, and I typically don’t trade them because I’m greedy that way, lol!

Using the Memory Box Joy Circle, Dove Circle, Peace Circle and Fancy Deer Circle dies, I cut the elements for the fronts of the coins from Neenah Classic Crest 110# Solar White cardstock, CutCardStock Stardream Metallic 105# Amethyst cardstock and CutCardStock Pop-Tone 65# Hot Fudge cardstock. Then I punched eight 2-1/2″ circles from Neenah Classic Crest Solar White 110# cardstock (two for each coin for added stability) with my Fiskars punch, along with circles from several different patterned papers from Polly’s Paper Studio. I created the sentiments on the laptop, printed them on Solar White cardstock, and cut them into strips. I used glitter washi tape on two of the backgrounds, and adhered the die cut elements and sentiments to the patterned paper circles, then adhered those to each coin base. Here are individual shots of each coin:

Dies R Us products used:
Memory Box Joy Circle
Memory Box Dove Circle
Memory Box Peace Circle
Memory Box Fancy Deer Circle

Other products used:
Cardstock/Paper: Neenah Classic Crest 110# Solar White cardstock, CutCardStock Stardream Metallic 105# Amethyst cardstock, CutCardStock Pop-Tone 65# Hot Fudge cardstock, Polly’s Paper Studio patterned paper
Stamps: Computer-generated sentiments
Dies/Punches: Fiskars 2-1/2″ Circle Punch
Accessories: Tonic Studios 12″ Guillotine Paper Trimmer, Bearly Art precision craft glue, Gemini Junior, Eyelet Outlet Purple Glitter Washi Tape, Eyelet Outlet Skinny Blue Glitter Washi Tape,

I hope you’ve enjoyed today’s project! Be sure to check out all the fun goodies at the Dies R Us store! They not only sell dies… they also carry stamps, embossing tools and supplies, all kinds of craft supplies, slimline products and even Yupo paper! Be sure to join in the fun going on over at the Dies R Us Challenge Blog – there’s a new challenge theme posted on the 1st and 15th of each month and one lucky random winner will receive a gift voucher prize to the Dies R Us store! And be sure to ‘like’ and ‘follow’ Dies R Us Facebook Page for lots of creative inspiration and to keep up with the latest news! Thanks so much for stopping by today – we’ll see you next time! ;)

Scrappy hugs,
lesliesig

wish big

Hi everybody! I hope you’re having a great week – it’s all good here with absolutely no complaints! The hubs started this year’s garden several months ago and tends to it several times a day. We live in a rural area and we’re not close to a farmer’s market, so this is the second year in a row that he’s grown our veggies, and they are SO good! Thankfully he has green thumbs! Affiliate links are used in this post at no cost to you. I really appreciate your support! Our new challenge is live this morning over at Love To Craft Challenge Blog and I’m super stoked to share my DT inspiration project for LTCCB #60 – July Anything Goes! The cut file I used for this awesome birthday card was in the CanvasWorkspace Project/Pattern Collection, and when I saw it I just had to make a colorful one!

I cut the card base from Neenah Classic Crest 80# Solar White cardstock and the rest of the pieces from CutCardStock Stardream Metallic 105# Amethyst, Aquamarine and Lagoon cardstock; CutCardStock Pop-Tone 65# Tangy Orange and Razzleberry cardstock; CutCardStock Basis 80# Dark Purple and Basis Orange; CutCardStock 80# Granny Smith cardstock; and The Paper Studio Four Seasons and Everything In Between -2- paper pad. The fun part is always assembling and watching the project come together, and this card was no exception! Using CUTplorations Skinny Sentiments, I die cut the sentiment from CutCardStock Basis Gold cardstock. The finishing touch was adding several tiny iridescent gemstones.

I cut the inside panel from Neenah Classic Crest 80# Solar White cardstock and embellished it with a leftover strip of the patterned paper used on the front. I found this hilarious rubber stamp among my Great Impressions stamps so I stamped it in Catherine Pooler Serenade ink and layered it on a larger piece of the patterned paper.

And one more peek… SO loving how this turned out! I’m all about colors and this sure fits the bill!

Products used:
Cardstock/Paper: Neenah Classic Crest 80# Solar White cardstock, CutCardStock Stardream Metallic 105# Amethyst, Aquamarine and Lagoon cardstock; CutCardStock Pop-Tone 65# Tangy Orange and Razzleberry cardstock; CutCardStock Basis 80# Dark Purple, Basis Gold and Basis Orange; CutCardStock 80# Granny Smith cardstock; The Paper Studio Four Seasons and Everything In Between paper pad
Stamps: Great Impressions Seriously! rubber stamp
Ink: Catherine Pooler Serenade ink
Dies/Punches: CanvasWorkspace Birthday Card cut file, CUTplorations Skinny Sentiments
Accessories: Tonic Studios 12″ Guillotine Paper Trimmer, Brother Scan N Cut, Bearly Art precision craft glue, Big Shot, ScraPerfect iridescent gemstones

I hope you’ve enjoyed seeing this fun birthday card and will link up an anything goes project with us this month! Thanks so much for stopping by today – we’ll see you next time! ;)

Scrappy hugs,
lesliesig

Merry Christmas slimline

Howdy, friends! I hope you’re having a fantastic week! It’s time for another fun challenge over at Merry Little Christmas Challenge Blog and I’m thrilled to share my DT inspiration project for MLCCB #36 – July Anything Christmas Goes! Affiliate links are used in this post at no cost to you. I really appreciate your support! I created a fun slimline featuring a line of trees and lots of shimmery and shiny gold bling! Who doesn’t love bling at Christmastime?!

I cut a landscape top-folding slimline card base measuring 9″ x 3-3/4″ from Neenah Classic Crest 110# Solar White cardstock along with a light teal gingham paper layer and a teal cardstock layer which I adhered together. I adhered a gold glitter filmstrip frame die cut across the bottom with a flagged red cardstock strip layered behind it. I dug into my scrap bin and found some light, medium and dark teal cardstock scraps, punched ten trees and layered them in sets of two. I added gold glitter alpha stickers and holiday light brads, and popped them up on foam dimensionals. I stamped ‘Christmas’ in teal ink on a white cardstock scrap, trimmed it and flagged one end, then adhered it in the bottom right corner.

I cut the inside panel from Neenah Classic Crest Solar White cardstock and embellished it with strips of the light teal gingham, red cardstock and gold glitter paper. I stamped the sentiment in teal ink and layered the panel on teal cardstock.

And one more look… totally smitten with this blinged-out card! And teal and red is one of my favorite color combinations!

Products used:
Cardstock/Paper: Neenah Classic Crest Solar White cardstock, GKD Ocean Mist cardstock, Colorbok red cardstock, Stampin’ Up gold Glimmer paper; red and light/medium/dark teal cardstock scraps; The Paper Studio Four Seasons and Everything In Between -2- paper pad
Stamps: The Project Bin Merriest Christmas stamp set
Ink: Stampin’ Up Lost Lagoon ink
Dies/Punches: Tim Holtz Alterations Filmstrip Frame Sizzlit, Stampin’ Up Tree Punch, EK Success 3/4″ square punch
Accessories: Tonic Studios 12″ Guillotine Paper Trimmer, Bearly Art precision craft glue, Tombow Mono permanent adhesive, Eyelet Outlet Holiday Light Brads, Darice gold Glitter Alpha Stickers

I hope you’ve enjoyed seeing this slimline card and will link up a Christmas project with us this month! We’d love to see what you’re making! Thanks so much for stopping by today – we’ll see you again soon! ;)

Scrappy hugs,
lesliesig