Get well soon

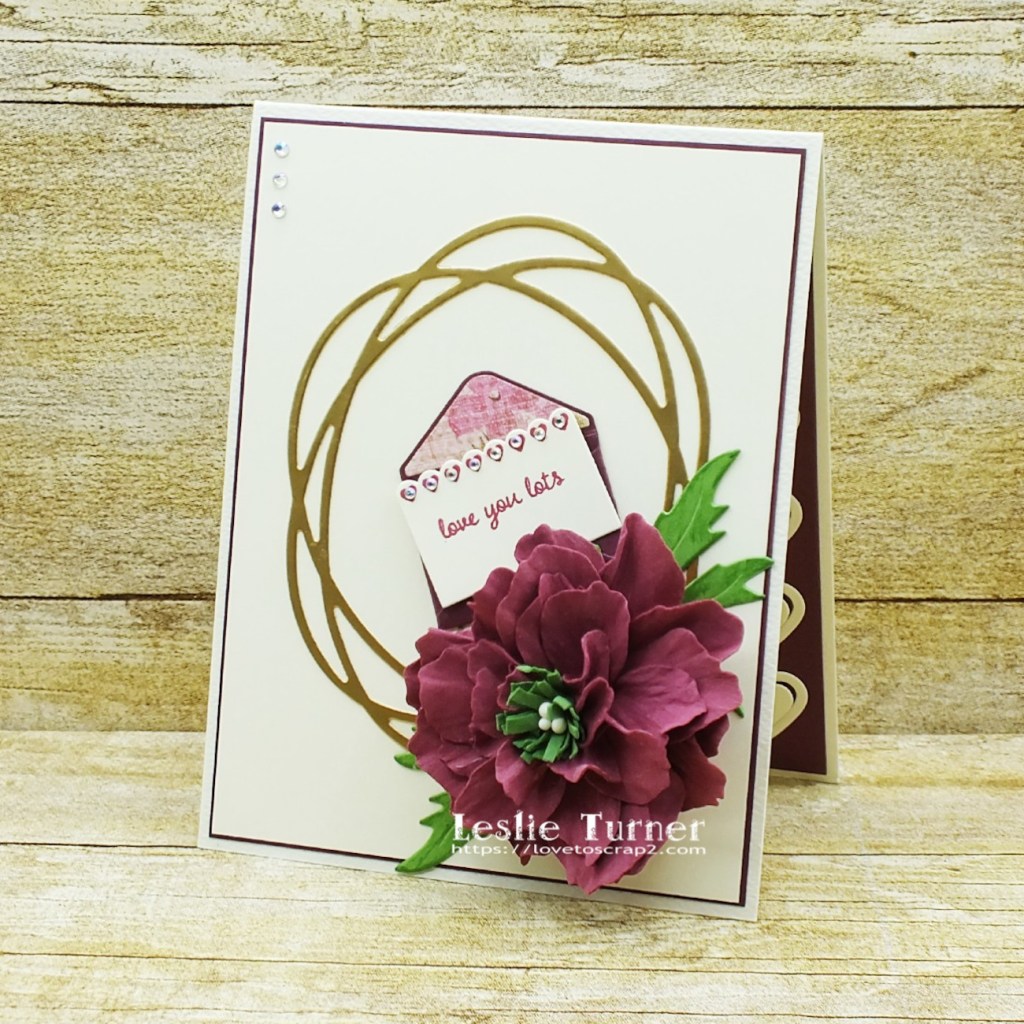
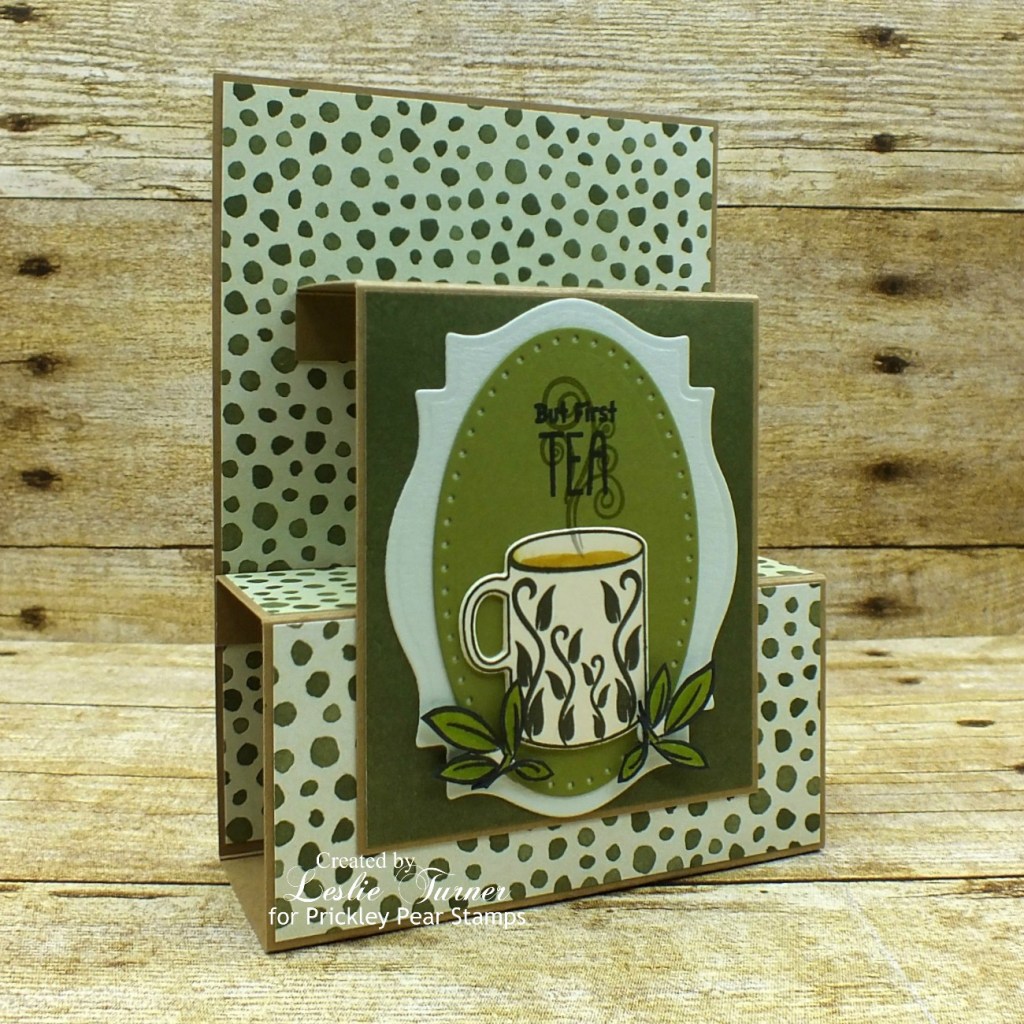
Hi everyone! Happy Saturday to you! Affiliate links are used in this post at no cost to you. I really appreciate your support! I’m thrilled to be back on the Eyelet Outlet blog today with another awesome DT inspiration project! I created a triple fold card that has a belly band and features some of the new quarantine brads in the store, along with enamel dots which are some of my personal favs! You know how I love fun folds – this is the second one of these I’ve made and it’s such an easy one!

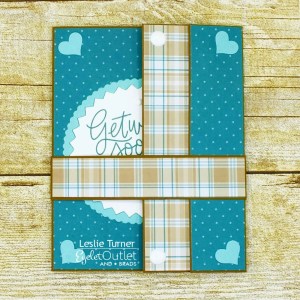
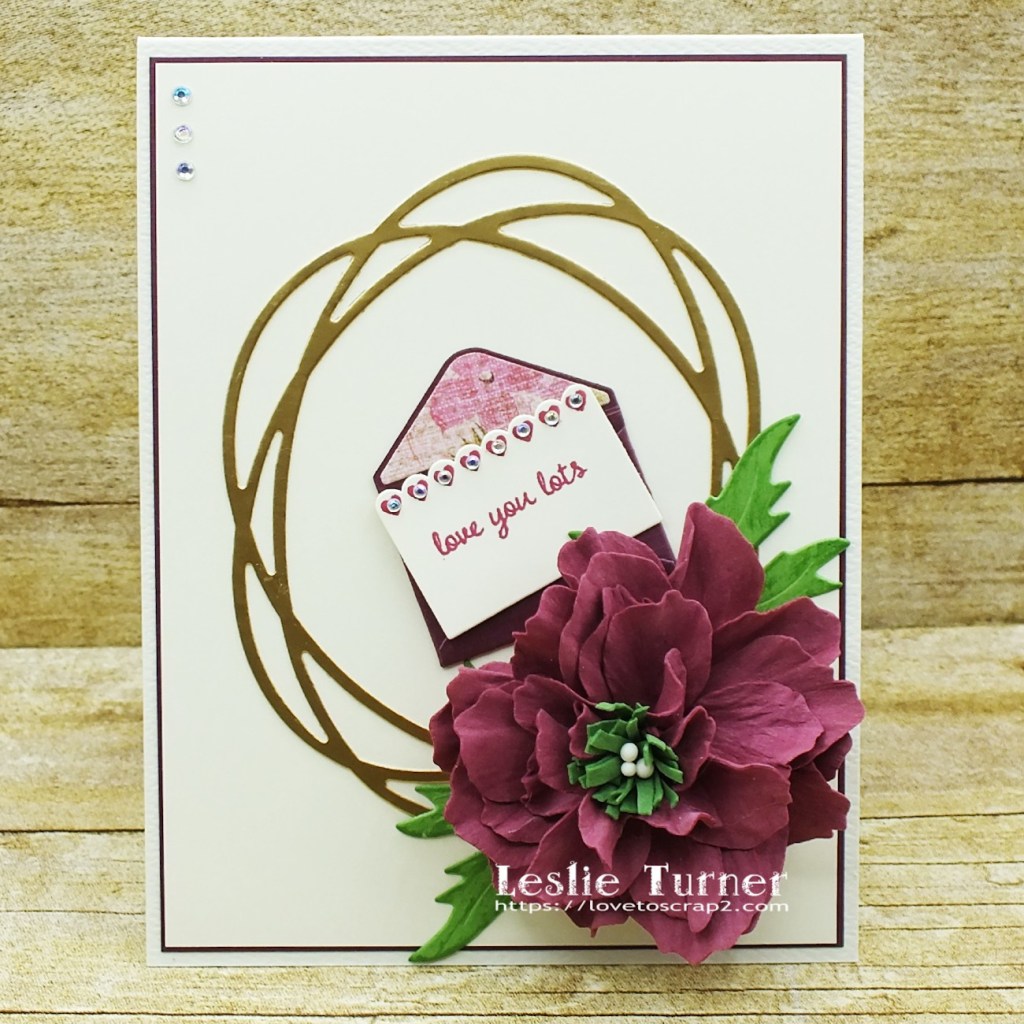
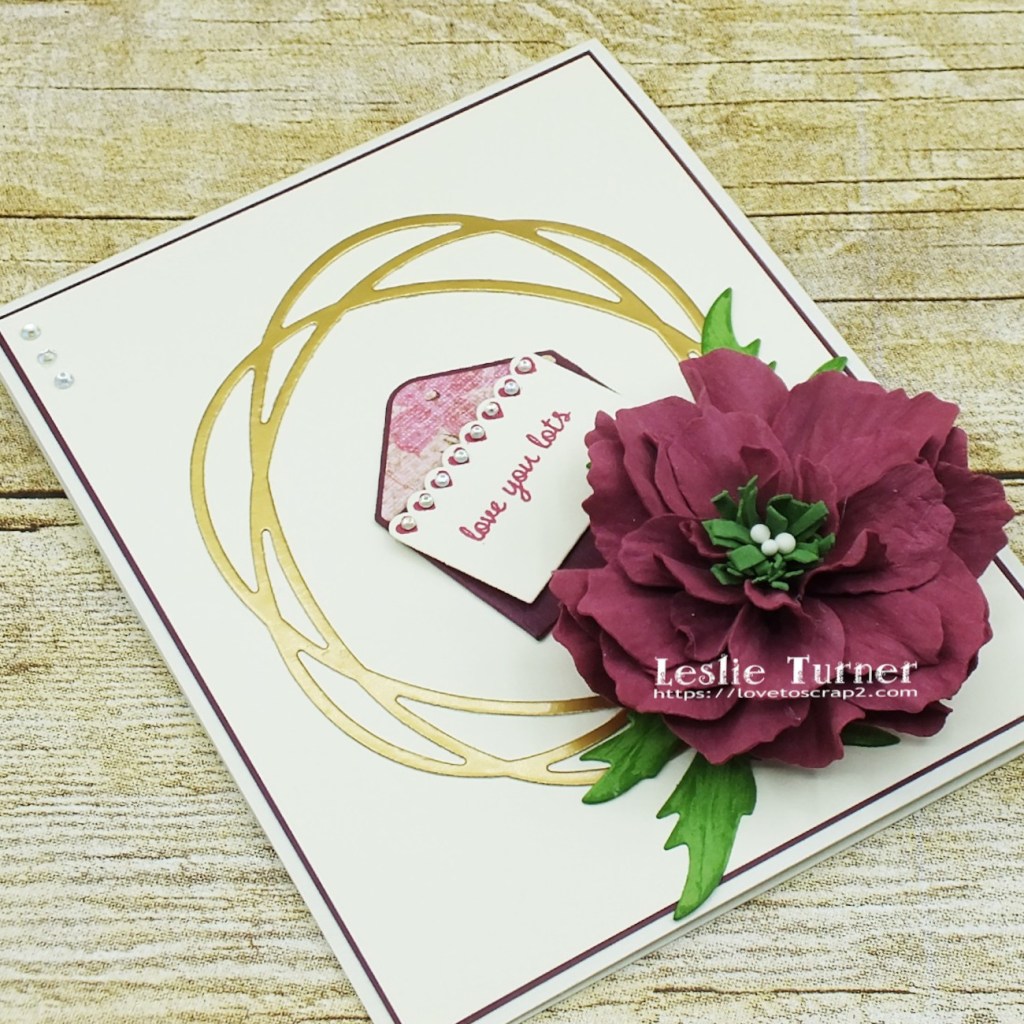
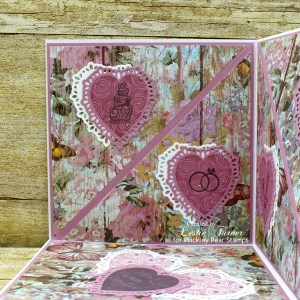
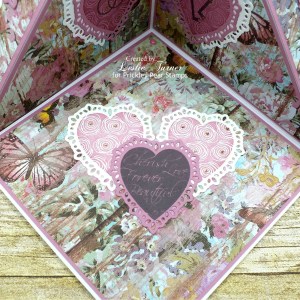
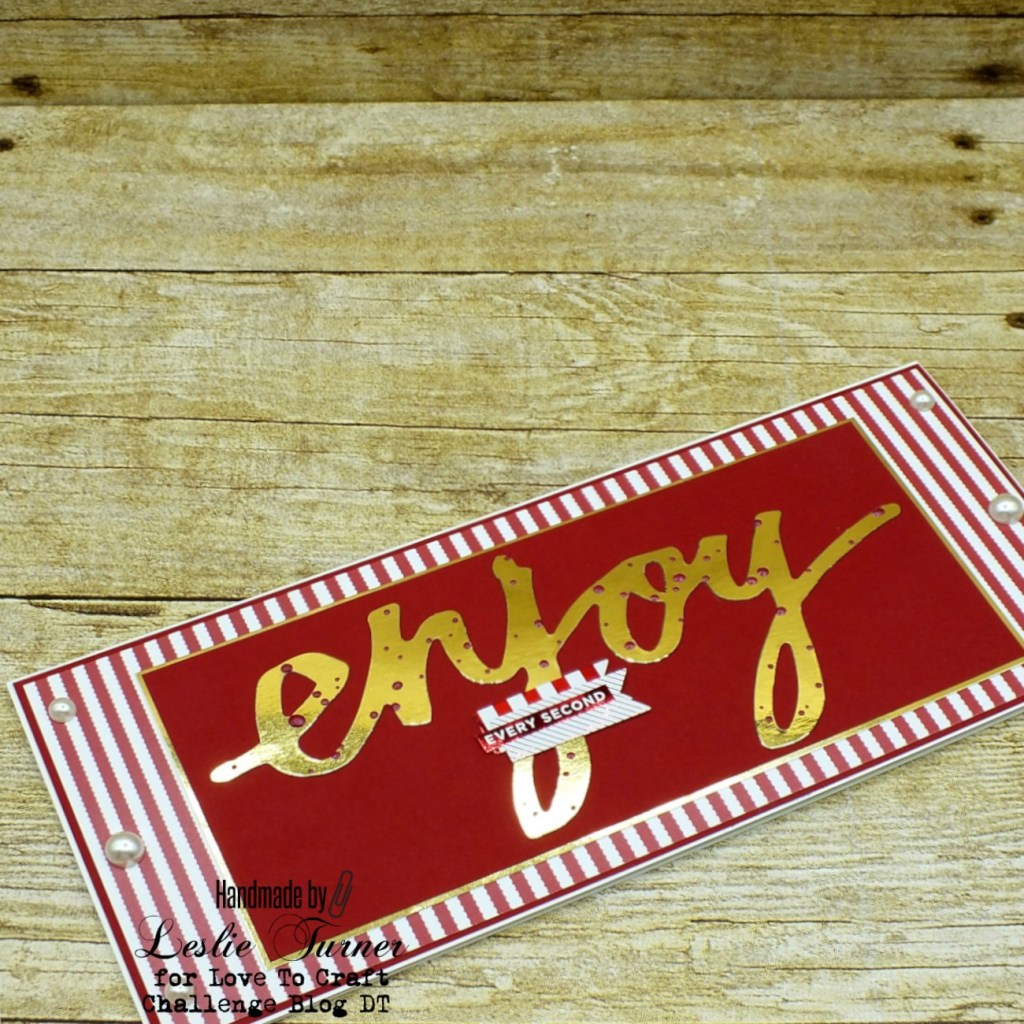
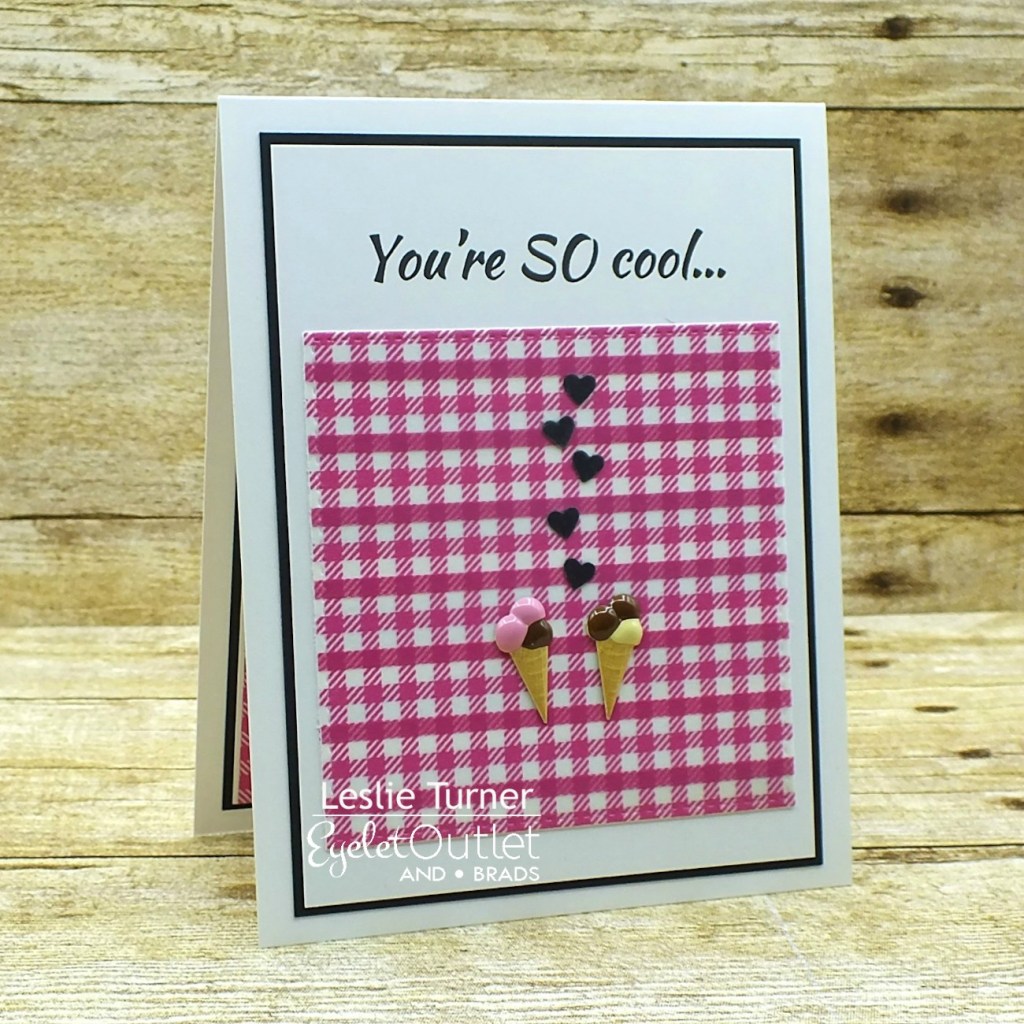
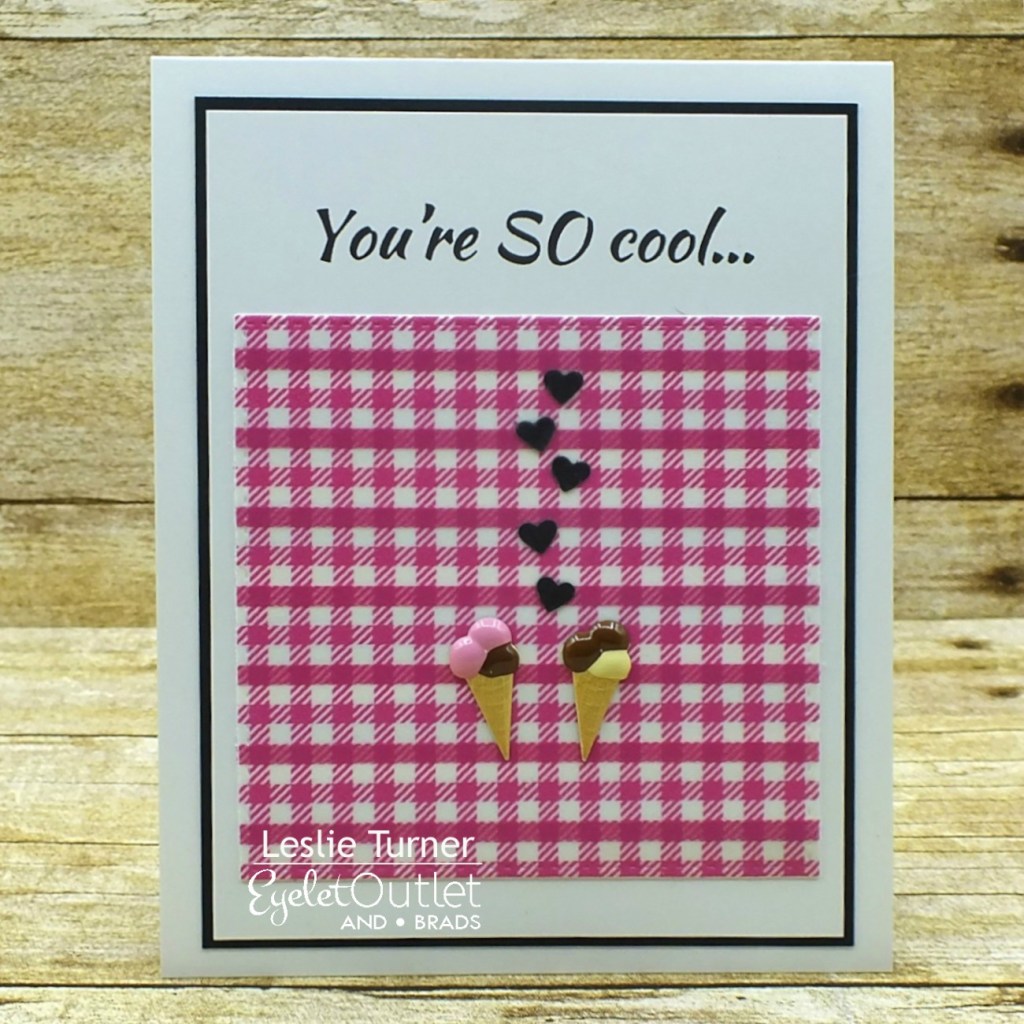
I pulled out a paper pad that hasn’t seen the light of day in quite a while and chose two coordinating prints that complimented the brown cardstock, and cut panels for the front and side flaps. I created a die cut element from CutCardStock Stardream Metallic Lagoon cardstock and Neenah Classic Crest Solar White cardstock on which I stamped the ‘get well’ sentiment, affixed a Kleenex Brad and Mask and Soap Brads, and added several White Enamel Dots. I embellished the corners with hearts punched from CutCardStock Stardream Metallic Lagoon cardstock scrap and slightly larger enamel dots.

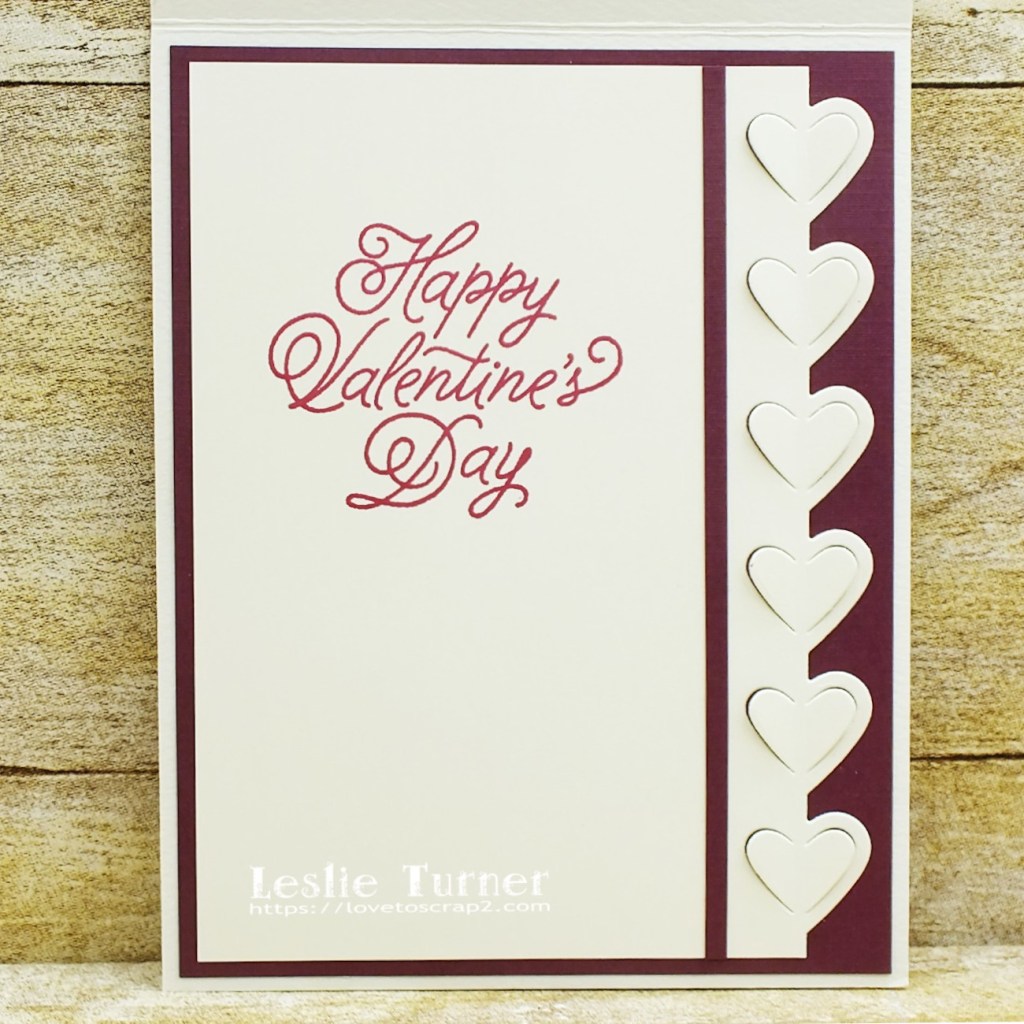
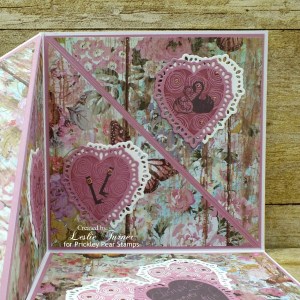
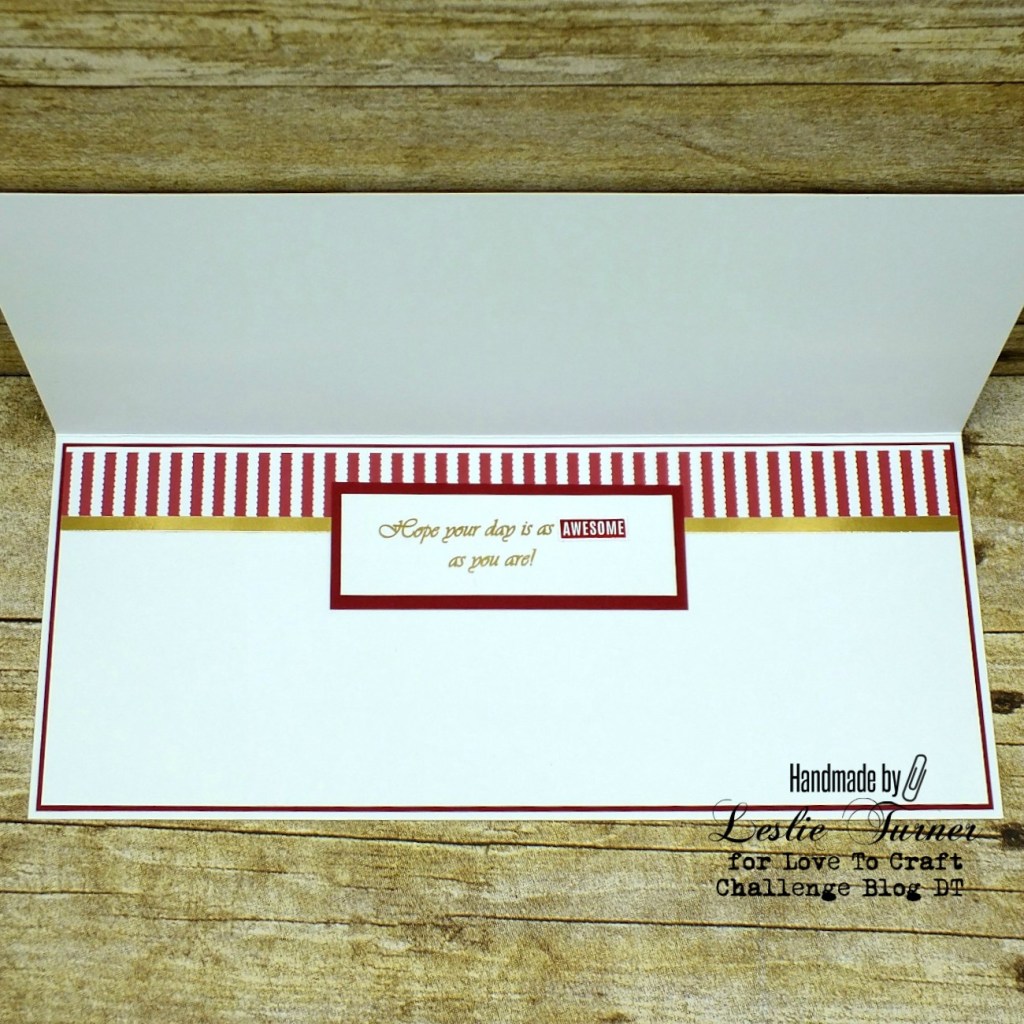
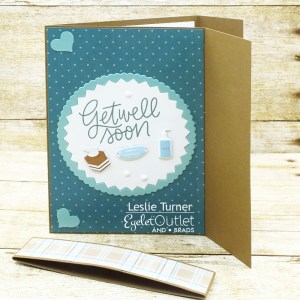
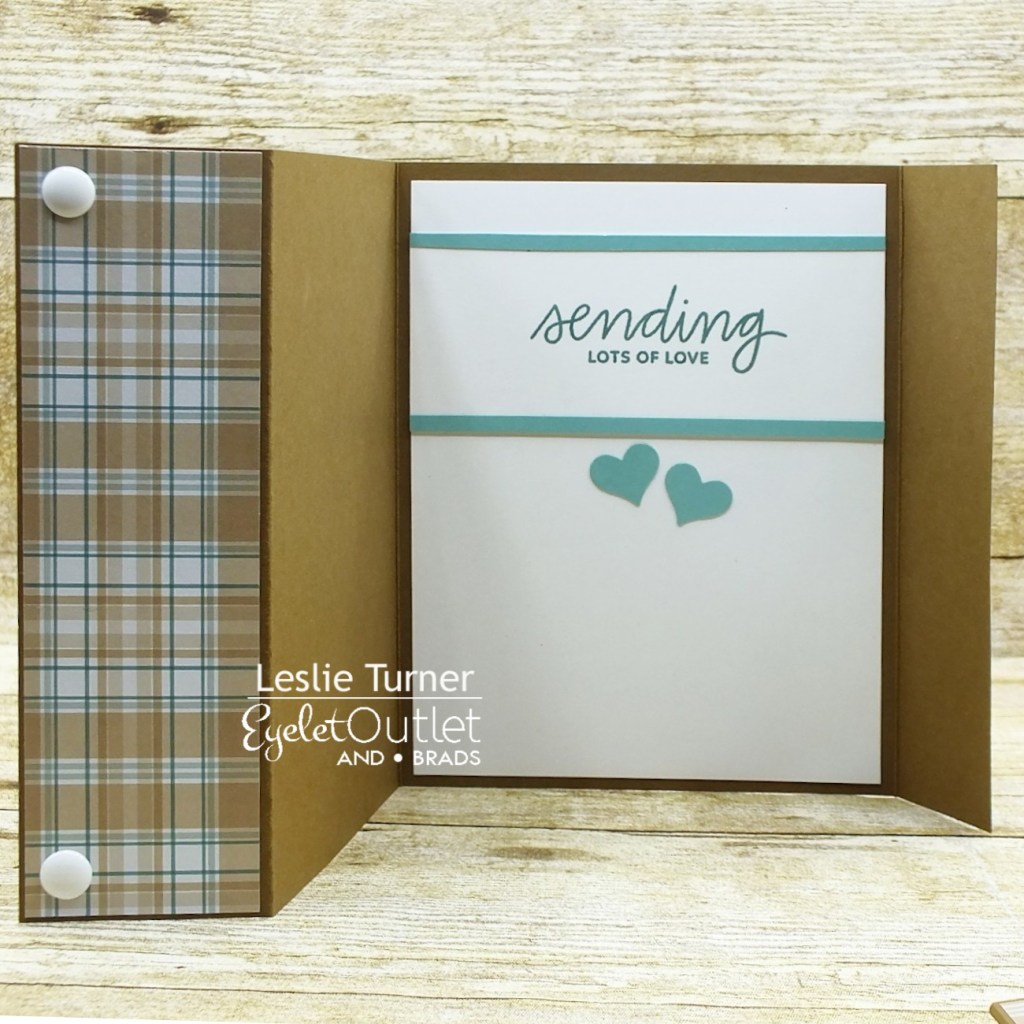
I cut the inside panel from Neenah Classic Crest Solar White cardstock and embellished it with narrow strips and punched hearts from CutCardStock Stardream Metallic Lagoon cardstock, stamped the sentiment and adhered the panel to the inside of the card base.

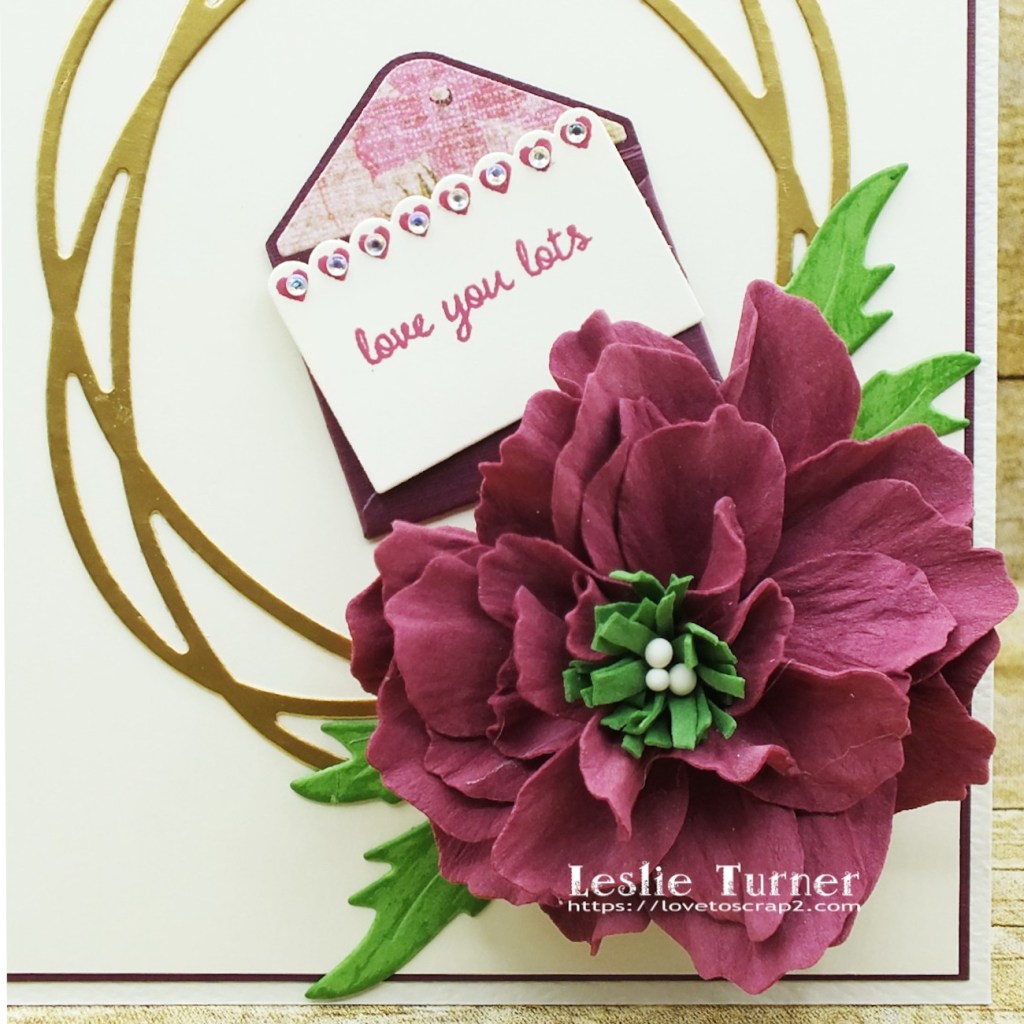
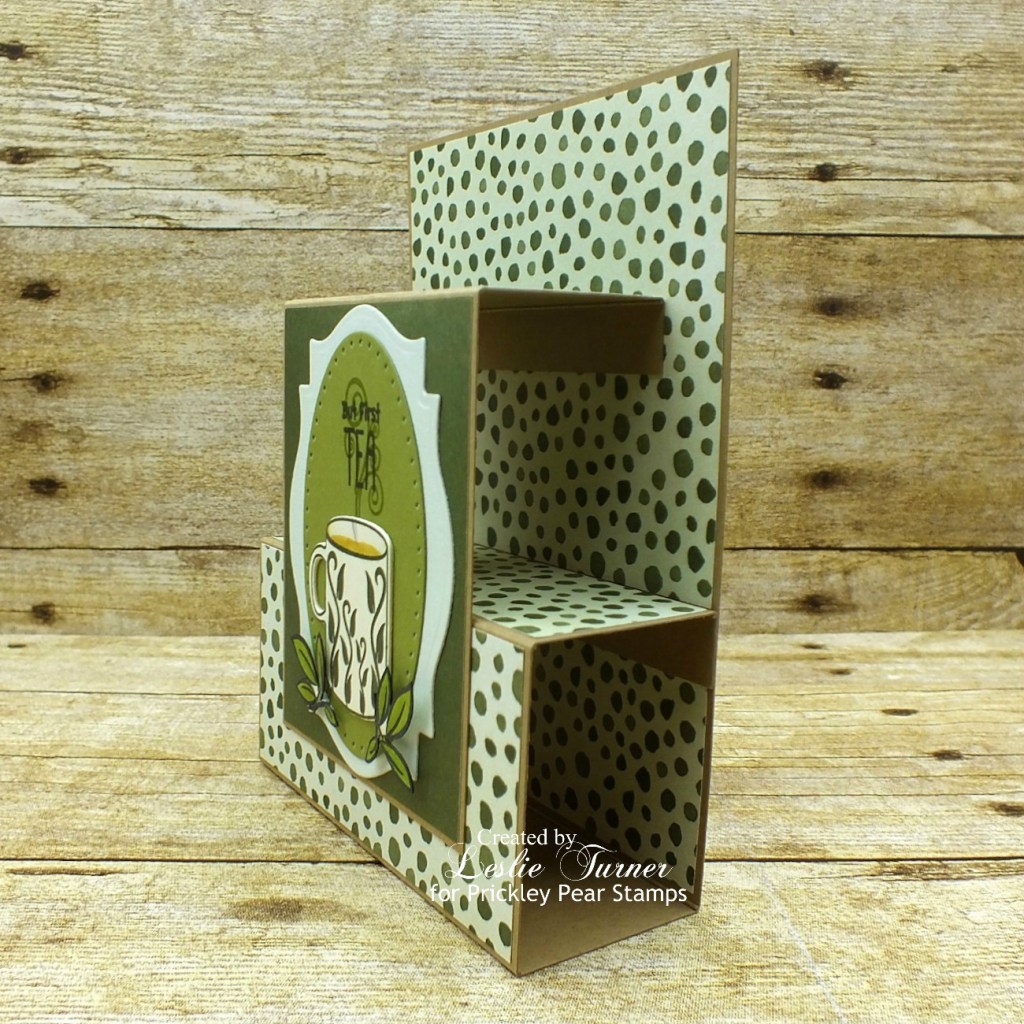
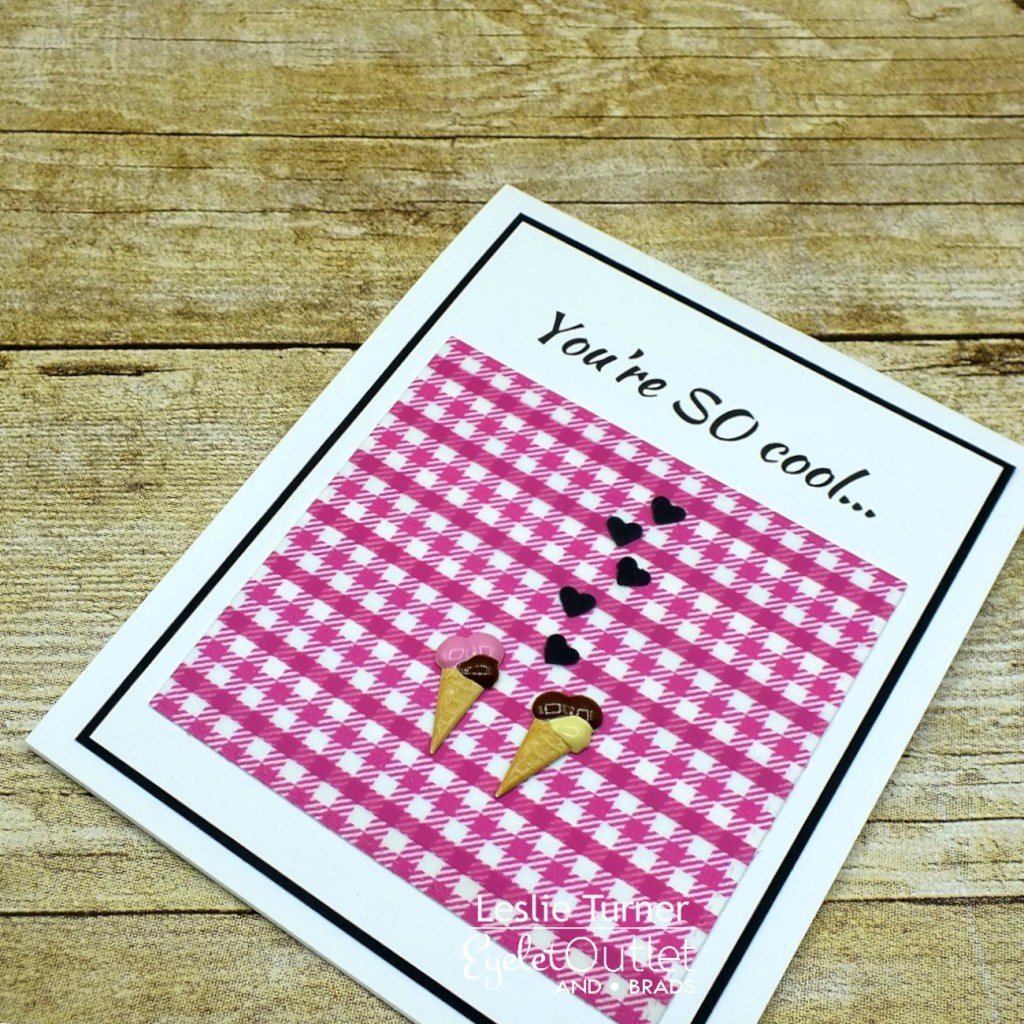
And one more peek… so loving how this turned out! I think this would cheer up the recipient!

Sharing in the following challenges:
1. A Perfect Time To Craft Open Challenge: #2-2021 – Anything Goes
2. Classic Design Challenge: #2 – Anything Goes
3. Penny’s Paper-Crafty Challenge Blog: #489 – Anything Goes

Eyelet Outlet products used:
Toilet Paper & Tissue Brads
Mask, Hand Sanitizer & Soap Brads
White Enamel Dots

Other products used:
Cardstock/Paper: Papertrey Ink Honey Nut cardstock, CutCardStock Stardream Metallic Lagoon cardstock, Neenah Classic Crest Solar White cardstock, Recollections Bold Basics paper pad
Stamps: Pretty Pink Posh Everyday Greetings stamp set
Ink: Stampin’ Up Lost Lagoon ink
Dies/Punches: Catherine Pooler Love Connection die set, Stampin’ Up Itty Bitty heart punch
Accessories: Bearly Art precision craft glue, Tombow Mono permanent adhesive, Gemini Junior, MISTI stamp tool

I hope you’ve enjoyed today’s project! Be sure to check out all the fun goodies at Eyelet Outlet! I can already see you drooling, lol! Be sure to ‘like’ and ‘follow’ Eyelet Outlet Facebook Page to keep up with news and sales, and while you’re at it, join the Eyelet Outlet Fans Facebook group for lots of creative inspiration! Thanks so much for stopping by today – we’ll see you next time! ;)

Scrappy hugs,
lesliesig

love you lots

2/18/21 Top 3 at Penny’s Paper-Crafty Challenge Blog!

Hi everyone! Hope you’re having a fantastic day! Affiliate links are used in this post at no cost to you. I really appreciate your support! I’m super stoked to share that I’ve been invited by the awesome Vicki Dutcher to be a February guest designer for Just Us Girls Challenge! My first project is a Valentine for Word Week #570. This card features a variety of die cuts and a handmade Foamiran flower!

And here’s our word prompt:

I learned how to make Foamiran flowers a while back and have only made a few. They are quite fun, I have to say! This card design is similar to one I made for another design team which features the very first Foamiran flower I made. I work ahead so you’ll see that card in several months. I used a different flower die for this flower and made this one in a different color. I die cut the leaves from green cardstock and DTP-inked the edges with mowed lawn distress ink. I adhered the leaves to a 3/4″ punched circle and then adhered the completed flower on top of that which makes it easier to adhere to the card front.

I cut a standard A2 size top-folding card base from CutCardStock Royal Sundance Felt Natural cardstock along with a couple Neenah Classic Crest Baronial Ivory cardstock layering panels, one for the front and one for the inside, and a tiny Valentine card. I layered the front panel on CutCardStock Royal Sundance Linen Burgundy cardstock and then cut a layering panel for the inside and die cut a tiny envelope for my tiny Valentine card. I cut a scrap of patterned paper to die cut the tiny envelope flap liner and assembled the envelope. I die cut the connected oval and adhered it to the panel, then adhered the flower and the tiny envelope.

I stamped the row of hearts and the sentiment in dark pink ink on the tiny Valentine card, and adhered it on top of the envelope with foam dimensionals. The finishing touch was adding tiny iridescent gemstones to the hearts on the tiny Valentine card and three slightly larger iridescent gemstones to the upper left corner.

I die cut a vertical row of dimensional hearts into the inside panel and added a narrow strip of the burgundy linen cardstock. I stamped the Valentine sentiment in pink ink and layered the panel on the burgundy linen cardstock.

And one more look… totally smitten with this! And I have a good idea who will receive it! ;)

Sharing in the following challenges:
1. A Perfect Time To Craft Open Challenge: #2-2021 – Anything Goes
2. Classic Design Challenge: #2 – Anything Goes
3. Crafts Galore Encore Challenges: #84 – February Anything Goes
4. Di’s Digi Challenge: 1 or More Hearts
5. Inspirational: #232 – Hearts

6. International Art & Soul: #101 – Hearts
7. Jan’s Digi Stamps Challenge: February Anything Goes
8. Let’s Craft and Create: #168 – Anything Goes w/ optional Red, Pink and/or White
9. Moving Along With The Times: #127 – Valentines/Love
10. My Time To Craft Challenge Blog: #450 – Love
11. Penny’s Paper-Crafty Challenge Blog: #489 – Anything Goes
12. Scrapping4fun Challenges: #185 – Wedding/Valentine/Friendship
13. Your Scrapbook Place: February Anything Goes

Products used:
Cardstock/Paper: CutCardStock Royal Sundance Felt Natural cardstock, CutCardStock Royal Sundance Linen Burgundy cardstock, Neenah Classic Crest Baronial Ivory cardstock, Papertrey Ink New Leaf cardstock, Marco’s Venicelux Metallic Gold cardstock, The Paper Studio Country Road 12×12 paper pad (scrap)
Stamps: Stampin’ Up Sealed With Love stamp set
Ink: Stampin’ Up Rose Red ink, Ranger mowed lawn distress ink
Dies/Punches: Whimsy Stamps Poppy Flower die set, Whimsy Stamps Connected Oval die, Stampin’ Up Love Notes Framelits, Stampin’ Up 3/4″ circle punch
Accessories: Tombow Mono permanent adhesive, Bearly Art precision craft glue, Burgundy and Dark Green Foamiran, Gemini Junior, MISTI stamp tool, hot glue gun, Darice iridescent gemstones

I hope you’ve enjoyed this project and will link up a Valentine with us this week at JUGS! Can’t wait to see what you create! Thanks so much for stopping by today – we’ll see you next time! ;)

Scrappy hugs,
lesliesig

Merry Christmoose

Hi everyone! I hope you had a fantastic weekend! They sure do go by fast, don’t they?! Affiliate links are used in this post at no cost to you. I really appreciate your support! Our February challenge is live this morning over at Merry Little Christmas Challenge Blog and I’m stoked to share my DT inspiration project for MLCCB #31 – February Anything Christmas Goes! I created a fun split panel card with acetate and used a Clearly Besotted stamp set that I won last year. This is the first time I’ve used it and it’s so stinkin’ cute I can’t stand it!

I created a standard A2 size top folding card base from Neenah Classic Crest Solar White cardstock and cut a portion out of it with a MFT Stitched Scallop Basic Edges die. I cut two thin borders from the leftover piece of cardstock, colored them red and set them aside. I cut a panel of acetate and adhered it behind the two pieces of cardstock to form the front flap.

I adhered the red borders and stamped the sentiment in black ink in the bottom right corner. I stamped ‘xo’ randomly over the top of the flap in two shades of green ink and adhered tiny iridescent gemstones randomly to fill in spaces.

I stamped the darling little moose on the inside, centering it between the two cardstock pieces, and then stamped the sentiment directly above it. I colored the moose with alcohol markers and that completed the card!

And one more look… totally loving how this turned out! This is such a fun technique!

Sharing in the following challenges:
1. 2 Crafty Critter Crazies: #47 – February Anything Goes
2. A Perfect Time To Craft Open Challenge: #2-2021 – Anything Goes
3. Classic Design Challenge: #2 – Anything Goes
4. Crafty Friends Challenge Blog: #149 – Animals/Birds
5. Creative Inspirations: January/February challenge – Animal Antics
6. The Crafter’s Cafe: #259 – Anything Goes

Products used:
Cardstock/Paper: Neenah Classic Crest Solar White cardstock
Stamps: Clearly Besotted Merry Christmoose stamp set
Ink: Memento Espresso Truffle, Bamboo Leaves and Pear Tart ink; Spectrum Noir alcohol markers- DR 2, DR4; Nuvo alcohol markers- 408, 420, 405, 431, 479, 466; Sakura Clear Star Gelly Roll pen
Dies/Punches: My Favorite Things Die-namics Stitched Scallop Basic Edges die
Accessories: Bearly Art precision craft glue, ScraPerfect Best Glue Ever, MISTI stamp tool, Gemini Junior, Darice tiny iridescent gemstones

I hope you’ve enjoyed today’s project and will link up a Christmas project with us this month! We can’t wait to see what you create! Thanks so much for stopping by today – we’ll see you again soon! ;)

Scrappy hugs,
lesliesig

Cherish-Love-Forever-Beautiful

Happy Monday, everybody! Well, we’re a whole month into 2021 already! Our new challenge is live over at Love To Scrap Challenge Blog and I’m stoked to share my DT inspiration project for LTSCB #142 – Love Is. You guessed it – we want to see your ‘love’ creation, whether it’s for a wedding, an anniversary, a Valentine or just because! I created this corner fold wedding congrats sample for Prickley Pear Stamps using their Heart Key Crown stamps and dies. This fold is super fun!

I created the card base from white cardstock and the layers from sugarplum cardstock and a gorgeous patterned paper. I cut quite a few heart die cuts from white and sugarplum cardstock, and did a good bit of stamping and layering on all the panels.

And last but not least, this awesome card folds flat for mailing!

Sharing in the following challenges:
1. A Perfect Time To Craft Open Challenge: #2-2021 – Anything Goes
2. Classic Design Challenge: #2 – Anything Goes
3. Crafts Galore Encore Challenges: #84 – February Anything Goes
4. Jan’s Digi Stamps Challenge: February Anything Goes
5. Moving Along With The Times: #127 – Valentines/Love
6. QKR Stampede: #413 – Anything Goes
7. The Crafter’s Cafe: #259 – Anything Goes
8. Your Scrapbook Place: February Anything Goes

Cardstock/Paper: American Crafts White cardstock, Stampin’ Up Sweet Sugarplum cardstock, The Paper Studio Country Road 12×12 paper pad
Stamps: Prickley Pear Stamps Heart Key Crown stamp set
Ink: Stampin’ Up Sweet Sugarplum ink, Memento Espresso Truffle ink
Dies/Punches: Prickley Pear Stamps Heart Key Crown die set, Sizzix Celebration Words: Script die set
Accessories: Tombow Mono permanent adhesive, Bearly Art precision craft glue, MISTI stamp tool, Gemini Junior, Stampendous pink Dot Sparklers, Dodlebug Design Sprinkles- Bubblegum Assortment

I hope you’ve enjoyed this project and will link up a ‘love’ project with us this month! Thanks so much for stopping by today – we’ll see you again soon! ;)

Scrappy hugs,
lesliesig

enjoy every second

Hi everyone! Top of the morning to you! Here’s wishing you a wonderful week ahead! Affiliate links are used in this post at no cost to you. I really appreciate your support! Our February challenge is underway over at Love To Craft Challenge Blog and I’m excited to share my DT inspiration project for LTCCB #55 – February Anything Goes! I created a fun slimline birthday card featuring some foiling! My go-to slimline size is 9″ x 3-3/4″ because I feel that it fits better in a #10 size business envelope.

I pulled out the Mini Minc and some red and gold foil. It has literally been ages since I played with this machine! There were several tiny spots that didn’t take the foil on the large ‘enjoy’ element (perhaps because it’s so old? hmmm…) so I dotted on some Crystal Drops to cover those areas. It looked so neat that I dotted on more Crystal Drops in various sizes until I achieved the look I wanted! Hey, there’s more than one way to skin that cat! Wait a minute… we don’t skin cats here but you know what I mean, lol! I created a card base from Neenah Classic Crest Solar White cardstock and created a background panel of red and white striped cardstock layered on red cardstock. I adhered the ‘enjoy’ element on red cardstock layered on gold foil cardstock. I added a small layered foiled flagged sentiment and some large white flat-back pearls. Sorry for the top angle of the photo but that’s the only way I could get the foil to not be black in the photos, lol!

I embellished the inside panel cut from Neenah Classic Crest Solar White cardstock with strips of red and white striped and gold foil cardstock, along with a layered foiled sentiment, and layered the panel on red cardstock.

And one more look… really happy with this despite the initial difficulty I encountered with the foil not ‘taking’ in several spots. My work-around prevailed, lol!

Sharing in the following challenges:
1. A Perfect Time To Craft Open Challenge: #2-2021 – Anything Goes
2. Classic Design Challenge: #2 – Anything Goes
3. QKR Stampede: #413 – Anything Goes
4. The Crafter’s Cafe: #259 – Anything Goes
5. Your Scrapbook Place: February Anything Goes

Products used:
Cardstock/Paper: Neenah Classic Crest Solar White cardstock, American Crafts Rouge cardstock, Hygloss Gold Foil cardstock, Canvas Corp Lots of Color Paper Collection
Accessories: Scotch ATG, Mini Minc machine; Minc gold and red foil, jumbo words, and flags; Nuvo Autumn Red Crystal Drops, Melissa Frances Trinkets & Baubles

I hope you’ve enjoyed seeing this slimine card and will link up with us this month! As always, we’d love to see what you’re working on! Thanks so much for stopping by today – we’ll see you again soon! ;)

Scrappy hugs,
lesliesig

But First Tea

2/28/21 Runner Up Winner at Classic Design Challenge Blog!

Hi friends! A very happy Monday to you! Our new challenge is live this morning over at Mix It Up Challenge Blog and I’m thrilled to share my DT inspiration for MIUCB #46 – Fancy Fold! Our challenges are Anything Goes and we offer an optional technique twist each month just to inspire you, and this month the twist is Fancy Fold! Affiliate links are used in this post at no cost to you. I really appreciate your support! I created another front step card using the awesome Coffee Cup and Tea stamp sets with coordinating Coffee Cup die set from Prickley Pear Stamps! This is one of my new favorite fancy folds and I’ve made several of them. This card was created for the Prickley Pear Stamps Hochanda showcase several months back and was shown on air!

This is a standard A2 size card that folds flat for mailing. The construction is really simple and can easily be altered to make the card a different size.

I created the card base from kraft cardstock and added double-sided patterned paper layers to both base elements. I created the focal element with two die cuts, stamped the sentiment and added the tea die cut with fussy cut tea leaves.

I added a panel cut from Neenah Classic Crest Baronial Ivory cardstock with a die cut Sizzix sentiment to the back.

And one more peek… here’s the card folded flat for mailing. Such a fun design!

Sharing in the following challenges:
1. A Perfect Time To Craft Open Challenge: #2-2021 – Anything Goes
2. Classic Design Challenge: #2 – Anything Goes
3. Crafts Galore Encore Challenges: #84 – February Anything Goes
4. Jan’s Digi Stamps Challenge: February Anything Goes
5. QKR Stampede: #413 – Anything Goes
6. The Crafter’s Cafe: #259 – Anything Goes

Products used:
Cardstock/Paper: Cardstock Warehouse Brown Box kraft cardstock, Neenah Classic Crest Baronial Ivory cardstock, GKD Fresh Asparagus cardstock, CutCardStock Curious Metallic Aloe cardstock, Stampin’ Up Color Me Autumn DSP
Stamps: Prickley Pear Stamps Coffee Cup stamp set and Tea stamp set
Ink: Memento Tuxedo Black ink; Stampin’ Up Always Artichoke and Smoky Slate ink; Nuvo alcohol markers- 416, 479
Dies/Punches: Spellbinders Labels Eighteen, Sizzix Dotted Ovals die, Tim Holtz Celebration Words: Script die
Accessories:  MISTI, Gemini Junior, Darice adhesive circles

I hope you’ve enjoyed this project and will link up with us this month! We always love seeing your ‘anything goes’ projects but we’d really love seeing you play the fancy fold twist! Just remember, the twist is not mandatory to play! Thanks so much for stopping by today – we’ll see you next time! ;)

Scrappy hugs,

lesliesig

Thinking of You

Hi everyone! I’m stoked to be back on the CutCardStock blog today with an awesome DT inspiration project featuring more of the Astrobright cardstock that was included in our Designer’s Pack – which happens to be on sale this month so be sure to get some! Affiliate links are used in this post at no cost to you. I really appreciate your support! I created a super adorable Get Well card – the flower pot is a pocket and the flowers are adhered to a pull-out card that slides into the pocket! OMG, so cute I can’t stand it!

I started by die cutting all the pieces. I cut three large flowers, three small flowers, the pull-out card base and an embellishing strip from Astrobright Solar Yellow cardstock. Then I cut three large flower centers and six large leaves, three small flower centers and six small leaves, and a thin embellishing strip from Pop-Tone Gumdrop Green cardstock. Next I cut the flower pot and three scalloped rims (to layer together) from Pop-Tone Tangy Orange cardstock. And finally I cut the sentiment layer for the pull-out card from Classic Crest Solar White 80# cardstock.

I assembled the flower pot to form a pocket that the pull-out card slides into. I adhered the centers to the six flowers and two leaves to each flower, then adhered the three large flowers to the pull-out card base and adhered the sentiment layer to the pull-out card. I stamped the front sentiment on the flower pot and the inside sentiment on the pull-out card. I affixed the three smaller flowers to the pull-out card using two Double-Sided Adhesive Foam Circles behind each flower. The dimension is needed for the flowers to hang over the rim of the flower pot when the card is inserted into the flower pot. The final touch was the addition of a tiny iridescent gemstone on each scallop on the rim of the flower pot.

And one more peek… totally loving how this turned out! I’ll be making a few more of these for my stash using different colors of cardstock for the flowers!

CutCardStock products used:
Astrobright Solar Yellow 80# cardstock
Pop-Tone Tangy Orange 65# cardstock
Pop-Tone Gumdrop Green 65# cardstock
Classic Crest Solar White 80# cardstock
Double-Sided Adhesive Foam Circles

Other products used:
Stamps: The Cat’s Pajamas Simply Stacked sentiments
Ink: Stampin’ Up Cajun Craze ink
Dies/Punches: Honey Bee Stamps Flower Pot Card die set
Accessories: Tombow Mono permanent adhesive, Bearly Art precision craft glue, Gemini Junior, MISTI stamp tool, Darice tiny iridescent gemstones

I hope you’ve enjoyed today’s project and you’re inspired to get crafty! Be sure to check out all the awesome cardstock and other goodies at CutCardStock (adhesives, labels, stickers, pens, watercolors and ribbon to name a few). And head on over to the CutCardStock Facebook Page for more inspiration! Thanks so much for stopping by today – we’ll see you next time!

Scrappy hugs,
lesliesig

You’re SO cool…

Happy Saturday, friends! How’s the weather where you are? It’s pretty chilly here and I love it! Affiliate links are used in this post at no cost to you. I really appreciate your support! I’m happy to be back on the Eyelet Outlet blog today with another awesome DT inspiration project! I created a fun card that would be a great Valentine, anniversary or wedding card, or a ‘just because’ kind of card! This card features some of our newest brads in the store which I paired with some awesome Washi Tape. Super simple design!

I cut a standard A2 sized top-folding card base from Neenah Classic Crest Solar White cardstock along with a slightly smaller black cardstock panel for layering. The sentiment is computer-generated which I printed on Neenah Classic Crest Solar White cardstock and trimmed so the sentiment was in the top one-third of the panel, and layered it on the black cardstock panel. I covered a square scrap of Neenah Classic Crest Solar White cardstock with Pink Checked Washi Tape and die cut a stitched square from it. I added two Ice Cream Brads and adhered several tiny black punched hearts. I adhered the die cut square to the layered white panel and adhered it to the card base. 

I cut the inside panel from Neenah Classic Crest Solar White cardstock and embellished it with a strip of the Pink Checked Washi Tape and a narrow strip of black cardstock, stamped the sentiment in black ink and layered the panel on the black cardstock.

One more look… really loving this simple design!

Eyelet Outlet products used:
Checked Washi Tape Pink
Ice Cream Brads

Other products used:
Cardstock/Paper: Neenah Classic Crest Solar White cardstock, American Crafts Black cardstock
Stamps: Paper Smooches Chart Toppers stamp set
Ink: Memento Tuxedo Black ink
Dies/Punches: My Favorite Things Die-namics Stitched Square STAX die, Stampin’ Up Cookie Cutter punch (tiny heart)
Accessories: Tombow Mono permanent adhesive, MISTI stamp tool, Gemini Junior

I hope you’ve enjoyed today’s project! Be sure to check out all the fun goodies at Eyelet Outlet! I can already see you drooling, lol! Be sure to ‘like’ and ‘follow’ Eyelet Outlet Facebook Page to keep up with news and sales, and while you’re at it, join the Eyelet Outlet Fans Facebook group for lots of creative inspiration! Thanks so much for stopping by today – we’ll see you next time! ;)

Scrappy hugs,
lesliesig

Advice from a sunflower

Happy Saturday, friends! Hope you’re having a great weekend! Affiliate links are used in this post at no cost to you. I really appreciate your support! I’m excited to be back on the Eyelet Outlet blog today with another awesome DT inspiration project! I created a pretty CAS ‘thinking of you’ card featuring several awesome products – but the main attraction on this card is the sunflowers! I love all kinds of flowers but I would have to say that the sunflower is my favorite!

I rounded one bottom corner of my Neenah Classic Crest Baronial Ivory cardstock card base to add a little interest. I adhered a small piece of patterned paper to the bottom of the front panel, added a strip of Wood Washi Tape and layered the panel on dark brown cardstock. I added a die cut stem and several Sunflower Brads, and adhered the layered panel to the card base. I die cut a digital sentiment and popped it up on foam pieces for a little dimension. The final touch was the addition of several small Ivory Enamel Dots.

I printed a small sunflower from the digital set on Neenah Classic Crest Baronial Ivory cardstock for the inside and trimmed the panel with the sunflower in the lower right corner. I colored the small sunflower with alcohol markers and embellished the panel with strips of the patterned paper and dark brown cardstock, and stamped the sentiment in brown ink.

One last look… so loving how this turned out!

Sharing in the following challenges:
1. A Perfect Time To Craft Open Challenge: #1-2021 – Anything Goes
2. Classic Design Challenge: January 2021 #1 – Anything Goes
3. Aud Sentiments Challenge Blog: #266 – Anything Goes + A Sentiment
4. Creative Moments: #207 – Anything Goes
5. Pammie’s Inky Pinkies Challenges: #2103 – Anything Goes
6. QKR Stampede: #412 – Anything Goes
7. Scrapping4fun Challenges: #184 – Anything Goes
8. The Crafter’s Cafe Challenge Blog: #258 – Anything Goes

Eyelet Outlet products used:
Sunflower Brads
Wood Washi Tape
Ivory Enamel Dots

Other products used:
Cardstock/Paper: Neenah Classic Crest Baronial Ivory cardstock, Papertrey Ink Dark Chocolate cardstock, Stampin’ Up Painted Autumn DSP
Stamps: Sparkle N Sprinkle Sunflowers digital image set, Paper Wings Productions Sayings & Sentiments stamp set
Ink: Memento Rich Cocoa ink, Nuvo alcohol markers- 466, 403, 389, 391
Dies/Punches: My Favorite Things Die-namics Mini Scallop Rectangle STAX die, Memory Box Forget Me Not Stem die
Accessories:  Tombow Mono permanent adhesive, Bearly Art precision craft glue, Gemini Junior

I hope you’ve enjoyed today’s project! Be sure to check out all the fun goodies at Eyelet Outlet! I can already see you drooling, lol! Be sure to ‘like’ and ‘follow’ Eyelet Outlet Facebook Page to keep up with news and sales, and while you’re at it, join the Eyelet Outlet Fans Facebook group for lots of creative inspiration! Thanks so much for stopping by today – we’ll see you next time! ;)

Scrappy hugs,
lesliesig

Yuletide Greetings diorama card

Hey, hey, hey! Happy Thursday, friends! Affiliate links are used in this post at no cost to you. I really appreciate your support! I’ve popped in this morning with a fun Christmas diorama card that folds flat for mailing! This is another version of the stand-alone Winter Cardinal Diorama that I posted several weeks ago HERE using some of the same stamps and one of the dies. I’m entering this fun fold into The Outlawz Monday Greeting Challenge! Our sponsor is Fred She Said and the challenges are always Anything Goes with a greeting!

I cut the card base from Neenah Classic Crest Solar White 110# cardstock. This card is 5″ x 5-1/2″ when folded flat, and when the front flap is opened the diorama is 4-1/4″ x 5-1/2″. I covered the front flap with candy cane paper, and added a stamped and layered panel cut from Neenah Classic Crest Solar White 80# cardstock embellished with washi tape, an additional stamped and die cut pine cone, and some snowflake bling down the left side. Very festive! ;)

The inside is actually the star of the show… a cluster of die cut pine branches, a pretty red stamped and die cut cardinal, some stamped and die cut pine cones and three red winter berries created with a 1/2″ circle punch, all ‘dusted’ with faux snow (which is actually grit paste), and all viewable through the oval aperture! I stamped the sentiment on Neenah Classic Crest Solar White cardstock, trimmed it and layered it on green cardstock, and adhered it at an angle over the top left of the oval aperture.

Here’s a shot from above so you can see the simple construction. Closing the front flap pushes the diorama to the right which folds the card flat.

And one more peek… this was so much fun! I have a cutting and scoring template for this diorama card that I have put up on my Freebies page, so be sure to take a peek if you’re interested!

Sharing in these additional challenges:
1. A Perfect Time To Craft Open Challenge: #1-2021 – Anything Goes
2. Addicted To Stamps and More: #397 – Christmas
3. Classic Design Challenge: January 2021 #1 – Anything Goes
4. Pammie’s Inky Pinkies Challenges: #2103 – Anything Goes
5. The Crafter’s Cafe Challenge Blog: #258 – Anything Goes
6. The Creative Crafters: #36 – Anything Goes

Products used:
Cardstock/Paper: Neenah Classic Crest Solar White 110# and 80# cardstock, GKD Christmas Pine and Red Hot cardstock, PhotoPlay Holiday Cheer paper
Stamps: Prickley Pear Stamps Cardinals, Cardinals 2 and Fall Leaves stamp sets
Ink: Memento Espresso Truffle ink, Stampin’ Up Tranquil Tide ink, Nuvo alcohol marker- 417
Dies/Punches: Memory Box Stitched Oval Layers die, Prickley Pear Stamps Cardinal die and Pine Branch die set, Stampin’ Up 1-1/4″ and 1/2″ circle punches
Accessories: Tombow Mono permanent adhesive, Bearly Art precision craft glue, Gemini Junior, MISTI stamp tool, Nuvo White Blizzard Glitter Drops, Eyelet Outlet snowflake bling

I hope you’ve enjoyed this project and will come join us in The Outlawz Challenges! Lots of fun going on! Thanks so much for stopping by – we’ll see you next time!

Scrappy hugs,
lesliesig