What’s Mew?

2/29/20 DT Favorite at Crafts Galore Encore Challenge Blog!

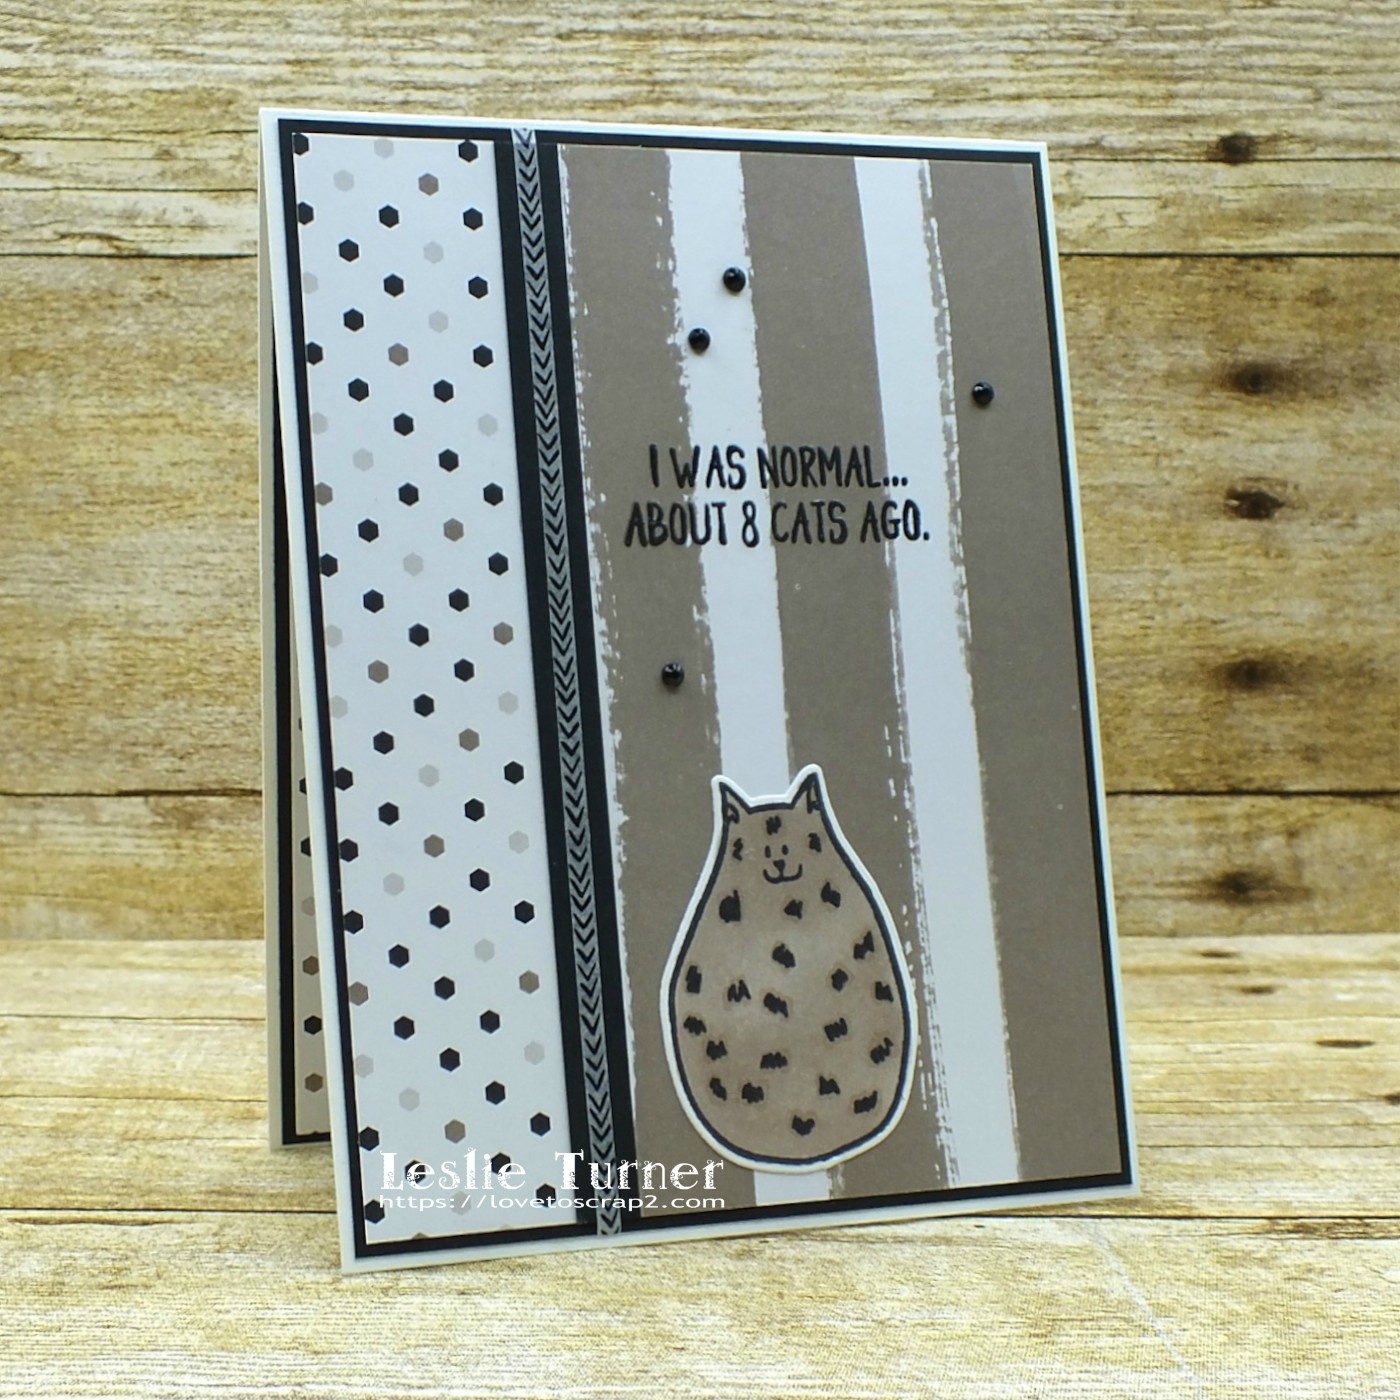
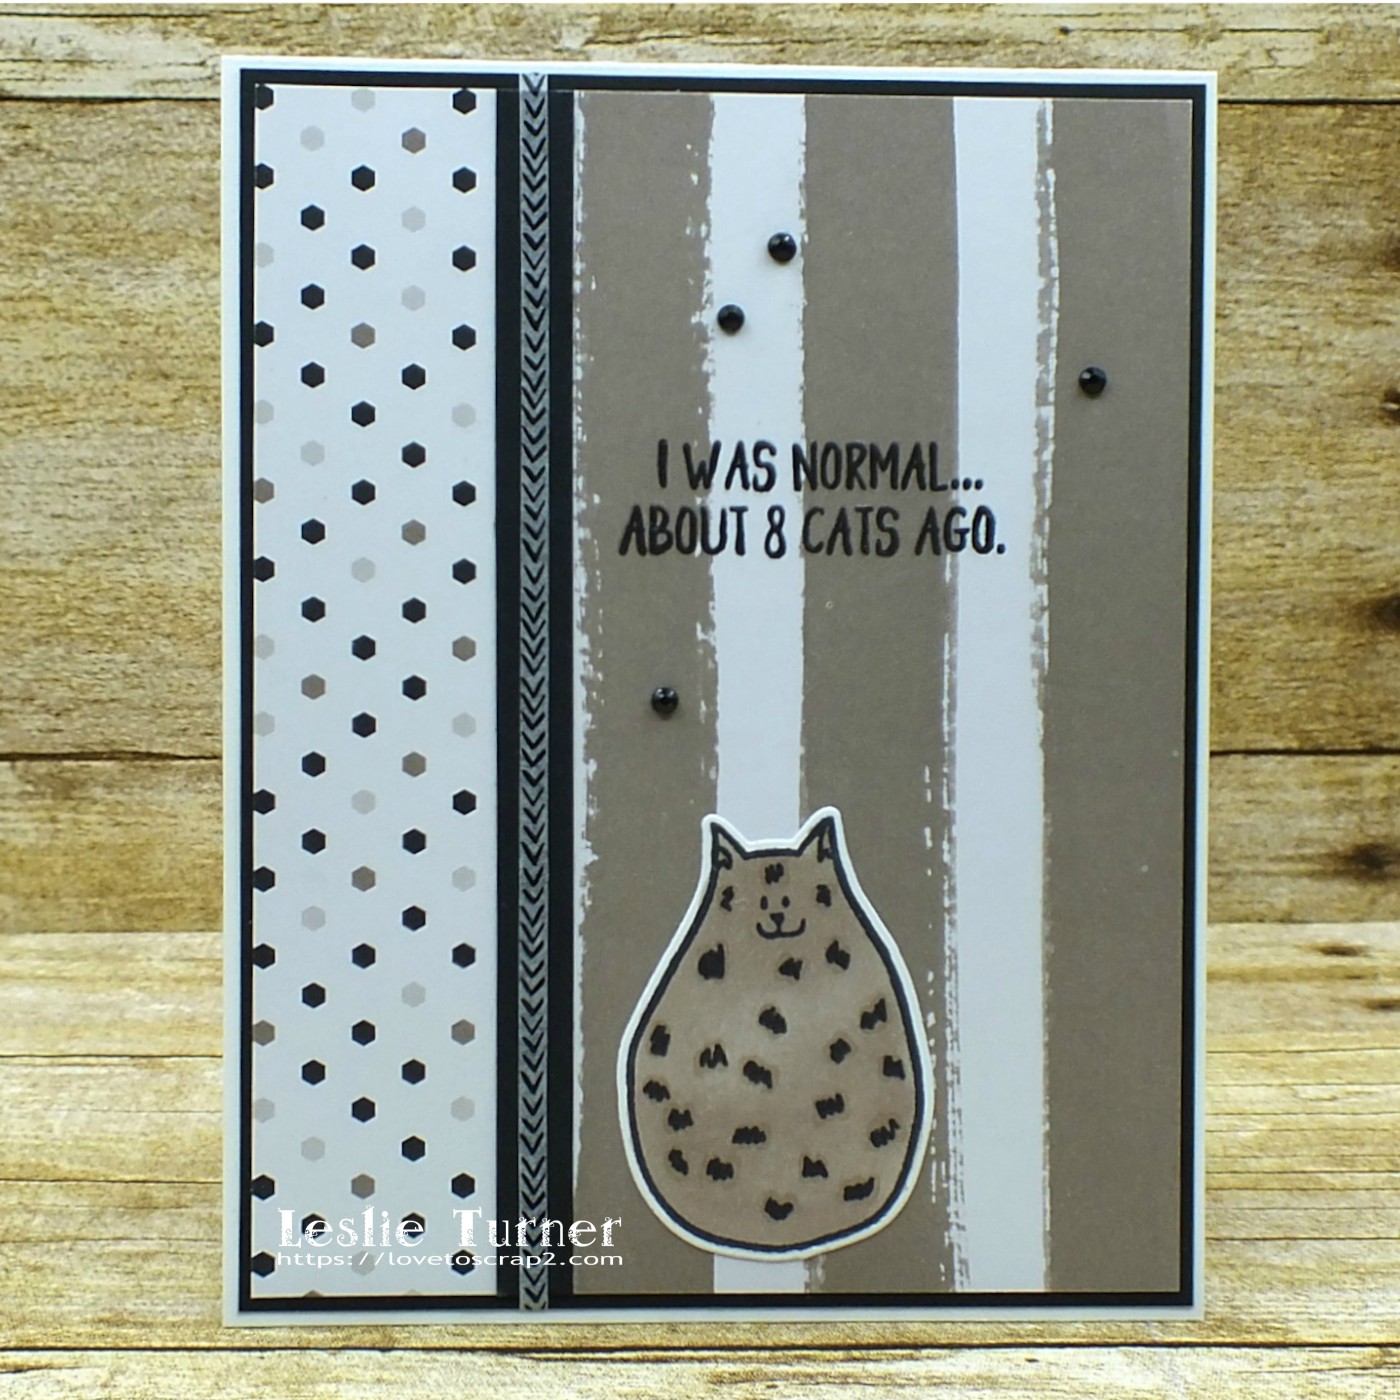
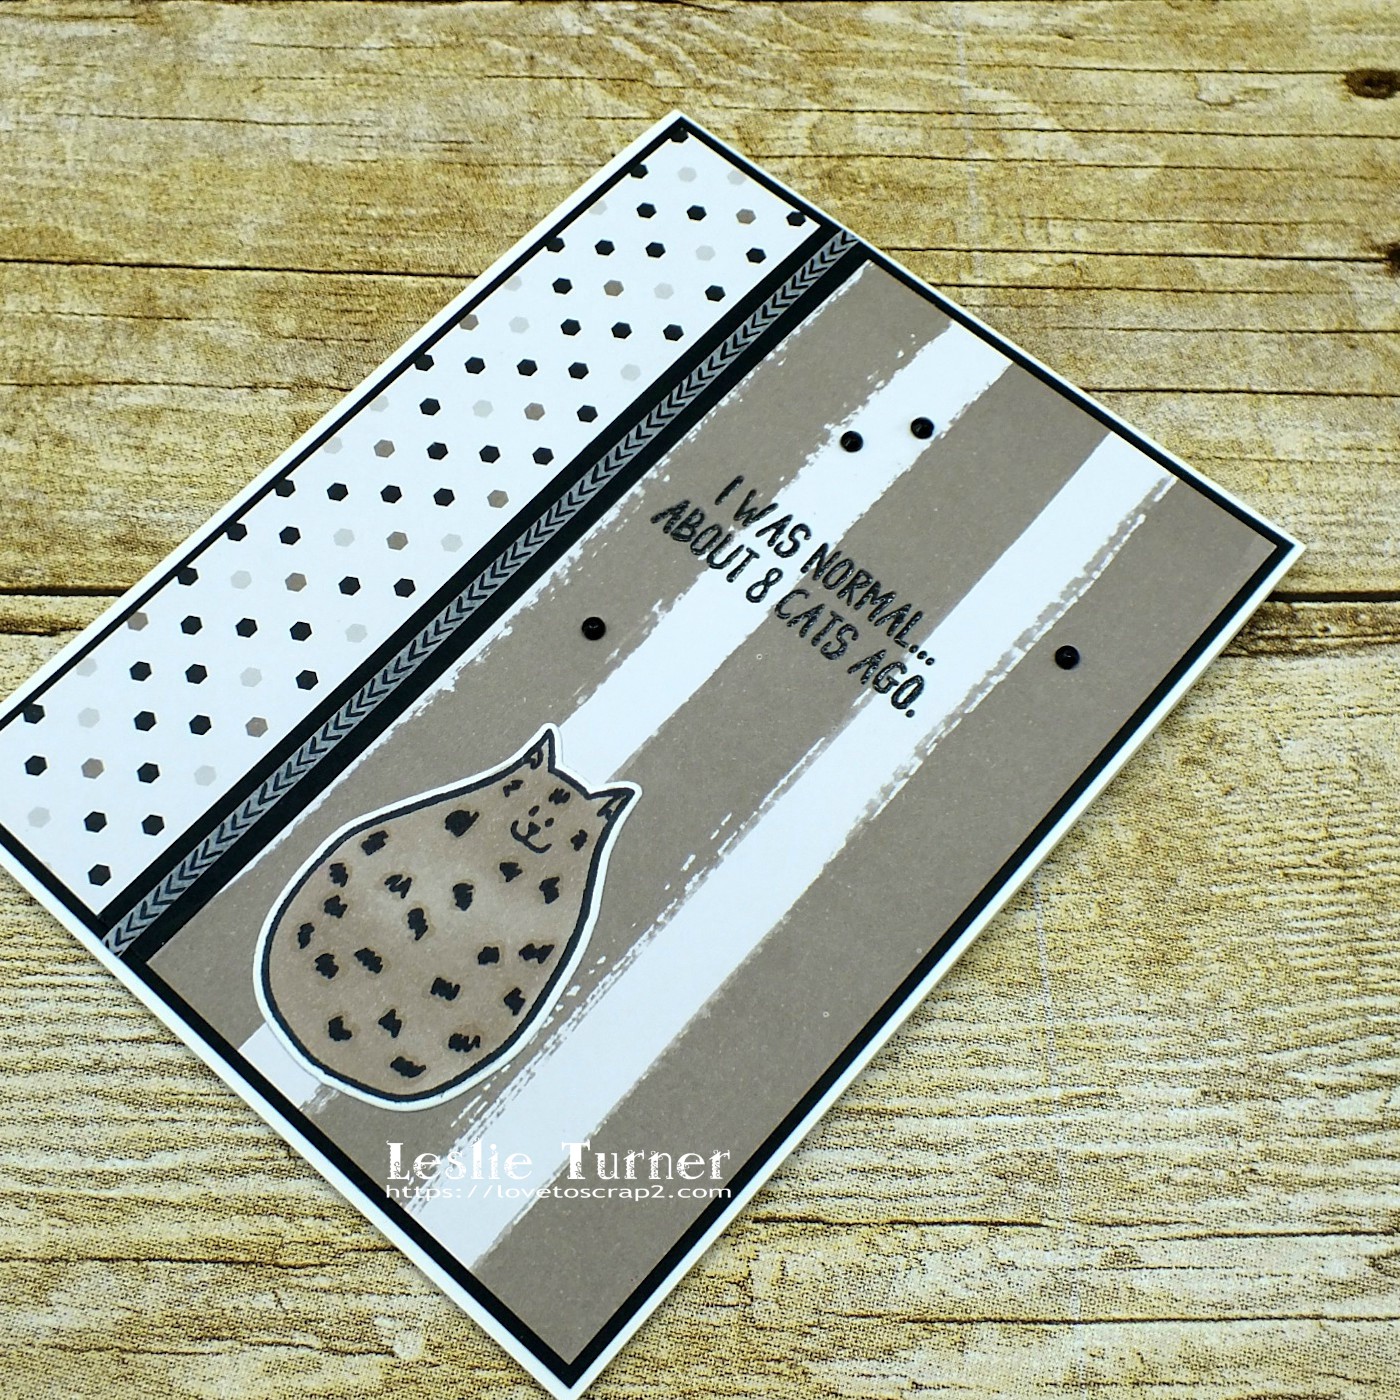
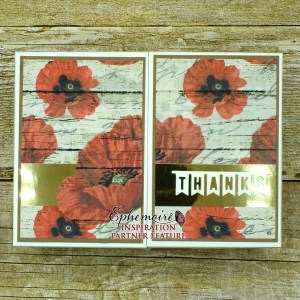
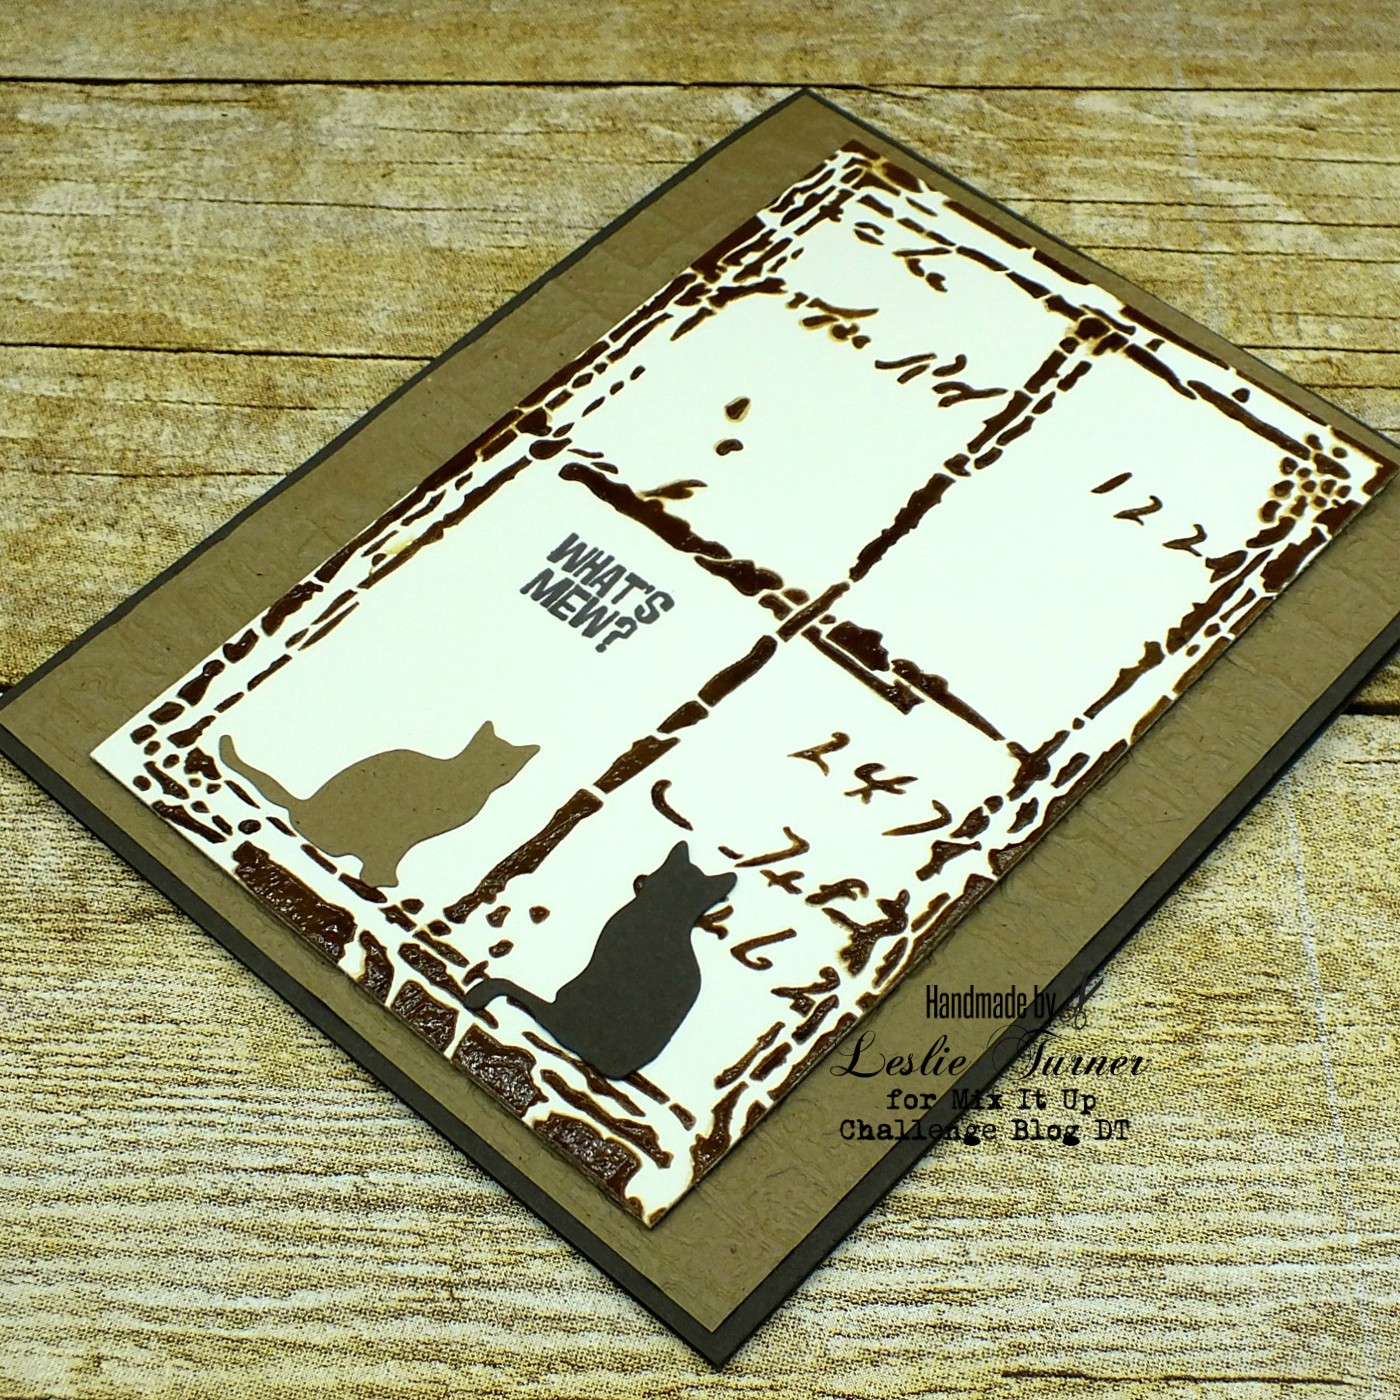
Hello, crafty peeps! Happy Saturday – I hope you’re having a great day! Can’t believe it’s February already! Our February challenge is live this morning over at Mix It Up Challenge Blog and I’m happy to share my DT inspiration project for MIUCB #34 – Anything Goes + Stenciling! I created a fun friendship card featuring a couple kitties looking out the stenciled window having a meowy conversation!

Leslie

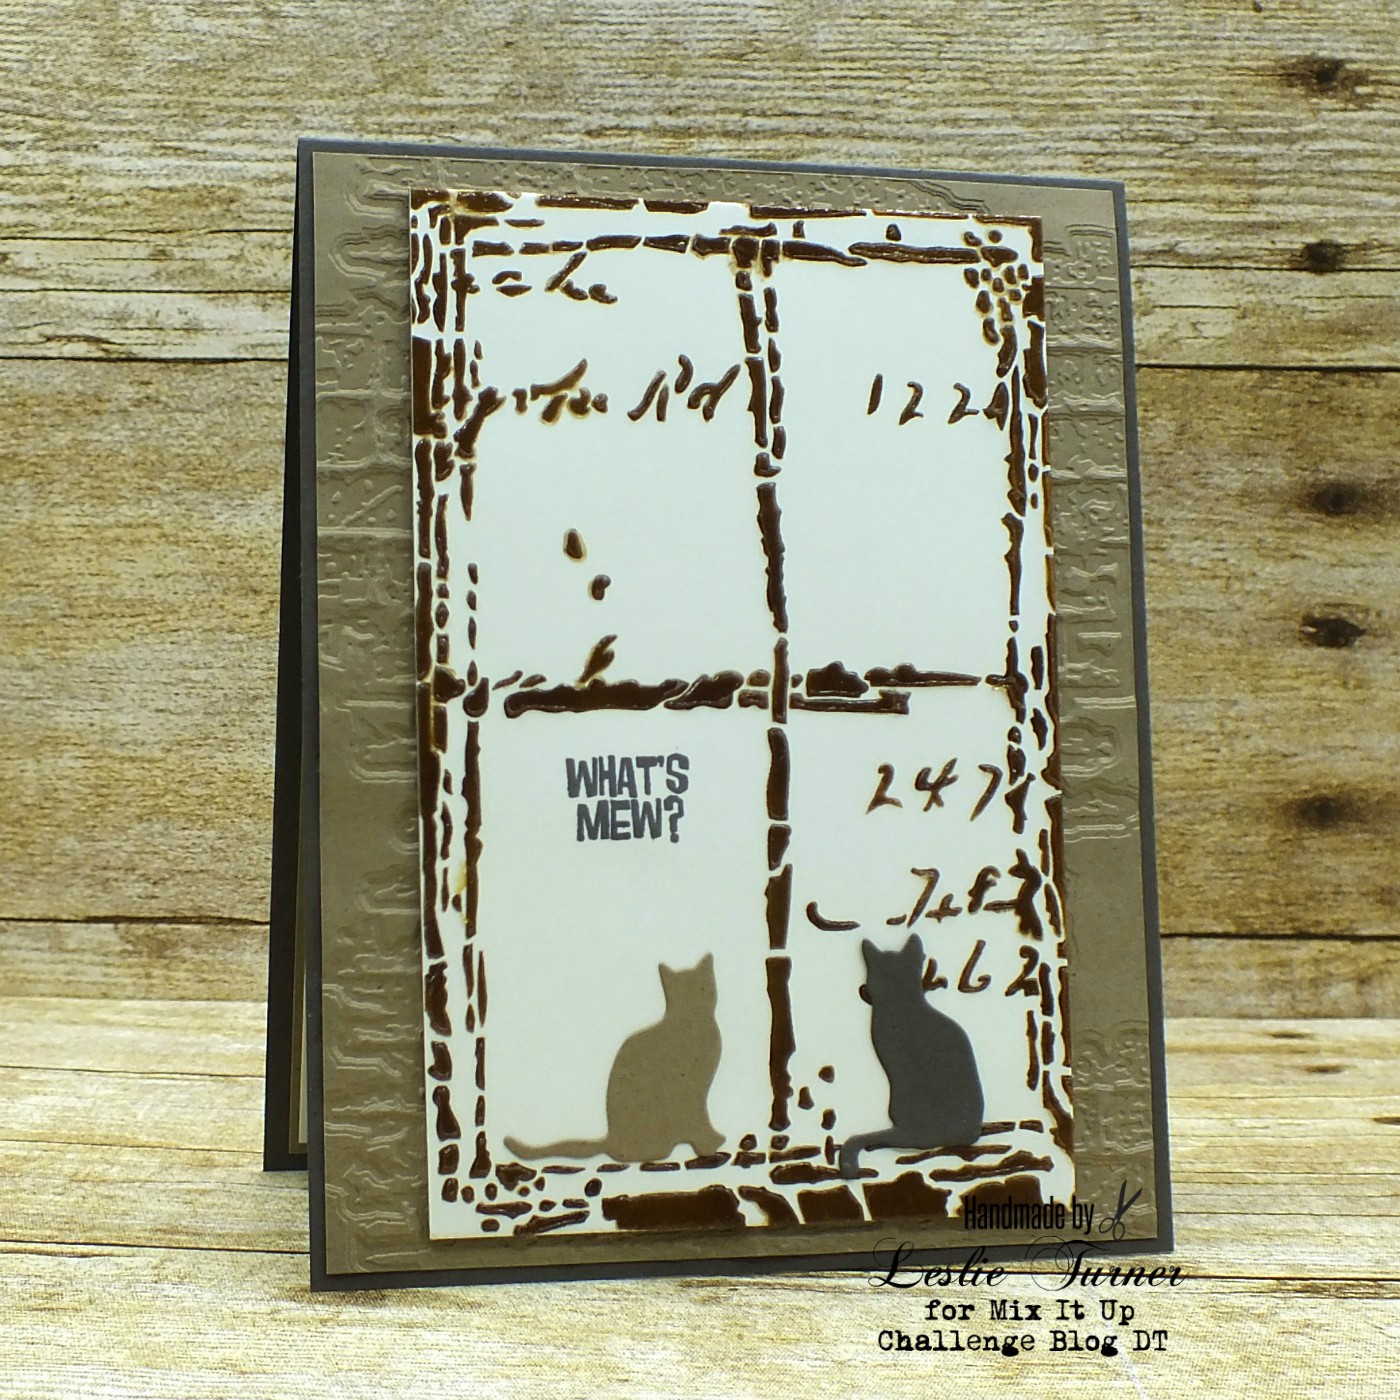
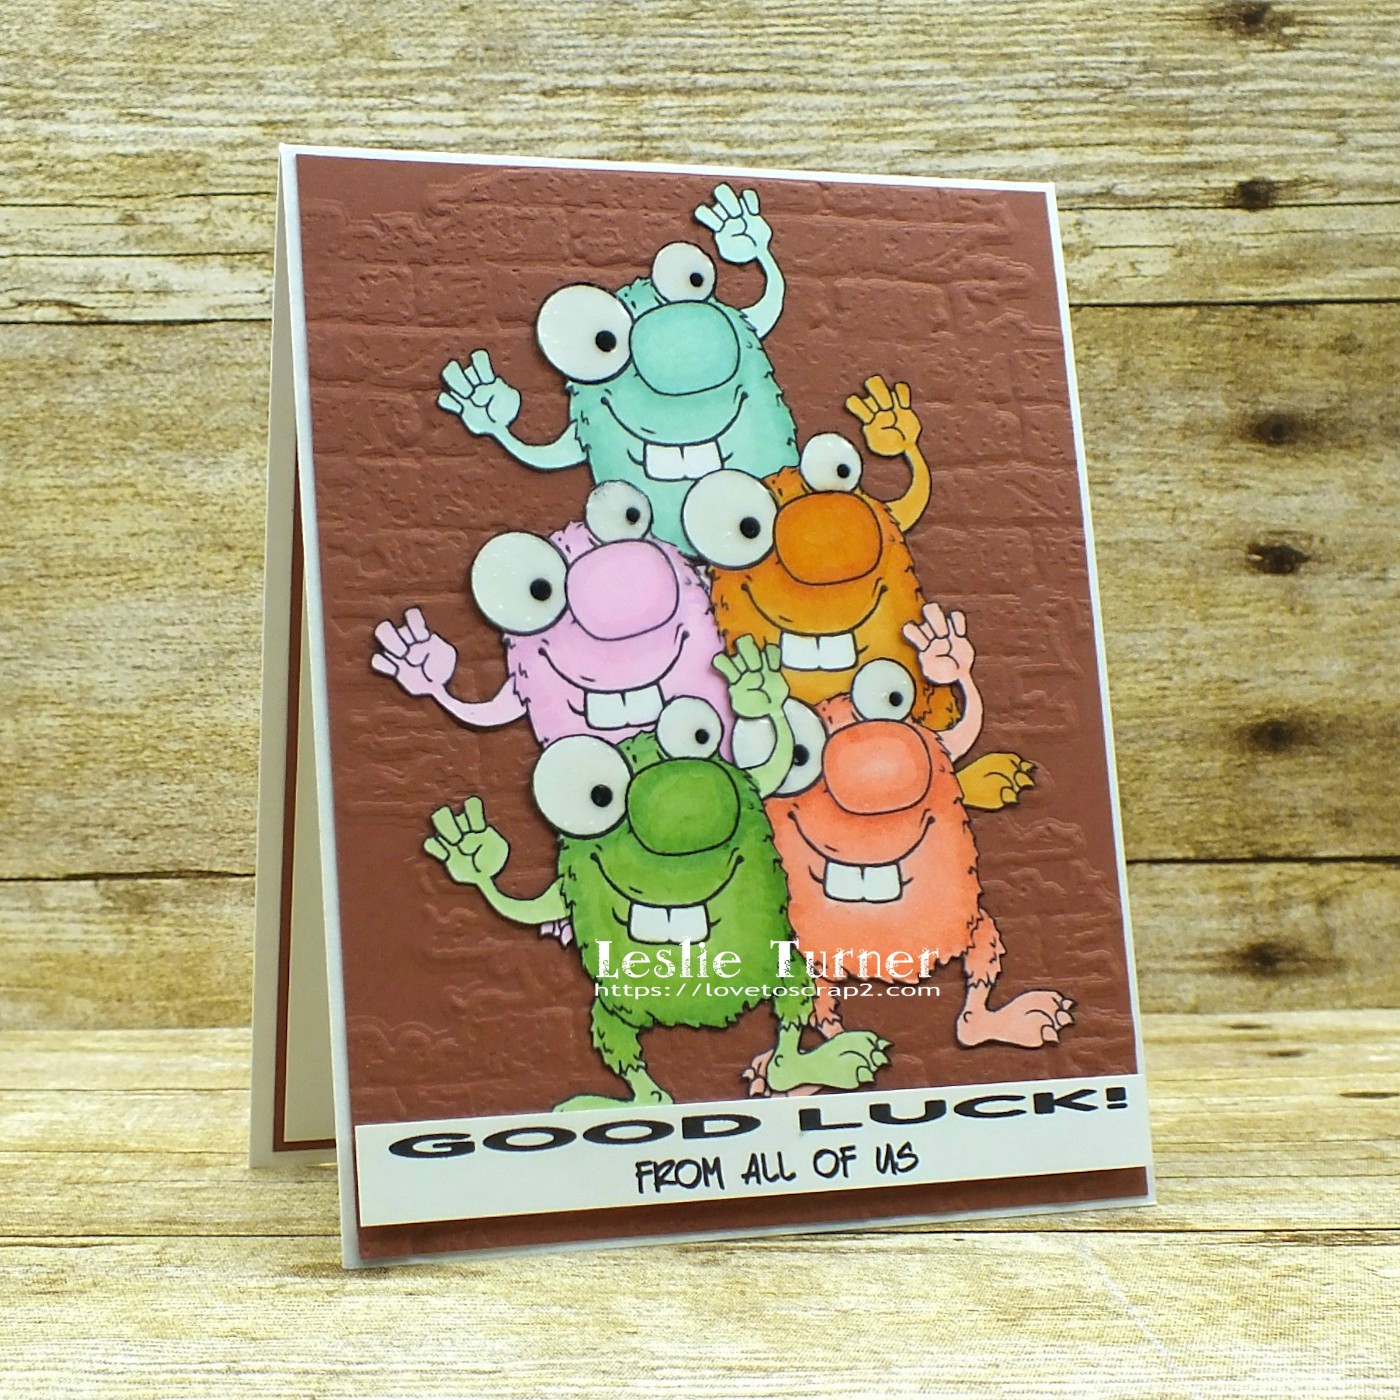
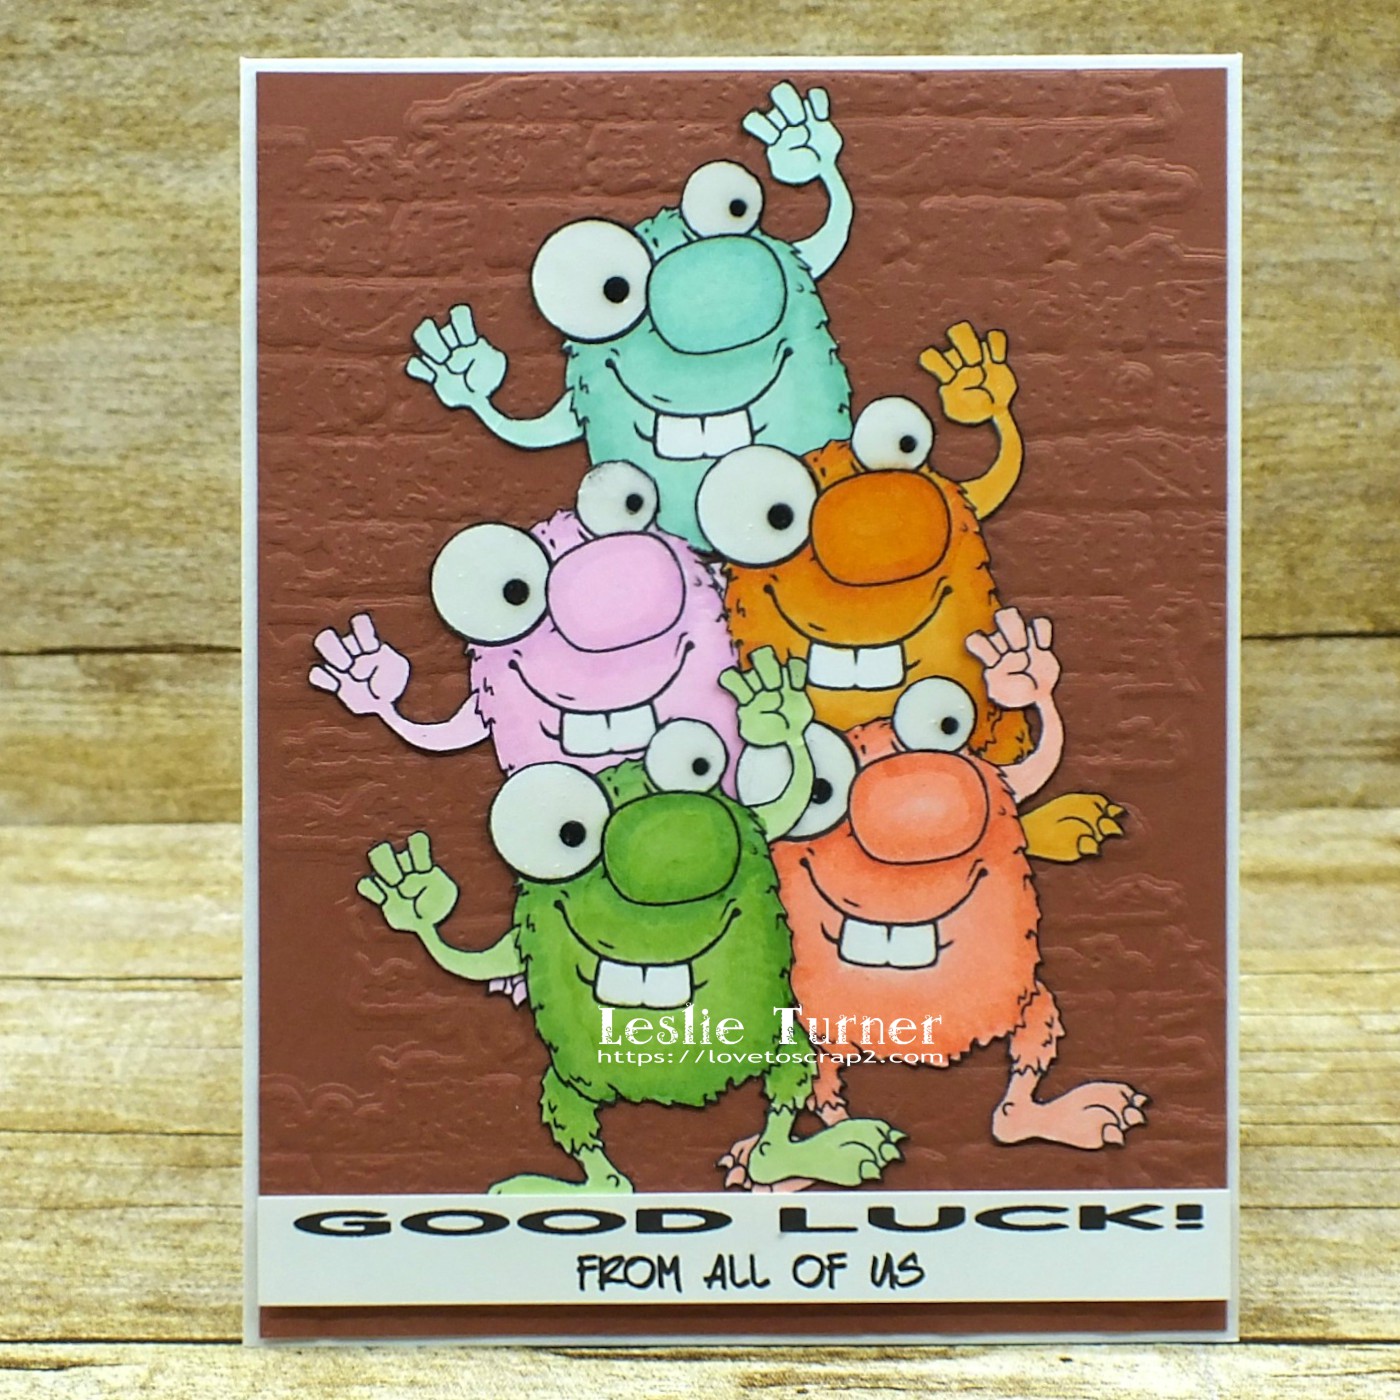
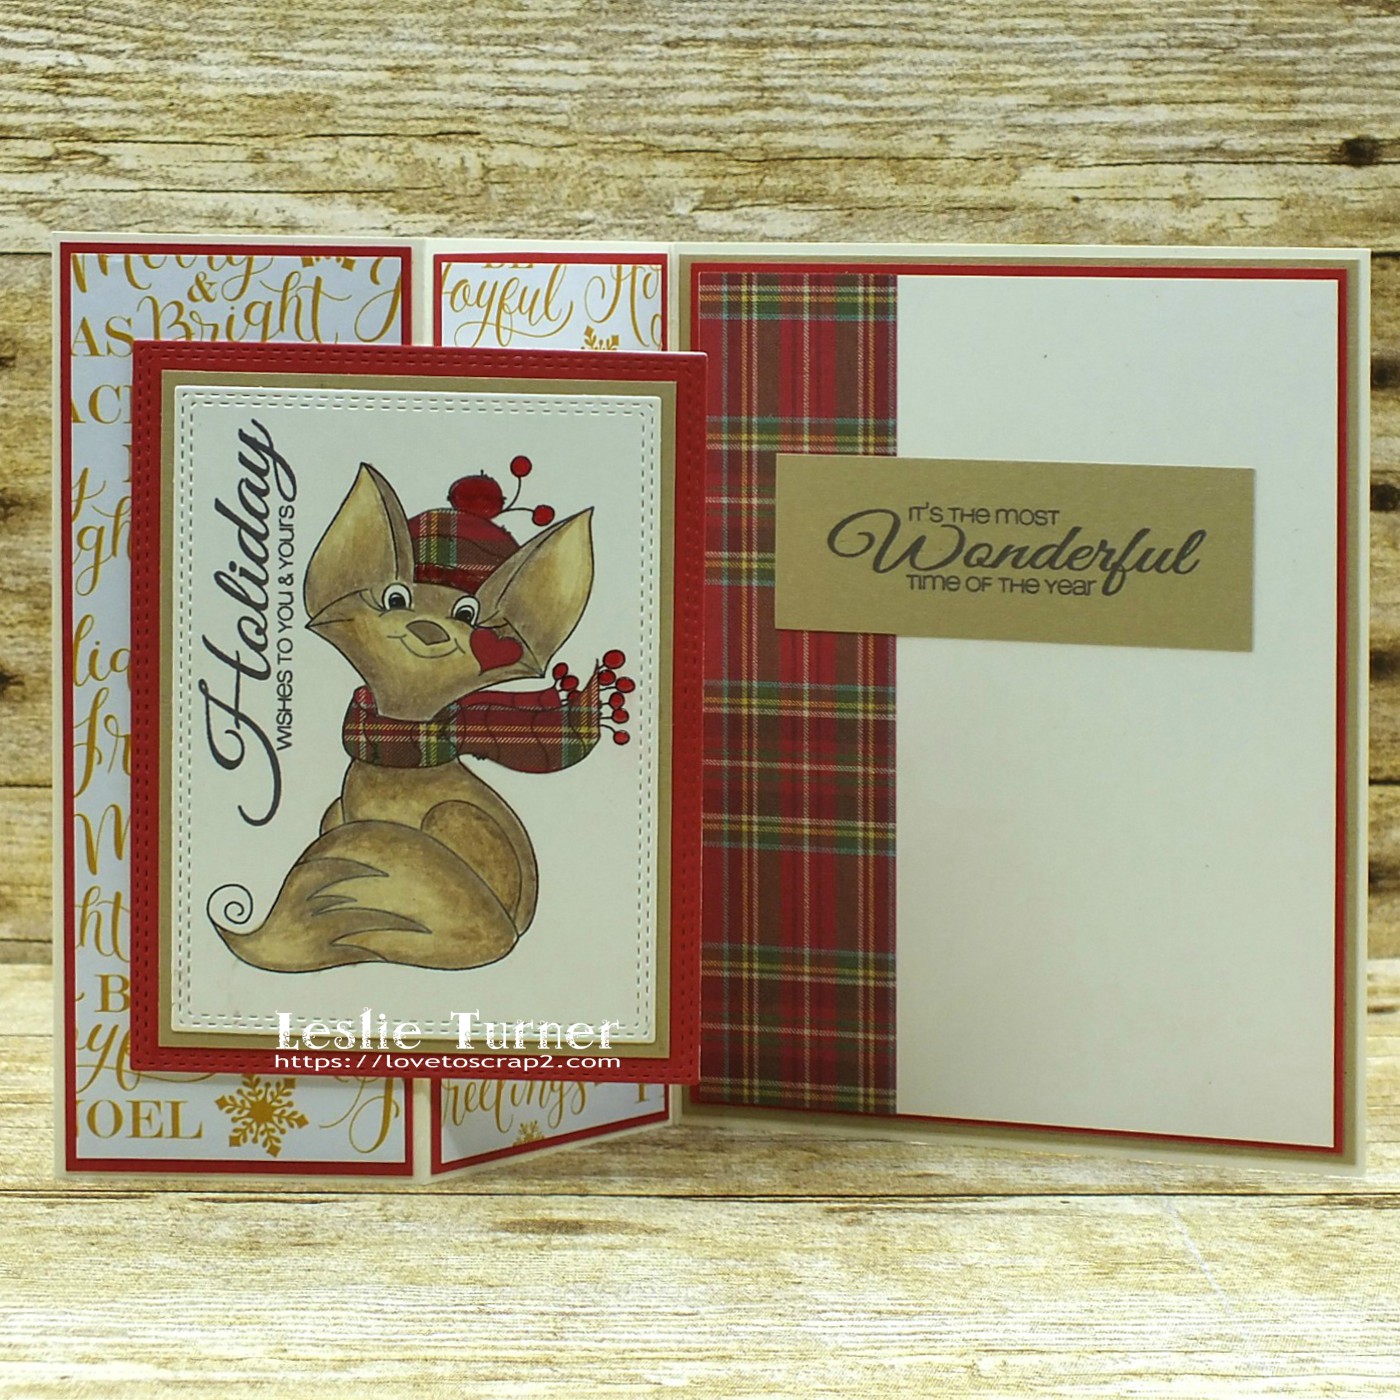
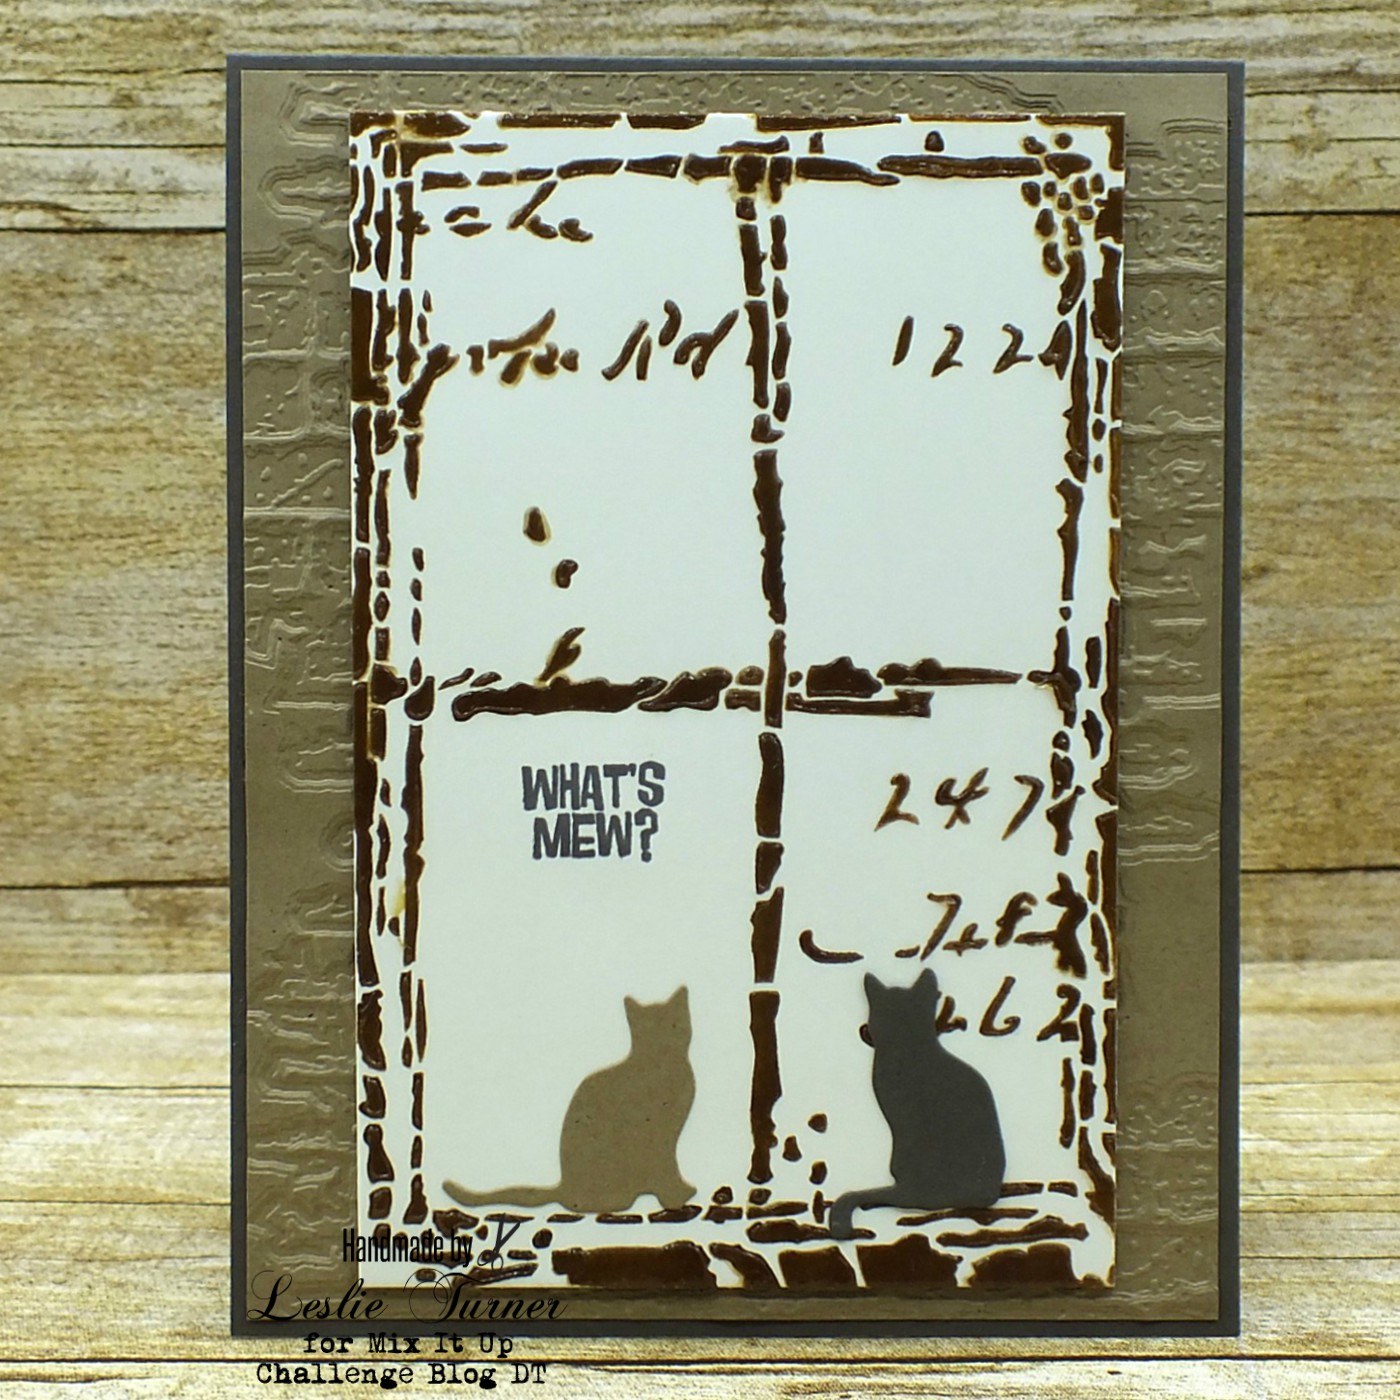
I used Ranger walnut stain ink with the StencilGirl Window Ledger 9 stencil first, then added Dreamweaver translucent embossing paste. I let it dry overnight and then trimmed around the window. I ran some kraft cardstock with a Tim Holtz Alterations brick embossing folder through my Gemini Junior die cutting maching to create the background, and then adhered the window panel to it. I added a couple Impression Obsession die cut kitties and a Paper Smooches sentiment (half of the kitty convo) stamped in Memento Espresso Truffle ink.

2019_1209006a

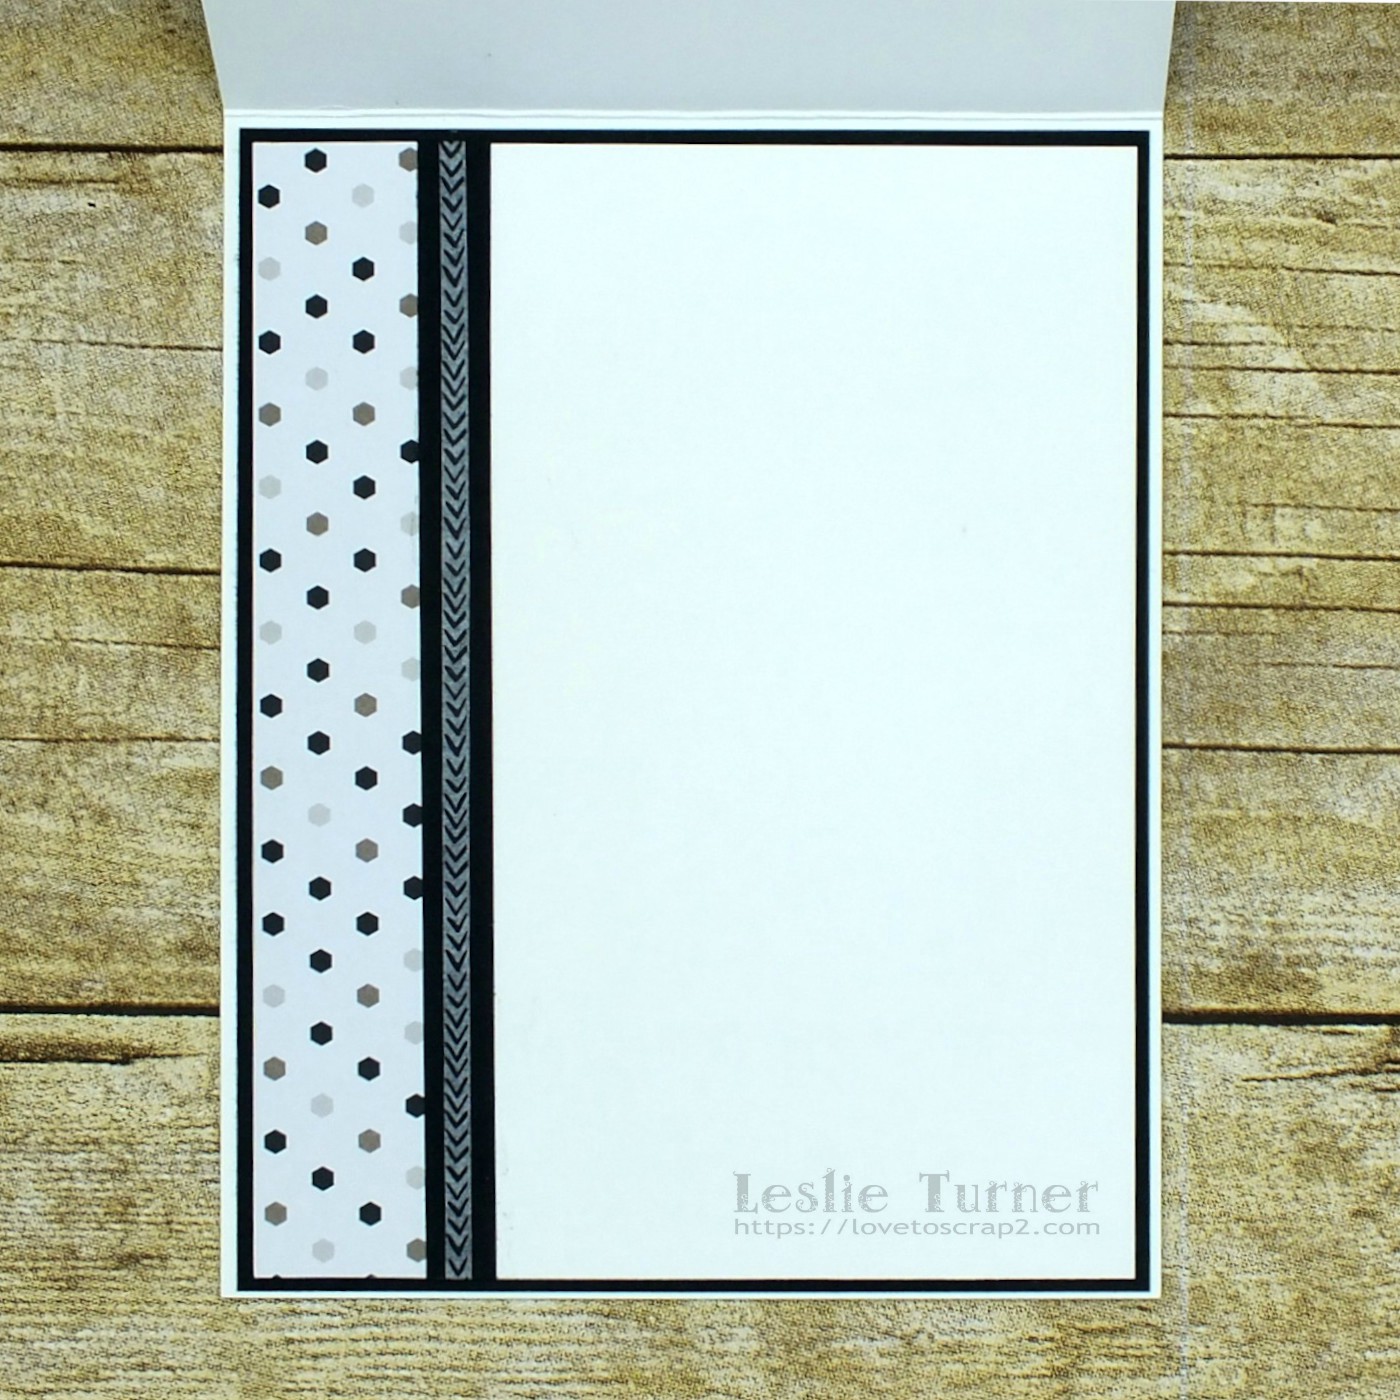
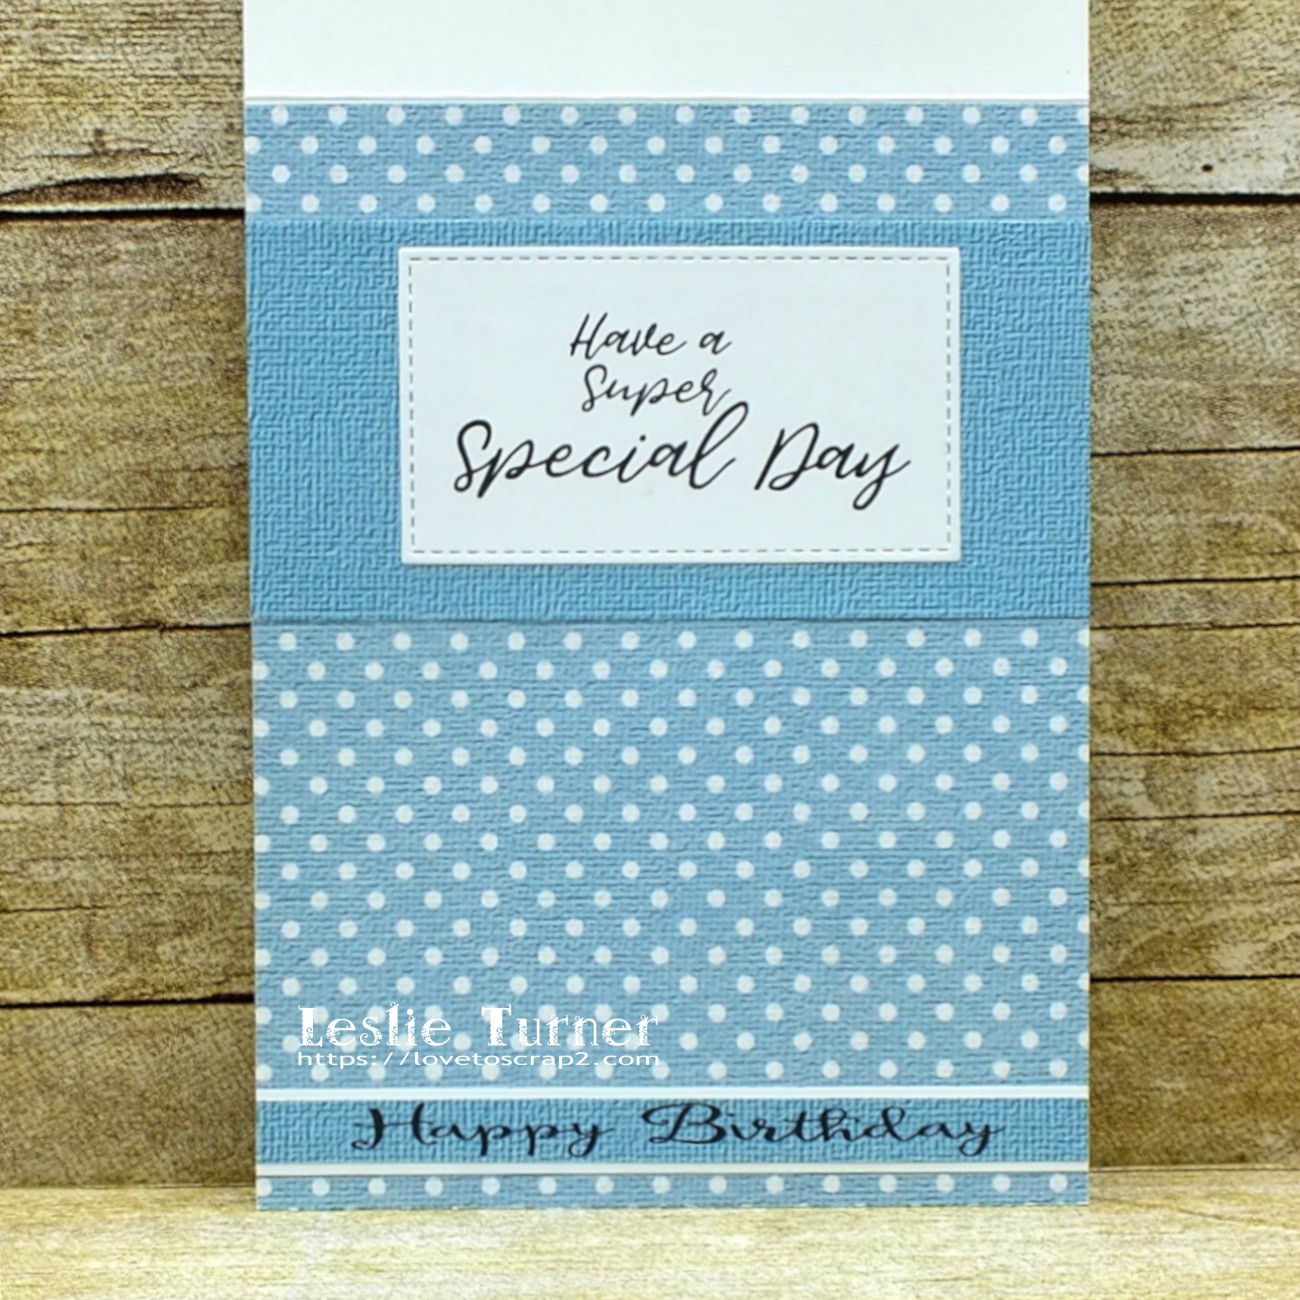
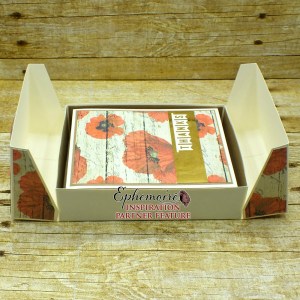
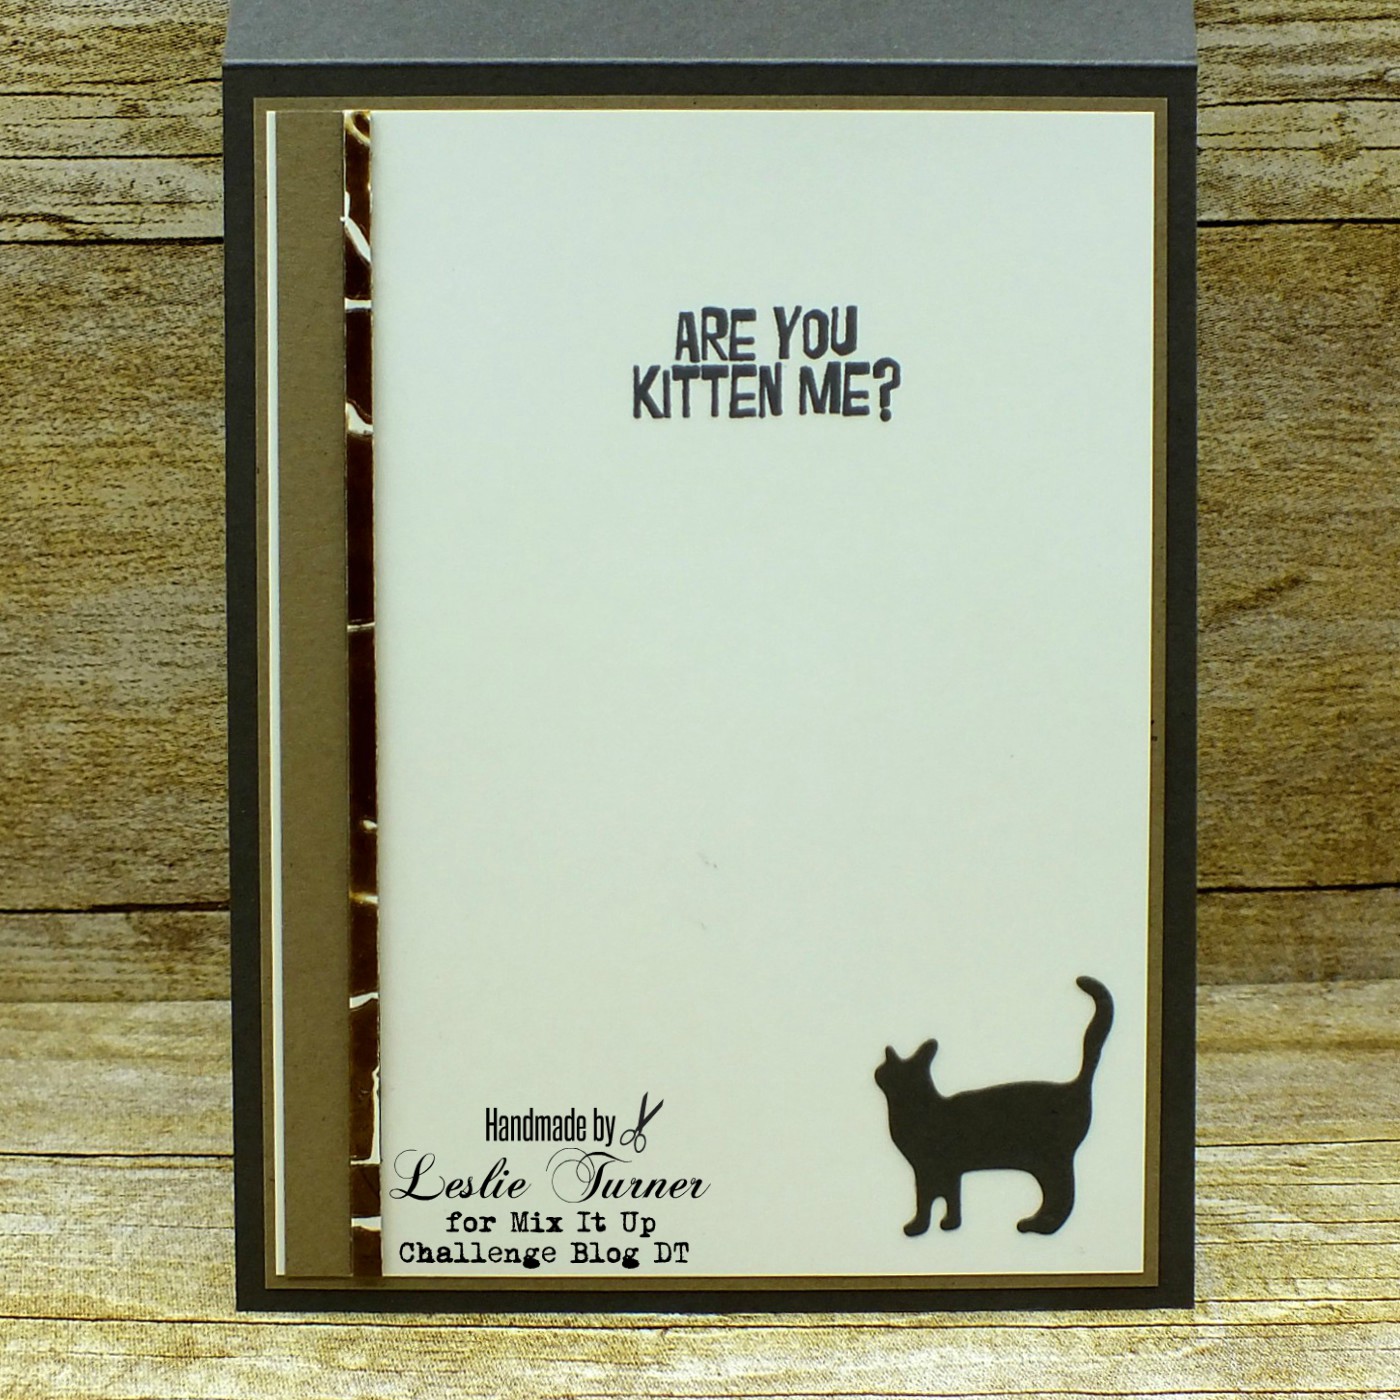
I embellished the inside panel with a strip of leftover kraft cardstock and a sliver of stenciled window trimmed from the front panel. I stamped the other half of the kitty conversation and added another cat die cut.

2019_1209007a

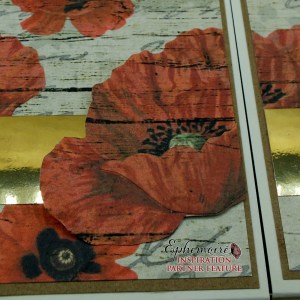
Here’s one more look… loving the texture! What a fun card! ;)

2019_1209008a

I’m entering this kitty card into the following challenges:
2 Crafty Critter Crazies: February Anything Goes
A Bit More Time To Craft: #109 – Anything Goes
A Perfect Time To Craft: #2-2020 – Anything  Goes
Classic Design Challenge: #2 – February Anything Goes
Crafts Galore Encore Challenge Blog: #72 – February Anything Goes
Crafty Calendar Challenge: February – Use Die Cuts or Punches
Creative Moments: #183 – Anything Goes
Krafty Chicks Challenge: #492 – Week 5 Anything Goes
Lemon Shortbread Challenge Blog: #112 – Anything Goes
Not Just Cards Challenge: January Anything Goes
The Crafter’s Cafe: #235 – Anything Goes

Products used:
Cardstock/Paper: Stampin’ Up thick and regular Very Vanilla cardstock, GKD Charcoal Brown cardstock, The Paper Cut kraft cardstock
Stamps: Paper Smooches Feline Friends stamp set
Ink: Ranger walnut stain distress ink, Memento Espresso Truffle ink
Dies/Punches: Impression Obsession Cats die set
Accessories:  StencilGirl Window Ledger 9 stencil, Dreamweaver translucent embossing paste, Gemini Junior die cutting machine, Tim Holtz Alterations/Texture Fades Brick embossing folder, ScraPerfect Best Glue Ever, MISTI stamp tool

I hope you’ve enjoyed this kitty card and will link up at least an anything goes project with us this month! We’d love it if you’d go one step further and play the ‘stenciling’ twist with us too, but you don’t have to! The twist is never mandatory to play in our challenges! Thanks so much for stopping by today – we’ll see you again soon! ;)

Scrappy hugs,
lesliesig

Amour Wedding Album

3/29/20 Winner at Creatalicious Challenges!

Hi everyone! Hope you’re having a great weekend! It’s February 1st already and I consider this the month of love! I’m sure my parents are celebrating their 72nd wedding anniversary in Heaven! It’s time for another fun challenge over at Love To Scrap Challenge Blog and I’m stoked to share my DT inspiration project for LTSCB #130 – Red and/or Pink Equals Love! I zeroed in on the red and created a wedding album for a very special couple in a red, black and white color combo which is one of my favorites.

Leslie

I created the album base and pull-outs from Cardstock Warehouse pure white cardstock. There are five pages and each page alternates a side and top pull-outs. The album is bound with white wire using my Zutter Bind It All.

2019_1128017a

The wire binding and each pull-out are embellished with lengths of ribbon tied with bamboo cord, all from Really Reasonable Ribbon.

Those who know me know that I have a weird sense of humor. I used the awesome Funny Kinda Love stamp set from STAMPlorations and chuckled as I was stamping most of the elements! I will say, though, that not all of them depict humor… there are few serious ones, lol! ;)

I used quite a few die sets for the stamped elements, along with lots of heart stickers. The backs of the first four pull-outs spell L-O-V-E.

The pretty filigree die cuts are from the Crafter’s Companion Opulent Swirls die set. I embellished several of the photos with these.

The bride and groom paid tribute to her late best friend so I embellished this photo with a set of angel wings. It’s been quite a while since I scrapped any photos for an album and I have to say it was great fun printing all these photos and deciding which ones to put where. Super happy with how this turned out!

I’m entering this album into the following challenges:
A Bit More Time To Craft: #109 – Anything Goes
A Perfect Time To Craft: #2-2020 – Anything  Goes
Classic Design Challenge: #2 – February Anything Goes
Crafts Galore Encore Challenge Blog: #72 – February Anything Goes
Crafty Calendar Challenge: February – Use Die Cuts or Punches
Crafty Catz: #491 – Anything Goes with optional twist of favorite color (combo of red, black and white)
Crafty Friends Challenge: #128 – Love/Romance
Creatalicious Challenges: #180 – Anything Goes with optional hearts
Krafty Chicks Challenge: #492 – Week 5 Anything Goes
Not Just Cards Challenge: January Anything Goes
QKR Stampede: #383 – Anything Goes
The Creative Crafters Challenge: #24 – Anything Goes
Time Out Challenges: #154 – Affectionate
Word Art Wednesday: Weeks #424/425 – Anything Goes
World Wide Open Design Team Challenge Blog: #1 – January Anything Goes
Your Scrapbook Place – February Anything Goes

Products used:
Cardstock/Paper: Cardstock Warehouse pure white cardstock; Darice textured cardstock; Canvas Corp A Little Love paper collection and Rainbow of Printed Solid Colors paper collection
Stamps: Stampin’ Up Labeler Alphabet stamp set, STAMPlorations Funny Kinda Love stamp set, Paper Wings Productions Mini Wings clear stamp set
Ink: Memento Tuxedo Black ink (pad and marker), Versamark, spectrum Noir Crystal Clear Sparkle overlay marker
Dies/Punches: Stampin’ Up Curvy Corner Trio punch, Stampin’ Up 1″ and 1-3/8″ circle punches; Spellbinders Labels Eighteen, Classic Ovals Large and Small, Classic Rectangles Large, and A2 Curved Matting Basics B die sets; My Favorite Things Die-namics Essential Fishtail Sentiment Strips, Stitched Square STAX, and Double-Stitched Square STAX die sets; Crafter’s Companion Opulent Swirls die set, Stampin’ Up Itty Bitty Heart punch
Accessories:  Zutter Bind It All with white wire, Hemptique bamboo cord; Really Reasonable Ribbon Christmas Celebrations, Haunted Halloween Assortment, Red & Turquoise Collection and Sweetheart Collection ribbon assortments; MISTI stamp tool, Hero Arts clear embossing powder, Darice black glitter alpha stickers, October Afternoon Daily Flash stickers, Glossy Accents

I hope you’ve enjoyed this wedding album and will link up a red and/or pink project with us this month! We can’t wait to see what you create! Thanks so much for stopping by today – we’ll see you again soon! ;)

Scrappy hugs,
lesliesig

Happy Birthday my friend

2/7/20 Top 3 at Crafty Catz Challenge!
3/7/20 Top 3 at Crafty Calendar Challenge!

Hi everyone! Hope your weekend is off to a great start! Our new challenge is live over at Love To Craft Challenge Blog and I’m excited to share my DT inspiration project for LTCCB #43 – February Anything Goes. I used an awesome sentiment stamp set I bought last month from The Project Bin called Just Sayin’ to create this fun birthday card. Love, love, love – it’s my new favorite stamp set! Stay tuned for more cards using other stamp sets from The Project Bin! ;)

2020_0119005a

Green is my favorite color so I went with a green and white color combo. I used several dies to create the front panel, and stamped the sentiment in black ink. Remember when rosettes were really popular a few years ago? Well, they seem to be coming back – I’m seeing them all over the place. I have dies for a small and large rosette so I made a small one for this card which I paired with punched leaves.

2020_0119006a

I created the inside panel with the same die set I used on the front and embellished it with some leftover strips of cardstock used on the front. The sentiment just cracked me up, as I have a couple friends who would really appreciate it, lol!

2020_0119007a

And here’s one more peek… I’m really loving how this turned out!

2020_0119008a

I’m entering this fun card into the following challenges:
A Bit More Time To Craft: #109 – Anything Goes
A Perfect Time To Craft: #2-2020 – Anything  Goes
Classic Design Challenge: #2 – February Anything Goes
Crafty Calendar Challenge: February – Use Die Cuts or Punches
Crafty Catz: #491 – Anything Goes with optional twist of favorite color (green)
Creatalicious Challenges: #180 – Anything Goes with optional hearts
Creative Inspirations Challenge Blog: January challenge – Something New or Something Old (new stamp set)
Krafty Chicks Challenge: #492 – Week 5 Anything Goes
Moving Along With The Times: #115 – No image – sentiment/quote focus on card
Not Just Cards Challenge: January Anything Goes
{PIN}spirational Challenges: #256 – picture inspiration

QKR Stampede: #383 – Anything Goes
The Sisterhood of Crafters: Newly Acquired Stash (new stamp set)
Word Art Wednesday: Weeks #424/425 – Anything Goes
Your Scrapbook Place – February Anything Goes

Products used:
Cardstock/Paper: Cardstock Warehouse Sweet Tooth cardstock, DCWV Seeing Dots cardstock, American Crafts Key Lime cardstock
Stamps: The Project Bin Just Sayin’ stamp set
Ink: Memento Tuxedo Black ink
Dies/Punches: Tim Holtz Alterations Mini paper Rosettes Sizzlits, Just Rite Stitched A2 Banners and Rectangles die set, Stampin’ Up Leaf Punch
Accessories:  ScraPerfect Best Glue Ever, MISTI stamp tool, Gemini Junior die cutting machine, Doodlebug Design Sprinkles Limeade Assortment

I hope you’ve enjoyed today’s project and will link up with us this month! We can’t wait to see whatever you’re working on! Thanks so much for stopping by today – we’ll see you next time! ;)

Scrappy hugs,
lesliesig

Faceted Christmas Ornaments

2/7/20 Honorable Mention at Creative Moments!
2/18/20 Top 3 at Not Just Cards Challenges!

Hello, crafty friends! It’s Saturday and I hope you have an awesome weekend planned! A new challenge is live over at Merry Little Christmas Challenge Blog and I’m thrilled to share my DT inspiration project for MLCCB #19 – February Anything Christmas Goes! I created some pretty faceted Christmas Ornaments!

Leslie

My inspiration for these faceted ornaments came from The Paper Pixie HERE and HERE. Julie is one talented lady and I love watching her videos! These look complex but you’d be surprised at how easy they are to make!

2019_1128001a

I grabbed some Stampin’ Up Cherry Cobbler and GKD Fresh Asparagus cardstock, and cut and scored all the bases for five long and three round ornaments.

2019_1128002a

I pulled out one Echo Park and two PhotoPlay Christmas collection packs, and cut all the squares, rectangles and triangles needed to layer onto the bases, using a variety of prints.

2019_1128003a

I used either gemstones, gumdrops, Glossy Accents or shimmery gold pen accents on the ornaments. The red/gold and brown/gold ribbon is from Really Reasonable Ribbon.

2019_1128004a

I’m so happy with how these turned out and I’m sure I will be making more of these later on! The sky is the limit with colors and prints! ;)

I’m entering these ornaments into the following challenges:
A Bit More Time To Craft: #109 – Anything Goes
A Perfect Time To Craft: #2-2020 – Anything  Goes
Classic Design Challenge: #2 – February Anything Goes
C.R.A.F.T. Challenge: #542 – Christmas
Crafts Galore Encore Challenge Blog: #72 – February Anything Goes
Creative Moments: #183 – Anything Goes
Fab ‘n’ Funky Challenges: #466 – Christmas
Krafty Chicks Challenge: #492 – Week 5 Anything Goes
Not Just Cards Challenge: January Anything Goes
The Crafter’s Cafe: #235 – Anything Goes
The Creative Crafters Challenge: #24 – Anything Goes
Word Art Wednesday: Weeks #424/425 – Anything Goes
World Wide Open Design Team Challenge Blog: #1 – January Anything Goes
Your Scrapbook Place – February Anything Goes

Products used:
Cardstock/Paper: Stampin’ Up Cherry Cobbler cardstock, GKD Fresh Asparagus cardstock, PhotoPlay Holiday Cheer and Here Comes Santa Collection Kits, Echo Park A Perfect Christmas Collection Kit
Ink: Sakura Clear Star Gelly Roll pen; Studio 71- YG7 (to color clear rhinestones)
Dies/Punches: 1/8″ hole punch
Accessories:  Really Reasonable Ribbon Rustic Hues Collection, Zva Creative green gemstones, Stampin’ Up clear rhinestones, Your Next Stamp red Glittered Gumdrops, Glossy Accents

I hope you’ve enjoyed today’s project and will link up a Christmas project with us this month! We can’t wait to see what you create! Remember, it’s NEVER too early to get started on those Christmas cards or projects because the holidays will be here before you know it! Thanks so much for stopping by today – we’ll see you again soon! ;)

Scrappy hugs,
lesliesig

I was normal… about 8 cats ago.

Hello, friends! I’ve popped in this morning to share a fun note card I created using the awesome Feline Good clear stamp set from The Project Bin! I have a few ‘free’ days before the 1st of February rolls around to create some projects that aren’t for design teams, so I’m taking advantage, lol! The fat cats and sentiments in this set are amazing, and the cat dies are included! The hubby and I are definitely crazy cat people – we have nine fur babies that we love as much as our human kids and grandkids!

2020_0125005a

I chose two coordinating papers in neutral colors and some skinny Washi Tape to create the front panel for this note card which features the taller of the two fat cats in this stamp set. I did some real basic coloring of the cat with alcohol markers and then heat embossed the sentiment in black.

2020_0125006a

I embellished the inside panel to match the front panel somewhat, and left plenty of blank space to write a message.

2020_0125007a

And one more peek… love how this turned out! We ARE crazy cat people after all, lol!

2020_0125008a

I’m entering this adorable note card into the following challenges:
Brown Sugar Challenge Blog: #297 – January Anything Goes
Creative Inspirations Challenge Blog: January challenge – Something New or Something Old (new stamp set)
Creative Moments: #183 – Anything Goes
Lemon Shortbread Challenge Blog: #112 – Anything Goes
Not Just Cards Challenge: January Anything Goes
The Creative Crafters Challenge: #24 – Anything Goes
The Sisterhood of Crafters: Newly Acquired Stash (new stamp set)
World Wide Open Design Team Challenge Blog: #1 – January Anything Goes

Products used:
Cardstock/Paper: Cardstock Warehouse Pure White cardstock, American Crafts Black cardstock, Stampin’ Up Go Wild DSP stack
Stamps/Dies: The Project Bin Feline Good stamps and dies set
Ink: Spectrum Noir- BG4, BG5; Memento Tuxedo Black ink, Versamark
Accessories: Gemini Junior die cutting machine, MISTI stamp tool, Hero Arts clear embossing powder; ScraPerfect Best Glue Ever, Perfect Crafting Pouch and Perfect Cleaning Pouch; Me & My Big Ideas skinny Washi Tape, Darice black gemstones

I hope you’ve enjoyed this card and will check out all the fun stamps and dies at The Project Bin! I’m fairly new to this online store but I can tell you that I see lots of products that I plan to add to my stash! Thanks so much for stopping by today – we’ll see you next time! ;)

Scrappy hugs,
lesliesig

Happy Birthday

Hi friends! Happy Saturday! I have a fun project to share with you today – an absolutely adorable birthday card that’s fairly simple but packs a powerful punch! This is a bi-level card base, meaning the front flap is cut slightly shorter than the back.

2020_0101013

I colored the adorable Polkadoodles digital image with Prismacolor pencils and cut it with a stitched oval die, then adhered it to a stitched mini scallop oval die cut. I adhered pink paper flowers around the image and tiny white flat-back pearls in the upper left and lower right corners.

2020_0101014

I embellished the inside with coordinating digital papers and cardstock, along with a digital sentiment cut with a stitched rectangle die. As mentioned earlier, the back flap of the card base is slightly longer than the front, so the main birthday sentiment strip at the very bottom will be visible when the card is closed (which you’ll see in the last photo).

2020_0101016

One more look… super happy with how this turned out! I don’t use paper flowers very often these days but I really love how they look. I might just have to re-think that. ;)

2020_0101017

Products used:
Cardstock/Paper: Stampin’ Up thick and regular Whisper White cardstock, Polkadoodles Octavia Moonfly Big Kahuna Digital Craft Download Bundle (Paper Heaven 1 and Plain Janes digital papers)
Stamps: Polkadoodles Big Bunch Winnie Celebrations 1 digital image and Winnie Celebrations 1 & 2 Sentiments
Ink: White Sharpie paint marker, Pentel Slicci Pink Metallic pen
Dies/Punches: My Favorite Things Stitched Rectangles STAX die, My Favorite Things Die-namics Stitched Mini Scallop Oval STAX die
Accessories:  ScraPerfect Best Glue Ever and Embellie Gellie; Prismacolor pencils- Pink, Process Red, Crimson Red, Light Cerulean Blue, Apple Green, Light Umber, Yellow Ochre, Aquamarine, White, Cream, Peach, Light Peach; Wild Orchid Crafts paper flowers, Darice white flat-back pearls

I hope you’ve enjoyed this project! Thanks so much for stopping by today – we’ll see you next time! ;)

Scrappy hugs,
lesliesig

Good Luck from all of us

Hi friends! Happy Hump Day! I’ve been in my studio today and created a project that’s not for a design team (I know, that’s hard to believe, lol) – its for the Twistoon Digi Stamps January Progressive Challenge. As I have mentioned before, if you love twisted cartoons images, this is the place for you! Lisa’s art is amazing! I chose the Progressive Monster 1 digital image for this retirement card. I’ll be officially retiring this year so I’m in that kind of frame of mind! This image is one of two freebies Lisa is offering in the Twistoon Digi Stamps store specifically for this progressive challenge. Isn’t he adorable?!

2020_0122001a

I used a brick embossing folder for the background panel. I printed the monster five times and colored him up in five different colors with Spectrum Noir alcohol markers to create my little group of friends. I arranged them on the background and added a computer-generated sentiment across the bottom popped up on foam tape. The final touch was Glossy Accents to their eyeballs. ;)

2020_0122002a

The inside sentiment is computer generated as well, cut into a panel and embellished with a leftover strip of cardstock used on the front.

2020_0122003a

And one more look… this is so stinkin’ cute I can’t even stand it! ;)

2020_0122004a

Products used:
Cardstock/Paper: Cardstock Warehouse Sweet Tooth cardstock, GKD Faded Brick and White cardstock
Stamps: Twistoon Digi Stamps Progressive Monster 1 digital image
Ink: Spectrum Noir- LV1, PL1 OR1, OR3, LG3, LG4, LG5, BT2, BT4, CR1, CR10
Accessories:  ScraPerfect Best Glue Ever, Tim Holtz Alterations Texture Fades Bricked embossing folder, Gemini Junior die cutting machine, Glossy Accents

I hope you’ve enjoyed this card! Be sure to check out Twistoon Digi Stamps and join her group in Facebook if you’re the twisted cartoon digi type! Thanks for stopping by today – we’ll see you next time! ;)

Scrappy hugs,
lesliesig

Holiday Wishes to you and yours

Hello, friends! Hope you’re having a good week! Our new challenge is live over at Southern Girls Challenge and I’m stoked to share my first Southern Girls Challenge DT inspiration project with you today! The theme for our challenge is Anything Goes and our sponsors this time are Auzz Trinklets, JMC Designs and Jan’s Digi Stamps, so come on over and play for a chance to win a prize! I was provided the Spicy Fox Collection from JMC Designs and created a sweet Christmas card using one of the images named Ginger! It’s never too early to start on those Christmas cards!

2019_1210021a

I created a Z-fold card base and layered patterned paper and cardstock on all the panels. I colored the sweet Ginger image with Prismacolor Pencils, cut it with a double-stitched rectangle die and layered it on tan and red cardstock. I paper-pieced her scarf and hat with red plaid paper, and added Glossy Accents to the tiny round elements. I stamped the vertical sentiment in brown ink.

2019_1210022a

I embellished the inside panel with the red plaid paper and layered it on tan and red cardstock, then added the stamped sentiment on a small tan panel.

2019_1210023a

And here’s one more look completely opened up. I love this fold and I’m thrilled with how it turned out! Pair an adorable image with some pretty papers and *poof* you have an awesome card! ;)

2019_1210025a

Products used:
Cardstock/Paper: Stampin’ Up thick and regular Very Vanilla cardstock, The Paper Studio Four Seasons and Everything in Between -2- paper pad, American Crafts Crimson and Brown Sugar cardstock
Stamps: JMC Designs Spicy Fox Collection (Ginger), CAS-ual Fridays Stamps Snowy Sayings stamp set
Ink: Memento Espresso Truffle ink
Dies/Punches: Cottage Cutz Double-Stitched Rectangles die
Accessories:  Prismacolor Pencils- Crimson Red, Ginger Root, Light Umber, Dark Brown; Gemini Junior die cutting machine, MISTI stamp tool, ScraPerfect Best Glue Ever

I hope you’ve enjoyed today’s project and will link up a project with us this fortnight! We’d love to see what you create! And be sure to check out all amazing goodies at Auzz Trinklets, JMC Designs and Jan’s Digi Stamps! Thanks so much for stopping by today – we’ll see you next time! ;)

Scrappy hugs,
lesliesig

Painted Poppies Boxed Set

Hello, my crafty friends! I hope you’re having a good Hump Day! I’m excited to share my Ephemoire inspiration project with you this morning. If you haven’t already done so, be sure to head over to the Ephemoire Etsy Shop to check out all the amazing digital printables… there are collage sheets, digital papers, journal kits, clip art and mixed media printables, and the print quality is awesome!

I was provided Painted Poppies #1, Painted Poppies #2 and Painted Poppies #3 letter size digital papers to create with this month, and created a pretty boxed set of 12 thank you cards. A friend and former co-worker reached out to request a dozen thank you cards, and I had already had my eye on these papers so I knew exactly what I wanted to do. ;)

2020_01110019a

Before I get into the details of my project, I have to share my latest light box visitor… Tigger! I was busy taking photos of the cards and before I knew it, Tigger jumped in and tried to get into that little card box. Oh yes he did, lol! Luckily I was able to get the box (and cards) out of the light box before he crushed it, and snapped a photo of him with his tongue out! Bahahaha, that’s our boy! ** I’ve updated this post with a couple more pics of Tigger without his tongue out so you can see how handsome he really is! ;) **

Okay, let me get back on track here… I created a flip-top box that coordinates with the set of cards. I fussy cut a couple pieces of a poppy and made it dimensional with foam pads and added it to the left side of the lid over top of the gold mirror cardstock strip. All the card fronts are layered on brown bag kraft, so I layered the box lid panels on brown bag as well and I covered the inside of the box with the brown bag.

And here are shots of all the cards in pairs. These papers are literally breath-taking and I used almost all of them. A while back I found the perfect 60# Hammermill copy paper to print on which really ramps up these digital prints. ;)

And one more look at the closed box. The strip of gold mirror cardstock makes them look so elegant and I know my friend is going to love them as much as I do!

2020_01110018a

Products used:
Cardstock/Paper: The Paper Studio Cream cardstock, Marco’s Gold Mirror cardstock, Marco’s Brown Bag Kraft, Ephemoire Painted Poppies #1, Painted Poppies #2 and Painted Poppies #3 letter size digital papers
Stamps: WPlus9 Hand-Lettered Thanks stamp set
Ink: Memento Rich Cocoa ink
Dies/Punches: Taylored Expressions Thanks die
Accessories: ScraPerfect Best Glue Ever, Gemini Junior die cutting machine, MISTI stamp tool

I hope you’ve enjoyed today’s project! Be sure to check out all the awesome printables at the Ephemoire Etsy Shop, and while you’re at it, head on over to the Ephemoire Facebook Page for tons of inspiration! Thanks so much for stopping by today – we’ll see you next time!

Scrappy hugs,
lesliesig

i love us

Hi everyone! Oh my gosh, time just needs to slow down – we CAN’T be approaching the end of January already! I’m not posting on the Simply Crafty SVGs Blog today but have popped in this morning to share an extra DT inspiration project with you, a sweet Valentine created with the free (yep, free…) Simply Crafty SVGs Flowers For Mom Card cut file. I was really thinking outside the box on this one when I decided on a Valentine.

2019_09040011a

I added some Dandelion Yellow Crystal Drops to the centers of the flowers for a little texture, and placed the sentiment on the bottom of the flower pot.

2019_09040012a

I really love this design – the large flower there in the center pops up when the card is opened. Super cute!

2019_09040013a

And here’s a look from overhead so you can see the cool design on this!

2019_09040014a

And one final look… folded flat and ready to be put in an envelope for mailing. So awesome!

2019_09040015a

Products used:
Cardstock/Paper: American Crafts black cardstock; Canvas Corp Brands Sending Love Words on White paper, GKD Black Onyx, Wild Dandelion, Fresh Asparagus and Cherry Red cardstock
Dies/Punches: Simply Crafty SVGs Flowers For Mom Card cut file
Accessories:  Tim Holtz Small Talk sentiment sticker, Nuvo Dandelion Yellow Crystal Drops, Darice iridescent gemstones

I hope you’ve enjoyed today’s project! Be sure to check out all the fun cut files in the Simply Crafty SVGs store – you’ll have so much fun! And there are tons of freebies to get started! Thanks so much for stopping by today – we’ll see you next time! ;)

Scrappy hugs,
lesliesig