I Heart Summer accordion album

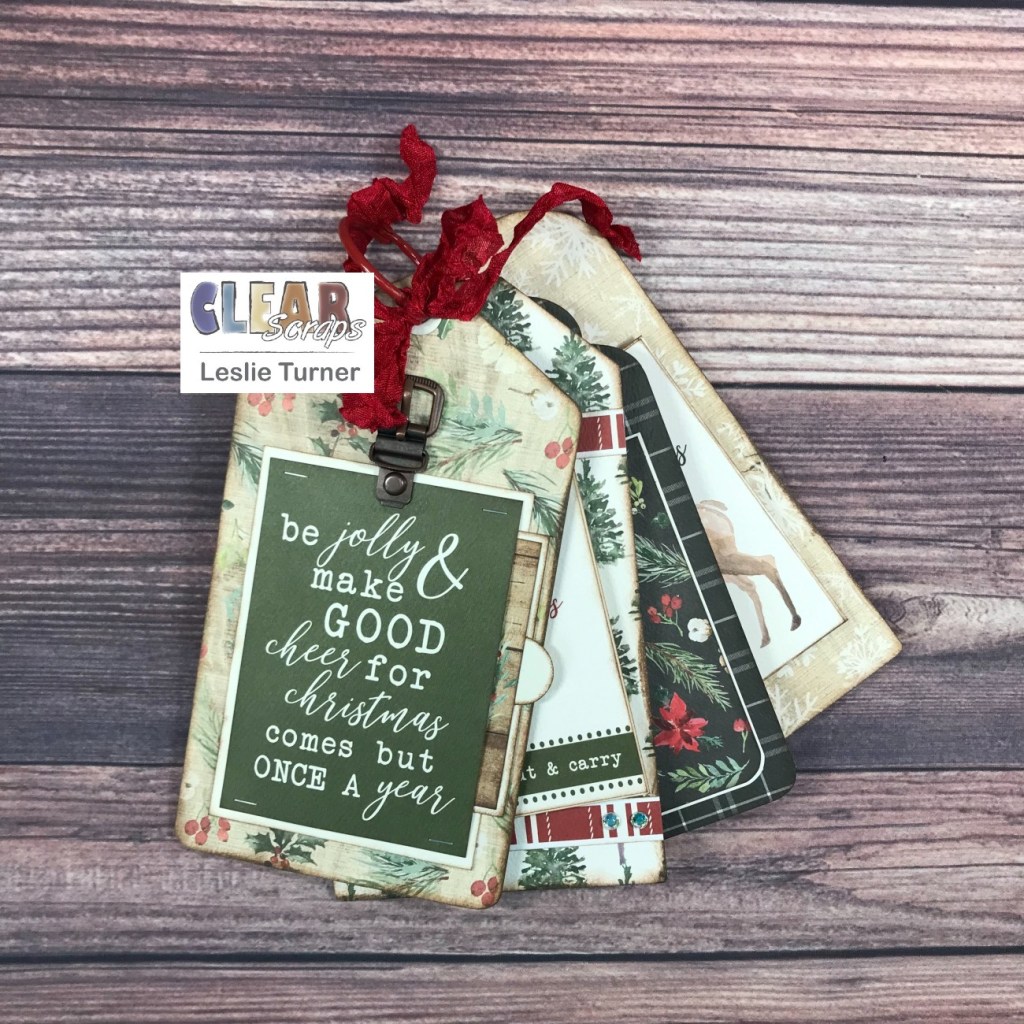
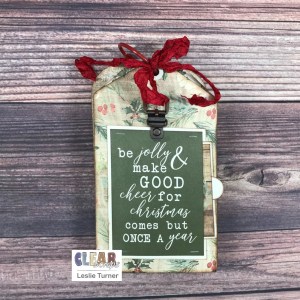
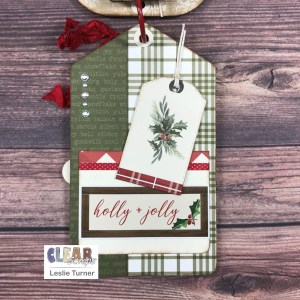
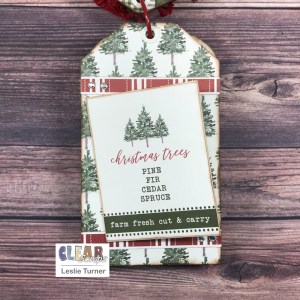
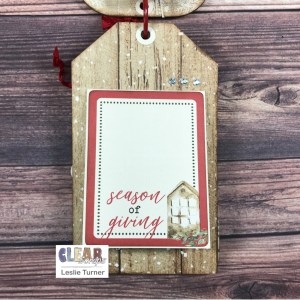
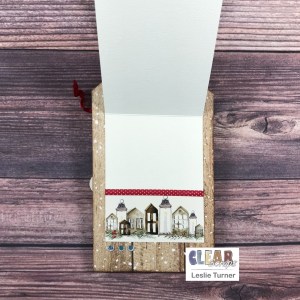
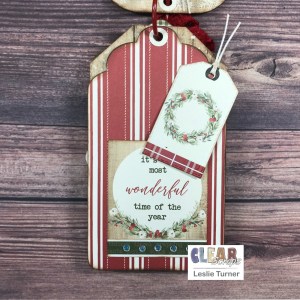
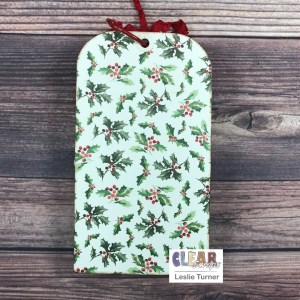
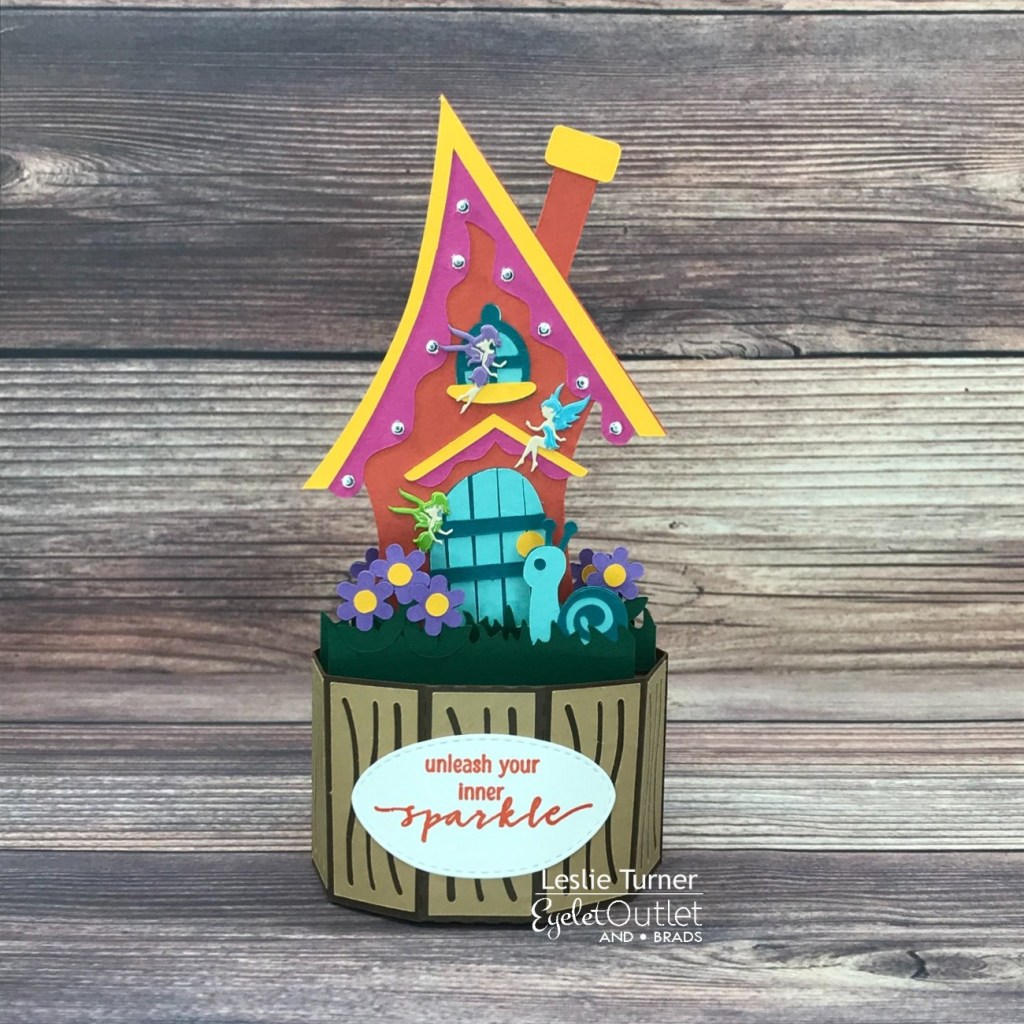
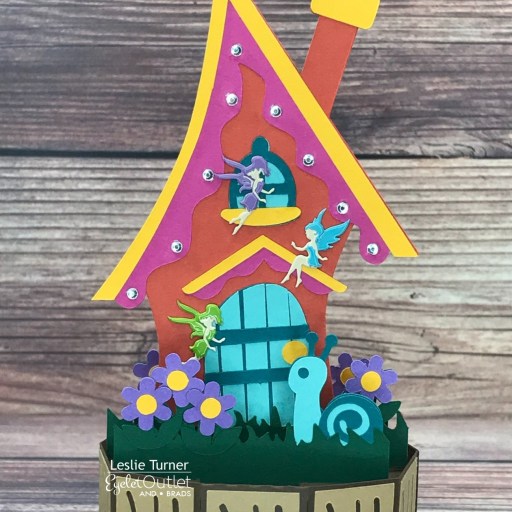
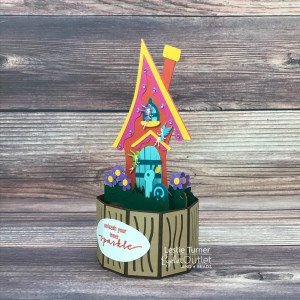
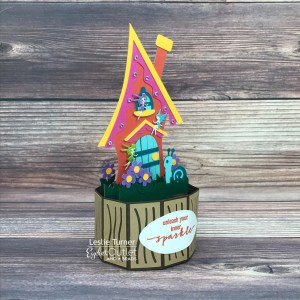
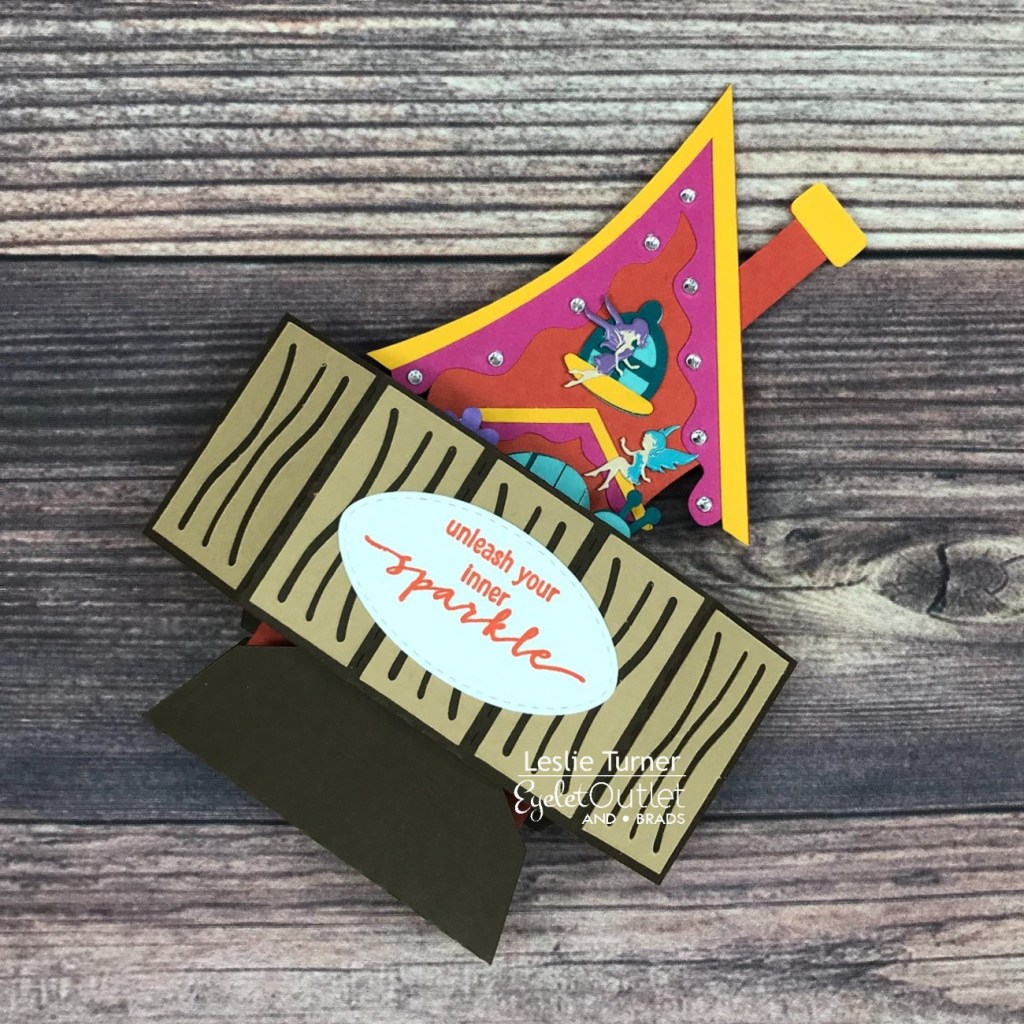
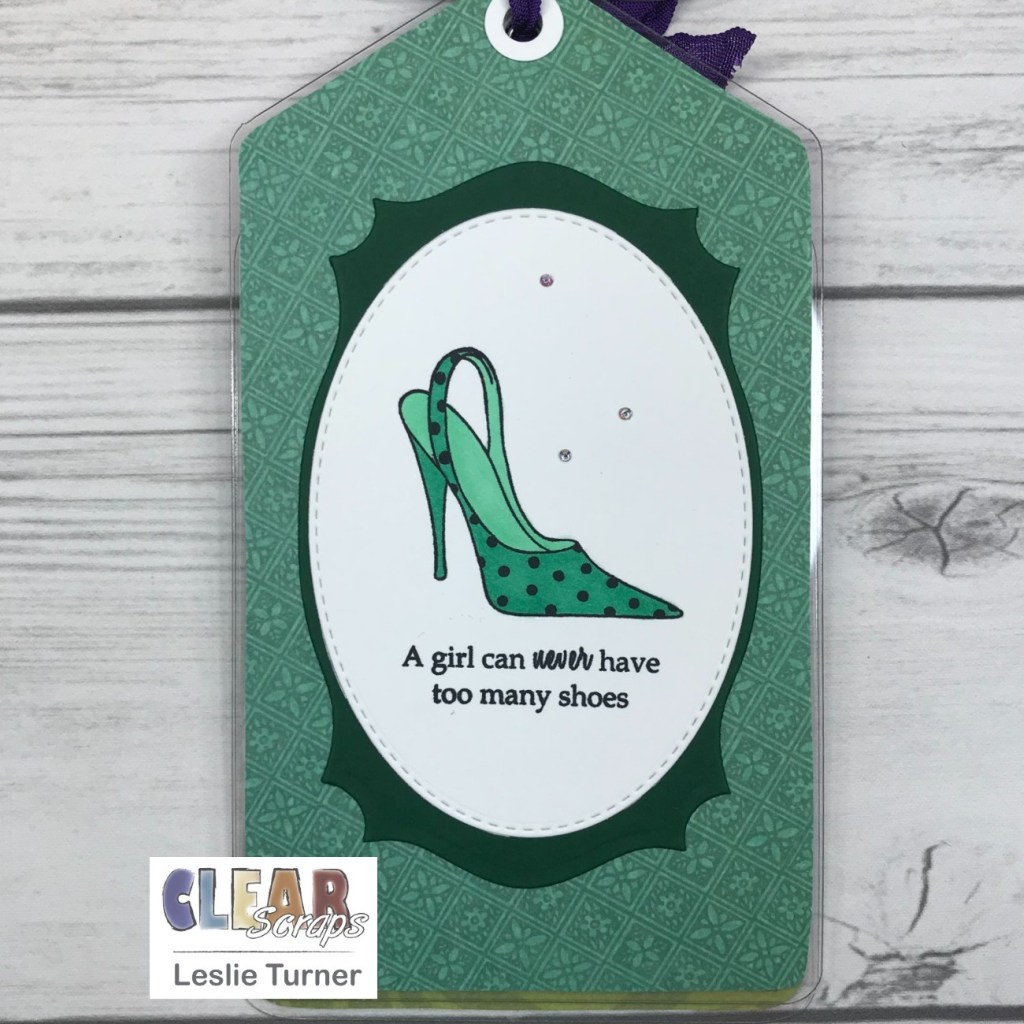
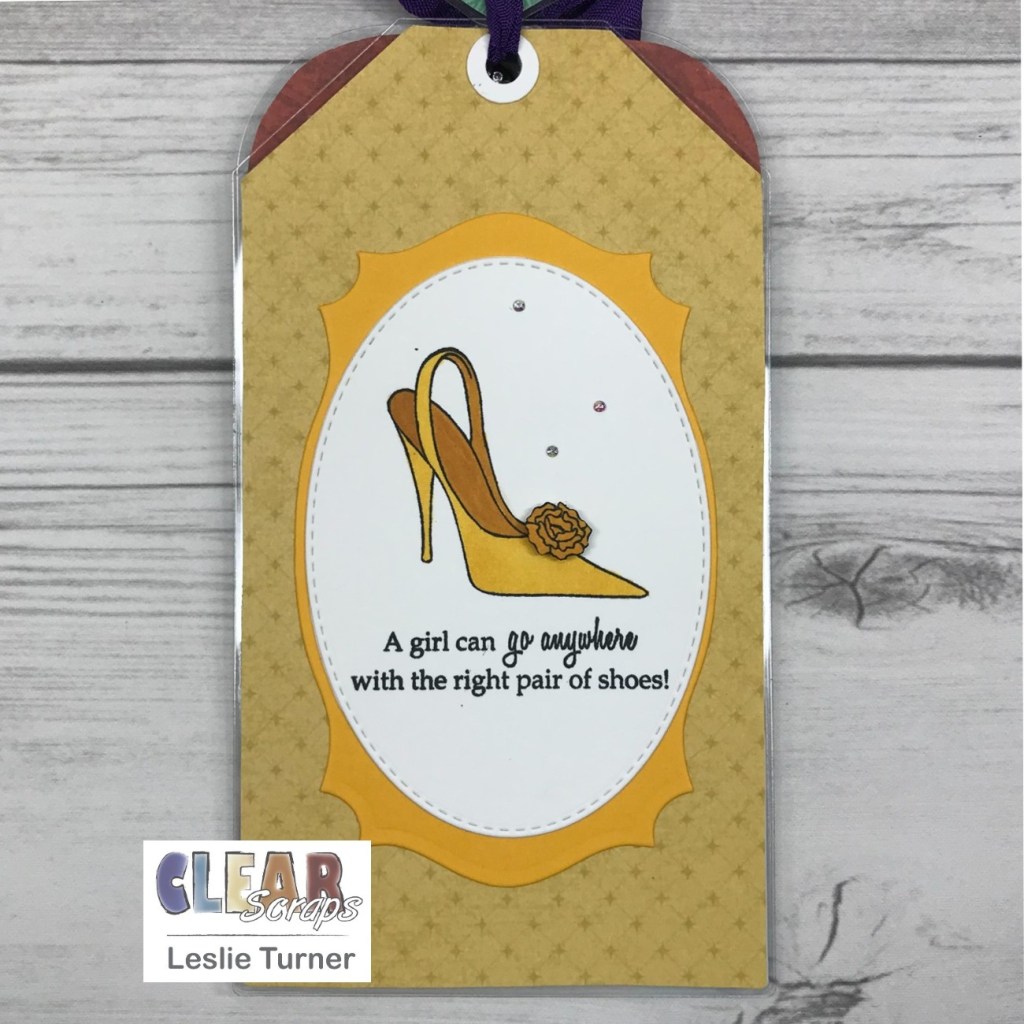
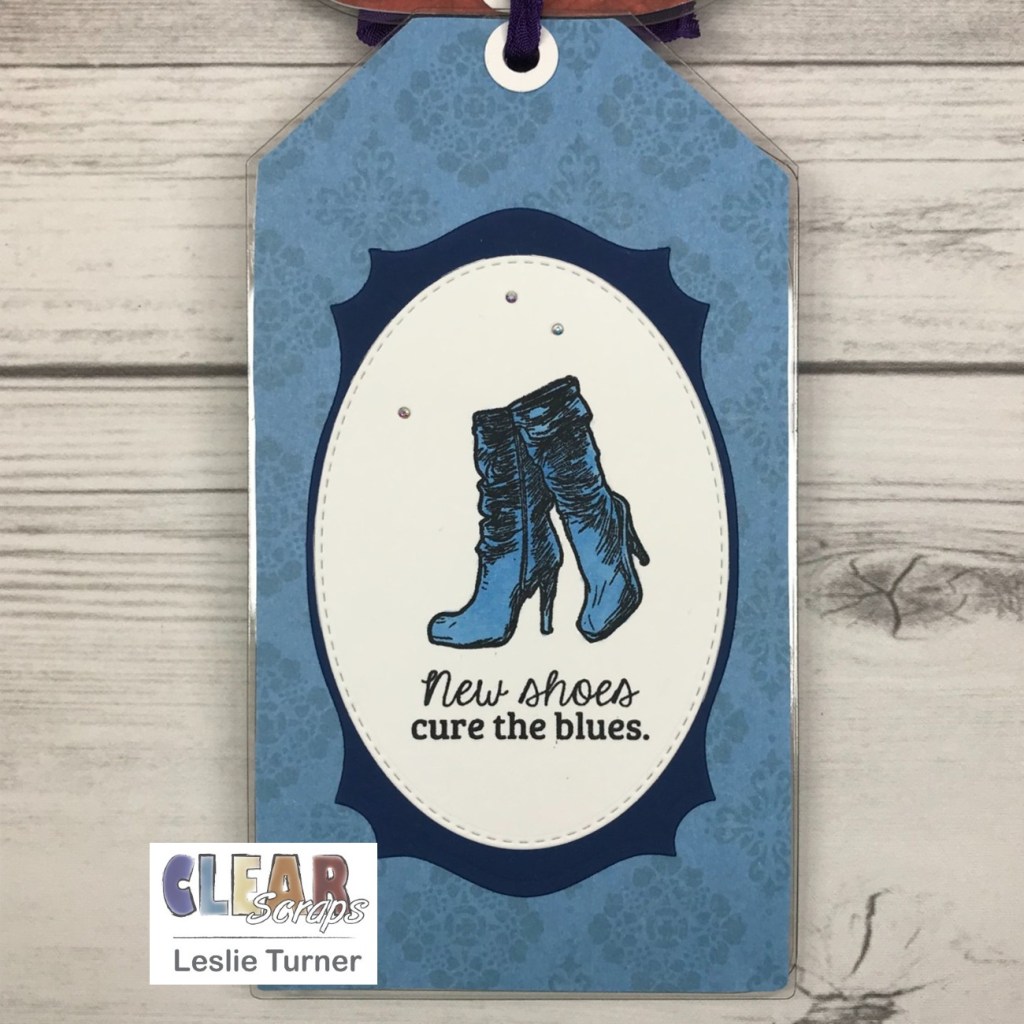
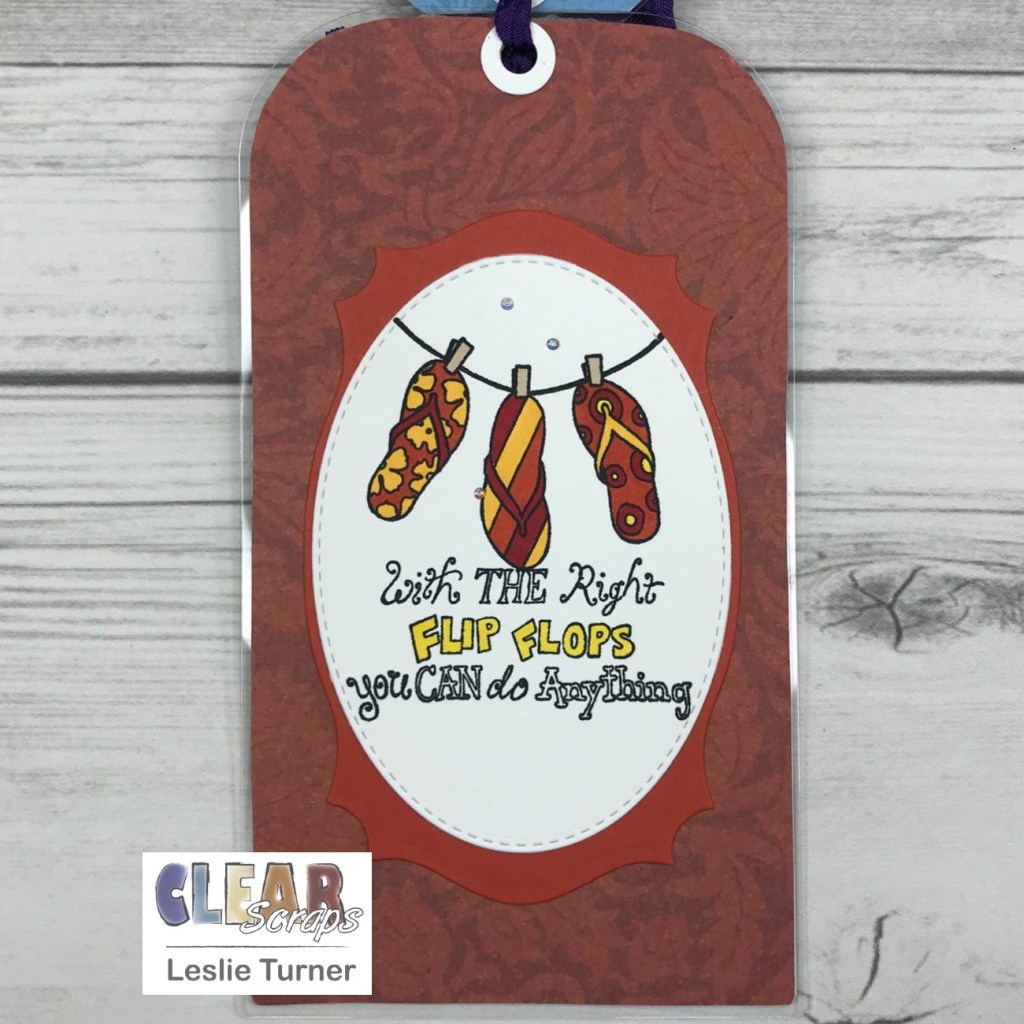
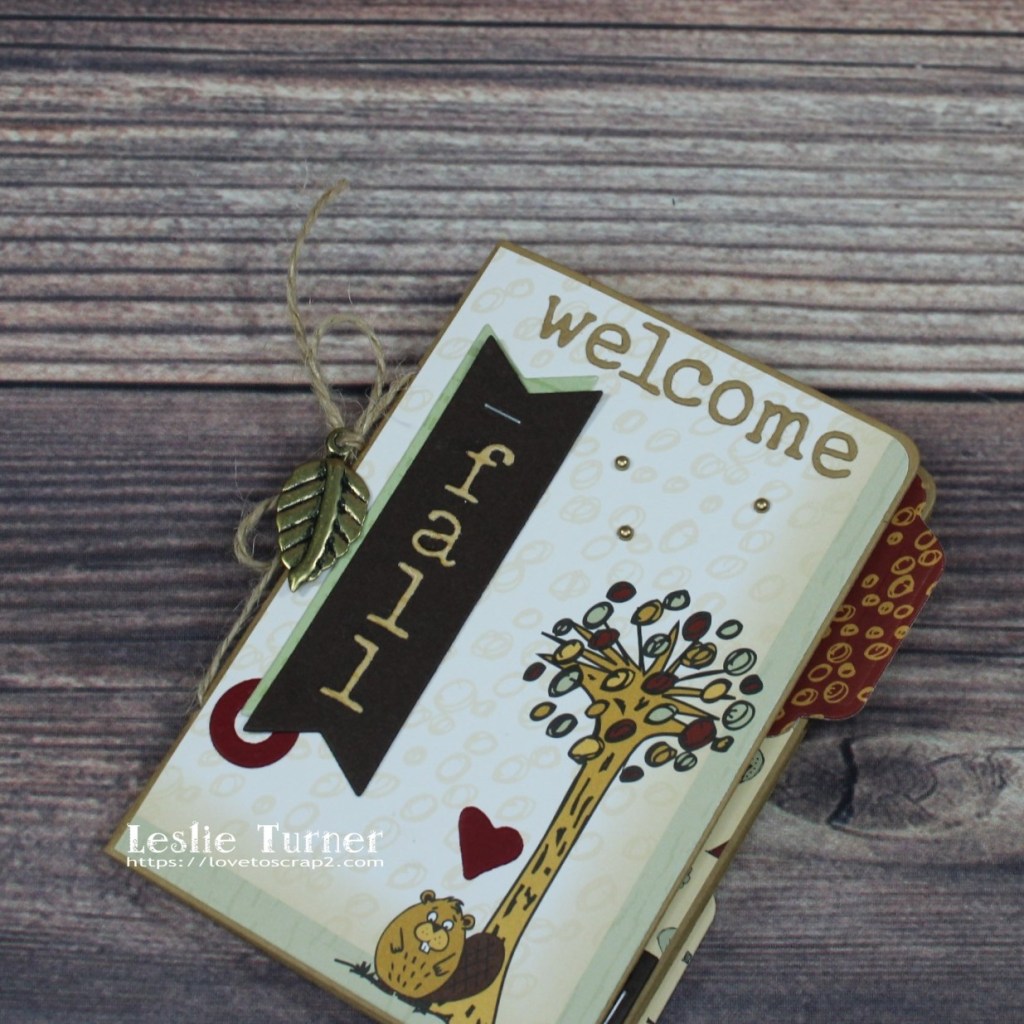
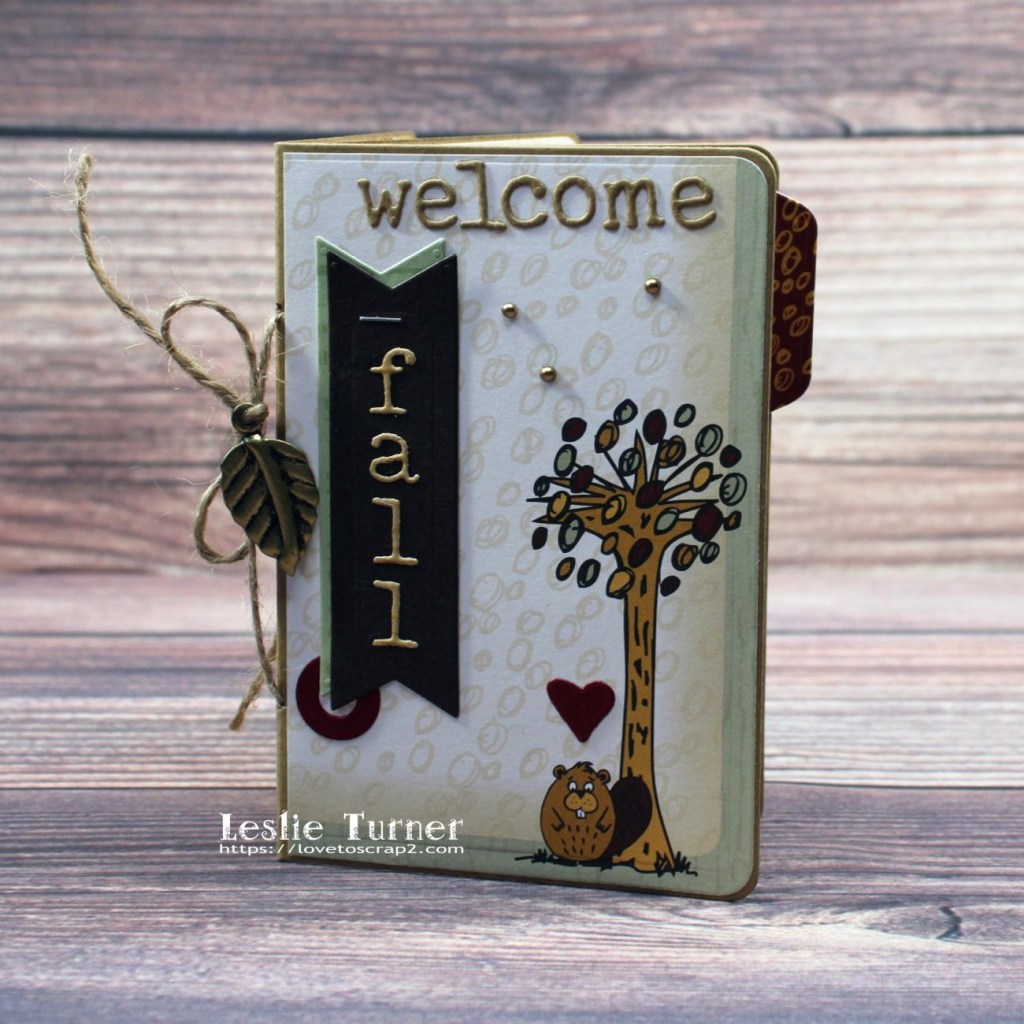
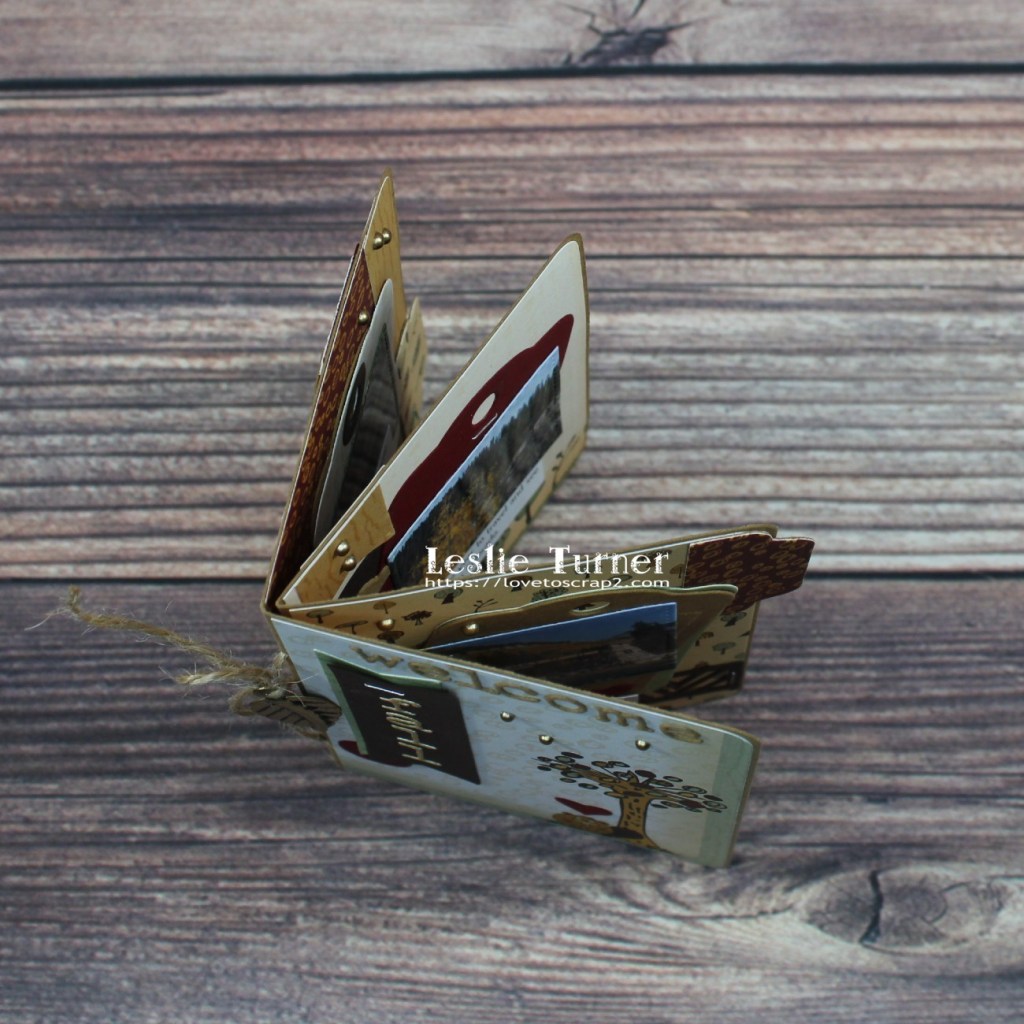
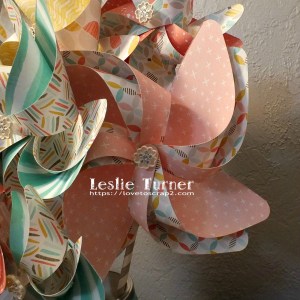
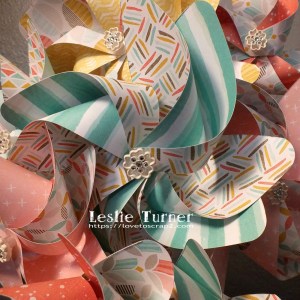
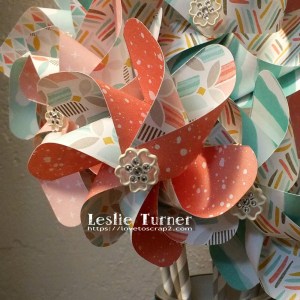
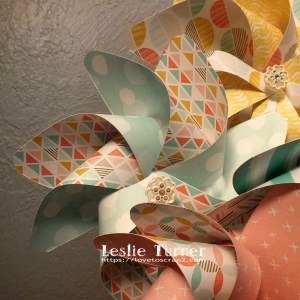
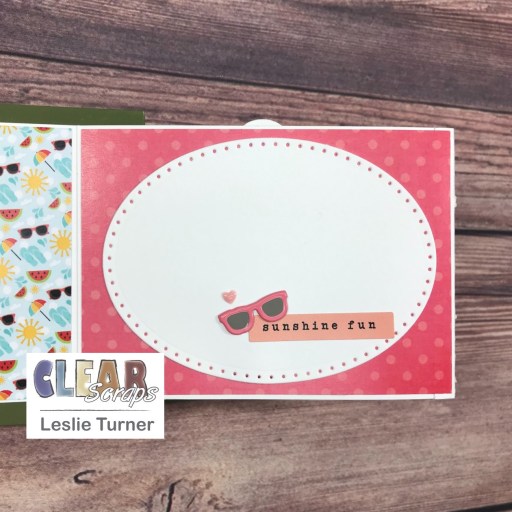
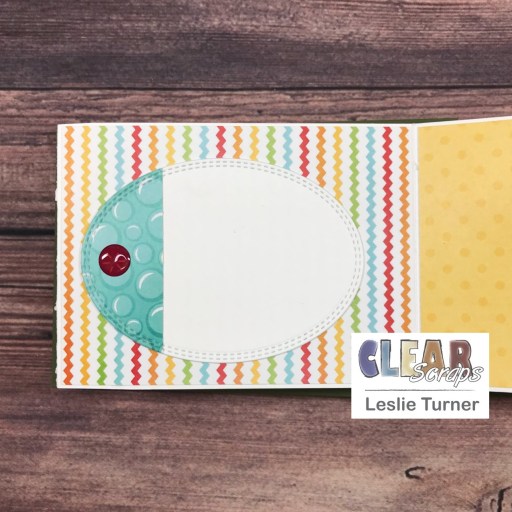
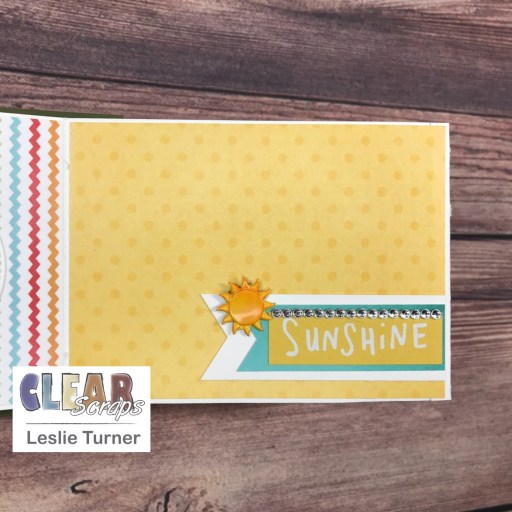
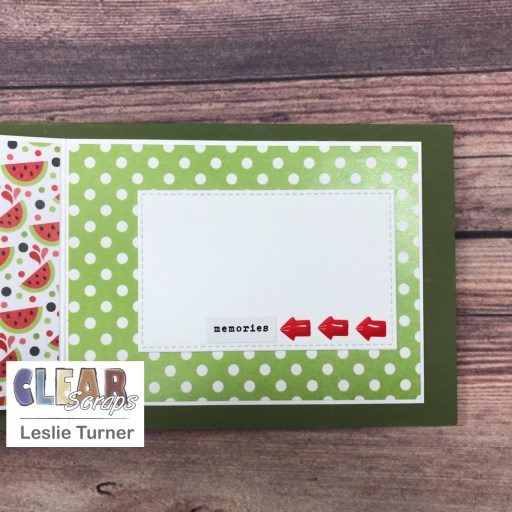
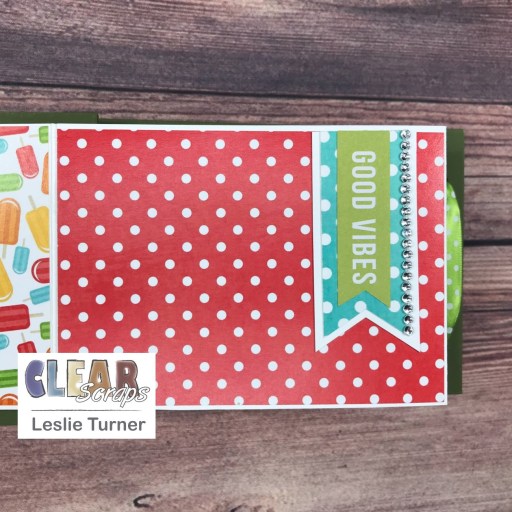
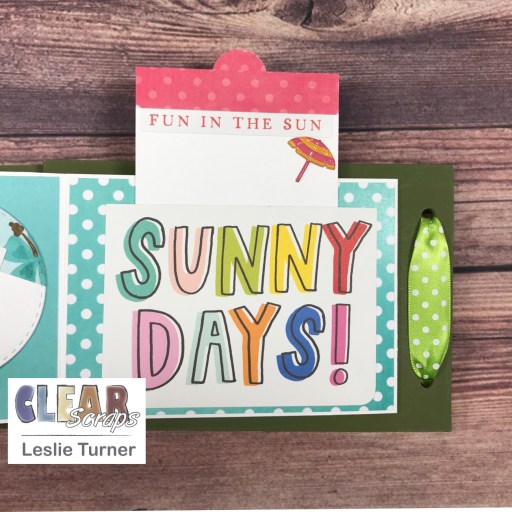
Hey, everybody! Happy Monday – hope you had a great weekend and your week ahead will be fabulous! We have something awesome to look forward to – our new internet service provider will be installing a little later this morning and we’ll finally have faster internet! Woo-hoo! I’m thrilled to be back on the Clear Scraps blog today with another awesome DT inspiration project! I created a very colorful Summer accordion album featuring our Blank Wood Card as the cover. This was a lot of fun!

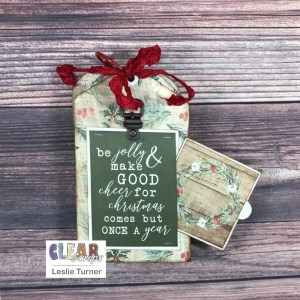
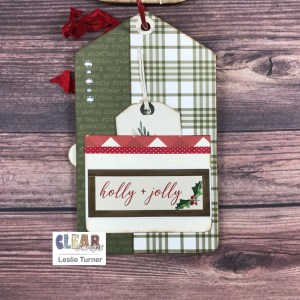
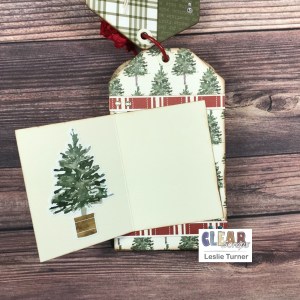
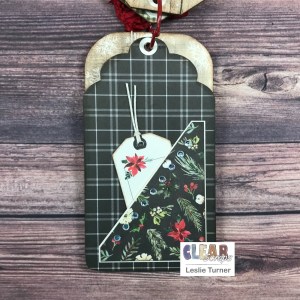
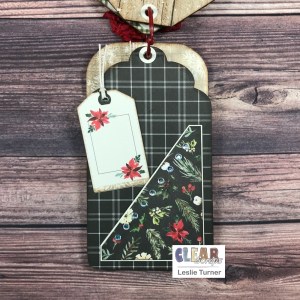
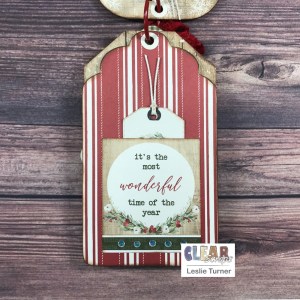
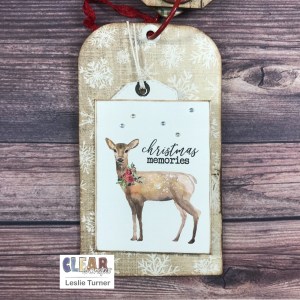
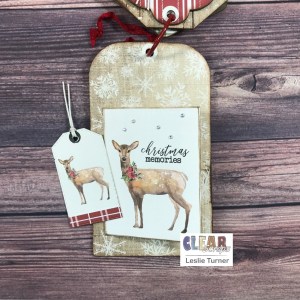
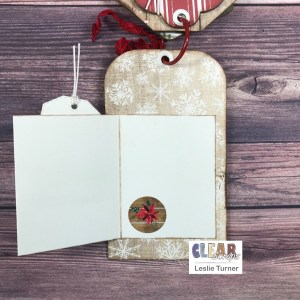
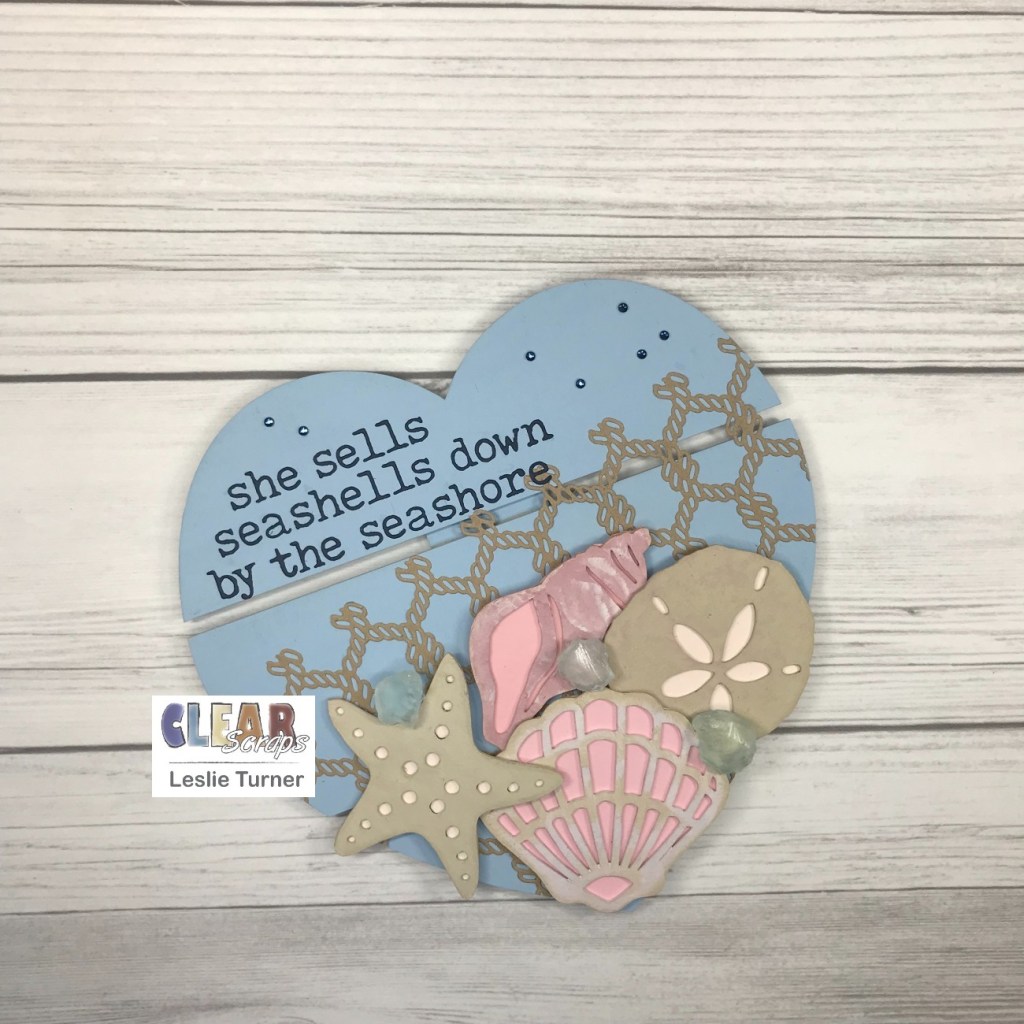
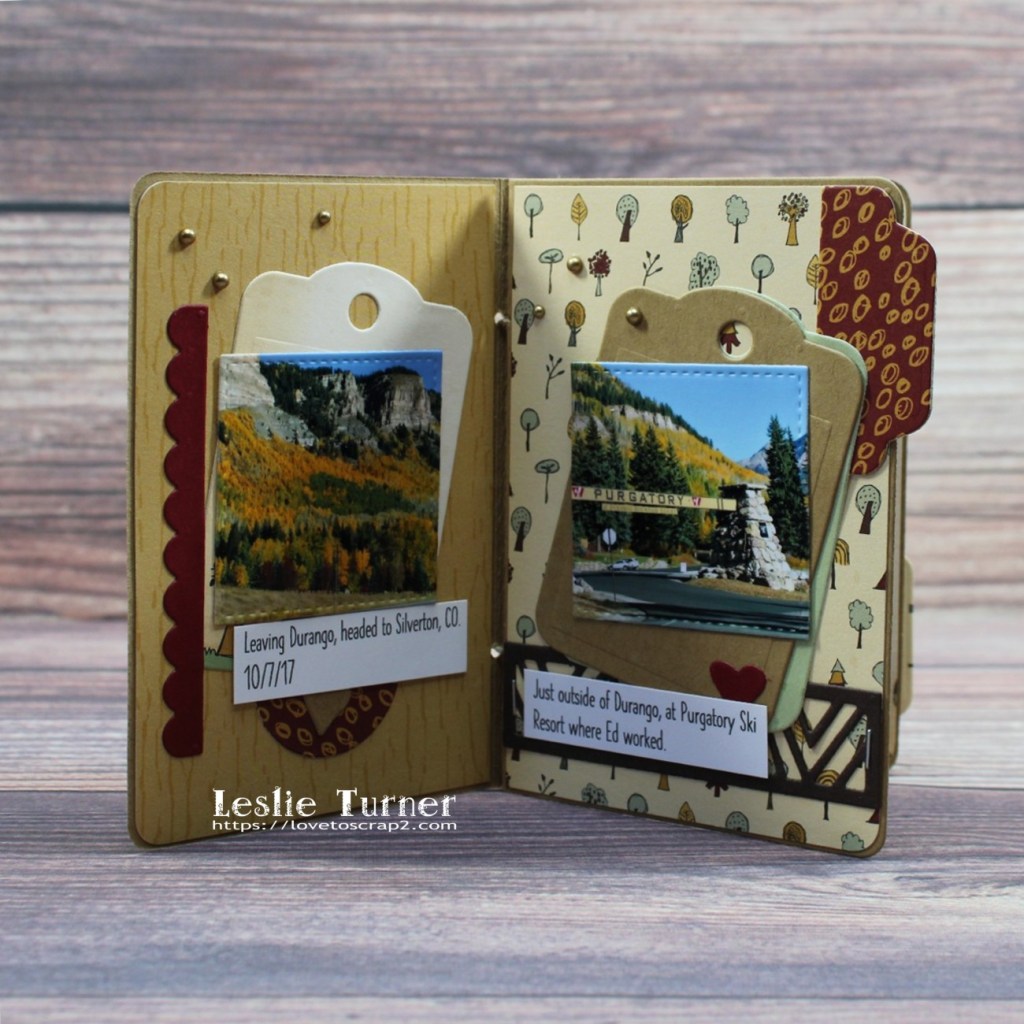
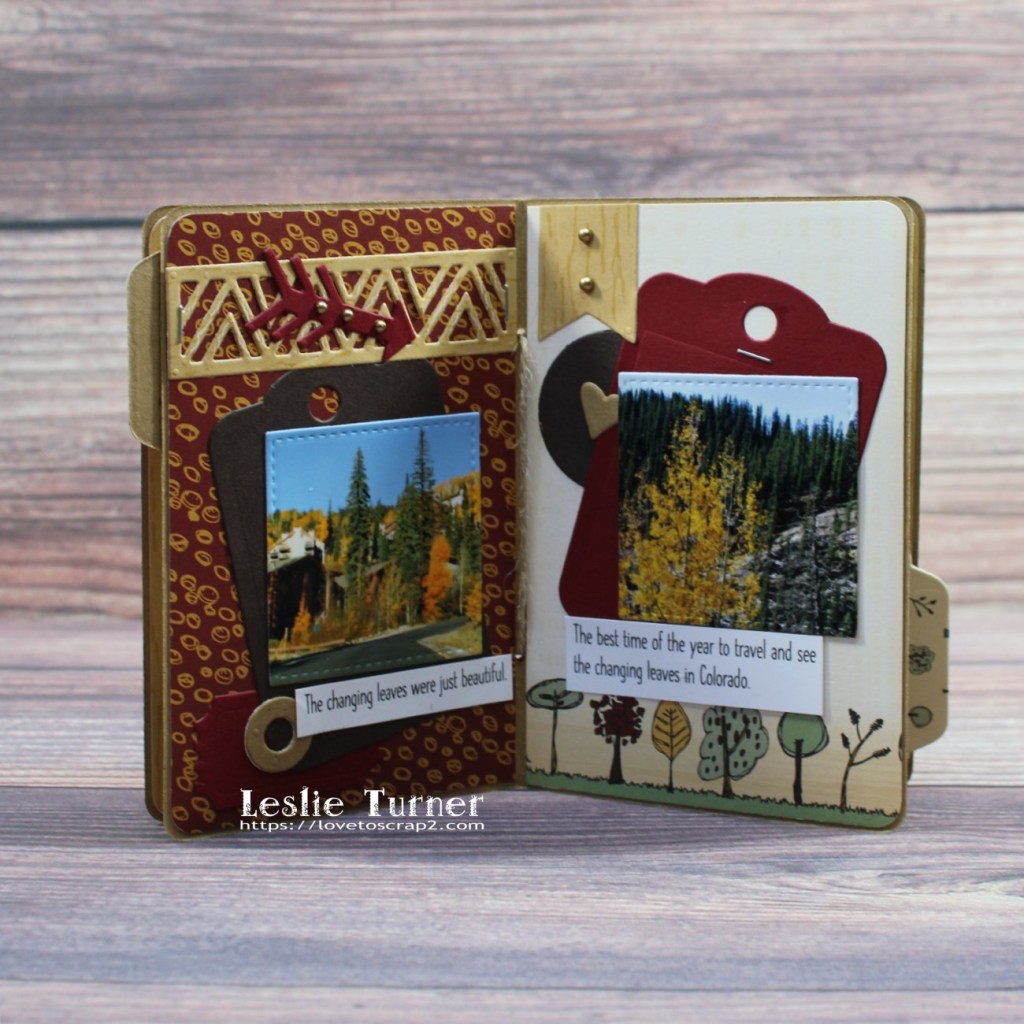
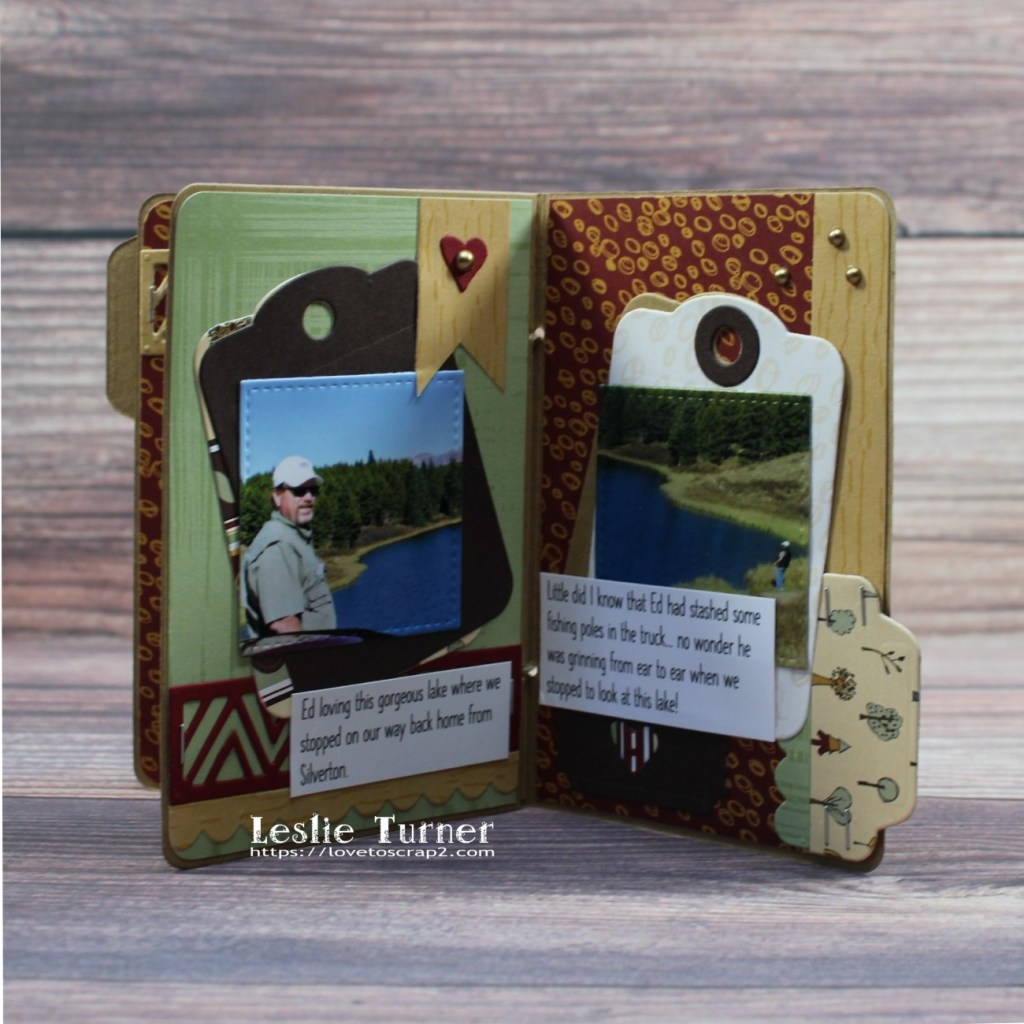
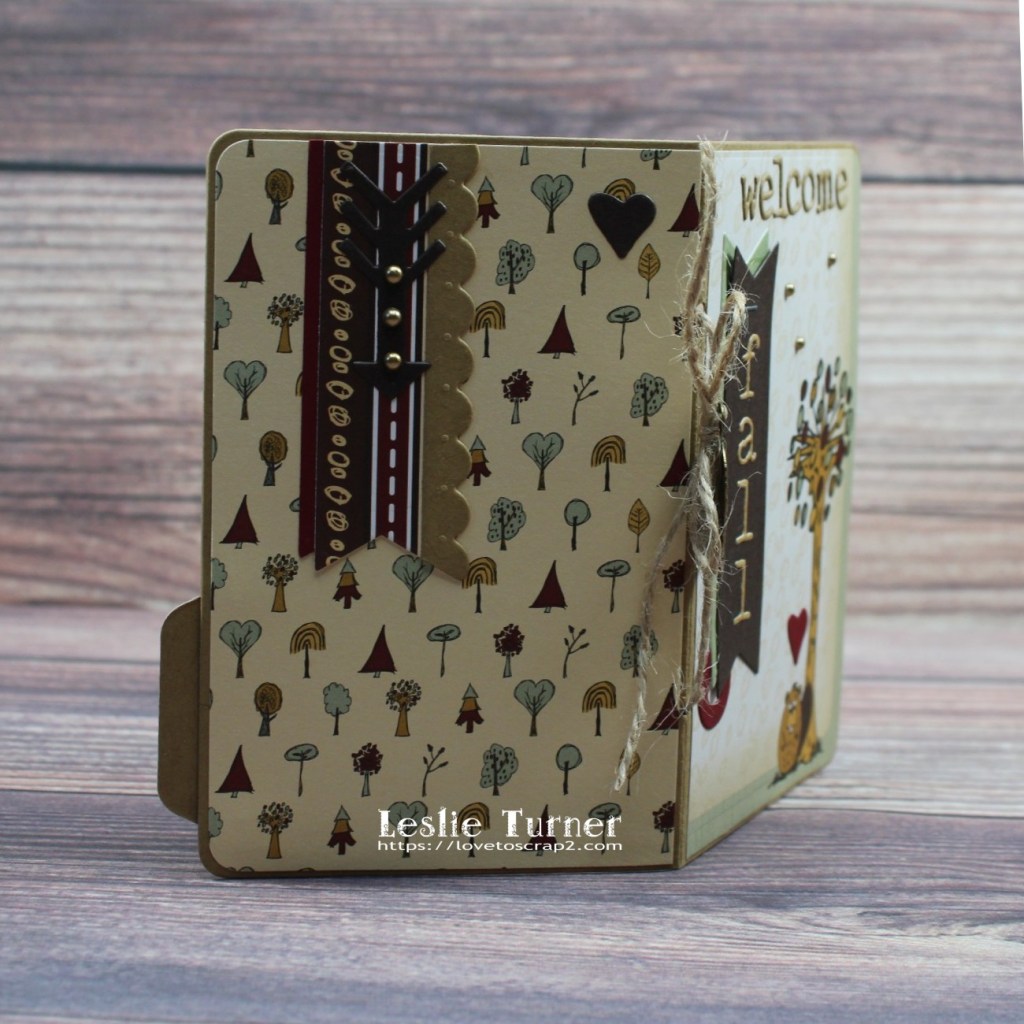
I painted the cover with green chalk paint and lightly sanded vertically and horizontally on it to create a very subtle cross-hatch design. I used some awesome patterned papers, ribbon, and tons of embellishments, die cuts, and elements throughout. Most of the pages contain flat photo/journaling areas but I did create one pocket with a pull-out card on the last page.

Sharing in the following challenges:
1. A Perfect Time To Craft Open Challenge: #1-2022 – Anything Goes
2. Classic Design Challenge: January 2022 #1 – Anything Goes
3. Crafting Happiness Challenges: #119 – Anything Goes
4. Crafty Calendar Challenge: January Anything Goes
5. Crafty Catz: #578 – Anything Goes w/ optional Checks or Plaids (no twist)
6. Let’s Craft and Create: #149 – Anything Goes + Something New (more new patterned paper :)
7. Lil Patch of Crafty Friends: #174 – Anything Goes
8. Lil Red Wagon: #636 – Pick Patterned Paper
9. River of Creativity: #9 – Anything Goes
10. Sparkles Monthly Challenges: #148 – Use Ribbon, Raffia or Twine
11. Wednesday’s Creative Inspirations Challenge Blog: January Anything Goes
12. World Wide Open Design Team Monthly Challenge: #01-January 2022 – Anything Goes

Clear Scraps products used:
Blank Wood Card

Other products used:
Cardstock/Paper: Stamp Anniething Summer Tropics 6×6 double-sided papers
Dies/Punches: Sizzix Dotted Ovals and Dotted Rectangles; Cottage Cutz Double-Stitched Ovals; Memory Box Stitched Circle Layers and Stitched Heart Layers; CUTplorations Stitched Tags Nesting Dies, Stampin’ Up 3/4″ circle punch, Kadomaru Pro corner rounder, Stampin’ Up Banner Triple Punch
Accessories: Tonic Studios 12″ Guillotine Paper Trimmer, Tim Holtz 8.5″ Guillotine Paper Trimmer; Eyelet Outlet Enamel Arrows, Clear Bling Strip, Sunglasses Brads, Flip Flop Brads, Sun/Cloud Brads and Beach Umbrella Brads; Creative Memories Part Time Collection Enamel Dots, Fantastico Collection Enamel Hearts, Carta Bella Summer Sticker Sheets, Simple Stories Sunkissed Collection Elements, Hemptique red crafting cord, Really Reasonable Ribbon Satin Swiss Dots, Folkart Spanish Moss chalk paint, Scrapbook Adhesives thin 3-D Foam Squares

I hope you’ve enjoyed today’s project and you’re inspired to get those craft supplies out to play! Be sure to check out all the amazing acrylic, wood and chipboard goodies at Clear Scraps… OMGoodness, you won’t be disappointed! And head on over to the Clear Scraps Facebook Page for lots of inspiration! And while you’re at it, join the Clear Scraps Facebook Creative Group to connect with other Clear Scraps fans! Thanks so much for stopping by today – we’ll see you next time!

Scrappy hugs,

Christmas Mini Album

Hey, everybody! Happy Hump Day – I hope you’re having a great week and it’s not too cold where you are! I’m thrilled to be back on the Clear Scraps blog today with another awesome DT inspiration project! I hope you had a wonderful Christmas – it’s so hard to believe that it has come and gone! We had an absolutely beautiful Christmas and the real truth is that it’ll be here again before we know it! I have one last Christmas project for the year to share featuring our Chipboard Tag Album that has plenty of room for documenting those Christmas memories. You’ll be seeing more Christmas projects from me in the upcoming months because Christmas is my favorite holiday and I create holiday cards and projects all year long!

I covered the front and back sides of the four tags with Christmas papers, inked the edges and embellished each side with coordinating ephemera and stickers. There are pockets with pull-out cards and tags as well as folders that open outward and upward… lots of open space for photos and journaling! This was a super fun project!

Sharing in the following challenges:
1. A Place To Start: #12 – Anything Goes w/ optional Blue Christmas (no twist)
2. Crafting Happiness Challenges: #118 – December Anything Goes
3. Creative Inspirations: December challenge – Christmas Time
4. Creative Moments: #229 – Anything Goes
5. Jan’s Digi Stamps Challenge: December Anything Goes
6. Lil Patch of Crafty Friends: #172: Anything Goes
7. My Time To Craft Christmas: #25 – Anything But A Card
8. River of Creativity: #8 – Celebrate (Christmas)

9. The Outlawz Festive Friday Challenge: Christmas
10. The Outlawz Monday Greetings Challenge: Anything Goes

Clear Scraps products used:
Chipboard Tag Album

Other products used:
Cardstock/Paper: CutCardStock Royal Sundance Felt Natural cardstock, Carta Bella Christmas Collection Kit
Ink: Ingvild Bolme Knotted Wood chalk ink edger
Dies/Punches: CUTplorations Stitched Tags Nesting Dies, Stampin’ Up 1/4″ and 1/2″ circle punches, Kadomaru Pro corner rounder
Accessories: Tonic Studios 12″ Guillotine Paper Trimmer, Bearly Art precision craft glue, Tim Holtz tiny attacher, Ranger distress collage medium, Tim Holtz Idea-ology Buckle, Hemptique bamboo crafting cord, Stampin’ Up dotted red skinny washi tape, Prairie Bird Boutique red wrinkled ribbon, Canvas Corp red binding ring, Darice iridescent gemstones

I hope you’ve enjoyed today’s project and you’re inspired to get those craft supplies out to play! Be sure to check out all the amazing acrylic, wood and chipboard goodies at Clear Scraps… OMGoodness, you won’t be disappointed! And head on over to the Clear Scraps Facebook Page for lots of inspiration! And while you’re at it, join the Clear Scraps Facebook Creative Group to connect with other Clear Scraps fans! Thanks so much for stopping by today – we’ll see you next time!

Scrappy hugs,

Santa Gnome gift bags

Hi friends! Well, tomorrow night is THE night… the night that jolly St. Nick will be here! Wishing you all a very Merry Christmas and a prosperous New Year! Affiliate links are used in this post at no cost to you – I really appreciate your support! I’ve popped in this morning to share a couple large gift bags decorated with Bearly Art Santa Gnome cut files. If you have an electronic die cutting machine and you’ve never seen their cut files, you need to check them out! They’ve got some really cute ones! Ed and I joined a large group of friends this past Sunday for a delicious Christmas meal (pasta bar, salad, garlic bread and dessert) and a delightful White Elephant game. We took our White Elephant gifts in large gift bags that I decorated with these adorable Santa Gnomes. They were a hit, as you can imagine!

I cut all the pieces from CutCardStock Basis Black, Basis Blue, Basis Green, Basis Soft Pink, Gold Glitter, Silver Glitter cardstockNeenah Classic Crest Solar White cardstock, Colorbok Red cardstock. I assembled the Gnome Santas and adhered them to the large gift bags. Using the Tim Holtz Idea-ology type lower cling foam stamps, I stamped ‘merry christmas’ in Catherine Pooler Midnight ink on the white bag and in StazOn Cotton White ink on the black bag. I LOVE foam stamps and I only have two sets (both are Tim’s) and they stamp with such an awesome impression, the first time! Of course, it helps to have juicy ink pads! ;) I love how these turned out!

Sharing in the following challenges:
1. A Bit More Time To Craft Challenge: December/January Anything Goes
2. A Bit More Time To Craft Extra Challenge: December Anything Goes
3. Classic Design Challenge: #12 – Anything Goes
4. Crafty Gals Corner: #226 – Merry & Bright
5. Creative Inspirations: December challenge – Christmas Time
6. My Time To Craft Christmas: #25 – Anything But A Card
7. River of Creativity: #8 – Celebrate (Christmas)
|
8. Sweet Stampers Challenge: #63 – Anything Goes

Products used:
Cardstock/Paper: CutCardStock Basis Black, Basis Blue, Basis Green, Basis Soft Pink, Gold Glitter, Silver Glitter cardstockNeenah Classic Crest Solar White cardstock, Colorbok Red cardstock
Stamps: Tim Holtz Idea-ology type lower cling foam stamps
Ink: Catherine Pooler Midnight ink, StazOn Cotton White ink
Dies/Punches/Cut Files: Bearly Art Santa Gnome cut file
Accessories: Brother Scan N Cut, Bearly Art precision craft glue

I hope you loved seeing these adorable Santa Gnomes as much as I enjoyed putting them together for these gift bags! Thanks so much for stopping by today – we’ll see you next time! ;)

Scrappy hugs,

Seasons Greetings Country Plaid Ornament

12/18/21 Top Rocker at 613 Avenue Create!
1/1/22 Favorite at {PIN}spirational Challenges!
1/13/22 Shoutout at River of Creativity!

Hi friends! A very Happy Tuesday to you all! I hope you’re having a stellar week so far! Affiliate links are used in this post at no cost to you – I really appreciate your support! I participated in the Bearly Arts ‘Merry Craftmas’ Ornament Exchange this year and wanted to share the long faceted Christmas ornament I made for my exchange partner, Cat, in Florida! I made several long and short faceted Christmas ornaments several years ago HERE and thought this style ornament in a country plaid theme would go over well! She has received it and loved it, so now I can post it!

I cut the ornament base from CutCardStock Basis Red cardstock along with panels from patterned cardstock from the Christmas Holiday Print and Christmas Print cardstock pads. I constructed the ornament, and adhered the panels and lots of pearl bling.

I used some red and white checked ribbon from my stash for the hanger, and added a circular sentiment stamped from the CAS-ual Fridays Stamps Snowflake Greetings stamp set and heat embossed in Hero Arts White Embossing Powder, then punched with a Stampin’ Up 3/4″ circle punch and a Fiskars 1-1/2″ circle punch, which I adhered to the top.

And one more peek… so loving how this turned out! I’m delighted that Cat loved it and am super proud to have made a new friend in the process! Definitely looking forward to participating in the ornament exchange again next year!

Sharing in the following challenges:
1. 613 Avenue Create: #12 – Anything Goes w/optional Any Holiday (Christmas :)
2. A Perfect Time To Craft Open Challenge Blog: #12 – Anything Goes
3. A Place To Start: #12 – Anything Goes w/optional A Blue Christmas (no twist)
4. Alphabet Challenge Blog: R is for Red
5. Classic Design Challenge: #12 – Anything Goes
6. Crafty Calendar Challenge: Christmas
7. Crafty Catz: #576 – Anything Goes w/optional Christmas Celebrations
8. Creative Inspirations: December Challenge – Christmas Time
9. {PIN}spirational Challenges: #284 – Photo Inspiration (red, plaid)

10. River of Creativity: #8 – Celebrate (Christmas :)

11. Scrapping4fun Challenges: #207 – Christmas/Winter
12. The Outlawz Challenges Festive Friday Challenge
13. The Outlawz Challenges Monday Greetings Challenge (ornament has a greeting! :)
14. The Outlawz Challenges Sunday Songs and Rhymes (inspired by ‘Christmas’)

Products used:
Cardstock/Paper: CutCardStock Basis Red cardstock, CutCardStock Basis Black cardstock, Christmas Holiday Print 6×6 Cardstock Pad, Christmas Print 6×6 Cardstock Pad
Stamps: CAS-ual Fridays Stamps Snowflake Greetings stamp set
Ink: Versamark
Dies/Punches: Stampin’ Up 3/4″ circle punch, Fiskars 1-1/2″ circle punch
Accessories: Tonic Studios 12″ Guillotine Paper Trimmer, Hero Arts White Embossing Powder, Bearly Arts precision craft glue, Darice white pearls, MISTI stamp tool, red and white checked ribbon from stash, ScraPerfect Perfect Crafting Pouch and Perfect Cleaning Cloth

I hope you’ve enjoyed seeing this ornament and you’ll consider joining in the fun next year! Be sure to sign up for Bearly Arts emails and watch for the invite to participate in November! Thanks so much for stopping by today – we’ll see you next time! ;)

Scrappy hugs,
lesliesig

unleash your inner sparkle

12/18/21 Top Rocker at 613 Avenue Create!
12/31/21 Best Technique Winner at Classic Design Challenge Blog!

Hey peeps! A very Happy Saturday to you – I hope you’ve had a great week! They seem to be flying by at a wicked fast rate of speed! Affiliate links are used in this post at no cost to you – I really appreciate your support! I’m stoked to be back on the Eyelet Outlet blog today with another awesome DT inspiration project! I created the cutest-ever fairy house 3-D project featuring our Fairy Brads and clear gemstones from our Clear Jewel Bling Strips! I actually made two of these fairy houses with very subtle differences between the two – one had pink flowers and two fairies (which I sent to my granddaughter) and this one has purple flowers and and three fairies.

I sure do enjoy my Scan N Cut, and whenever I get it out for a crafty spin, I cut multiple projects to work on between design team projects that keep me busy for the weeks to come. There’s nothing more fun than watching a 3-D project come to life! Going back 12 years, I’ve owned a personal size Cricut, a Cricut Expression and a Silhouette Cameo prior to buying my first Scan N Cut six years ago.

I upgraded to an SDX125 a little while back and I’m in love. It came with three extra design collections when I bought it (plus it already has 600+ built-in designs) and the cutting blade has an auto-sensor that tells the machine how thick the paper, cardstock, leather, foam, acetate, fabric, etc. is that you’re cutting, so no more adjusting the cutting blade depth. If you’re in the market for a die cutting machine (or an upgrade), the SDX125 is the way to go! ;)

I cut all the pieces from CutCardStock Basis Brown, Basis Light Brown, Basis Green, Basis Aqua, Basis Teal, Basis Gold, Basis Magenta, Pop-Tone Tangy Orange and Pop-Tone Grape Jelly cardstock. I assembled the fairy house and added three Fairy Brads prior to adding the second base layer of the house for stability. I added several clear gemstones from our Clear Jewel Bling Strips to the soffit for a little sparkle.

I stamped the sentiment on Neenah Classic Crest 80# Solar White cardstock in orange ink, cut it with a stitched oval die, and adhered it to the front of the tree stump. Here are a couple angled shots:

And one more look folded flat for mailing! So stinkin’ cute I can’t stand it!

Sharing in the following challenges:
1. 613 Avenue Create: #12 – Anything Goes w/optional twist of Any Holiday (no twist)
2. A Perfect Time To Craft Open Challenge: #12 – Anything Goes
3. A Place To Start: #12 – Anything Goes w/optional twist of Blue Christmas (no twist)
4. Classic Design Challenge: #12 – Anything Goes
5. Crafty Catz: #576 – Anything Goes w/optional twist of Christmas Celebrations (no twist)
6. Creative Moments: #228 – Anything Goes
7. Lil Patch of Crafty Friends: #171 – Anything Goes
8. The Corrosive Challenge Blog: #12 – Anything Goes
9. The Crafter’s Cafe Challenge Blog: #279 – Anything Goes

Eyelet Outlet products used:
Fairy Brads
Clear Jewel Bling Strips

Other products used:
Cardstock/Paper: CutCardStock Basis Brown, Basis Light Brown, Basis Green, Basis Aqua, Basis Teal, Basis Gold, Basis Magenta, Pop-Tone Tangy Orange and Pop-Tone Grape Jelly cardstock; Neenah Classic Crest 80# Solar White cardstock
Stamps: CAS-ual Fridays Stamps Be A Unicorn stamp set
Ink: Catherine Pooler Mandarin Spice ink
Dies/Punches/Cut files: My Scrap Chick Fairy House cut file
Accessories: Bearly Art precision craft glue, MISTI stamp tool, Big Shot

I hope you’ve enjoyed today’s project! Be sure to check out all the fun goodies at Eyelet Outlet! I can already see you drooling, lol! Be sure to ‘like’ and ‘follow’ Eyelet Outlet Facebook Page to keep up with news and sales, and while you’re at it, join the Eyelet Outlet Fans Facebook group for lots of creative inspiration! Thanks so much for stopping by today – we’ll see you next time! ;)

Scrappy hugs,
lesliesig

She Sells Seashells

12/12/21 Rising Star at A Place To Start!

Hey, everybody! So hard to believe that we’re a little over a week into December already! This year has literally flown by and it won’t be too much longer before the jolly round man will make his appearance! I’m thrilled to be back on the Clear Scraps blog today with another awesome DT inspiration project! Even though we’re almost officially into Winter, I’m squeezing in one more Summer-themed project! This home decor piece features our Medium Heart DIY Pallet Shape embellished with our Sand Dollar Chipboard Embellishments and Fan Shells Chipboard Embellishments along with a few other supplies! Can’t tell you how much I enjoyed creating this! ;)

I started by painting the front and back of the Medium Heart DIY Pallet Shape with Glacier chalk paint. Then I moved on to the Sand Dollar Chipboard Embellishments and Fan Shells Chipboard Embellishments, and painted them with Prominent Pink, Tuscan Red and Oatmeal chalk paint, all mixed separately with Farmhouse White Ash paint to get the desired colors for the individual shells. Then I adhered various shades of pink cardstock behind the shells and inked the edges with antique linen distress ink. I die cut the twisted rope background and adhered it at an angle to the heart pallet. I attached the shells, one by one, to the heart pallet and then added three pieces of sea glass (not sure if it’s real or faux but it works!) that I inked with tumbled glass distress ink. I die cut the letters needed for the sentiment, adhered them in the upper left corner, and then added dark blue gemstones to finish the piece.

And one more look… super happy with how this turned out and I can’t wait to share it! I absolutely LOVE it when a project turns out exactly the way I envisioned it! ;)

Sharing in the following challenges:
1. 613 Avenue Create: #12 – Anything Goes w/optional twist of Any Holiday (no twist)
2. A Perfect Time To Craft Open Challenge: #12 – Anything Goes
3. A Place To Start: #12 – Anything Goes w/optional twist of Blue Christmas (no twist)
4. Classic Design Challenge: #12 – Anything Goes
5. Crafty Catz: #576 – Anything Goes w/optional twist of Christmas Celebrations (no twist)
6. Creative Moments: #228 – Anything Goes
7. Lil Patch of Crafty Friends: #171 – Anything Goes
8. The Corrosive Challenge Blog: #12 – Anything Goes
9. The Crafter’s Cafe Challenge Blog: #279 – Anything Goes

Clear Scraps products used:
Medium Heart DIY Pallet Shape
Sand Dollar Chipboard Embellishments
Fan Shells Chipboard Embellishments

Other products used:
Cardstock/Paper: CutCardStock Brown Bag Kraft Paper, CutCardStock Pop-Tone Bubblegum cardstock, CutCardStock Basis Pink cardstock, CutCardStock Basis Soft Pink cardstock, CutCardStock Basis Navy cardstock
Ink: Ranger Antique Linen and Tumbled Glass Distress Inks
Dies/Punches: Tutti Designs Twisted Rope Background die, Sizzix Alphanumeric Tiny Type Lower Thinlits
Accessories: Farmhouse white Ash paint; Folkart Chalk Paint- Prominent Pink, Tuscan Red, Oatmeal and Glacier; sea glass, hot glue gun, Eyelet Outlet Dark Blue Jewel Bling

I hope you’ve enjoyed today’s project and you’re inspired to get those craft supplies out to play! Be sure to check out all the amazing acrylic, wood and chipboard goodies at Clear Scraps… OMGoodness, you won’t be disappointed! And head on over to the Clear Scraps Facebook Page for lots of inspiration! And while you’re at it, join the Clear Scraps Facebook Creative Group to connect with other Clear Scraps fans! Thanks so much for stopping by today – we’ll see you next time!

Scrappy hugs,
lesliesig

Do I really need more shoes?!

Hey, everybody! Well, another weekend has come and gone, and here we are facing Monday again! But that’s okay as far as I’m concerned… a crafty day is a good day, and it doesn’t matter what day of the week it is! I’m thrilled to be back on the Clear Scraps blog today with another awesome DT inspiration project! Those who know me know that I am passionate about two things: (1) fun folds and (2) shoes! ;) Well, actually three things: (1) cats – we rescue, (2) fun folds and (3) shoes! When I married my kids’ dad many moons ago, I had nearly 60 pairs and he just couldn’t understand it, lol! I don’t have nearly that many now but I still reminisce about the good ol’ days when I had a pair in every color imaginable to coordinate with every outfit. So out came the Acrylic Tag Album to document those memories! This was a fun project!

I cut different colors and patterns of paper for every page, hand-cut in a whimsical fashion, leaving just a tad bit of the clear acrylic showing on all edges. I die cut labels and stitched ovals for each page and layered the white stitched ovals on the label die cuts. I stamped different shoes (including boots and flip flops) with sentiments on the ovals and colored them with alcohol markers to coordinate with the patterned paper on that page. I created hole reinforcements with two circle punches and tied the pages together with purple wrinkled ribbon embellished with a shoe charm from my stash. I added tiny iridescent gemstones to each page to finish the album.

One more look… so loving how this turned out! Great selection of shoes, boots and flip flops – had to cover all bases, lol!

Sharing in the following challenges:
1. 613 Avenue Create: #11 – Anything Goes with optional twist of Thanks/Thankfulness
2. A Bit More Time To Craft Challenge: November/December – Anything Goes
3. A Place To Start: #11 – Craft A Favorite Memory (having lots of shoes back in the day!)
4. Classic Design Challenge Blog: #11 November – Anything Goes
5. Jan’s Digi Stamps Challenges: November – Anything Goes
6. Lemon Shortbread Challenge Blog: #158 – Anything Goes
7. Pammie’s Inky Pinkies Challenges: #2146 – Anything Goes
8. QKR Stampede: #432 – Anything Goes
9. The Creative Crafters: #46 – Anything Goes
10. World Wide Open Design Team Monthly Challenge: #11 – Anything Goes

Clear Scraps products used:
Acrylic Tag Album

Other products used:
Cardstock/Paper: CutCardStock Basis Dark Purple, Basis Magenta, Basis Gold, Basis Teal, Basis Blue, Basis Green, Pop-Tone Tangy Orange, Pop-Tone Gumdrop Green cardstock, Neenah Classic Crest Solar White cardstock, K & Co. Essentials Dark Designer Paper Pad
Stamps: STAMPlorations A Girl and Her Shoes stamp set, Paper Pretties Sassy Shoes stamp set, Great Impressions Hanging Flip Flops and Right Flip Flop rubber stamps
Ink: Memento Tuxedo Black ink (pad and marker), Versamark Dazzle; Arteza alcohol markers- YG25, G36/38, B17, BR68, Y03/22/25/33, YR00, R21, BG23/29
Dies/Punches: Spellbinders Labels Twenty-Five, Memory Box Stitched Oval Layers, Stampin’ Up 1/4″ and 1/2″ Circle Punches
Accessories: MISTI stamp tool, Big Shot, Bearly Art precision craft glue, Ranger Sticky Embossing Powder, Stampin’ Up Dazzling Diamonds Glitter, Prairie Bird Boutique wrinkled purple ribbon, shoe charm and rings from stash, Stampin’ Up Mini Dimensionals, ScraPerfect iridescent gemstones, Trinity Pick-Up Stick

I hope you’ve enjoyed today’s project and you’re inspired to get those craft supplies out to play! Be sure to check out all the amazing acrylic, wood and chipboard goodies at Clear Scraps… OMGoodness, you won’t be disappointed! And head on over to the Clear Scraps Facebook Page for lots of inspiration! And while you’re at it, join the Clear Scraps Facebook Creative Group to connect with other Clear Scraps fans! Thanks so much for stopping by today – we’ll see you next time!

Scrappy hugs,
lesliesig

welcome fall mini album

11/19/21 Top 4 at Alphabet Challenge Blog!
11/26/21 Top Rocker at 613 Avenue Create!
12/3/21 Top 3 at Crafty Calendar Challenge!

Hi friends! Happy Hump Day! We’ve had several vet visits over the past week and one of our most recently rescued 10-week-old kittens has been at the vet since Monday morning. We’re praying for a good outcome, and if you’re the praying type, we’d appreciate some prayers. Please and thank you. <3 Affiliate links are used in this post at no cost to you – I really appreciate your support! We’re still loving our Fall weather out here (even though it gets pretty darn chilly at night) and I thought it only appropriate to share a super cute little mini album with you today, documenting a trip to Silverton, CO, several years ago in October, not long after we moved out here in May. The changing of the leaves in Colorado is just breath-taking!

I’ve had this adorable set of Sizzix Mini Album Thinlits in my stash for a while and had never used it, so I thought it would be a good time to play! I cut the mini album base from Cardstock Warehouse Brown Box Kraft cardstock and all the layering panels for the pages from Nikki Sivils Tree Love 6×6 Mini Pad (an oldie in my paper stash). I printed the photos from my phone onto glossy photo paper, cut them with My Favorite Things Stitched Square STAX Die-namics and set them aside. Using the same set of Mini Album Thinlits, I cut the elements for each page from CutCardStock Basis Dark Red cardstock, CutCardStock Pop-Tone Hot Fudge cardstock, and Nikki Sivils Tree Love 6×6 Mini Pad. I added a leaf charm on a piece of jute cord tied in a bow to hold the album together, added the title on the front (cut from the Brown Box Kraft with the Sizzix Alphanumeric Tiny Type Lower Thinlits), and then finished it up with some gold flat-back pearls. As you can imagine, the most fun was putting it together… I’m so smitten! I absolutely love how it turned out!

Sharing in the following challenges:
1. 613 Avenue Create: #11 – Anything Goes with optional twist of Thanks/Thankfulness
2. A Place To Start: #11 – Craft A Favorite Memory (documented trip)
3. Alphabet Challenge Blog: P is for Patterned Paper
4. Classic Design Challenge Blog: #11 November – Anything Goes
5. Crafty Calendar Challenge: November – Anything Goes
6. Creative Moments: #226 – Anything Goes
7. Lil Patch of Crafty Friends: #169 – Anything Goes
8. Moving Along With The Times: #136 – Anything But A Card
9. Penny’s Paper Crafty Challenge Blog: #509 – Anything Goes
10. The Crafting Challenge: November – Stitching (Real or Faux) (photos cut with stitched square dies)
11. Through The Purple Haze: #186 – Anything Goes with optional For Him

Products used:
Cardstock/Paper: Cardstock Warehouse Brown Box Kraft cardstock, CutCardStock Basis Dark Red cardstock, CutCardStock Pop-Tone Hot Fudge cardstock, Nikki Sivils Tree Love 6×6 Mini Pad
Dies/Punches: Sizzix Mini Album Thinlits, My Favorite Things Stitched Square STAX Die-namics, Sizzix Alphanumeric Tiny Type Lower Thinlits
Accessories: Tonic Studios 12″ Guillotine Paper Trimmer, Big Shot, Tim Holtz Tiny Attacher, Canvas Corp Jute Cord, Leaf Charm from stash, Bearly Art precision craft glue, Flourish With A Bling Gold Flat-Back Pearls

I hope you’ve enjoyed seeing this adorable little mini album – I sure enjoyed making it! I’m hoping to play in some challenges this month… it’s been a little while since I’ve entered any challenges and I’m really missing it! Thanks so much for stopping by today – we’ll see you next time! ;)

Scrappy hugs,
lesliesig

the GOOD life

11/30/21 November Rising Star at A Place To Start!

Hey, everybody! It’s Friday and I hope you have something fun – and safe – planned for this weekend! You know where I’ll be… I can’t be any safer than I am in my studio, lol! ;) I’m thrilled to be back on the Clear Scraps blog today with another awesome DT inspiration project! I created a retro home decor piece featuring the Medium Circle DIY Pallet Shape decorated with paint, the 12″ Funky Boxes Mascils Mask/Stencil and markers, along with a Mini Shaker Retro TV with Sprinkles Groovy Flowers and Sprinkles Lime Confetti as the shaker filler! This was beyond fun and brought back so many memories! I distinctly remember the groovy green and orange color palette so many people had in their homes (and clothing) in the 70s! Yep, those were the good ol’ days!

I started by painting the front and back of the Medium Circle DIY Pallet Shape a super pale green by mixing Adirondack White with a tiny bit of Spanish Moss chalk paint. When that was dry, I laid the 12″ Funky Boxes Mascils Mask/Stencil on the pallet and pounced Spanish Moss chalk paint all over it with a dauber. The paint ended up sparse and spotty in some areas and thicker in other areas but I left it that way to add to the retro/vintage feel. Once dry, I outlined all the stenciled areas with a dark green alcohol marker for contrast and interest.

Next, I painted the front chip form of the Mini Shaker Retro TV with Liquitex Yellow Oxide mixed with Cadmium Orange acrylic paint. Once that was dry, I ran a black alcohol marker around the outside edges and the TV screen cut-out and set it aside. I also ran the black marker around the outside edges of the rest of the chip forms so they’d all be uniform. I adhered a piece of orange patterned paper to the inside of the chip back and then adhered the next two chip forms to it. I added the shaker filler consisting of green and orange pieces of Sprinkles Groovy Flowers and Sprinkles Lime Confetti, added the acrylic divider, and then adhered the painted front chip form to close it up. I cut a rabbit ears antenna from metallic silver foil cardstock and adhered it to the TV. I adhered the TV to the bottom front of the pallet and added retro thrift shop word stickers to complete the piece.

And one more look… I couldn’t be more happy with how this turned out! All of the absolutely awesome Clear Scraps products made this project come to life! I LOVE it!

Sharing in the following challenges:
1. A Perfect Time To Craft Challenge: #11 November – Anything Goes
2. A Place To Start: #11 – Craft A Favorite Memory (teenage years!)
3. Classic Design Challenge Blog: #11 November – Anything Goes
4. Moving Along With The Times: #136 – Anything But A Card
5. Through The Purple Haze: #186 – Anything Goes with optional For Him

Clear Scraps products used:
Medium Circle DIY Pallet Shape
12″ Funky Boxes Mascils Mask/Stencil
Mini Shaker Retro TV
Sprinkles Groovy Flowers
Sprinkles Lime Confetti

Other products used:
Cardstock/Paper: Polly’s Paper Studio orange patterned paper, Hygloss Metallic Silver Foil cardstock
Ink: Copic alcohol marker- 100 Black; Arteza alcohol marker- YG10 Jasper Green
Accessories: Folkart Adirondack White and Spanish Moss chalk paint, Liquitex Yellow Oxide and Cadmium Orange acrylic paint, Bearly Art precision craft glue, Ranger Distress Collage Medium, October Afternoon Thrift Shop Word Stickers

I hope you’ve enjoyed today’s project and you’re inspired to get those craft supplies out to play! Be sure to check out all the amazing acrylic, wood and chipboard goodies at Clear Scraps… OMGoodness, you won’t be disappointed! And head on over to the Clear Scraps Facebook Page for lots of inspiration! And while you’re at it, join the Clear Scraps Facebook Creative Group to connect with other Clear Scraps fans! Thanks so much for stopping by today – we’ll see you next time!

Scrappy hugs,
lesliesig

Pinwheel Bouquet

11/30/21 November Rising Star at A Place To Start!
12/1/21 Top 5 Winner at Moving Along With The Times!
12/6/21 Top Sprout at A Place To Start!

Hi everyone! A very Happy Monday to you! I hope it’s not too awfully cold where you are! It has cooled off nicely here and we love it! Our new challenge is live over at Mix It Up Challenge Blog and I’m super stoked to share my DT inspiration project for MIUCB #55 – Anything Goes + 3-D Project! Our challenges are always ‘anything goes’ and we offer a technique twist each month to inspire our participants but the twist is not mandatory to play. This month the twist is to create a 3-D project – and I created a pinwheel bouquet! I thought it would be fun to make one for my studio and it sure brought back some childhood memories!

I painted the inside of a wide-mouth mason jar with Farmhouse paint and let it dry for several days. I made eight pinwheels in 4″, 5″, 6″ and 7″ sizes using the WRMK Pinwheel Punch Board and attached a jeweled embellishment in the center of each one with Ranger distress collage medium. I arranged them inside the mason jar with hot glue and floral foam. I wrapped ribbon around the jar lid and tied a bow, and attached a small button in the center.

And one more look… totally loving how this turned out! Definitely a fun project!

Sharing in the following challenges:
1. A Bit More Time To Craft Extra Challenge: November Anything Goes
2. A Perfect Time To Craft Challenge: #11 November – Anything Goes
3. A Place To Start: #11 – Craft A Favorite Memory (playing with pinwheels as a kid!)
4. Classic Design Challenge Blog: #11 November – Anything Goes
5. Moving Along With The Times: #136 – Anything But A Card
6. Your Scrapbook Place: November – Anything Goes

Products used:
Cardstock/Paper: Stampin’ Up Best Day Ever DSP
Dies/Punches: We R Memory Keepers Pinwheel Punch Board
Accessories: Tonic Studios 12″ Guillotine Paper Trimmer, Wide-mouth mason jar, White Ash Farmhouse paint, American Crafts Pinwheel Attachments, Ranger distress collage medium, Stampin’ Up Best Day Ever ribbon and button, Stampin’ Up Falling In Love Embellishments

I hope you’ve enjoyed today’s project and will link up either an ‘anything goes’ or 3-D project with us this month! We’d love to see what you create! Thanks so much for stopping by today – we’ll see you again soon! ;)

Scrappy hugs,
lesliesig