Red Glitter Ornament

Hi friends! I hope you’re having a wonderful crafty weekend! This month’s challenge is live over at Merry Little Christmas Challenge Blog and I’m thrilled to share my DT inspiration project with you for MLCCB #14 – September Anything Christmas Goes! I created a beautiful red glitter ornament which I plan to gift because with eight cats, we won’t be putting up a tree again this year, lol! We love our fur babies, but boy-oh-boy they sure can wreak havoc on a Christmas tree! Bwahahaha!

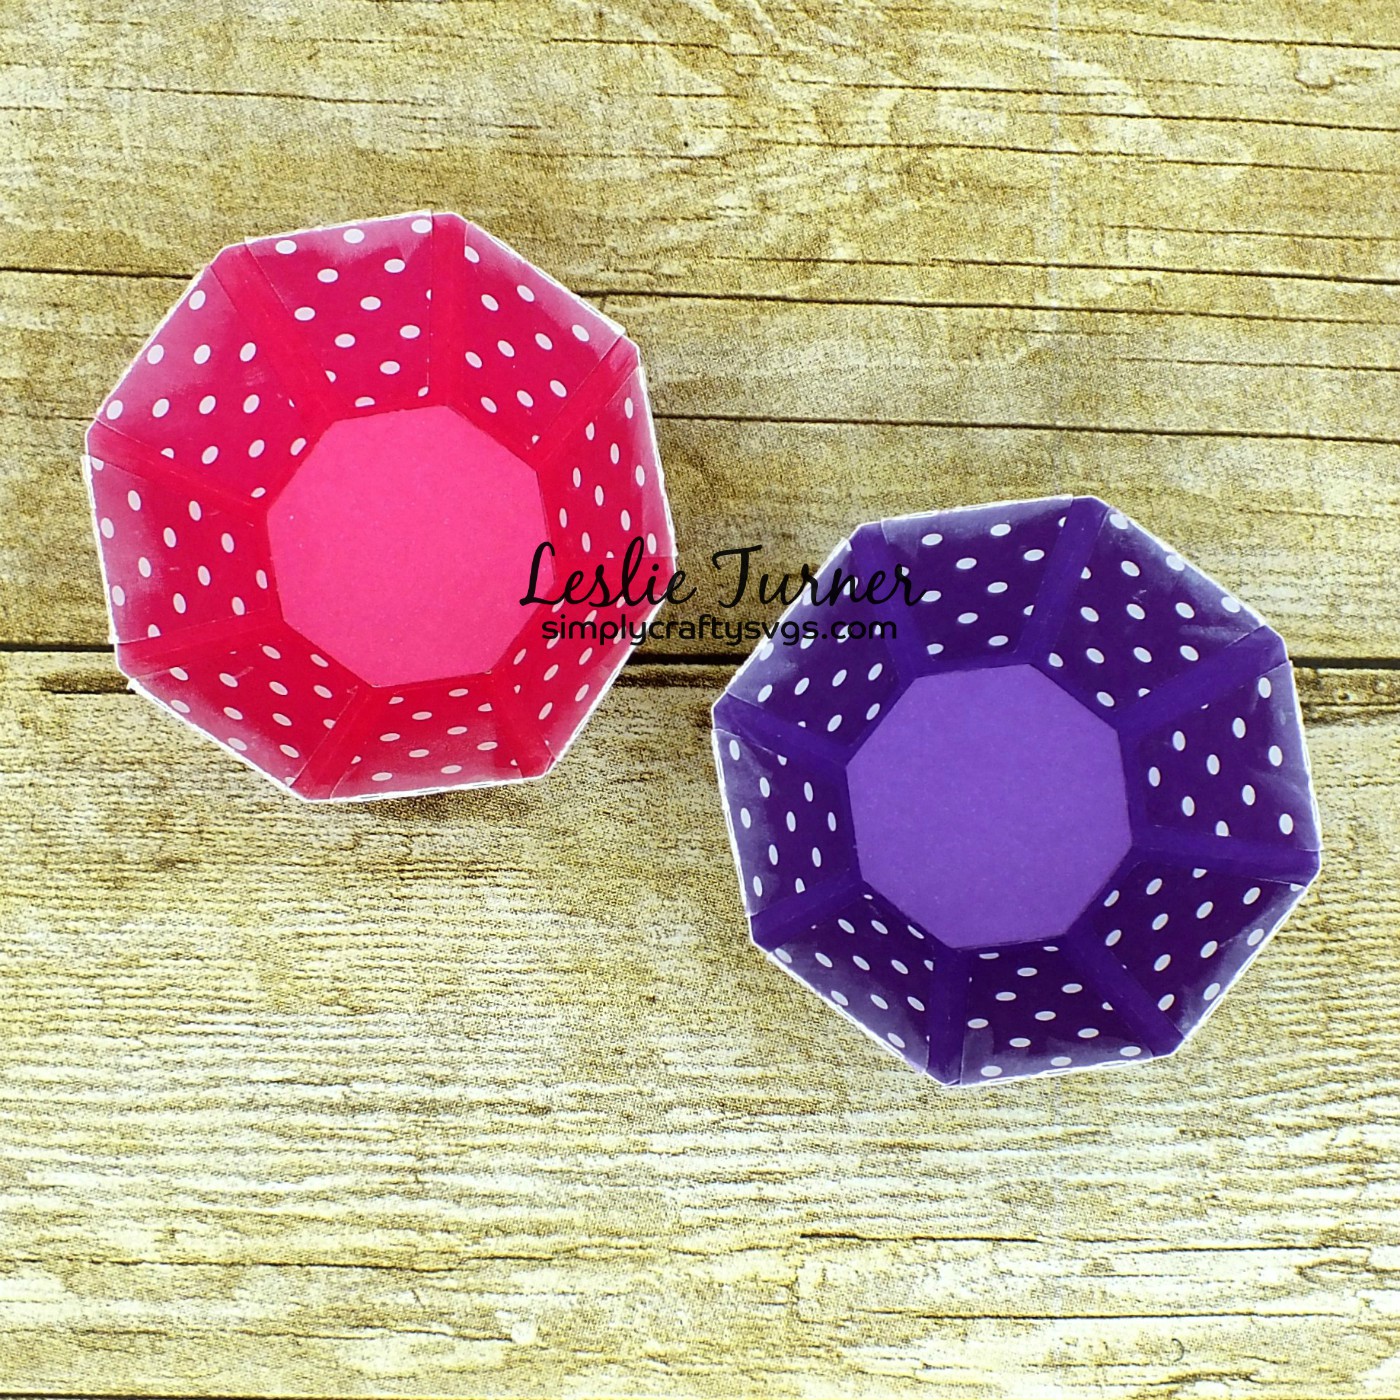
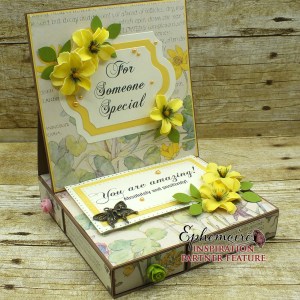
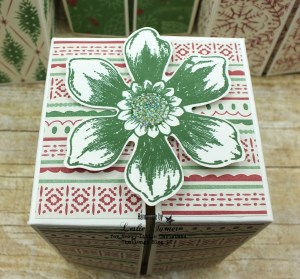
Ornaments are really easy to create with intricate dies, as long as the design is the same on both sides. I cut four die cuts of this pretty round ornament from red glitter paper.

2019_0811001a

I folded each of them down the middle and adhered the right side of one to the left side of the next until all four were adhered. Just prior to adhering the third one to the fourth one, I sandwiched a loop of metallic string between the layers. I added a few clear rhinestones for a little extra added bling.

2019_0811002a

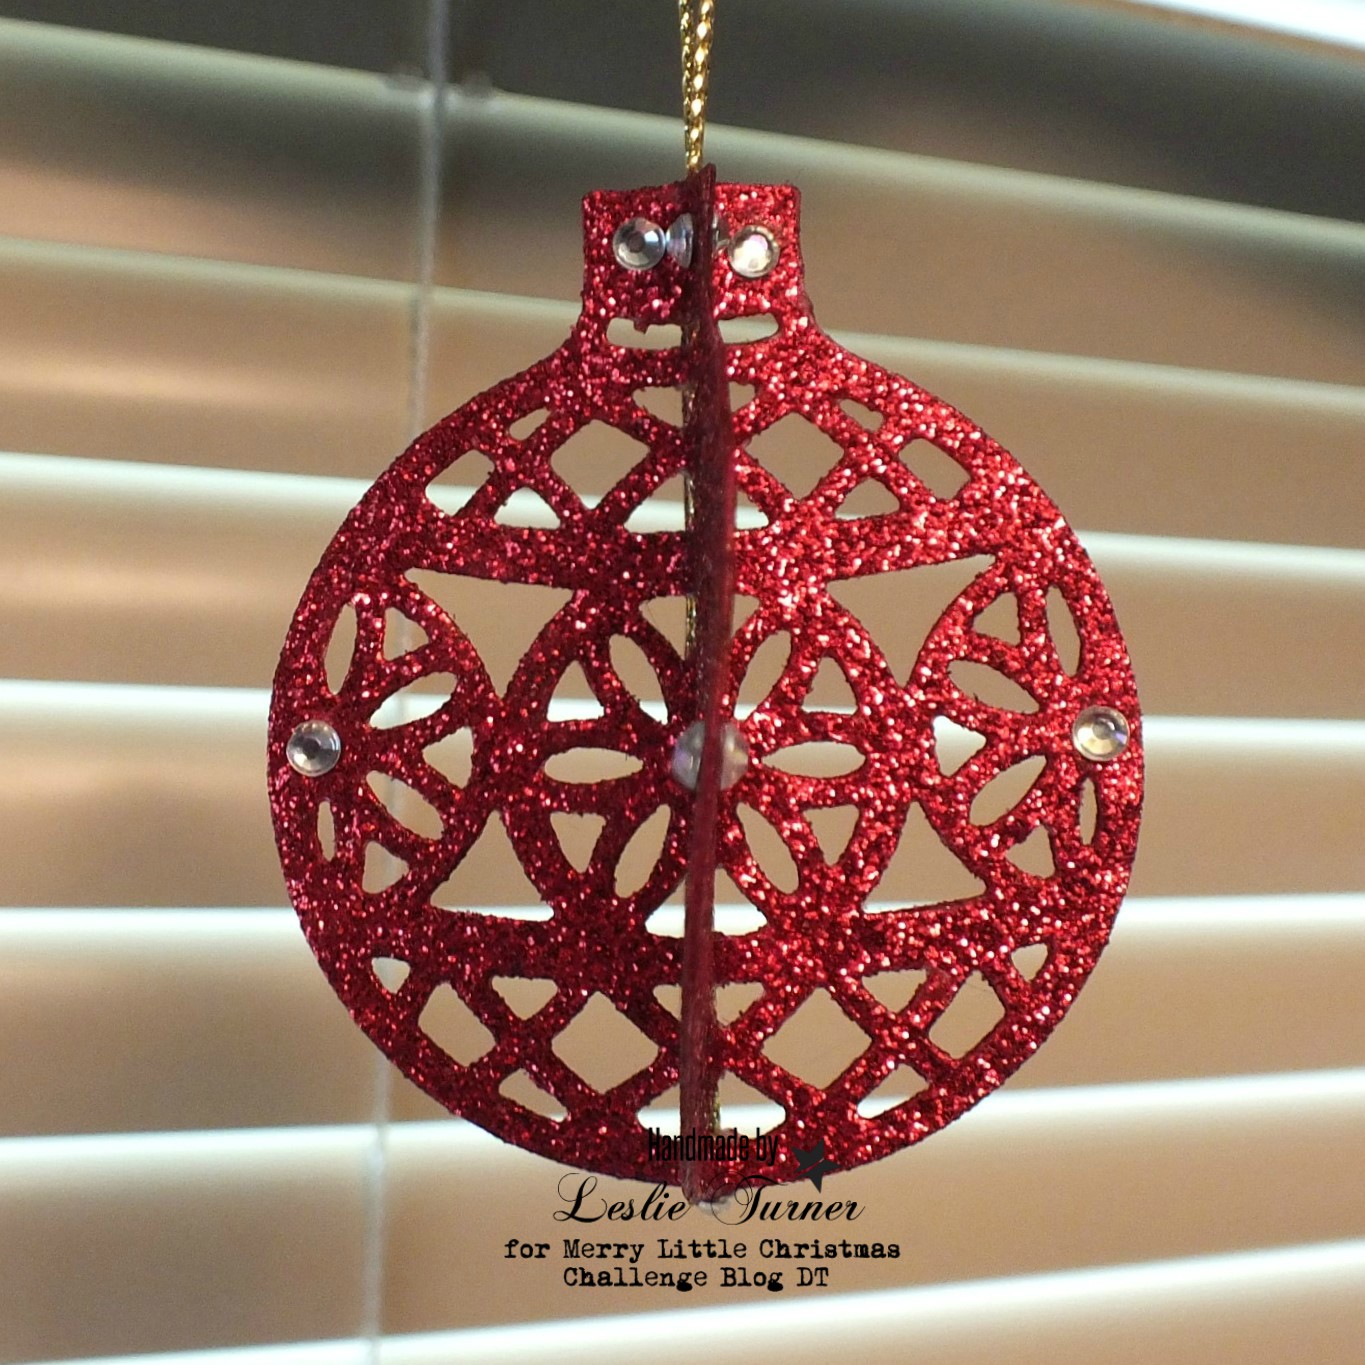
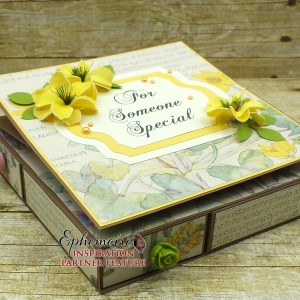
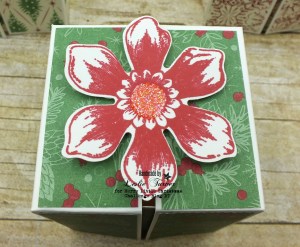
And here’s one more close-up look. Super happy with how this turned out!

2019_0811003a

I’d love to enter this ornament into the following challenges:
A Perfect Time To Craft: #9 – September Anything Goes
Classic Design Team Challenge Blog: #9 – September Anything Goes
Crafts Galore Encore Challenge Blog: September Anything Goes

Products used:
Cardstock/Paper: Stampin’ Up Red Glimmer Paper
Ink: Studio 71 alcohol marker- R20
Dies/Punches: Stampin’ Up Delicate Ornaments Thinlits
Accessories:  Gemini Junior die cutting machine, Really Reasonable Ribbon Gold Metallic String

I hope you’ve enjoyed this Christmas ornament and will link up a Christmas project with us this month! It’s never too early to get started! Thanks so much for stopping by – we’ll see you again soon! ;)

Scrappy hugs,
lesliesig

Pink & Purple Dotted Bowls

Hi everyone! Happy Wednesday – I hope you’re having a great week! I’m not posting on the Simply Crafty SVGs Blog today but have popped in this morning to share an extra DT inspiration project with you, a pair of dotted bowls created with the free Simply Crafty SVGs Embellishment Bowl cut file. Yes, I said free, so be sure to check it out! ;)

2019_087001a

I inked the upper and lower edges of these bowls with white chalk ink to disguise the white core of the dotted papers I chose.

2019_087002a

Sandy hit the ball home when she created this file… these bowls are an amazing addition to any crafter’s studio and went together seamlessly. I just had to have a couple of these on my table to put small embellishments in so I wouldn’t lose them. Can’t tell you how many times I’ve lost small things that I had set aside for projects I was working on! Love how these turned out and I’m thoroughly enjoying using them! ;)

2019_087003a

Products used:
Cardstock/Paper: Colorbok pink and purple cardstock, Colorbok pink and purple Seeing Dots paper stack
Ink: White chalk ink
Dies/Punches: Free Simply Crafty SVGs Embellishment Bowl cut file

I hope you’ve enjoyed today’s project! Be sure to check out all the fun cut files in the Simply Crafty SVGs store – you’ll have so much fun! And there are tons of freebies (like this one I used) to get started! Thanks so much for stopping by today – we’ll see you next time! ;)

Scrappy hugs,
lesliesig

Laundry counted cross-stitch

Hi everyone! Happy August 1st – it should be about time for the weather to start cooling off! It’s time for another fun challenge over at Love To Craft Challenge Blog, and I’m stoked to share my DT inspiration project for LTCCB #37 – August Anything Goes! I created the most adorable laundry room wall hanging! OMG!

Leslie

I picked up this counted cross-stitch kit almost a year and a half ago, and it had been laying in my studio, so I decided to make it. It had been a very (very) long time since I did any counted cross-stitch, but I remembered how easy it was to do. The kit contained the cloth, all the colors of thread and the hoop, and I added the bow at the top.

2019_0720002a

One more look… so glad I finally got around to making this! I just love it!

2019_0720003a

Products used:
Dimensions counted cross-stitch kit
Ribbon from stash

I hope you’ve enjoyed today’s project and will link up an ‘anything goes’ project with us this month! Thanks so much for stopping by – we’ll see you again soon! ;)

Scrappy hugs,
lesliesig

For Someone Special

Hello, my crafty friends! I hope you’re having a good crafty day! I’m super stoked to share my Ephemoire inspiration project with you this morning. If you haven’t already done so, be sure to head over to the Ephemoire Etsy Shop to check out all the amazing digital printables… there are collage sheets, digital papers, journal kits, clip art and mixed media printables, and the print quality is awesome!

I was provided Floral Field Notes #1, Floral Field Notes #2 and Floral Field Notes #3 to play with this month, all letter size, and created a four-drawer easel card. This is only the second one of these I’ve made – the first one was back in August of 2015 for another DT I was on at the time, and if you’d like to take a peek, it’s HERE. I have to say, I like this one better, lol! ;)

2019_07200017a

I created the base from heavy cardstock so it would keep it’s shape, then cut all the pieces to go around the outside of the box, the top of the box and the easel. The sentiments are computer-generated and I cut them with dies. I added flowers and a charm from my stash, and created the leaves with a punch.


I lined all the drawers and added flower brads for the drawer pulls. ;) 

Here’s one more look, open and closed… loving how this one turned out! So fun! ;)

Products used:
Cardstock/Paper: American Crafts Chocolate, Vanilla, Sunflower and Leaf cardstock, Ephemoire Floral Field Notes #1, Floral Field Notes #2 and Floral Field Notes #3, all letter size
Dies/Punches: Crafter’s Companion Die’sire ‘Ruth’ Create-A-Card die set, Sizzix Dotted Rectangle dies, Stampin’ Up Leaf punch
Accessories:  Green and Pink Petaloo flower brads, yellow Hobby Lobby flowers, Fairy charm, Doodlebug Design yellow Mini Pearls

I hope you’ve enjoyed today’s project! Be sure to check out all the awesome printables at the Ephemoire Etsy Shop, and while you’re at it, head on over to the Ephemoire Facebook Page for tons of inspiration! Thanks so much for stopping by today – we’ll see you next time!

Scrappy hugs,
lesliesig

Santa decor

Hi everyone! Happy Hump Day! We’re just cruising right through the month! Today is my post day on the Simply Crafty SVGs Blog and I’m excited to share my DT inspiration project with you, an adorable Santa table piece created with the Simply Crafty SVGs Cone Santa cut file. OMG, he’s so stinkin’ cute I can’t stand it!

2019_0324001a

As I’ve mentioned many times before, Sandy does all the work for you – all you have to do is cut all the pieces and assemble. And she has either written tutorials or videos for all her files. This was an unbelievably fun project that didn’t take very long and was relatively easy. Now I can’t wait for the Christmas season so I can show off this guy! ;)


Products used:
Cardstock/Paper: Stampin’ Up Real Red, Whisper White and Blushing Bride cardstock, Marco’s Kaleida-Paper Black cardstock, Marco’s Venicelux Metallic Gold cardstock
Dies/Punches: Simply Crafty SVGs Cone Santa cut file

I hope you’ve enjoyed today’s project! Be sure to check out all the fun cut files in the Simply Crafty SVGs store – you’ll have so much fun! And there are tons of freebies to get started! Thanks so much for stopping by today – we’ll see you next time! ;)

Scrappy hugs,
lesliesig

Washi Tape Caddy

Hi everyone! It’s HUMP DAY says the camel, lol! Today is my post day on the Simply Crafty SVGs Blog and I’m excited to share my DT inspiration project with you, a fun Washi Tape caddy that I created for my studio with the Simply Crafty SVGs Tool Caddy cut file. I’ve become addicted to skinny Washi Tape and thought it only fitting to create a caddy to hold it!

2019_03240010a

I used 120# Kraft cardstock for the base and some orange dotted cardstock for the panels. I have a fun Crafty Organization stamp set from Inspired by Stamping in my stash that I decided to use to stamp the label in matching orange ink. What a fun project – I’ll soon be making a couple more of these in different colors to hold the rest of my Washi Tape! ;)


Products used:
Cardstock/Paper: Paper Accents 120# Kraft cardstock, Colorbok Seeing Dots cardstock, GKD Tomato Soup cardstock, Stampin’ Up Whisper White cardstock scrap
Stamps: Inspired by Stamping Crafty Organization stamp set
Ink: Stampin’ Up Tangerine Tango ink
Dies/Punches: Simply Crafty SVGs Tool Caddy cut file
Accessories:  Tim Holtz stamp platform, tiny hole punch, Tim Holtz Idea-ology Mini Fasteners

I hope you’ve enjoyed today’s project! Be sure to check out all the fun cut files in the Simply Crafty SVGs store – you’ll have so much fun! And there are tons of freebies to get started! Thanks so much for stopping by today – we’ll see you next time! ;)

Scrappy hugs,
lesliesig

Candy Corn Witch gift box

Hi everyone! We are just rockin-and-rollin’ through the year! Hard to believe it’s June already! I’m happy to share that I’m once again sponsoring and guest designing for C.R.A.F.T. Challenge, this time for Challenge #516 – Not A Card! As a sponsor for this challenge, I have a great prize pack consisting of an Art Gone Wild Crafty Cutts die set, a Paper Pretties birthday clear stamp set, and a package of Michaels Paper Flowers for a lucky winner over on the C.R.A.F.T. Challenge blog!

I created a super cute gift box using the Candy Corn Witch cut file from The Dreaming Tree. Fun, fun, fun!

2018_0226001a

I know it’s a little early, but isn’t this witchy gal the cutest ever?! And SO much fun putting together!

2018_0226002a

I used the traditional Halloween colors of black, purple, orange and yellow. And the best part is there’s not a huge list of supplies – just cardstock and a die cutting machine!

2018_0226003a

And here’s a shot with the lid off showing the box. Hmmmm… wonder what I should put in it?!

2018_0226004a

Products used:
Cardstock/Paper: Stampin’ Up Crushed Curry, Tangerine Tango, Basic Black, Whisper White and Elegant Eggplant cardstock, Marco’s Gold Mirror cardstock
Dies/Punches: The Dreaming Tree Candy Corn Witch cut file

I hope you’ve enjoyed today’s project that is not a card, and you will link up with us this week! We’d love to see what you create! Thanks so much for stopping by and we’ll see you again soon! ;)

Scrappy hugs,
lesliesig

Small Split-Top Treat Boxes

Hi everyone! Happy Hump Day and it’s May 1st! A new challenge is live over at Merry Little Christmas Challenge Blog and I’m happy to share my DT inspiration project for MLCCB #10 – May Anything Christmas Goes! I created a fun set of nine small split-top treat boxes. My inspiration came from an older YouTube tutorial here done by my friend, Dawn. I used Stampin’ Up cardstock, paper, stamp, ink and flower punch.

DSCF4610

I did these assembly line fashion, by cutting the bases first and then all the patterned paper pieces. I stamped the flowers, punched them out, coated the centers with Glossy Accents and added glitter.  I popped the flowers up on dimensional foam pads on one side so the boxes could easily be opened.

DSCF4612

Here are close-ups of the flowers. They turned out so pretty!

And here’s one final look at the group from overhead… love how these turned out!

DSCF4611

Products used:
Cardstock/Paper: Stampin’ Up Very Vanilla cardstock, Stampin’ Up This Christmas Specialty DSP
Stamps: Stampin’ Up Beautiful Bunch stamp set
Ink: Stampin’ Up Garden Green and Real Red ink
Dies/Punches: Stampin’ Up Fun Flower Punch
Accessories:  Tim Holtz Stamp Positioner, Glossy Accents, Stampin’ Up Dazzling Diamonds Glitter

I hope you’ve enjoyed today’s project and will link up a Christmas project with us this month! It’s never too early to start! Thanks so much for stopping by today and we’ll see you again real soon! ;)

Scrappy hugs,
lesliesig

Gingerbread House

Hi everyone! Happy Hump Day! Today is my post day on the Simply Crafty SVGs Blog and I’m excited to share my DT inspiration project with you, a piece of Christmas home decor created with the Simply Crafty SVGs Gingerbread House Box cut file. Oh, what fun!

2019_0323001a

Sandy actually designed this cut file to be a gift box or a box to hold a battery-operated tea light. I glued the box closed and intend to use it as Christmas decor. I created the base from 120# kraft cardstock, and then used white cardstock and scraps of brown, red, yellow and green cardstock. I used a red Glitter Gumdrop for the door handle, and used clear sparkle overlay marker on all the paper gumdrops for a little shimmer.

2019_0323002a

Here are a few more shots from different angles… love how this turned out and can’t wait for Christmas to roll around again, lol!

2019_0323003a
2019_0323004a
2019_0323005a

Products used:
Cardstock/Paper: Paper Accents 120# Kraft cardstock, Stampin’ Up scraps of Early Espresso, Crushed Curry, Real Red and Garden Green cardstock, The Paper Studio White cardstock
Ink: Spectrum Noir Crystal Clear Sparkle Overlay Marker
Dies/Punches: Simply Crafty SVGs Gingerbread House Box cut file
Accessories:  YNS Red Glitter Gumdrops

I hope you’ve enjoyed today’s project! Be sure to check out all the fun cut files in the Simply Crafty SVGs store – you’ll have so much fun! And there are tons of freebies to get started! Thanks so much for stopping by today – we’ll see you next time! ;)

Scrappy hugs,
lesliesig

Feel Better

Hi everyone! It’s Hump Day (says the camel… lol!) Today is my post day on the Simply Crafty SVGs Blog and I’m excited to share my DT inspiration project with you, a super sweet get well box card created with the Simply Crafty SVGs Orchid Box Card cut file. I just love it!

2018_09090001a

The sky is the limit as far as color combos and occasions go – these orchids are so versatile… get well, birthday, thinking of you, missing you… the list goes on!

2018_09090002a

Here’s an overhead shot so you can see the construction. Pretty cool, huh?!

2018_09090003a

One final shot of the box card flattened and ready to be put in an envelope. Love that it folds flat for mailing! Super happy with how this turned out!

2018_09090005a

Products used:
Cardstock/Paper: White Clear Path Paper cardstock, Stampin’ Up Berry Burst, Crushed Curry and Always Artichoke cardstock, Stampin’ Up Fresh Florals DSP
Stamps: Stampin’ Up Sassy Salutations stamp set
Ink: Stampin’ Up Berry Burst ink, Versamark Dazzle
Dies/Punches: Simply Crafty SVGs Orchid Box Card cut file, Sizzix Dotted Rectangles die
Accessories:  Tim Holtz Stamp Platform, Hero Arts Clear Embossing Powder, Hot Pink Glitter Dots

I hope you’ve enjoyed this pretty orchid box card… I sure enjoyed making it! Be sure to check out all the fun cut files in the Simply Crafty SVGs store – you’ll have so much fun! And there are tons of freebies to get started! Thanks so much for stopping by today – we’ll see you next time! ;)

Scrappy hugs,
lesliesig