Get Better Soon

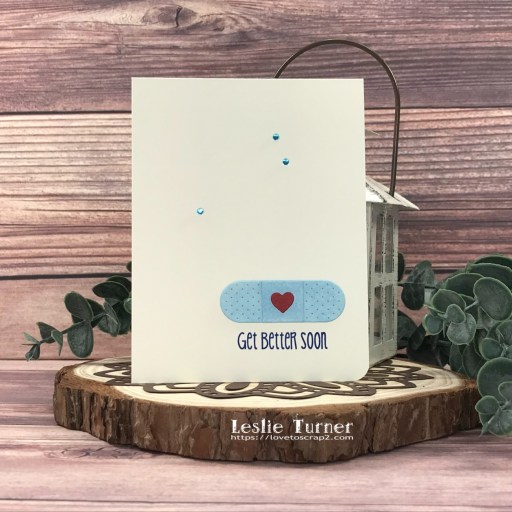
Hey everybody! Happy Hump Day – I hope you’re having a wonderful week! Our new challenge is live this morning over at Love To Craft Challenge Blog and I’m delighted to share my DT inspiration project for LTCCB #73 – Anything Goes! Every year I try to use stamps and dies that I’ve had in my stash for a long time (many of them have never seen the light of day) and I typically do pretty well. I believe I’ve used this Band-Aids die set from My Favorite Things once, about 4-5 years ago, so I thought it was time to bring it back out for another play since it’s so stinkin’ cute! A clean and simple get well card in calming shades of blue seemed perfect!

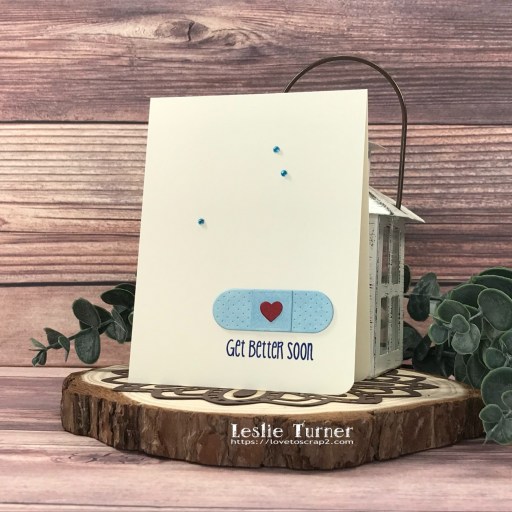
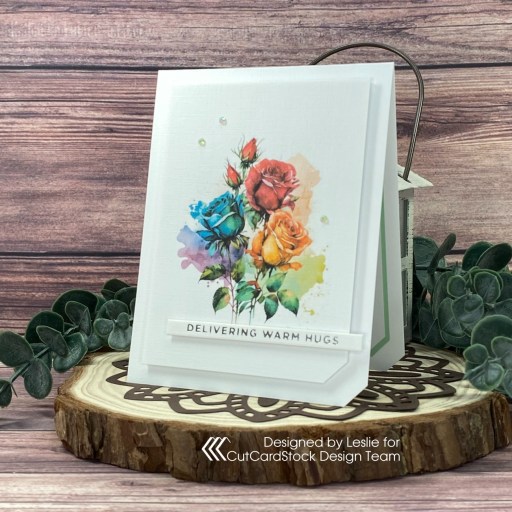
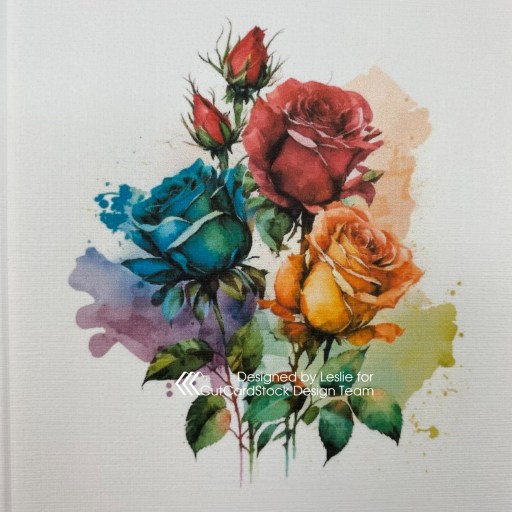
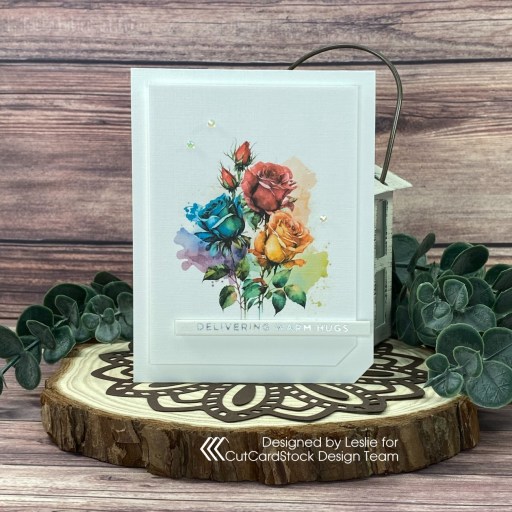
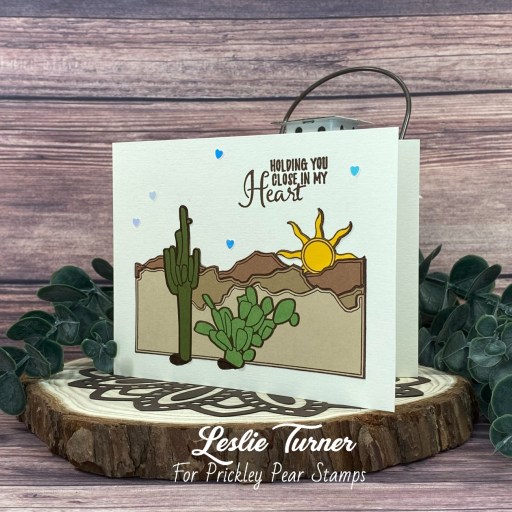
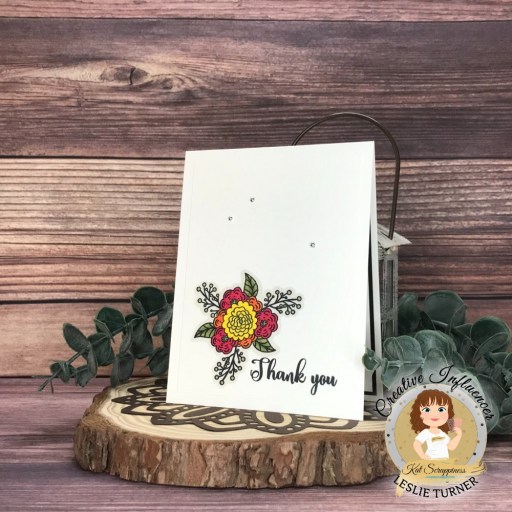
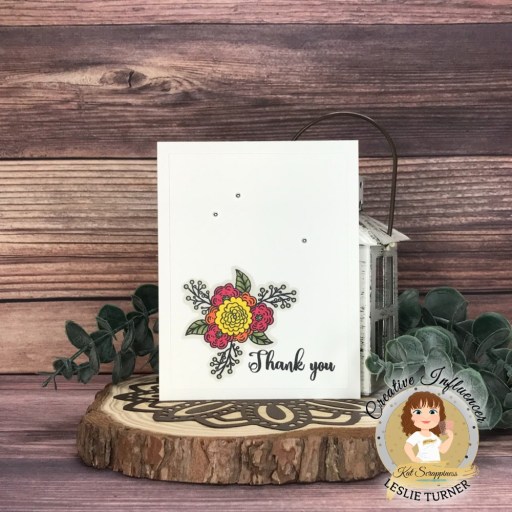
I cut a standard A2 size top-folding card base from CutCardStock Basis 110# Natural cardstock and rounded the lower right corner. I die cut the larger Band-Aid and accompanying elements from a scrap of the Basis Natural and colored them with alcohol markers. I stamped a sentiment from the Prickley Pear Stamps Flourished Borders stamp set in Catherine Pooler Suede Shoes ink.

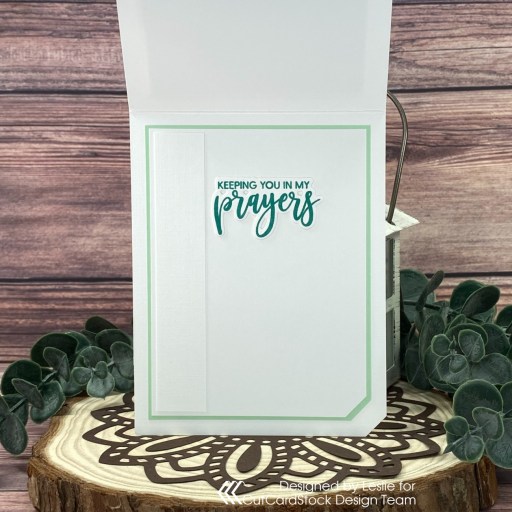
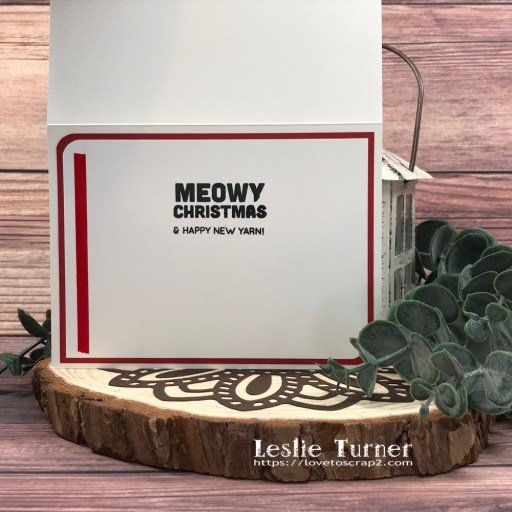
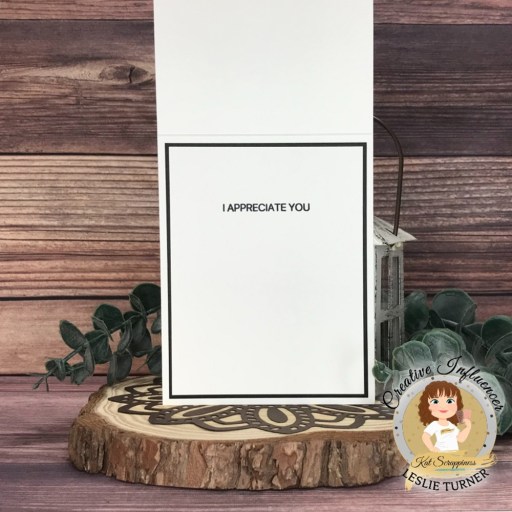
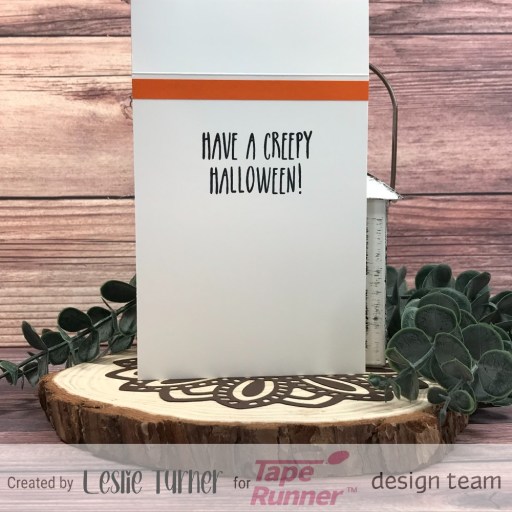
I simply stamped a sentiment (partly masked) from the Stampin’ Up Something To Say stamp set on the inside in Catherine Pooler Suede Shoes ink without adding any layers or embellishing strips.

Sharing in the following challenges:
1. A Perfect Time To Craft Open Challenge Blog: March #3-2023 – Anything Goes
2. Classic Design Challenge: March 2023 #3 – Anything Goes
3. Crafts Galore Encore Challenge Blog: #109 – March Anything Goes
4. Cut It Up Challenge Blog: #272 – Clean and Simple
5. Little Red Wagon: #294 – Feel Better!
6. Penny’s Paper-Crafty Challenges: #541 – Anything Goes Using Paper
7. QKR Stampede: #462 – Anything Goes

Affiliate links are used in this post at no cost to you – I really appreciate your support! 

Products used:
Cardstock/Paper: CutCardStock Basis 110# Natural cardstock
Stamps: Prickley Pear Stamps Flourish Borders, Stampin’ Up Something To Say stamp set
Ink: Arteza alcohol markers- B18, R21; Catherine Pooler Suede shoes ink
Dies/Punches: Kadomaru Pro Corner Rounder, My Favorite Things Band-Aids dies
Accessories: Tonic Studios 12″ Guillotine Paper Trimmer, Bearly Art precision craft glue, MISTI stamp tool, Big Shot, Eyelet Outlet blue bling

I hope you’ve enjoyed seeing this project and will link up with us this time! Thanks so much for stopping by today – we’ll see you next time! ;)

Scrappy hugs,

Delivering Warm Hugs

3/5/23 Sweet Pick at Cupcake Inspirations!

Hi everyone! I hope you have something fun planned this weekend! It sure got here fast… not that I’m complaining! I love every day of the week! I have an awesome CutCardStock DT inspiration project to share with you today featuring our Solar White Classic Linen and Classic Crest paired with Pop Tone Spearmint cardstock! I printed an absolutely gorgeous digital image from The Hungry Jpeg on 80# Classic Linen, trimmed it down and popped it up on white craft foam on a 100# Classic Linen card base. I added a foiled sentiment and some gemstones, and BOOM, a beautiful clean and simple card was made!

I printed The Hungry Jpeg’s Roses 3 digital image on Neenah Classic Linen 80# Solar White cardstock, trimmed it down to fit the card base, and cut the bottom right corner off with my Tonic corner punch. Here’s a close-up of the image so you can see how gorgeous it looks printed on the linen cardstock!

I cut a standard A2 size top-folding card base from Neenah Classic Linen 100# Solar White cardstock and cut off the bottom right corner. I adhered the digital image to a piece of Darice Foamies white craft foam and then to the card base. I added a foiled sentiment that I created with the Spellbinders Glimmer Hot Foil System, Spellbinders Glimmer Silver Foil, and Spellbinders Glimmer Mini Christmas Sentiment Strips Hot Foil Plate & Die Set. The finishing touch was adding several gemstones from the Trinity Andradite Sparkle Embellishment Mix with my Trinity Pick Up Stick.

I cut the inside panel from Neenah Classic Crest 80# Solar White, embellished it with a leftover strip of Neenah Classic Linen 80# Solar White, and layered the panel on CutCardStock Pop Tone Spearmint cardstock. I stamped the sentiment from Waffle Flower Essential Sentiments in Catherine Pooler Aquatini ink and cut it with the coordinating die.

Sharing in the following challenges:
1. Cardz 4 Galz: #193 – Red, White and Pink
2. Cupcake Inspirations: #563 – Photo Inspiration

3. Cut It Up Challenge Blog: #272 – Clean and Simple (front and inside sentiments cut with dies)
4. My Time To Craft: #502 – Theme of Rainbow(s)

Affiliate links are used in this post at no cost to you – I really appreciate your support!

CutCardStock products used:
Neenah Classic Linen 100# Solar White cardstock
Neenah Classic Linen 80# Solar White cardstock
CutCardStock Pop Tone Spearmint cardstock
Neenah Classic Crest 80# Solar White cardstock

Other products used:
Stamps: The Hungry Jpeg Roses 3 digital image, Waffle Flower Essential Sentiments stamp set
Ink: Catherine Pooler Aquatini ink
Dies/Punches: Tonic Corner Punch, Waffle Flower Essential Sentiments die set
Accessories: Tonic Studios 12″ Guillotine Paper Trimmer, Tombow Mono permanent adhesive, MISTI stamp tool, Big Shot, Darice Foamies white craft foam,  Spellbinders Glimmer Hot Foil SystemSpellbinders Glimmer Silver FoilSpellbinders Glimmer Mini Christmas Sentiment Strips Hot Foil Plate & Die Set, 1/4″ double-sided foam strip, Trinity Stamps Andradite Sparkle Embellishment Mix, Trinity Pick Up Stick

I hope you’ve enjoyed today’s project and you’re inspired to get crafty! Be sure to check out all the awesome cardstock and other goodies at CutCardStock (adhesives, labels, stickers, pens, watercolors and ribbon to name a few). And head on over to the CutCardStock Facebook Page for more inspiration! Thanks so much for stopping by today – we’ll see you next time!

Scrappy hugs,

Coffee because adulting is Hard

Hey everybody! Happy Hump Day – I hope you’re having a good week! I’ve popped in this morning to share another Kat Scrappiness Creative Influencer inspiration project. I created a clean and simple note card for that coffee lover featuring the Perk Up Stamp Set and Perk Up Coordinating Dies! This card, as simple as it is, was so much fun and made me giggle the entire time it took me to make it!

I cut a standard A2 size top-folding card base from Neenah Classic Crest 110# Solar White cardstock and rounded the bottom right corner. I cut strips of patterned paper from the Keep It Simple Mango 12×12 Collection Pack and adhered them to the bottom of the card front. I stamped the coffee pot and sentiment in Memento Tuxedo Black ink on Solar White cardstock and cut them with the coordinating dies. I cut two more coffee pots and adhered them together for a little dimension. I adhered several loops of Coats and Clark gold sewing thread to the back side of the coffee pot element and then adhered it to the card base. The finishing touch was adding several Eyelet Outlet white enamel dots.

I embellished the inside flap with narrow strips of the patterned paper used on the front. Since this is a note card, I left the inside blank with plenty of room to write custom message.

Sharing in the following challenges:
1. A Place To Start: February 2023 – Anything Goes w/ optional Pick a Palette
2. Classic Design Challenge: February 2023 #2 – Anything Goes
3. If You Give A Crafter A Cookie: February Challenge – Orange
4. Jan’s Digi Challenges: February 2023 – Anything Goes
5. Wednesday’s Creative Inspirations Challenge Blog: February Anything Goes

Affiliate links are used in this post at no cost to you – I really appreciate your support!

Kat Scrappiness products used:
Perk Up Stamp Set
Perk Up Coordinating Dies

Other products used:
Cardstock/Paper: Neenah Classic Crest 110# Solar White cardstock, Keep It Simple Mango 12×12 Collection Pack
Ink: Memento Tuxedo Black ink
Dies/Punches: Kadomaru Pro Corner Rounder
Accessories: Tonic Studios 12″ Guillotine Paper Trimmer, Art Glitter Dries Clear adhesive, Tape Runner, MISTI stamping tool, Big Shot, Coats & Clark Gold Sewing Thread, Eyelet Outlet White Enamel Dots

I hope you’ve enjoyed this project and I’ve inspired you to get crafty! Be sure to check out all the amazing stuff in the Kat Scrappiness store… there’s some of just about everything you’ll need to get your craft on, I promise! Be sure to Follow us on Facebook, Instagram, Pinterest and YouTube for tons of crafty inspiration! And we’d love it if you’d join the Kat Scrappiness Insiders and Stamping Enablers Facebook Groups for lots of fun crafty ideas and to share your creativity! Thanks so much for stopping by today – we’ll see you next time!

Scrappy hugs,

Sending Good Thoughts your way

Hi friends! Well, we busted through another week and it’s Saturday again! But that’s not a bad thing, is it?! I’m back up on the Prickley Pear Stamps blog today with another card featuring the oh-so-gorgeous Brighter Days Ahead stamp set which I absolutely love! Besides the amazing focal image, there are tons of sentiments. A couple days ago I shared a paper-pieced card created with it, so I colored the image on this one with alcohol markers. It’s difficult trying to achieve texture with markers but I think I did okay! ;)

I cut a standard A2 size side-folding card from CutCardStock 110# Basis Natural cardstock and rounded the bottom right corner. I stamped the image in Memento Rich Cocoa ink on 80# Basis Natural and masked the lower right corner of the image. I traced the rounded corner of the card base onto the image, and colored it with alcohol markers. I stamped the sentiment and added several flat sequins which completed the card.

Sharing in the following challenges:
1. Classic Design Challenge: February 2023 #2 – Anything Goes

Affiliate links are used in this post at no cost to you – I really appreciate your support!

Prickley Pear Stamps products used:
Brighter Days Ahead stamp set

Other products used:
Cardstock/Paper: CutCardStock 110# Basis Natural cardstock
Ink: Memento Rich Cocoa ink (pad and marker); Arteza alcohol markers- BR41/43/44/51, YG22/45, Y22
Dies/Punches: Kadomaru Pro Corner Rounder
Accessories: Tonic Studios 12″ Guillotine Paper Trimmer, Art Glitter Dries Clear adhesive, MISTI stamp tool, Picket Fence Studios Spiked Cider Sequin Mix

I hope you’ve enjoyed this project! Be sure to check out all the awesome stamps and dies at Prickley Pear Stamps! Save 10% on anything on the site when you shop at Prickley Pear Stamps by using coupon code LESLIE10 at checkout! And be sure to ‘like’ and ‘follow’ the Prickley Pear Stamps Facebook page to keep up with news and sales, and join Prickley Pear Pals (the fan group) for lots of fun crafty ideas and to share your creativity! And finally, we’d love to see you visit the Prickley Pear Stamps blog and become a Follower! Hope to see you there! Thanks so much for stopping by today – we’ll see you next time! ;)

Scrappy hugs,

Holding you close in my Heart

Hey everybody! I hope you’re having a fabulous week! I’m up on the Prickley Pear Stamps blog today with a beautiful uplifting card created with stamps from the gorgeous Brighter Days Ahead stamp set. I did quite a bit of paper piecing with colored cardstock on this CAS-ish card and I wish you could run your fingers over it and feel all the texture! I love how it turned out!

I cut a standard A2 size side-folding card base from CutCardStock 110# Basis Natural cardstock. I stamped the focal image on the card base in Memento Rich Cocoa ink and then six more times – once on CutCardStock Basis Gold, Basis Light Brown, Sandcastle, Ginger Snap, Pop Tone Jellybean Green and Pop Tone Gumdrop Green cardstock. Then the fun began fussy cutting each element or section and adhering them to the card base. I stamped the sentiment and added several Eyelet Outlet tiny heart sequins which completed the card.

Sharing in the following challenges:
1. Classic Design Challenge: February 2023 #2 – Anything Goes
2. Crafts Galore Encore Challenge Blog: #108 – Anything Goes
3. Scrapping4fun Challenges: #220 – Anything Goes
4. Wednesday’s Creative Inspirations Challenge Blog: February Anything Goes

Affiliate links are used in this post at no cost to you – I really appreciate your support!

Prickley Pear Stamps products used:
Brighter Days Ahead stamp set

Other products used:
Cardstock/Paper: CutCardStock 110# Basis Natural, Basis Gold, Basis Light Brown, Sandcastle, Ginger Snap, Pop Tone Jellybean Green and Pop Tone Gumdrop Green cardstock
Ink: Memento Rich Cocoa ink (pad and marker)
Accessories: Tonic Studios 12″ Guillotine Paper Trimmer, Art Glitter Dries Clear adhesive, MISTI stamp tool, Eyelet Outlet tiny heart sequins

I hope you’ve enjoyed this project! Be sure to check out all the awesome stamps and dies at Prickley Pear Stamps! Save 10% on anything on the site when you shop at Prickley Pear Stamps by using coupon code LESLIE10 at checkout! And be sure to ‘like’ and ‘follow’ the Prickley Pear Stamps Facebook page to keep up with news and sales, and join Prickley Pear Pals (the fan group) for lots of fun crafty ideas and to share your creativity! And finally, we’d love to see you visit the Prickley Pear Stamps blog and become a Follower! Hope to see you there! Thanks so much for stopping by today – we’ll see you next time! ;)

Scrappy hugs,

Wishing you a purrfect holiday

Hi friends! Happy Saturday – I hope you have something fun planned this weekend! Our new challenge is live this morning over at Ally’s Angels and I’m stoked to share my DT inspiration project for Challenge #65! I created an adorable CAS hybrid kitty Christmas card featuring Jen Leeflang’s 7 Cats digital image! I also used sentiments from Simon Says Stamp Christmas Cats stamp set and created the card in neutrals with a pop of red! So stinkin’ cute!

I cut a standard A2 size top-folding landscape card base from CutcardStock Basis White and a layering panel from CutCardStock Basis Red. I printed the image on Basis White and colored it with alcohol markers. I trimmed it, rounded the upper left and lower right corners on both layering panels, and adhered them together. I stamped a sentiment from the Simon Says Stamp Christmas Cats stamp set in Memento Tuxedo Black ink and added several Eyelet Outlet White Enamel Dots, which completed the front.

I cut the inside panel from Basis White, rounded the upper left and lower right corners, and embellished it with Eyelet Outlet Skinny Red Washi Tape. I stamped another sentiment from the same stamp set in black ink and layered the panel on Basis Red cardstock.

Affiliate links are used in this post at no cost to you – I really appreciate your support! 

Products used:
Cardstock/Paper: CutCardStock Basis White and Basis Red cardstock
Stamps: Jen Leeflang 7 Cats digital image, Simon Says Stamp Christmas Cats stamp set
Ink: Arteza alcohol markers- NG04/06/08; Memento Tuxedo Black ink
Dies/Punches: Kadomaru Pro Corner Rounder
Accessories: Tonic Studios 12″ Guillotine Paper Trimmer, Tape Runner, MISTI stamp tool, Eyelet Outlet Skinny Red Washi Tape and White Enamel Dots

I hope you’ve enjoyed seeing this project and will link up with us this month! Thanks so much for stopping by today – we’ll see you next time! ;)

Scrappy hugs,

Clean and Simple Thank You

Hey everybody! I hope you’re having a great weekend! Are you still stuffed from Thanksgiving?! LOL! I’ve popped in this morning to share a Kat Scrappiness Creative Influencer inspiration project with you! I created a clean and simple Thank You card featuring the Friendship Greetings stamp set along with the Silver Pearl Mix. Really loving how this turned out, and nobody can have too many thank you cards in their stash!

Card base is a standard A2 size top-folding cut from Neenah Classic Crest 110# Solar White cardstock. A sentiment and the largest floral image from the Friendship Greetings stamp set were stamped in Memento Tuxedo Black ink and colored with alcohol markers. The finishing touch was adding several silver pearls from the Silver Pearl Mix.

The inside panel was cut from 80# Solar White cardstock, another sentiment from the Friendship Greetings stamp set stamped in black ink, and panel layered on CutCardStock Pop Tone Black Licorice cardstock.

Affiliate links are used in this post at no cost to you – I really appreciate your support!

Kat Scrappiness products used:
Friendship Greetings stamp set
Silver Pearl Mix

Other products used:
Cardstock/Paper: Neenah Classic Crest 110# and 80# Solar White cardstock, CutCardStock Pop Tone Black Licorice cardstock
Ink: Memento Tuxedo Black ink; Arteza alcohol markers- YG45/46, GS09, R43, YR33, Y03
Accessories: Tonic Studios 12″ Guillotine Paper Trimmer, Tombo Mono permanent adhesive, Bearly Art precision craft glue, MISTI stamping tool, Trinity Pick Up Stick

I hope you’ve enjoyed this project and I’ve inspired you to get crafty! Be sure to check out all the amazing stuff in the Kat Scrappiness store… there’s some of just about everything you’ll need to get your craft on, I promise! Be sure to Follow us on Facebook, Instagram, Pinterest and YouTube for tons of crafty inspiration! And we’d love it if you’d join the Kat Scrappiness Insiders and Stamping Enablers Facebook Groups for lots of fun crafty ideas and to share your creativity! Thanks so much for stopping by today – we’ll see you next time!

Scrappy hugs,

I’m here to decorate your house

Hi everyone! Happy Friday – I hope you’ve had a great week and you’re looking forward to doing something fun this weekend! I have an awesome Tape Runner DT inspiration project to share with you today. I’ve been in a ‘clean and simple’ mode and this Halloween card features the spider from Creepy Halloween, another stamp set from The Project Bin. That hilarious spider is the star of the show and the punched sentiment circles are the only layers on this card, and they were adhered with Tape Runner. This would be a great card to mass produce if you send out a lot of Halloween cards!

I cut a standard A2 size top folding card base from 110# Solar White cardstock, and stamped the spider in the bottom right corner. I stamped the sentiment on a scrap piece of Solar White cardstock and punched it with a 1-1/2″ Fiskars circle punch. I punched an additional circle from a CutCardStock Basis Orange cardstock scrap with a 1-3/4″ Stampin’ Up circle punch and adhered it beneath the sentiment circle and then to the card base. The finishing touch was the addition of several gemstones from an Eyelet Outlet 4mm Orange Jewel Bling Strip.

The inside was super simple as well, consisting of a strip cut from CutCardStock Basis Orange cardstock and a sentiment (from the same stamp set) stamped in Memento Tuxedo Black ink.

Sharing in the following challenges:
1. Cardz 4 Galz: #184 – Halloween or Anything in Halloween Colors
2. Country View Challenges: October 2022 – Halloween or Harvest
3. Crafting Happiness Challenges: #135 – Halloween all month long
4. Crafty Catz: #612 – Anything Goes w/ optional Kraft (no twist)
5. Crafty Gals Corner: #236 – Halloween Colors
6. Make My Monday Challenge Blog: #186 – Spooky or Halloween Colors
7. Try It On Tuesday: Halloween Time

Tape Runner products used:
Tape Runner

Affiliate links are used in this post at no cost to you – I really appreciate your support!

Other products used:
Cardstock/Paper: Neenah Classic Crest 110# Solar White cardstock, CutCardStock Basis Orange cardstock
Stamps: The Project Bin Creepy Halloween stamp set
Ink: Memento Tuxedo Black ink
Dies/Punches: 1-1/2″ Fiskars Circle Punch, Stampin’ Up 1-3/4″ Circle Punch
Accessories: Tonic Studios 12″ Guillotine Paper Trimmer, Bearly Art precision craft glue, MISTI stamping tool, Eyelet Outlet 4mm Orange Jewel Bling Strip

I hope you’ve enjoyed today’s project and you’re inspired to get your craft on! Be sure to check out the ah-mazing Tape Runner, Retractable Tape Runner and Highlight Tape Runner at TapeRunner.com! Be sure to Follow us on Facebook and Instagram! Thanks so much for stopping by today – we’ll see you next time!

Scrappy hugs,

Be Prepared to be Scared.

Hey everybody! Happy Hump Day – they sure do roll around fast these days! I’ve stopped in this morning to share an awesome Tape Runner DT inspiration project! I created a clean and simple Halloween card featuring the adorable Cool Ghoul stamps and dies from The Project Bin, and of course, the ghosts were adhered with Tape Runner, and I even put a strip under the washi tape (on the front and inside) for good measure! This card couldn’t have been any easier, and I LOVE how it turned out!

I cut a standard A2 size top-folding card base from 110# Solar White cardstock. I stamped the two ghosts from the Cool Ghoul stamp set in Memento Tuxedo Black ink on scraps of Solar White cardstock and cut them with the coordinating dies. I adhered a strip of Doodlebug Design Beetle Black Swiss Dots Washi Tape to anchor the ghosts on, and stamped the sentiment (from the same stamp set) just to the right of it. I adhered the two ghosts and added a few Eyelet Outlet Black Enamel Dots, which completed the card front.

I adhered a strip of Doodlebug Design Beetle Black Swiss Dots Washi Tape to the top of the inside flap and stamped another sentiment from the Cool Ghoul stamp set in Tuxedo Black ink.

Sharing in the following challenges:
1. A Perfect Time To Craft Open Challenge: #10-2022 – Anything Goes
2. Aud Sentiments Challenge Blog: #198 – Halloween/Fall + A Sentiment
3. Classic Design Challenge: October #10 – Anything Goes
4. Crafting Happiness Challenges: #135 – Halloween All Month Long
5. Crafty Calendar Challenge: October Halloween Challenge
6. Just Us Girls: #653 – Trend Week – CAS
7. Make The Cards Challenge: #65 – Halloween
8. Paperbabe Stamps: #178 – Anything Goes
9. Shopping Our Stash: #481 – Frightfully Delightful

Tape Runner products used:
Tape Runner

Affiliate links are used in this post at no cost to you – I really appreciate your support!

Other products used:
Cardstock/Paper: Neenah Classic Linen 100# Solar White
Stamps/Dies: The Project Bin Cool Ghoul stamps and dies
Ink: Memento Tuxedo Black ink
Accessories: Tonic Studios 12″ Guillotine Paper Trimmer, Bearly Art precision craft glue, MISTI stamping tool, Big Shot, Doodlebug Design Beetle Black Swiss Dots Washi Tape, Eyelet Outlet Black Enamel Dots

I hope you’ve enjoyed today’s project and you’re inspired to get your craft on! Be sure to check out the ah-mazing Tape Runner, Retractable Tape Runner and Highlight Tape Runner at TapeRunner.com! Be sure to Follow us on Facebook and Instagram! Thanks so much for stopping by today – we’ll see you next time!

Scrappy hugs,

Clean and Simple Hello

Hi everyone! Okay, we’ve zoomed through another month and I’ll say it again… where is the time going?! I’ve popped in this morning to share an awesome Tape Runner DT inspiration project! This pretty clean and simple mini slimline card features acrylic block stamping along with the Kat Scrappiness Mini Slimline Scalloped Edge dies, and of course, all panels were adhered with Tape Runner. I know I’ve mentioned (several times, lol) that I’m thrilled to have found mini slimline dies for my go-to size of 3-1/2″ x 6″ mini slim cards! Kat Scrappiness also carries pre-made envelopes (AND envelope dies!) for this size card which makes me really happy! This is the legal size to mail through the post office and the only size mini slim that I make. ;)

As mentioned above, all panels were adhered with Tape Runner. Wet glue was used only to adhere the pearls. I cut a top-folding mini slimline card base from two panels of 110# Solar White cardstock. Next, I die cut a scalloped panel from CutCardStock Stardream Metallic Azalea cardstock (using a Kat Scrappiness Mini Slimline Scalloped Edge die) and a layering panel from CutCardStock Stardream Metallic Eris cardstock. I inked a 2″ square acrylic block with Catherine Pooler It’s A Girl ink, spritzed it with my Tim Holtz distress sprayer and stamped it onto the Eris cardstock panel. Once dry, I stamped the bouquets and sentiment from the Scrapbook.com Friendly Bouquets stamp set in Memento Tuxedo Black ink and colored the flowers with a pink acrylic paint pen. The finishing touch was adding several gemstones from the Trinity Stamps Morganite Muse Embellishment Mix with my Trinity Pick Up Stick.

For the inside, I die cut another scalloped panel from CutCardStock Stardream Metallic Azalea cardstock using a Kat Scrappiness Mini Slimline Scalloped Edge die along with a layering panel from 80# Solar White cardstock, and adhered them together. I stamped the sentiment from the same stamp set in black ink and adhered the panel to the inside of the card base.

And one more look… totally loving how this card turned out! I love the simplicity of stamping with an acrylic block, and of course, the confidence that everything will hold together beautifully with Tape Runner! ;)

Sharing in the following challenges:
1. Cardz 4 Galz: Black & White + 1 Other Color
2. Classic Design Challenge: July #7 – Anything Goes
3. Lil Patch of Crafty Friends: #186 – Anything Goes
4. Little Red Wagon: #664 – Stitching Sensations
5. Paperbabe Stamps: #172 – Anything Goes
6. Stamping Sensations: Summer Flowers
7. Try It On Tuesday: Make It Feminine

Tape Runner products used:
Tape Runner

Affiliate links are used in this post at no cost to you – I really appreciate your support!

Other products used:
Cardstock/Paper: Neenah Classic Crest 110# and 80# Solar White cardstock, CutCardStock Stardream Metallic Azalea cardstock, CutCardStock Stardream Metallic Eris cardstock
Stamps: Scrapbook.com Friendly Bouquets stamp set
Ink: Catherine Pooler It’s A Girl ink, Memento Tuxedo Black ink, pink acrylic paint pen
Dies/Punches: Kat Scrappiness Mini Slimline Scalloped Edge Dies
Accessories: We R Memory Keepers Large Guillotine Paper Trimmer, Bearly Art precision craft glue, MISTI stamping tool, Big Shot, 2″ square acrylic block, Tim Holtz distress sprayer, Trinity Stamps Morganite Muse Embellishment Mix, Trinity Pick Up Stick

I hope you’ve enjoyed today’s project and you’re inspired to get your craft on! Be sure to check out the ah-mazing Tape Runner, Retractable Tape Runner and Highlight Tape Runner at TapeRunner.com! Be sure to Follow us on Facebook and Instagram! Thanks so much for stopping by today – we’ll see you next time!

Scrappy hugs,