12/21/24 Weekly Favorite at Splitcoast Stampers!
Hi friends! I hope you are having some fun this weekend, despite the cool weather! Our new challenge is live this morning over at Ally’s Angels and I’m thrilled to share my DT inspiration project for Challenge #89. This is my last inspiration project for Ally’s Angels, as I have handed off all my challenge blogs effective January 1, 2025. Our challenges are always ‘anything goes’ so come on over and play! I created one of THE most fun box cards ever using the Amazing Paper Grace/Spellbinders 3D Vignette Bubble Gum Machine die set and quite a variety of CutCardStock colors of cardstock. I mean… look at this… how stinkin’ cute?!

I cut the bubble gum machine from red, black and silver cardstock; the coin receptacle from Bright Silver Foil; a coin from Bright Gold Foil; and the gum balls from blue, yellow, green, orange, purple and pink. There’s even some acetate on the front to make it look a little more realistic. The assembly is always the most fun–it’s a joy watching 3D projects like this come to life!
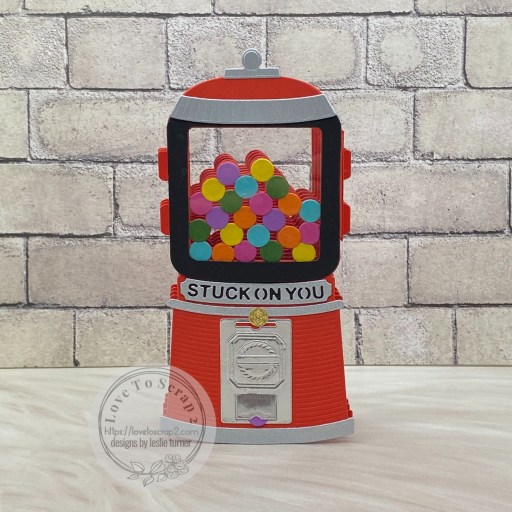
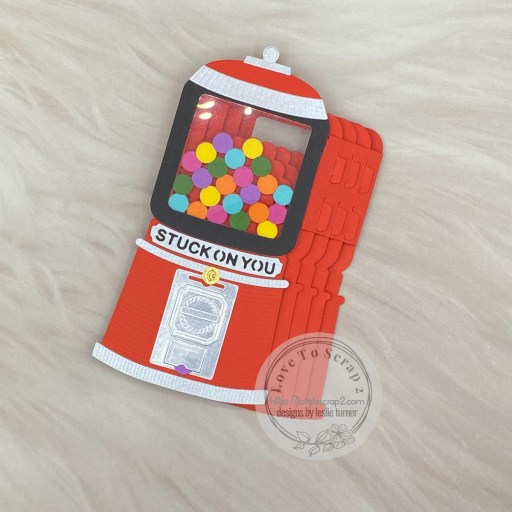
I used a Keep It Simple Stitched Squares Nested Die to cut a panel for the back to write a message and sign. And one final photo of the card folded flat for mailing.

Affiliate links are used in this post at no cost to you – I really appreciate your support!
Products used:
CARDSTOCK/PAPER: CutCardStock Lessebo Cherry Red, Lessebo Pitch Black, Lessebo White, Stardream Metallic Silver, Bright Silver Foil, Bright Gold Foil, Pop Tone Blue Raspberry, Pop Tone Lemon Drop, Scottish Highlands Green, Basis Orange, Astrobrights Planetary Purple and Raspberry Ice cardstock
DIES/PUNCHES: Amazing Paper Grace/Spellbinders Pop Up 3D Vignette Bubble Gum Machine die set, Keep It Simple Stitched Squares Nested Dies
ACCESSORIES: Bearly Art precision craft glue, Big Shot, Grafix Crystal Clear Craft Plastic
I hope you’ve enjoyed seeing this project and will link up with us this time! Thanks so much for stopping by today – we’ll see you again soon! ;)
Scrappy hugs,