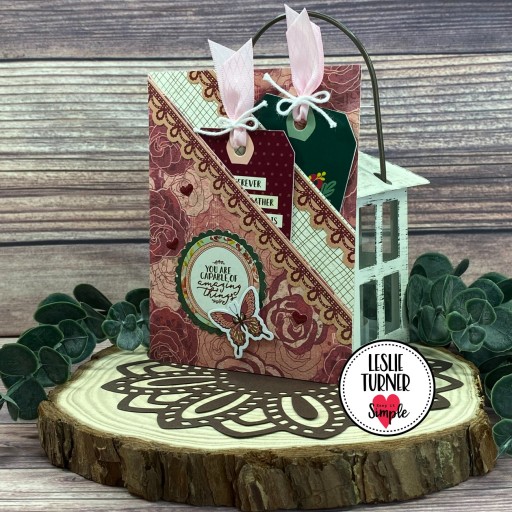
Hey everybody! Happy Friday! I hope you’ve had a great week and are headed into a fun weekend! How about another Splitcoast Stampers Dirty Dozen DT inspiration project?! You know how much I LOVE Art Impressions stamps and dies, and the Twister line is another one of my favorites, so I created a fun twister card using the Santa Twist Set stamps and dies!
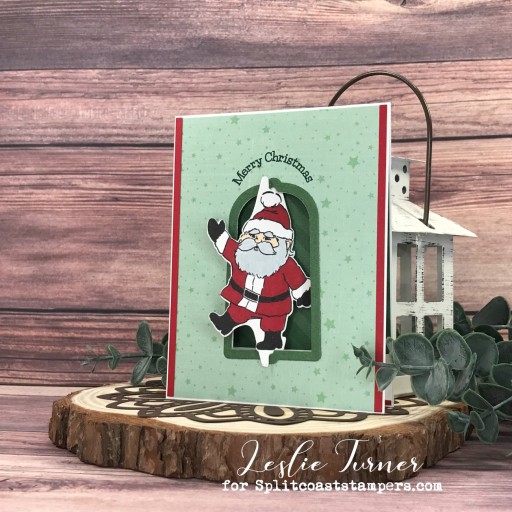
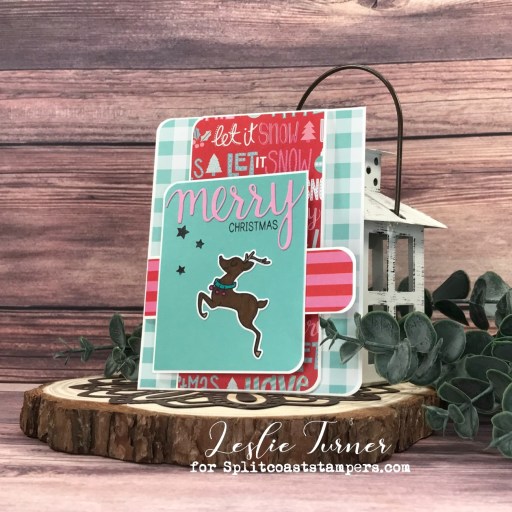
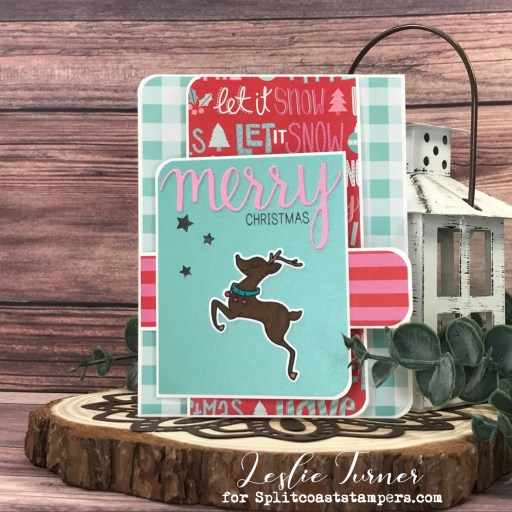
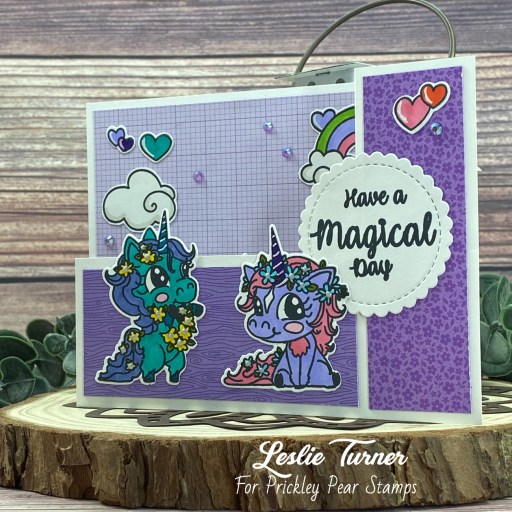
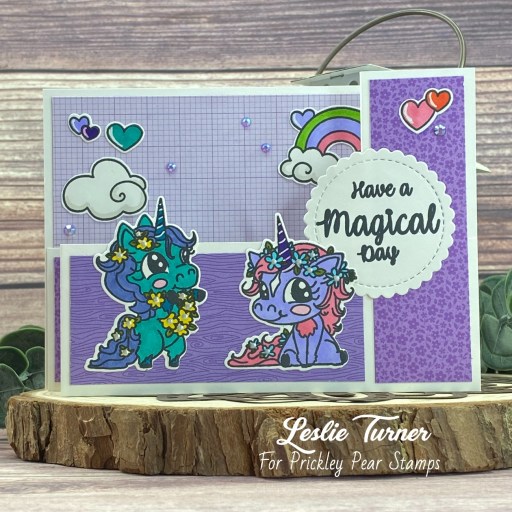
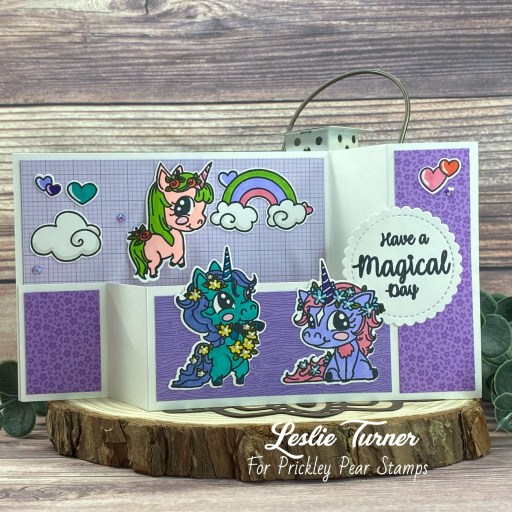
I cut a standard A2 size top-folding card base from 110# Solar White cardstock along with a layering panel and aperture frame from two coordinating papers in the Keep It Simple Jade 12×12 Collection Pack. Using the Art Impressions Twist Frame Dies, I cut the aperture into the front flap and layering panel, and adhered the frame. I adhered two narrow strips to the sides cut from CutCardStock Pop Tone Wild Cherry cardstock. I stamped the sentiment from the Santa Twist Set stamps over the aperture and then stamped Santa’s front and back sides (from the same stamp set) on Solar White. I colored Santa with alcohol markers and cut him with the coordinating Santa Twist Set dies.
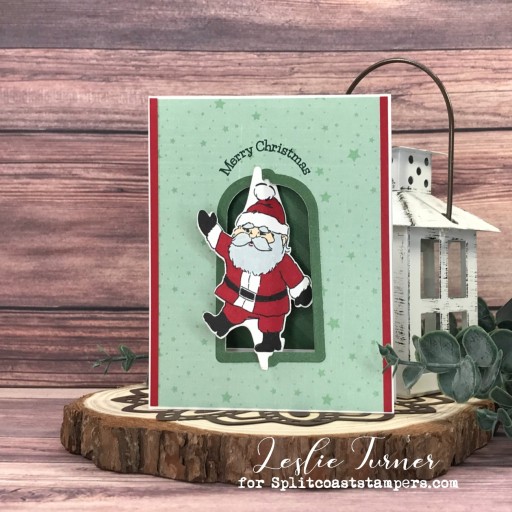
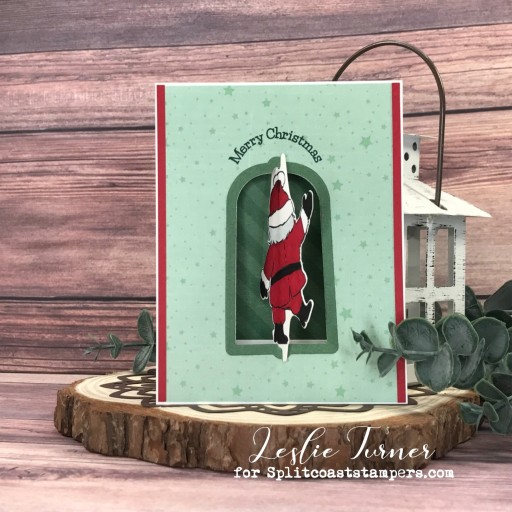
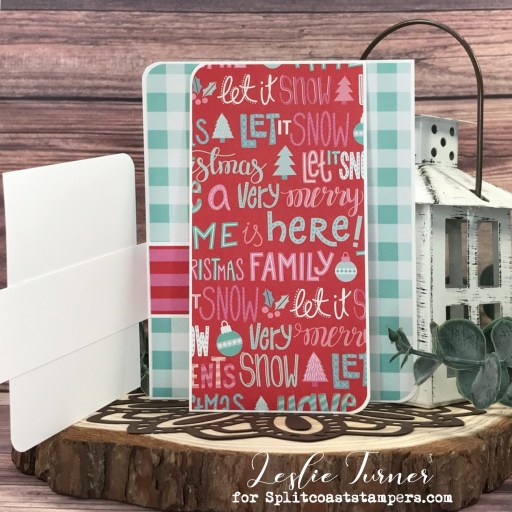
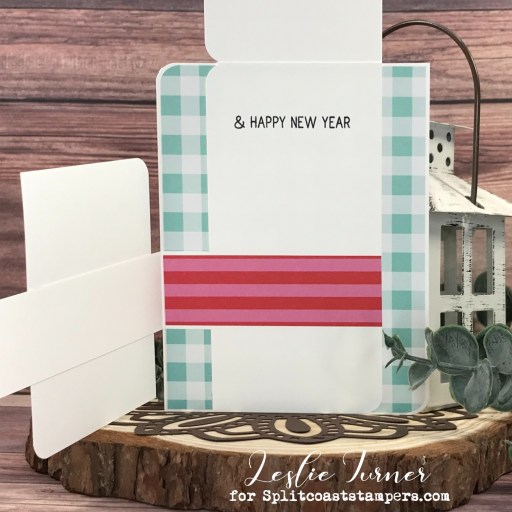
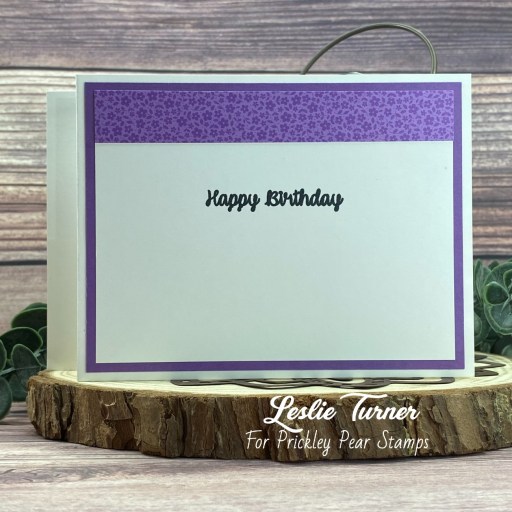
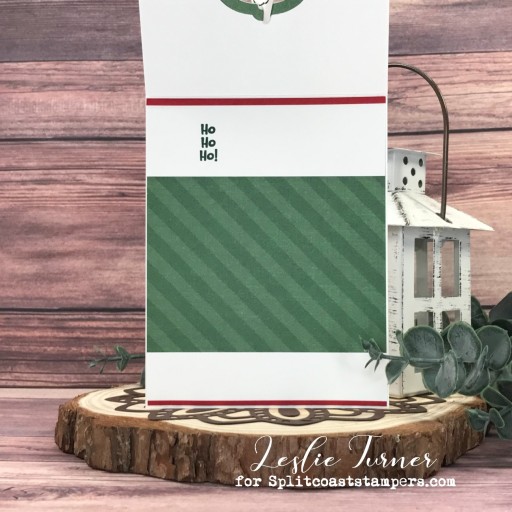
I adhered another panel from a coordinating print in the Keep It Simple Jade 12×12 Collection Pack on the inside (visible through the twist aperture), and stamped another sentiment from the Santa Twist Set stamps in black ink.
Sharing in the following challenges:
1. ABC Christmas Challenge: L is for Lots of Layers and M is for Mice (layers)
2. Dragonfly Dreams: June Challenge – Fancy Folds
Affiliate links are used in this post at no cost to you – I really appreciate your support!
Products used:
CARDSTOCK/PAPER: Neenah Classic Crest 110# Solar White cardstock, Keep It Simple Jade 12×12 Collection Pack, CutCardStock Pop Tone Wild Cherry cardstock
STAMPS: Art Impressions Santa Twist Set stamps
INK: Memento Tuxedo Black ink; Arteza alcohol markers- R31, RP09, NG08, BR28, BK00; Catherine Pooler Deck The Halls ink
DIES/PUNCHES: Art Impressions Twist Frame die and Santa Twist Set dies
ACCESSORIES: Tonic Studios 12″ Guillotine Paper Trimmer, Tombow Permanent Adhesive, Bearly Art precision craft glue, MISTI stamp tool, Big Shot
I hope you’ve enjoyed seeing this project and will consider joining the Splitcoast Stampers Fan Club which costs less than $25 for an entire year! There are tons of member perks (like seeing all the Dirty Dozen DT’s inspiration projects each month) in addition to access to all the other free content on the Splitcoast Stampers website. Be sure to check it out! The subscription is seriously awesome! Thanks for stopping by today – we’ll see you again soon!
Scrappy hugs,