Greetings from the Herd

Hi everyone! A very Happy Saturday to you – I hope you’ve had a great week! Affiliate links are used in this post at no cost to you. I really appreciate your support! I’m thrilled to be back on the Eyelet Outlet blog today with another awesome DT inspiration project! I created a fun tri-fold good luck/congratulations card featuring our Animal Stamp Set along with our Cow & Goat Brads, Pig & Sheep Brads, Horse/Pony Brads and Wide Sky Washi Tape!
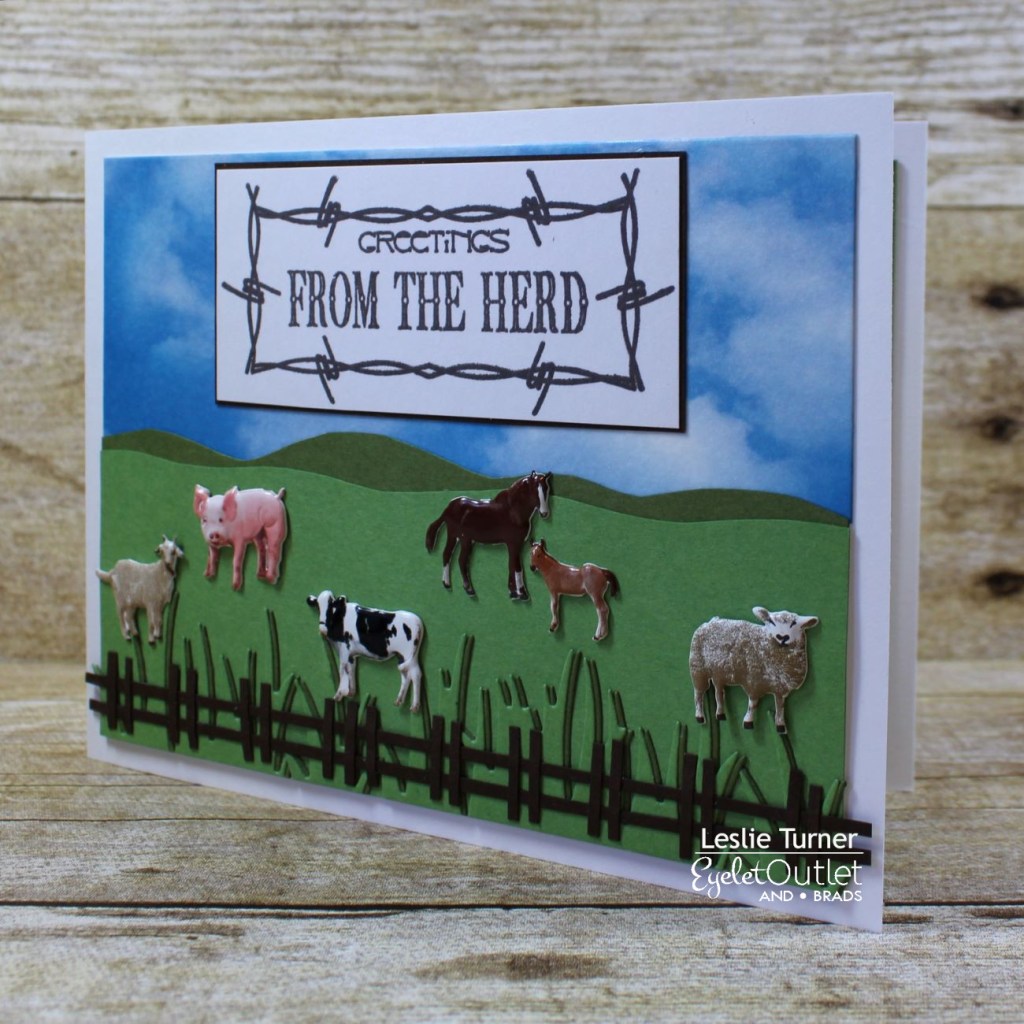
I cut a standard A2 size side-folding card base from Neenah Classic Crest Solar White 110# cardstock along with a layering panel which I covered with Wide Sky Washi Tape and a green cardstock pasture. I added die cut grass and a hand-cut fence to keep the herd in, lol! ;) I added the Cow & Goat Brads, Pig & Sheep Brads, and Horse/Pony Brads to complete the front of the card.

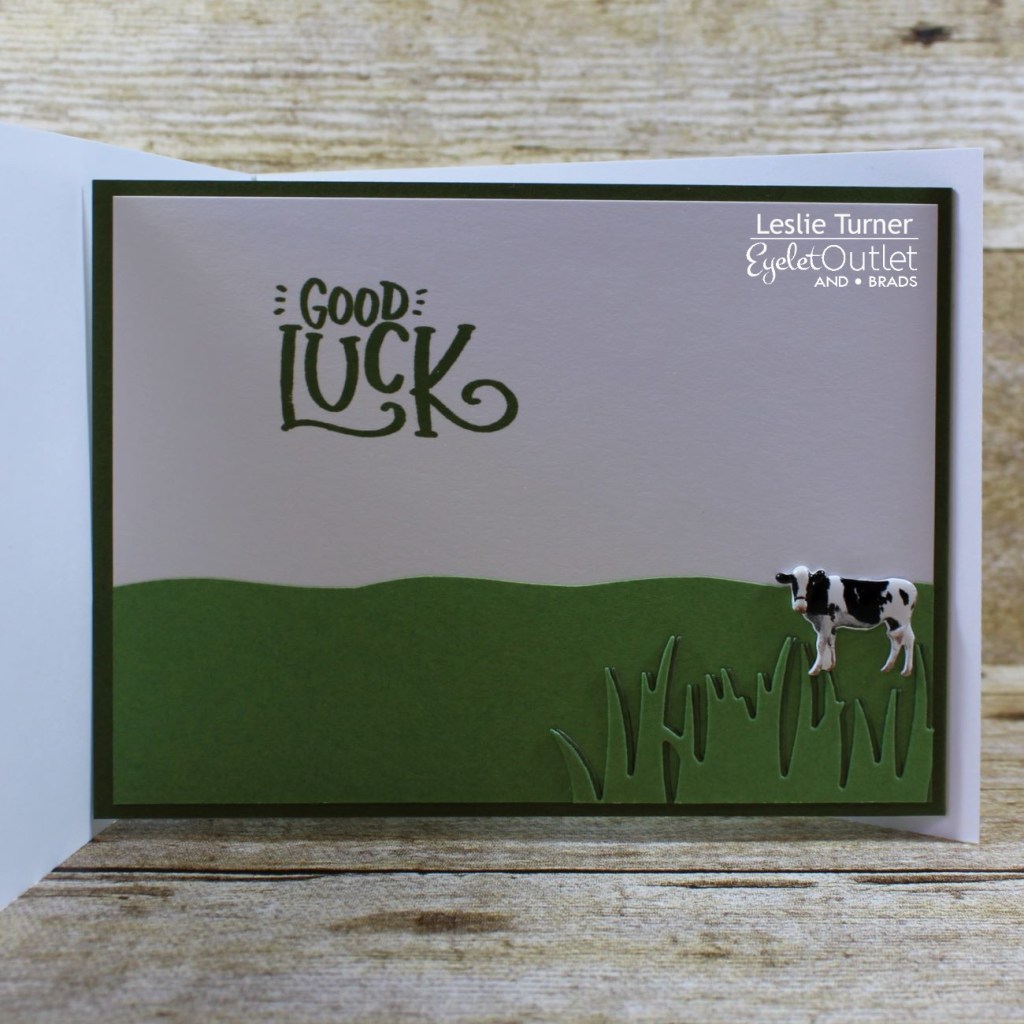
I cut the inside panel from Neenah Classic Crest 80# Solar White cardstock along with a layering panel from CutCardStock Pop-Tone 65# Jellybean Green cardstock, and embellished it with a section of die cut grass, a green cardstock pasture and a cow brad. I stamped the sentiment in dark green ink and layered the panel on the jellybean green cardstock.
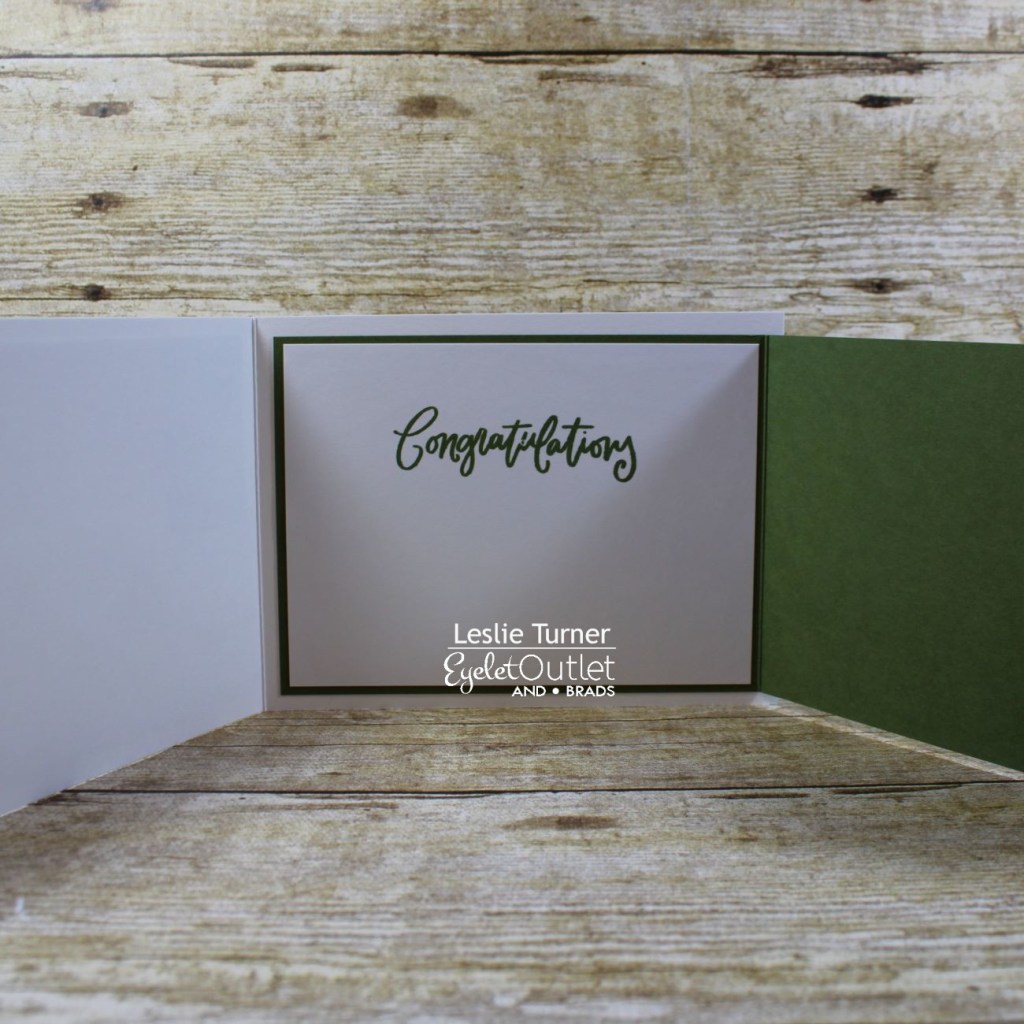
I cut a second white cardstock panel along with a folded panel from the jellybean cardstock (to fashion the third fold), stamped another sentiment in dark green ink and adhered the panel on the inside. This was a fun one!
Eyelet Outlet products used:
Animal Stamp Set
Cow & Goat Brads
Pig & Sheep Brads
Horse/Pony Brads
Wide Sky Washi Tape

Other products used:
Cardstock/Paper: Neenah Classic Crest 110# and 80# Solar White cardstock, CutCardStock Pop-Tone 65# Gumdrop Green cardstock, CutCardStock Pop-Tone 65# Jellybean Green cardstock, CutCardStock Basis 80# Brown cardstock
Stamps: Brutus Monroe Super Sentimental stamp set
Ink: Memento Espresso Truffle ink, Catherine Pooler Eucalyptus ink
Dies/Punches: The Cat’s Pajamas Grassy Patches die set
Accessories: Tonic Studios 12″ Guillotine Paper Trimmer, Gemini Junior, MISTI stamp tool, Bearly Arts precision craft glue

I hope you’ve enjoyed today’s project! Be sure to check out all the fun goodies at Eyelet Outlet! I can already see you drooling, lol! Be sure to ‘like’ and ‘follow’ Eyelet Outlet Facebook Page to keep up with news and sales, and while you’re at it, join the Eyelet Outlet Fans Facebook group for lots of creative inspiration! Thanks so much for stopping by today – we’ll see you next time! ;)

Scrappy hugs,
lesliesig

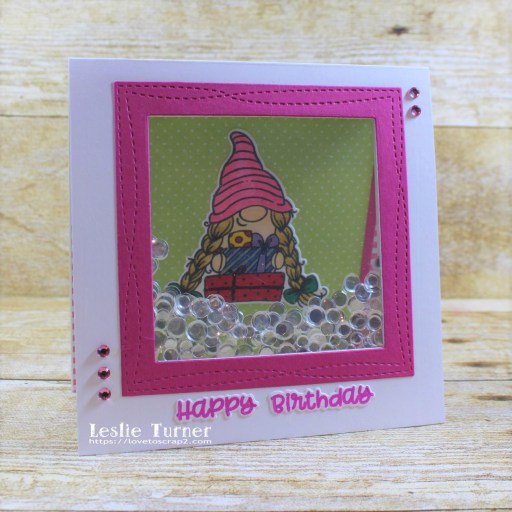
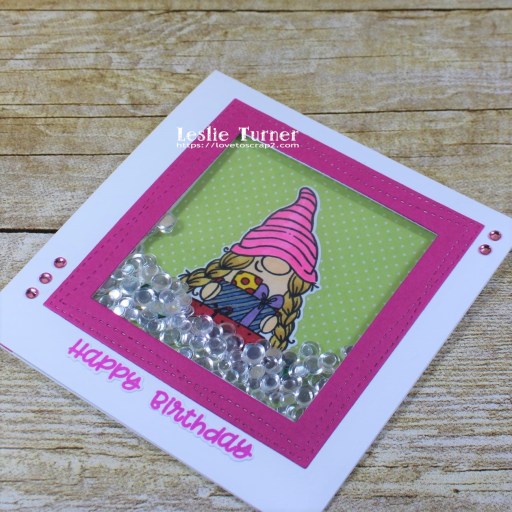
Happy Birthday, Gnomie!

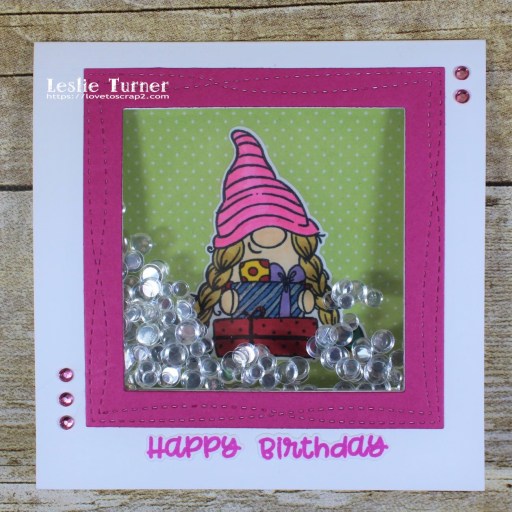
Hey everybody! Happy Hump Day – I hope your week is going well! Can you believe another month is almost behind us?! Affiliate links are used in this post at no cost to you. I really appreciate your support! I’ve popped in with a fun shaker card I created with the adorable Trinity Stamps Just For You stamp set along with the coordinating Just For You die set. Trinity Stamps has been celebrating their 3rd birthday all month long (and I took advantage of a great birthday sale and bought several stamp and die sets), so I thought it only fitting to share a birthday card! I sure do love me some gnomes and they have some of the cutest! ;)

binary comment

I cut a square top-folding card base from Neenah Classic Crest 110# Solar White cardstock, and cut a square aperture with a My Favorite Things Die-namics Wonky Stitched Square STAX die along with a frame from CutCardStock Basis Magenta 80# cardstock which I adhered to the outside of the aperture. Using the Trinity Stamps Just For You stamp set, I stamped the gnome on Solar White cardstock, colored her with alcohol markers, and cut her with the coordinating Just For You die set. I used my oh so lonely We R Memory Keepers Fuse Tool to seal a large pouch filled with Melted Icicle Clear Twinkle Sequin Confetti Mix and adhered it to the back side of the front flap so it was visible through the aperture. I adhered a second piece of white cardstock with a square aperture on the back side of the front flap to conceal the edges of the pouch. I stamped and die cut the sentiment, and adhered it beneath the aperture. The finishing touch was the addition of some pink bling.

I embellished the inside flap with patterned paper, and adhered the stamped, colored and die cut gnome in the center so she was visible through the aperture.

binary comment

And one more peek… such a super cute stamp set! Thanks, Trinity Stamps, for celebrating your 3rd birthday and for having such an awesome sale! ;)

binary comment

Products used:
Cardstock/Paper: Neenah Classic Crest 110# and 80# Solar White cardstock, CutCardStock Basis Magenta 80# cardstock, Hot Off The Press Sweet Pea 6×6 papers
Stamps: Trinity Stamps Just For You stamp set
Ink: Nuvo alcohol markers- Rich Reds Collection, Sunshine Yellow Collection, Woodland Greens Collection, Marina Blues Collection, Royal Purples Collection, Flamingo Pinks Collection, Honey Amber Collection; Spectrum Noir alcohol marker- FS9; Pentel Slicci Silver pen, Catherine Pooler Pucker Up ink
Dies/Punches: Trinity Stamps Just For You die set, My Favorite Things Die-namics Wonky Stitched Square STAX
Accessories: Tonic Studios 12″ Guillotine Paper Trimmer, MISTI stamp tool, Gemini Junior, Bearly Art precision craft glue, Trinity Stamps Melted Icicle Clear Twinkle Sequin Confetti Mix, Eyelet Outlet Pink Jewel Bling

I hope you’ve enjoyed seeing this cute birthday shaker card! I love celebrating birthdays, I love shaker cards and I love gnomes, so this was definitely a win-win! ;)

Scrappy hugs,
lesliesig

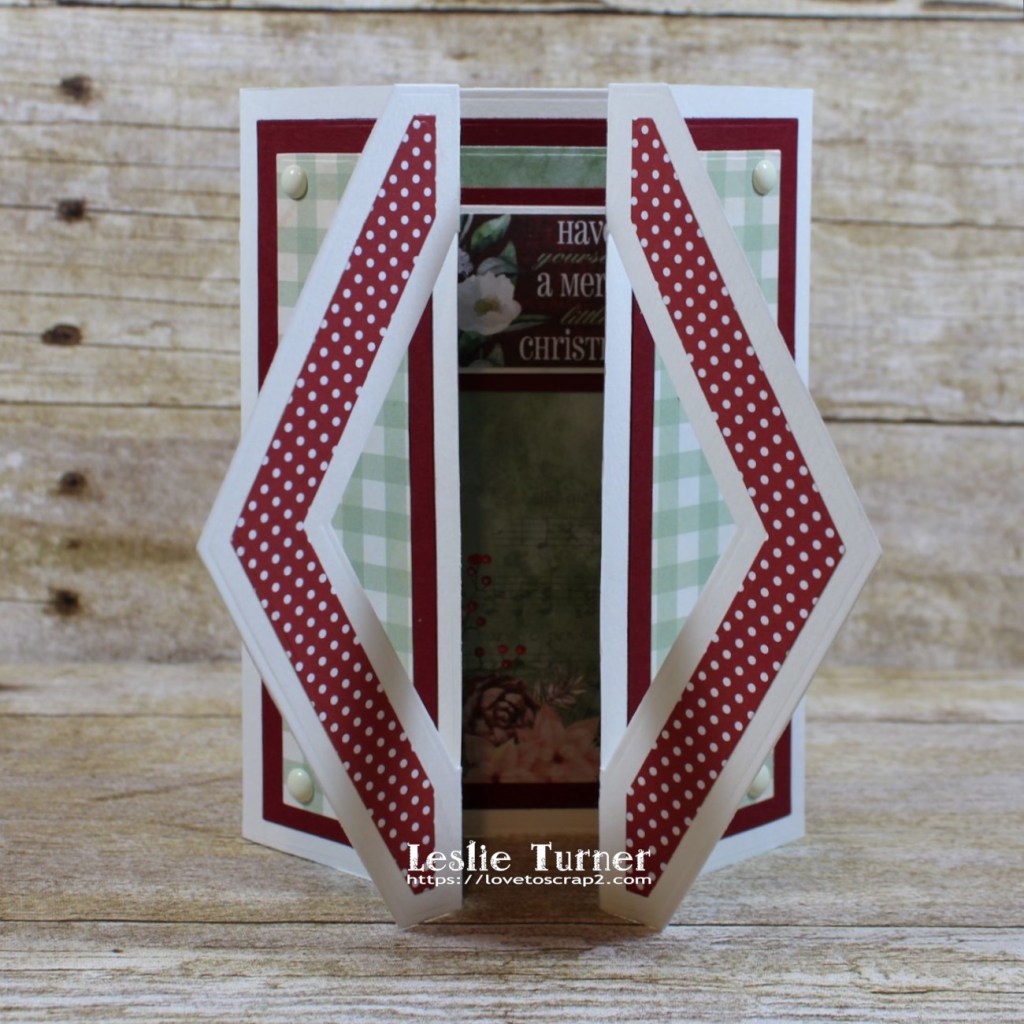
Have yourself a Merry little Christmas

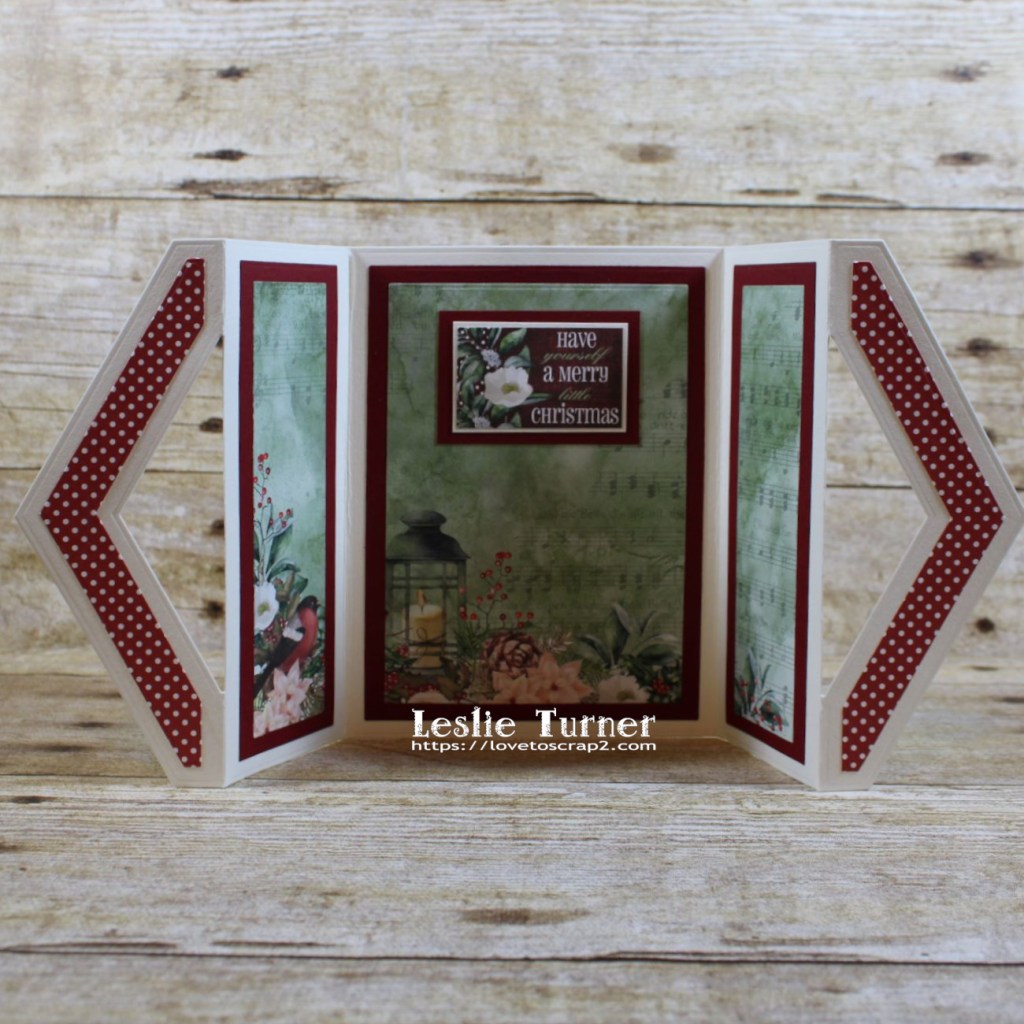
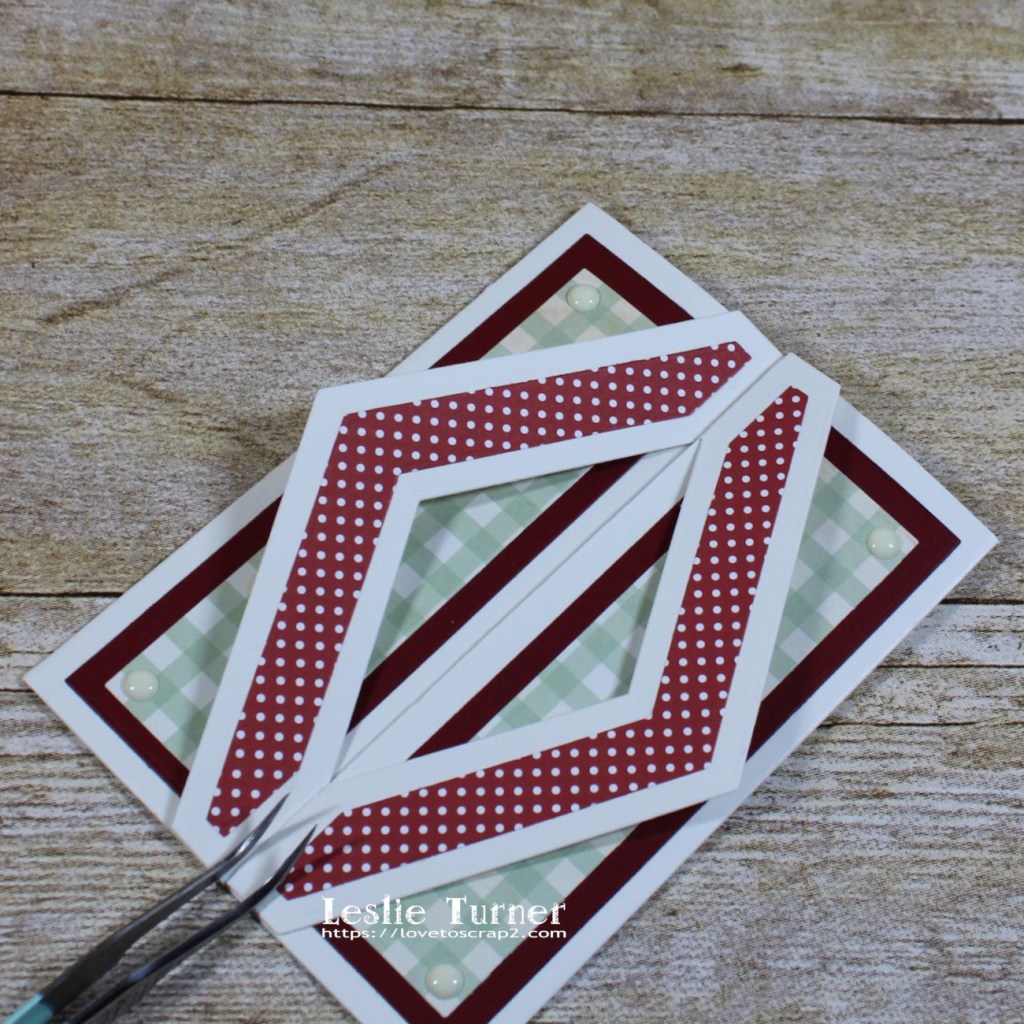
Hi friends! Happy Fri-YAY – hope you’ve had a great week! And I hope you have something wonderful, fun and safe planned for the weekend! Affiliate links are used in this post at no cost to you. I really appreciate your support! I’ve created a few more cards for the current challenges over at The Outlawz and am deciding on which ones to enter into what challenges. The hubs had a couple out-of-town doctor appointments this week and my mind has played tricks on me all week long as far as what day of the week it is, even after looking at the calendar, lol! The card I’m sharing with you today is for The Outlawz Monday Greetings Challenge and is another super easy one I created with another one of the Creative Craft Products die sets I ordered from Paper Wishes. This one is a double gate fold, which is easy enough to make without a die set, but the cut-outs on the front panels are just so pretty! ;)

I cut the card base from CutCardStock Basis 110# Natural cardstock and layers from CutCardStock Basis Dark Red cardstock and Hot Off The Press Christmas Memories 6×6 papers.

This card only took about 20 minutes (tops) to make from start to finish. The die set took all the measuring and guesswork out of the equation, and all I had to do was cut the cardstock base, cut the cardstock and paper layers, cut out and mat the sentiment (part of the paper pack), and assemble. Plus no stamping (which is kinda rare for me)! Can’t get any easier than that!

And one more peek… so loving how this turned out! This would make an amazing set of Christmas cards for those special folks on your list!

Products used:
Cardstock/Paper: CutCardStock Basis 110# Natural cardstock, CutCardStock Basis Dark Red cardstock, Hot Off The Press Christmas Memories 6×6 papers
Dies/Punches: Creative Craft Products Double Gate Fold die set
Accessories: Gemini Junior, Bearly Art precision craft glue, Eyelet Outlet Ivory Enamel Dots

I hope you’ve enjoyed this project and will come join us in The Outlawz Challenges! Lots of fun going on! Thanks so much for stopping by – we’ll see you next time!

Scrappy hugs,
lesliesig

Gnomie hello

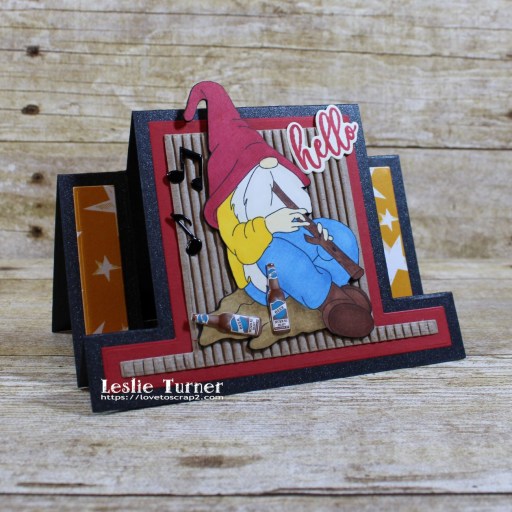
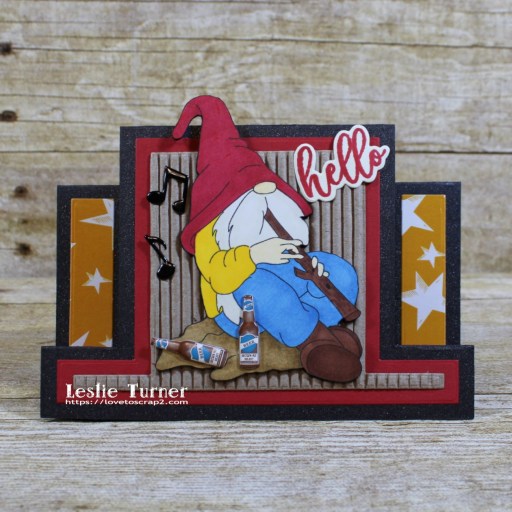
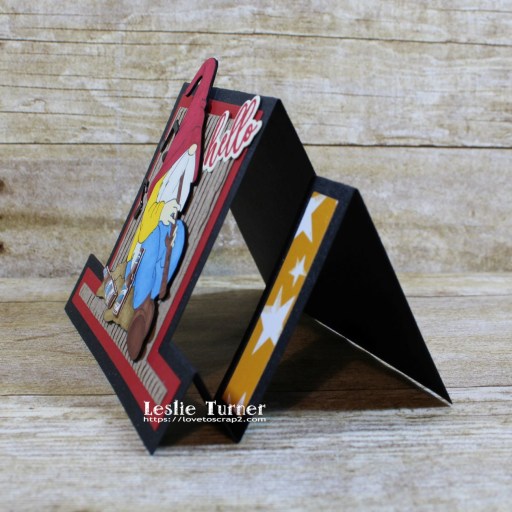
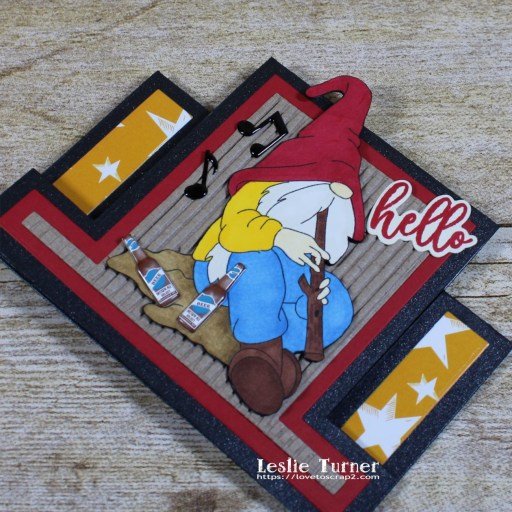
Hi friends! Happy Thursday – another week almost behind us! We’ve had a busy one and I’ve fallen a little behind in my posting. Affiliate links are used in this post at no cost to you. I really appreciate your support! I created this adorable center easel card for The Outlawz Sunday Songs & Rhymes Challenge where KLM Designs is sponsoring this month. “The World Cup” poem was the inspiration for this challenge and I focused on the bar scene and beer, lol! I used the super cool KLM Designs ‘Gnome Musician’ digital image along with Eyelet Outlet Beer Brads and Music Note Brads to make this card to tell someone how awesome they are!

I’ve made a number of easel cards over the years and have always used a paper trimmer that has the ability to make independent cuts without totally cutting the cardstock or paper in two, if that makes sense. Well, I’ve recently found several die sets that do all the work – and used one of them for this card. No measuring – just die cutting… and what a dream! ;) I die cut the base from CutCardStock Curious Metallic 111# Night cardstock, and front layers from CutCardStock Basis 80# Red cardstock, Canvas Corp Corrugated Kraft, and Canvas Corp Trendy Halloween Paper Collection (the yellow star paper). I printed the digital image four times, colored one of them with alcohol markers and layered them for a little dimension, and adhered him to the card base. I added the beer brads and music note brads, then adhered the sentiment stamped from Waffle Flower Essential Sentiments stamp set in Catherine Pooler Rockin’ Red ink which I cut with the coordinating Waffle Flower Essential Sentiments die.

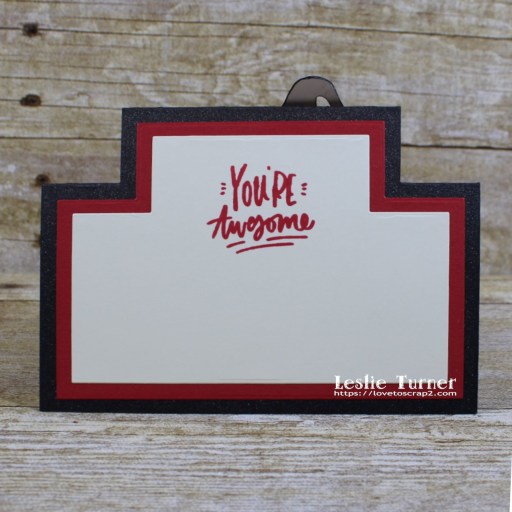
I die cut the back layers from the Basis Red and Neenah Classic Crest 80# Baronial Ivory cardstock and stamped the sentiment from Brutus Monroe Super Sentimental stamp set in the CP red ink.

Here’s an angled shot so you can see the dimension.

And one more peek… so loving how this turned out! Gnomie dude’s got it goin’ on! ;)

Products used:
Cardstock/Paper: CutCardStock Curious Metallic 111# Night cardstock, CutCardStock Basis 80# Red cardstock, Canvas Corp Corrugated Kraft, Neenah Classic Crest 80# Baronial Ivory cardstock, Canvas Corp Trendy Halloween Paper Collection
Stamps: KLM Designs Gnome Musician digital image, Waffle Flower Essential Sentiments stamp set, Brutus Monroe Super Sentimental stamp set
Ink: Nuvo alcohol markers- Rich Reds Collection, Sunshine Yellow Collection, Marina Blues Collection, Natural Browns Collection, Honey Amber Collection, Fair Skin Tones Collection, Depth & Shadows Collection; Memento Tuxedo Black marker, Catherine Pooler Rockin’ Red ink
Dies/Punches: Creative Craft Products High Centre Stepper Card die set, Waffle Flower Essential Sentiments die set
Accessories: Tonic Studios 12″ Guillotine Paper Trimmer, MISTI stamp tool, Gemini Junior, Eyelet Outlet Beer Brads and Music Note Brads, Ranger Distress Collage Medium

I hope you’ve enjoyed this project and will come join us in The Outlawz Challenges! Lots of fun going on! Thanks so much for stopping by – we’ll see you next time!

Scrappy hugs,
lesliesig

Happy Holidays Trifold Window Card

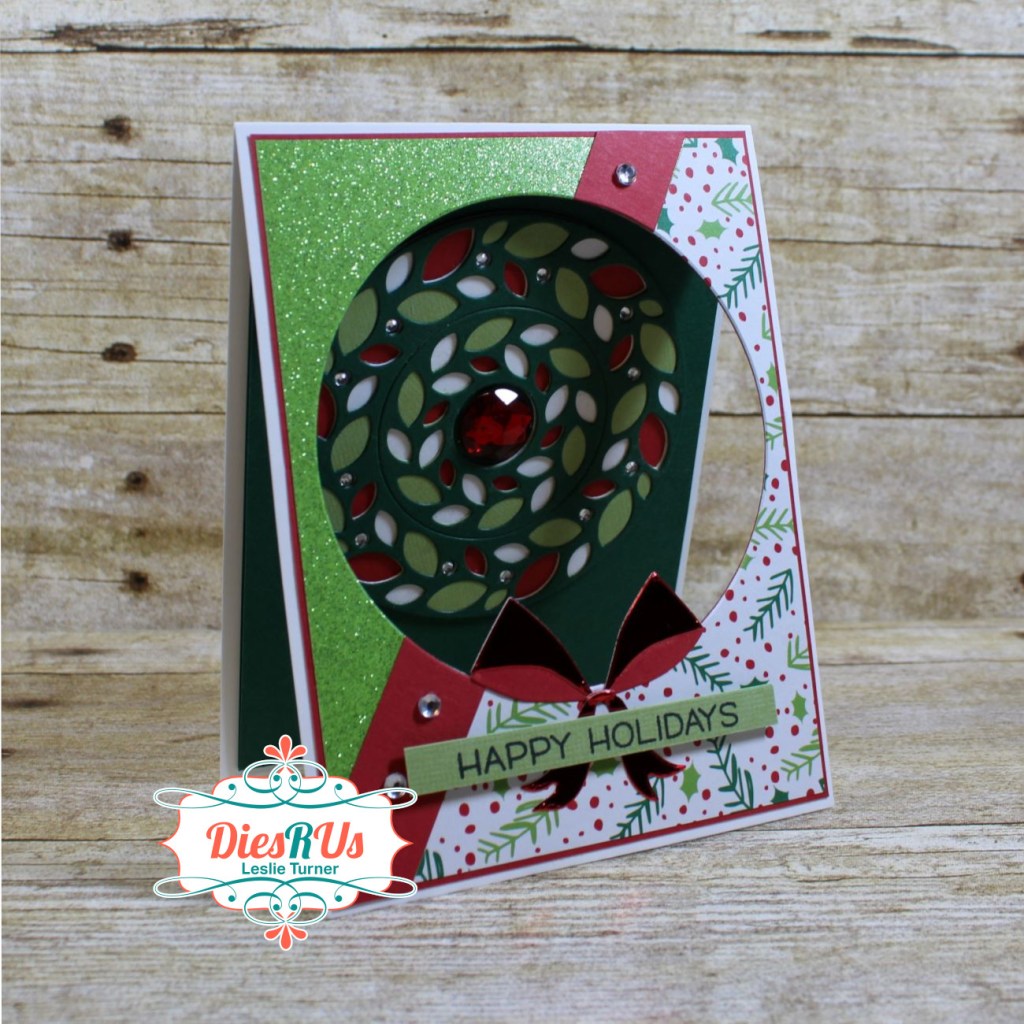
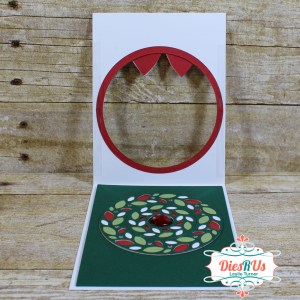
Hi everyone! Happy Friday – I hope you’ve had a wonderful week! Can’t believe another week is almost behind us! Affiliate links are used in this post at no cost to you. I really appreciate your support! I’m stoked to be back on the Dies R Us Inspiration Blog today with another awesome DT inspiration project! I created a fun trifold window card. This came in a recent Splitcoast Stampers newsletter (tutorial is HERE if you’re interested) but I already had handwritten notes in my tutorial folder from a few years back which followed basically the same super easy process. I have made several horizontal trifolds over the years and this vertical one with the window is particularly fun. I used the amazing Birch Press Design Wreath Layer Set as the focal, along with a sentiment and bow from the Sizzix Christmas Ribbon Thinlits, some pretty coordinating Christmas papers, and lots of bling.

I cut a standard A2 size top-folding card base from Neenah Classic Crest Solar White 110# cardstock, along with a CutCardStock Basis Green cardstock folded panel, a Neenah Classic Crest Solar White 80# cardstock layer, and diagonally-cut patterned paper layers from the Christmas Print 6×6 paper pad. I adhered the patterned papers to the CutCardStock Basis Red cardstock panel, added a diagonal embellishing strip, and then die cut a large circular aperture in the layers with a Tutti Designs Dotted Nesting Circle die. I traced the aperture on the front flap and then cut a slightly larger circular aperture on the front flap and adhered the layered panel to it. I added a bow created with the Sizzix Christmas Ribbon Thinlits to the bottom of the aperture along with a stamped sentiment.

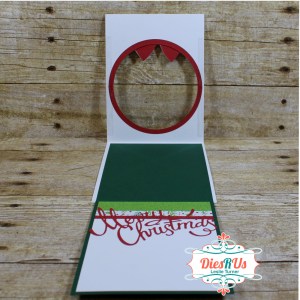
I adhered the CutCardStock Basis Green cardstock folded panel to the inside of the card base with the fold at the bottom, opened it up, and adhered the Neenah Classic Crest Solar White 80# cardstock layer. I embellished this layer with strips of green glitter paper and the holly patterned paper from the Christmas Print 6×6 paper pad along with a narrow red cardstock strip. I adhered the sentiment cut from the Sizzix Christmas Ribbon Thinlits with Elmer’s Craft Bond Spray Adhesive, then folded it upwards into the card base, closed the front flap, and adhered the Birch Press Design Wreath into the opening. The finishing touch was the addition of tiny clear gemstones to the wreath and some larger ones to the diagonal strip, along with a large red gemstone in the center.

And one more peek… this was so much fun! Now to decide who will receive it in the mail! I’m starting to earmark certain Christmas cards for certain people! I like to be ahead of the game, lol! ;)

Dies R Us products used:
Birch Press Design Wreath Layer Set
Sizzix Christmas Ribbon Thinlits
Tutti Designs Dotted Nesting Circles

Other products used:
Cardstock/Paper: Neenah Classic Crest 110# and 80# Solar White cardstock, CutCardStock Basis Green cardstock, CutCardStock Basis Red cardstock, CutCardStock Canvas Texture Galax 4×6 cardstock, Christmas Print 6×6 paper pad
Stamps: Lawn Fawn Happy Happy Happy stamp set
Ink: Memento Tuxedo Black ink
Accessories: Tonic Studios 12″ Guillotine Paper Trimmer, Gemini Junior, MISTI stamp tool, Bearly Art precision craft glue, Elmer’s Craft Bond Spray Adhesive, Flourish with a Bling clear rhinestones, large red gemstone

I hope you’ve enjoyed today’s project! Be sure to check out all the fun goodies at the Dies R Us store! They not only sell dies… they also carry stamps, embossing tools and supplies, all kinds of craft supplies, slimline products and even Yupo paper! Be sure to join in the fun going on over at the Dies R Us Challenge Blog – there’s a new challenge theme posted on the 1st and 15th of each month and one lucky random winner will receive a gift voucher prize to the Dies R Us store! And be sure to ‘like’ and ‘follow’ Dies R Us Facebook Page for lots of creative inspiration and to keep up with the latest news! Thanks so much for stopping by today – we’ll see you next time! ;)

Scrappy hugs,
lesliesig

Happy Holidays

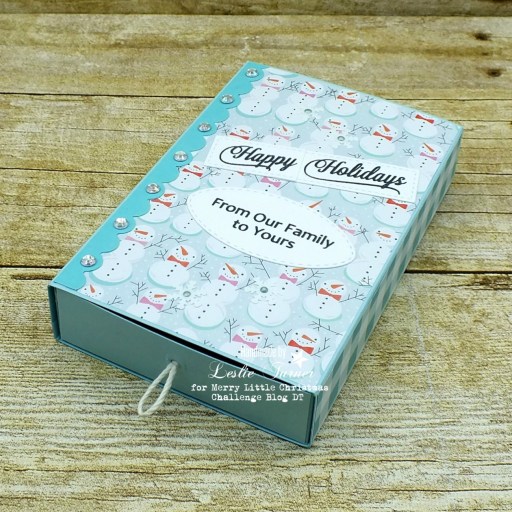
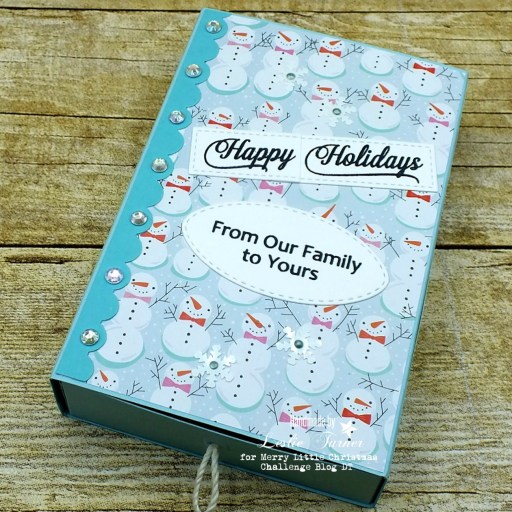
Hi everyone! Hope your week is off to a great start! Couldn’t ask for better weather here! This is my ‘other’ favorite time of year! Affiliate links are used in this post at no cost to you. I really appreciate your support! It’s time for a new challenge over at Merry Little Christmas Challenge Blog and I’m super stoked to share my DT inspiration project for MLCCB #35 – June Anything Christmas Goes using the adorable Prickley Pear Stamps Snow Family stamp set! What a treat this is… a matchbox pop-up card! You know me and fun folds! This is the first one of these I’ve made and it was crazy fun!

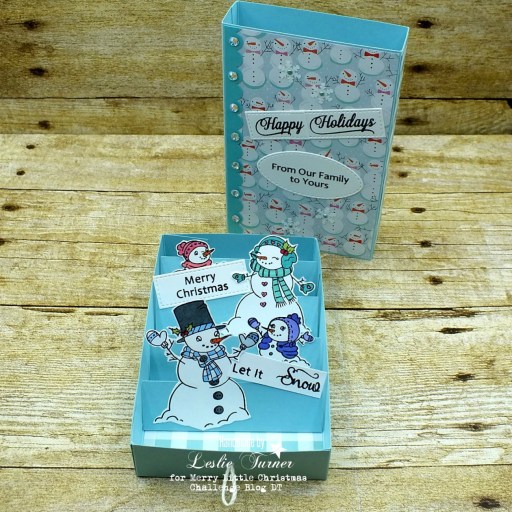
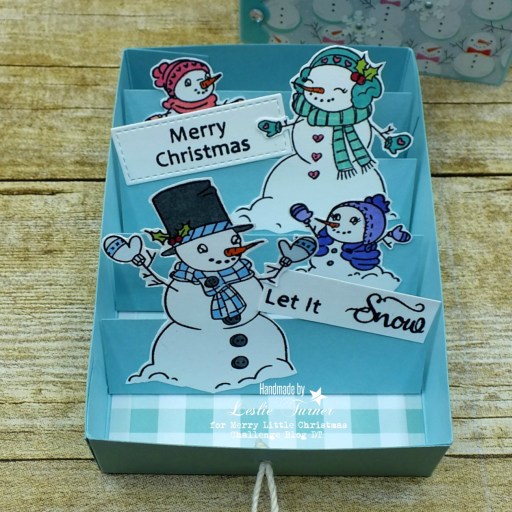
I created the box from light teal cardstock. I went with a snowman theme and used snowman paper on the top of the box and gingham paper on the sides, both from The Paper Studio Four Seasons and Everything In Between -2- paper pad. I added a scalloped border punched from Papertrey Ink Tropical Teal cardstock on the left side of the top and embellished it with iridescent gemstones. I stamped the sentiments on Neenah Classic Crest 80# Solar White cardstock, die cut them with a My Favorite Things Stitched Rectangles STAX die and a Memory Box Stitched Oval Layers die, and added several snowflake sequins adorned with Nuvo Neptune Crystal Drops. The inside drawer features the Prickley Pear Stamps Snow Family stamped on Neenah Classic Crest 80# Solar White cardstock, colored with alcohol markers and fussy cut, along with a couple more stamped sentiments. I added looped cord to the front of the drawer to assist in pulling it out. With this fold, you pull the drawer out from the front and push the drawer in from the back to close it.

Here’s a close-up of the inside drawer – so stinkin’ cute I can’t stand it! ;)

And one more look with the drawer back inside the box… totally loving how this turned out!

Products used:
Cardstock/Paper: GKD Ocean Mist cardstock, Papertrey Ink Tropical Teal cardstock, Neenah Classic Crest Solar White cardstock, The Paper Studio Four Seasons and Everything In Between -2- paper pad
Stamps: Prickley Pear Stamps Snow Family stamp set
Ink: Memento Tuxedo Black ink; Nuvo alcohol markers- 425, 427, 436, 443, 489, 379, 453, 369, 363, 393, 412, 451
Dies/Punches: My Favorite Things Stitched Rectangles STAX die, Memory Box Stitched Oval Layers die, Stampin’ Up 1/2″ circle punch, 1/8″ hole punch
Accessories: Tonic Studios 12″ Guillotine Paper Trimmer, Tombow Mono permanent adhesive, Bearly Art precision craft glue, MISTI stamp tool, Gemini Junior, Hemptique bamboo crafter’s cord, Stampin’ Up Snowflake Frosted Sequins, Nuvo Neptune Crystal Drops, Darice iridescent gemstones

I hope you’ve enjoyed seeing this matchbox pop-up card and will link up a Christmas project with us this month! We’d love to see what you create! Thanks so much for stopping by today – we’ll see you again soon! ;)

Scrappy hugs,
lesliesig

Flowers for beautiful you

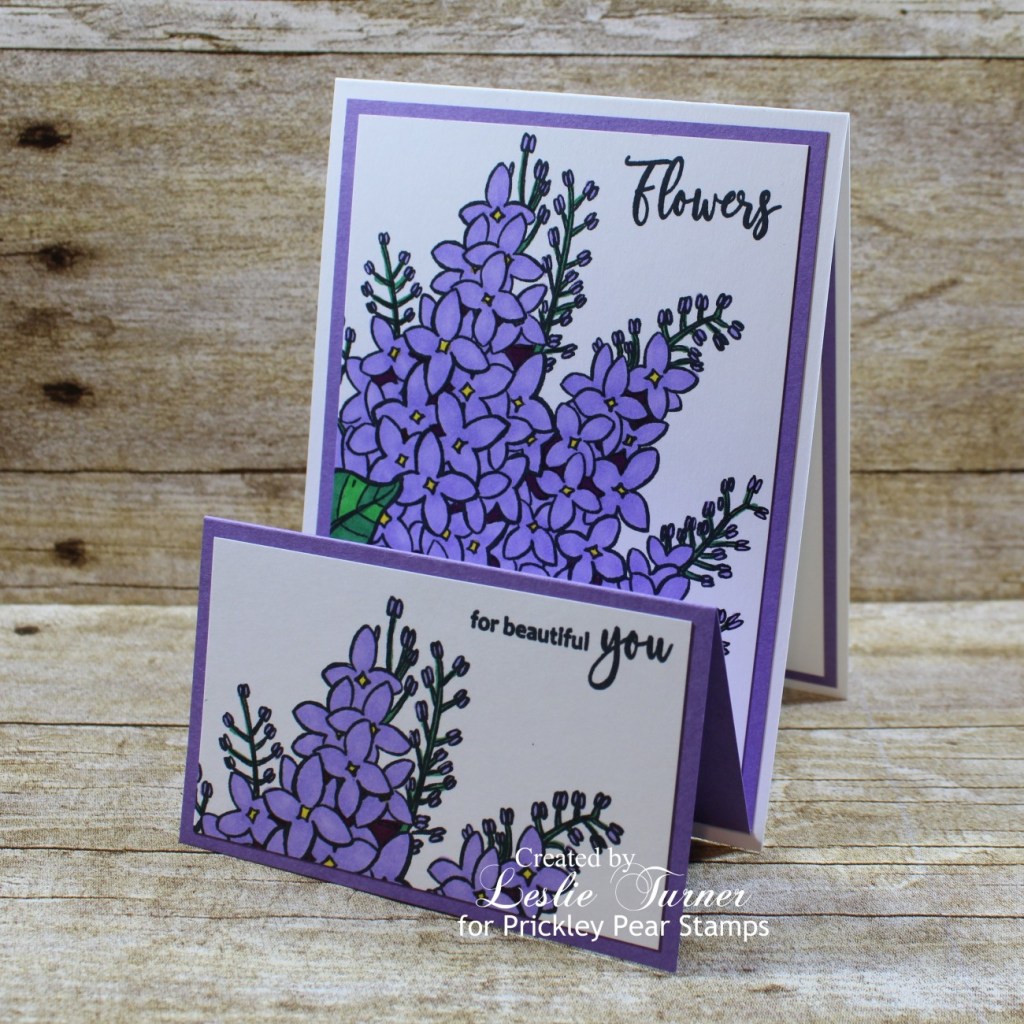
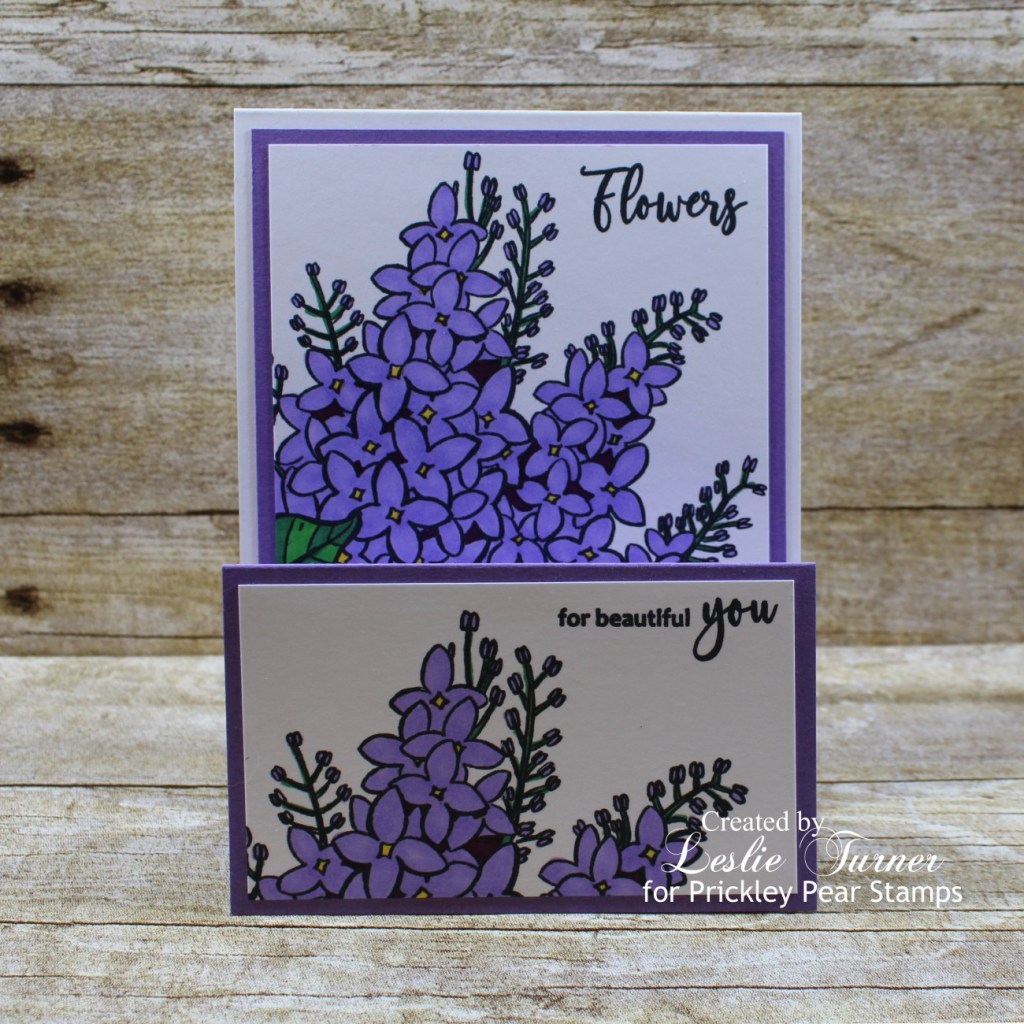
Hi friends! A super Happy Saturday to you! Hope you have something fun (but safe) planned this weekend! Affiliate links are used in this post at no cost to you. I really appreciate your support! I’ve popped in this morning to share another sample I created for the Prickley Pear Stamps Spring 2021 Release! I’ve had the best time creating with these amazing new sketched florals, super sweet praying Tess, and the masculine stamps! Be sure to check them out! I’ve had handwritten instructions for a new fun fold in my arsenal for several months now, called a double easel fold, which I saw in a newsletter from Sharon Armstrong, a SU Demonstrator in Texas, so I decided to try it out. It’s super easy and oh, I love it! This card features the gorgeous Sketched Florals – Lilac stamp set which I paired with the Flowers for Beautiful You stamp set!

I cut the card base and layering panels from Neenah Classic Crest Solar White 80# cardstock and CutCardStock Pop-Tone 65# Grape Jelly cardstock. I stamped the full image on the Solar White layering panel and a partial image on a scrap piece of Solar White cardstock, and colored them with Bic Mark-Its. I used those markers this time because I really liked the purples in the set for this image. I trimmed the colored images, stamped the sentiments and layered them on the purple cardstock panels.

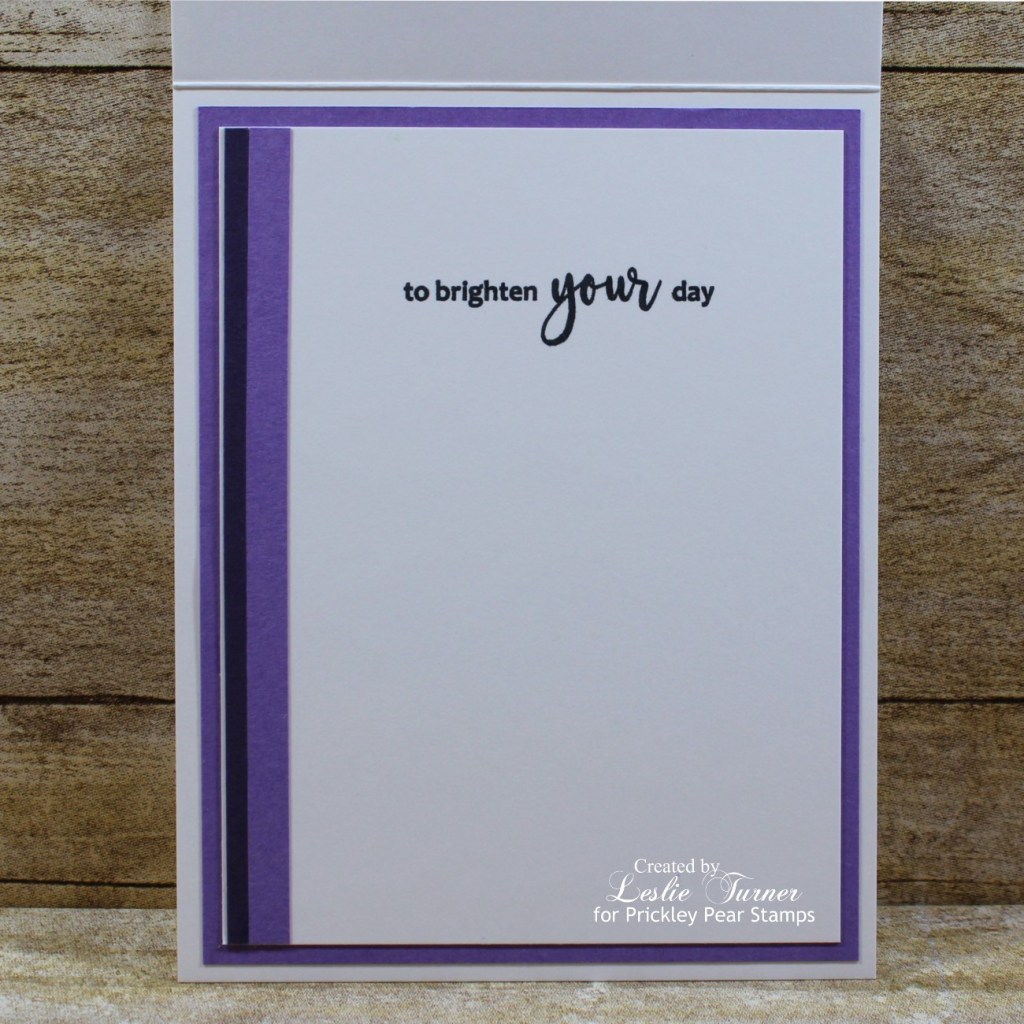
I cut the inside panel from Neenah Classic Crest 80# Solar White cardstock as well and embellished it with strips of CutCardStock Basis 80# Dark Purple cardstock and CutCardStock Pop-Tone 65# Grape Jelly cardstock, stamped the sentiment in black ink and layered the panel on the lighter purple cardstock.

Prickley Pear Stamps products used:
Sketched Florals – Lilac stamp set
Flowers for Beautiful You stamp set

Other products used:
Cardstock/Paper: Neenah Classic Crest 80# Solar White cardstock, CutCardStock Pop-Tone 65# Grape Jelly cardstock, CutCardStock Basis 80# Dark Purple cardstock
Ink: Memento Tuxedo Black ink; Bic Mark-Its- Polynesian Purple, Plumtastic Purple, Yellow Blaze, Forest Green, Key Lime
Accessories: MISTI stamp tool, Bearly Art precision craft glue, Tonic Studios 12″ Guillotine Paper Trimmer

I hope you’ve enjoyed this project! Be sure to check out all the awesome stamps and dies at Prickley Pear Stamps! If you’d like to save 10% on anything on the site when you shop at Prickley Pear Stamps, use the coupon code LESLIE10 at checkout! And be sure to ‘like’ and ‘follow’ the Prickley Pear Stamps Facebook page to keep up with news and sales, and join Prickley Pear Pals (the fan group) for lots of fun crafty ideas and to share your creativity! And finally, we’d love to see you visit the Prickley Pear Stamps blog that’s in the process of being revived and become a Follower! Hope to see you there! Thanks so much for stopping by today – we’ll see you next time! ;)

Scrappy hugs,
lesliesig

Thank You tower fold

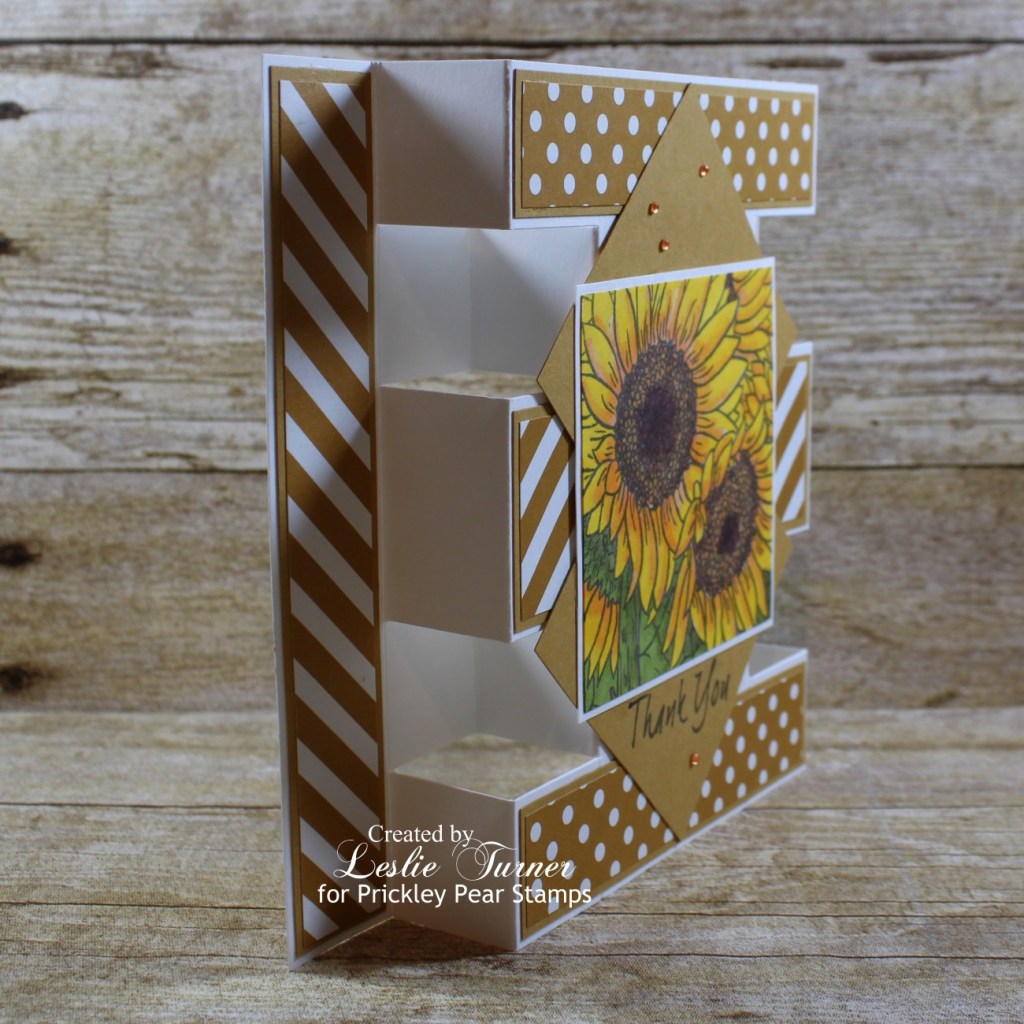
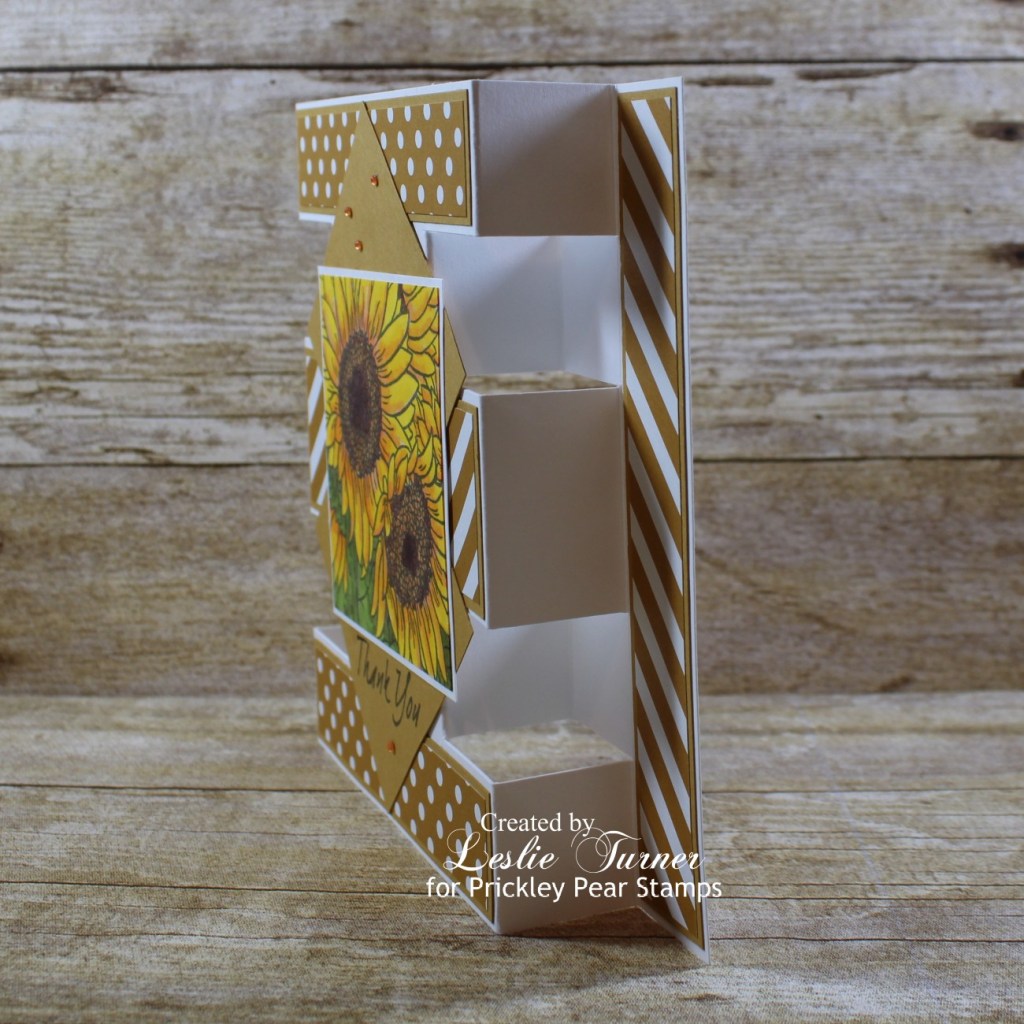
Hi everybody! How is your Thursday going? Great, I hope… not much longer till the weekend is here! Affiliate links are used in this post at no cost to you. I really appreciate your support! I’ve popped in to share one of several samples I created for the Prickley Pear Stamps Spring 2021 Release! You won’t believe the gorgeous selection of sketched florals, adorable praying Tess, and even a couple sets for the guys, so be sure to check them out and stay tuned for more pretties! You know me and fun folds, and I saw another great one in a recent Splitcoast Stampers newsletter that I’m sure I’ll be making again and again! The tutorial is HERE if you’re interested. This one is called a tower fold and I’ve used the stunning Sketched Florals – Sunflowers stamp set which I think looks amazing on this thank you card!

I cut the tower fold card base from Neenah Classic Crest Solar White 110# cardstock and embellished it with coordinating patterned paper and cardstock panels. I stamped the image from the Sketched Florals – Sunflowers stamp set twice on Neenah Classic Crest Solar White 80# cardstock, colored both with alcohol markers, trimmed the portion of each image I needed for the front and back panels of the card, and layered them on cardstock panels. I adhered the front panel, stamped the sentiment from Oak & Maple Leaf 2 stamp set beneath the image, and added several tiny yellow gemstones.

Here’s a shot of the back with another sentiment from the Oak & Maple Leaf 2 stamp set – and it’s just as pretty as the front, lol! ;)

And one more peek from a different angle… such a gorgeous stamp set and fabulous fold! I’ve already made another one, lol, which you’ll see a little later on!

Prickley Pear Stamps products used:
Sketched Florals – Sunflowers stamp set
Oak & Maple Leaf 2 stamp set

Other products used:
Cardstock/Paper: Neenah Classic Crest 110# Solar White cardstock, Stampin’ Up Delightful Dijon cardstock, Stampin’ Up Delightful Dijon double-sided paper from the 2015-2017 DSP Stack
Ink: Memento Espresso Truffle ink; Nuvo alcohol markers- 389, 391, 405, 416, 420, 465, 466
Accessories: MISTI stamp tool, Bearly Art precision craft glue, Darice tiny yellow gemstones

I hope you’ve enjoyed this project! Be sure to check out all the awesome stamps and dies at Prickley Pear Stamps! If you’d like to save 10% on anything on the site when you shop at Prickley Pear Stamps, use the coupon code LESLIE10 at checkout! And be sure to ‘like’ and ‘follow’ the Prickley Pear Stamps Facebook page to keep up with news and sales, and join Prickley Pear Pals (the fan group) for lots of fun crafty ideas and to share your creativity! And finally, we’d love to see you visit the Prickley Pear Stamps blog that’s in the process of being revived and become a Follower! Hope to see you there! Thanks so much for stopping by today – we’ll see you next time! ;)

Scrappy hugs,
lesliesig

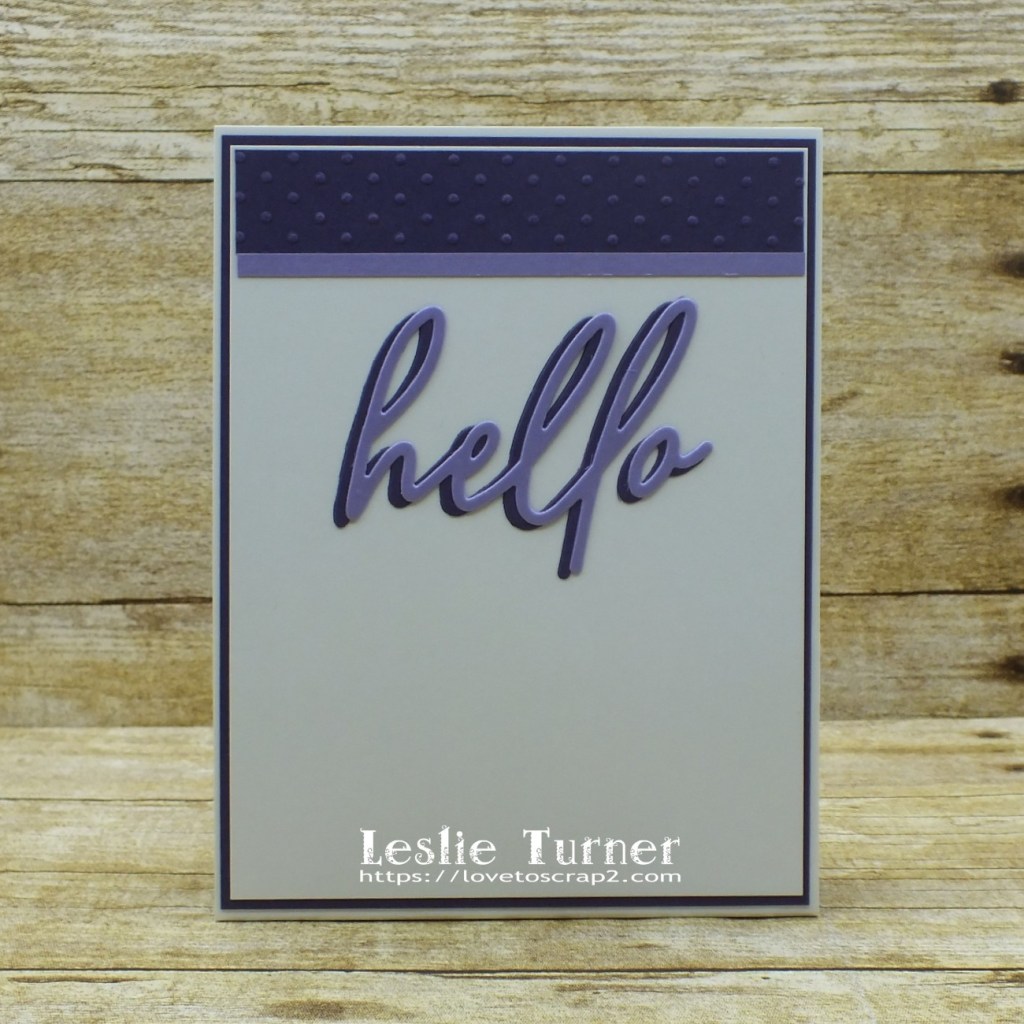
Just saying hello

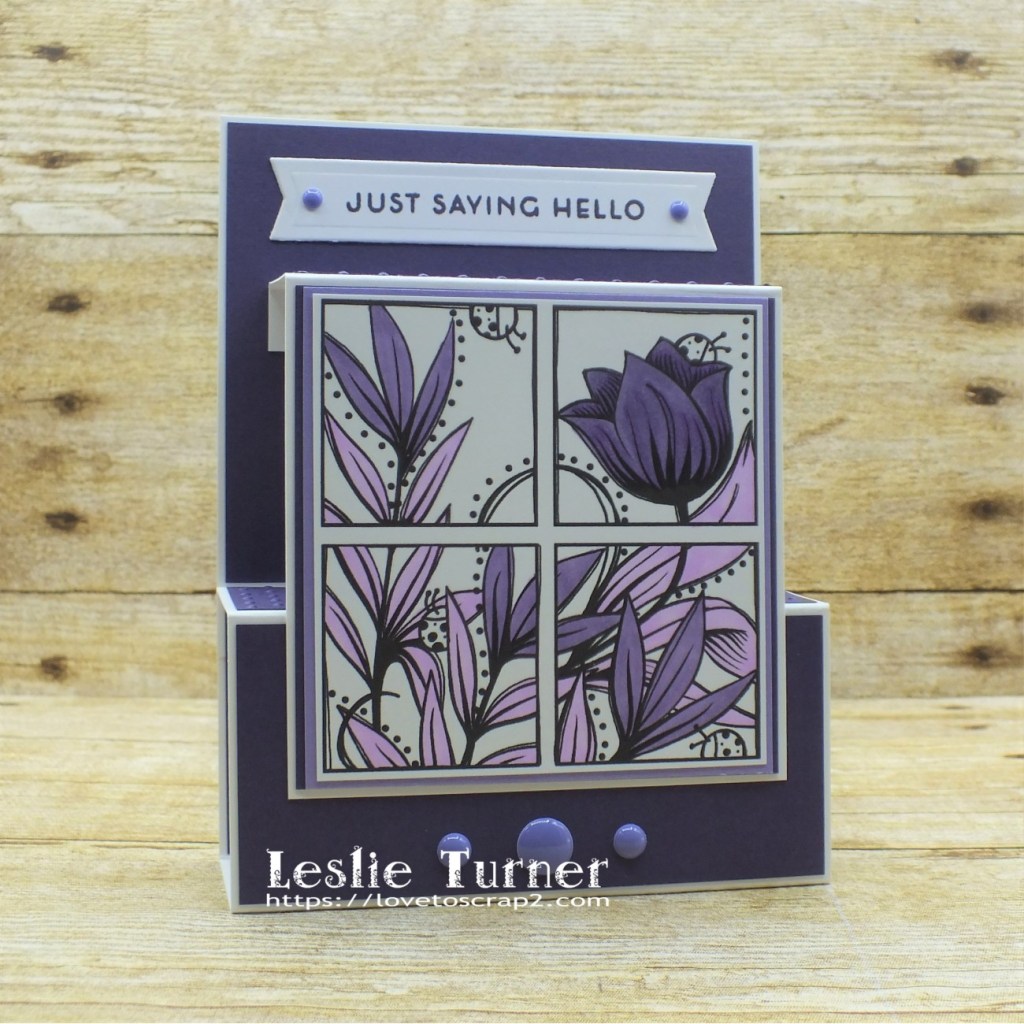
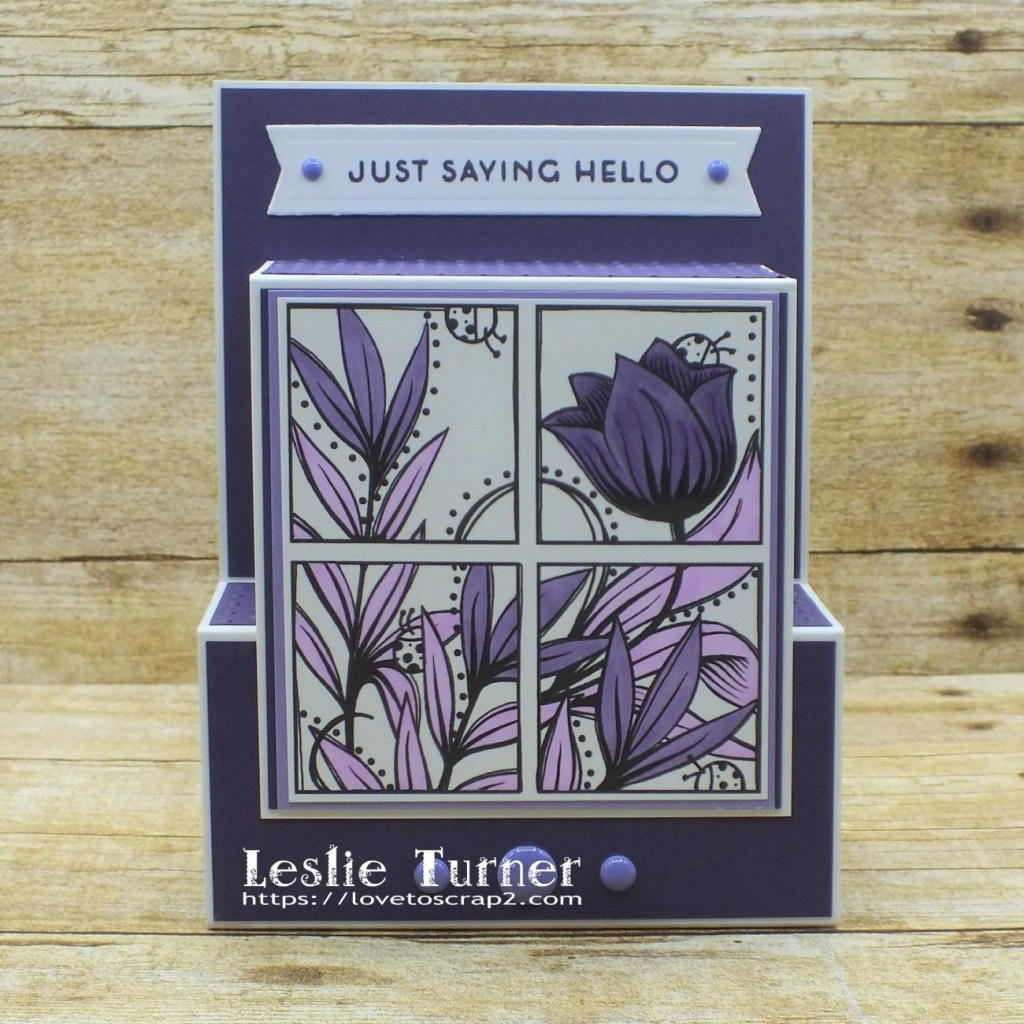
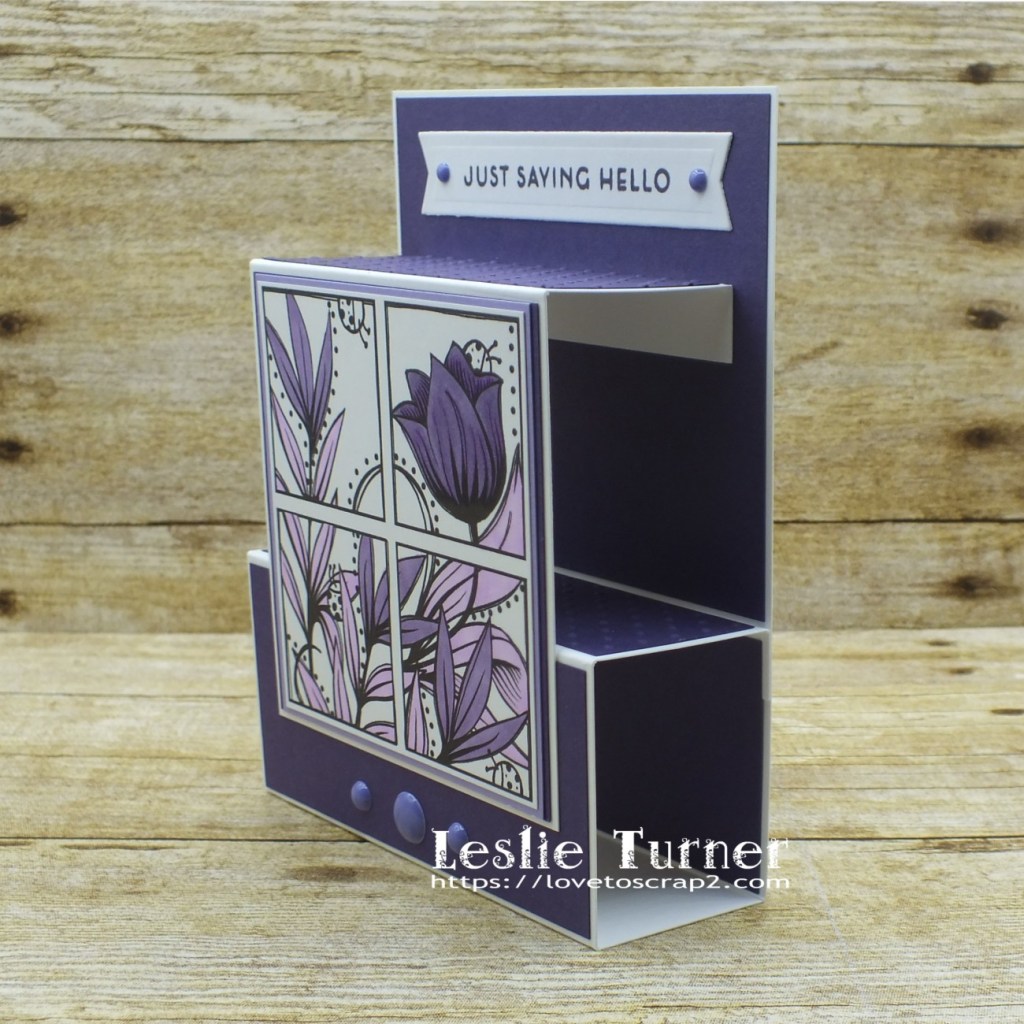
Happy Tuesday, friends! I hope your week is off to a great start! Can’t believe we’re in the middle of May already! Affiliate links are used in this post at no cost to you. I really appreciate your support! A new Monochrome challenge has started today over at The Outlawz Tuesday Color Challenge and our sponsor is Bugaboo Stamps so be sure to come on over and play! We know you love you some Bugaboo! I created another front step card, this one being a hybrid card featuring one of my favorite fun folds, using the 4 Block Tulip Square digital image gifted to me from Bugaboo and a stamped sentiment from Altenew! I love this image! A good friend of mine recently asked me what a ‘hybrid’ card is so I explained the card maker’s definition which is the use of rubber/clear stamping along with digital stamping on cards, and the scrapbooker’s definition which is the use of store-bought patterned paper along with digital paper on scrapbook layouts. I scrapbooked years ago and created hybrid layouts all the time but just kind of lost interest and got into card making. But she thought that was awesome and said she had never heard of that term, lol! She’s not a crafter, so go figure… ;)

For the Monochrome challenge this fortnight, we are to use varying shades of purple as shown in the photo below. I love purple so this challenge was a fun one!

I created a front step card base from Neenah Classic Crest Solar White 110# cardstock and cut layering panels from CutCardStock Basis Dark Purple cardstock. I ran two of the layering panels through the Big Shot with a Swiss Dots embossing folder for a little texture. I colored the tulip image with alcohol markers in several shades of purple, layered it on CutCardStock Stardream Metallic Amethyst cardstock and then on the CutCardStock Basis Dark Purple cardstock with just a tiny bit showing on the sides, and adhered it to the card base. I stamped the sentiment in dark purple ink, cut it with a flagged die and adhered it at the top. The final touch was adding purple enamel dots to the top and bottom.

I cut the back panel from Neenah Classic Crest 80# Solar White cardstock and embellished it with two hello die cuts that I cut from CutCardStock Stardream Metallic Amethyst cardstock and CutCardStock Basis Dark Purple cardstock and layered together to carry over the sentiment from the front. I adhered a Swiss Dots embossed dark purple strip and a narrow amethyst strip to the top of the panel.

And one more look… a side view so you can see the cool construction. I show this every time I make this fold, lol! I love it! And it folds flat for mailing!

Products used:
Cardstock/Paper: Neenah Classic Crest 110# and 80# Solar White cardstock, CutCardStock Basis Dark Purple cardstock, CutCardStock Stardream Metallic Amethyst cardstock
Stamps: Bugaboo Stamps 4 Block Tulip Square digital image, Altenew Painted Butterflies stamp set
Ink: Nuvo alcohol markers- 437, 439, 441; Memento Elderberry ink
Dies/Punches: Altenew Calming Reverie die set, Inspired by Stamping Fancy Label Dies 3
Accessories: Tombow Mono permanent adhesive, Bearly Art precision craft glue, Cuttlebug Swiss Dots embossing folder, Big Shot, Eyelet Outlet Purple Enamel Dots

I hope you’ve enjoyed this project and will come over and join in all the fun at The Outlawz Challenges! I hope you’ll link up a project this fortnight – we’d love to see what you do with this color challenge! And be sure to check out all the fun images at Bugaboo Stamps! Thanks so much for stopping by – we’ll see you next time! ;)

Scrappy hugs,
lesliesig

Free Spirit Wild Heart

5/15/21 Top Rocker at 613 Avenue Create!

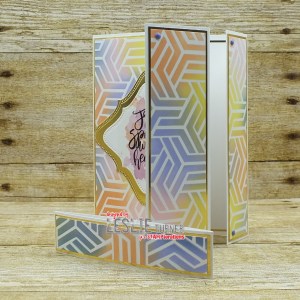
Hi friends! As I mentioned in my last post, I’m into my second month guest designing for STAMPlorations Stencil Sunday and I’m in crafty heaven! Affiliate links are used in this post at no cost to you. I really appreciate your support! I have three projects to share for my second feature and I’m showcasing them individually so I can enjoy sharing them in some challenges. All three projects feature several ARTplorations Stencils along with other products available in the store, so I’m back with my second project which is a triple fold. If you know me, then you know that I’m a real sucker for fun folds! I’ve made several of these triple folds previously and they are so cool!

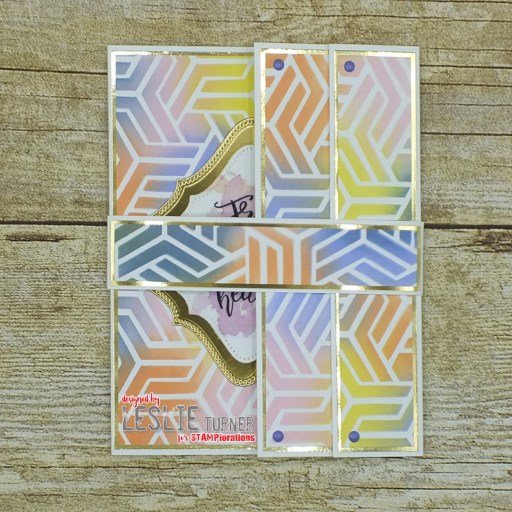
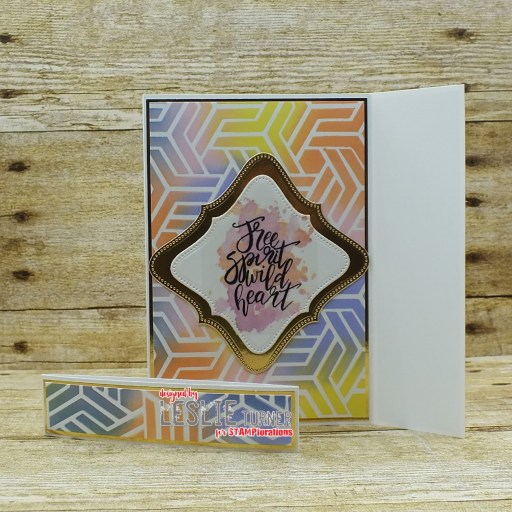
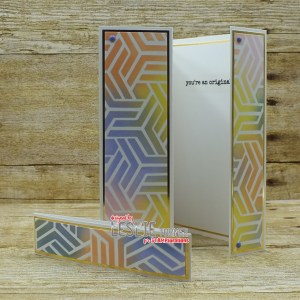
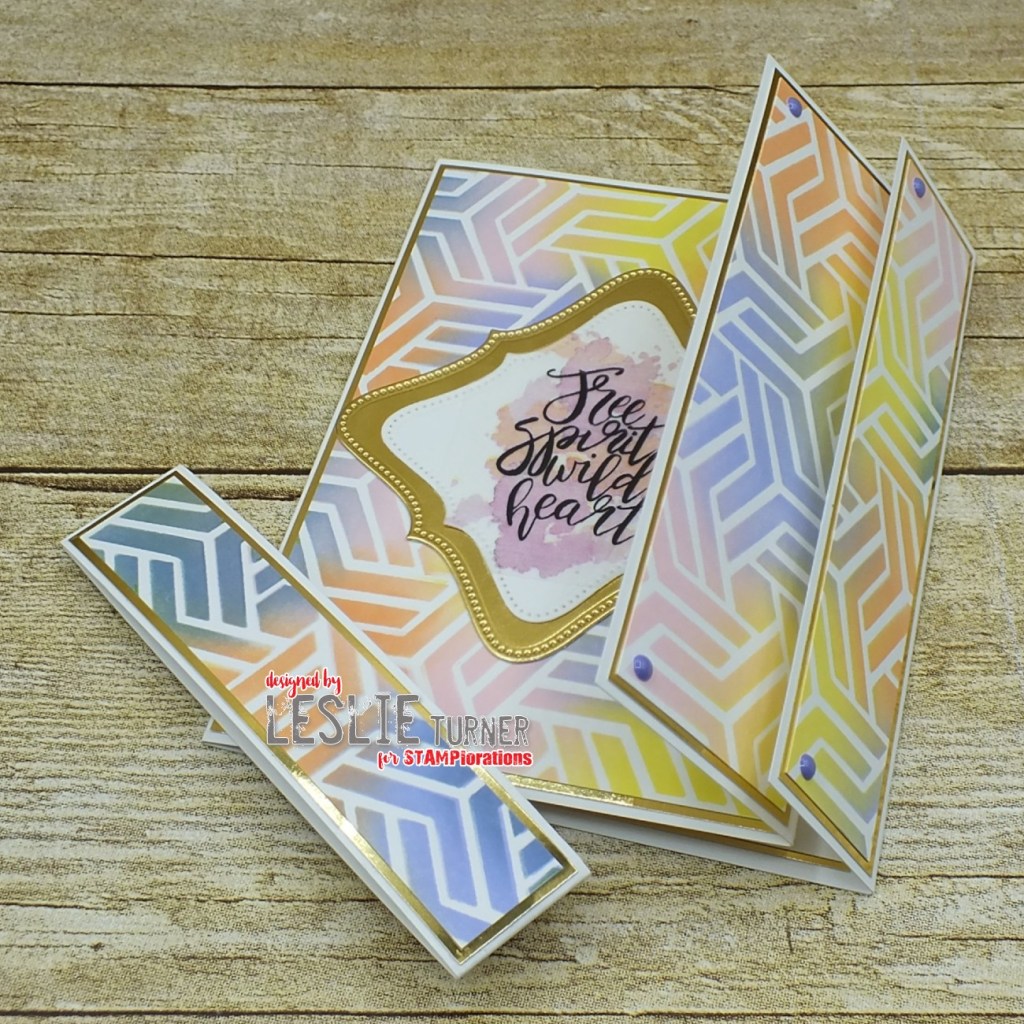
I created the triple fold card base from Neenah Classic Crest Solar White cardstock and then cut layering panels from gold foil cardstock. Using the ARTplorations Aperture Slimline Stencil, I randomly applied several colors of distress inks to a sheet of Neenah Classic Crest Solar White cardstock. I cut slightly smaller panels from the inked cardstock and adhered them to the gold foil panels and then to the card base. I applied a clear sticker from CRAFTplorations Free Spirit Clear Stickers to a scrap piece of white cardstock and cut it in a diamond orientation rather than square with a die from CUTplorations Pierced Curly Frames/Tags Nesting Dies, layered it on a slightly larger die cut shape from gold foil and adhered it to the card front. The final step was adding small purple enamel dots to the corners and creating a belly band to keep the card closed.

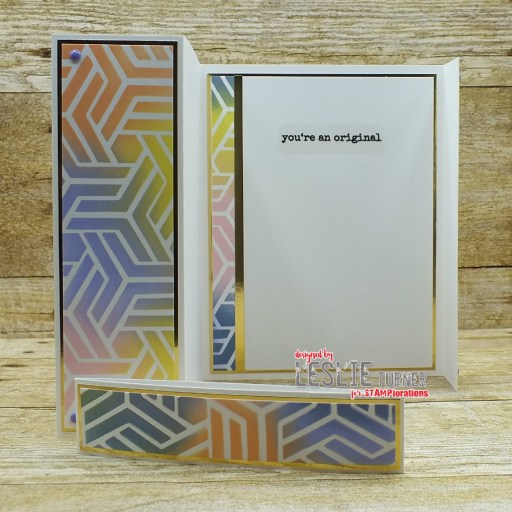
This is such a unique fold! Here are a couple shots of the card opening.

I cut the inside panel from Neenah Classic Crest Solar White cardstock and embellished it with leftover strips of the inked cardstock and gold foil, applied a clear sticker from CRAFTplorations Shine Bright Clear Stickers, and layered the panel on gold foil cardstock.

And one more look… totally loving how this turned out! This stencil is amazing!

Sharing in the following challenges:
1. 613 Avenue Create: #5 – Anything Goes w/ optional twist of Mood Board (no twist)
2. A Perfect Time To Craft Open Challenge: #5-2021 – Anything Goes
3. Classic Design Challenge: #5 – Anything Goes
4. Just Us Girls: #583 – Trend Week/Layers
5. Lemon Shortbread Challenge Blog: #145 – Anything Goes
6. QKR Stampede: #419 – Anything Goes
7. The Crafter’s Cafe: #265 – Anything Goes
8. Through The Purple Haze: #180 – Anything Goes w/ optional Gems and/or Pearls (playing twist)

STAMPlorations products used:
ARTplorations Aperture Slimline Stencil
CUTplorations Pierced Curly Frames/Tags Nesting Dies
CRAFTplorations Free Spirit Clear Stickers
CRAFTplorations Shine Bright Clear Stickers

Other products used:
Cardstock/Paper: Neenah Classic Crest 80# Solar White cardstock, Hygloss Gold Foil cardstock
Ink: Ranger distress ink- spun sugar, shaded lilac, stormy sky, dried marigold and squeezed lemonade
Accessories: Bearly Art precision craft glue, Tombow Mono permanent adhesive, Big Shot, Eyelet Outlet Purple Enamel Dots

I hope you’ve enjoyed these projects and you’re inspired to grab some of your stencils and play! Be sure to check out all the amazing stamps, dies, stencils, digis and other crafty goodies at the STAMPlorations main, outlet and digital stores! Use code STAMPGIRLLESLIE for a 20% discount on your orders in the store (with unlimited uses)! And there is A LOT going on over at the STAMPlorations blog – tons of creative inspiration, tutorials, promotions and giveaways – all month long! If you’ve never visited, you are definitely in for a good time! When you do visit, be sure to leave comments on the posts! Every month Shery draws seven random winners from all the posts published during the month, so the more posts you comment on, the more chances you have to win! And be sure to Follow STAMPlorations on Facebook, Instagram and Pinterest for more creative inspiration! Thanks so much for stopping by today – we’ll see you next time! ;)

Scrappy hugs,
lesliesig