4/28/22 DT Favorite at A Perfect Time To Craft Open Challenge!
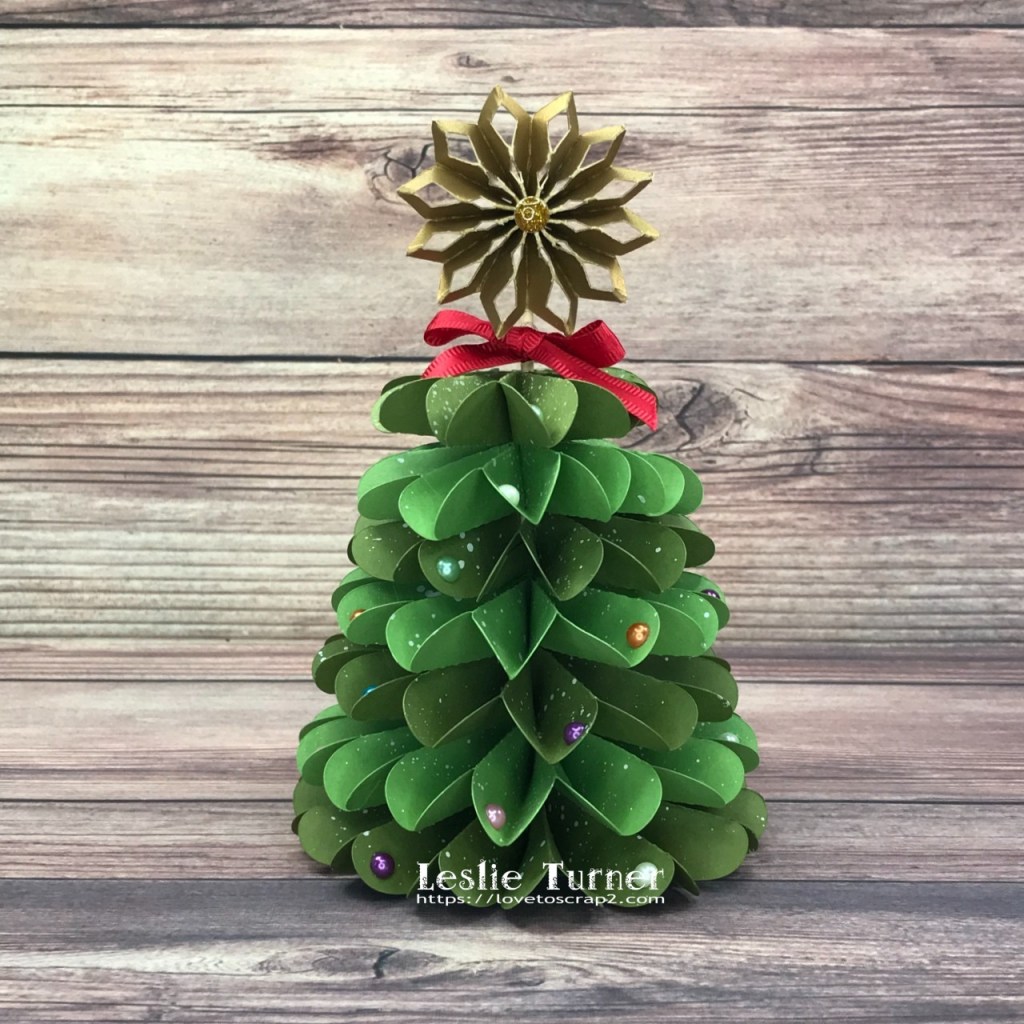
Hi friends! A big Happy Tuesday to you! I hope you had an awesome weekend and your week has started off nicely! Affiliate links are used in this post at no cost to you – I really appreciate your support! Our new challenge is live this morning over at Merry Little Christmas Challenge Blog and I’m excited to share my DT inspiration project for MLCCB #43 – Anything Christmas Goes! I’m sure you all remember that Ed and I rescue cats and kittens and our current count is 18 – 11 inside and 7 outside. That said, we haven’t put up a regular Christmas tree in a few years, and we have a small one I made with my Scan N Cut that we put up high and out of reach along with a few other decorations!
I assembled the Christmas tree, and added an Eyelet Outlet Gold Glitter Enamel Dot to the star on the top. I then added Eyelet Outlet Green, Orange, Pink, Blue and Purple Pearl Bling to the tree along with a red bow.
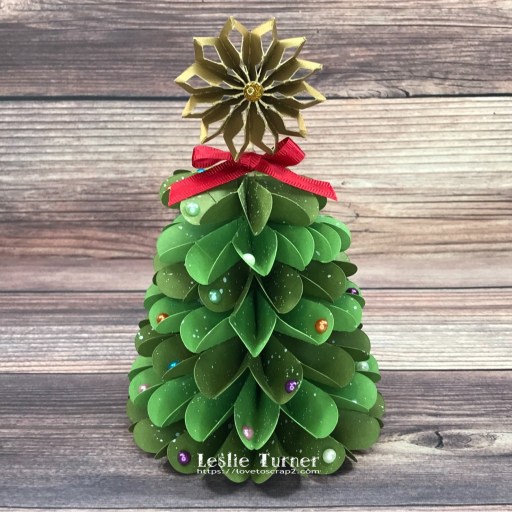
And one more peek… so loving how this turned out! Definitely a fun little decoration to add a bit of festive cheer to our living room even with 11 feline kids running about! ;)
Products used: Cardstock/Paper: CutCardStock Pop-Tone Jellybean Green, Pop-Tone Gumdrop Green and Stardream Metallic Antique Gold cardstock Dies/Punches/Cut Files: Scan N Cut Canvas Rosette Christmas Tree cut file Accessories: Brother Scan N Cut, Liquitex White Acrylic Paint, Tim Holtz Distress Sprayer, Bearly Art precision craft glue, bamboo skewer, Eyelet Outlet Gold Glitter Enamel Dots; Eyelet Outlet Green, Orange, Pink, Blue and Purple Pearl Bling; Darice White Pearls, Stampin’ Up Real Red ribbon
I hope you’ve enjoyed seeing this project and will link up a Christmas project with us this time! We’d love to see what you create! Thanks so much for stopping by today – we’ll see you next time! ;)
1/9/22 Top Rocker at 613 Avenue Create! 1/9/22 Rising Star at A Place To Start! 1/31/22 DT Favorite Winner at Classic Design Challenge! 2/13/22 Shoutout at River of Creativity!
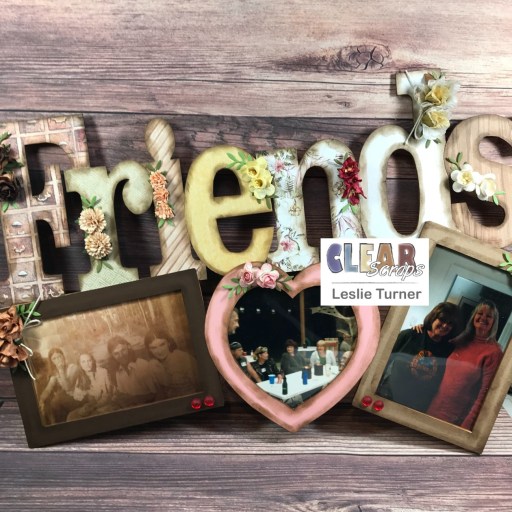
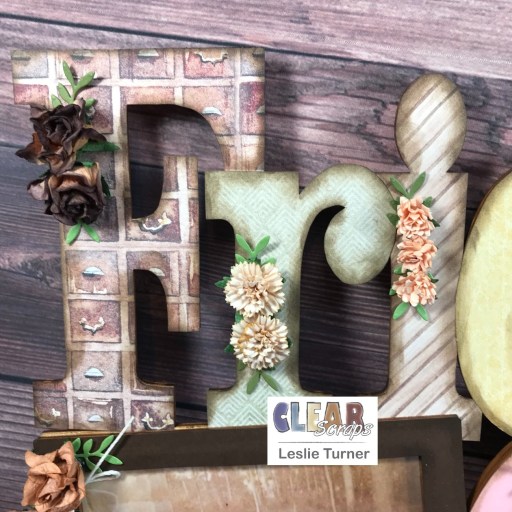
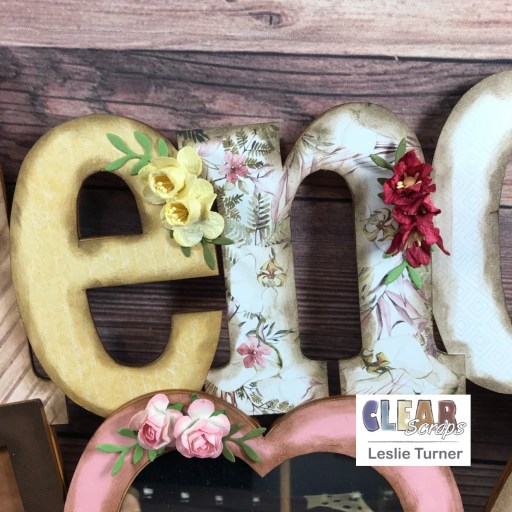
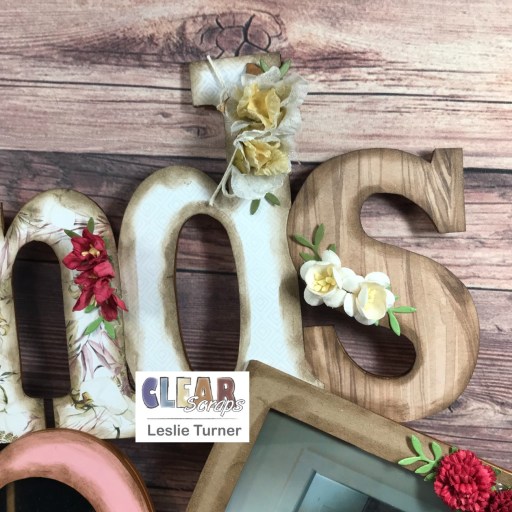
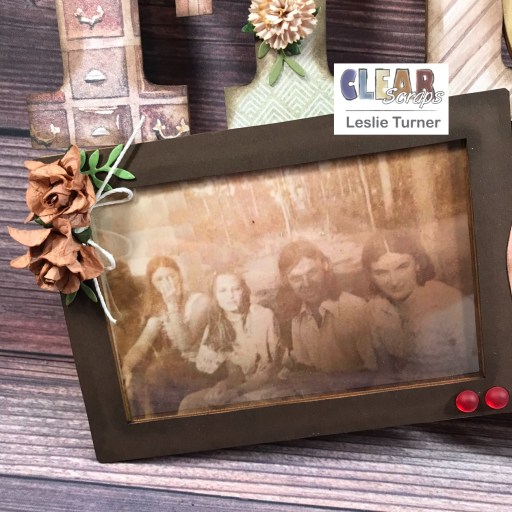
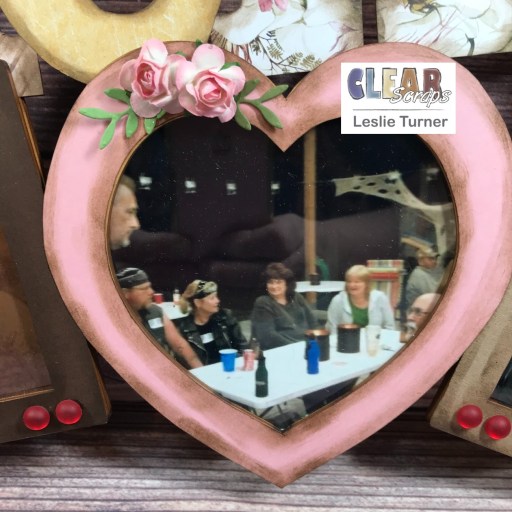
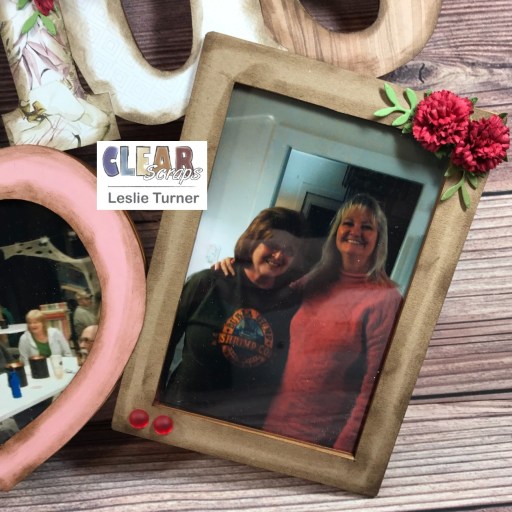
Hey, everybody! Is it me, or is this first week of January just a blur?! It’s been busy, that’s for sure! I’m thrilled to be back on the Clear Scraps blog today with another awesome DT inspiration project! I focused on some old middle/high school friends when I created today’s inspiration project featuring the Friends XL Wood Frame. This piece is huge and wonderful! It was definitely a fun project – from picking out the three photos I wanted to use, to the actual creation with pretty papers and flowers and the assembly! Brought back so many memories! And I’m not insinuating that any of us are old… just friends from a long time ago! ;)
I covered each letter with a different patterned paper and the frames with a different color of cardstock, heavily inked the edges, and then added paper flowers and die cut greenery, and a couple bamboo cord bows. I added a few gemstones to complete the frame.
Now for the old photos… middle school friends in the photo on the left (I’m second from the left).
35th high school reunion eleven years ago in the middle photo (hubby and I are on the left seated at the table).
A long-time friend since middle school with me in the photo on the right (I’m on the right) taken about ten years ago. The cool thing is I’m still in touch with every one of these friends! Sorry about the weird shadows on the photos cast from the acetate used to keep the photos clean and dust-free. I took many photos and these were the best ones. :\
Other products used: Cardstock/Paper: P13 Always and Forever 6×8 designer paper pack, CutCardStock Basis Brown cardstock, Pop-Tone Bubblegum cardstock, Pop-Tone Gumdrop Green cardstock, Pop-Tone Jellybean Green cardstock and Brown Bag Kraft paper Ink: Ranger walnut stain distress ink Dies/Punches: Sizzix Bird Scene Thinlits (greenery) Accessories: Tonic Studios 12″ Guillotine Paper Trimmer, Grafix Craft Plastic, Bearly Art precision craft glue, hot glue gun, Wild Orchid Crafts paper flowers, Martha Stewart gemstones, Hemptique bamboo crafting cord
I hope you’ve enjoyed today’s project and you’re inspired to get those craft supplies out to play! Be sure to check out all the amazing acrylic, wood and chipboard goodies at Clear Scraps… OMGoodness, you won’t be disappointed! And head on over to the Clear Scraps Facebook Page for lots of inspiration! And while you’re at it, join the Clear Scraps Facebook Creative Group to connect with other Clear Scraps fans! Thanks so much for stopping by today – we’ll see you next time!
12/21/21 Featured Project at Little Red Wagon! 12/27/21 Featured Creation at Scrapping4fun Challenges! 12/28/21 Top Rocker at 613 Avenue Create! 1/2/22 Winner at 613 Avenue Create! 1/4/22 Top Pick at Jan’s Digi Stamps Challenges! 1/13/22 Shoutout at River of Creativity! 1/14/22 Best Technique Winner at World Wide Open Design Team Monthly Challenge!
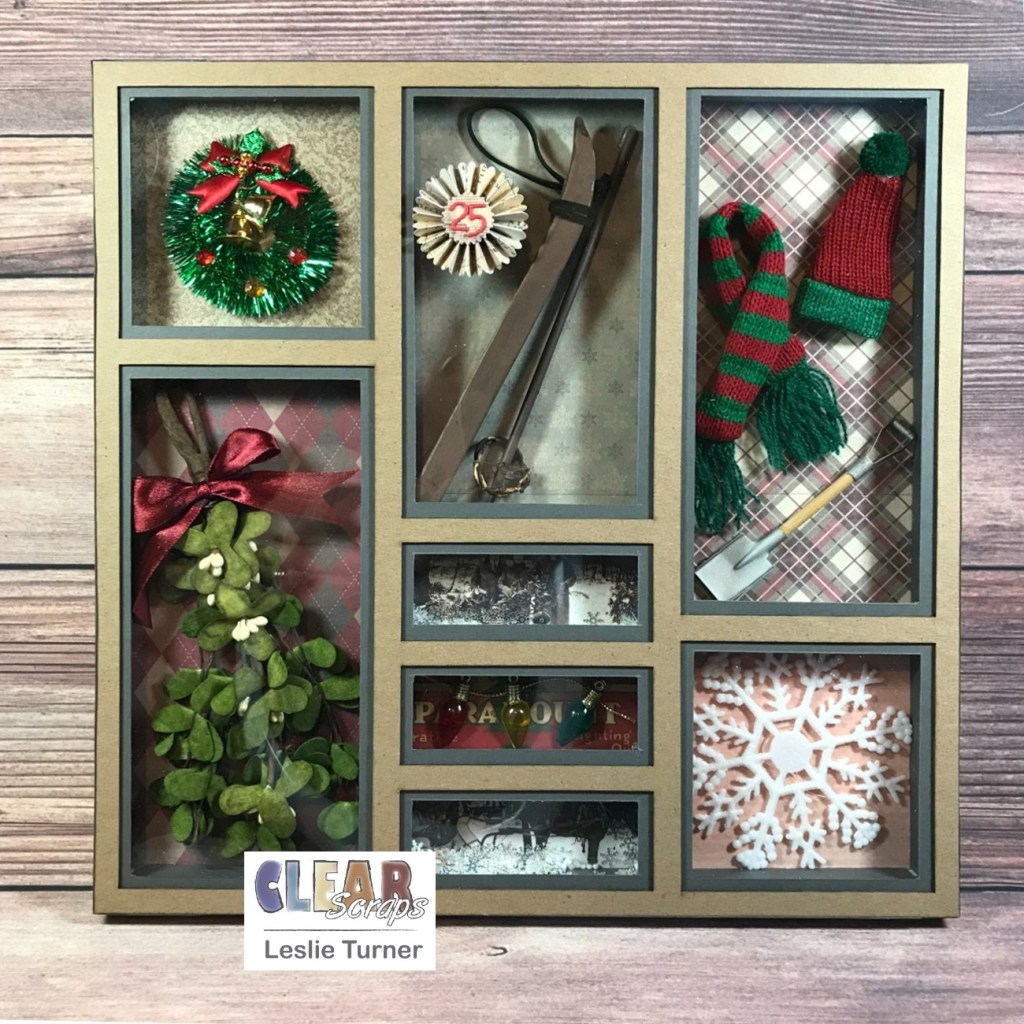
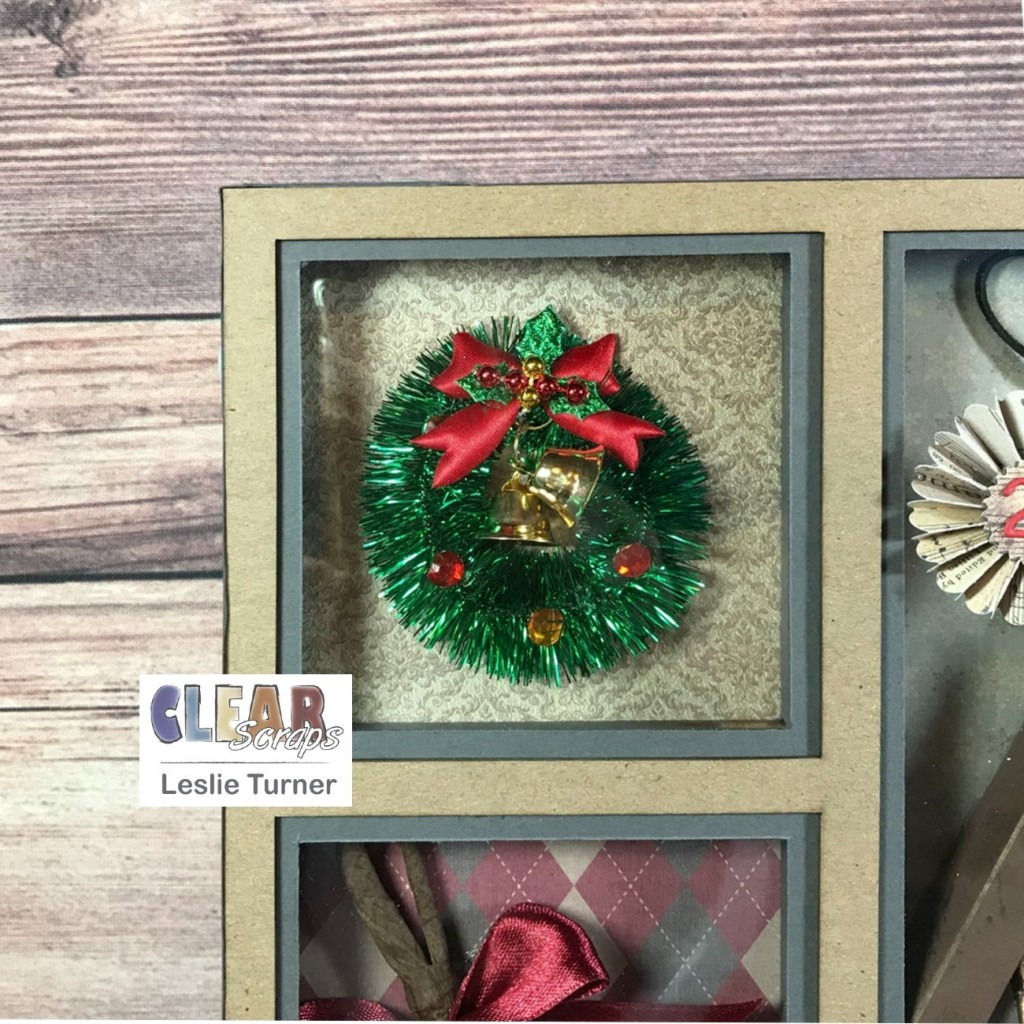
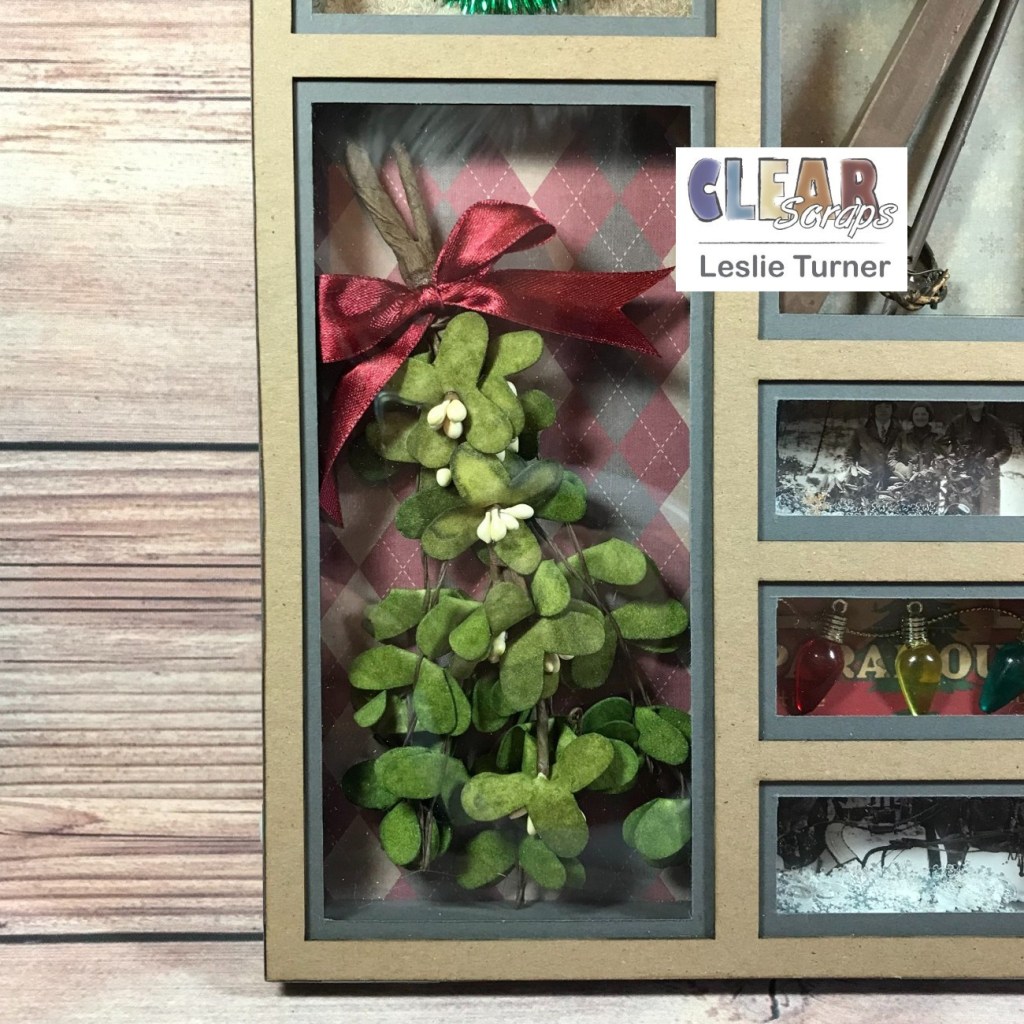
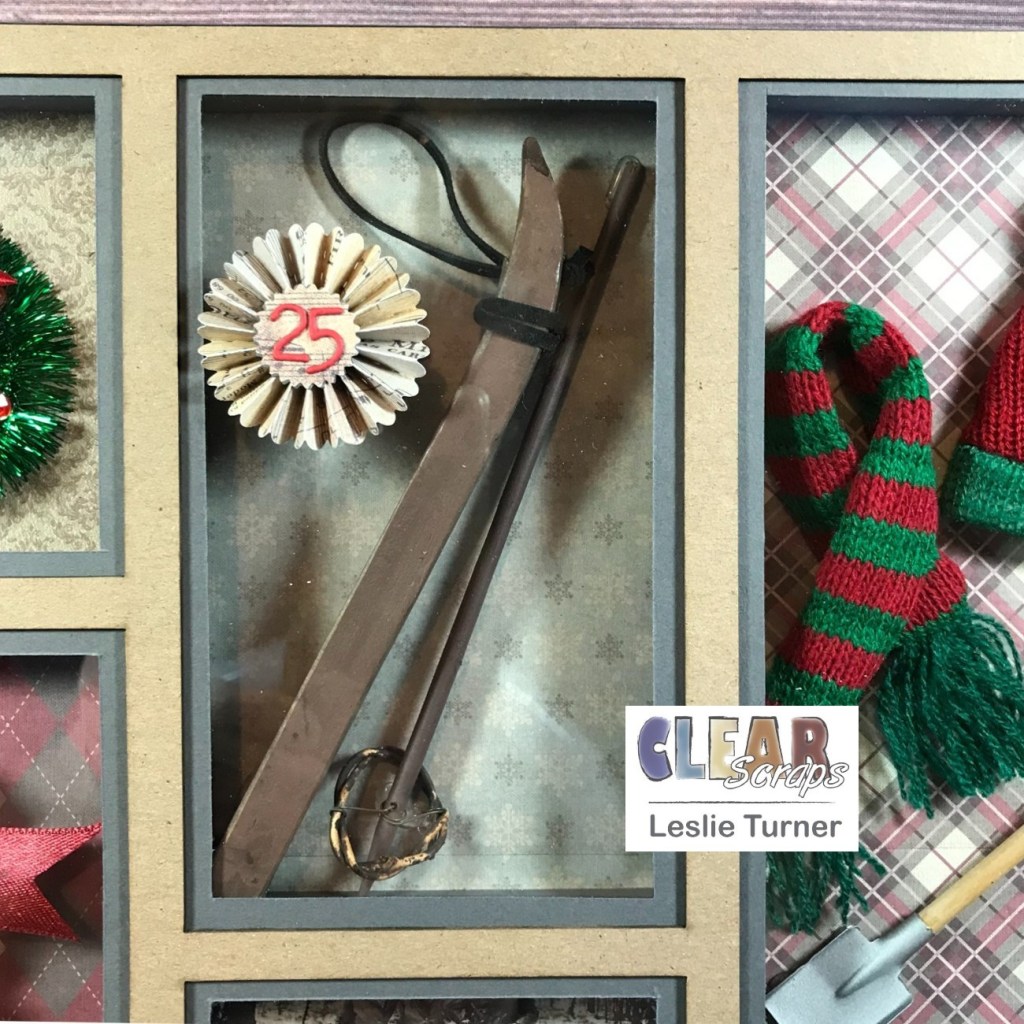
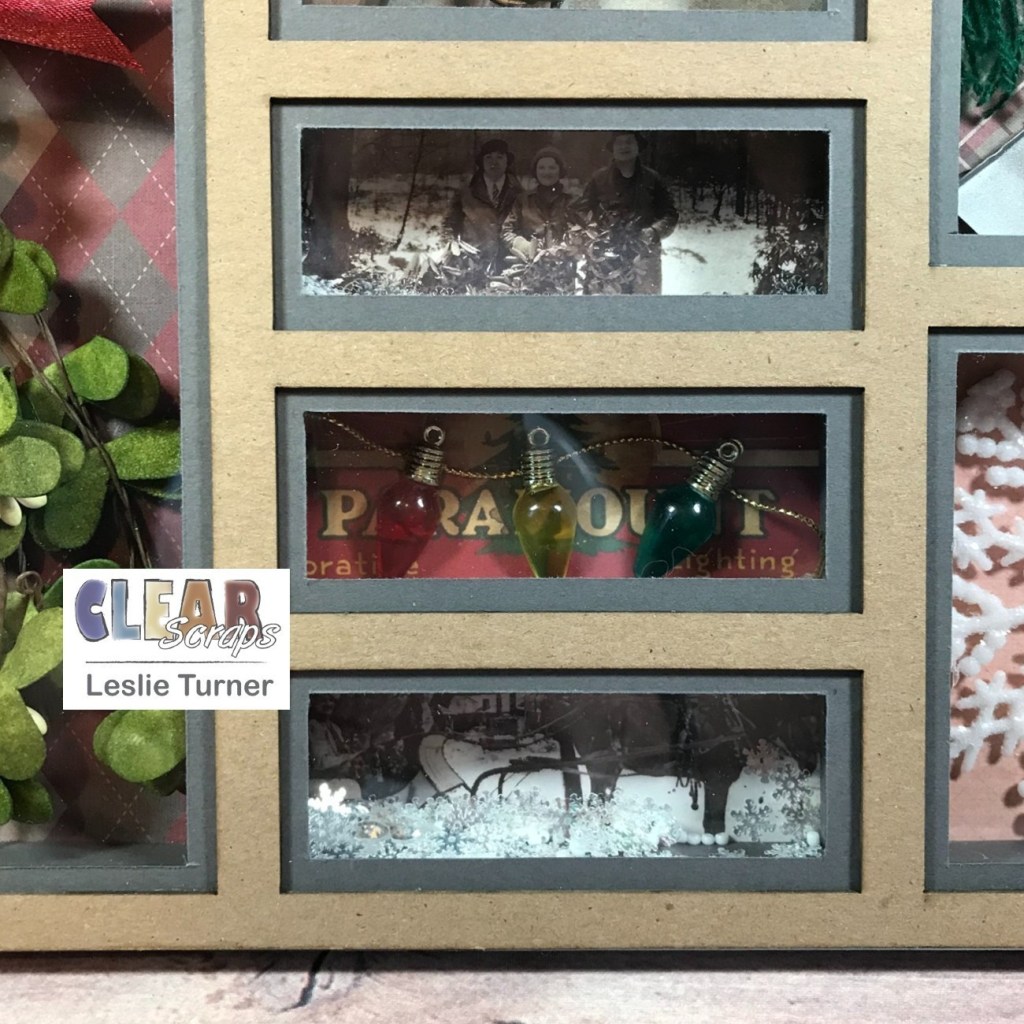
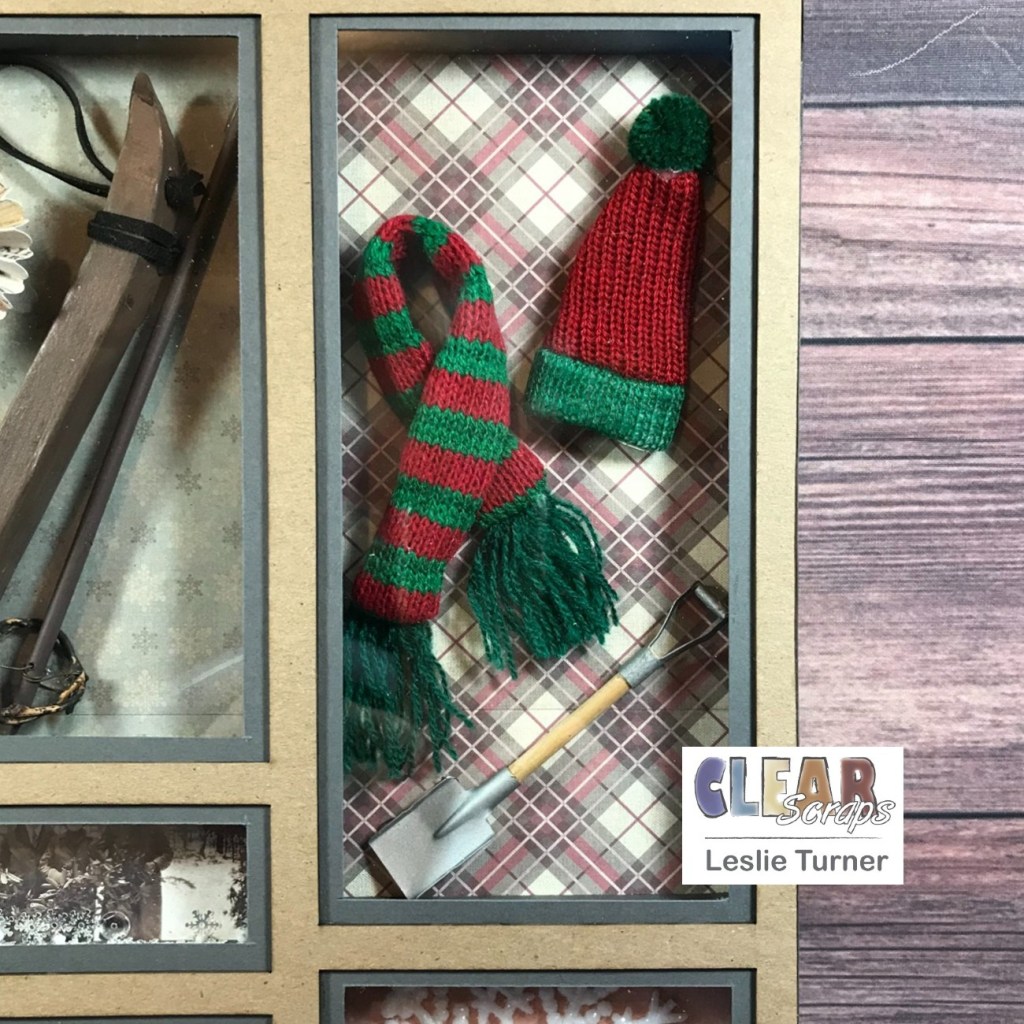
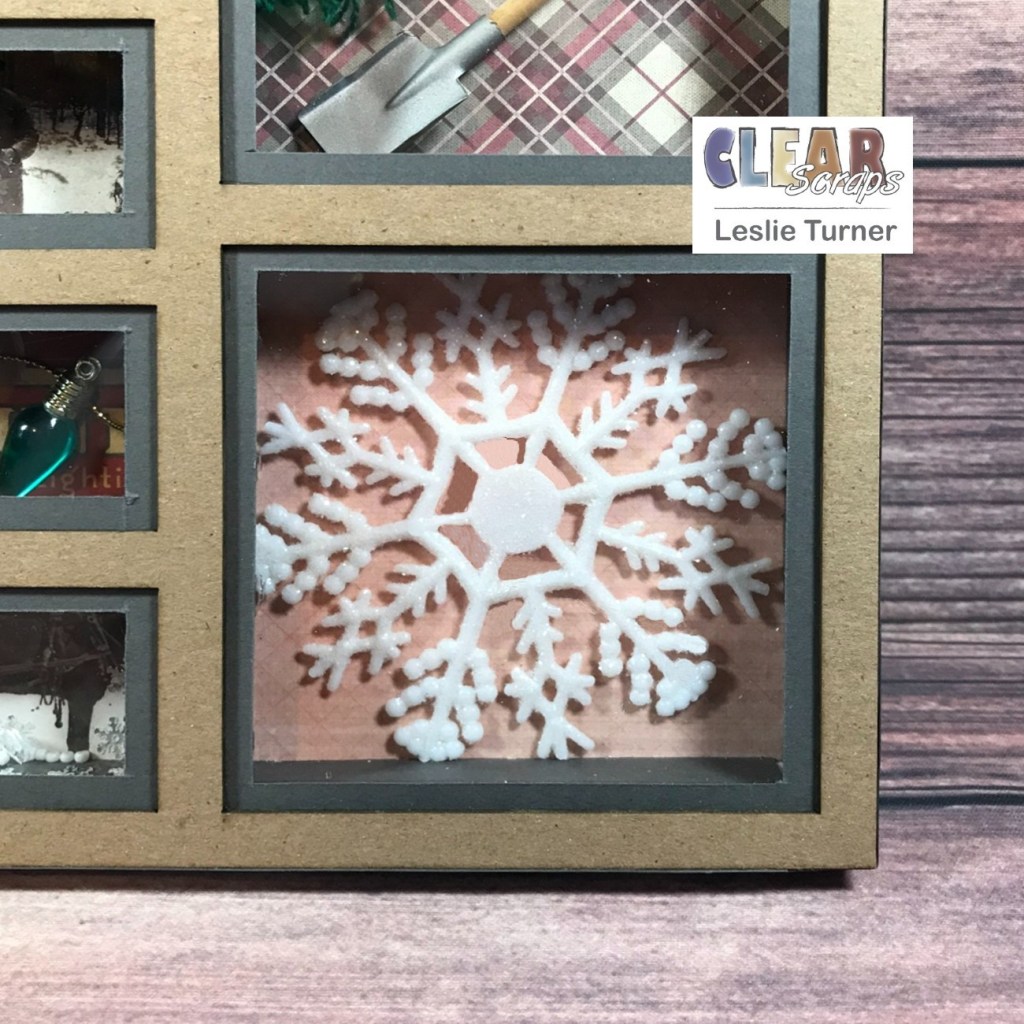
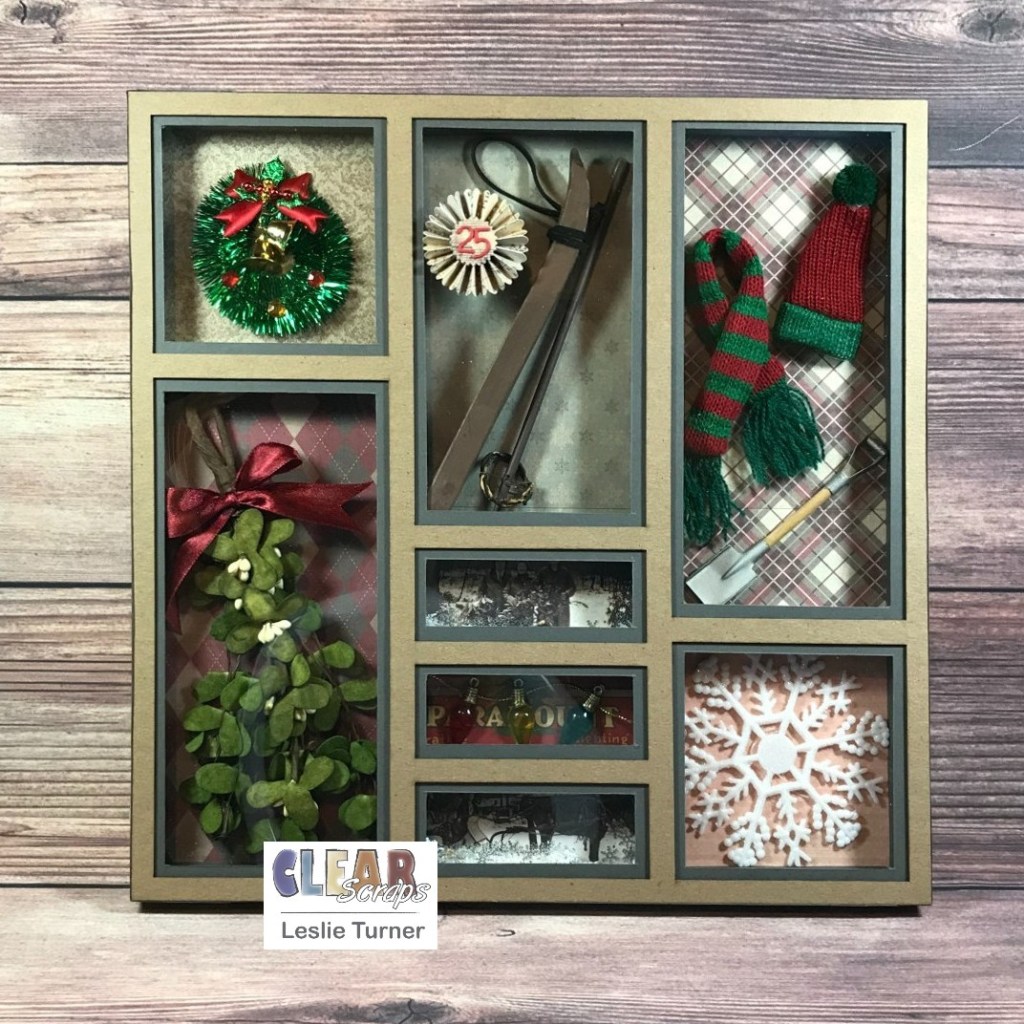
Hey, everybody! Welcome to another Monday closer to Christmas… it’s almost here! I hope you have all your Christmas crafting done or at least close to being done! I’m stoked to be back on the Clear Scraps blog today with another awesome DT inspiration project! I created a shadowbox from our Small Rectangle Printer Tray Frame, and I can’t tell you how much fun this was! I added several strips of double-sided adhesive foam tape between each of the chipboard layers so the compartments were deep enough to accommodate the vintage Christmas elements. I bought all of these fun vintage items (wreath, mistletoe, wood ski and pole, Christmas lights, scarf and hat, shovel, and snowflake) several years ago along with a different kind of shadowbox, and the shadowbox turned out to be too small, so everything just sat in my stash… until now!
Using one of the chipboard layers as a template, I adhered different colors and patterns of vintage Christmas paper, a couple vintage photos and a piece of ephemera to the chipboard back, to be seen through the apertures from each compartment. I then separated the compartments by adding several strips of foam tape down and across the interior sections and around the outside edges, added a chipboard layer, and then added several more foam tape strips to the interior sections and around the outside edges. I repeated the process with the second chipboard layer and more foam tape strips.
I adhered strips of gray cardstock around the inside perimeter of each compartment for a clean finished look, and then adhered the vintage Christmas elements into the compartments with a hot glue gun, adding sequins and seed beads to the two compartments containing the vintage photos. I adhered the acrylic divider to the front after removing the protective film from the underside, and then turned my attention to the third chipboard layer.
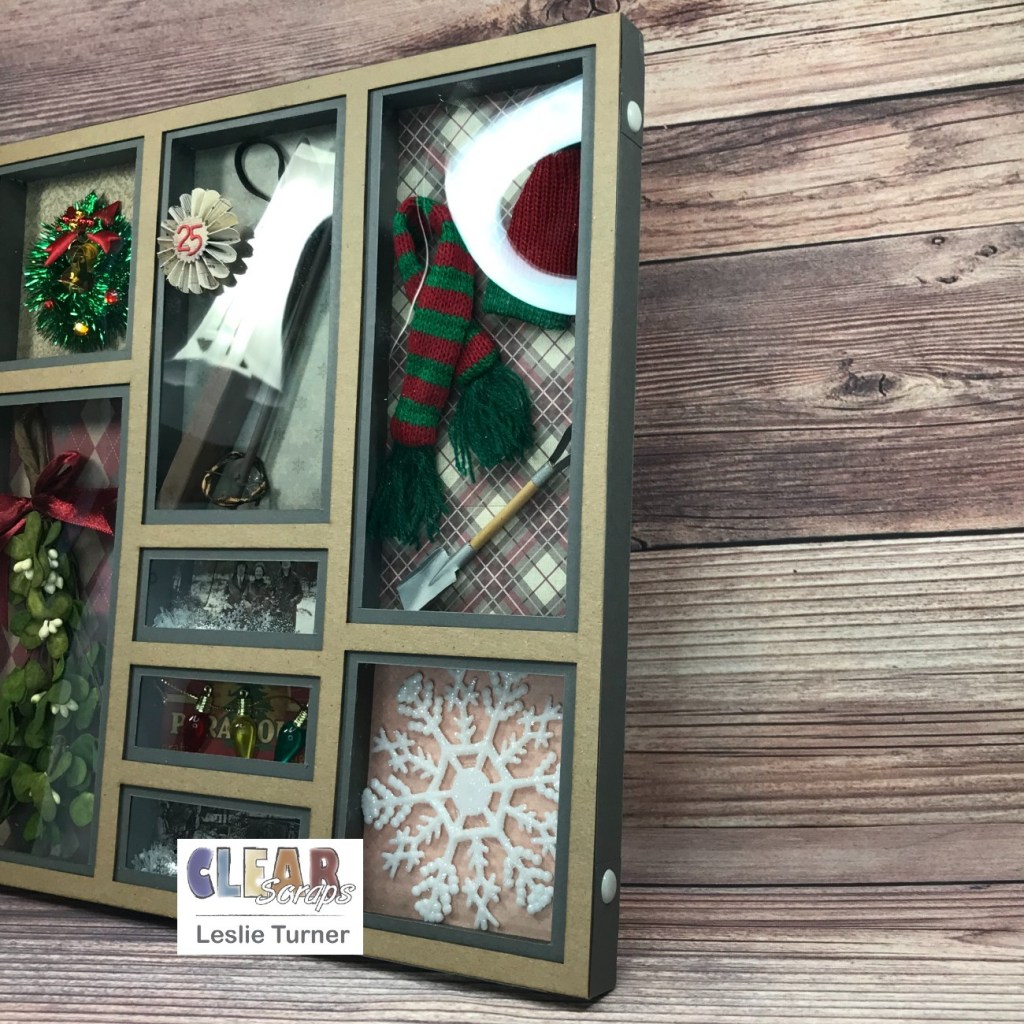
I cut a frame for each aperture on the third chipboard layer so that about 1/8″ of gray cardstock shows around the opening and adhered them to the back side of the chipboard layer, and then adhered it to the front after removing the protective film from the front side of the acrylic divider. I adhered strips of gray cardstock with gray enamel dots around the outside edge to conceal the foam tape strips, chipboard layers and acrylic divider. To finish the shadowbox, I adhered a rosette to the front that I die cut from patterned paper and embellished with die cut numbers. Here are close-ups of each compartment:
And one more peek… I’m absolutely in love with this project! SO happy with how it turned out! These printer tray frames are so versatile and the sky is the limit with what you can create with them! <3
Other products used: Cardstock/Paper: CutCardStock Basis Gray cardstock, CutCardStock Basis Red cardstock, Crafter’s Companion Vintage Christmas Collection paper pad Dies/Punches: Sizzix Alphanumeric Tiny Type Lower Thinlits, Sizzix/Tim Holtz Alterations Mini Paper Rosette strip die Accessories: Tonic Studios 12″ Guillotine Paper Trimmer, Fiskars 12″ SureCut Paper Trimmer, Scotch 3M foam tape, Bearly Art precision craft glue, vintage Christmas items from stash (wreath, mistletoe, wood ski and pole, Christmas lights, scarf and hat, shovel, and snowflake), Tim Holtz Festive Ephemera Pack, GKD gold cord, Eyelet Outlet Snowflake Sequins, Eyelet Outlet Gray Enamel Dots, Neat & Tangled Sequins, Pretty Pink Posh Marshmallow Seed Beads, hot glue gun
I hope you’ve enjoyed today’s project and you’re inspired to get those craft supplies out to play! Be sure to check out all the amazing acrylic, wood and chipboard goodies at Clear Scraps… OMGoodness, you won’t be disappointed! And head on over to the Clear Scraps Facebook Page for lots of inspiration! And while you’re at it, join the Clear Scraps Facebook Creative Group to connect with other Clear Scraps fans! Thanks so much for stopping by today – we’ll see you next time!
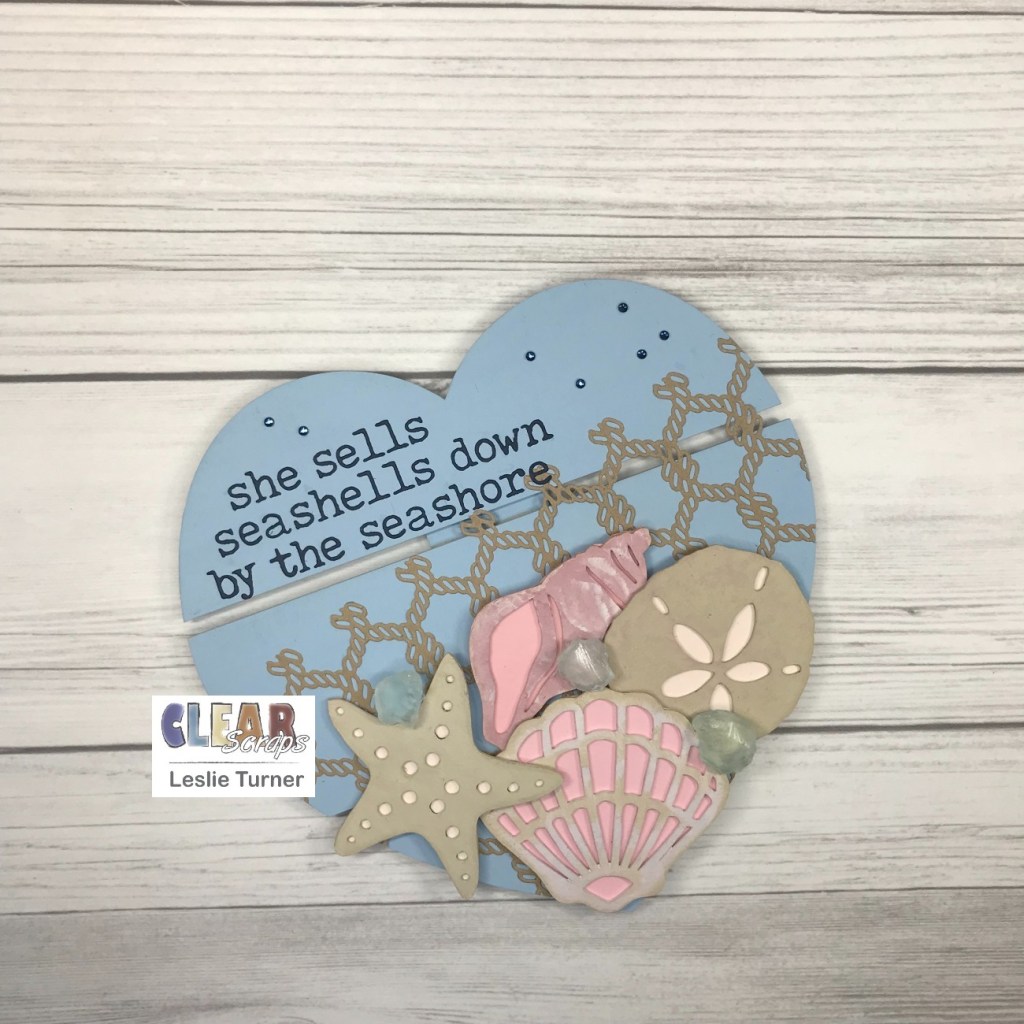
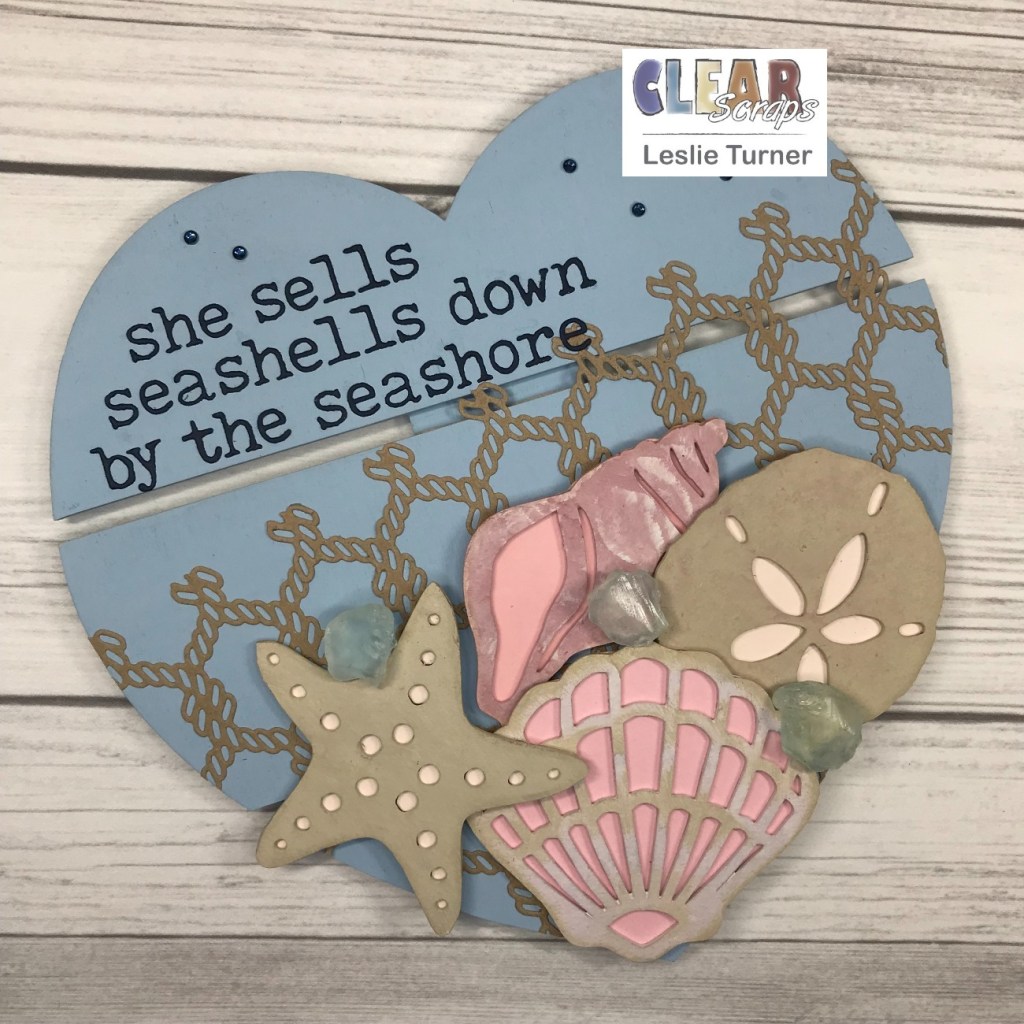
Hey, everybody! So hard to believe that we’re a little over a week into December already! This year has literally flown by and it won’t be too much longer before the jolly round man will make his appearance! I’m thrilled to be back on the Clear Scraps blog today with another awesome DT inspiration project! Even though we’re almost officially into Winter, I’m squeezing in one more Summer-themed project! This home decor piece features our Medium Heart DIY Pallet Shape embellished with our Sand Dollar Chipboard Embellishments and Fan Shells Chipboard Embellishments along with a few other supplies! Can’t tell you how much I enjoyed creating this! ;)
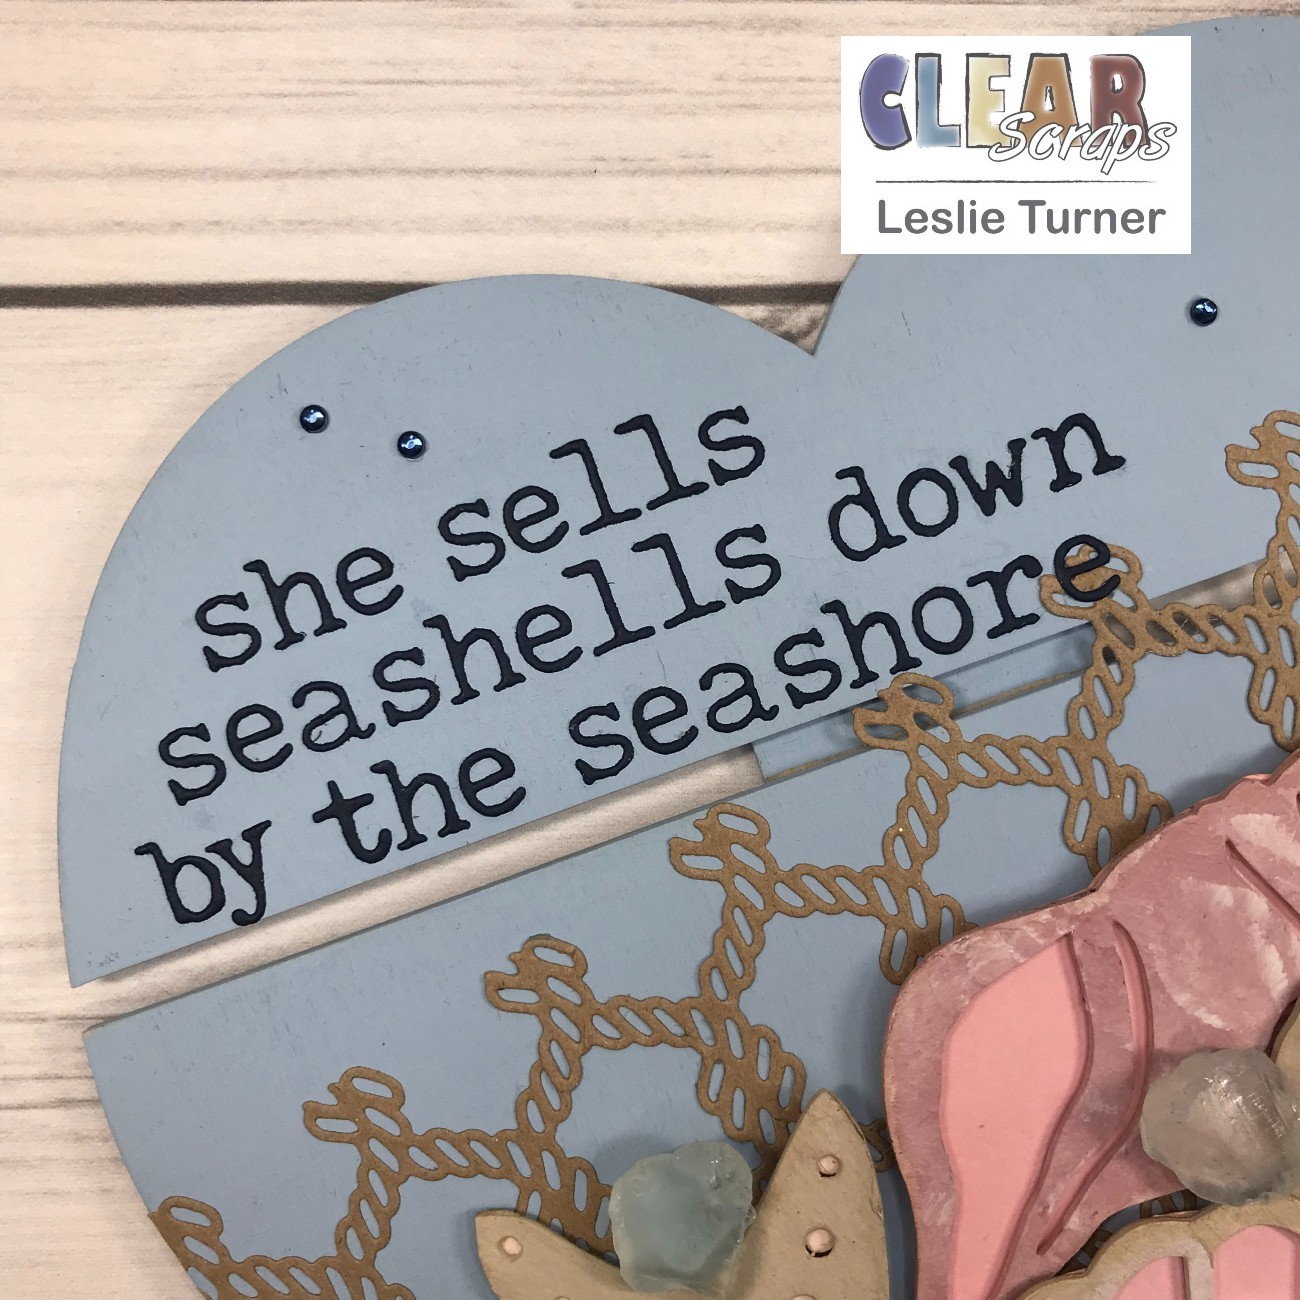
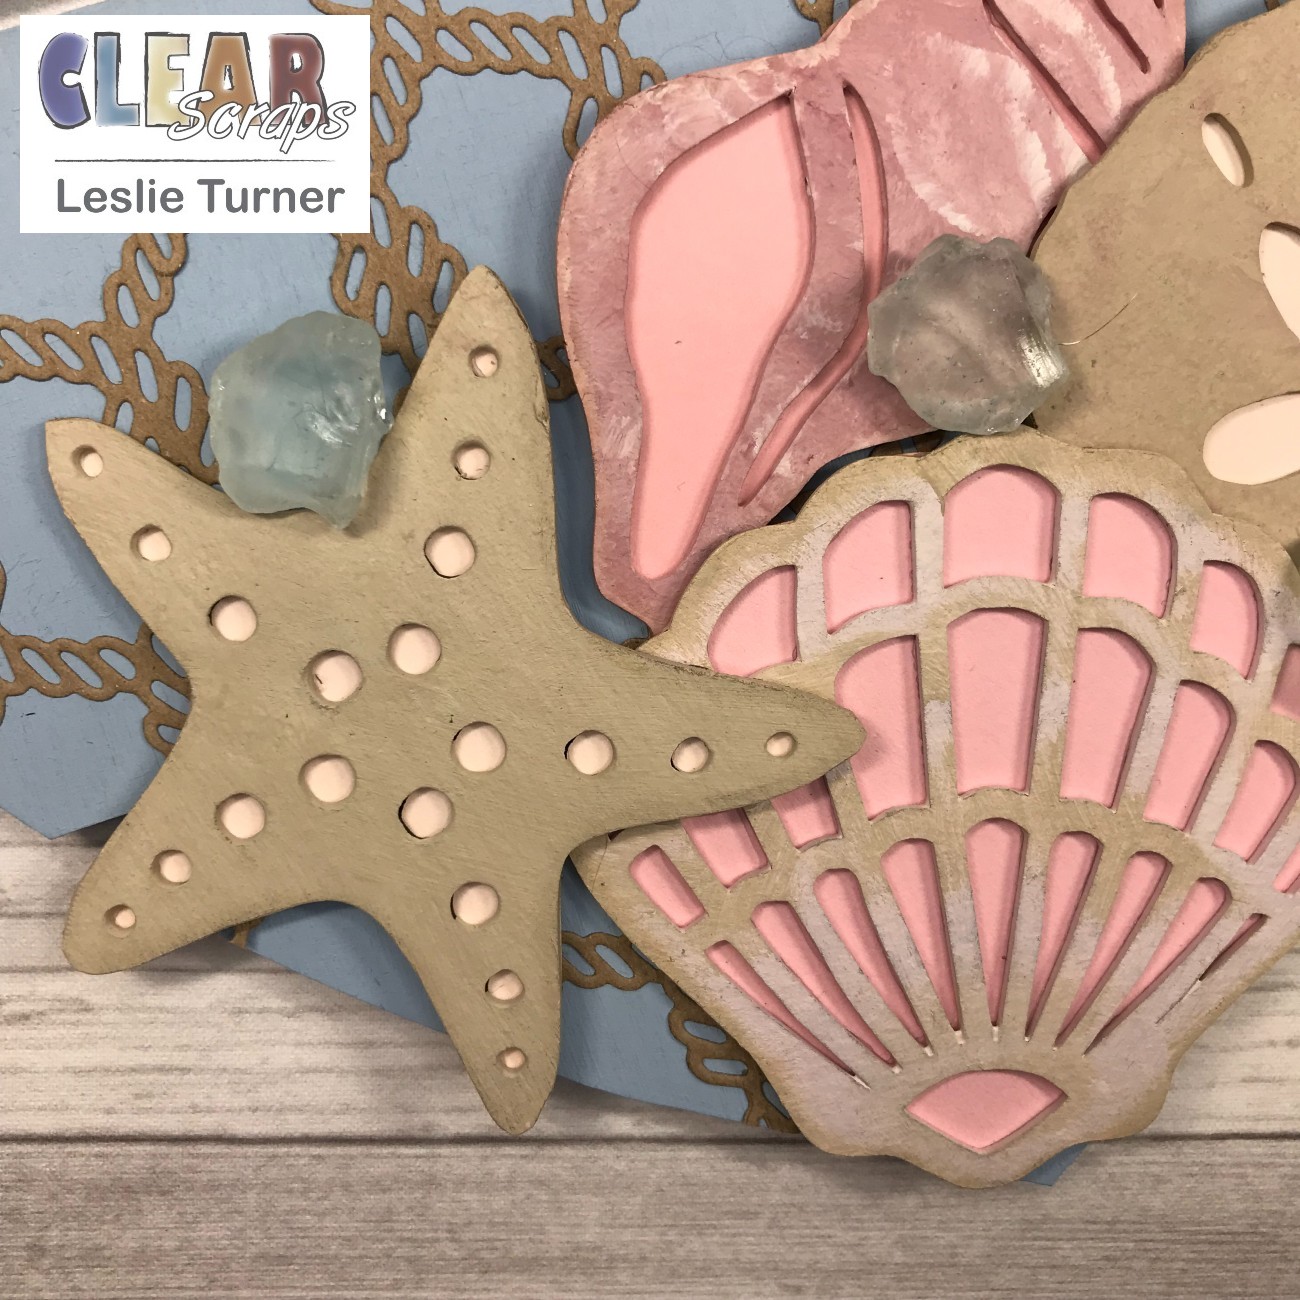
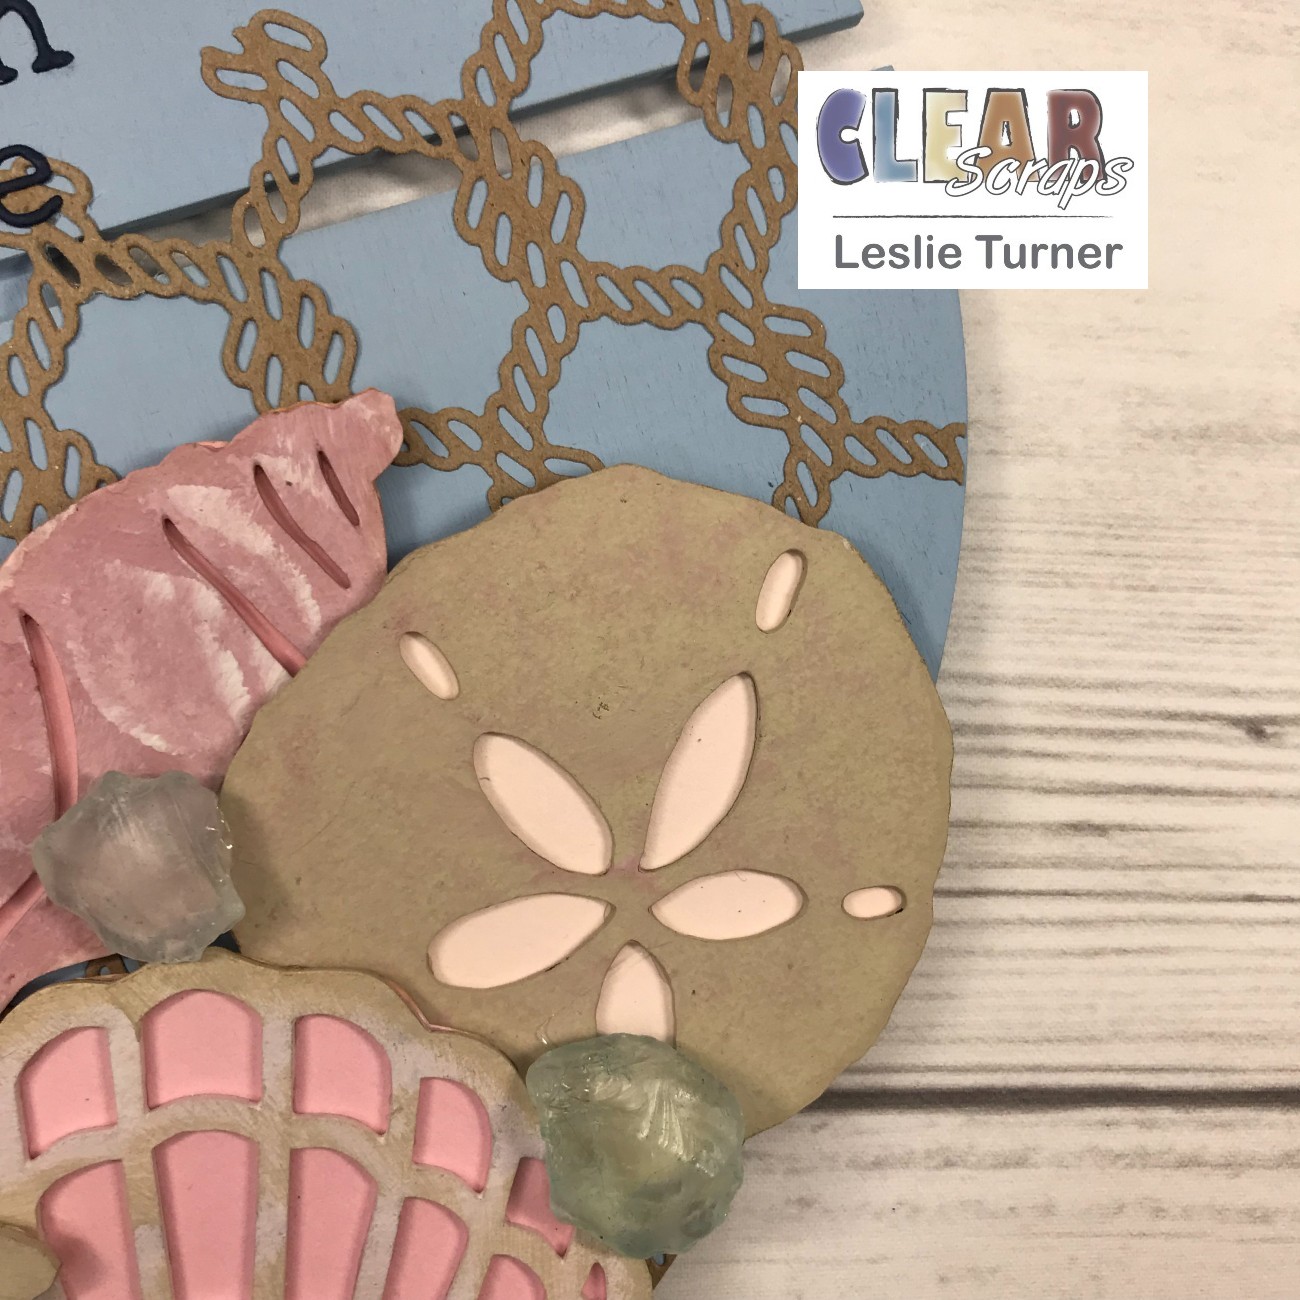
I started by painting the front and back of the Medium Heart DIY Pallet Shape with Glacier chalk paint. Then I moved on to the Sand Dollar Chipboard Embellishments and Fan Shells Chipboard Embellishments, and painted them with Prominent Pink, Tuscan Red and Oatmeal chalk paint, all mixed separately with Farmhouse White Ash paint to get the desired colors for the individual shells. Then I adhered various shades of pink cardstock behind the shells and inked the edges with antique linen distress ink. I die cut the twisted rope background and adhered it at an angle to the heart pallet. I attached the shells, one by one, to the heart pallet and then added three pieces of sea glass (not sure if it’s real or faux but it works!) that I inked with tumbled glass distress ink. I die cut the letters needed for the sentiment, adhered them in the upper left corner, and then added dark blue gemstones to finish the piece.
And one more look… super happy with how this turned out and I can’t wait to share it! I absolutely LOVE it when a project turns out exactly the way I envisioned it! ;)
Other products used: Cardstock/Paper: CutCardStock Brown Bag Kraft Paper, CutCardStock Pop-Tone Bubblegum cardstock, CutCardStock Basis Pink cardstock, CutCardStock Basis Soft Pink cardstock, CutCardStock Basis Navy cardstock Ink: Ranger Antique Linen and Tumbled Glass Distress Inks Dies/Punches: Tutti Designs Twisted Rope Background die, Sizzix Alphanumeric Tiny Type Lower Thinlits Accessories: Farmhouse white Ash paint; Folkart Chalk Paint- Prominent Pink, Tuscan Red, Oatmeal and Glacier; sea glass, hot glue gun, Eyelet Outlet Dark Blue Jewel Bling
I hope you’ve enjoyed today’s project and you’re inspired to get those craft supplies out to play! Be sure to check out all the amazing acrylic, wood and chipboard goodies at Clear Scraps… OMGoodness, you won’t be disappointed! And head on over to the Clear Scraps Facebook Page for lots of inspiration! And while you’re at it, join the Clear Scraps FacebookCreative Group to connect with other Clear Scraps fans! Thanks so much for stopping by today – we’ll see you next time!
11/30/21 November Rising Star at A Place To Start!
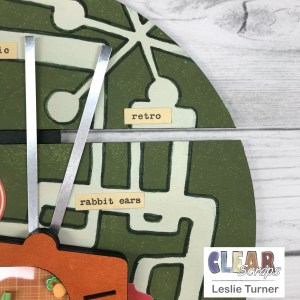
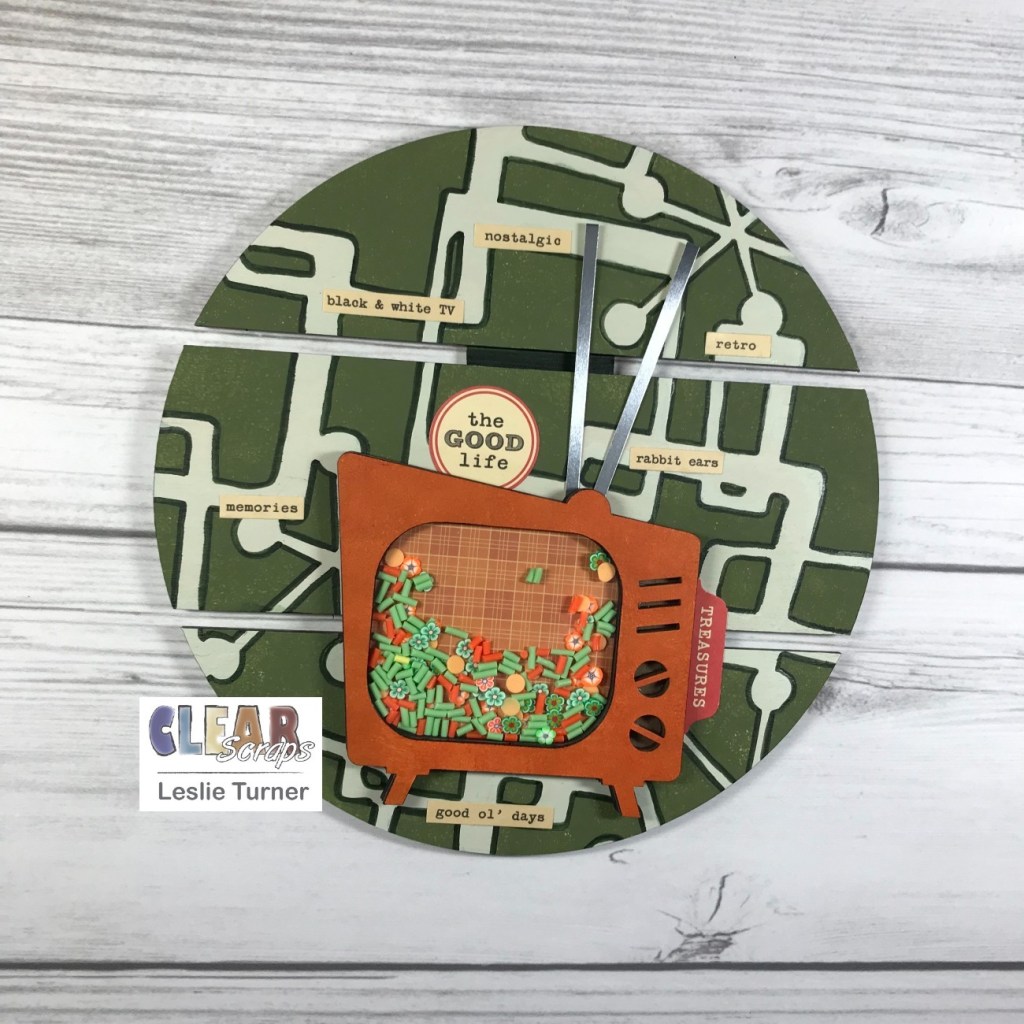
Hey, everybody! It’s Friday and I hope you have something fun – and safe – planned for this weekend! You know where I’ll be… I can’t be any safer than I am in my studio, lol! ;) I’m thrilled to be back on the Clear Scraps blog today with another awesome DT inspiration project! I created a retro home decor piece featuring the Medium Circle DIY Pallet Shape decorated with paint, the 12″ Funky Boxes Mascils Mask/Stencil and markers, along with a Mini Shaker Retro TV with Sprinkles Groovy Flowers and Sprinkles Lime Confetti as the shaker filler! This was beyond fun and brought back so many memories! I distinctly remember the groovy green and orange color palette so many people had in their homes (and clothing) in the 70s! Yep, those were the good ol’ days!
I started by painting the front and back of the Medium Circle DIY Pallet Shape a super pale green by mixing Adirondack White with a tiny bit of Spanish Moss chalk paint. When that was dry, I laid the 12″ Funky Boxes Mascils Mask/Stencil on the pallet and pounced Spanish Moss chalk paint all over it with a dauber. The paint ended up sparse and spotty in some areas and thicker in other areas but I left it that way to add to the retro/vintage feel. Once dry, I outlined all the stenciled areas with a dark green alcohol marker for contrast and interest.
Next, I painted the front chip form of the Mini Shaker Retro TV with Liquitex Yellow Oxide mixed with Cadmium Orange acrylic paint. Once that was dry, I ran a black alcohol marker around the outside edges and the TV screen cut-out and set it aside. I also ran the black marker around the outside edges of the rest of the chip forms so they’d all be uniform. I adhered a piece of orange patterned paper to the inside of the chip back and then adhered the next two chip forms to it. I added the shaker filler consisting of green and orange pieces of Sprinkles Groovy Flowers and Sprinkles Lime Confetti, added the acrylic divider, and then adhered the painted front chip form to close it up. I cut a rabbit ears antenna from metallic silver foil cardstock and adhered it to the TV. I adhered the TV to the bottom front of the pallet and added retro thrift shop word stickers to complete the piece.
And one more look… I couldn’t be more happy with how this turned out! All of the absolutely awesome Clear Scraps products made this project come to life! I LOVE it!
Other products used: Cardstock/Paper: Polly’s Paper Studio orange patterned paper, Hygloss Metallic Silver Foil cardstock Ink: Copic alcohol marker- 100 Black; Arteza alcohol marker- YG10 Jasper Green Accessories: Folkart Adirondack White and Spanish Moss chalk paint, Liquitex Yellow Oxide and Cadmium Orange acrylic paint, Bearly Art precision craft glue, Ranger Distress Collage Medium, October Afternoon Thrift Shop Word Stickers
I hope you’ve enjoyed today’s project and you’re inspired to get those craft supplies out to play! Be sure to check out all the amazing acrylic, wood and chipboard goodies at Clear Scraps… OMGoodness, you won’t be disappointed! And head on over to the Clear Scraps Facebook Page for lots of inspiration! And while you’re at it, join the Clear Scraps FacebookCreative Group to connect with other Clear Scraps fans! Thanks so much for stopping by today – we’ll see you next time!
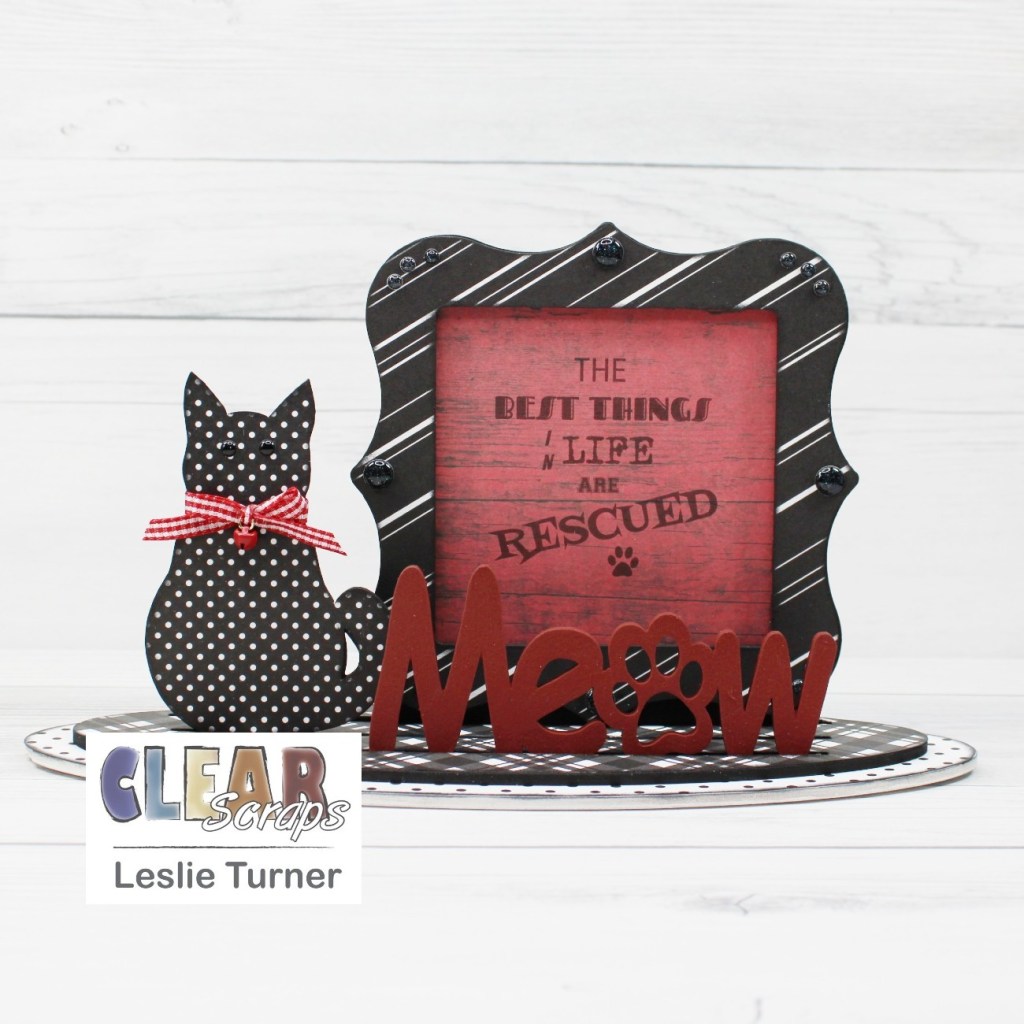
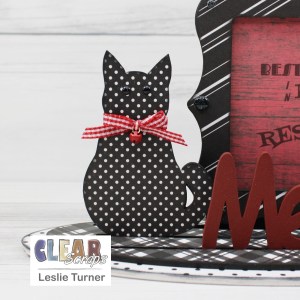
Hey, everybody! Hope you’re having a wonderful week and you’re not working too hard! I’m thrilled to be back on the Clear Scraps blog today with another awesome DT inspiration project! I had some 3-D Frameables fun with the Deco Frame and Meow-Cat Word n Shape and used a B&W + Red color combo which is one of my favorites! The 3-D Frameables are new in the store – you pick your frame and then you choose your theme. There are two base pieces (which attach to each other) which have long slots that the frame, word and shape fit into. This project is really close to my heart because my husband and I are ‘crazy cat people’ and we rescue. We have ten indoor fur babies with a catio and nine more outside (feral and semi-feral) with another catio in our fenced back yard!
I started by painting the smaller oval base, cat and frame with black chalk paint; the larger oval base with white chalk paint; and the Meow word with red chalk paint. I used four coordinating black and white patterned papers to cover the two oval bases, the cat and the front of the frame, and inked the edges of all the pieces with black soot distress ink.
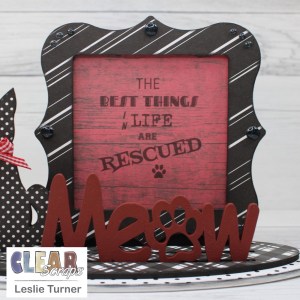
I added small black enamel dots to the cat for her eyes and tied a red and white gingham ribbon around her neck with a tiny red bell. I designed the sentiment on my laptop and printed it on red wood-look patterned paper, trimmed it, and sandwiched it between the frame pieces. Finally, I added glitter enamel dots to the corners of the frame to complete the project.
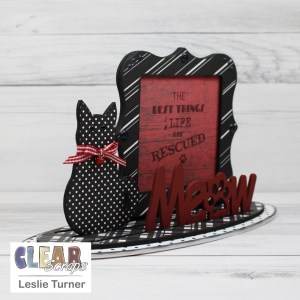
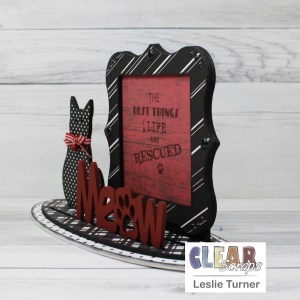
Here are couple more shots from different angles. I’m really loving how this turned out! These 3-D Frameables are so much fun, and the sky is the limit with regard to interchangeable frames, shapes and words!
Other products used: Cardstock/Paper: The Paper Cut Plaid, Diagonal Stripe, Black Mini Dots and Reverse Mini Dots patterned paper; Simple Stories Wood & Gingham Basics paper pad Ink: Ranger black soot distress ink Accessories: Folkart Rich Black, Adirondack White and Tuscan Red chalk paint; Bearly Art precision craft glue, brayer, Eyelet Outlet Black Enamel Dots and Black Glitter Enamel Dots, Studios Blackbird 1/4″ red and white gingham ribbon, Stampin’ Up Mini Jingle Bell
I hope you’ve enjoyed today’s project and you’re inspired to get those craft supplies out to play! Be sure to check out all the amazing acrylic, wood and chipboard goodies at Clear Scraps… OMGoodness, you won’t be disappointed! And head on over to the Clear Scraps Facebook Page for lots of inspiration! And while you’re at it, join the Clear Scraps FacebookCreative Group to connect with other Clear Scraps fans! Thanks so much for stopping by today – we’ll see you next time!
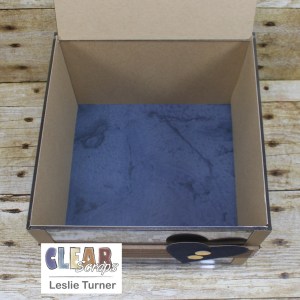
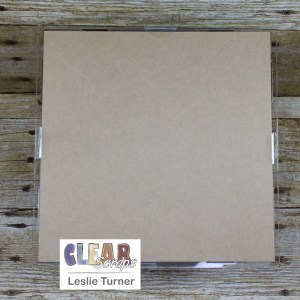
Hey, everybody! A super Happy Thursday and last day of September to you! We are barreling right into October! My ring light came in and I used it with my Ott lights for these photos, and I love how they turned out. I’m super stoked to have finally found the happy medium! I’m thrilled to be back on the Clear Scraps blog today with another awesome DT inspiration project! I created a pretty shabby chic keepsakes box using the Acrylic Keepsake Box with a variety of texture papers and corrugated cardstock, dies and punches, paper flowers and pearls, and ribbon and twine! This was SO much fun! The sky is the limit with the fun you can have with these! ;)
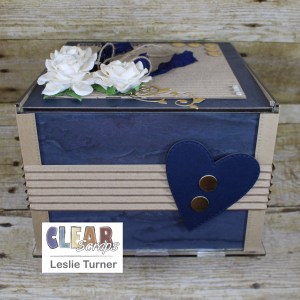
Prior to assembly, I layered blue texture paper onto kraft cardstock for the four side panels which I adhered to the inside of each panel so the paper can be seen through the acrylic. The texture looks like cement on some of the pieces and peeling cardboard on the others. :) I also adhered kraft cardstock to the inside of the lid and blue texture paper to the inside bottom for a more finished look to the inside once it was assembled. I adhered vertical strips on the outside edges where the sides connect, and used a stitched border die on both sides of each strip for a little interest. Then I embellished each side with a horizontal strip of larger channel corrugated cardstock and then adhered die cut hearts embellished with punched gold foil circles, keeping the sides fairly simple with emphasis on the shabby papers. I adhered kraft cardstock to the outside bottom of the box, again for a more finished look.
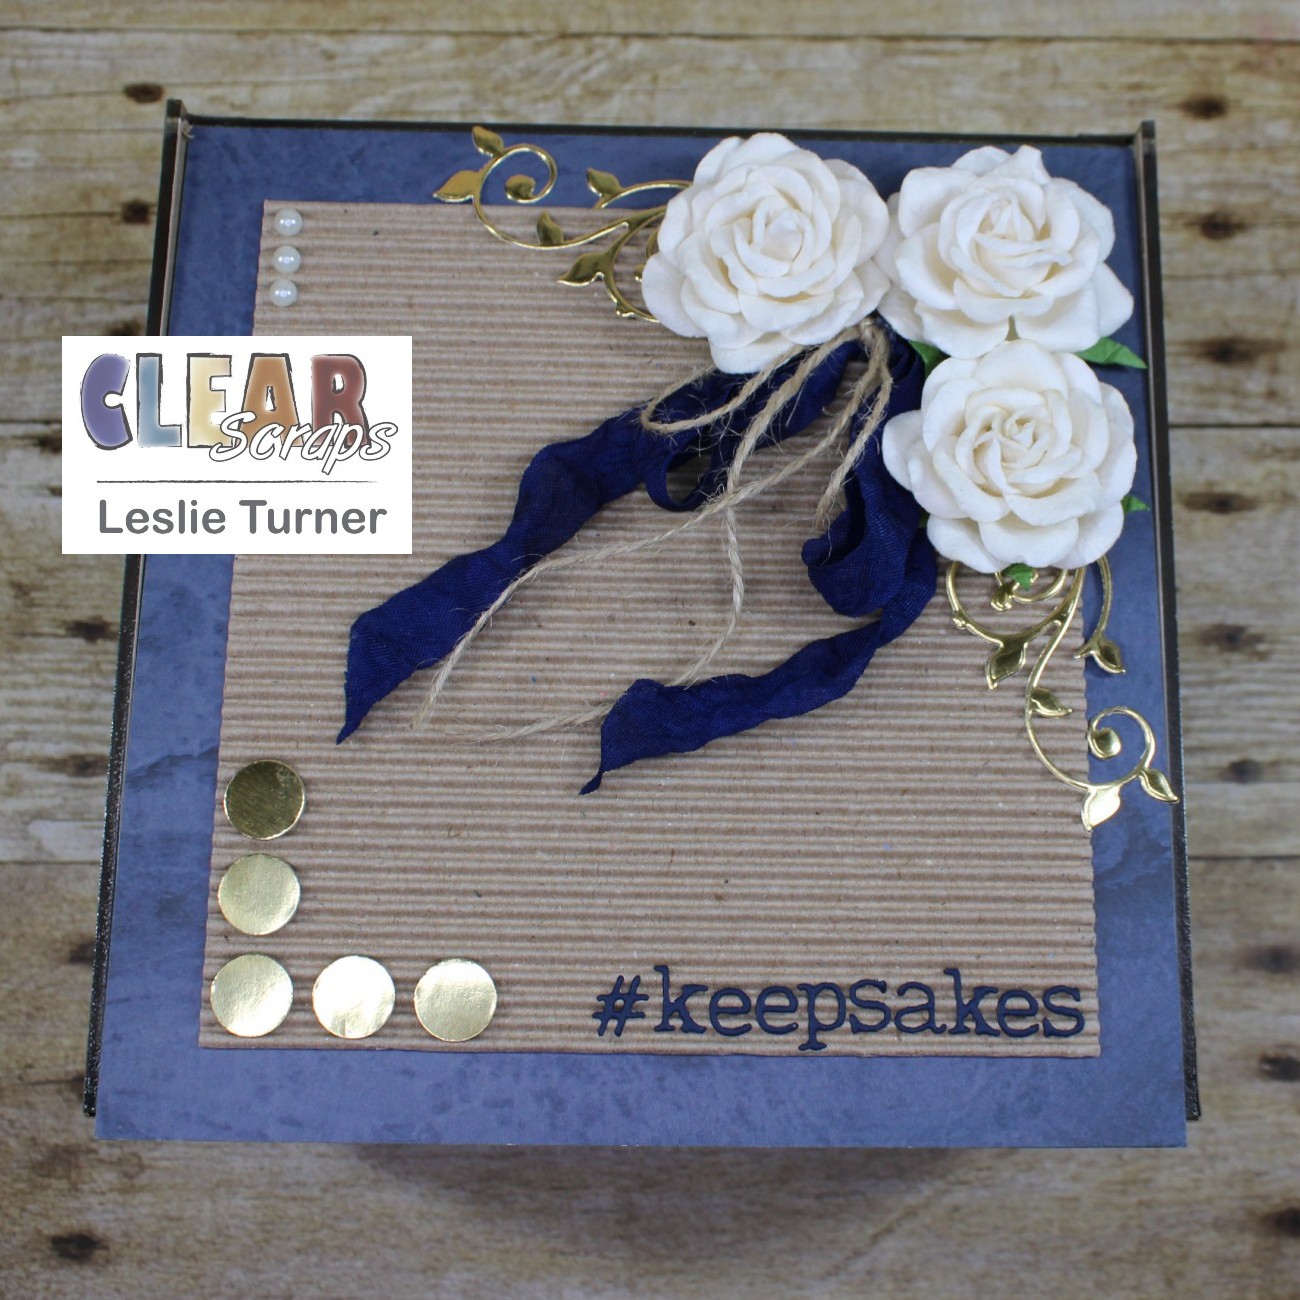
I used smaller channel corrugated cardstock for the square on the lid which I embellished with punched gold foil circles, gold die cut flourishes, large paper flowers, pearls, and simple ribbon and twine bows for the chic part of the design. I dyed white seam binding to get just the right color blue I needed for the ribbon. This was messy inky fun and I actually remembered to put on gloves, lol! The finishing touch was adding #keepsakes die cuts in the lower right corner.
Other products used: Cardstock/Paper: CutCardStock Basis 80# Navy cardstock, CutCardStock 80# Twine cardstock, corrugated cardstock, Hygloss gold foil cardstock, Paper Accents 120# kraft cardstock, The Paper Studio Entirely Textures 2 paper pad Ink: Ranger Denim Adirondack Color Wash Dies/Punches: Memory Box Stitched Heart Layers, Stampin’ Up 1/2″ circle punch, Lawn Fawn Stitched Borders, JustRite Stitched Oval and Vine dies, Sizzix Alphanumeric tiny Type Lower Thinlits Accessories: Tonic Studios 12″ Guillotine Paper Trimmer, Bearly Art precision craft glue, Big Shot, Ranger Distress Collage Medium, Wild Orchid Crafts paper flowers, Hug Snug chalk white seam binding, Canvas Corp Jute Cord, Darice flat back pearls
I hope you’ve enjoyed today’s project and you’re inspired to get those craft supplies out to play! Be sure to check out all the amazing acrylic, wood and chipboard goodies at Clear Scraps… OMGoodness, you won’t be disappointed! And head on over to the Clear Scraps Facebook Page for lots of inspiration! And while you’re at it, join the Clear Scraps FacebookCreative Group to connect with other Clear Scraps fans! Thanks so much for stopping by today – we’ll see you next time!
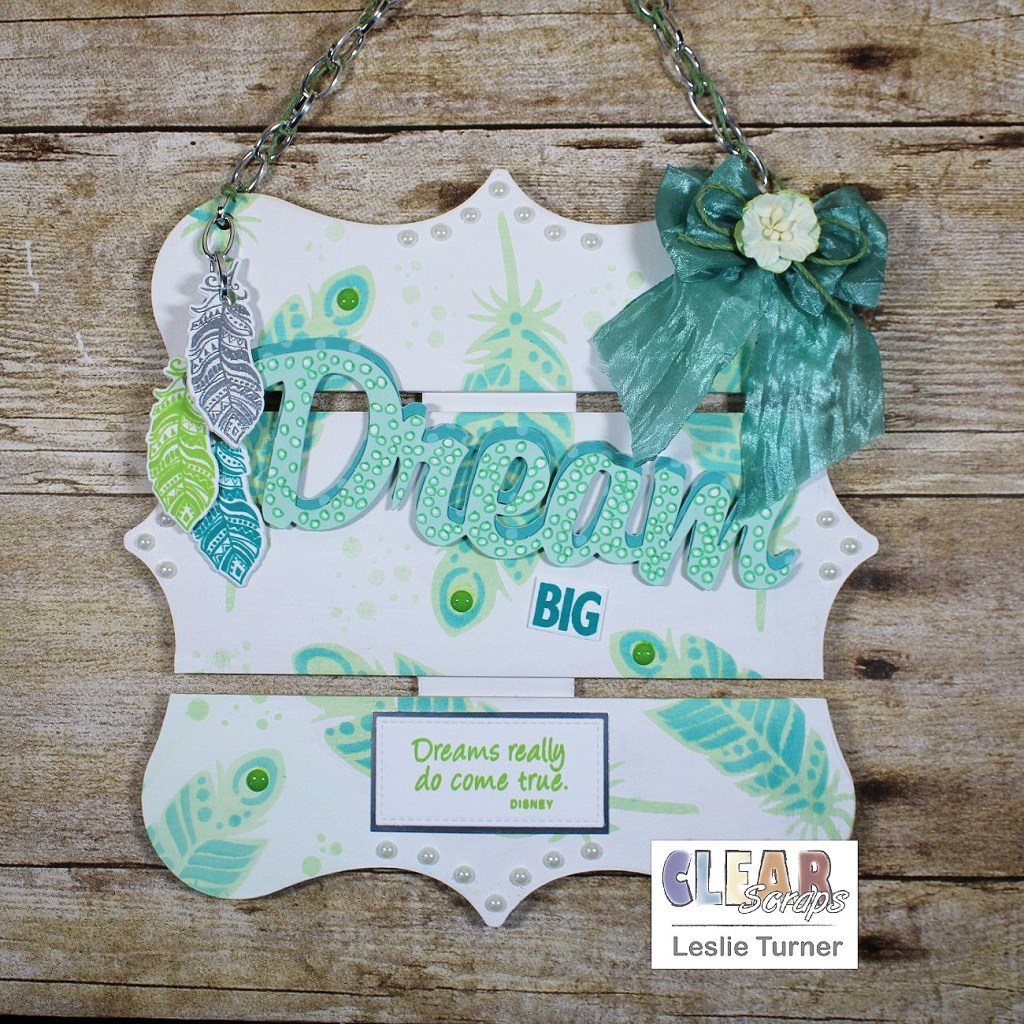
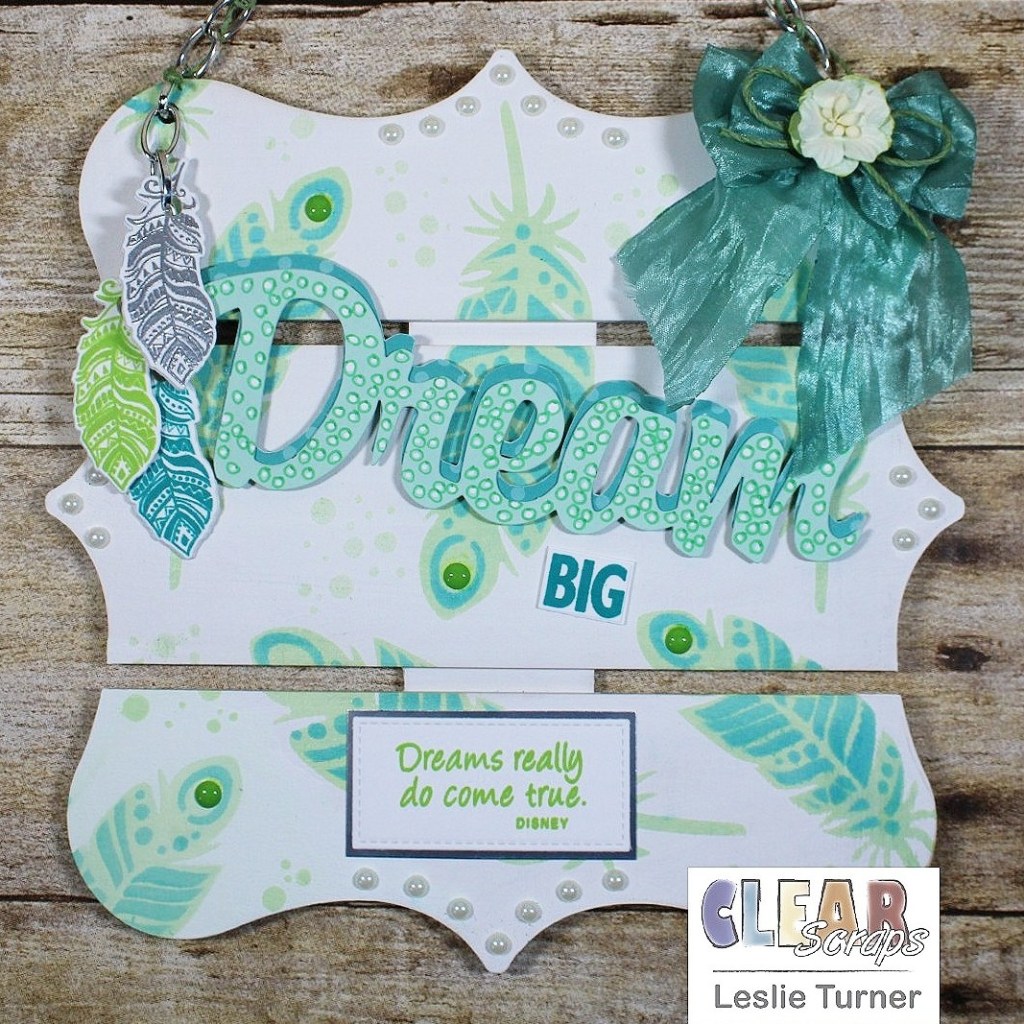
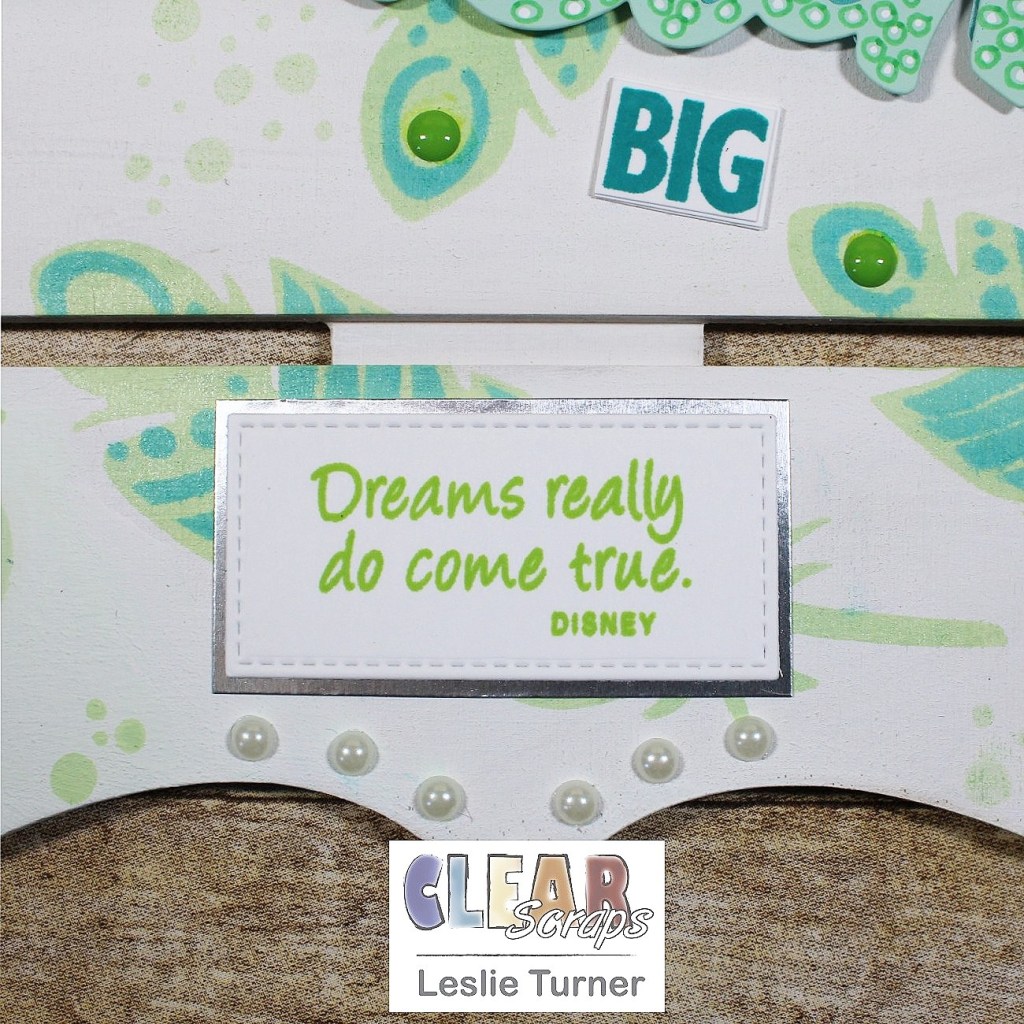
Hey, everybody! Happy Hump Day – I hope you’re having a fantastic week! I’m super stoked to share my debut project as a new Clear Scraps design team member! Oh, the F-U-N I’m having! I’m up on the Clear Scraps blog today with a pretty piece of home decor – a Dream BIG wall hanging (very appropriate for this dream design gig!) created with the Deco Pallet Shape, 5×9 Feathers Layering Stencil, and small Dream Clear Word Title!
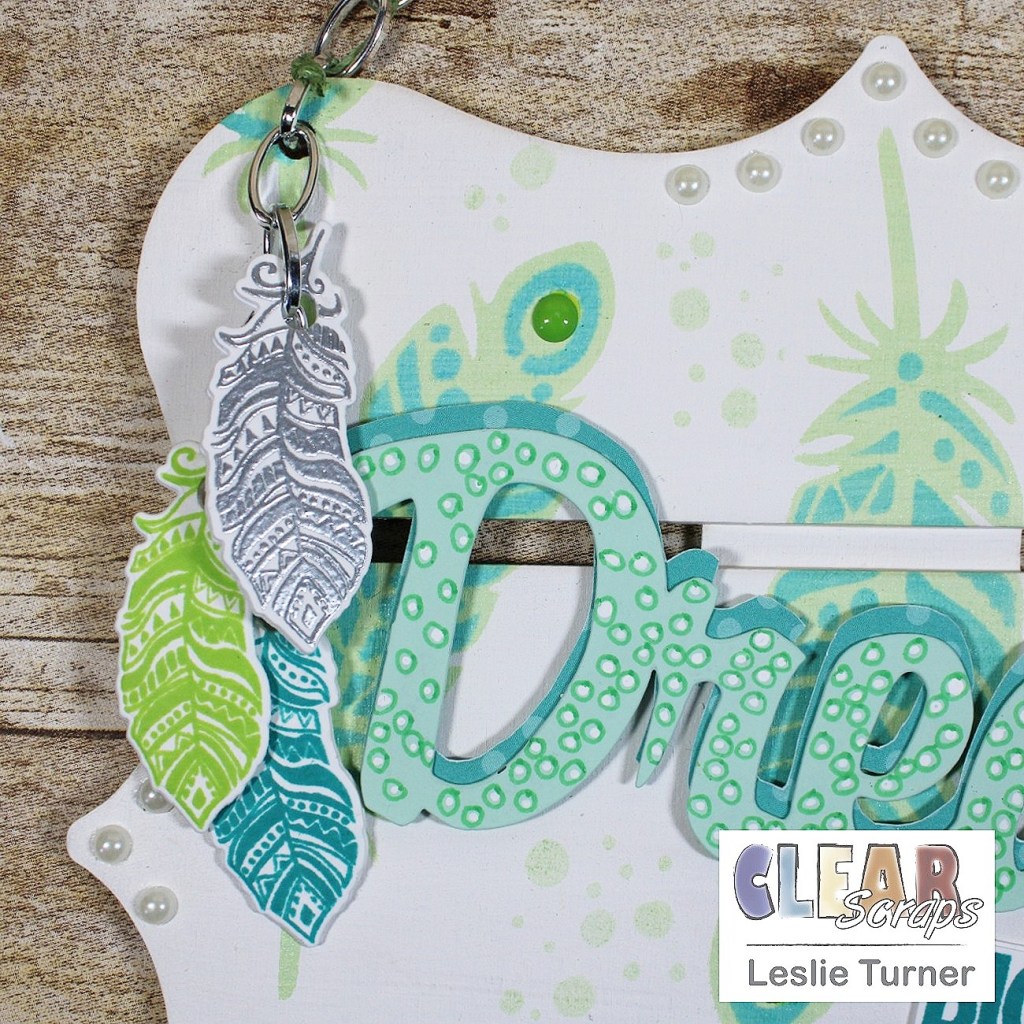
I started by sanding and painting the Deco Pallet Shape with white chalk paint. I added feathers randomly over the surface using the 5×9 Feathers Layering Stencil and distress inks, and then stamped clusters of small dots in green ink to fill in blank spaces. I then affixed a green enamel dot to the top of several feathers. I traced the small Dream clear word title backwards onto the back side of a piece of dotted patterned paper and fussy cut it. I painted the Dream word with light teal chalk paint, added whimsical dots and circles with white paint pen and green Sharpie for some interest, and adhered the patterned paper tracing behind it for a shadow effect. I adhered it to the pallet with double-sided foam circles, and then added the BIG stamped portion just beneath it with craft glue. I added white flat-back pearls to the top, bottom and sides of the pallet, and then fashioned a hanger from silver chain and looped green crafting cord through every other chain link.
I created some cute little feather ‘charms’ to dangle from the top left – one silver embossed, one stamped in green and one stamped in teal – and all die cut and layered three times. I punched holes through each charm and added them to several extra chain links.
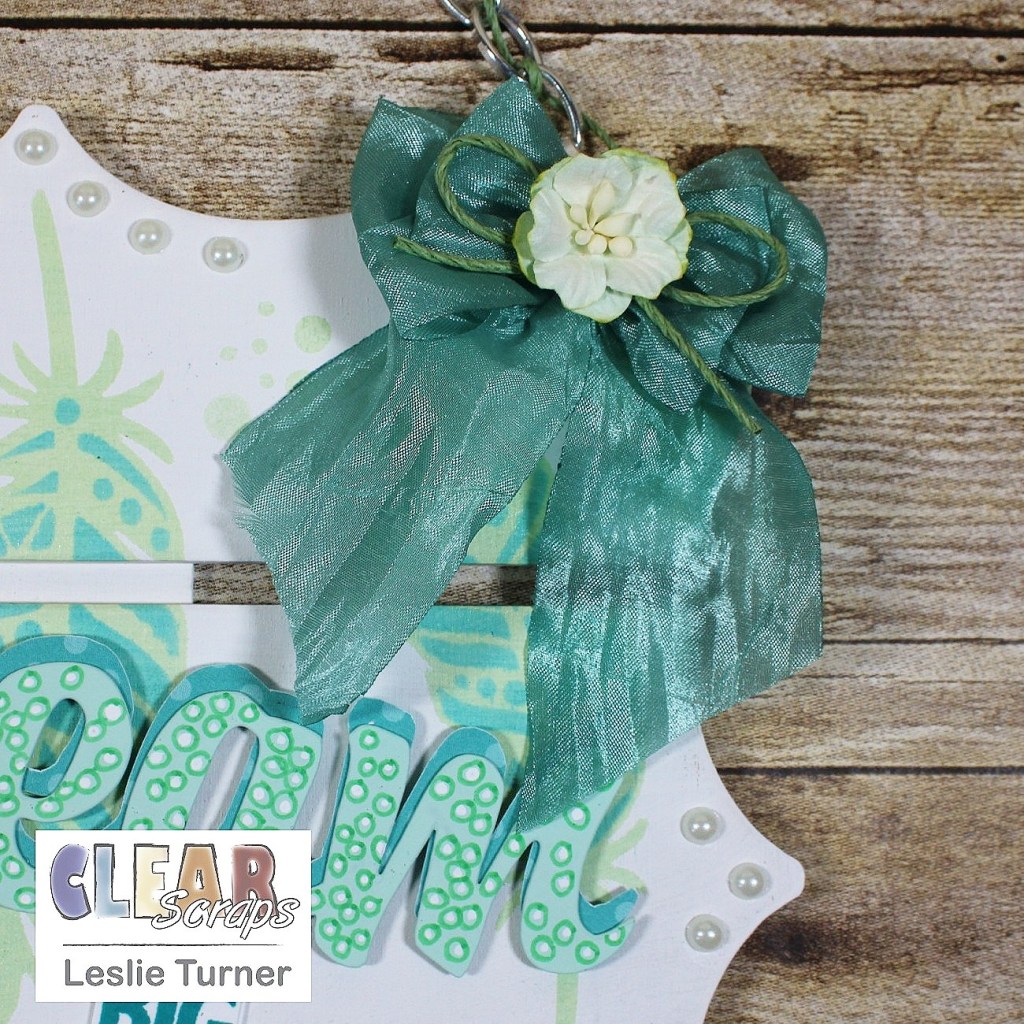
I fashioned a double-loop bow from teal ribbon which I adhered to the top right with hot glue, and embellished it with a green crafting cord bow and paper flower.
The final addition to the piece was a sentiment stamped in green, die cut and layered on silver foil cardstock, which I adhered to the bottom center with glue.
Other products used: Cardstock/Paper: Neenah Classic Crest Solar White 110# cardstock, Hygloss silver foil cardstock, Sunny Studio Polka-dot Parade 6×6 paper Stamps: Dare2BArtzy Dream BIG stamp set, Altenew Happy Dreams stamp set Ink: Ranger Twisted Citron and Peacock Feathers distress ink, Versamark, Posca white paint pen, Sharpie Lime ultra fine point pen Dies/Punches: Dare2BArtzy Dream BIG die set, My Favorite Things Stitched Rectangle STAX Die-namics Accessories: Plaid Folkart White Adirondack and Seaside Villa Chalk paint, Doodlebug Design Sprinkles Limeade assortment, MISTI stamp tool, Big Shot, SweetStamps fine detail silver embossing powder, Crop-A-Dile Big Bite, Bearly Art precision craft glue, Darice double-sided adhesive foam circles, Darice white flat-back pearls, 2″ square acrylic stamp block, eeBeads silver chain, hot glue gun, Really Reasonable Ribbon Silky Crush teal ribbon, Hemptique green hemp crafting cord, Wild Orchid Crafts paper flower
I hope you’ve enjoyed today’s project and you’re inspired to get those craft supplies out to play! Be sure to check out all the amazing acrylic, wood and chipboard goodies at Clear Scraps… OMGoodness, you won’t be disappointed! And head on over to the Clear Scraps Facebook Page for lots of inspiration! And while you’re at it, join the Clear Scraps FacebookCreative Group to connect with other Clear Scraps fans! Thanks so much for stopping by today – we’ll see you next time!
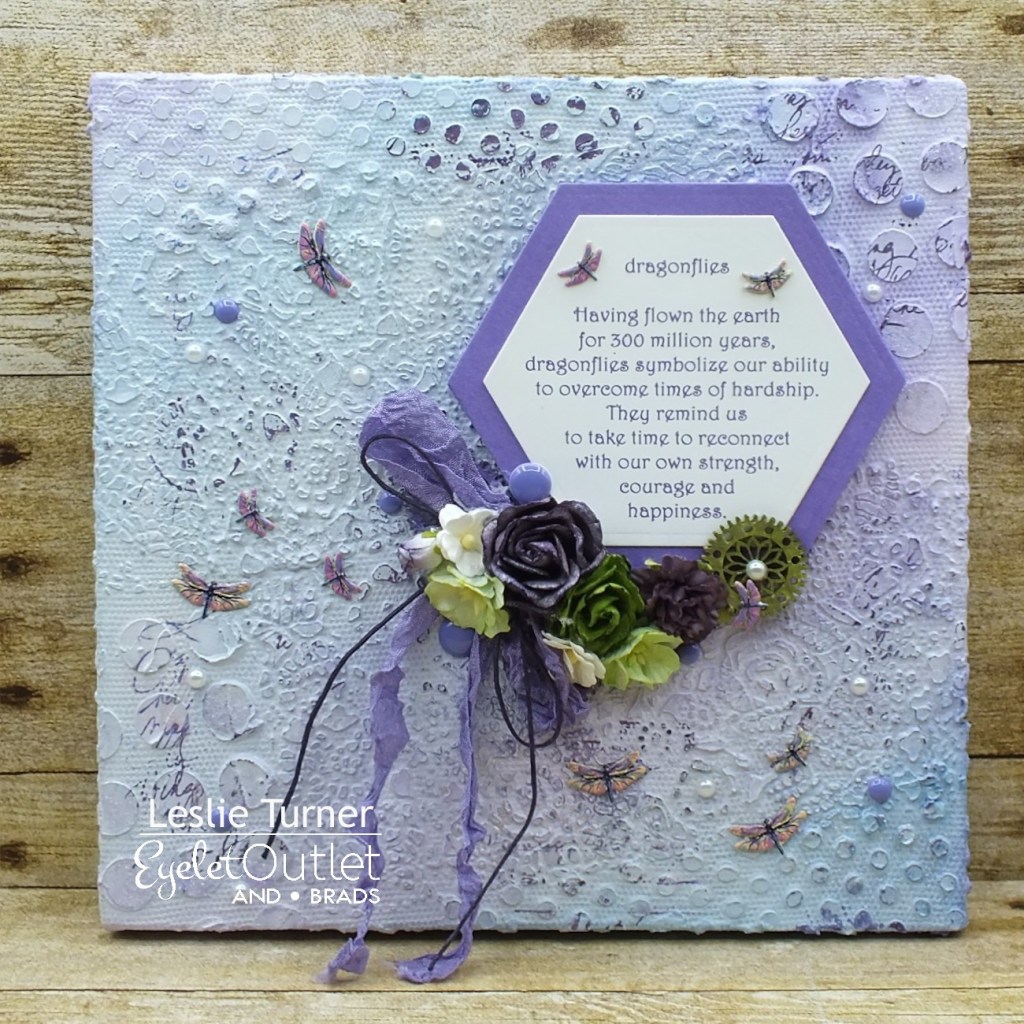
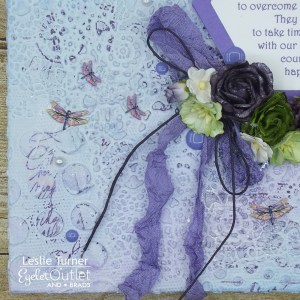
Hi everyone! I hope you’ve had a great week and have something really fun planned this weekend! I’m happy to be back on the Eyelet Outlet blog today with another awesome DT inspiration project! I created a pretty mixed media canvas featuring the new Dragonfly Brads in the store which I paired with Purple Enamel Dots and White Pearl Bling. OMGosh, these dragonflies are SO pretty! I love dragonflies (as much as butterflies) and these really spoke to me!
This took about a week to make… understanding the mechanics of mixed media, you need to let each layer dry thoroughly before applying the next, plus I was also working on projects for other teams. I covered an 8×8 stretched canvas with white gesso. Using a spatula and two dot stencils, I applied Ranger opaque matte texture paste over random areas of the canvas. I also applied Tim Holtz distress grit paste with a spatula and a doily stencil in random areas to cover the rest of the canvas, and then added another thin layer of white gesso. I spritzed a variety of glimmer mists and color washes randomly over the canvas, lightly hit the entire canvas with water in a Tim Holtz distress sprayer and let it all run together. The fun part is you never know what you’re going to get, lol! Some areas are darker/lighter than others and it’s totally random!
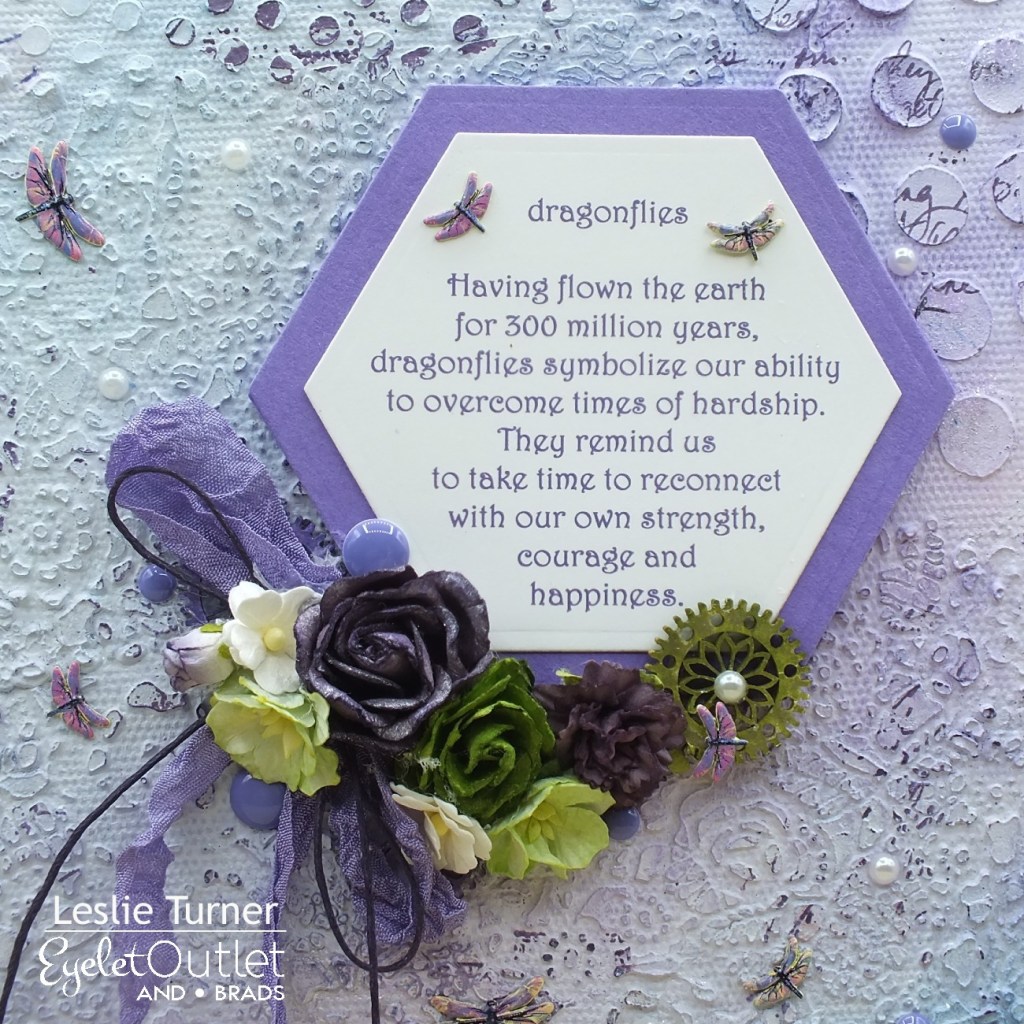
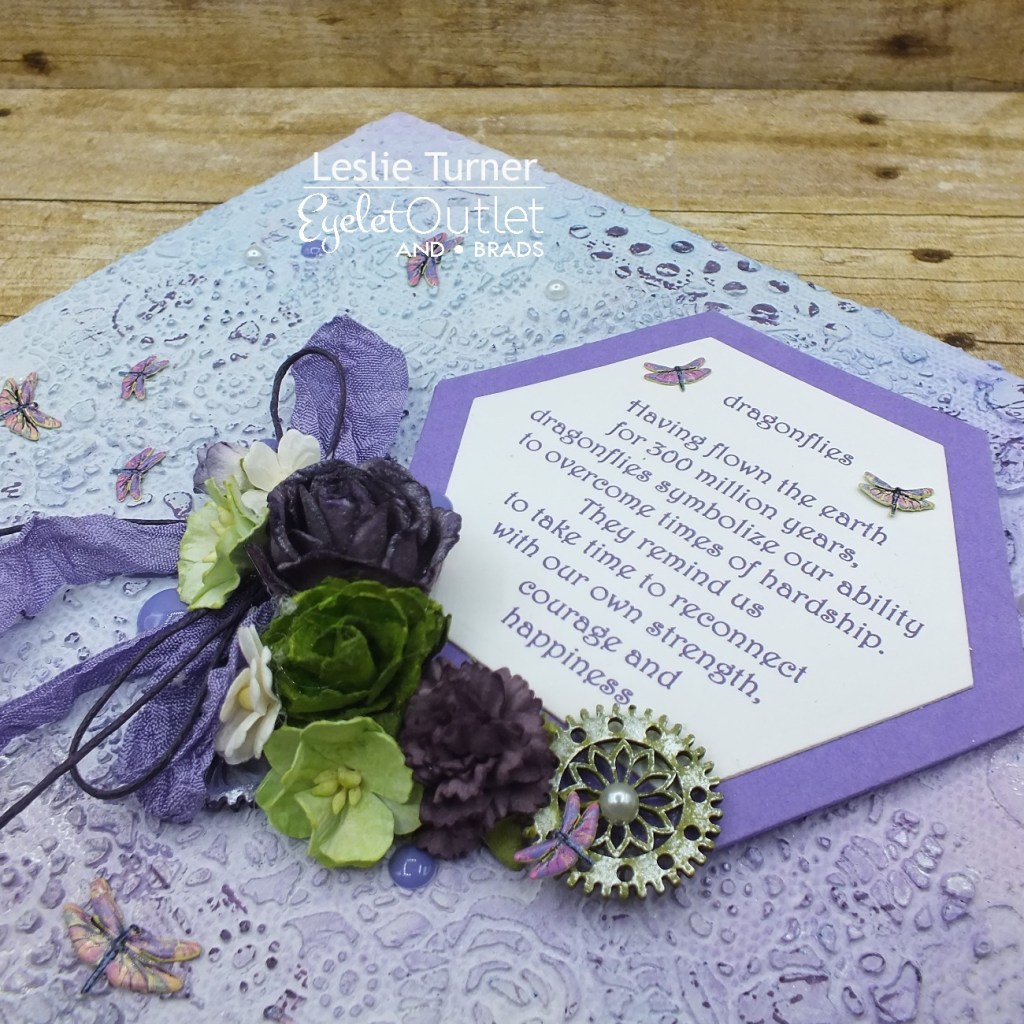
I stamped randomly over the canvas with writing and texture stamps using purple archival ink. I smeared glue in a few places with my fingers and sprinkled on glitter glass but unfortunately you can’t see it in any of the photos but the sparkle is real! I found the dragonflies meaning online and typed it in a purple font on my laptop, printed it on Neenah Classic Crest 80# Solar White cardstock and cut it with a hexagon die. I layered it on a slightly larger purple hexagon die cut and adhered it to the canvas. I added a variety of paper flowers from my stash (some colored with sprays and glimmer mist), along with a purple seam binding bow and a purple crafting cord bow, and a little wooden gear that I sprayed with green glimmer mist. I then added Dragonfly Brads, Purple Enamel Dots and White Pearl Bling to complete the canvas.
Here are a few shots going around the canvas showing the colors and textures.
And one more look… super happy with how this turned out! These dragonfly brads are gorgeous and really add to a project!
Other products used: Cardstock/Paper: Neenah Classic Crest 80# Solar White cardstock, GKD Wild Lilac cardstock Stamps: Paper Wings Productions Writing Backgrounds and Big Art Textures stamp sets Ink: Ranger dusty concord archival ink Dies/Punches: Spellbinders Hexagon Dies Accessories: Canvas Corp 8×8 stretched canvas, Liquitex white gesso, spatula, Ranger opaque matte texture paste, Tim Holtz distress grit paste, Tim Holtz Doily layering stencil, Memory Box Texture Mini Dots stencil, The Crafter’s Workshop Mini Circle Grid stencil, Tim Holtz distress sprayer; Tattered Angels Party Pink, It’s Blue, Dragonfly, It’s Green, and Iridescent Silver Glimmer Mists; Ranger Adirondack Lettuce and Purple Twilight Color Wash; Really Reasonable Ribbon Grape seam binding, purple craft cording, Bearly Art precision craft glue, hot glue gun; Reneabouquets German glitter glass, gears and flowers
I hope you’ve enjoyed today’s project! Be sure to check out all the fun goodies at Eyelet Outlet! I can already see you drooling, lol! Be sure to ‘like’ and ‘follow’ Eyelet Outlet Facebook Page to keep up with news and sales, and while you’re at it, join the Eyelet Outlet Fans Facebook group for lots of creative inspiration! Thanks so much for stopping by today – we’ll see you next time! ;)
1/1/21 Top 3 Winner at Craft-Dee Bowz! 1/2/21 Winner at A Bit More Time To Craft Extra Challenge! 1/5/21 Top 3 at Creative Inspirations!
Hi everyone! I hope you’re having a fabulous weekend! It has taken me a couple days to create but check out this pretty Winter Cardinal Diorama that I’m entering into The Outlawz Festive Fridays Challenge! Our sponsor this month is Fred She Said and the themes to choose from in this new challenge are New Year, Christmas, Thinking of You and Anything Goes. I chose the Christmas theme – and I know I’m a little too late for this Christmas but I’m one home decor project ahead for next Christmas, lol!
I love creating 3-D projects, and I thoroughly enjoyed this one! I’ve created quite a few diorama cards over the years and when I saw this Stampendous WindowRama 3-D Chipboard Kit, I just had to have it! There are enough front, back and side pieces (including the large snowflakes) in the kit to make five stand-alone projects. I have lots of goodies in my Christmas craft stash to create scenes for the inside, so I’m sure you’ll be seeing a few more of these! Handmade seasonal home decor always makes great gifts that will be treasured for years to come! ;)
I assembled the box and painted it with white gesso, along with the snowflake. When they were dry, I sprayed Tattered Angels It’s Blue Glimmer Mist in short spurts, added blue glitter and then white glitter, and then applied Krylon fixative so the glitter wouldn’t fall off. I then sprayed Tattered Angels Tarnished Silver Glimmer Mist in a few spots. I arranged the pine bough, pine cone and winter berry with a couple pearl sprays and adhered them to the inside of the box with the hot glue gun. I added some of Tim’s Distress Grit-Paste on the elements to resemble snow. I stamped the Prickley Pear Stamps cardinal on red cardstock, cut it with the coordinating die and layered five more cardinal die cuts beneath it for strength and dimension, then adhered it to the front of the pine bough. I tied a bow from Christmas plaid ribbon and adhered it to the bottom right corner. I added iridescent gemstones to the snowflake and adhered it to the upper left corner. I stamped the sentiment on a piece of scrap Solar White cardstock, trimmed it, rolled one end and flagged the other end, then adhered it across the snowflake. I used one of the snowflake stamps in the Prickley Pear Stamps set and randomly stamped snowflakes on the front in Cotton White StazOn ink. The finishing touch was the addition of two more iridescent gemstones in the top right and lower left corners.
And one more look… I’m totally smitten! I LOVE how this turned out!
Products used: Cardstock/Paper: DCWV Reds cardstock, Neenah Classic Crest Solar White cardstock scrap Stamps: Prickley Pear Stamps Cardinals clear stamp set Ink: Memento Tuxedo Black ink, Cotton White StazOn ink; Tattered Angels It’s Blue and Tarnished Silver Glimmer Mist Dies/Punches: Prickley Pear Stamps Cardinal die, EK Success 3/4″ square punch (to flag sentiment) Accessories: Stampendous WindowRama Snowflake 3-D Chipboard Kit, Liquitex white gesso, Making Memories Aqua Scrapbook Shimmer, Stampin’ Up Dazzling Diamonds Glitter, Krylon fixative, MISTI stamp tool, Gemini Junior; pine bough, pine cone and winter berry from Christmas craft stash; Wild Orchid Crafts pearl sprays, Tim Holtz Distress Collage Medium and Distress Grit-Paste; Really Reasonable Ribbon Christmas Plaid ribbon, hot glue gun, Darice iridescent gemstones
I hope you’ve enjoyed this project and will come join us in The Outlawz Challenges! Lots of fun going on! Thanks so much for stopping by – we’ll see you next time!