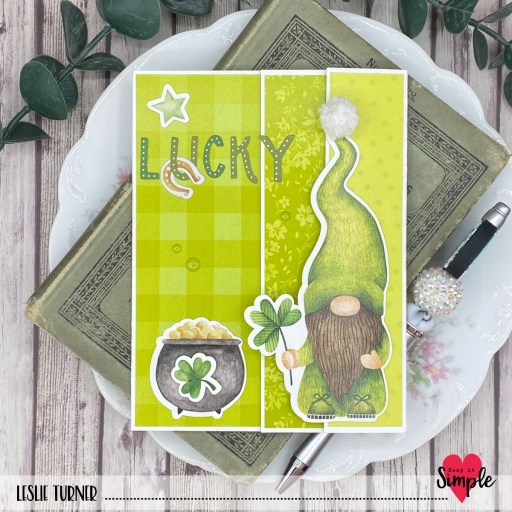
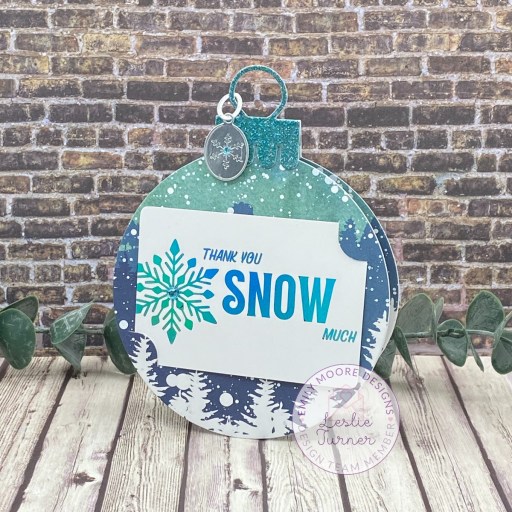
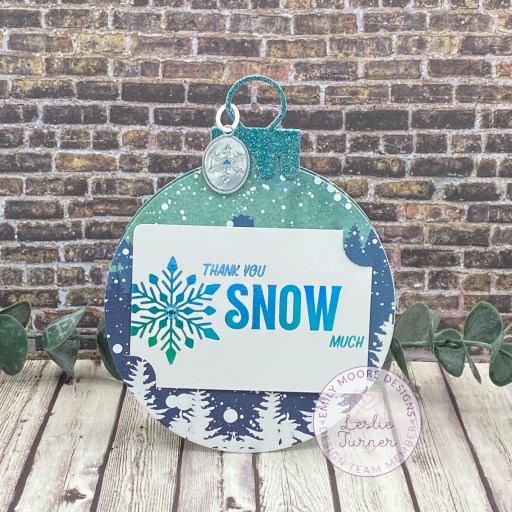
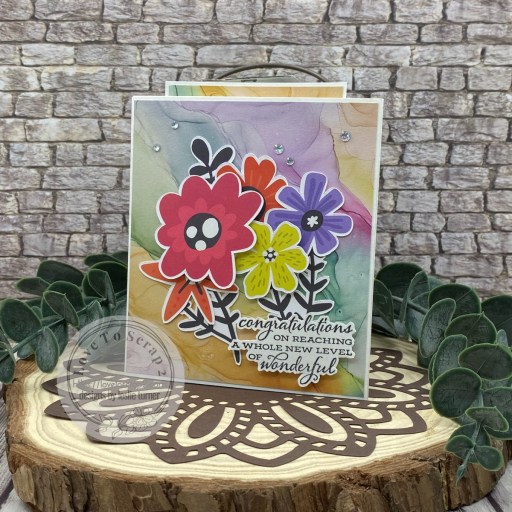
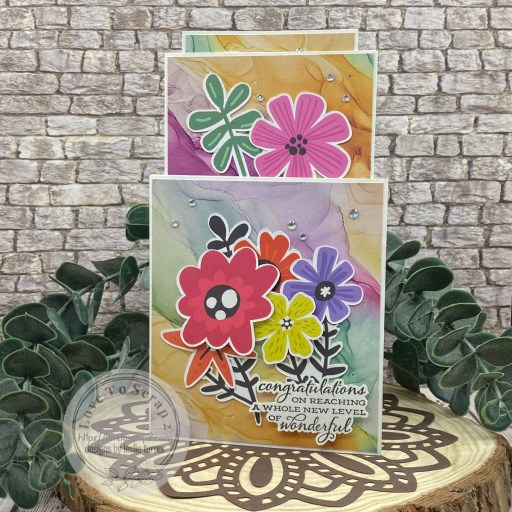
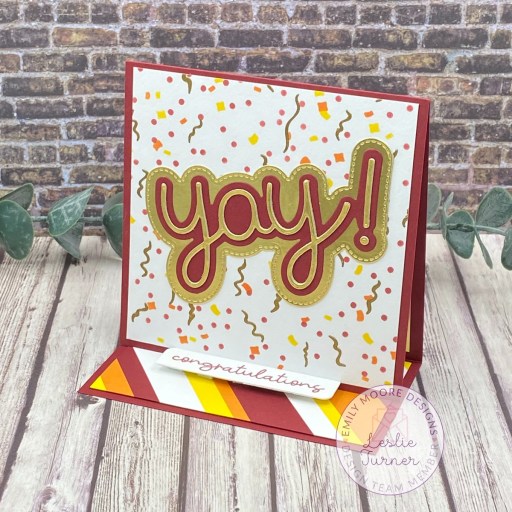
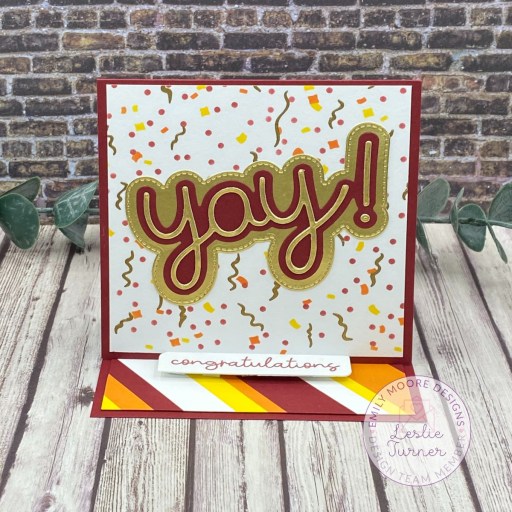
Hey everybody, Happy Friday! Only one more Friday to go, then this month is a bust! I’m delighted to share an Emily Moore Designs DT inspiration project with you today, created with a variety of products that you may notice I use a lot and have become fast favorites (wink-wink). This retirement card features the Confetti Layered Stencils, Yay! Layered Word Die, Graduation & Retirement stamp set, and Card Sentiment Dies. I also used Simon’s Gold Lunar Paste and a couple Scrapbook Adhesives products that Emily sells in her store. If you want to shop and you’re a new customer, remember to use my code LESLIE10 for 10% off your order! The tented easel card is one of my favorite fun folds because it’s so easy to make and sure packs a punch. So, I guess you could say this card is a win-win!
Before I get going, the measurements for this card are as follows:
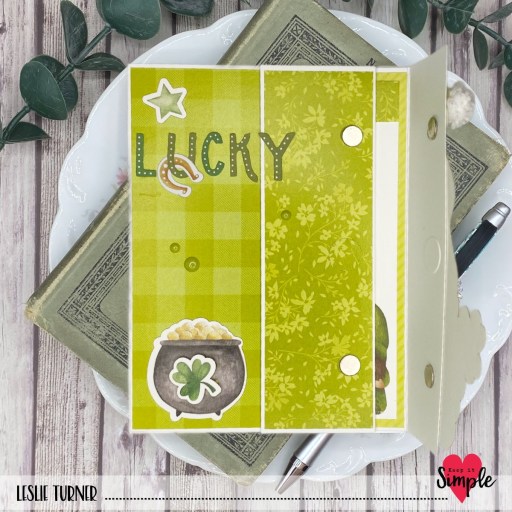
1. Card base is 4-1/4″ x 11″, scored at 4-1/4″ and 8-1/2″, making the folded card 4-1/4″ square.
2. Front layering panel is 4″ x 4″.
3. Bottom layering panel is 2-1/4″ x 4″.
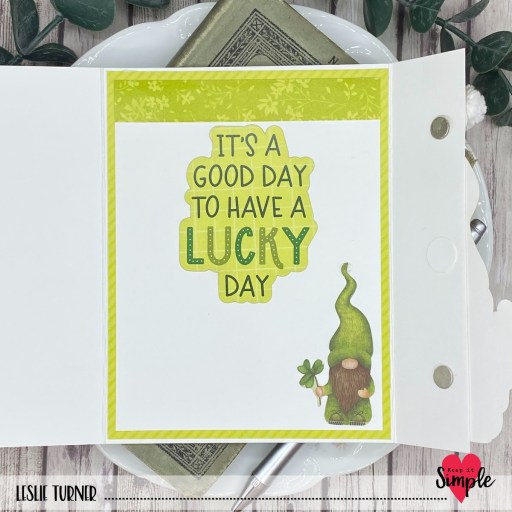
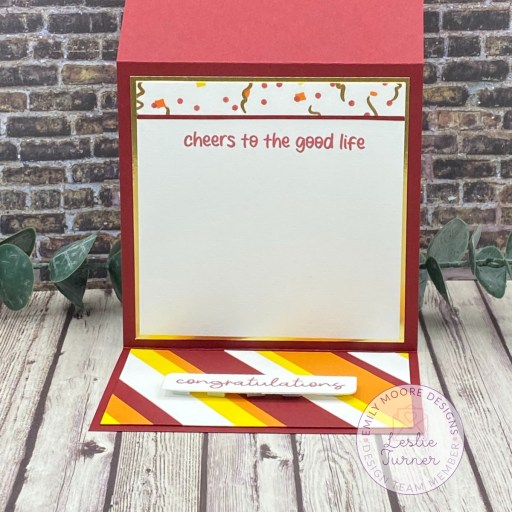
4. White layering panel for the inside cut at 4″ x 4″.
I started by creating the background on a piece of CutCardStock Savoy Brilliant White Cotton cardstock affixed to my Ranger-Wendy Vecchi Make Art Stay-tion 7″ with the magnets. Then I gathered the Confetti Layered Stencils, three Memento inks, some blending brushes, and Simon Hurley Gold Rush Lunar Paste and a spatula. While the panel was drying, I cut the Yay! sentiment from CutCardStock Bright Gold Foil and Basis Dark Red cardstock and assembled it using Scrapbook Adhesives 4×6 adhesive sheet on the back of the layers.
I cut the card base and a few strips (of varying widths) from Basis Dark Red cardstock along with more strips from CutCardStock Lessebo White, Lessebo Brick Orange and Lessebo Sunflower Yellow, which I adhered in diagonal fashion on a piece of white copy paper (again with a Scrapbook Adhesives 4×6 adhesive sheet), trimmed to 2-1/4″ x 4″, and adhered it to the bottom of the card base. At this point, the stenciled background was dry, so I trimmed it to 4″ x 4″ and adhered it to the card base as well, along with the sentiment.
I stamped the congrats sentiment from the Graduation & Retirement Stamp Set in Memento Rhubarb Stalk ink on a scrap piece of Lessebo White, cut it with a die from the Card Sentiment Dies, and popped it up on American Crafts thick adhesive foam squares. In addition to adding another sentiment, this served as the stopper.
I cut the inside panel at 4″ x 4″ from Lessebo White cardstock and embellished it with a leftover strip cut from the stenciled panel on the front and a very thin strip of Basis Red cardstock. I stamped another sentiment from the Graduation & Retirement Stamp Set in Memento Rhubarb Stalk ink, and layered the panel on a piece of Bright Gold Foil cardstock.
Emily Moore Designs products used:
Confetti Layered Stencils
Yay! Layered Word Die
Graduation & Retirement stamp set
Card Sentiment Dies
Simon Hurley Gold Rush Lunar Paste
Scrapbook Adhesives 4×6 Adhesive Sheets
Scrapbook Adhesives E-Z Runner Permanent Strips
Affiliate links are used in this post at no cost to you – I really appreciate your support!
Other products used:
CARDSTOCK/PAPER: CutCardStock Savoy Brilliant White Cotton, Basis Dark Red, Bright Gold Foil, Lessebo White, Lessebo Brick Orange, and Lessebo Sunflower Yellow cardstock
INK: Memento Dandelion, Morocco & Rhubarb Stalk inks
ACCESSORIES: Fiskars 12″ ProCision Rotary Bypass Paper Trimmer, Bearly Art precision craft glue, My Sweet Petunia Precision Glue Press, Mini MISTI, Big Shot, Ranger-Wendy Vecchi Make Art Stay-tion 7″, blending brushes, spatula, Scrapbook Adhesives Adhesive Sheets, American Crafts thick adhesive foam squares
I hope you’ve enjoyed seeing this project and you’re inspired to get crafty! New customers – use code LESLIE10 for 10% off your order! Be sure to Follow us on Facebook, Instagram and YouTube for crafty inspiration! Emily shares videos on all the social media platforms, and they are awesome and on point! Thanks so much for stopping by today – we’ll see you next time!
Scrappy hugs,