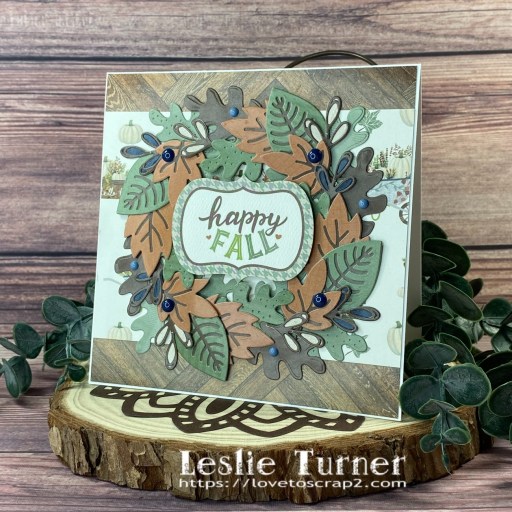
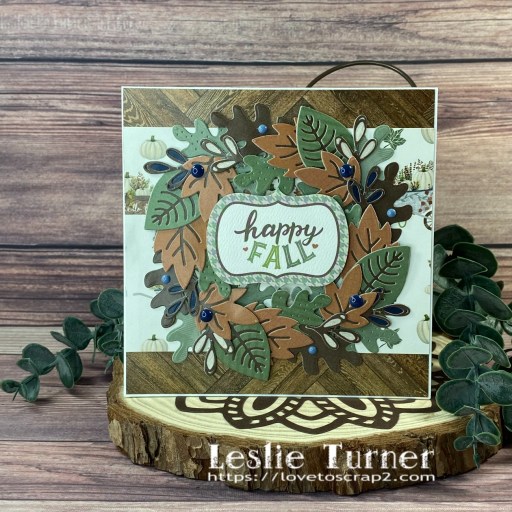
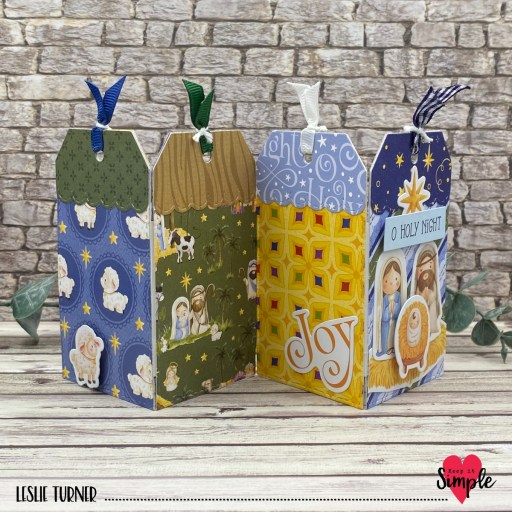
Hi friends! I have a fun ScrapbookingStore DT inspiration project to share with you today created with the November 2024 Scrapbook Kit with Upgrades. It’s been a minute since I created a sidewalk cafe sign card and I thought the papers and stickers in this month’s kit were perfect for this card! Despite it’s complex look, this card is really pretty simple, and it folds flat for mailing.

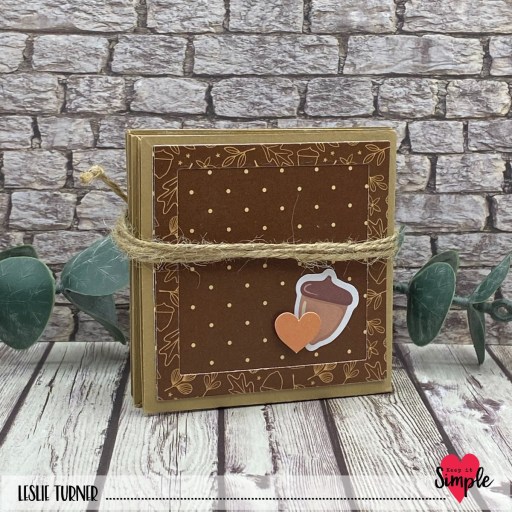
I cut the card base and box from CutCardStock Lessebo Brick Orange cardstock. The card base is 4-1/4″ x 11″, scored at 5-1/2″. The box is 1-1/4″ x 6-1/2″, scored at 1/2″, 1-1/4″, 5-1/4″ and 6″. The strip for the inside of the box is 1-1/8″ x 4-3/4″, scored at 3/8″ and 4-3/8″. The decorative strip for the box front is 1-1/8″ x 3-7/8″, cut from patterned paper.
To make the ‘legs’ for the cafe sign, close the card base and measure 1″ inward from the left edge. Cut upward 1-1/2″, across for a length of 2-1/4″, and then back down 1-1/2″. Remove the pieces and discard. Note: You can cut each half of the card base separately if you don’t want to cut through two layers of cardstock.
The background pieces for the front and back are both 4-1/8″ x 5-3/8″, cut from patterned paper. Measure 7/8″ inward from the left edge and cut upward 1-1/2″. Cut across for a length of 2-3/8″ and then back down 1-1/2″. Do this for both pieces.
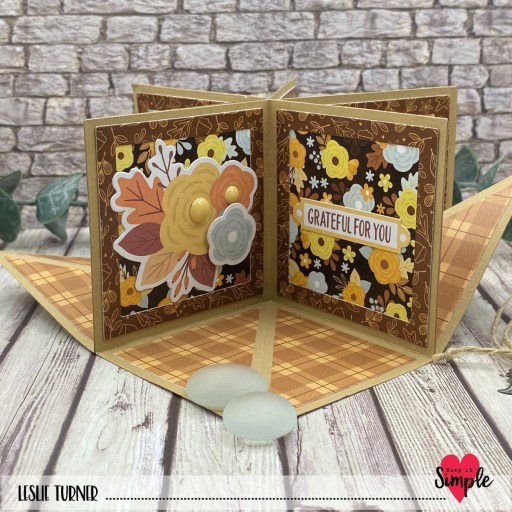
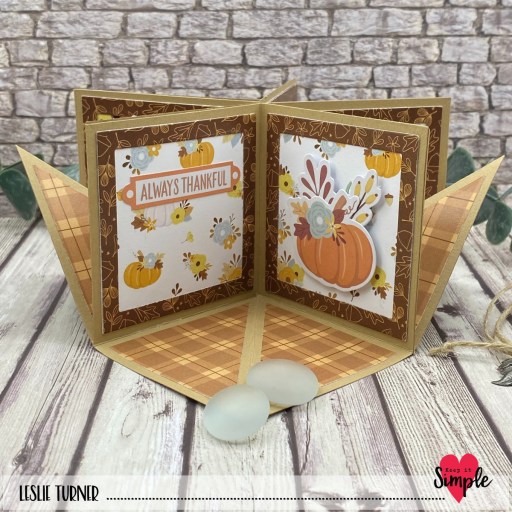
I trimmed a journaling card in the paper pack to use as the focal image. I chose several floral cluster stickers, adhered them to Solar White cardstock scraps, and trimmed around the stickers. I adhered one piece to the strip inside the box and the other piece directly on the background at the bottom of the focal image, both on black foam strips. The finishing touch was adding some pumpkin stickers to the outside of the box.

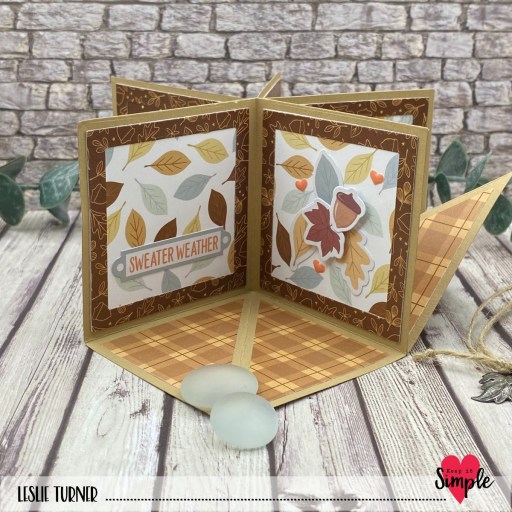
The inside panel is 3-3/4″ x 4″, cut from Solar White cardstock and embellished with strips of paper in the collection. I added a sentiment sticker along with floral and pumpkin stickers, which completed the card.

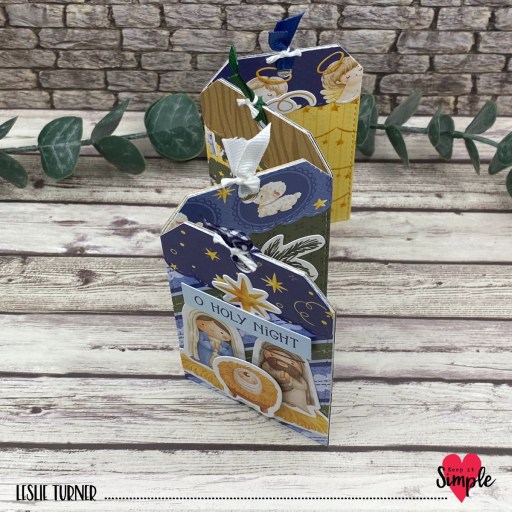
Here are a couple angled shots so you can see the construction. So stinkin’ cute!


Affiliate links are used in this post at no cost to you – I really appreciate your support!
ScrapbookingStore products used:
November 2024 Scrapbook Kit with Upgrades:
Echo Park Fall Collection Kit
Upgrades: Momenta Clear Stamps
Leaf Stickers
Simple Stories Acorn Lane Card Kit
Other products used:
CARDSTOCK/PAPER: CutCardStock Lessebo Brick Orange cardstock, Neenah Classic Crest 80# Solar White cardstock
ACCESSORIES: Fiskars 12″ ProCision Rotary Bypass Paper Trimmer, Cricut Paper Trimmer, Bearly Art precision craft glue, My Sweet Petunia Precision Glue Press, Ranger Letter It Black 3D Adhesive Foam
I hope you’ve enjoyed today’s project and you’re thinking about all the fun you could have with this month’s kit… you really ought to think about joining the Subscription Club! Be sure to Follow us on Facebook, Instagram, Pinterest and YouTube for lots of crafty inspiration! And if you do decide to join the Subscription Club, join our ScrapbookingStore Club Member Group on Facebook for more inspiration and to share your projects! Thanks so much for stopping by today – we’ll see you next time!
Scrappy hugs,