Hey everybody! Just a quick reminder that our debut challenge over at Mini Album Mania went live on September 1st!
To quickly recap the challenge specifics: The size should be no more than 6″ on any side, must have at least three pages (the more the merrier) and must be embellished/decorated. Photos are optional. Albums can have any kind of binding such as rings, wire, ribbon, staples, glued tabs, etc. Or accordion or flap type with no binding. Just remember they must have at least three pages. No blank undecorated albums, please.
We host six challenges per year, and each challenge lasts approximately six weeks. All challenges are family-friendly ‘any type of mini album goes.’ Challenges go live at 4:00 AM Mountain Time on the 1st day of each odd month and run until 4:00 PM Mountain Time on the 15th day of the following month.
Our winners are randomly chosen to give everyone an equal chance of winning, and our top picks are chosen on merit. Our winners and top picks are announced on the 1st of the month following the close of each challenge along with details of the new challenge.
Come on over and play! We’d love to see your mini album projects!
We have openings on our new design team, too, so if you have lots of photos that need homes in albums, this team is for you! Shoot us an email at ltscb at mail dot com (not gmail, just mail) – or leave a comment on this post – and we’ll be in touch with more details!
9/20/23 Honorable Mention at The Outlawz No Stamp Challenge!
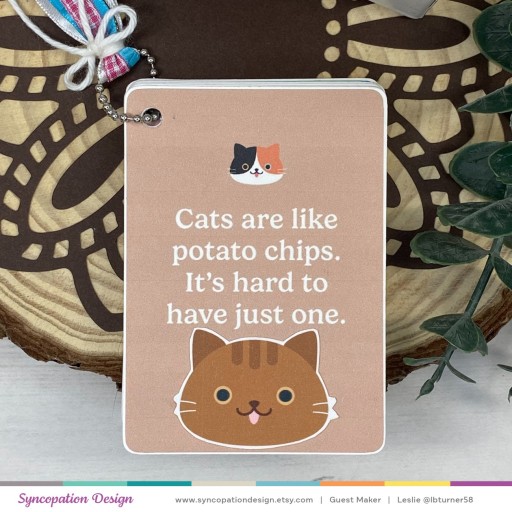
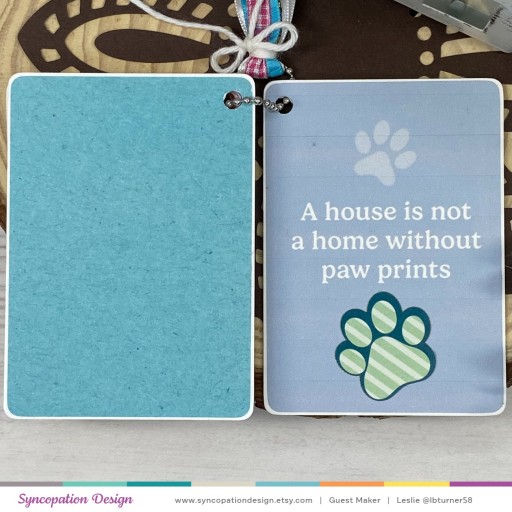
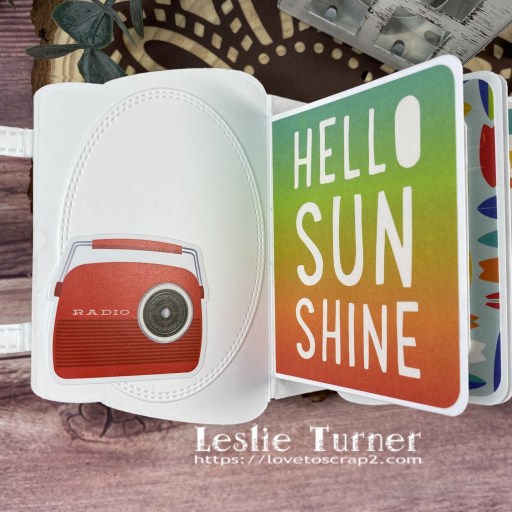
Hey everybody, Happy Thursday! I’ve popped in this morning to share a Syncopation Design DT inspiration project! I created a fun ATC mini album using pocket cards, papers and elements in the new Caturday digiscrap collection which I absolutely love! You know how I love me some mini albums, and as soon as I saw this collection, I knew I had to create something to document all those fun cat antics! This was definitely a fun project! However, I do need to disclose a profanity alert on two of the album pages just in case any parents might be thinking about sharing this post with youngsters. Typically I keep my posts family-friendly and the profanity is very minor in my opinion, but I still feel the need to disclose.
I cut ten ATC size (2-1/2″ x 3-1/2″) pages for the album from Neenah Classic Crest 165# Solar White cardstock and rounded the corners. I trimmed ten pocket cards and ten digital papers (five patterned and five plain printed on HP 32# copy paper) from the collection to just slightly under ATC size, rounded the corners, and adhered them randomly to both sides of each page.
I added elements from the collection to embellish most of the pages but did use a few items from my stash. I punched a hole in the top left corner of the stack of pages using my Crop-A-Dile Big Bite and bound the album with a ball chain and clasp from my stash. I wrapped an assortment of ribbon pieces around the chain clasp and tied them together with white twine.
Affiliate links are used in this post at no cost to you – I really appreciate your support!
Other products used: CARDSTOCK/PAPER: Neenah Classic Crest 165# Solar White cardstock, HP 32# copy paper DIES/PUNCHES: Kadomaru Pro Corner Rounder, Crop-A-Dile Big Bite ACCESSORIES: Tonic Studios 12″ Guillotine Paper Trimmer, Bearly Art precision craft glue, This Calls for Confetti Kittens Confetti (gray kitten polymer clay slices); Keep It Simple Max & Daisy Collection Pack Die Cut Ephemera Sheet and Namaste Home Collection Pack Sticker Sheet; ball chain and clasp, assorted ribbon pieces, Doodlebug Design Lily White Doodle Twine
I hope you’ve enjoyed this project and are inspired to get crafty! Be sure to check out all the fun digital papers, pocket cards, elements, cut files, bundles and scrap kits, as well as clear stamps in the Syncopation Design Etsy store! And be sure to Follow on Instagram and Facebook for crafty inspiration! Thanks so much for stopping by today – we’ll see you next time!
9/15/23 Top 5 at Halloween Crafts All Year ‘Round!
Hey everybody! I hope you’re having a great week so far! I’m back with my second post this morning and this one is a super cute Keep It Simple DT inspiration project created with items in the NEW too-cute-to-spook A Wee Bit Wicked Collection! OMGoodness, I’m having THE best time with this collection! I’ve made another swing flap card which has quickly climbed to the top of my all-time favorite fun folds! It packs such a punch and is great for any occasion!
I cut the card base from CutCardStock Basis Black cardstock along with a layering panel from a spider web print in the A Wee Bit Wicked 12×12 Collection Pack. I adhered the witch and cloud (from the Wee Bits Die Cut Pieces) to a square cut from Basis Black using the Stitched Squares Nested Dies. I added the front sentiment, a black and white striped strip and stars from the Cards and Phrases Die Cut Pieces, which completed the card front.
I layered an orange dot panel from the 12×12 Collection Pack on the inside, then stamped a sentiment in Memento Tuxedo Black ink from the Halloqueen Sentiments stamp set and cut it with the coordinating Halloqueen Outline Dies. I also added another star from the Cards and Phrases Die Cut Pieces and a cat from the Wee Bits Die Cut Pieces to complete the inside.
Here’s a shot of the card folded flat for mailing. Swoon! I SO love this fold!
I hope you’ve loved seeing this project as much as I loved creating it, and you’re inspired to get crafty! Be sure to check out ALL the fun goodies in the Keep It Simple store such as paper, stamps, die cuts, ephemera, washi tape and enamel dots to name just a few! You’ll go crazy! Be sure to Follow us on Facebook, Instagram, and Pinterest for lots of crafty inspiration! Thanks so much for stopping by today – we’ll see you next time!
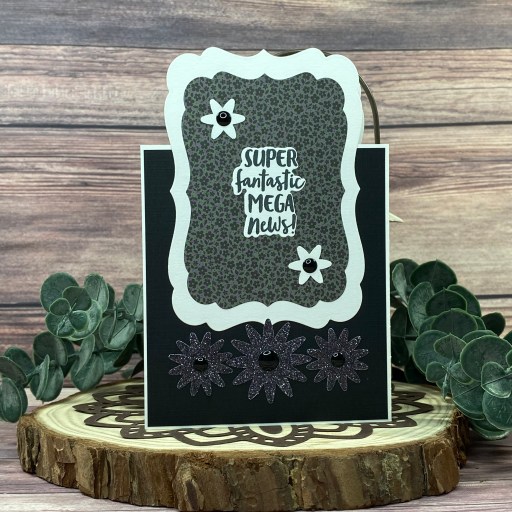
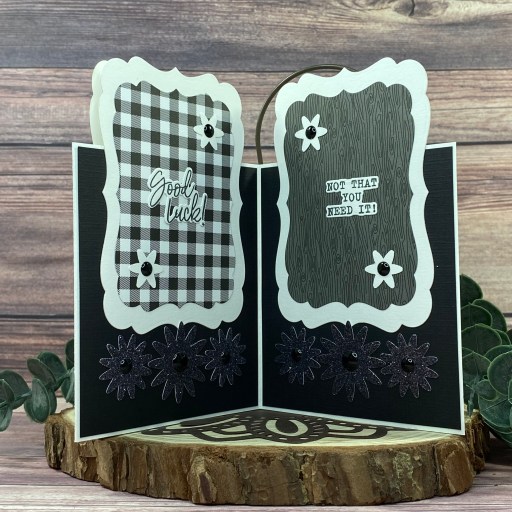
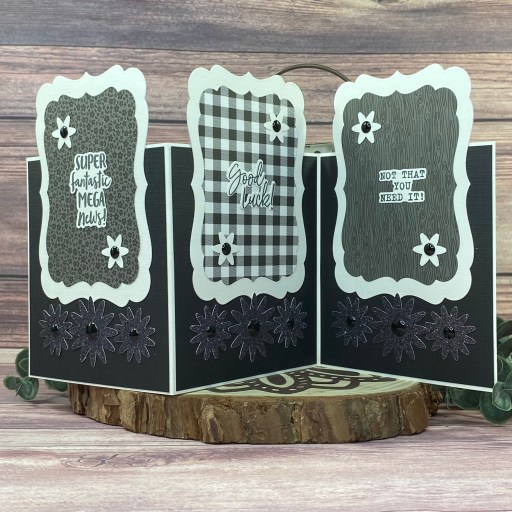
Happy Hump Day, everybody! I hope you’re having a great week! I’m up on the CutCardStock blog today with an awesome DT inspiration project featuring our Basis White, Basis White 12×12, Royal Sundance Linen Eclipse Black and Silk Glitter Black Prince cardstock. I created a pretty tri-fold congratulations card in a gorgeous black and white color combo. You know how I love me some fun folds! I made one similar to this recently with oval panels. The best part of this particular design is being able to make the panels whatever shape you want! ;)
I cut the tri-fold card base from Basis 80# White 12×12 cardstock along with layering panels from Royal Sundance Linen Eclipse Black cardstock. I then die cut decorative panels for the three panels from Basis 80# White 8.5×11 cardstock along with slightly smaller ones from Doodlebug Design Floral-Graph and Buffalo Check-Woodgrain Rainbow Petite Prints. I used the old-as-the-hills Spellbinders Nestabilities Labels Seventeen dies which I’m sure I’ve had in my stash (along with many others in this line) for close to ten years, lol!
Using the Stampin’ Up Blossom Bunch Punch, I punched quite a few flowers from Silk Glitter Black Prince cardstock and Basis White cardstock, and added Eyelet Outlet Black Enamel Dots to the centers of each. I adhered them across the bottom of the three panels and on each decorative panel. I stamped the sentiments from the Stampin’ Up Charming Sentiments stamp set in Catherine Pooler Black Jack ink and cut them with the coordinating Stampin’ Up Sentiment Silhouettes Dies.
I cut a small signature panel for the back from Basis White which I layered on a coordinating Doodlebug Design pattern.
Other products used: PAPER: Doodlebug Design Floral-Graph and Buffalo Check-Woodgrain Rainbow Petite Prints STAMPS: Stampin’ Up Charming Sentiments stamp set INK: Catherine Pooler Black Jack ink DIES/PUNCHES: Spellbinders Nestabilities Labels Seventeen Dies, Stampin’ Up Blossom Bunch Punch, Stampin’ Up Sentiment Silhouettes Dies ACCESSORIES: Tonic Studios 12″ Guillotine Paper Trimmer, Tombow Mono Dots adhesive, Bearly Art precision craft glue, MISTI stamp tool, Big Shot, Eyelet Outlet Black Enamel Dots
I hope you’ve enjoyed today’s project and you’re inspired to get crafty! Be sure to check out all the awesome cardstock and other goodies at CutCardStock (adhesives, labels, stickers, pens, watercolors and ribbon to name a few). And head on over to the CutCardStock Facebook Page and for more inspiration! Also, be sure to join our Creating with Card Stock Facebook Group for even more crafty inspiration! Thanks so much for stopping by today – we’ll see you next time!
Hey everybody! Happy Monday! I hope you had a great weekend! It’ll soon be Halloween and I’m still playing with scary cats and bats! I’m delighted to be back up on the Prickley Pear Stamps blog today with a fun Halloween card featuring the Cheshire-type cat in the Scary Cats 2 stamp set! This was such a fun and easy card to put together, and would be a great design to mass-produce if you send out a lot of Halloween Cards, and especially if you’re an Alice in Wonderland fan! ;)
I cut a standard A2 size top-folding card base from Neenah Classic Crest Solar White cardstock and a layering panel from Keep It Simple Ruby 12×12 Collection Pack. A striped pattern to match the cat was just the ticket! I rounded the bottom right corner on both the card base and layering panel, and then stamped the cat from the Scary Cats 2 stamp set on Solar White. I cut him at an angle with an oval die and then cut a slightly larger oval to offset behind the cat. I stamped the sentiment (from the same stamp set) and added several black enamel dots to complete the card.
Other products used: Cardstock/Paper: Neenah Classic Crest 80# Solar White cardstock, Keep It Simple Ruby 12×12 Collection Pack Ink: Memento Tuxedo Black ink Dies/Punches: Kadomaru Pro Corner Rounder, Spellbinders Classic Ovals Large & Small dies Accessories: Tonic Studios 12″ Guillotine Paper Trimmer, MISTI stamp tool, Big Shot, Tape Runner, Eyelet Outlet black enamel dots
I hope you’ve enjoyed this project! Be sure to check out all the awesome stamps and dies at Prickley Pear Stamps! Save 10% on anything on the site when you shop at Prickley Pear Stamps by using coupon code LESLIE10 at checkout! And be sure to ‘like’ and ‘follow’ the Prickley Pear Stamps Facebook page to keep up with news and sales, and join Prickley Pear Pals (the fan group) for lots of fun crafty ideas and to share your creativity! And finally, we’d love to see you visit the Prickley Pear Stamps blog and become a Follower! Hope to see you there! Thanks so much for stopping by today – we’ll see you next time! ;)
10/28/23 September DT Favorite Winner at A Perfect Time To Craft Open Challenge!
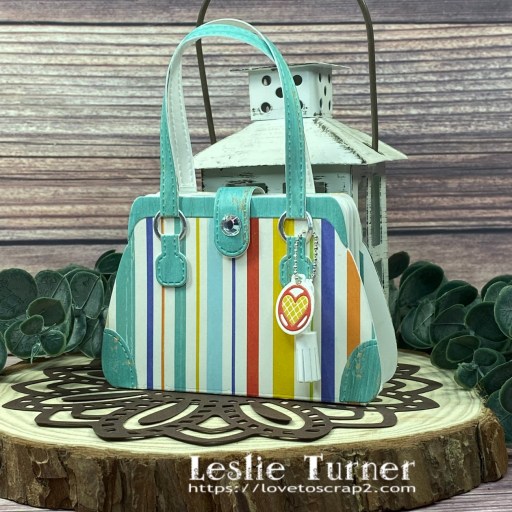
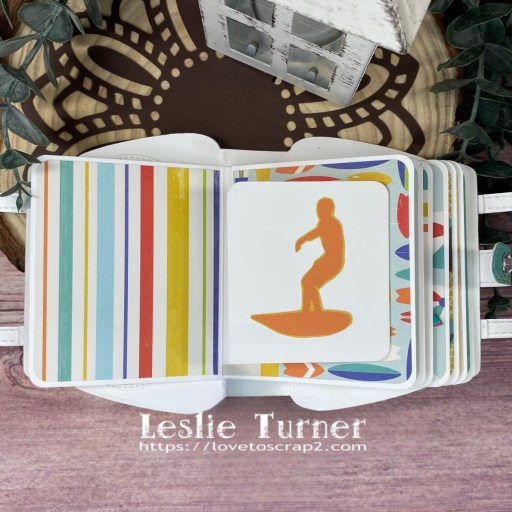
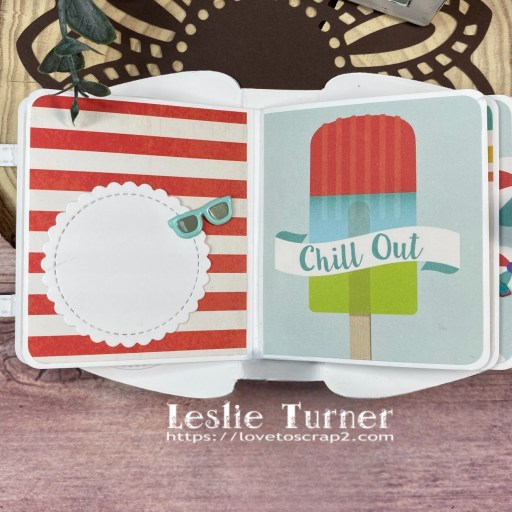
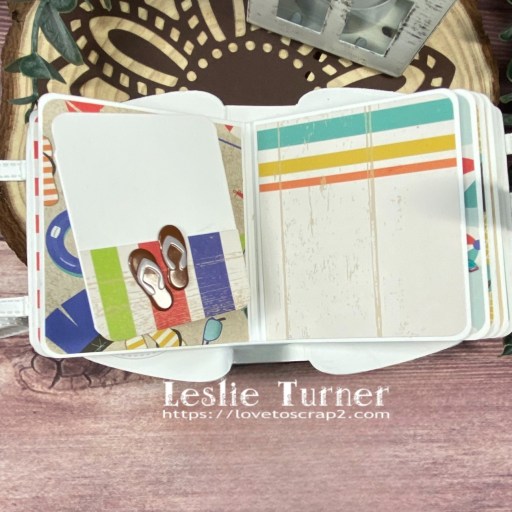
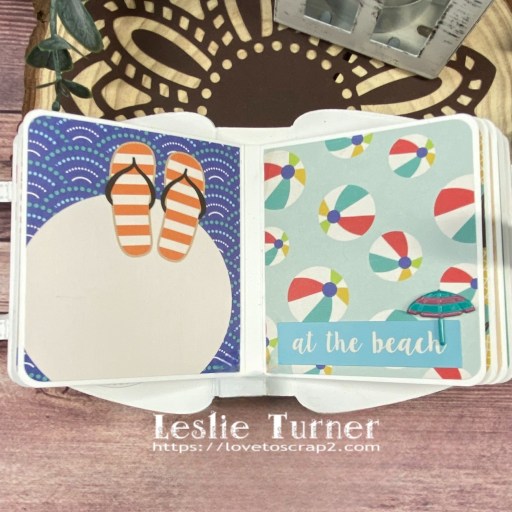
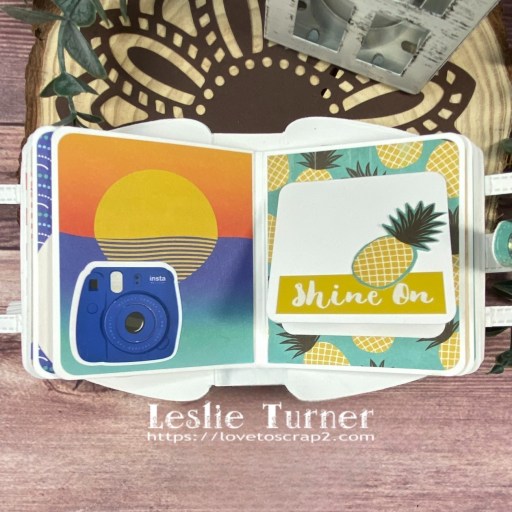
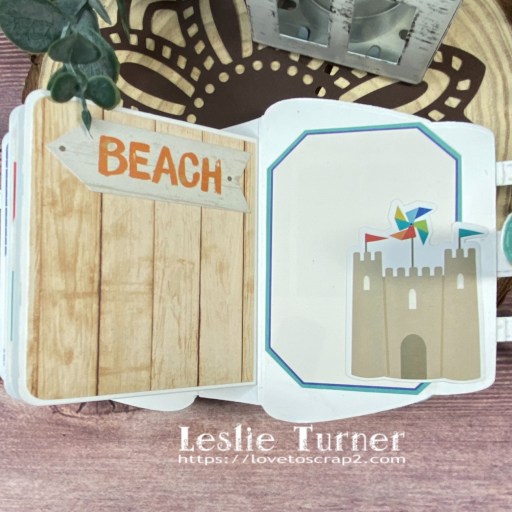
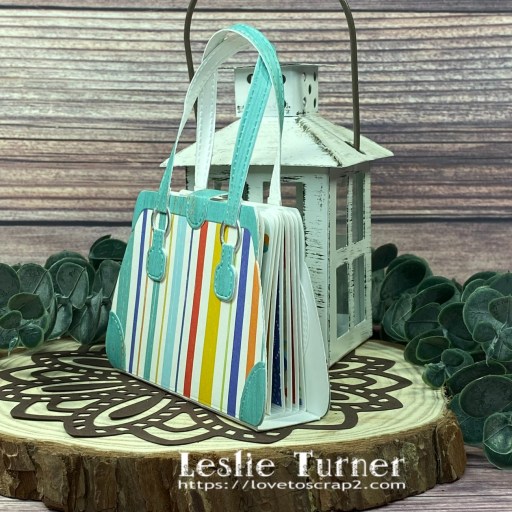
Hey everybody! Happy Friday – I hope you have a fun weekend planned! Our very first challenge is live this morning over at Mini Album Mania and I’m super excited to share my debut DT inspiration project for MAM #1 – Any Type of Mini Album Goes! We have room for a few more design team members, so if you’re interested, let me know! I created a purse-shaped Beach Memory Album for our first challenge with lots of room for photos and journaling!
Here’s a quick run-down of how our new challenge works: We host challenges every other (odd) month and each challenge lasts six weeks. We welcome all types of handmade mini albums. The size should be no more than 6″ on any side, the album must have at least three pages, and it must be embellished and decorated. Photos are optional. Mini albums can have any kind of binding such as rings, wire, ribbon, staples, glued tabs, etc. Or they can be an accordion or flap type with no binding. Just remember they must have at least three pages, and we don’t want to see any blank undecorated albums.
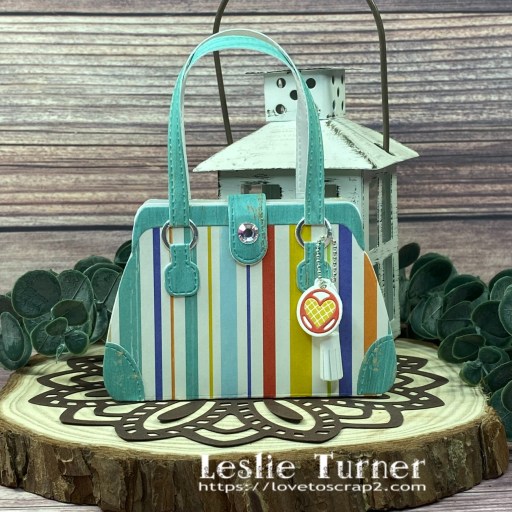
Using the Concord & 9th Everyday Purse Builder dies, I created the album base from Neenah Classic Crest 110# Solar White cardstock. I cut the album pages from 110# Solar White cardstock as well and rounded the two outside corners of each page. I used papers from the Carta Bella Beach Party Collection Kit to cover the base. I used coordinating papers and stickers from the collection kit as well as Eyelet Outlet Sunglasses, Flip Flops, Beach Umbrella, and Sun/Cloud Brads to embellish the pages.
There are several pull-ups and pull-outs, as well as die cut panels made with My Favorite Things Stitched Mini Scallop STAX, Stitched Rectangle STAX and Stitched Square STAX and CottageCutz Double-Stitched Ovals. I used CutCardStock Bright Silver Foil cardstock for the rings on the base of the straps. I used a Velcro fastener on the flap closure and embellished it with a Darice iridescent gemstone. I made a charm and tassel which I attached with a tiny ball chain and clasp from my stash.
Affiliate links are used in this post at no cost to you – I really appreciate your support!
Products used: CARDSTOCK/PAPER: Neenah Classic Crest 110# and 80# Solar White cardstock, CutCardStock Bright Silver Foil cardstock, Carta Bella Beach Party Collection Kit DIES/PUNCHES: Concord & 9th Everyday Purse Building Dies, Kadomaru Pro Corner Rounder; My Favorite Things Stitched Mini Scallop STAX, Stitched Square STAX, Stitched Rectangle STAX; CottageCutz Double-Stitched Ovals, Stampin’ Up 1/2″ Circle Punch ACCESSORIES: Tonic Studios 12″ Guillotine Paper Trimmer, Bearly Art precision craft glue, Big Shot; Eyelet Outlet Sunglasses, Flip Flops, Beach Umbrella, and Sun/Cloud Brads; Velcro fastener, 1/4″ double-sided foam strip, Darice iridescent gemstones, tiny ball chain and clasp
I hope you’ve enjoyed seeing this project and will link up a mini album project in our debut challenge! If you have a lot of photos that need homes in mini albums, then this challenge is for you! Thanks so much for stopping by today – we’ll see you next time! ;)
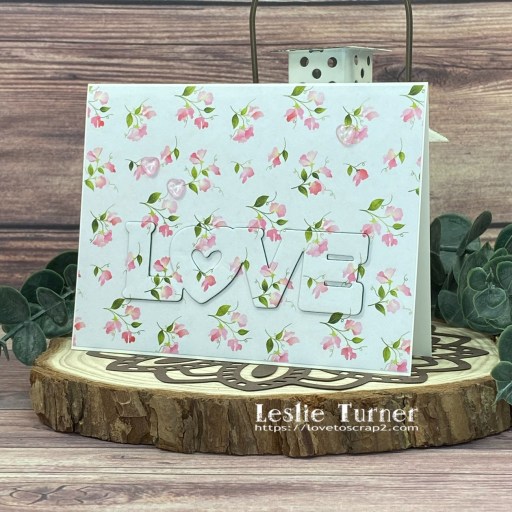
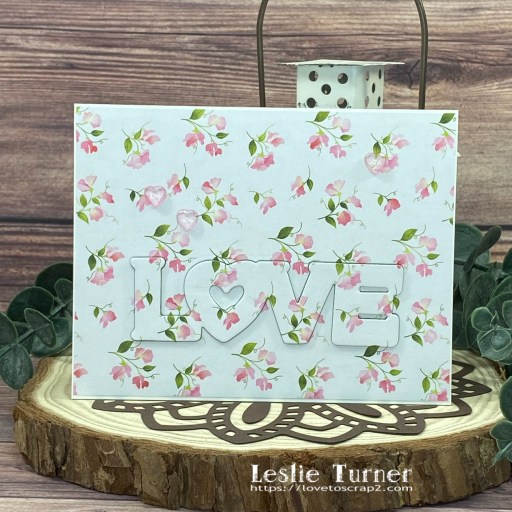
Howdy peeps! Well, I have to ask… how is the weather where you are? It’s not too awfully bad here in southwestern Colorado. The temps are still a little warm but definitely tolerable. Our new challenge is live this morning over at Love To Craft Challenge Blog and I’m thrilled to share my DT inspiration project for LTCCB #76 – Anything Goes! I had this gorgeous Hot Off The Press paper pack out on my desk from another project and thought it would be so pretty to use to employ the phantom die cutting technique with the Love You die set from Prickley Pear Stamps! I absolutely love big sentiment dies and this turned out so pretty!
I cut a standard A2 size top-folding card base from Neenah Classic Crest 110# Solar White cardstock along with a layering panel from a pretty floral print in the Hot Off The Press Sweet Pea double-sided paper pack. Using the Prickley Pear Stamps Love You dies, I die cut the large LOVE sentiment into the floral layering panel. I die cut the word twice more from CutCardStock Kale Green cardstock, adhered them together and then into the negative space in the floral layering panel, and then adhered the floral one on top. The finishing touch was adding several hearts from the Buttons Galore & More Pink Sparkletz.
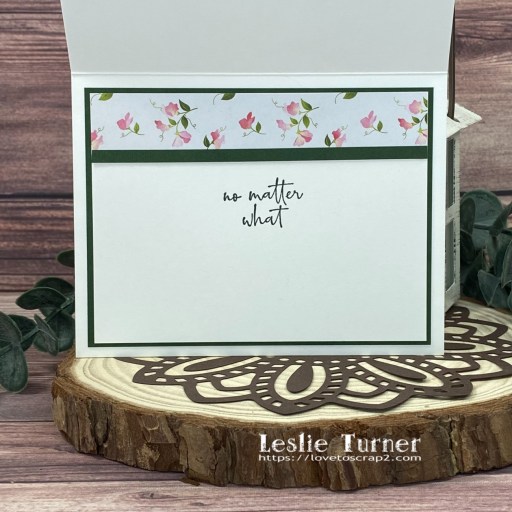
I cut the inside panel from 80# Solar White cardstock and embellished it with strips of the floral print and dark green cardstock used on the front. I stamped a sentiment from the Stampin’ Up Happy & Heartfelt stamp set in Memento Northern Pine ink.
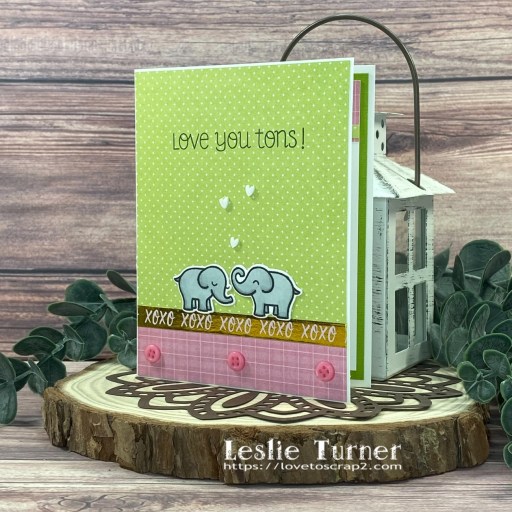
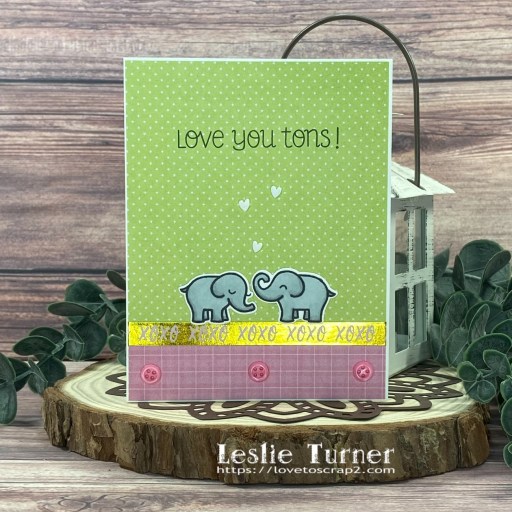
Hey everybody! I’m back with another post on this busy September 1st morning! Our new challenge is live this morning over at Love To Scrap Challenge Blog and I’m delighted to share my DT inspiration project for LTSCB #163 – Anything Goes! I’ve had this adorable Lawn Fawn stamp and die set in my stash for quite some time and have never used them, so out they came for a play! I created a super cute birthday card in a green and pink color combo (one of my favs)!
I cut a standard A2 size side-folding card base from Neenah Classic Crest 110# Solar White cardstock along with layering panels from green and pink prints in the Hot Off The Press Sweet Pea 6×6 double-sided paper pack. I stamped the elephants from the Lawn Fawn Love You Tons stamp set on a scrap of Solar White cardstock and colored them with alcohol markers.
I stamped the sentiment from the same stamp set in Memento Tuxedo Black ink. I added a strip of Eyelet Outlet skinny XOXO washi tape along with buttons from the Buttons Galore & More Pink Grapefruit Buttons and some tiny hearts from the Buttons Galore & More Daydreams Mix Upz Embellishments.
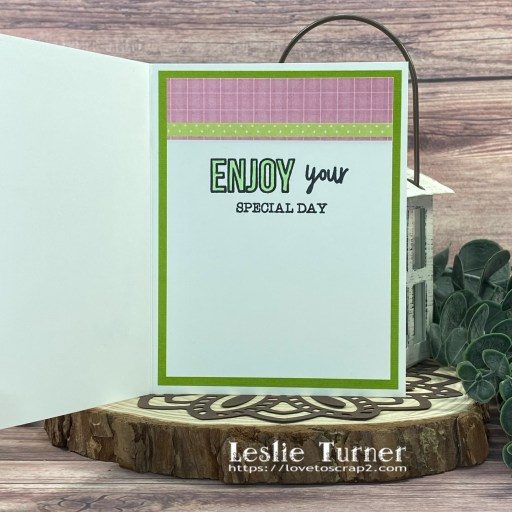
I cut the inside panel from 80# Solar White cardstock, embellished it with the pink and green prints used on the front, and layered it on CutCardStock Mantis Green cardstock. I stamped a sentiment from the Keep It Simple Birthday Sentiments stamp set in Tuxedo Black ink and colored the word ‘ENJOY’ with a Kirarina Wink Lime Green marker.
Hey everybody! It’s busy on my blog this morning with all the new challenges launching on this first day of September! Our new challenge is live this morning over at Merry Little Christmas Challenge Blog and I’m excited to share my DT inspiration project for MLCCB #52 – Anything Christmas Goes! I created an adorable card with a vintage feel featuring Santa and Rudolph! These stamps and dies are from Prickley Pear Stamps and are so cute I can’t stand it!
I cut a standard A2 side-folding card base from Cougar Smooth White cardstock along with layering panels from two coordinating prints from the Hot Off The Press Joyful Christmas 6×6 double-sided paper pack. I added several strips of Me & My Big Ideas striped skinny washi tape across the seam of the two papers. I stamped the images and sentiment from the Prickley Pear Stamps Santa and Rudolph stamp set on Cougar White cardstock in Memento Rich Cocoa ink, colored Santa and the reindeer with alcohol markers, and cut all of them with the coordinating Santa and Rudolph dies. The finishing touch was adding several red gemstones.
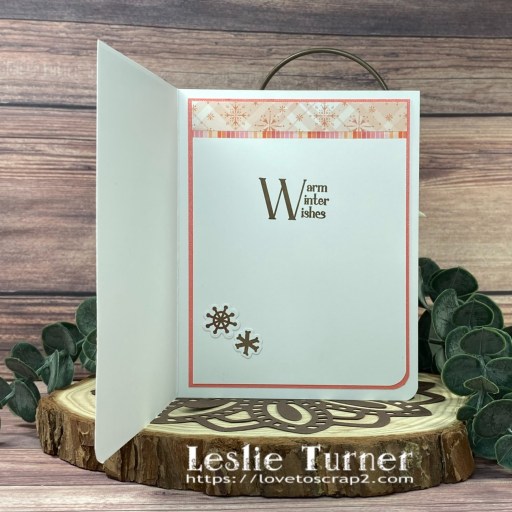
I cut the inside panel from Cougar Smooth White cardstock and embellished it with strips of the Hot Off The Press peach patterned paper and a strip of the MAMBI striped skinny washi tape used on the front. I stamped a sentiment from the same Santa and Rudolph stamp set in Memento Rich Cocoa ink and added two stamped and die cut snowflakes.
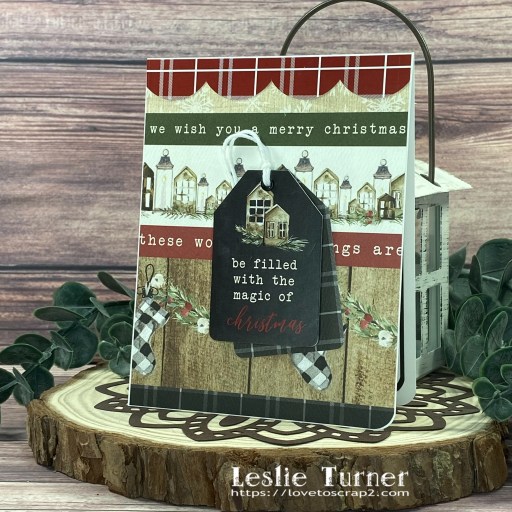
Hey everybody! Happy Friday! Our new challenge is live this morning over at Christmas BINGO Challenges and I’m delighted to share my DT inspiration project for CBC #3 – Anything Goes with Featured Christmas BINGO Card! I went with Column B this time – black, tag, no stamping, and stripes. I love using tags on cards because they speak volumes but I don’t do it very often… why, I don’t know! I used the Carta Bella Christmas Collection kit for this card and I love how it turned out!
I cut a standard A2 size top-folding card base from Neenah Classic Crest 80# Solar White cardstock and rounded the bottom right corner. I cut a layering panel from a print in the Carta Bella Christmas Collection Kit and added a scalloped edge sticker from the sticker sheet in the kit across the top of the panel. I cut two tags and rounded the bottom corners. I tied Doodlebug Design lily white doodle twine to the top of the tags and adhered them to the card front with 1″ double-sided foam strip. Super easy!
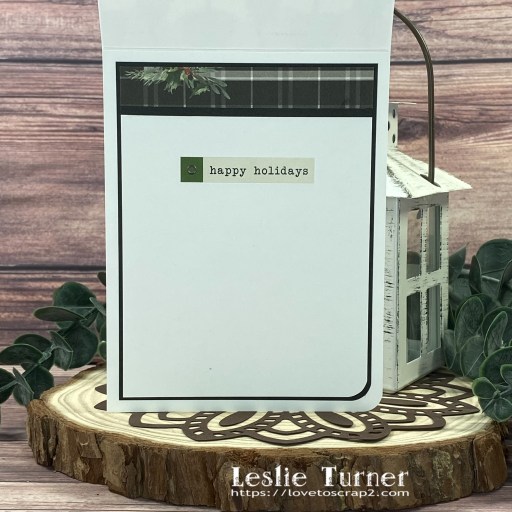
I cut the inside panel from 80# Solar White cardstock and embellished it with a strip cut from a coordinating paper in the Carta Bella Christmas Collection Kit and a narrow strip of CutCardStock Pop Tone Black Licorice cardstock. I added a sentiment from the sticker sheet in the kit which completed the card.
Affiliate links are used in this post at no cost to you – I really appreciate your support!
Products used: Cardstock/Paper: Neenah Classic Crest 80# Solar White cardstock, CutCardStock Pop Tone Black Licorice cardstock, Carta Bella Christmas Collection Kit Dies/Punches: Kadomaru Pro Corner Rounder Accessories: Tonic Studios 12″ Guillotine Paper Trimmer, Art Glitter Dries Clear adhesive, black eyelet from stash, WRMK Crop-A-Dile, Doodlebug Designs lily white doodle twine, Glossy Accents, 1″ double-sided foam strip
I hope you’ve enjoyed seeing this project and will link up with us this time! We can’t wait to see what you create! Thanks so much for stopping by today – we’ll see you next time! ;)