Know what I love?

12/31/19 DT Favorite at A Perfect Time To Craft Open Challenge!

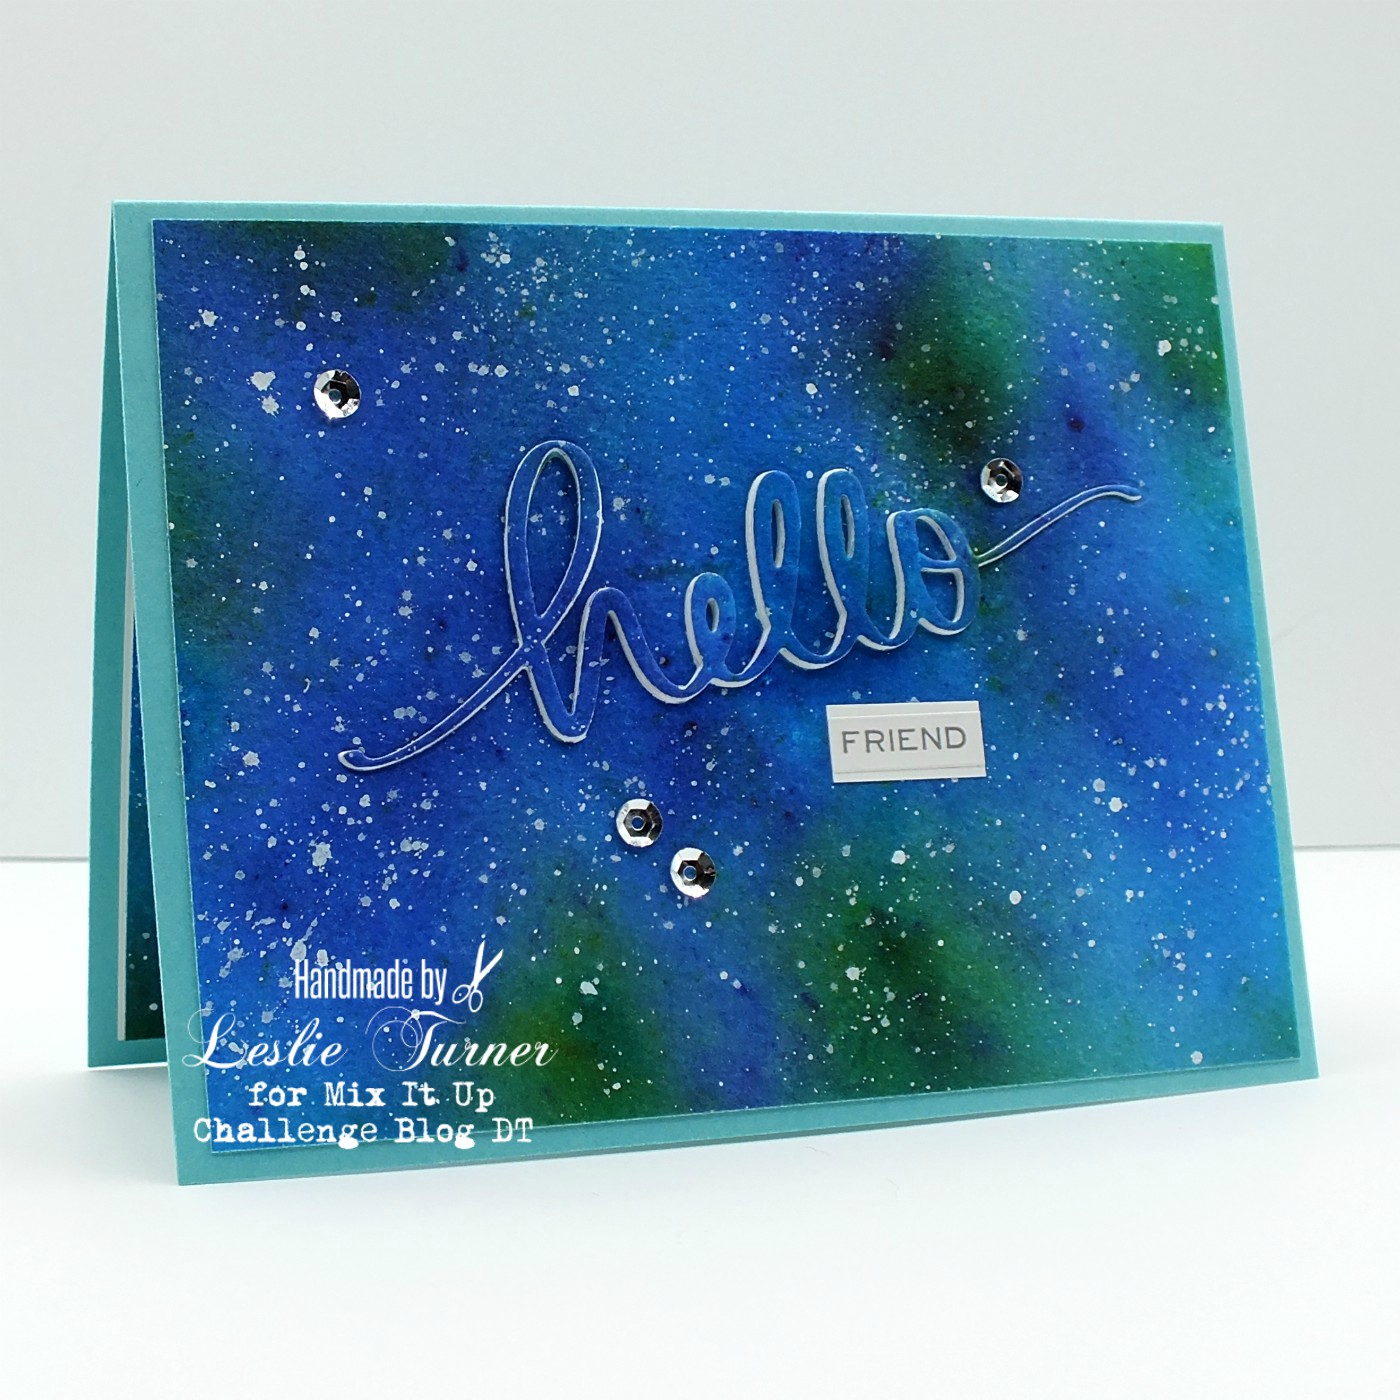
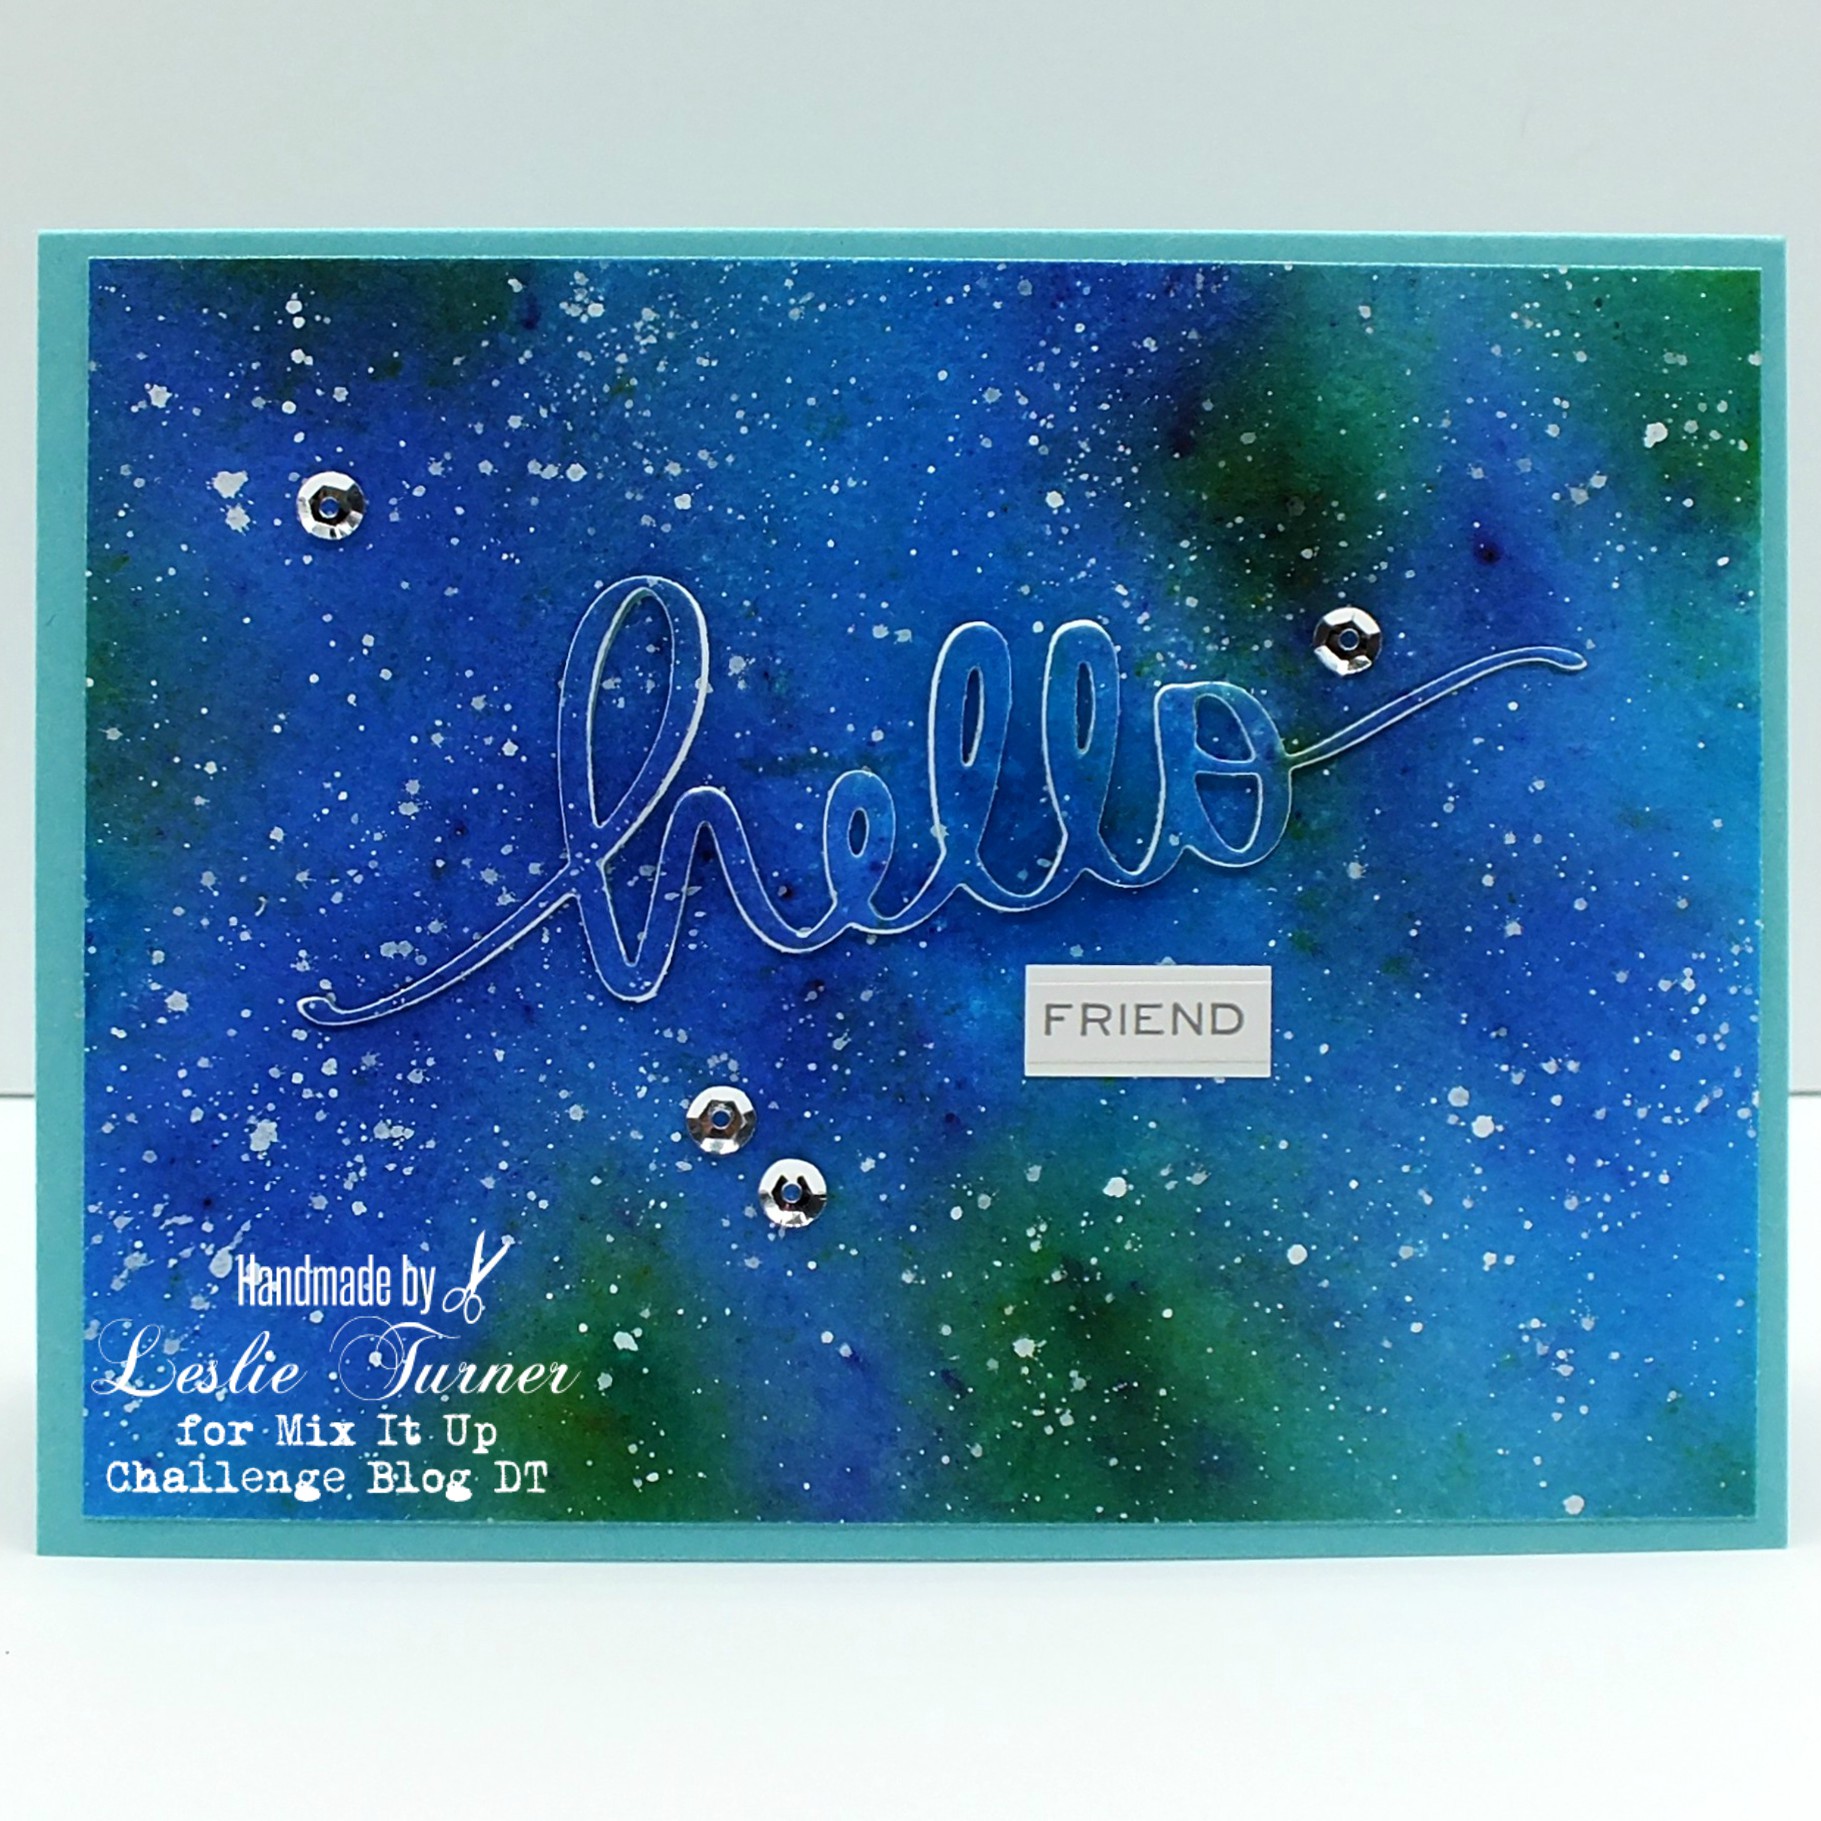
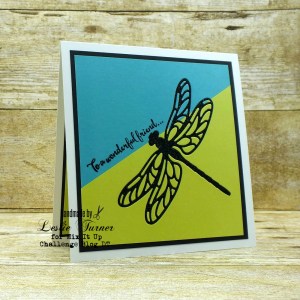
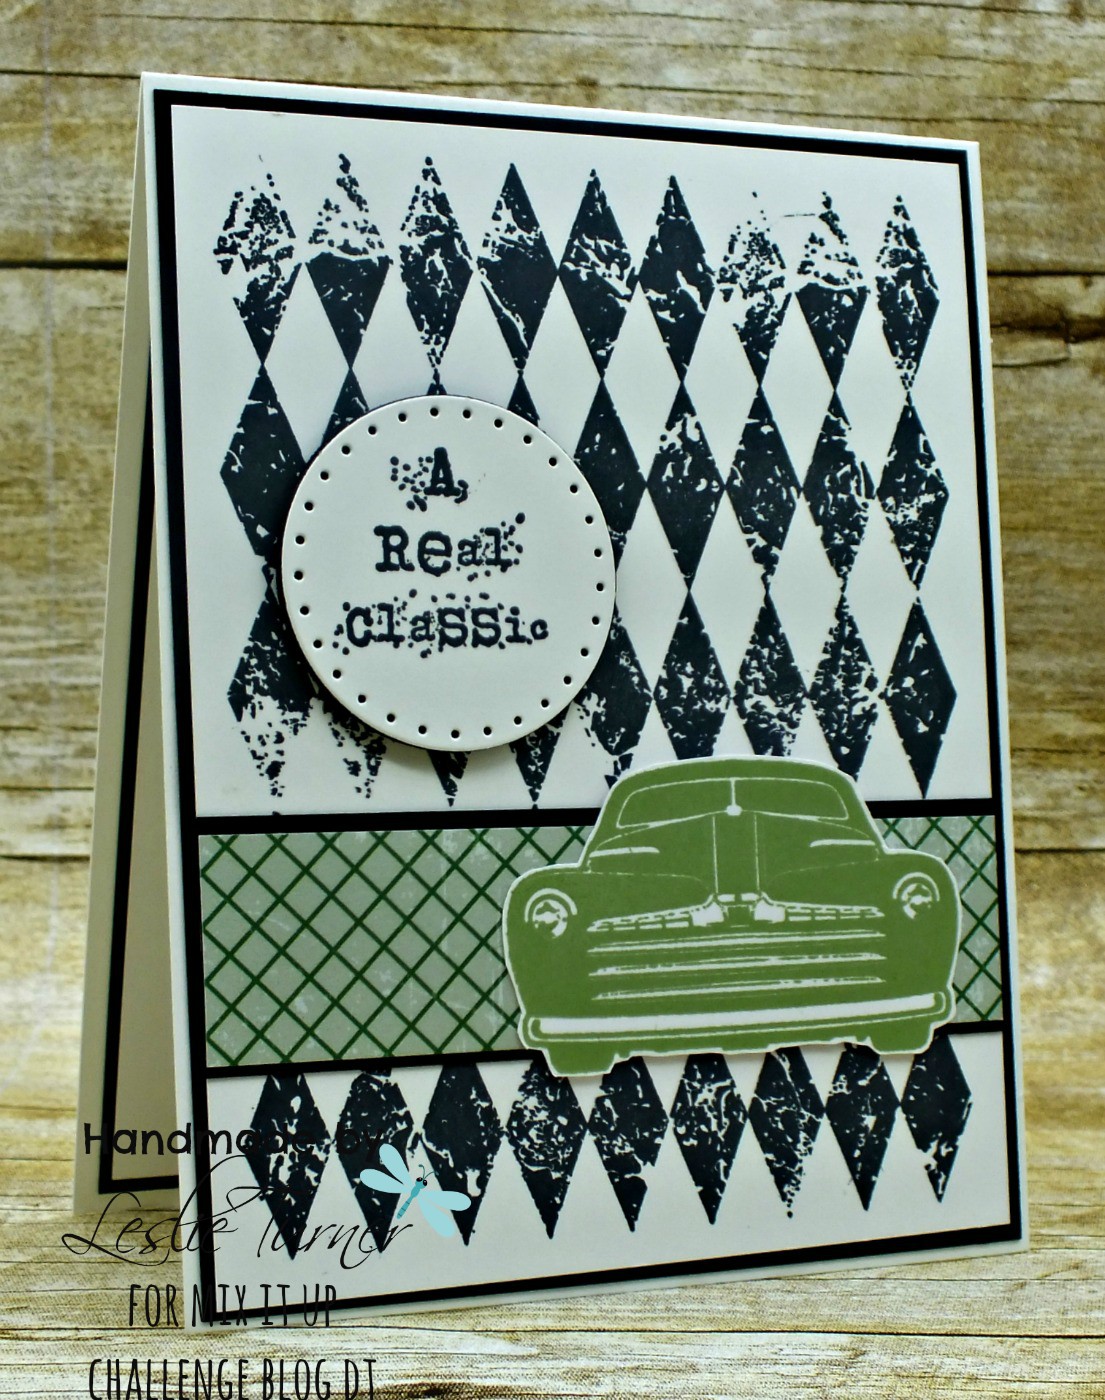
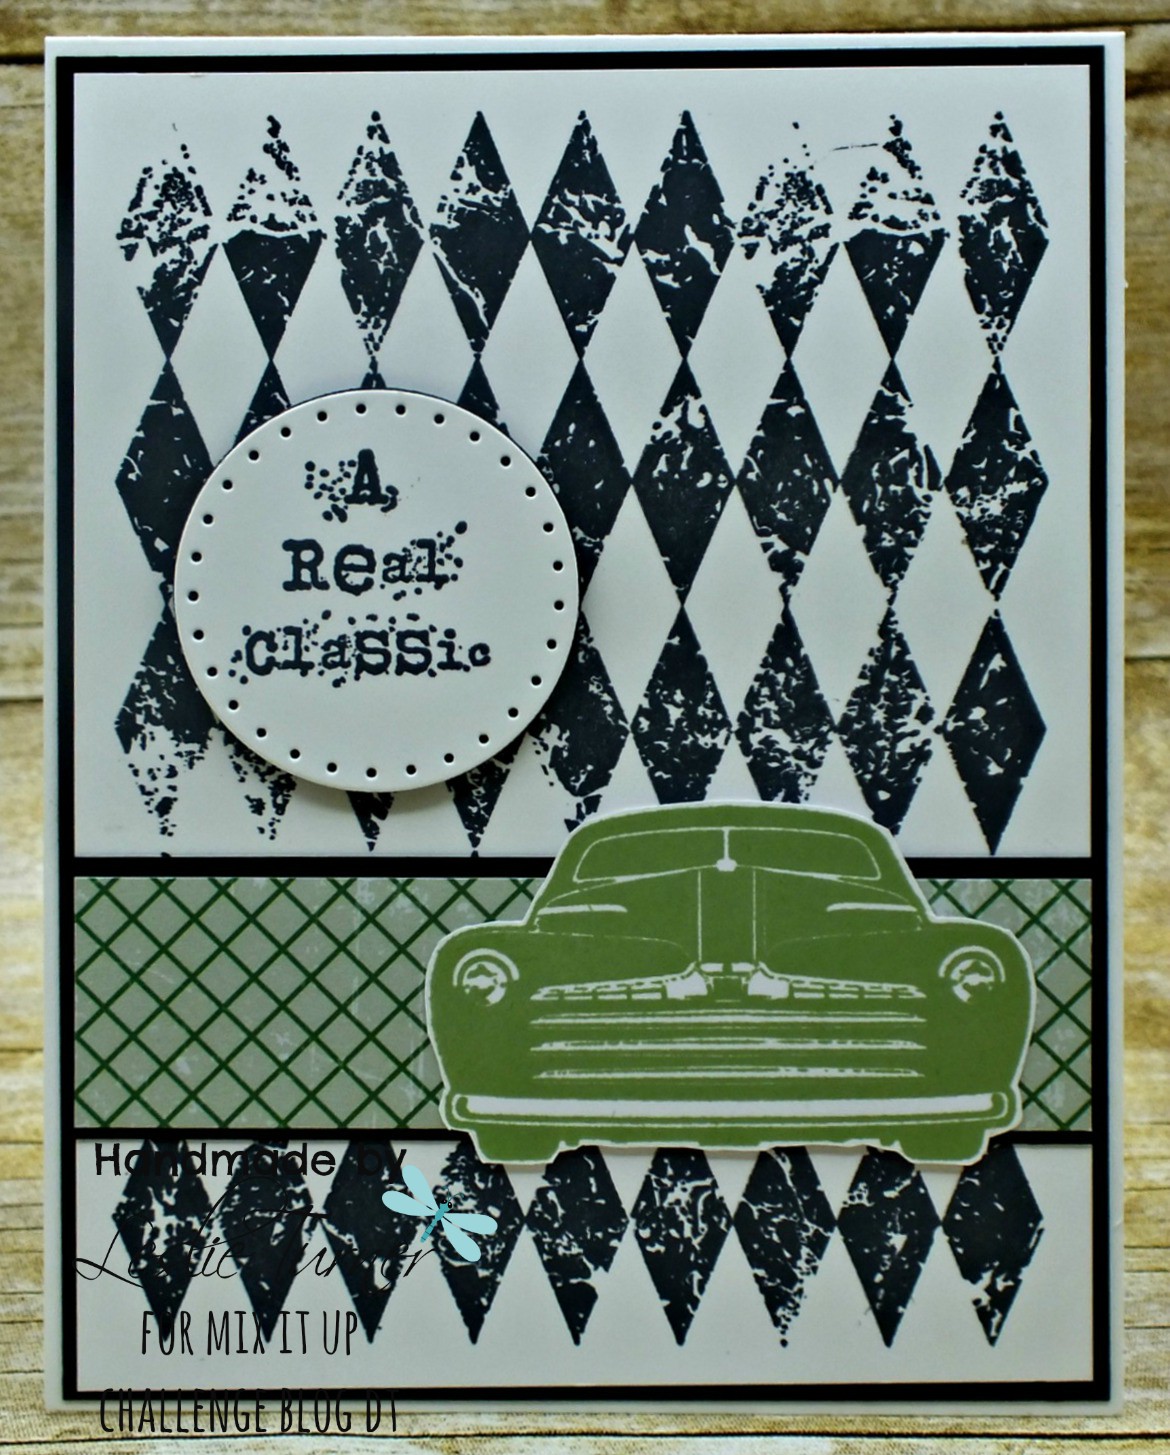
Hi everyone! Happy December 1st! Yay… one of my favorite months of the year! Love December – the sites, the sounds and the smells! Our new challenge is live over at Mix It Up Challenge Blog and I’m stoked to share my DT inspiration project for MIUCB #32 – Anything Goes + Veggie Stamping! Yep, you read that right… let your creativity soar with carrots, green beans, dried beans, lettuce, celery, etc.! I used celery! ;)

2019_0922010a

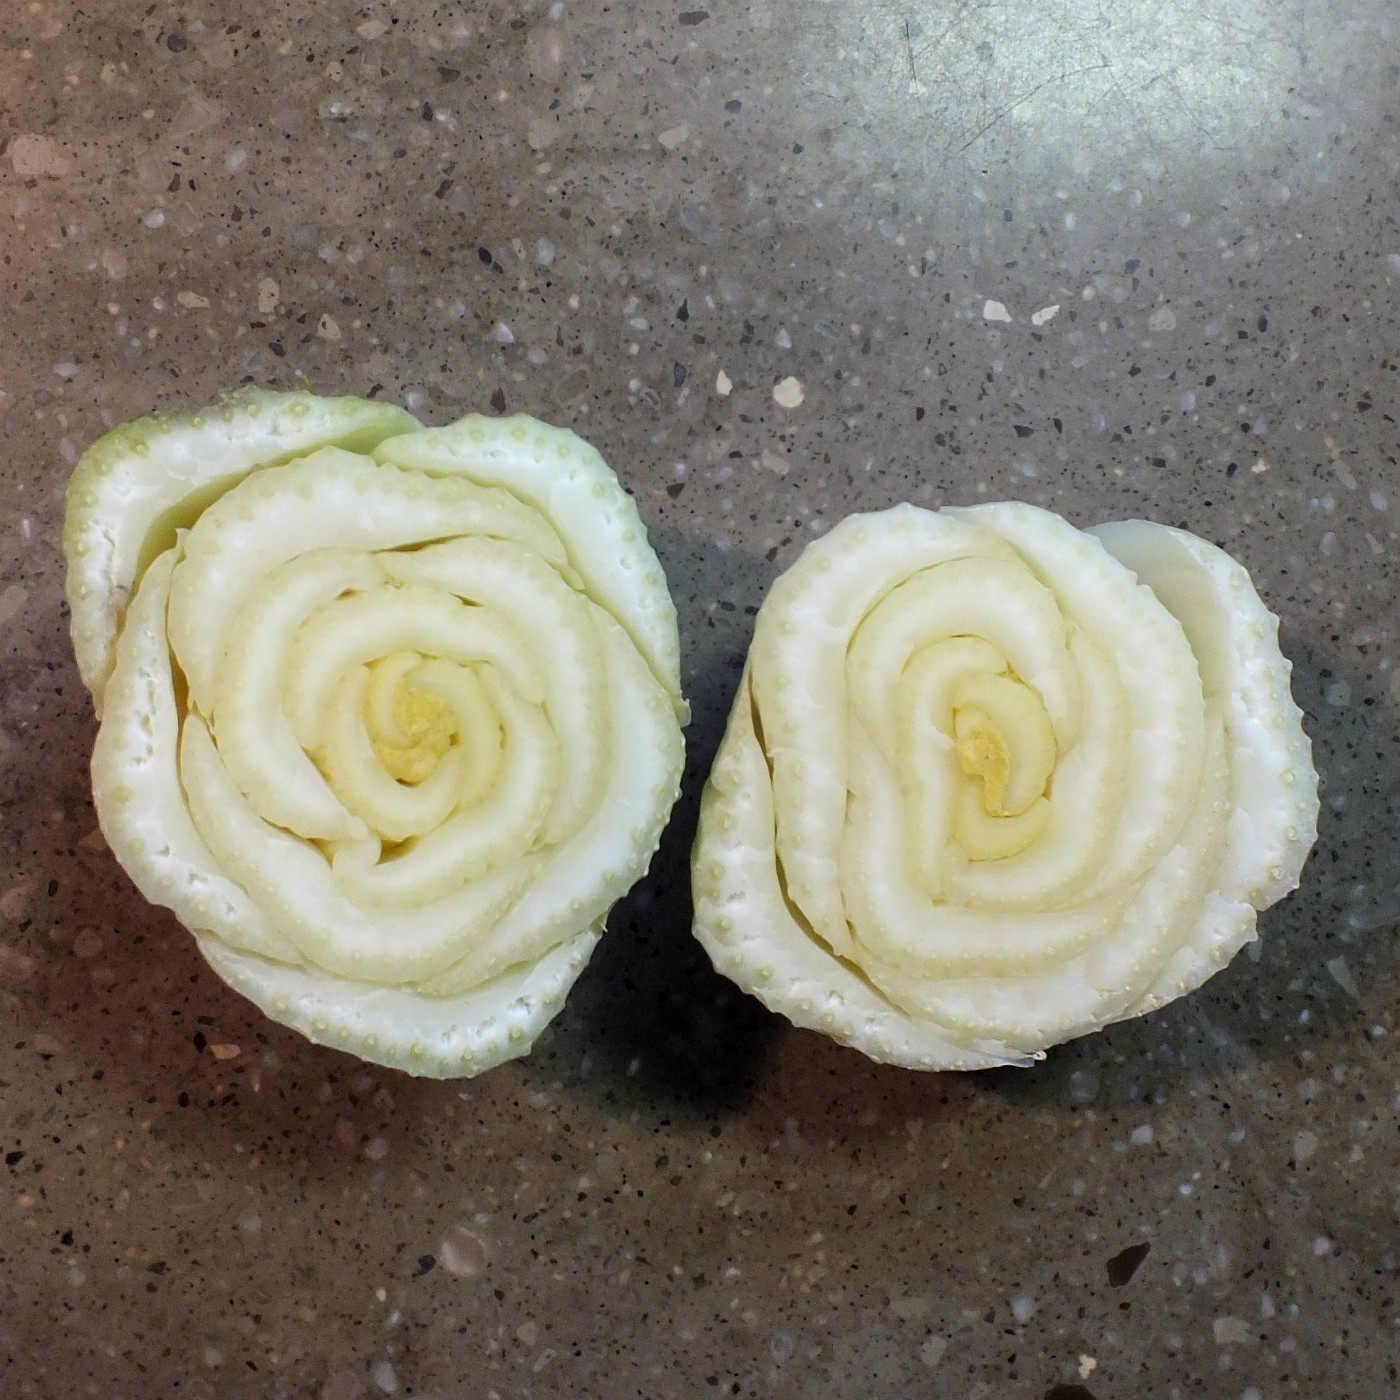
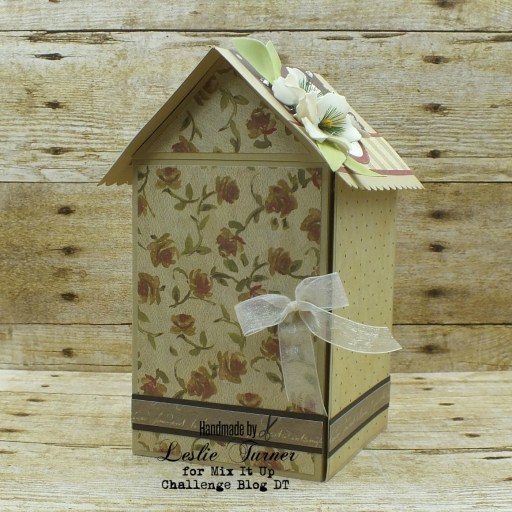
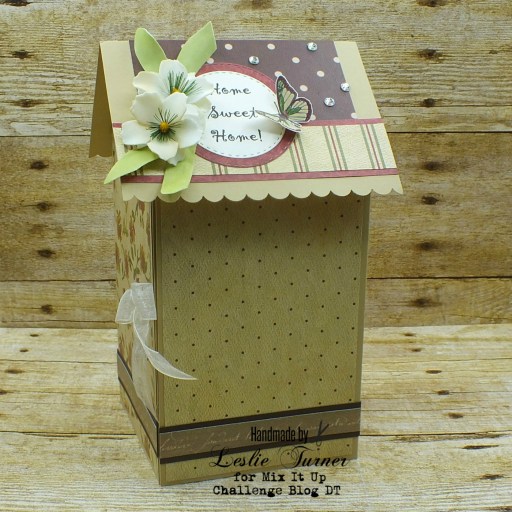
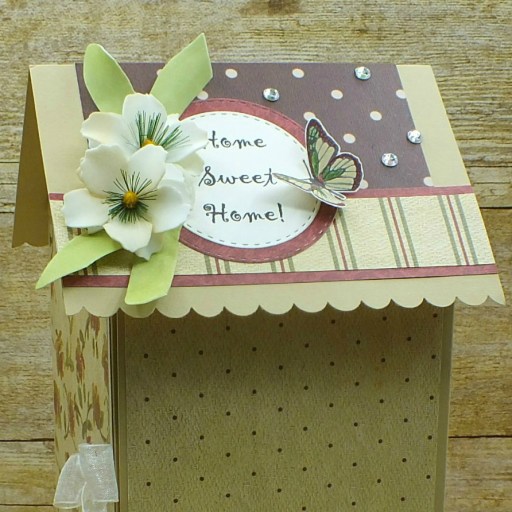
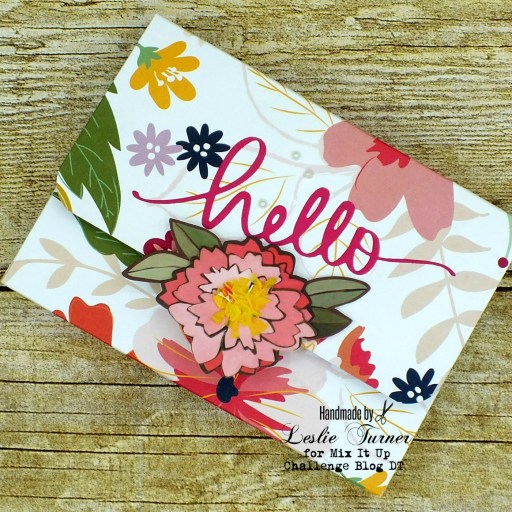
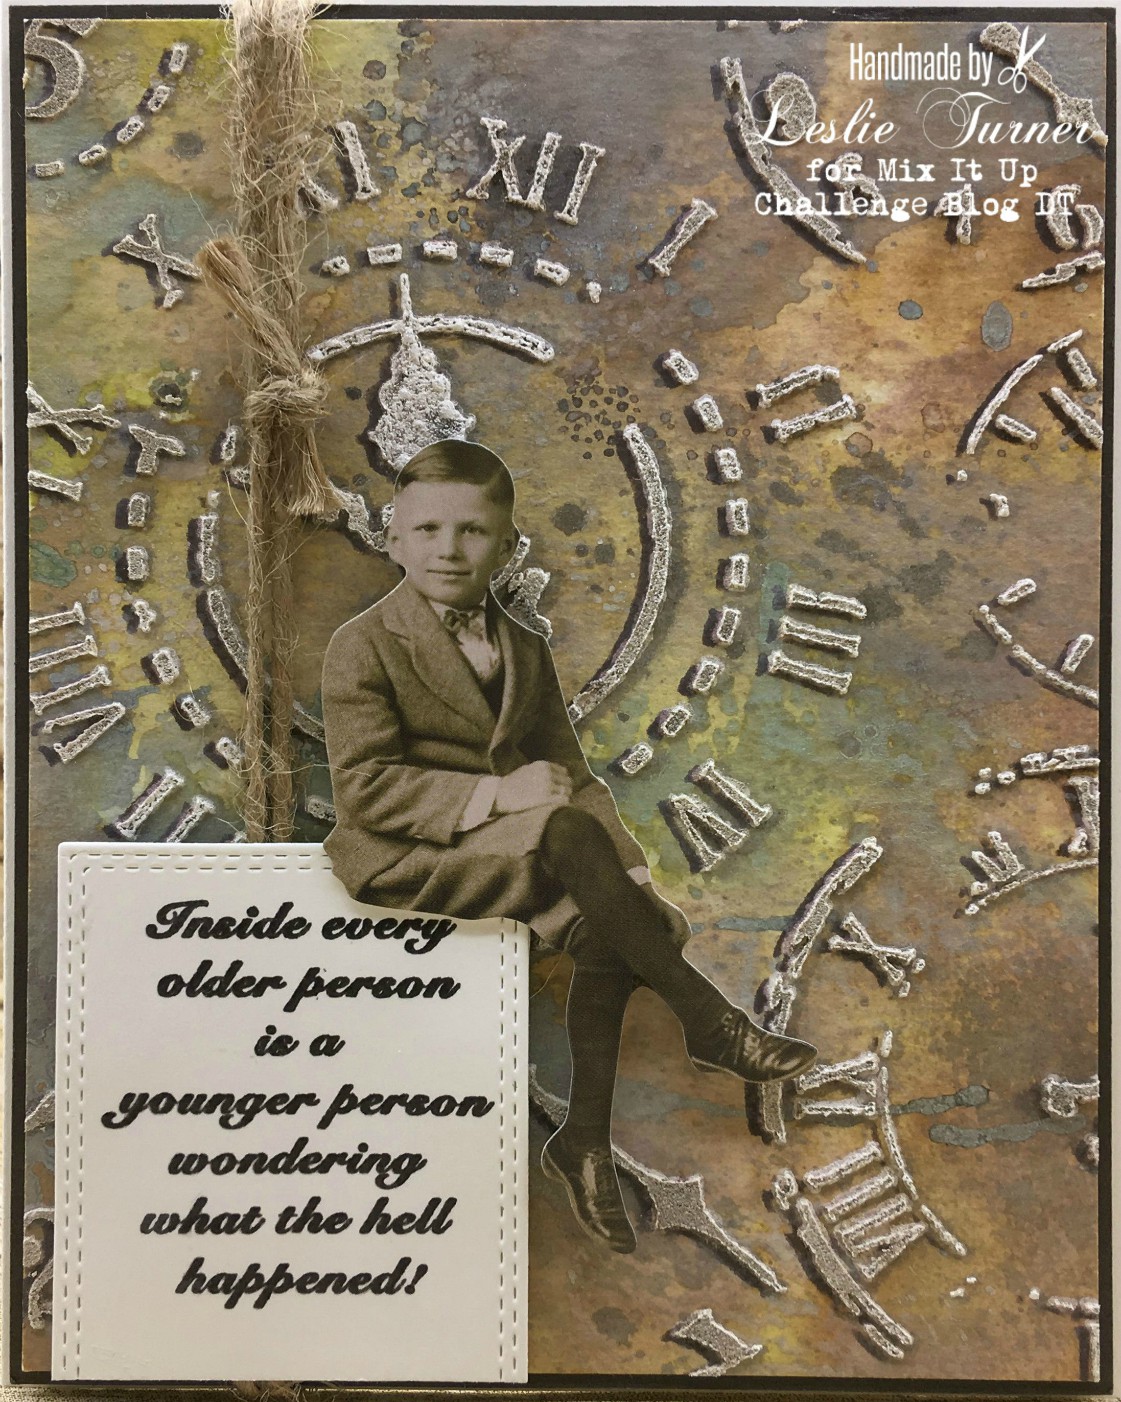
I created roses with the celery. It’s a good thing I had two celery ends, lol! I initially tried acrylic paint but it didn’t work too well so I used the second celery end on ink pads, and that was definitely the ticket – they turned out pretty good! I stamped and watercolored some leaves on each of the roses.

2019_0922011a

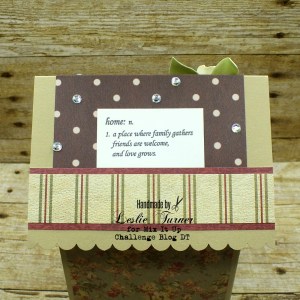
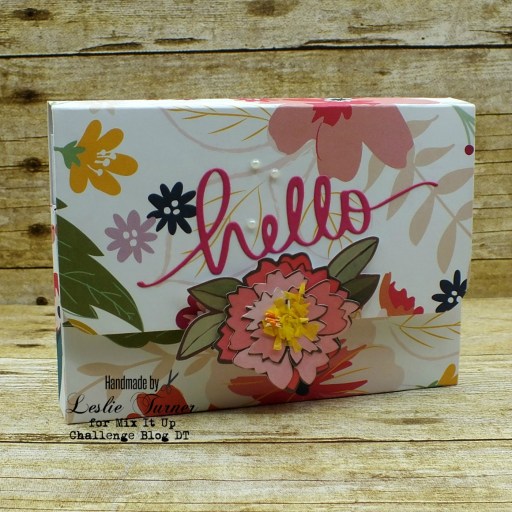
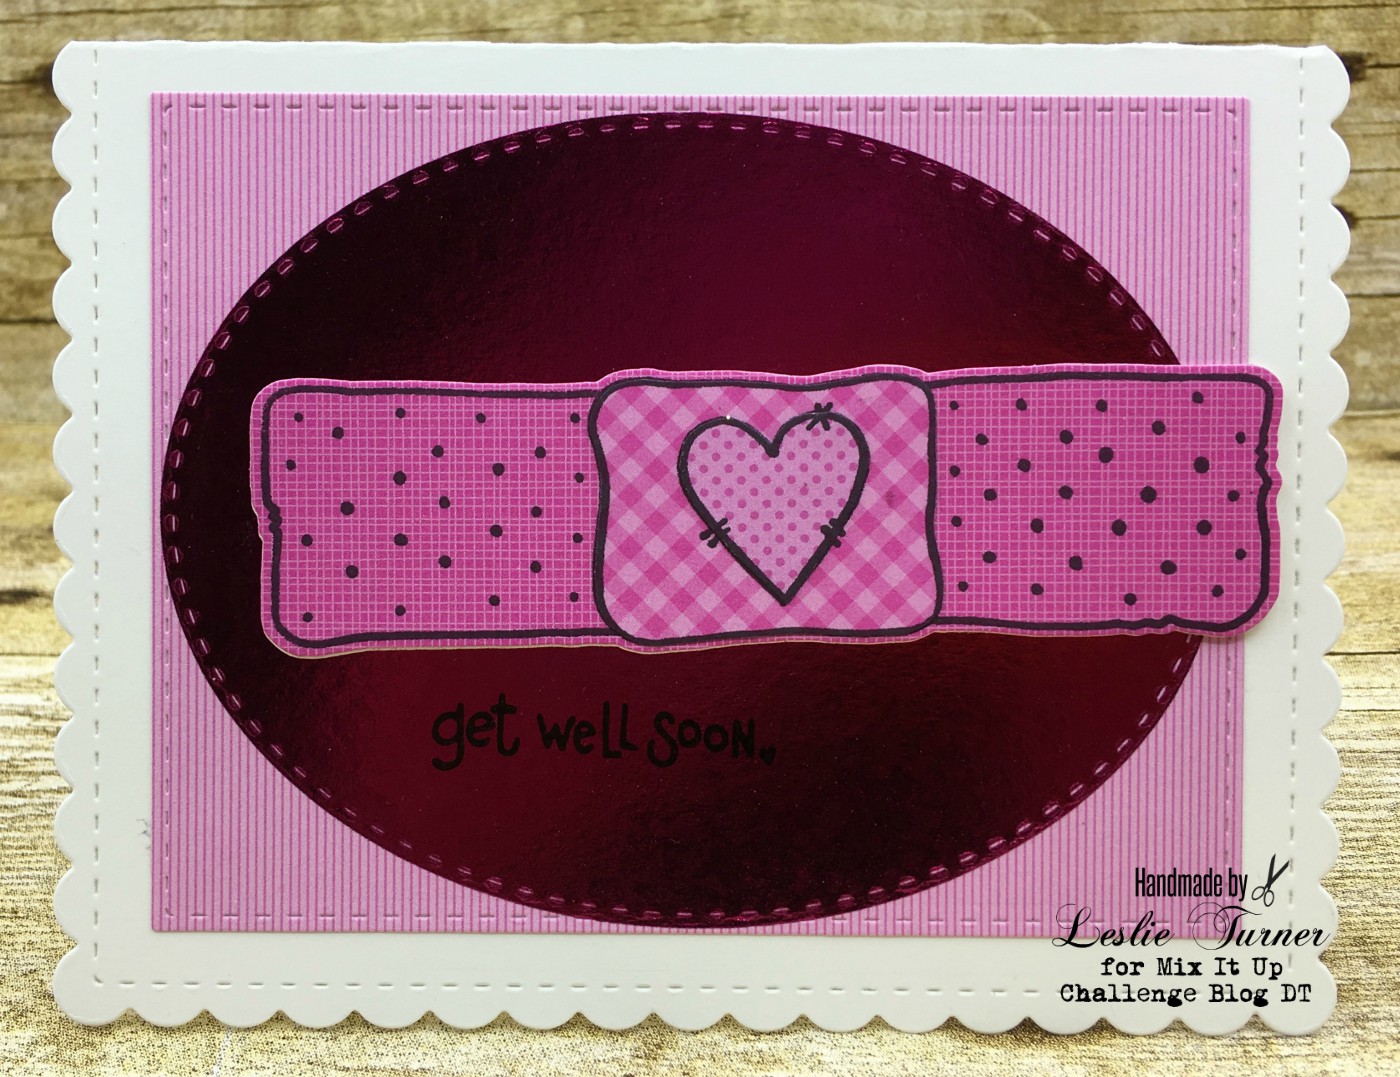
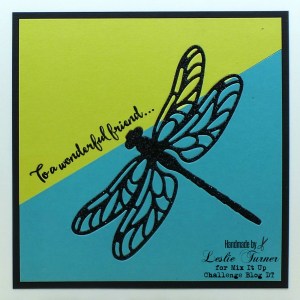
While I had the acrylic paint out, I ‘stamped’ the bottom panel with bubble wrap. After adding the rose panel, I added green glitter and green stripe Washi Tape at the seam, and stamped the sentiment across the bottom.

2019_0922012a

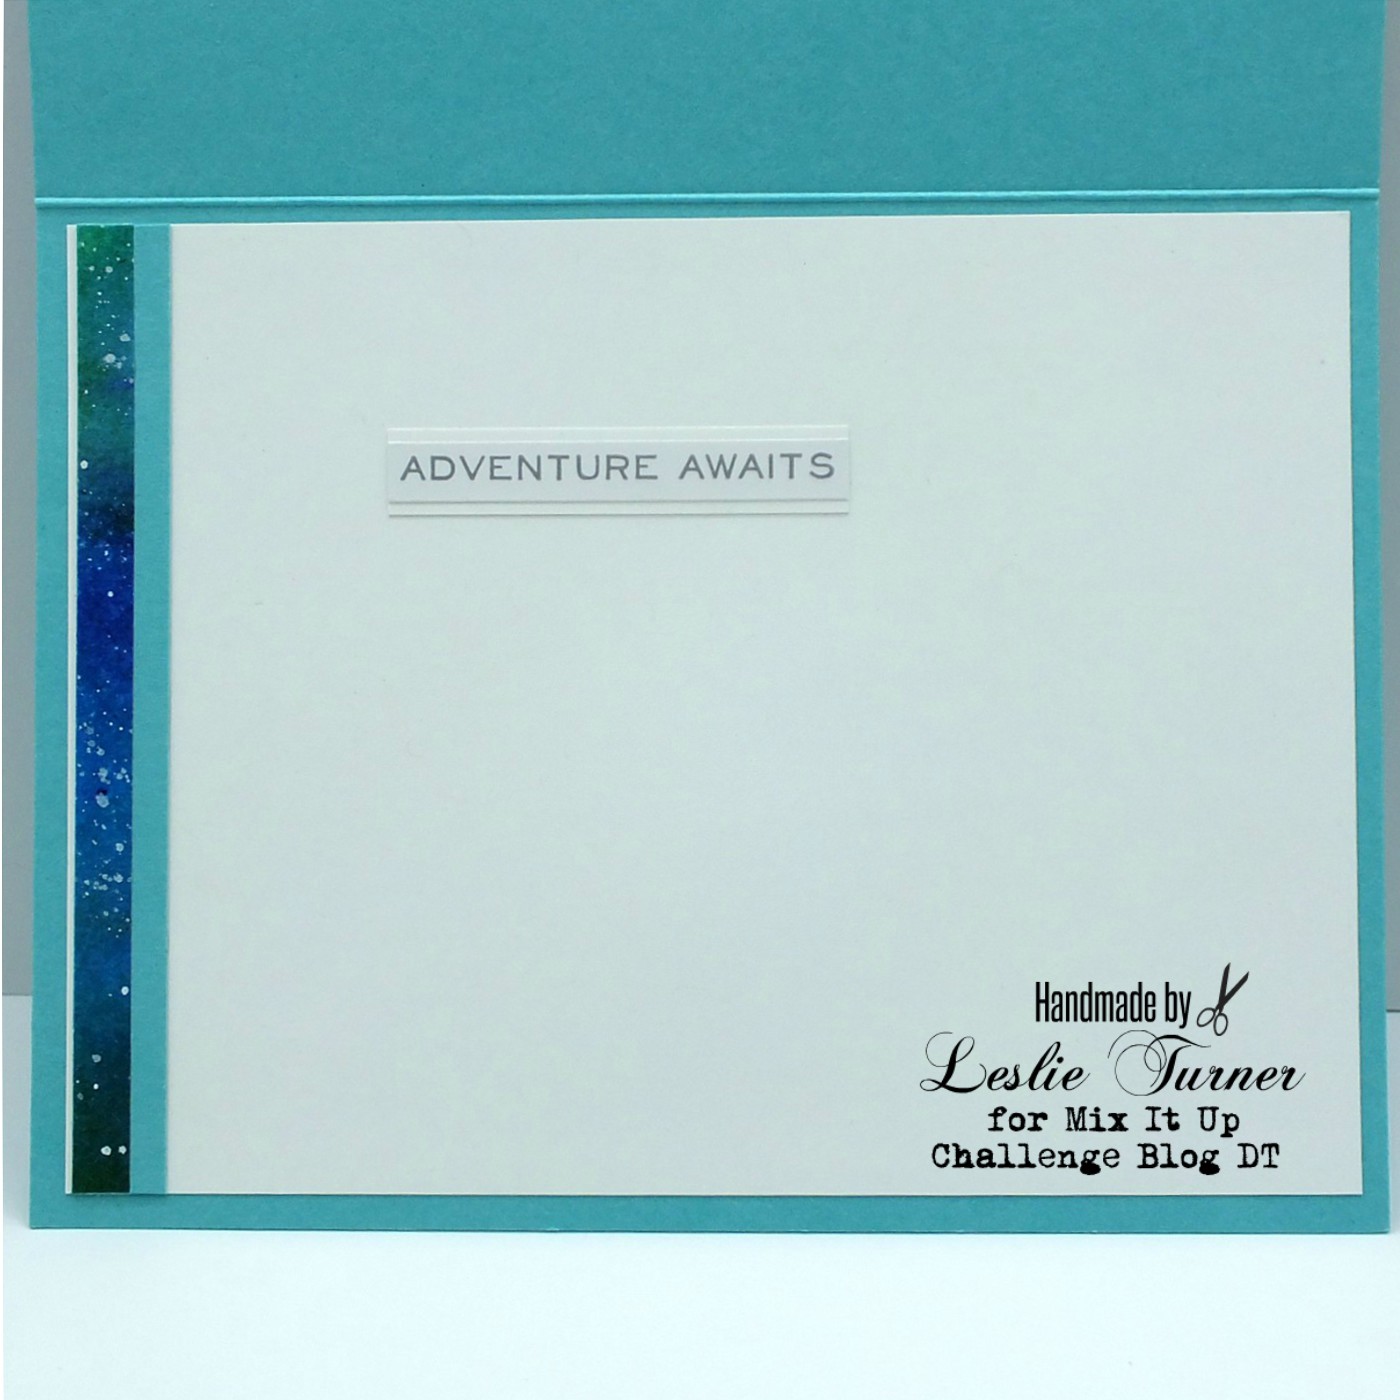
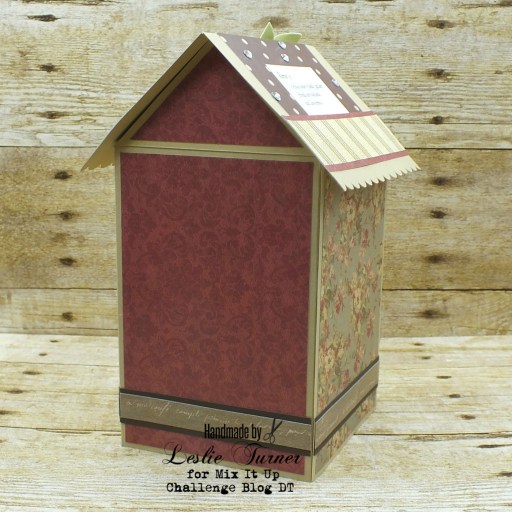
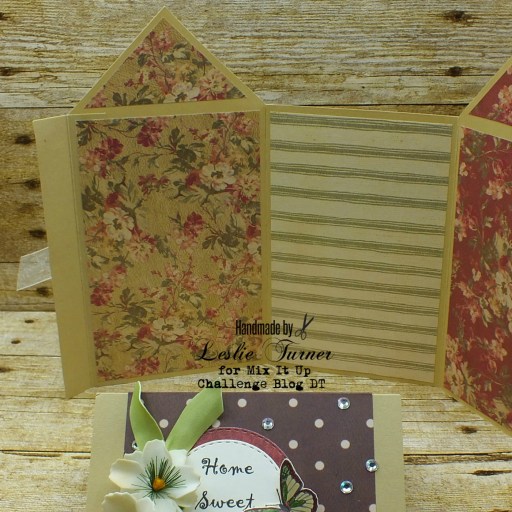
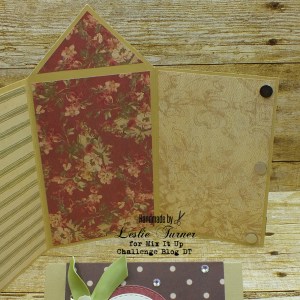
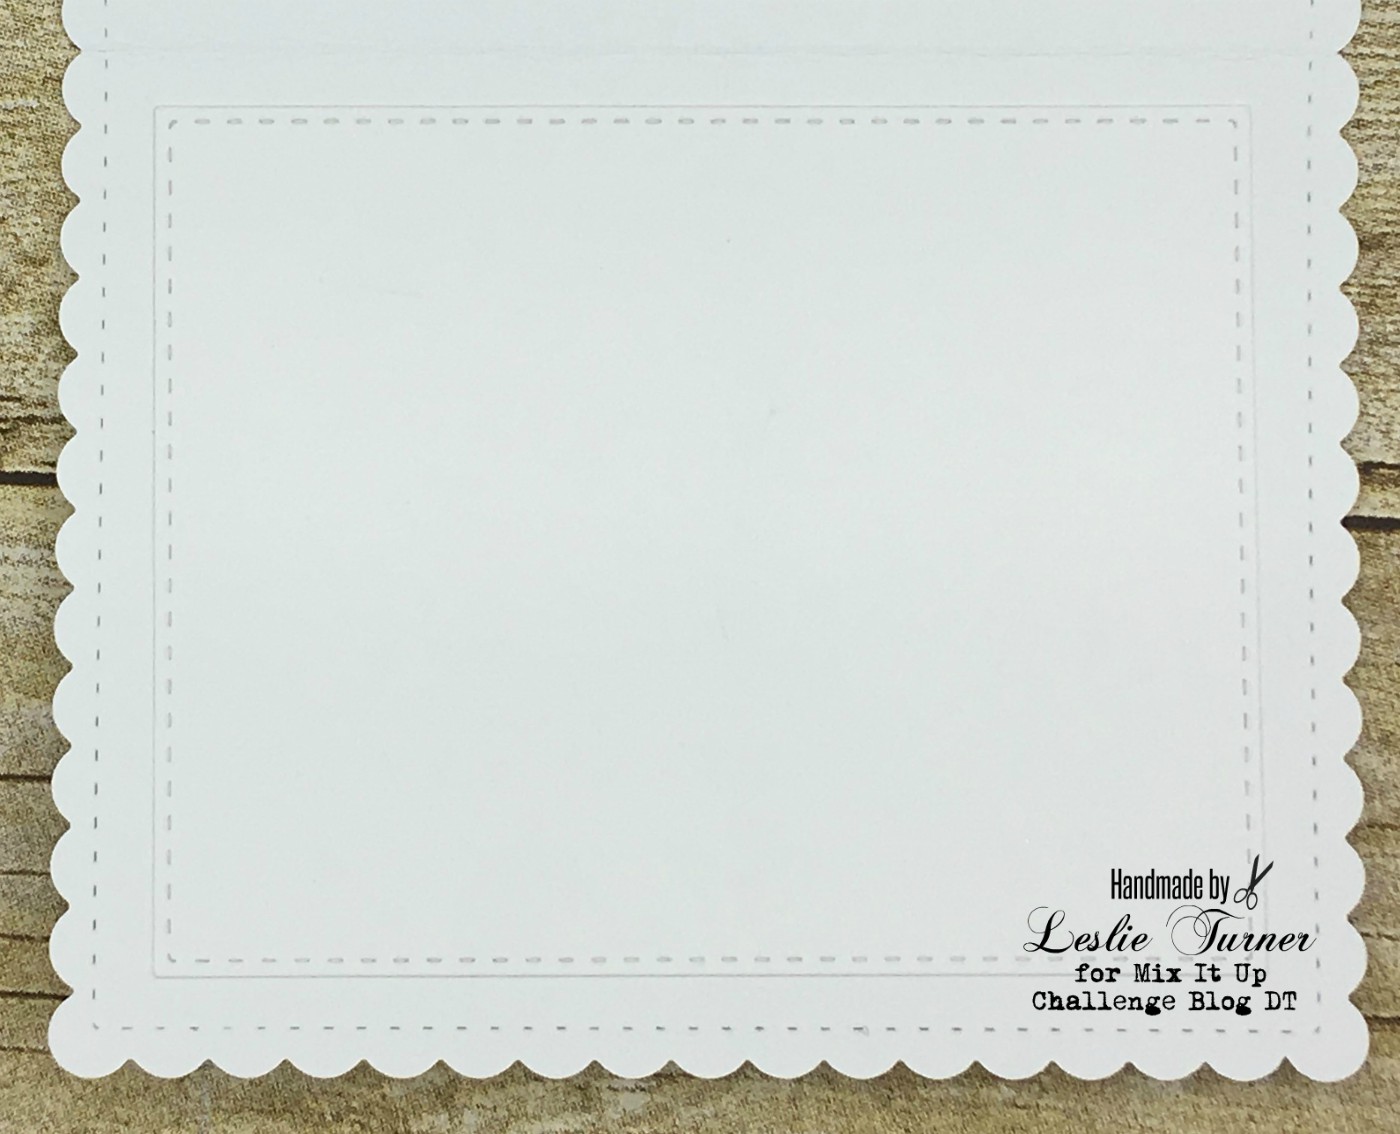
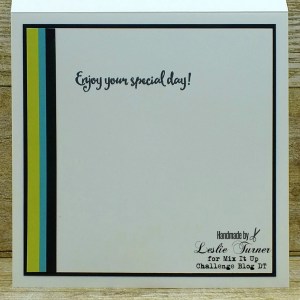
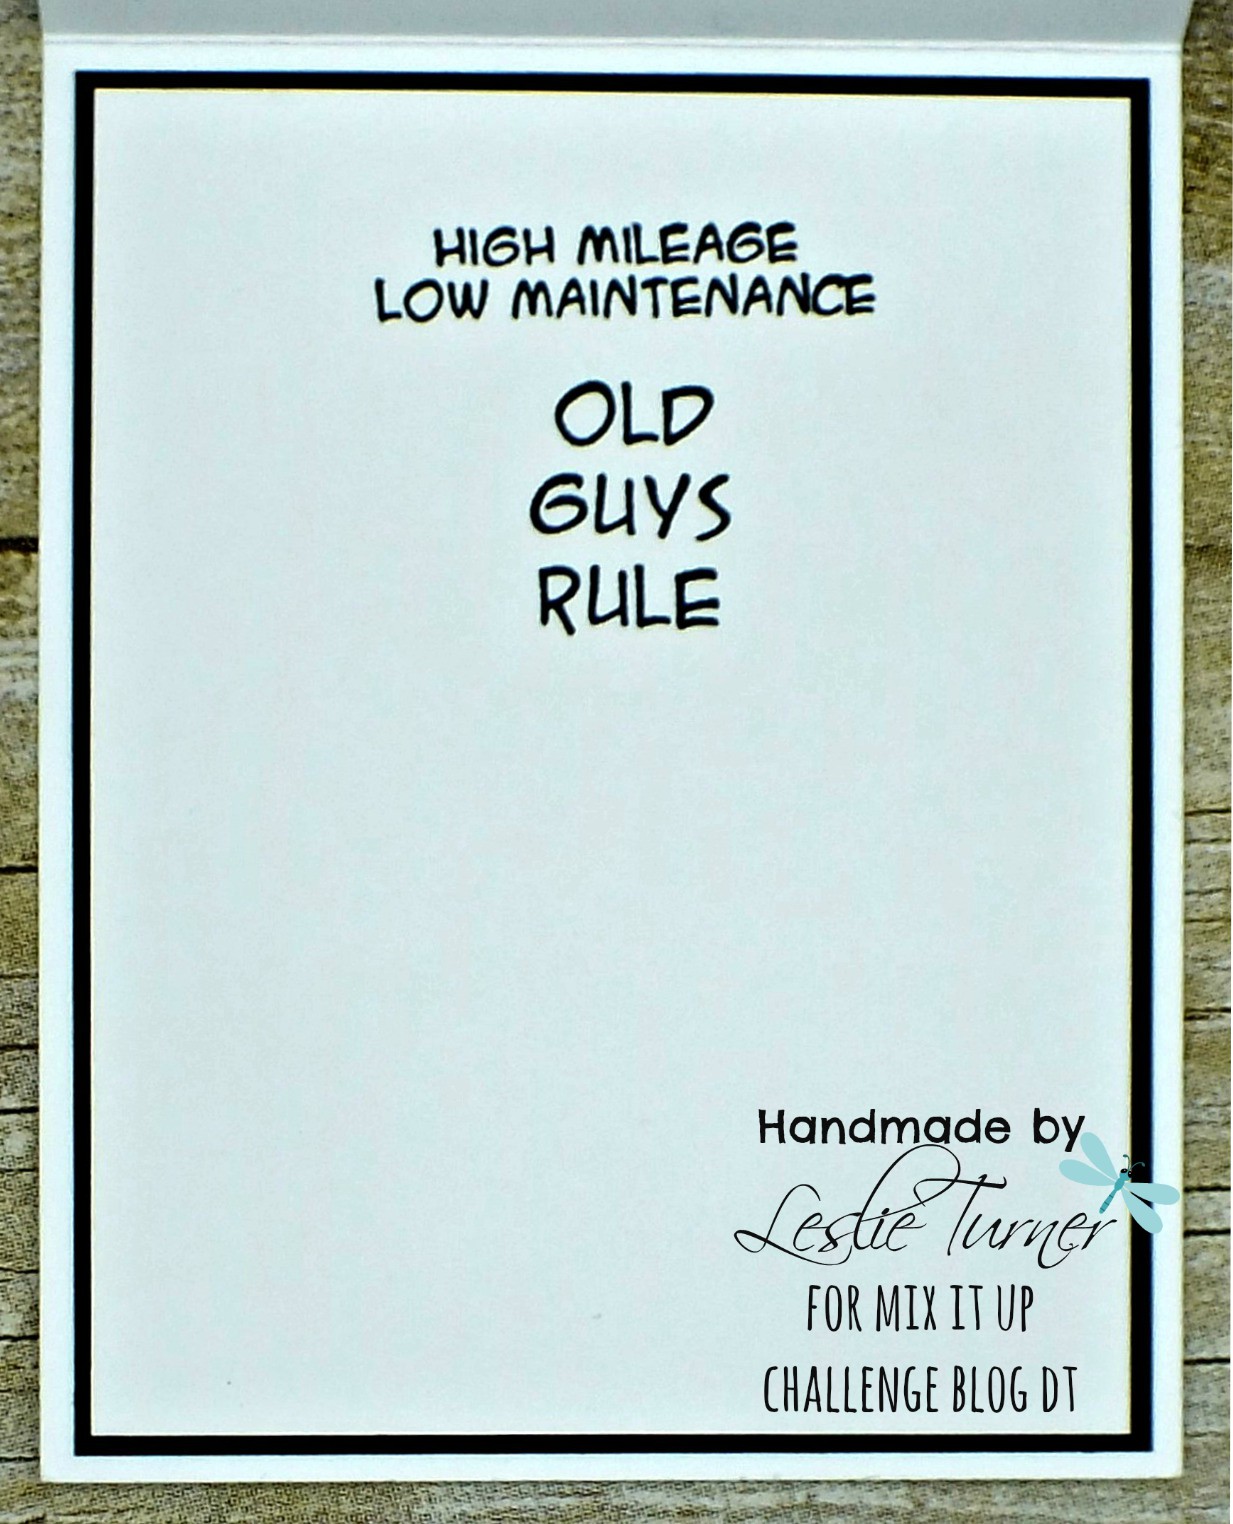
I embellished the inside panel with a leftover piece of the celery-stamped rose panel and some of the Washi Tape, and then stamped the simpel sentiment.

2019_0922013a

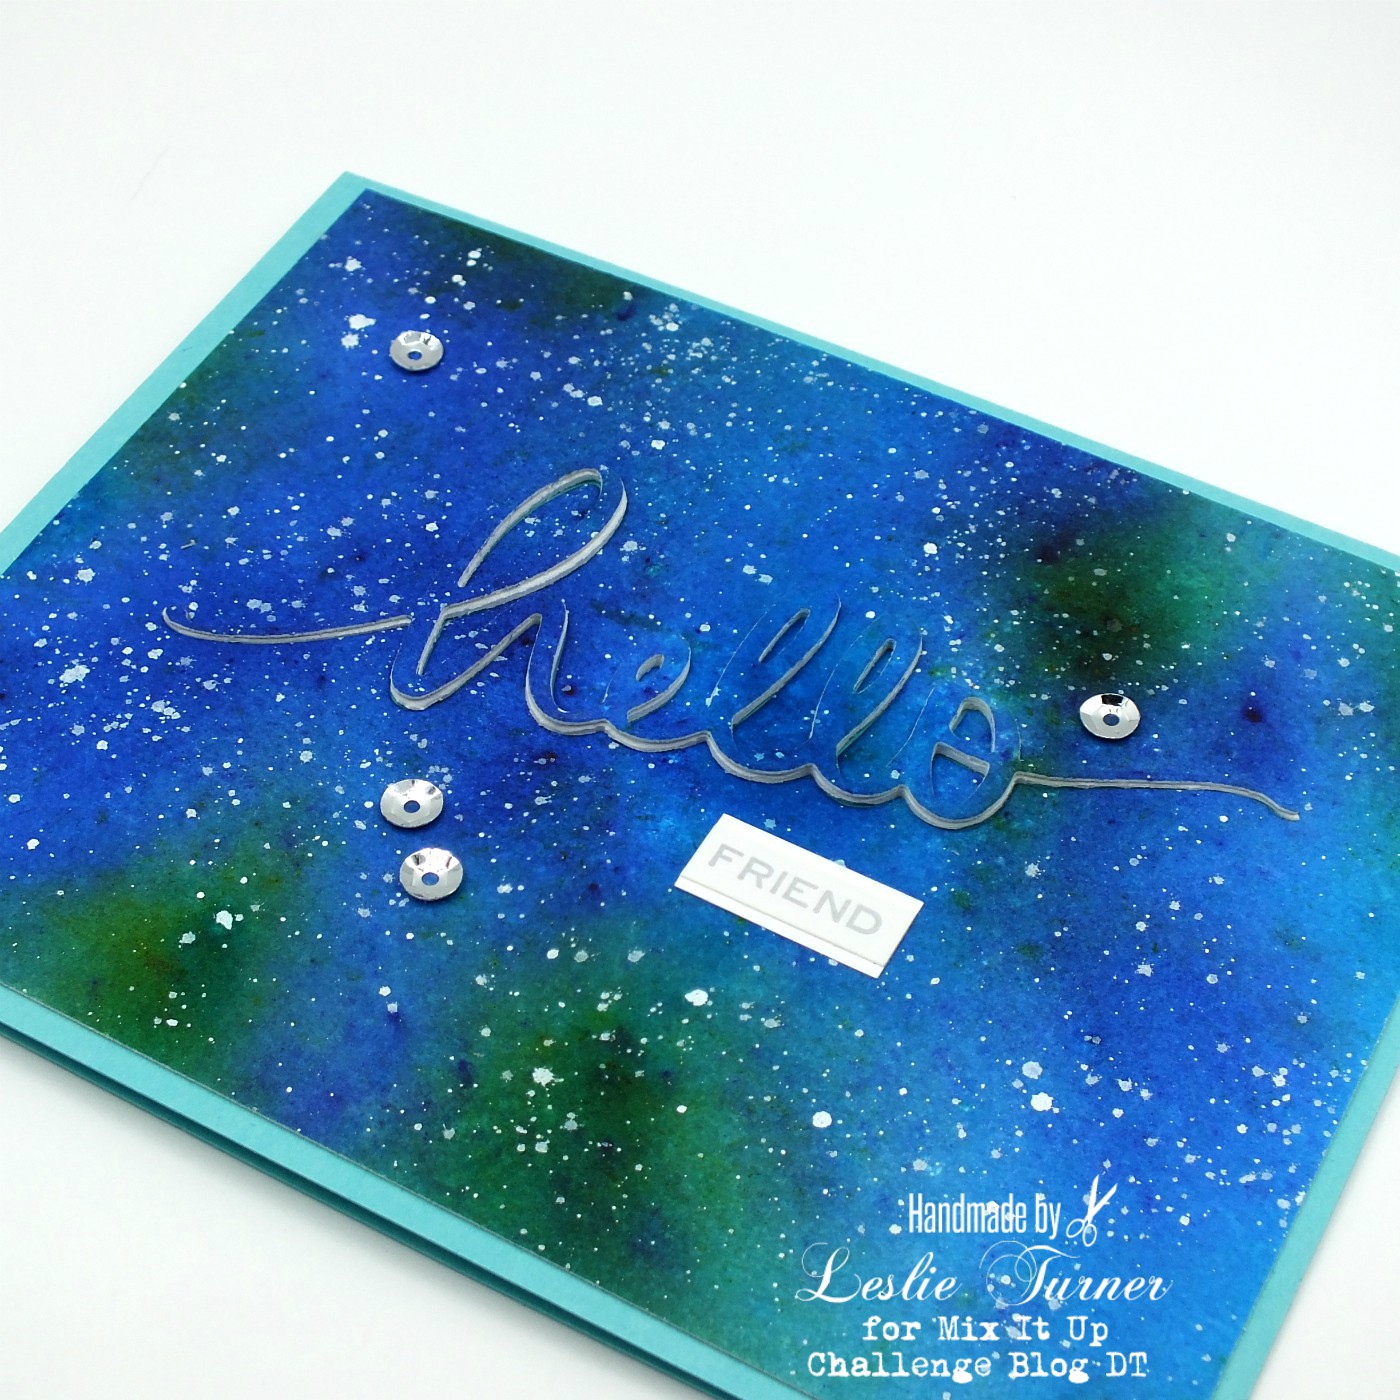
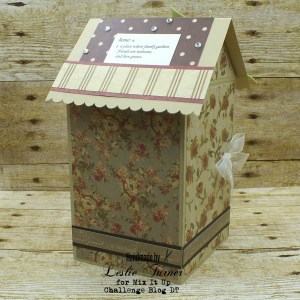
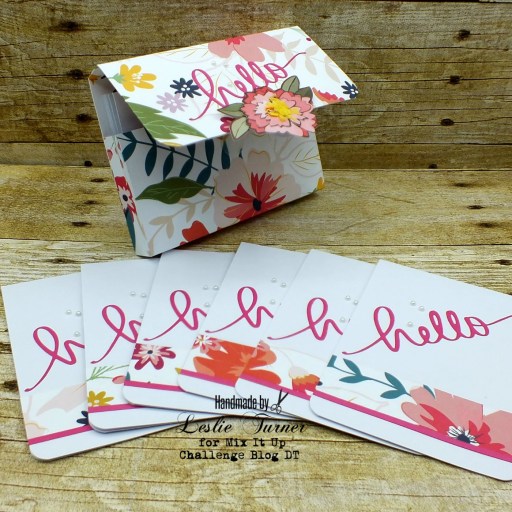
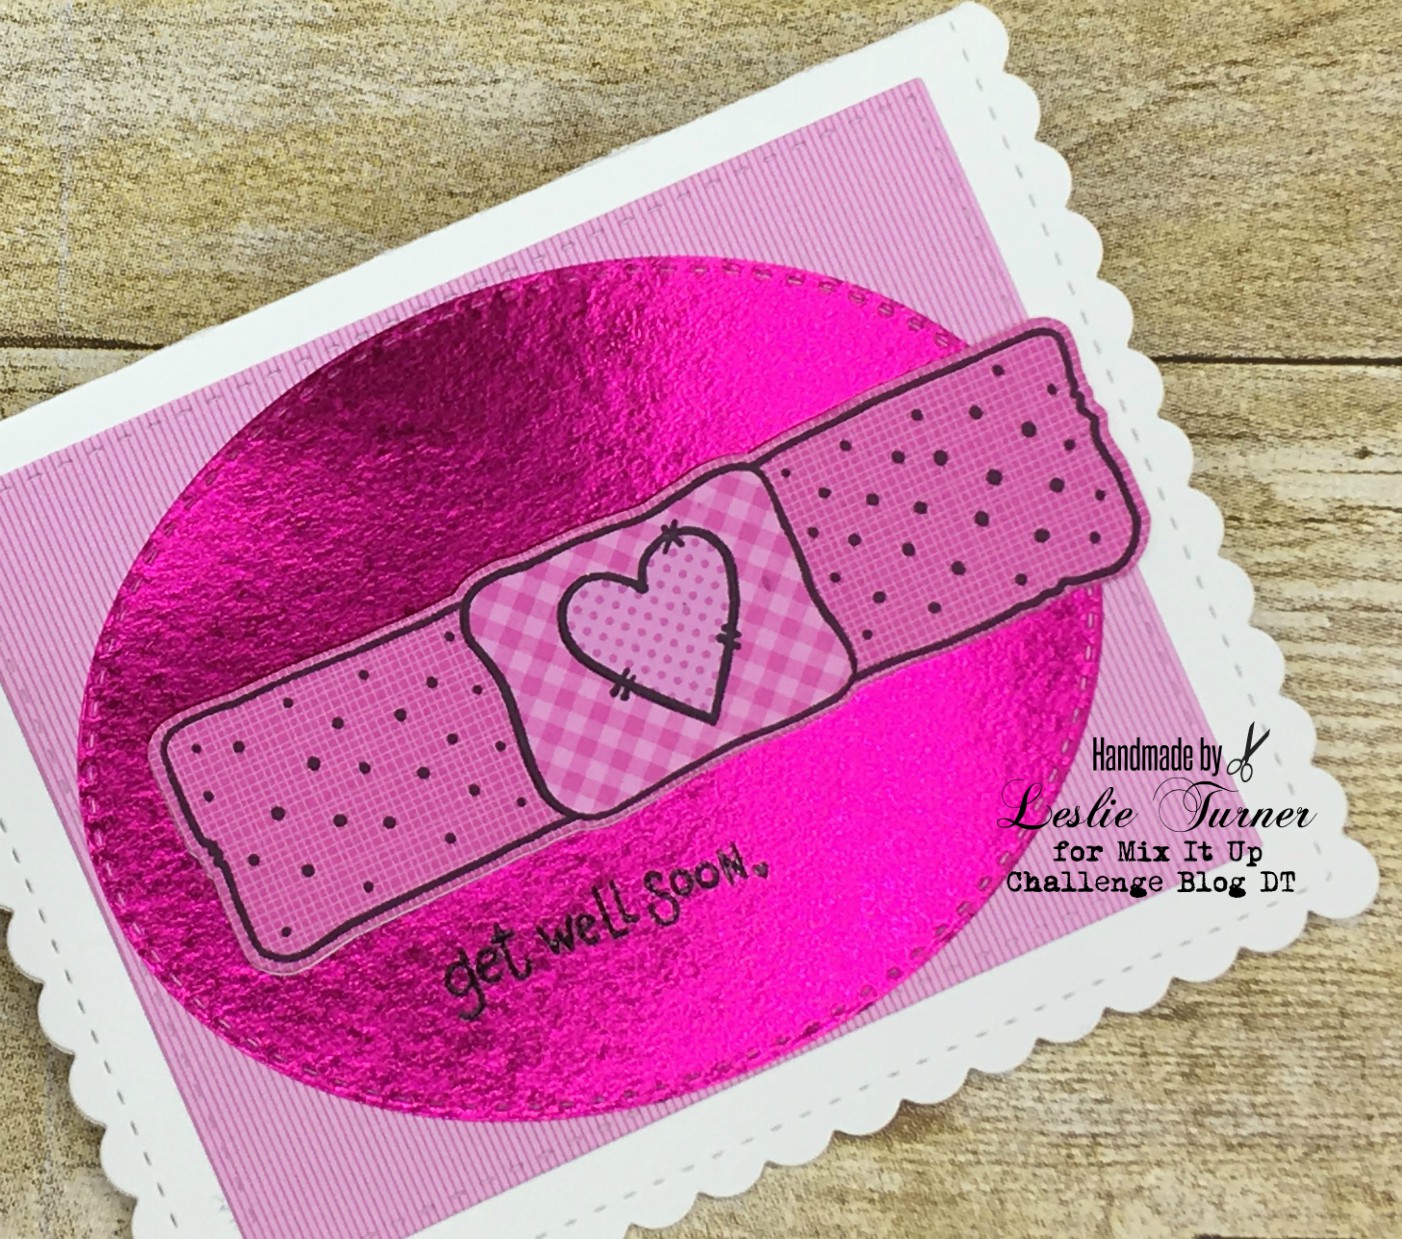
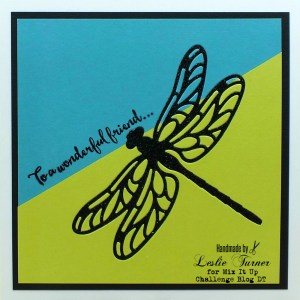
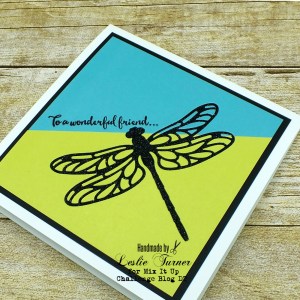
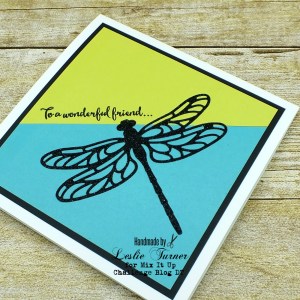
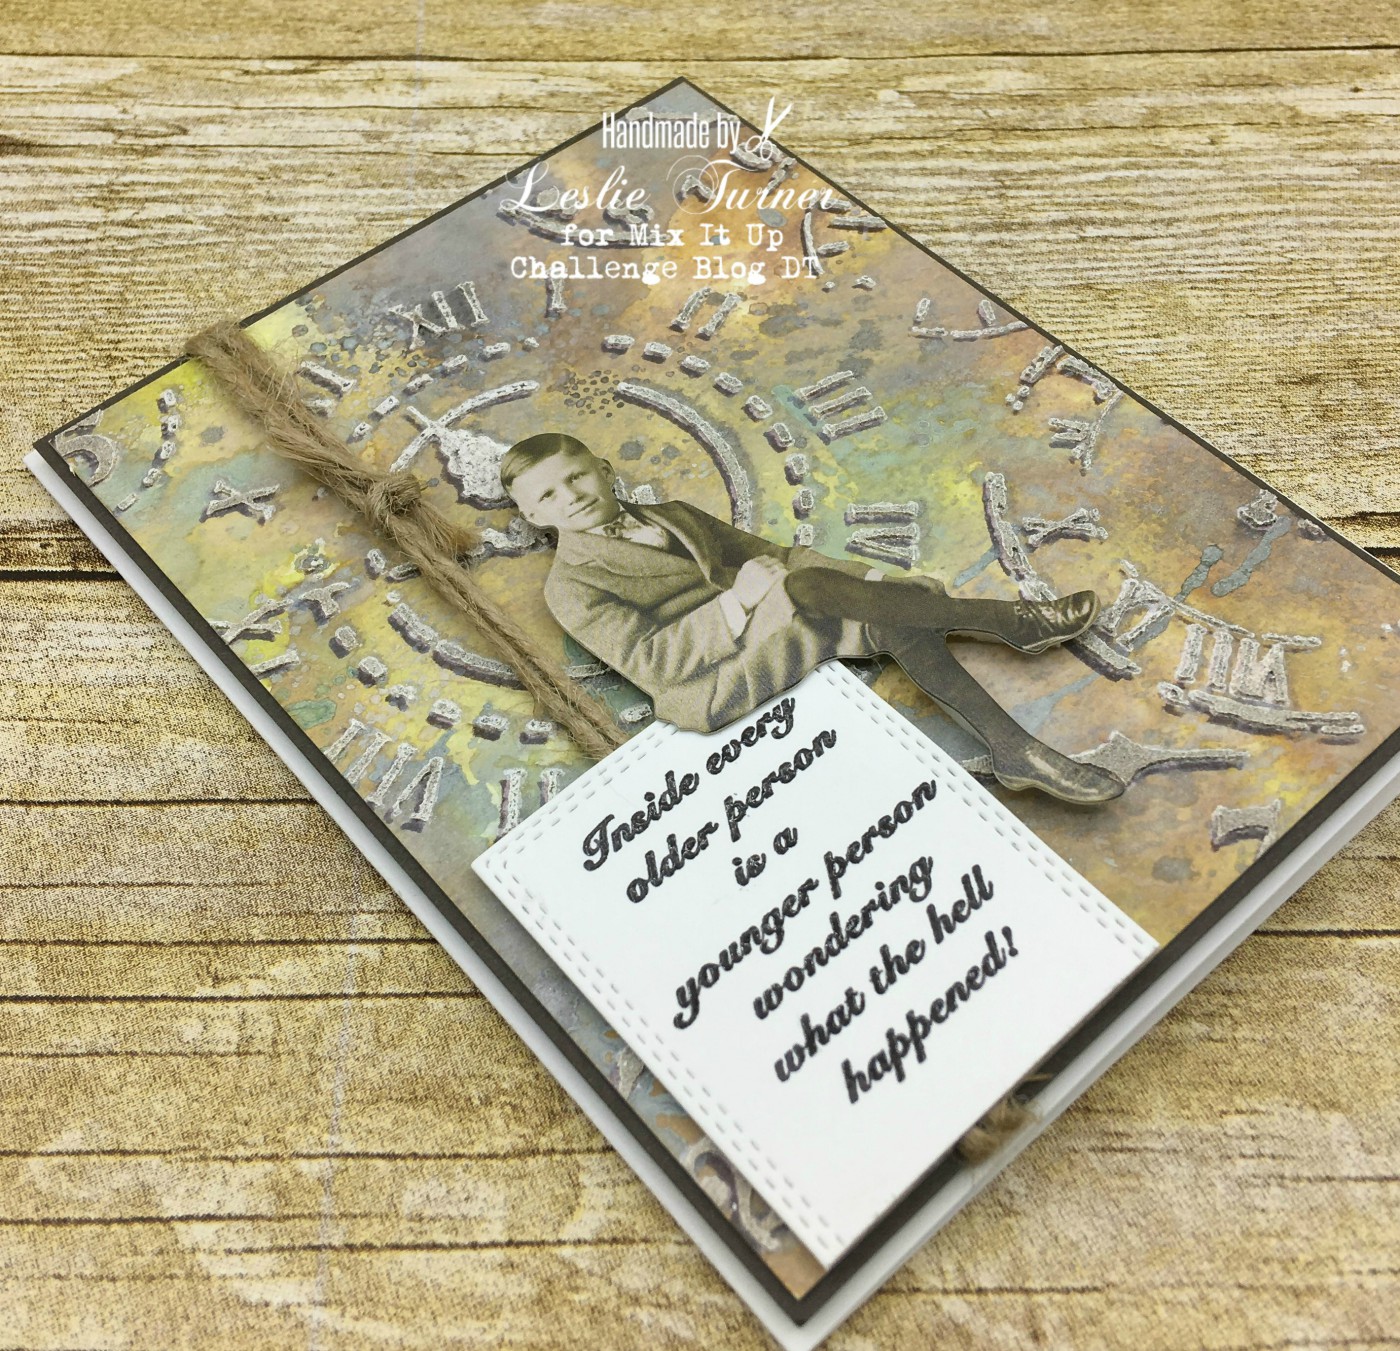
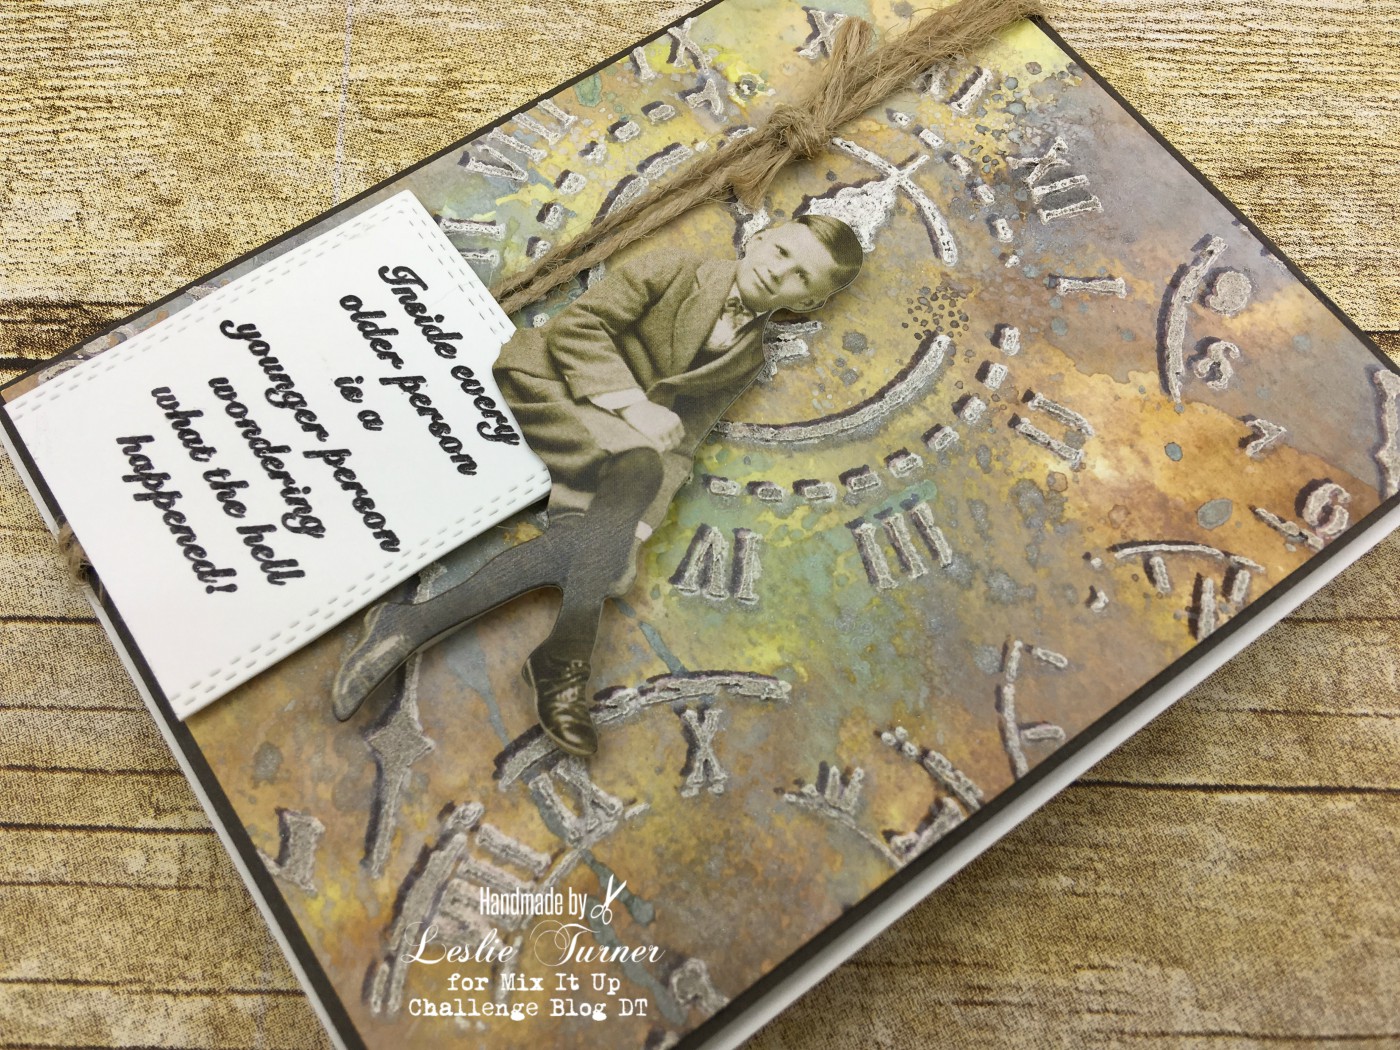
Here’s one more peek… I absolutely LOVE how this turned out! This was definitely a fun challenge!

2019_0922014a

Proud to enter this fun veggie-stamped card into the following challenges:
A Bit More Time To Craft Challenge: #105 – Anything Goes
A Perfect Time To Craft Open Challenge Blog: #12 – Anything Goes
Addicted To Stamps Challenge: #179 – Anything Goes
Arty Divas: #9 – Anything Goes
Classic Design Team Challenge Blog: #12 – Anything Goes
Crafty Cardmakers: #246 – No Patterned Paper
Crafty Friends: #124 – Anything Goes
Through The Craft Room Door: Anything Goes Week of 11/26/19
Word Art Wednesday: Weeks #414/415 – Anything Goes
Your Scrapbook Place: December Anything Goes

Products used:
Cardstock/Paper: Stampin’ up thick and regular Very Vanilla and Berry Burst cardstock
Stamps: Stampin’ Up What I Love stamp set
Ink: Stampin’ Up Berry Burst, Sugarplum and Garden Green ink; Ranger botanical alcohol ink, Studio yellow pastel acrylic paint
Accessories:  MISTI stamp tool, bubble wrap, Kuretake water brush, Peachy Cheap green glitter Washi Tape, Me & MY Big Ideas green and white striped Washi Tape

I hope you’ve enjoyed today’s project and will link up an ‘anything goes’ project with us this month! Why not go one step further and play the twist with us… stamping with a veggie! We’d LOVE to see what you create! Thanks so much for stopping by today – we’ll see you again soon! ;)

Scrappy hugs,
lesliesig

hello Friend

Hi everyone! Happy Friday! It’s November 1st and this month’s challenge is live over at Mix It Up Challenge Blog! I’m super stoked to share my DT inspiration project for MIUCB #31 – Anything Goes + Watercoloring. All of our challenges are ‘anything goes’ and we offer a technique twist each month to inspire you, and the twist is not required to play. This month the twist is watercoloring and it can be the background, the focal image or some other part of your project. I created a gorgeous and very vivid background using turquoise, blue and green Brushos spritzed with water. This is my first project with a raised inlaid die cut sentiment that I’m calling ‘phantom die cutting.’ This is actually a pretty fun technique where you die cut into your background and then again on foam, adhere the foam die cut into the negative space, and then adhere the flat background die cut on top of the foam. This yields a very cool raised effect!

2019_0813009a

After creating the background with Brushos and drying it with my heat tool, I spattered white ink with a fan brush. I then die cut the sentiment at an angle and adhered a white foam die cut in the negative space, then adhered the flat die cut on the foam. I adhered the ‘friend’ sentiment under the die cut and then a few sequins. My hubby came into my studio while I was deciding on the color of sequins and suggested going with silver, so that’s what I did. ;)

2019_08130010a

I embellished the inside panel with leftover strips from the watercolor background and the turquoise card base. The inside sentiment (as well as the one on the front) is a Tim Holtz Quotations sticker which I layered on white cardstock.

2019_08130010aa

And one more look… I’m in love with this watercolor background! And I need to do this ‘phantom die cutting’ technique more often – I love how it looks!

2019_08130011a

I’d love to enter this card into the following challenges:
A Perfect Time To Craft Open Challenge: #11 – November Anything Goes
Brown Sugar Challenge Blog: #295 – Anything Goes
Classic Design Team Challenge Blog: #11 – Anything Goes
Crafts Galore Encore Challenge Blog: #69 – November Anything Goes
Your Scrapbook Place: November Anything Goes

Products used:
Cardstock/Paper: Arches Cold Press watercolor paper, GKD Pure Luxury White and Turquoise Sea cardstock
Ink: Turquoise, Ultra Marine and Leaf Green Brushos powders; Copic Opaque White ink
Dies/Punches: Mama Elephant hello script die
Accessories:  Distress Sprayer, Gemini Junior die cutting machine, Tim Holtz Quotations Silver Metallic stickers, Darice white Foamies foam, Darice silver sequins

I hope you’ve enjoyed today’s project and will link up an ‘anything goes’ project with us! Remember, the technique twist this month is watercoloring and is not required to play in our challenge. We’d love to see what you create! Thanks so much for stopping by – we’ll see you again soon! ;)

Scrappy hugs,
lesliesig

Home Sweet Home Mini Album

Hi everyone! Happy Tuesday – I hope the week has started off on a great note for you! It’s time for another fun challenge over at Mix It Up Challenge Blog and I’m super stoked to share my DT inspiration project for MIUCB #30 – Anything Goes + Open Technique! All of our challenges are ‘anything goes’ and we offer a technique twist each month to inspire you and it’s not required to play. This month the twist is an open technique and all we ask is that you mention in your blog post which technique you chose to use on your project. I chose the 3-D technique to create my project for this challenge, in the form of the most adorable mini album shaped like a little house! I used The Paper Studio Mirabelle cardstock on all the panels and roof, using a different pattern on each, and I embellished the front with a sheer ribbon bow. Here are shots of all the angles going around the outside of the house.

My inspiration for this adorable mini album came from a Splitcoast Stampers newsletter a few months back that you can find HERE. I immediately fell in love and couldn’t wait for the prime opportunity to make one, putting my own spin on the design! I created the ‘Home Sweet Home’ sentiment on the computer which I cut with a stitched circle die and layered on a slightly larger stitched circle die cut. I embellished this sentiment with flowers and a stamped butterfly that I colored with Prismacolor pencils. I stamped the home definition on the other side of the roof in dark brown ink.

I used magnets to close in the house shape, and when opened, reveals panels on the inside to display photos and/or journaling. OMG, cuteness overload!

Happy to enter this sweet mini album into the following challenges:
A Bit More Time To Craft: #101 – Anything Goes
A Perfect Time To Craft Open Challenge: #10 – Anything Goes
Arty Divas: #5 – Anything Goes
Classic Design Team Challenge Blog: #10 – Anything Goes
Crafts Galore Encore Challenge Blog: #68 – October Anything Goes
Crafty Sentiments Challenge Blog: October Anything Goes
DL. Art: October Anything Goes
Sweet Stampers Challenge: #36 – Use A Sentiment
Word Art Wednesday: Weeks #405-407 – Anything Goes
Your Scrapbook Place: October Anything Goes

Products used:
Cardstock/Paper: American Crafts brown sugar and coffee cardstock, The Paper Studio Mirabelle cardstock
Stamps: Paper Pretties Every Day Miracles stamp set, Inspired By Stamping Butterflies stamp set
Ink: Memento Espresso Truffle ink
Dies/Punches: Memory Box Stitched Circle Layers dies
Accessories:  Michaels ivory sheer ribbon, Prismacolor pencils- Olive Green, Ginger Root, Tuscan Red; tiny round magnets from stash, Tim Holtz stamp platform, Darice clear rhinestones, Hobby Lobby flowers

I hope you’ve enjoyed seeing this mini album and will link up a project with us this month! If you use any special technique to create your project, remember to mention it in your blog post. Thanks so much for stopping by – and we’ll see you again soon!

Scrappy hugs,
lesliesig

Clutch with 6 Notelets

Hi everyone! We are busting through the months… it’s September 1st already! It’s time for another fun challenge over at Mix It Up Challenge Blog and I’m stoked to share my DT inspiration project for MIUCB #29 – Anything Goes + 3-D Project! Remember, all of our challenges are ‘anything goes’ and we offer a different technique twist each month for inspiration but the twist is not required to play! This month the twist is to create a 3-D project – which could be something like jewelry, gift box, canvas, gift bag, home decor, etc. I created a clutch containing a set of six notelets.

I created the clutch with a sheet of double-sided 12×12 paper. I got my inspiration from a tutorial in a recent Splitcoast Stampers newsletter HERE. I added a hot pink ‘hello’ die cut, some tiny flat-back pearls and a layered sticker over the closure. Then I created a set of six notelets featuring a hot pink ‘hello’ die cut, tiny flat-back pearls, a wide strip of the floral paper and a narrow strip of the hoy pink cardstock. I included A1 sized envelopes that I ordered from Amazon.

One more look – a close-up of the closed clutch. LOVE how this turned out! What fun!

Proud to enter this pretty little clutch with 6 notelets into the following challenges:
A Perfect Time To Craft: #9 – September Anything Goes
Classic Design Team Challenge Blog: #9 – September Anything Goes
Crafting by designs: September Anything Goes
Crafts Galore Encore Challenge Blog: September Anything Goes

Products used:
Cardstock/Paper: American Crafts Pink Paislee Whimsical 12×12 paper, American Crafts White and Taffy cardstock
Dies/Punches: Mama Elephant hello script die, Stampin’ Up 1-1/4″ circle punch
Accessories:  Gemini Junior die cutting machine, Fiskars corner rounder, Kadomaru Pro corner rounder, Saturday Afternoon One Canoe Two layered stickers, small velcro circle, tiny white flat-back pearls, A1 envelopes from Amazon

I hope you’ve enjoyed today’s project and will link up an ‘anything goes’ project with us this month! Of course, we’d love it if you’d play the technique twist and create a 3-D project! Thanks so much for stopping by today – we’ll see you soon! ;)

Scrappy hugs,
lesliesig

Wishing You Comfort

Hi everyone! It’s Thursday and it’s time for another fun challenge over at Mix It Up challenge Blog! I’m happy to share my DT inspiration project with you today for MIUCB #28 – Anything Goes + Triple Time Stamping! All of our challenges are ‘anything goes’ and each month we offer an optional technique twist to inspire you, and this month the twist is triple layer stamping. What a fun technique!

I created a sympathy card in a pretty kraft and navy color combo, which is one of my favorites. You can pair just about any color with kraft and get a gorgeous result. I don’t create sympathy cards very often even though I do like to keep a few in my stash, and I actually created two this time using the triple layer stamping technique. I’ll be showcasing the other one later on as an inspiration project for another design team.

Leslie

I started by cutting the three kraft layers in graduating sizes, then I cut the mats for each and the card base. I positioned the kraft layers and stamped the large dahlia covering the background as best I could. I then matted the stamped layers on the navy cardstock pieces, adhered them together and then to card base. I stamped the sentiment on kraft and punched it with an oval die, then layered it on a scalloped oval and adhered it in the center. I finished the front with a few small glittered gumdrops.

2019_0726009a

I stamped the dahlia on the inside kraft panel along with the sentiment, and embellished the top of the panel with a leftover strip of navy cardstock.

2019_07260010a

One more look… I’m very happy with how this turned out!

2019_07260011a

Products used:
Cardstock/Paper: GKD In The Navy cardstock, Marco’s Brown Bag Cover Paper
Stamps: Stampin’ Up Definitely Dahlia stamp, Dare 2B Artzy Wishing You Comfort stamp set
Ink: Memento Paris Dusk ink
Dies/Punches: Stampin’ Up large oval punch, Marvy Uchida scallop oval punch
Accessories:  Tim Holtz stamp platform, YNS navy Glittered Gumdrops

I hope you’ve enjoyed this card and will link up a project with us this month! Remember, our challenge is ‘anything goes’ but we’d love to see your project featuring the triple time stamping technique! Thanks so much for stopping by – we’ll see you soon! ;)

Scrappy hugs,
lesliesig

Get Well Soon

Hiya, crafty friends! Half the year is over… yep, Christmas will be here before we know it, lol! A new challenge is live this morning over at Mix It Up Challenge Blog and I’m excited to share my DT inspiration project for MIUCB #27 – Anything Goes + Foiling. Remember, all of our challenges are ‘anything goes’ and we offer a different technique twist each month for inspiration but the twist is not required to play! This month the twist is to use foiling – this could be a Minc machine, foiled cardstock, aluminum foil, etc. If you’re inclined to play the twist, let your creativity soar! I created a hot pink Get Well card using DCWV Washi Foil, and if this doesn’t make someone feel better, it will certainly blind them, lol! It’s bright and I love it!

2018_11180013a

I’ve used lots of dies on this, starting with the scalloped stitched card base and stitched panels, then moving on to the foiled stitched oval with stamped sentiment, and finally the stamped and die cut band-aid with a little paper piecing. This was so much fun!

2018_11180014a

I left the inside blank for a custom written message.

2018_11180016a

And final look… did I mention how much fun this was?! Love how it turned out! And yes, it’s BRIGHT!

2018_11180015a

Products used:
Cardstock/Paper: Stampin’ Up Thick Whisper White, Doodlebug Design dot-grid-daisy-stripe and gingham-linen Rainbow Petite Prints 6×6 paper pad, DCWV Washi Tape Basics Stack
Stamps: Spellbinders Get Well Soon Stamp & Die Set
Ink: Black StazOn ink, Memento Tuxedo Black ink
Dies/Punches: PaperTrey Ink Noted: Scalloped A2 Die Collection, Spellbinders Get Well Soon Stamp & Die Set
Accessories:  Tim Holtz Stamp Platform

I hope you’ve enjoyed today’s project and will link up with us this month! Whether you play the twist or not – we’d love to see what you create! Thanks for stopping by and we’ll see you again real soon! ;)

Scrappy hugs,
lesliesig

To a wonderful friend…

Hi everyone! Happy Saturday – hope you’re having a good crafty one! It’s time for another fun challenge over at Mix It Up Challenge Blog and I’m super stoked to share my DT inspiration project for MIUCB #26 – Anything Goes + optional twist of Inlaid Die Cut! This is one of my favorite techniques – it reminds me of putting together a puzzle when I was young! I created a pair of birthday cards for my stash using (another) one of my favorite color combos of lime green and teal blue.

2019_03100015a

These cards are identical except for the reversal of the colors and the process was the same for each card. I cut each of the green and teal shimmer cardstock panels in half on a diagonal and then adhered half-panels of each color together. I cut two large intricate dragonflies from black glitter paper and set them aside.

I die cut a dragonfly into each panel and placed a piece of Stick It adhesive sheet behind the panel. I then carefully placed the black glittered dragonfly into the negative space on each panel, then proceeded to place the tiny parts of the wings into place. I stamped the sentiment on each panel in black StazOn ink and then layered each one on black cardstock.

I decorated the inside panel on each card with leftover strips of the lime green and teal blue shimmer cardstock and the black cardstock, stamped the sentiment, and then layered the panel on black cardstock. The black is really striking on these colors, I think, and I’m super happy with how these turned out!

Products used:
Cardstock/Paper: Stampin’ Up thick and regular Whisper White cardstock, DCWV Shimmer cardstock, Stampin’ Up Black Glimmer paper, Marco’s Kaleida-Paper cardstock
Stamps: Stampin’ Up Dragonfly Dreams stamp set
Ink: Black StazOn ink, Memento Tuxedo Black ink
Dies/Punches: Stampin’ Up Detailed Dragonfly thinlits dies
Accessories:  Stick It adhesive sheet, Tim Holtz stamp platform

I hope you’ve enjoyed this pretty set of cards and will link up an anything goes project with us this month – and we’d absolutely love to see you play the optional inlaid die cut twist! Remember, the twist is not every mandatory to play in our challenges but we always love to see your creativity! Thanks so much for stopping by – we’ll see you again soon!

Scrappy hugs,
lesliesig

faith wall hanging

Hello, my crafty peeps! Happy Hump Day! The May challenge launched this morning over at Mix It Up Challenge Blog and I’m super stoked to share my DT inspiration project for MIUCB #25 – Anything Goes + Mixed Media! Remember, our challenges are always Anything Goes and we offer an optional technique twist each month to inspire you! This month our twist is mixed media and we’d love to see you create a project using more than two kinds of media. I created a faith wall hanging for my studio to remind me to have a little faith on a daily basis… and I SO enjoyed creating this!

2019_0421005a

I started with a 6 x 6 gesso board that I painted with black Gesso, then used a couple stencils with translucent paste and a spatula, and let it dry thoroughly. Then I rubbed some acrylic paint lightly over the stenciled areas with my finger tip, and let that dry. Meanwhile, I dug deep into my stash and brought out a variety of elements to use – a zipper, key, sequins, gears, flowers, ribbon, glass vial that I filled with beads, a dragonfly charm and a flashcard. Then I sprayed and spritzed ink, and the fun began… laying everything out and adhering all the elements in place. It was awesome watching it transform, lol!

Here are a few close-ups…


And here’s one more look… really loving how this turned out. I sure do love me some purple! Can you tell?! ;)

2019_04210010a

Products used:
Ink: Dr. Ph. Martin Violet india ink
Accessories:  6 x 6 Gesso Board, Black Gesso, Tim Holtz Gothic stencil, The Crafter’s Workshop Mini Harlequin stencil, DreamWeaver Translucent Paste; Liquitex Deep Violet, Cobalt Blue and Silver acrylic paint; Liquitex Matte Gel, variety of Wild Orchid Crafts flowers, dragonfly charm, key brad, Indygo Junction zipper, Pretty Pink Posh Lavendar Moon sequins, Queen & Co. Baby Beads; Tim Holtz Idea-ology Corked Vial, Flashcards and Swivel Clip; Hobby Lobby Woodpile Gears, Marvy Uchida silver DecoColor paint marker, Prairie Bird Boutique wrinkled ribbon

I hope you’ve enjoyed this wall hanging and will link up an ‘anything goes’ project with us this month! Although the technique twist of mixed media is not required to play, we’d love to see a mixed media project using more than two kinds of media! Thanks so much for stopping by and we’ll see you again soon! ;)

Scrappy hugs,
lesliesig

A Real Classic

Hiya, crafty peeps! Yep, the time is flying by – welcome to April! Do you have any April Fool’s jokes planned for anyone, lol?! A new challenge is live this morning over at Mix It Up Challenge Blog and I’m happy to share my DT inspiration project for MIUCB #24 – Anything Goes + Black & White Plus One Color. Remember, all of our challenges are ‘anything goes’ and we offer a different technique twist each month to inspire you, but the twist is not required to play! So come on over and join us!

Leslie

I had already created a birthday card for the hubs several months ago but I’m thinking I may give him this one instead. His birthday is in June so I have a couple months to decide which one to give him. All stamps used on the front of this card are from Blank Page Muse. I used green with the black and white, and layered all the panels on black. I cut the sentiment with a dotted circles die and layered it on black foam.

2018_06120002a

I kept the inside relatively simple with stamped sentiments from Sparkle N Sprinkle on a layered panel.

2018_06120003a

Products used:
Cardstock/Paper: Stampin’ Up thick and regular Whisper White and Basic Black cardstock, Crafter’s Companion Just For Men 6×6 paper
Stamps: Blank Page Muse Diamonds Background stamp, Classic Car Front End View stamp, and A Real Classic sentiment stamp; Sparkle N Sprinkle Woody stamp set
Ink: Memento Tuxedo Black and Bamboo Leaves ink
Dies/Punches: Sizzix Dotted Circles die
Accessories:  Tim Holtz Stamp Platform, Black Darice Foamies foam

I hope you’ve enjoyed today’s masculine birthday card and will link up with us this month! We’d love to see your ‘anything goes’ project – or play the twist if you’d like! Black and white with one color isn’t too hard to pull off! Thanks for stopping by today and we’ll see you again real soon! ;)

Scrappy hugs,
lesliesig

Inside every person

Hi everyone! Happy Friday and March 1st! It’s time for another fun challenge over at Mix It Up Challenge Blog and I’m stoked to share my DT inspiration project for MIUCB #23 – Anything Goes + Inked Background! Remember all of our challenges are Anything Goes and we throw in a technique twist just to inspire you and they are not required to play! ;)

I had THE best time creating this birthday card for a co-worker (she loved it, by the way!) featuring The Crafter’s Workshop Mini Time Travel stencil and Ranger Distress Grit Paste, Ranger Walnut Stain distress ink, several different Ranger Distress Oxide inks, and Tsukineko Pewter Shimmer Spritz to create the background, then a fun River City Rubber Works rubber stamp and a Tim Holtz Paper Doll to balance it all out.

2018_11180008a

I created the background by smooshing Ranger Water Color Paper into puddles of different colors of distress oxide inks spritzed with water, and drying with the heat tool between smooshing sessions. You get a much better result that way. I then used the Mini Time Travel stencil with Walnut Stain Distress ink to get the clock faces. Then I moved the stencil up slightly and to the right and applied Distress Grit Paste over the stencil with a spatula. When that was dry, I re-placed the stencil and added a little more Walnut Stain Distress ink to color the paste. I trimmed down the panel and layered it on brown cardstock, and added twine, the stamped/embossed ‘older person’ sentiment from River City Rubber Works which I LOVE, and the paper doll. On a side note, River City Rubber Works has sadly gone out of business. I really loved their stamps.

2018_11180009a

I decorated the inside panel with a scrap of the trimmed-down front panel and a strip of leftover brown cardstock, stamped the sentiment (from a Stampin’ Up stamp set), and layered the panel on the brown cardstock.

2018_11180010a

A couple more angled shots… I’m absolutely loving how this turned out! So happy my co-worker liked it!

2018_11180011a
2018_11180012a

Products used:
Cardstock/Paper: Stampin’ Up thick and regular Whisper White cardstock, GKD Charcoal Brown cardstock, Ranger Water Color Paper
Stamps: River City Rubber Works Inside Every Person rubber stamp, Stampin’ Up Dragonfly Dreams stamp set
Ink: Ranger Walnut Stain Distress Ink; Ranger Distress Oxides- Frayed Burlap, Antique Linen, Peeled Paint, Vintage Photo, Iced Spruce, Walnut Stain; Tsukineko Pewter Shimmer Spritz; Stampin’ Up Early Espresso ink, Versamark
Dies/Punches: Cottage Cutz Double Stitched Rectangles die
Accessories:  The Crafter’s Workshop Mini Time Travel Stencil, Ranger Distress Grit Paste, twine, Hero Arts Clear Embossing Powder, Tim Holtz Idea-ology Paper Dolls

I hope you’ve enjoyed today’s project and will link up with us this month! We’d love to see your ‘anything goes’ project and would really love to see an inked background to go with it, lol! But remember, the twist is not necessary to play! Thanks so much for stopping by today – we’ll see you again soon! ;)

Scrappy hugs,
lesliesig