You are too kind.

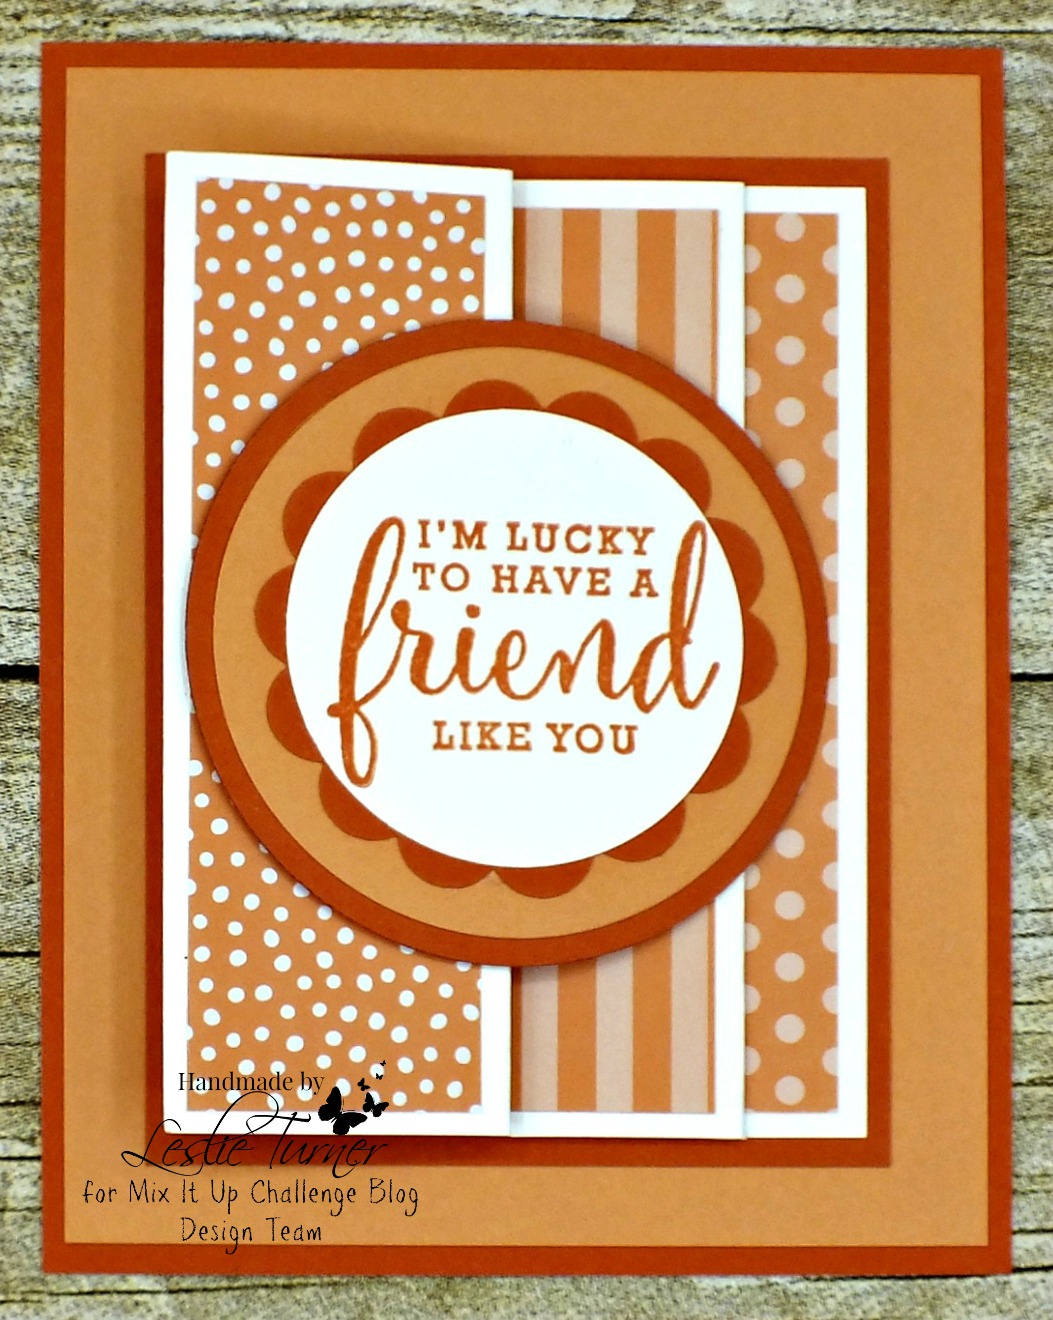
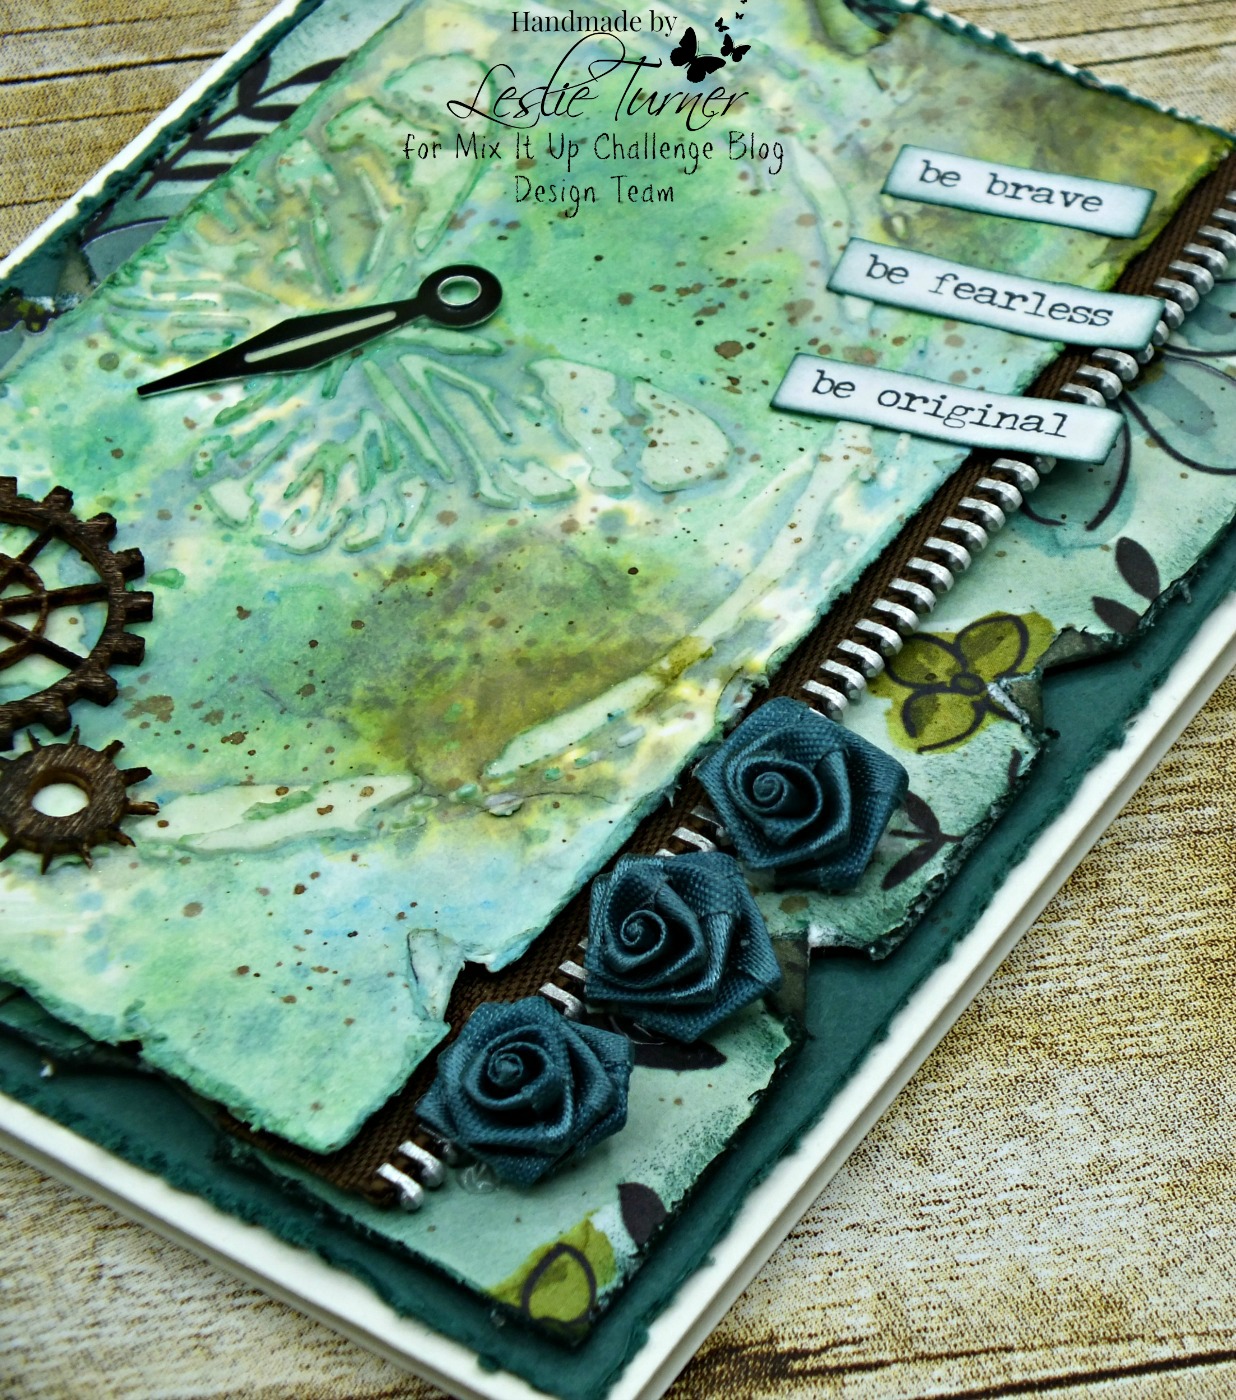
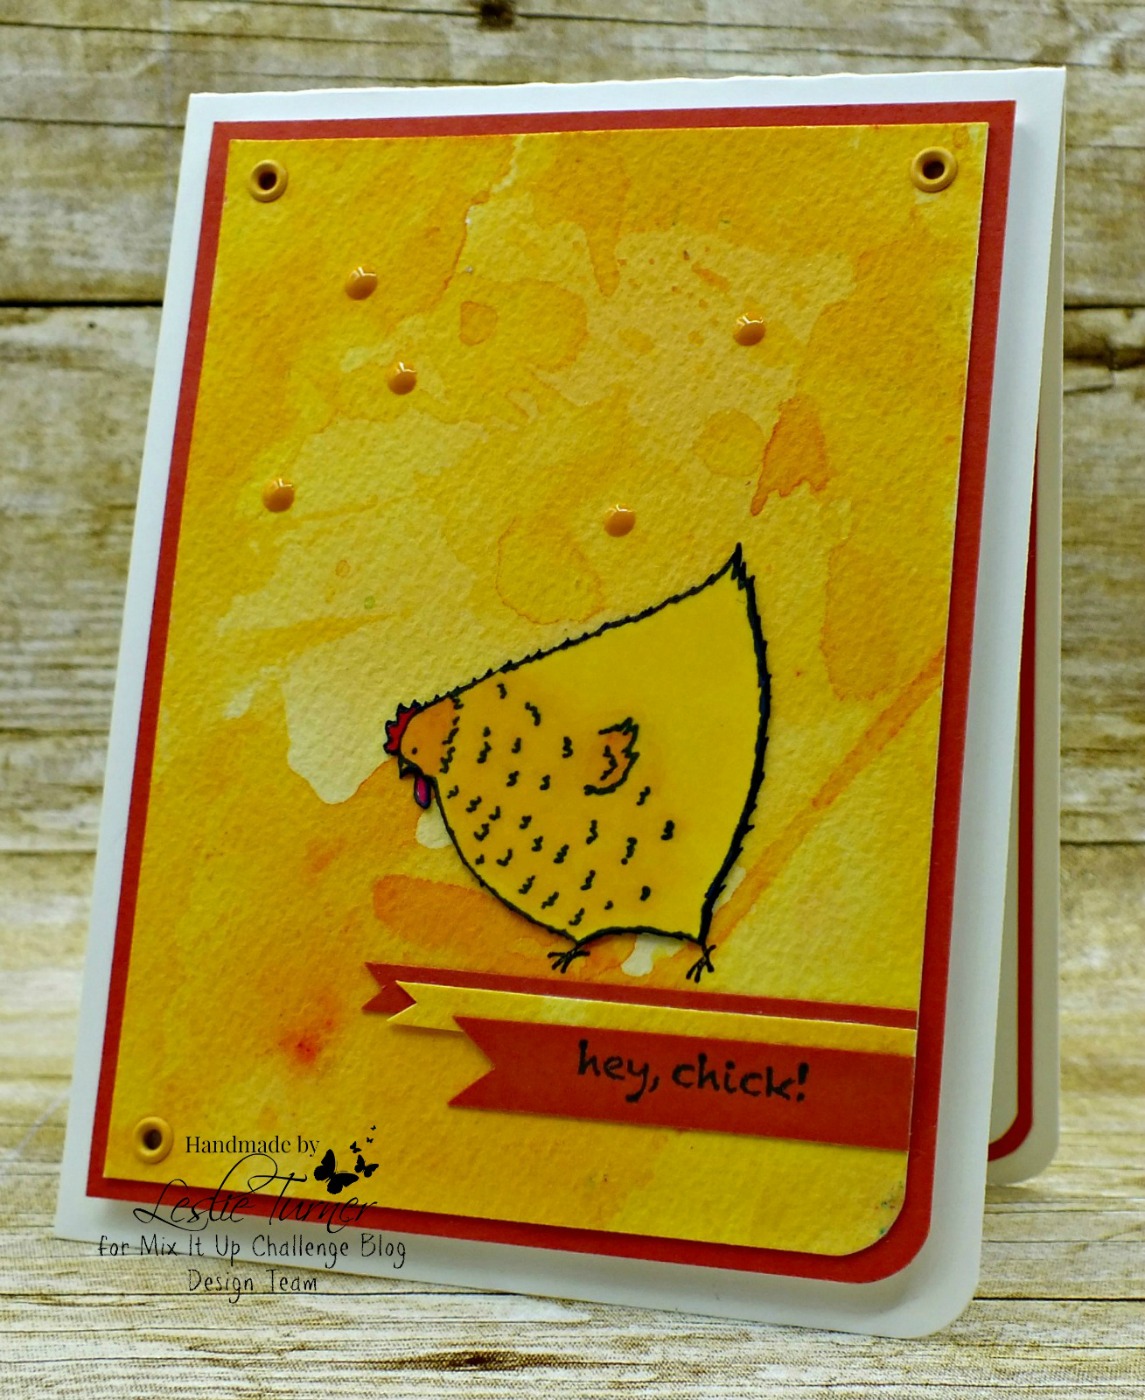
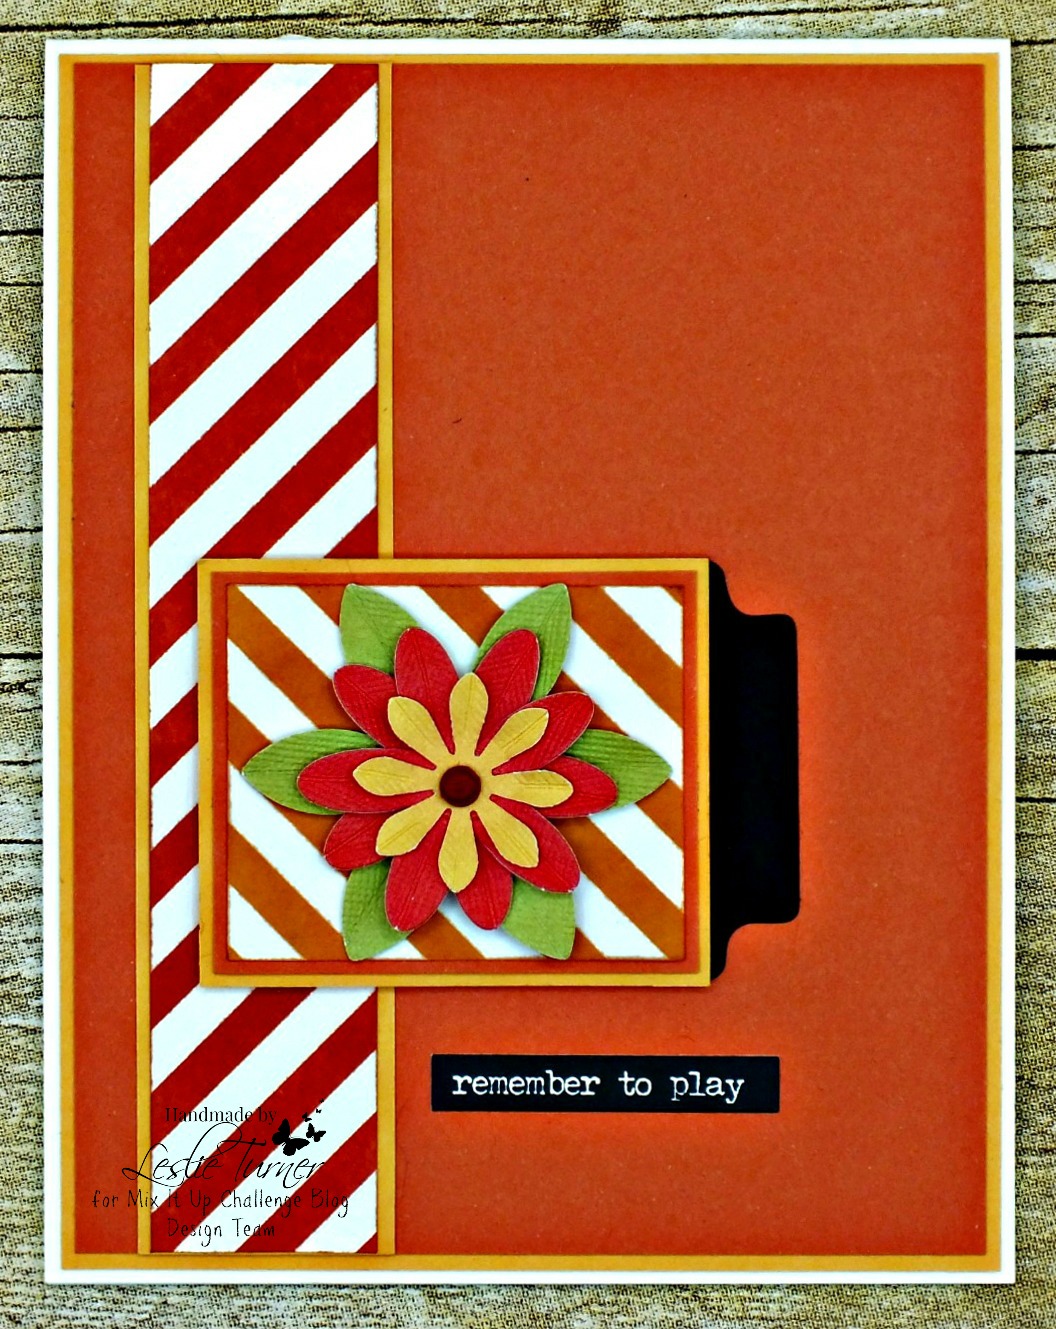
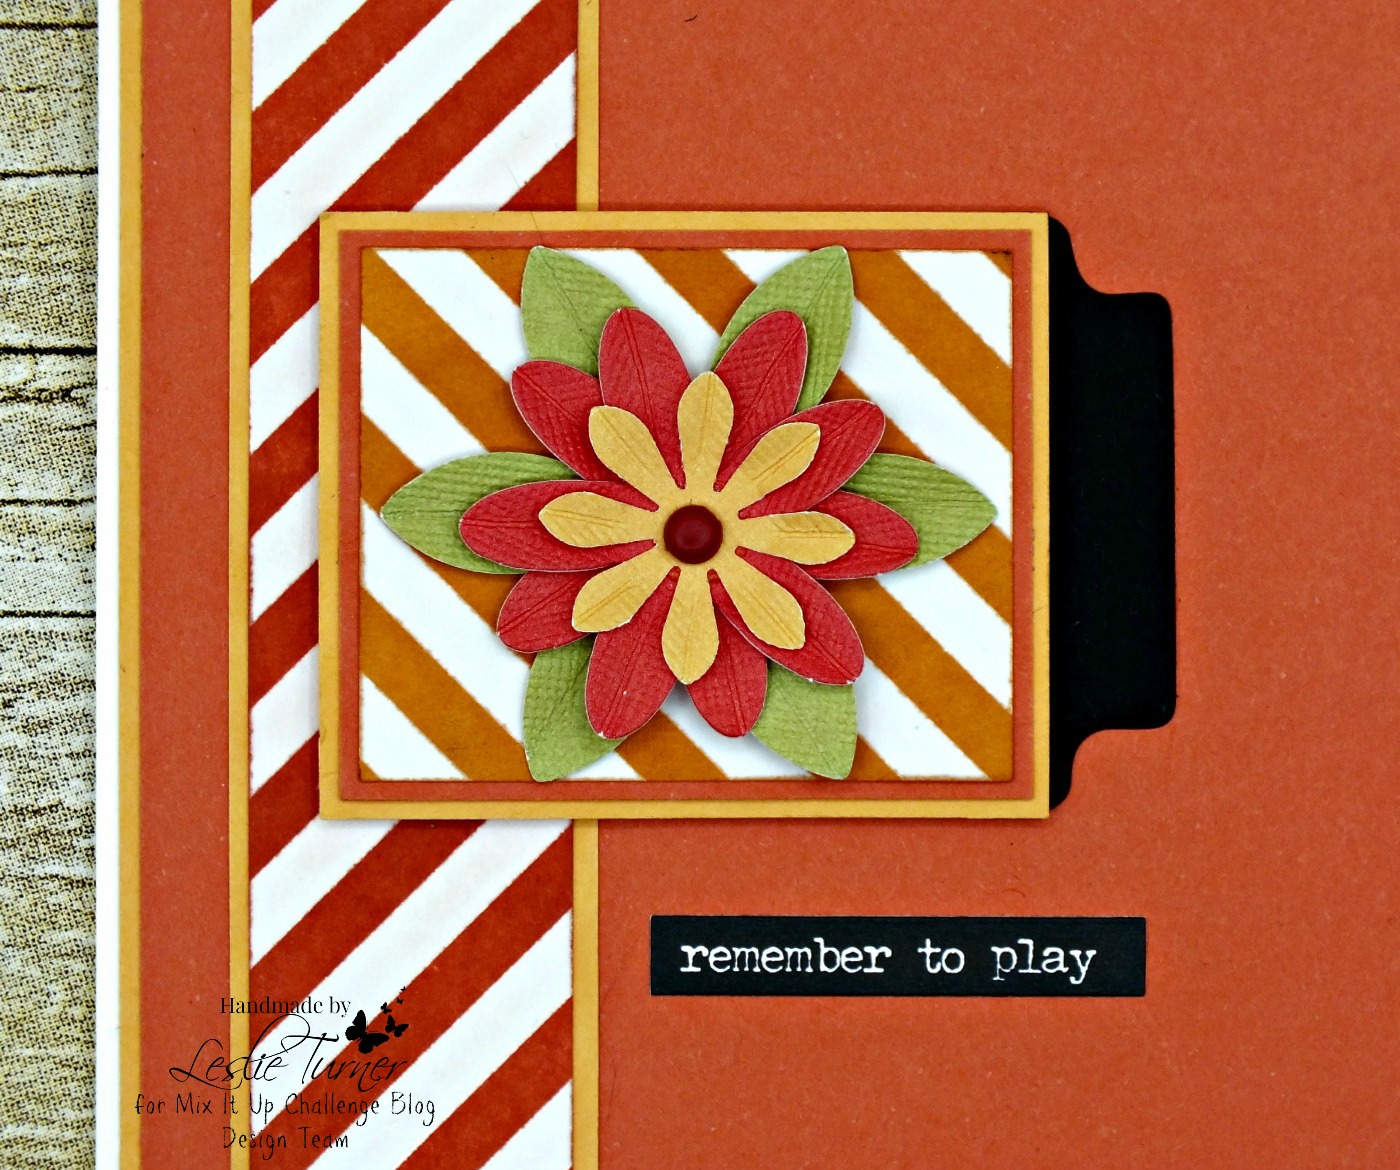
Hi everyone! I’m back with another fun project this morning! A new challenge is live over at Mix It Up Challenge Blog and I’m stoked to share my DT inspiration project for MIUCB #22 – Anything Goes + Rubberband Stamping! Nope, I’m not out of my mind, lol! You really CAN stamp with rubberbands – either wrapped around an acrylic block or a brayer! I created a clean and simple thank you card using two sizes of rubberbands wrapped around a 3″ square acrylic block, and it turned out pretty neat!

2018_11180004a

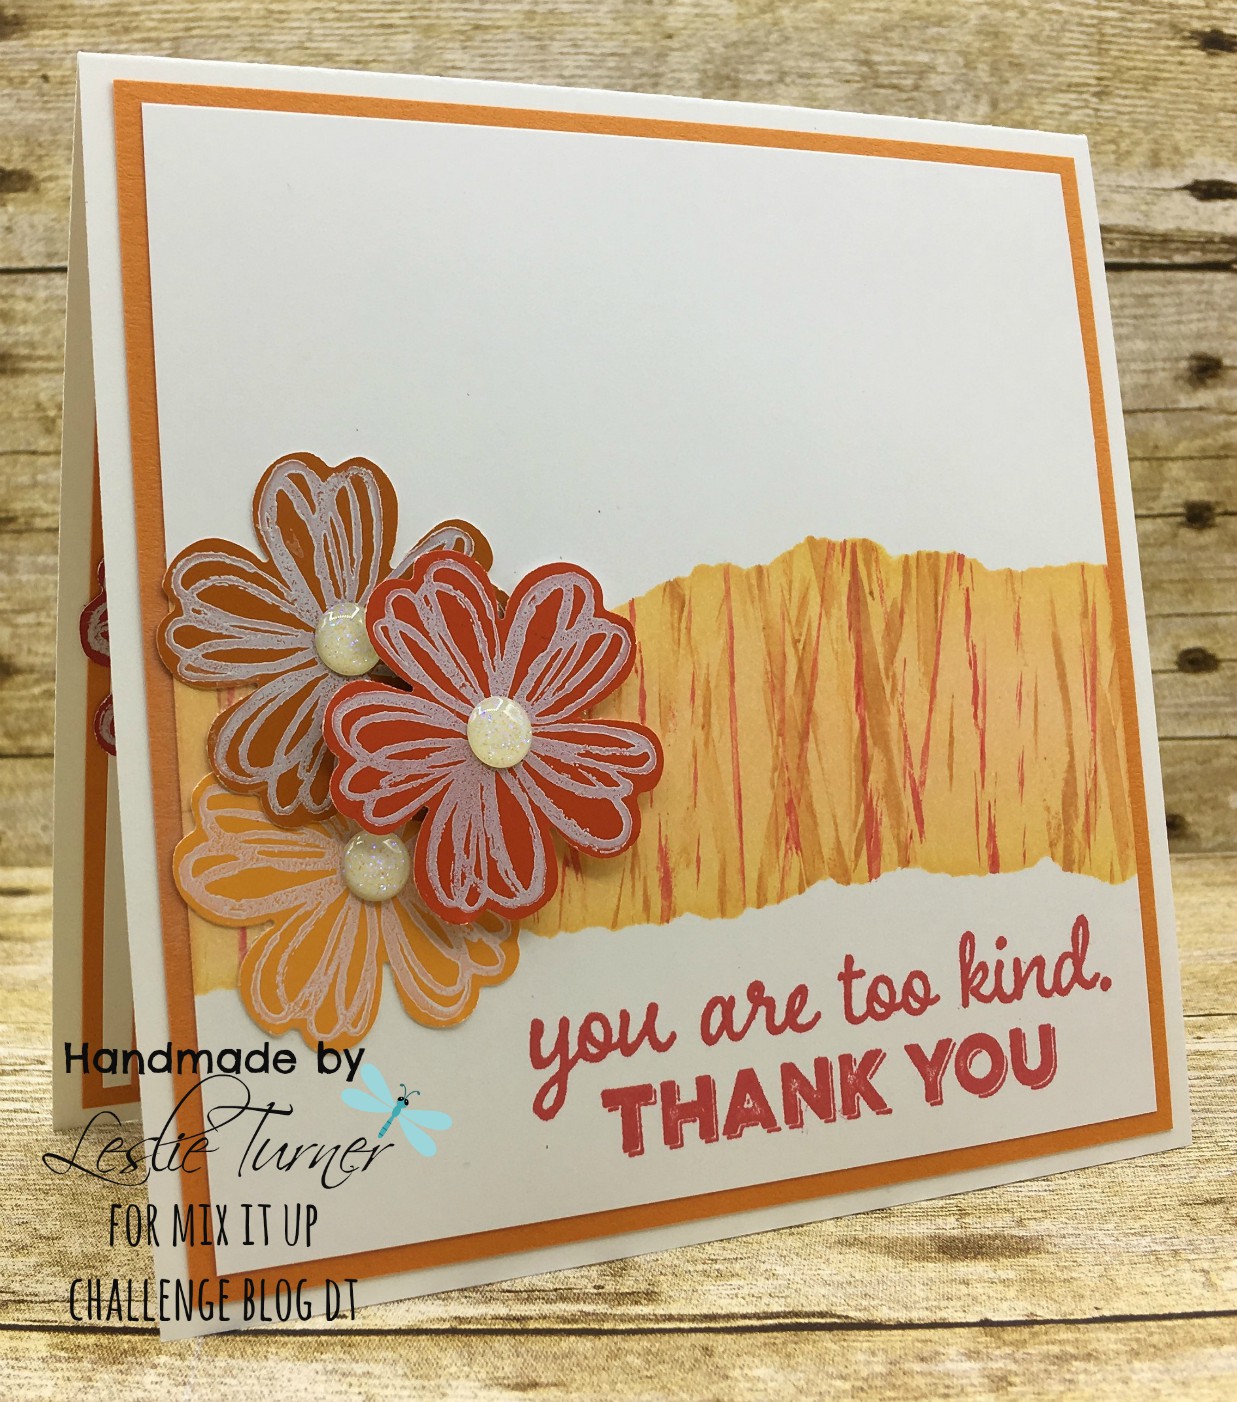
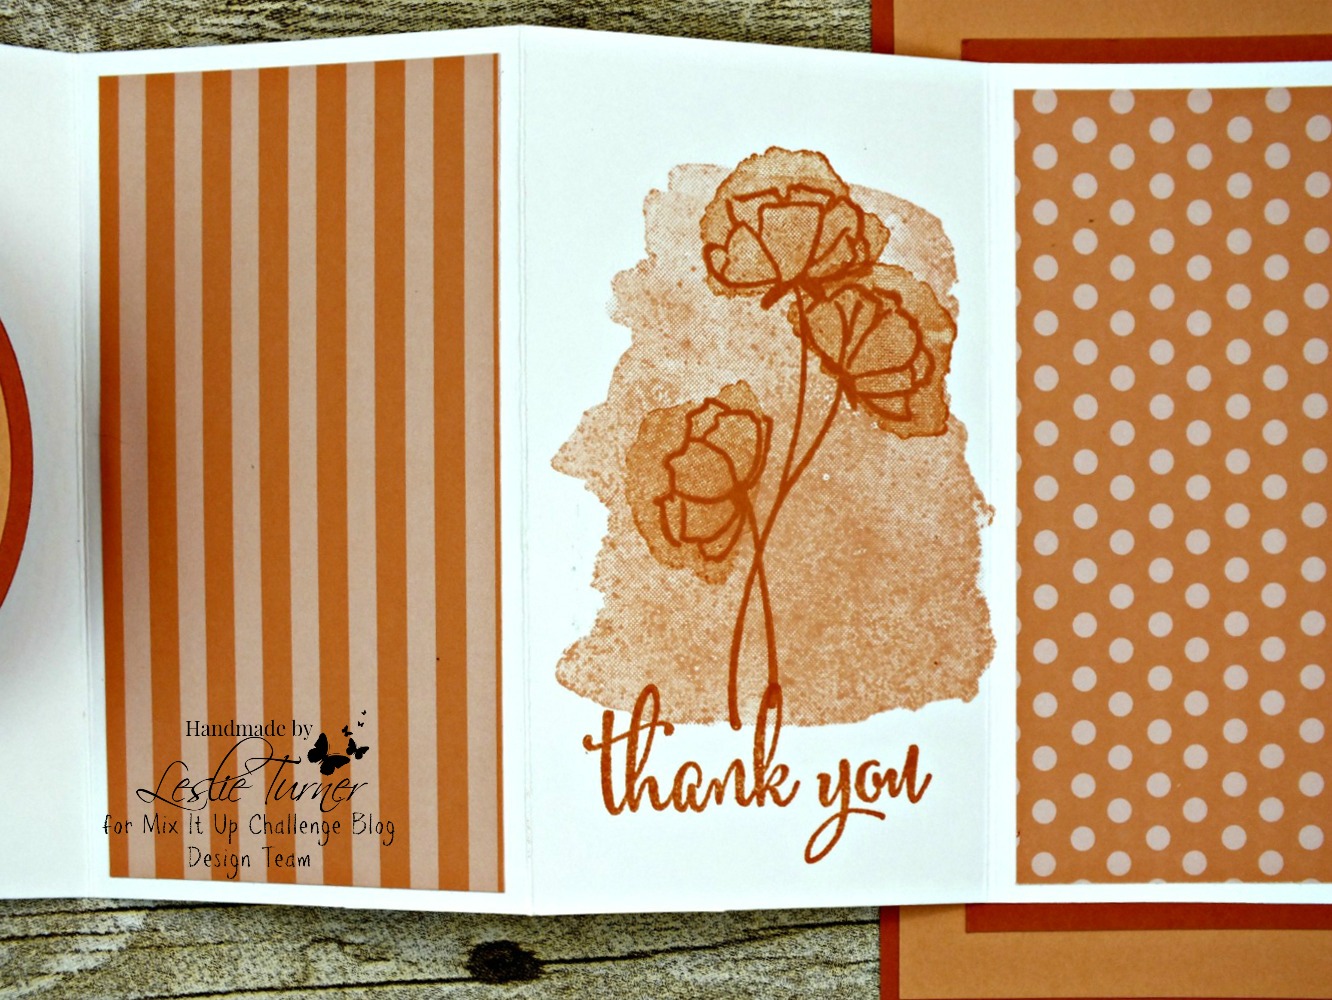
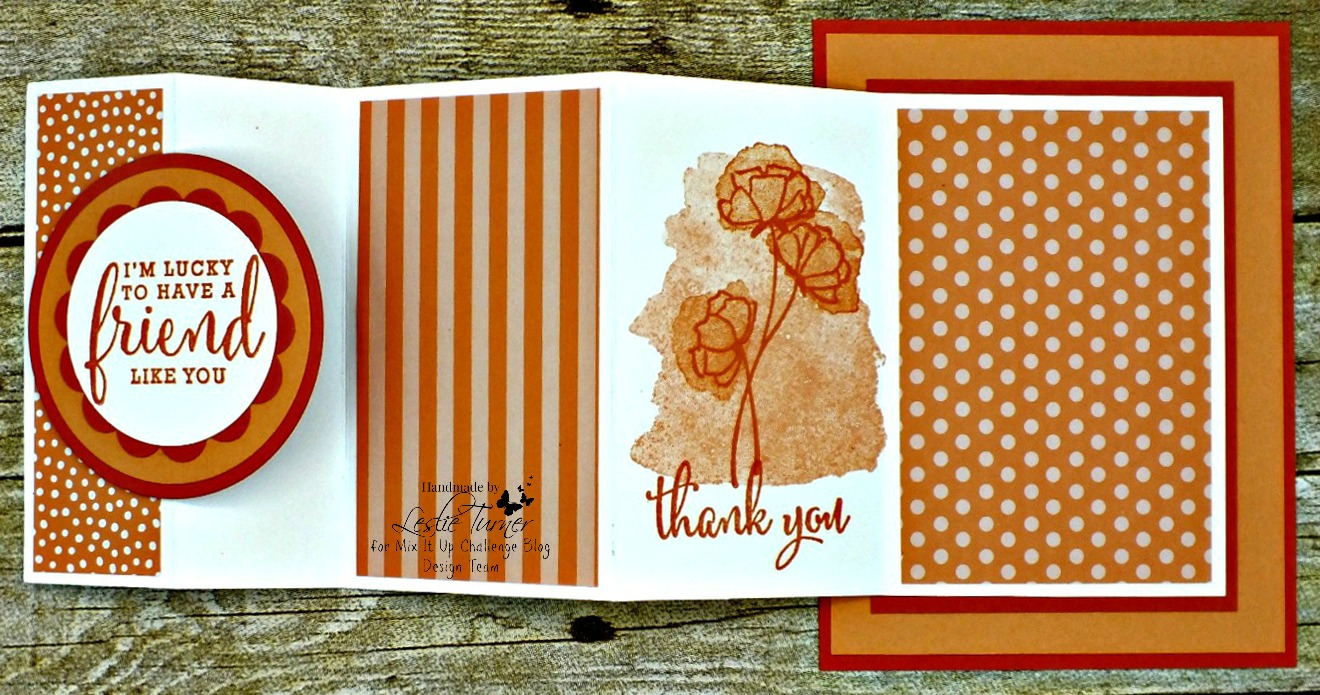
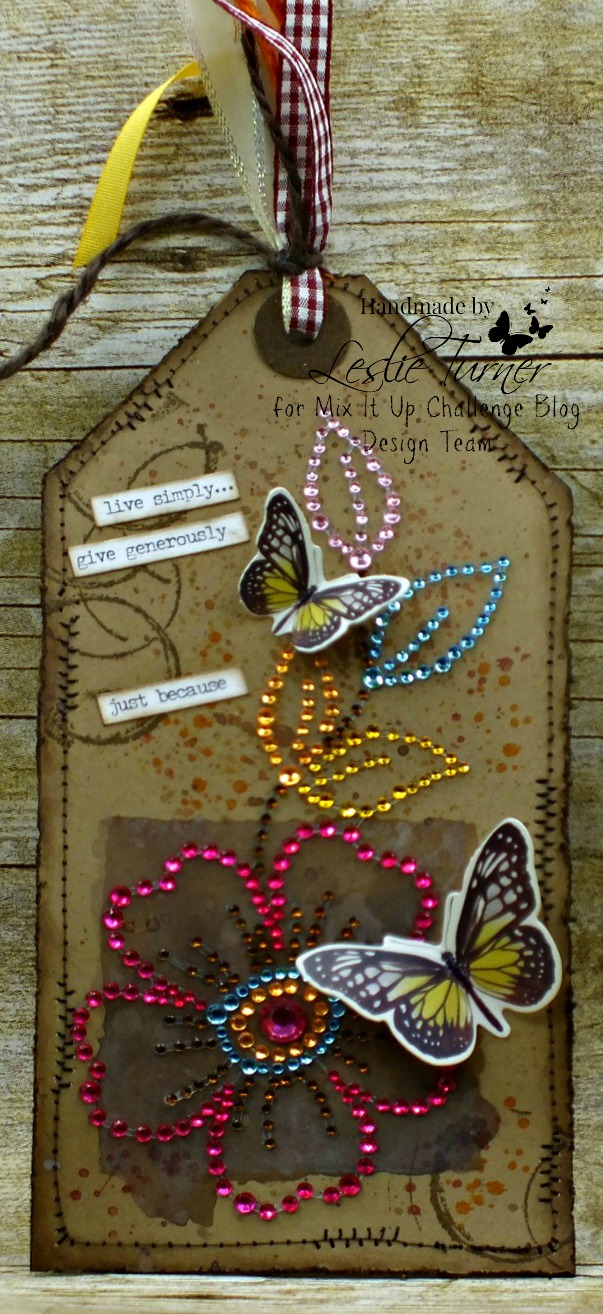
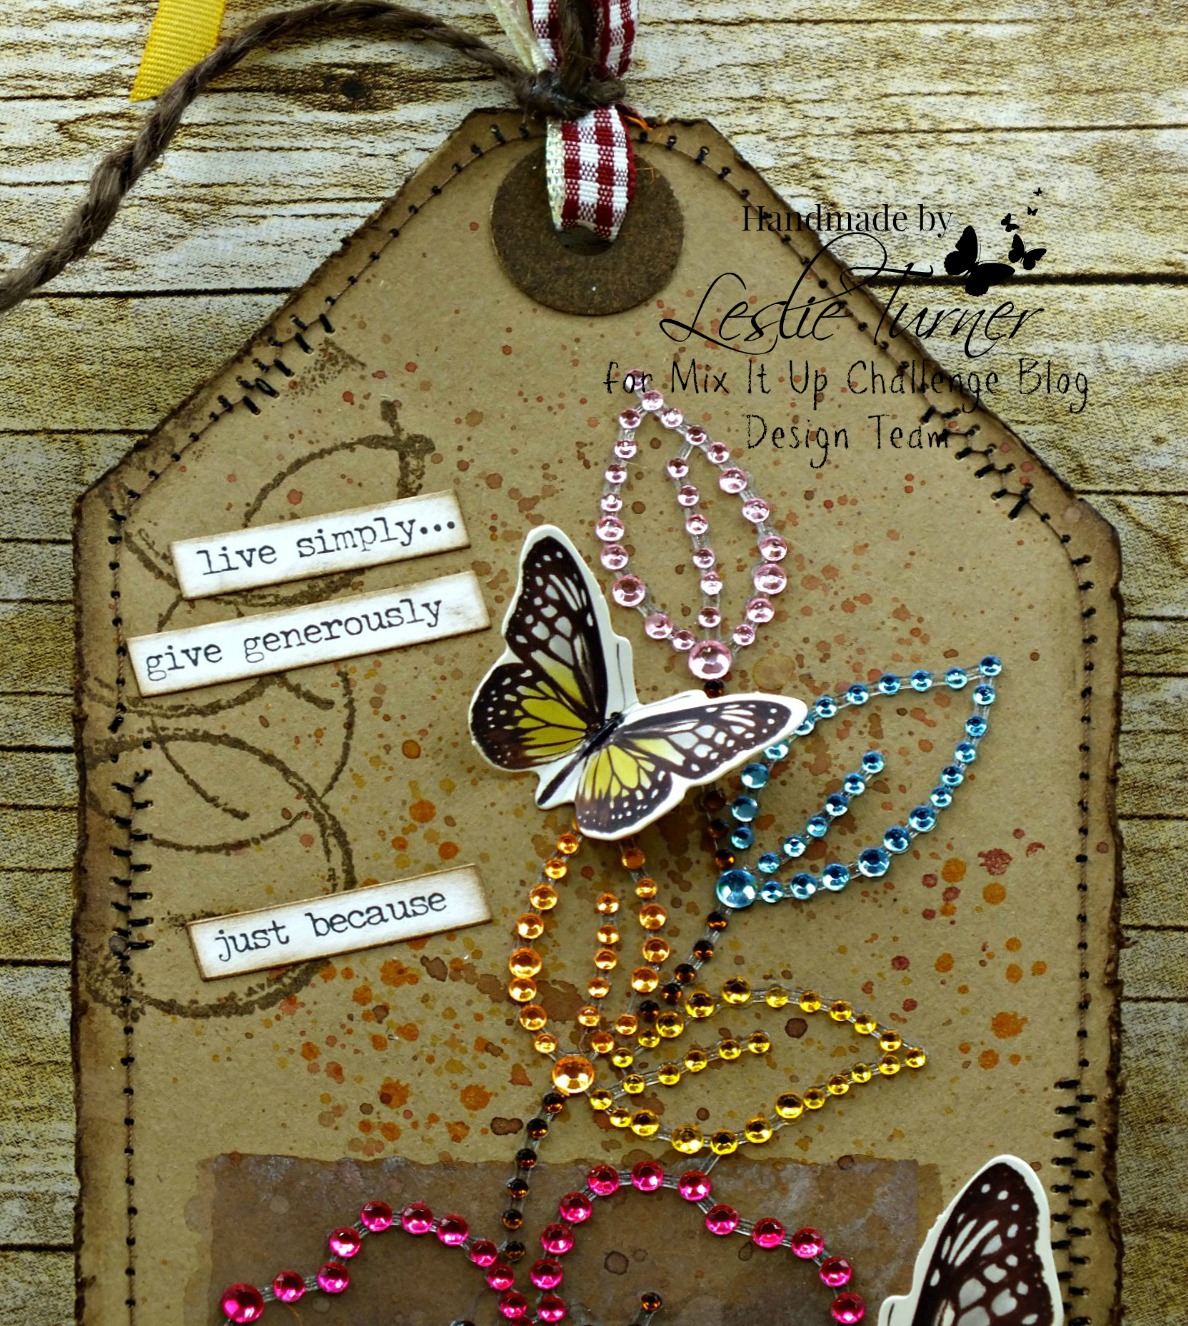
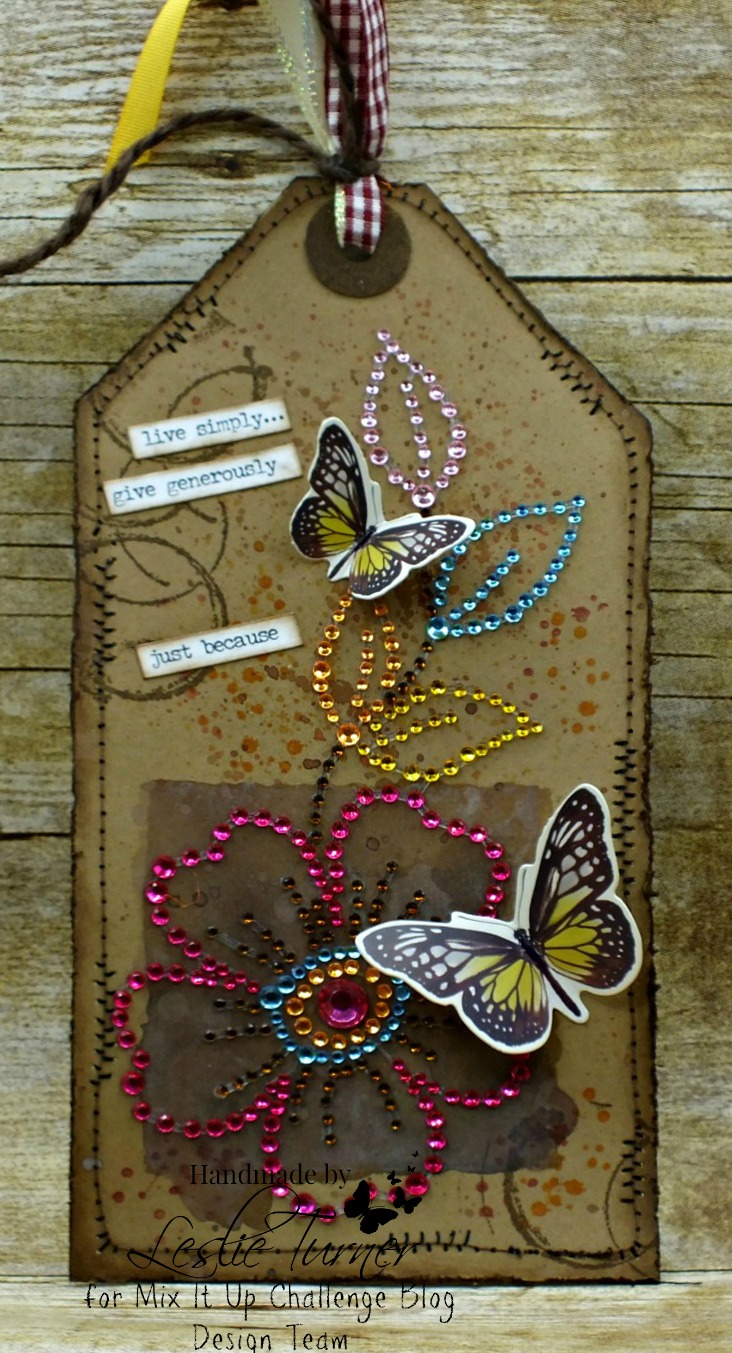
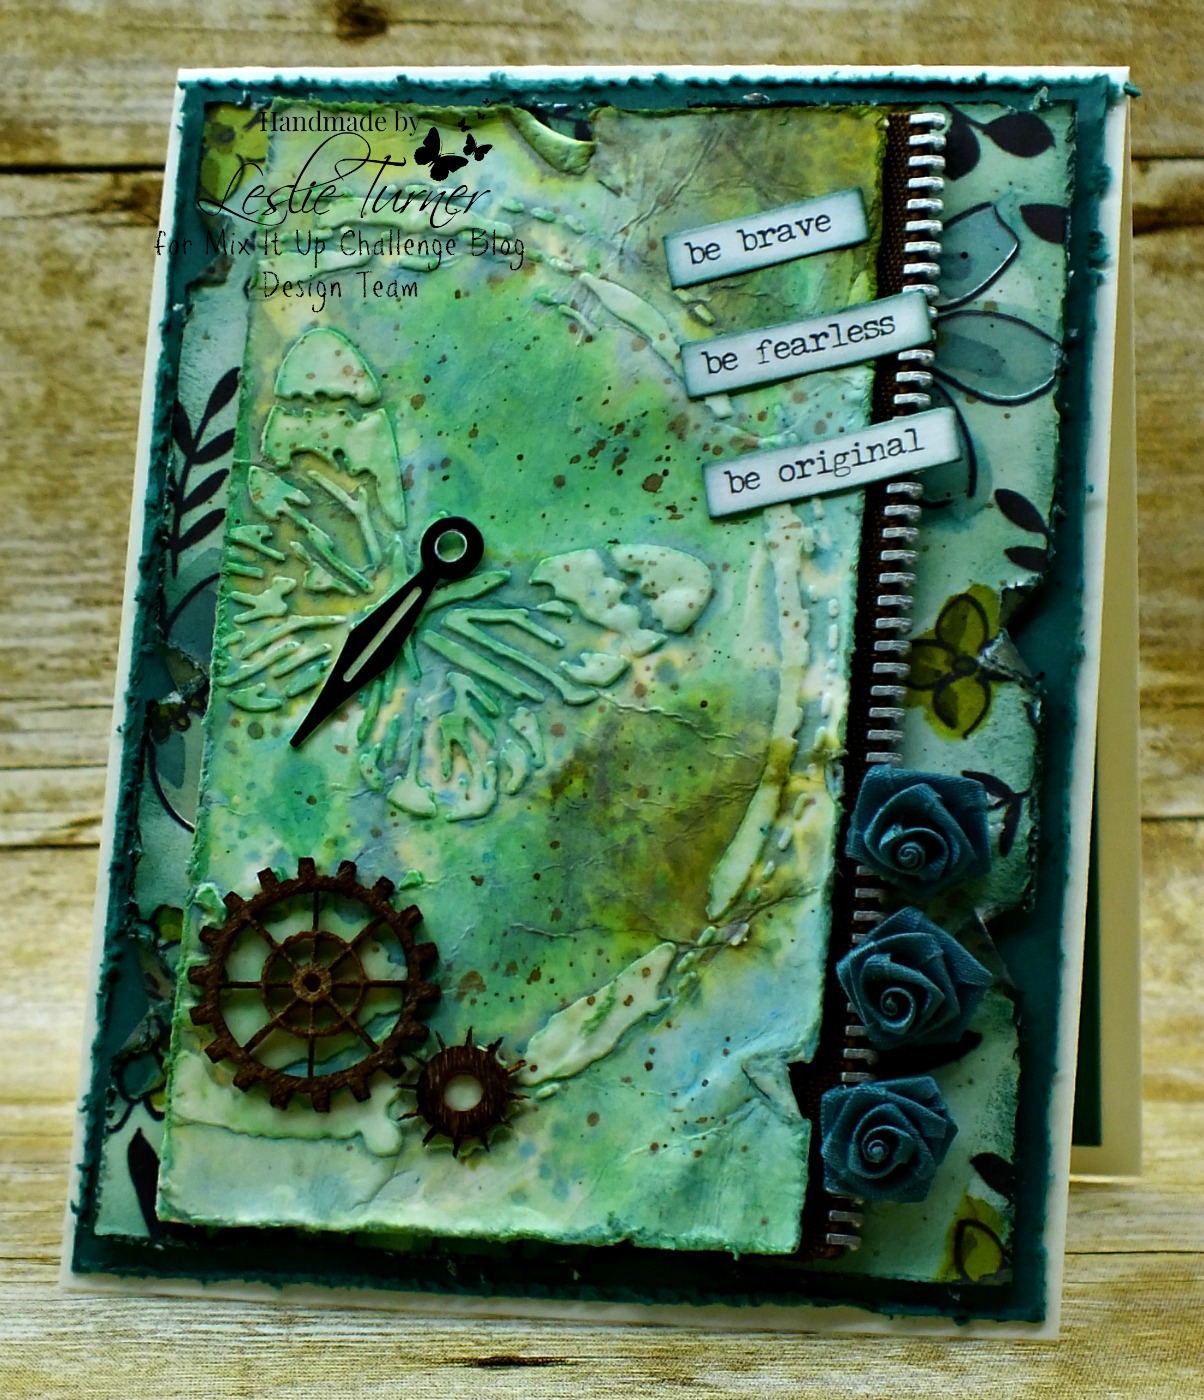
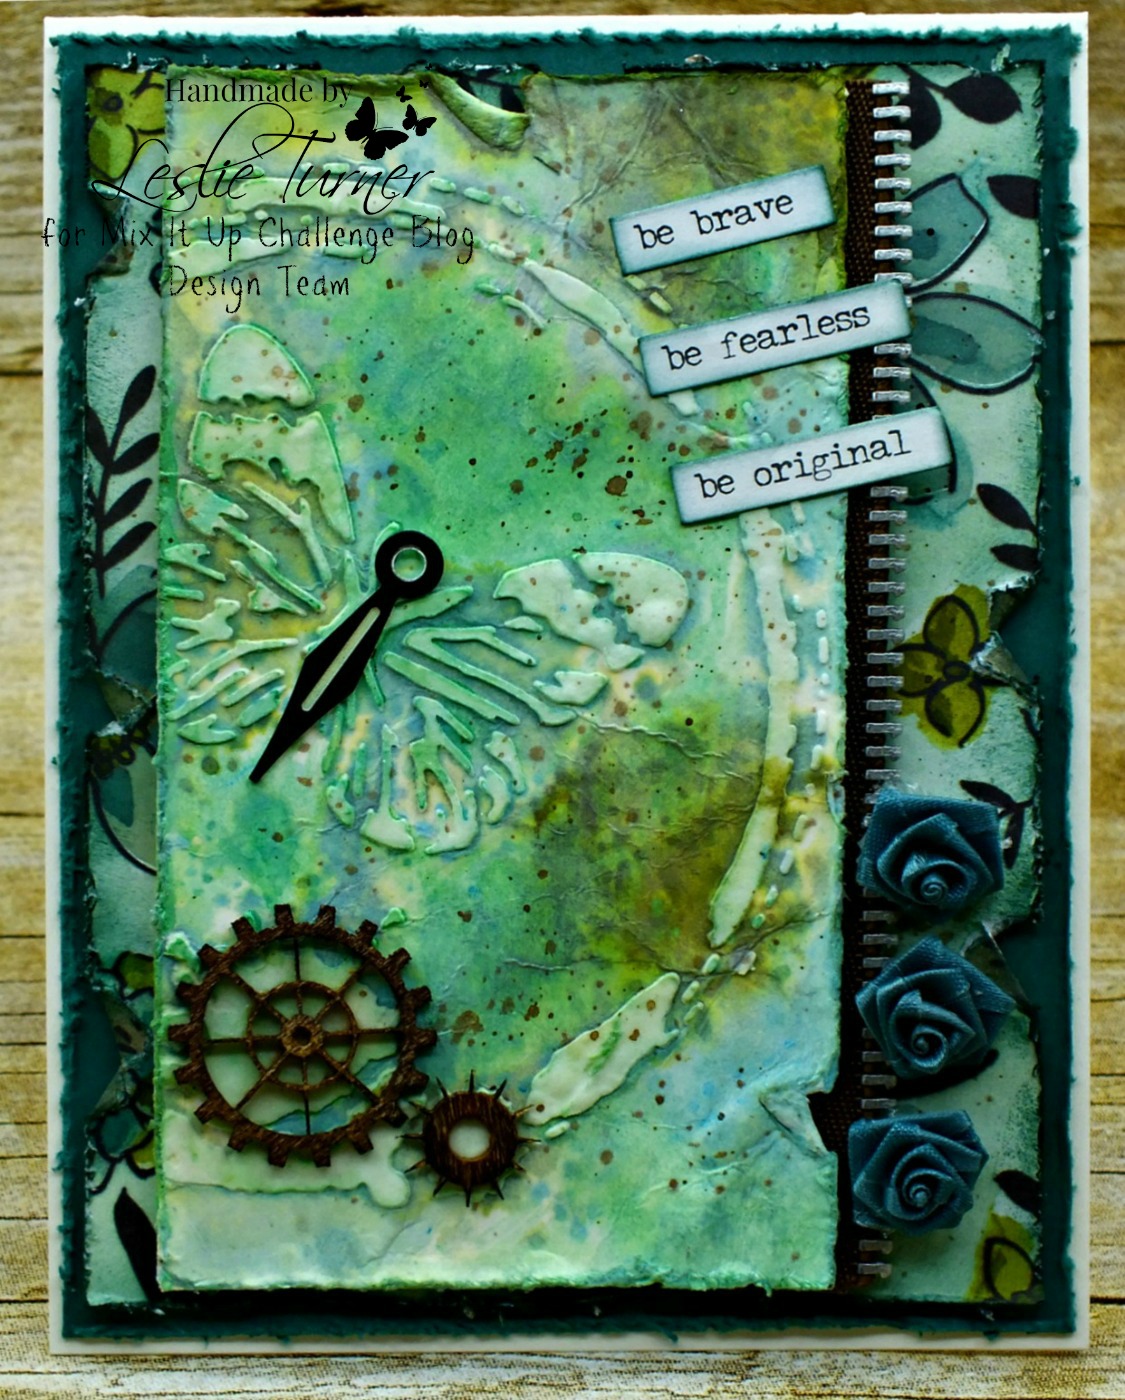
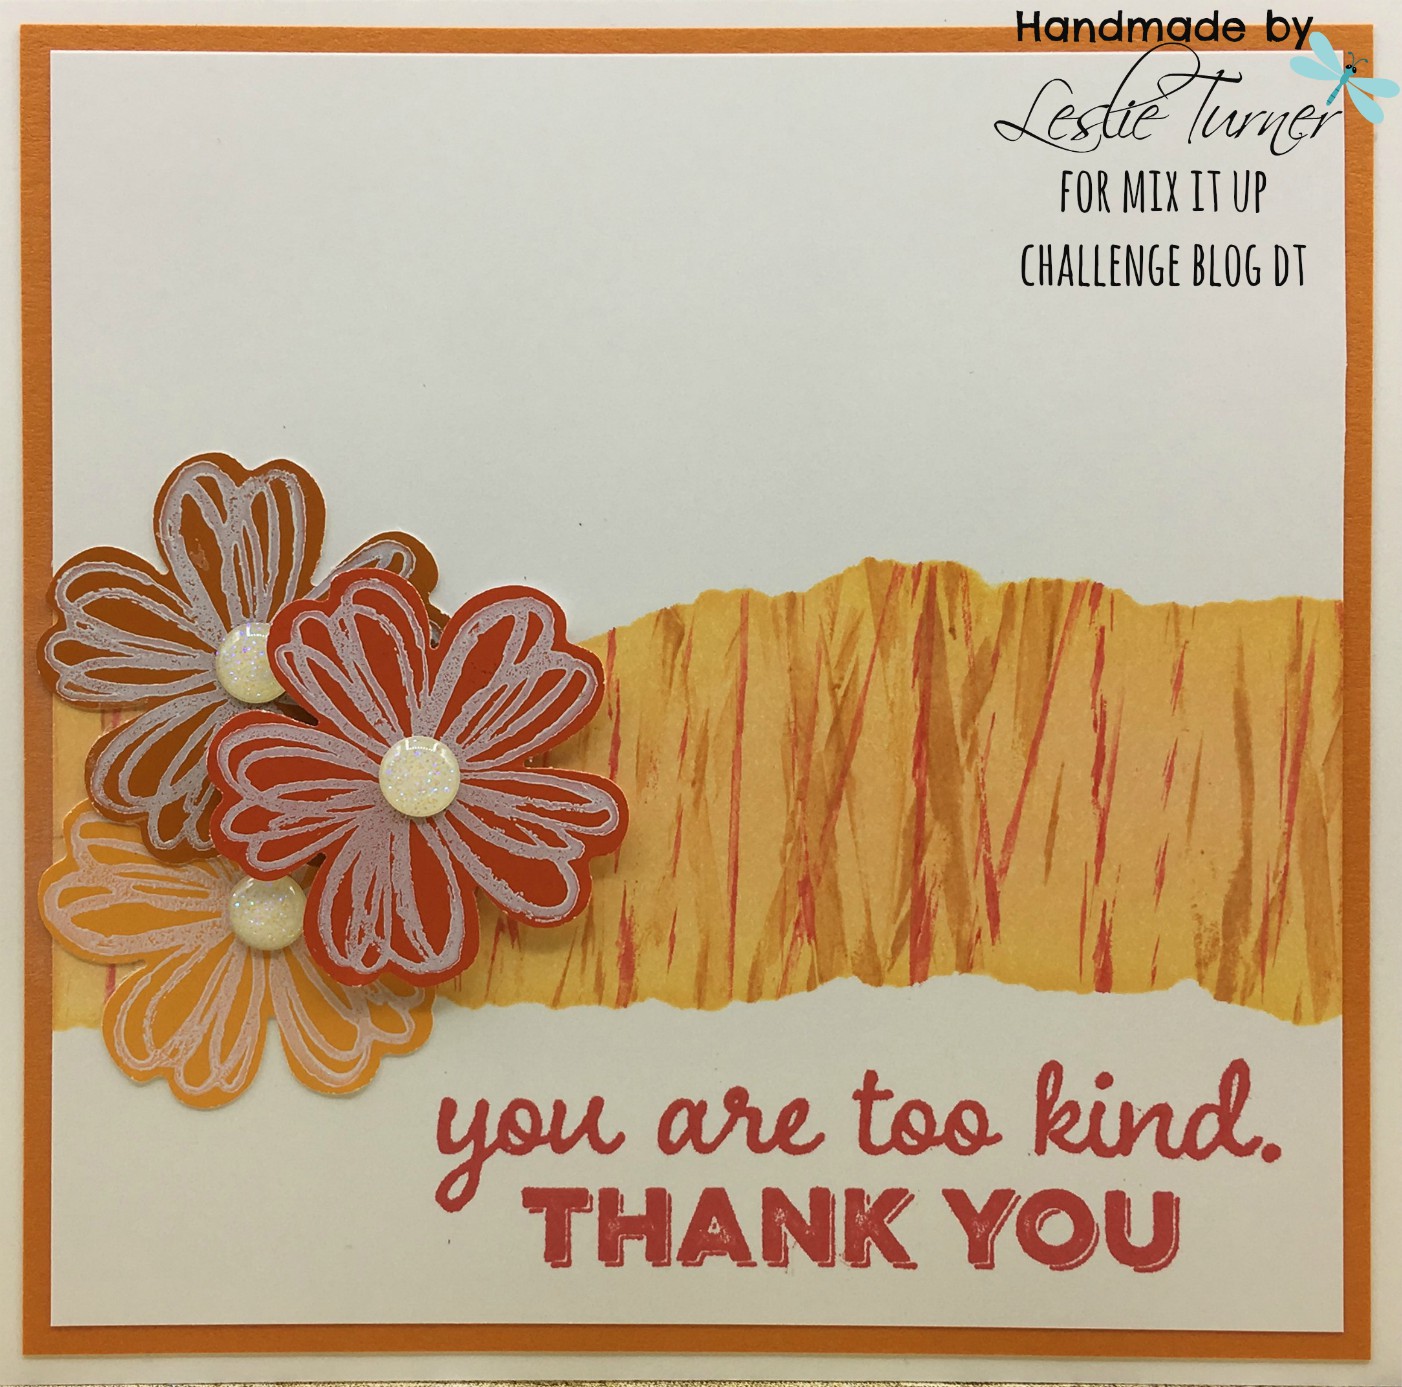
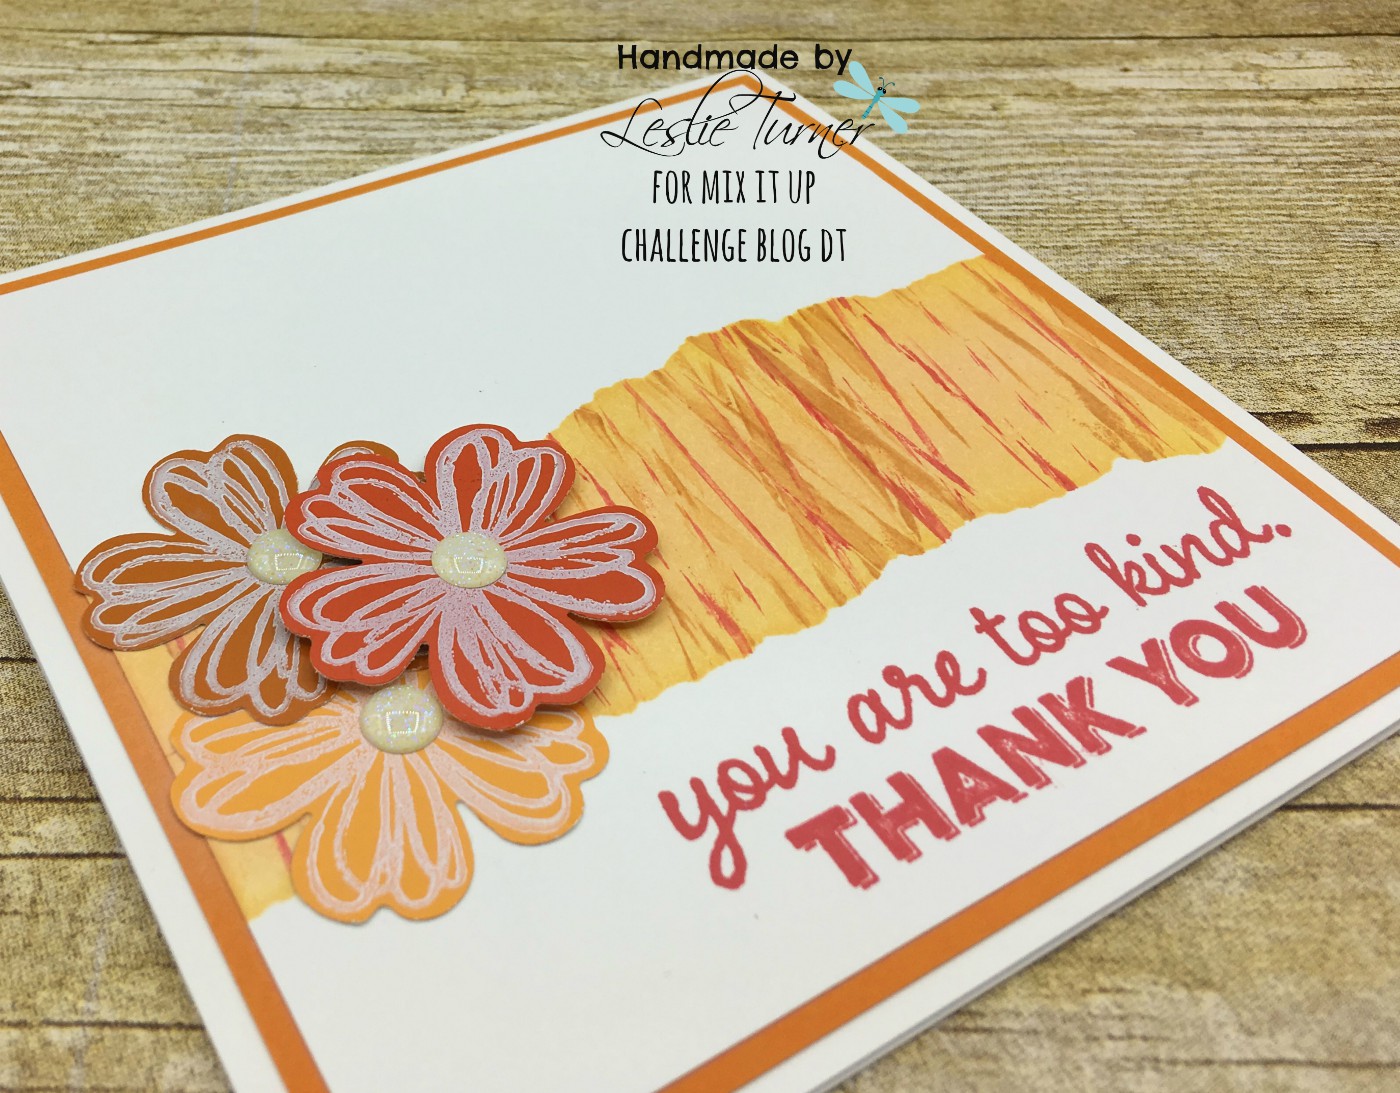
I masked the top and bottom portions of the panel, inked the center with two light shades of distress ink, stamped in the center with two darker shades of distress ink, and then removed the masking paper. I stamped a large sentiment across the bottom and then layered the panel and attached it to the card base. I stamped large flowers on Valspar paint cards and punched them out. I affixed glitter gumdrops to the centers of the flowers and adhered them to the front of the card.

2018_11180005a

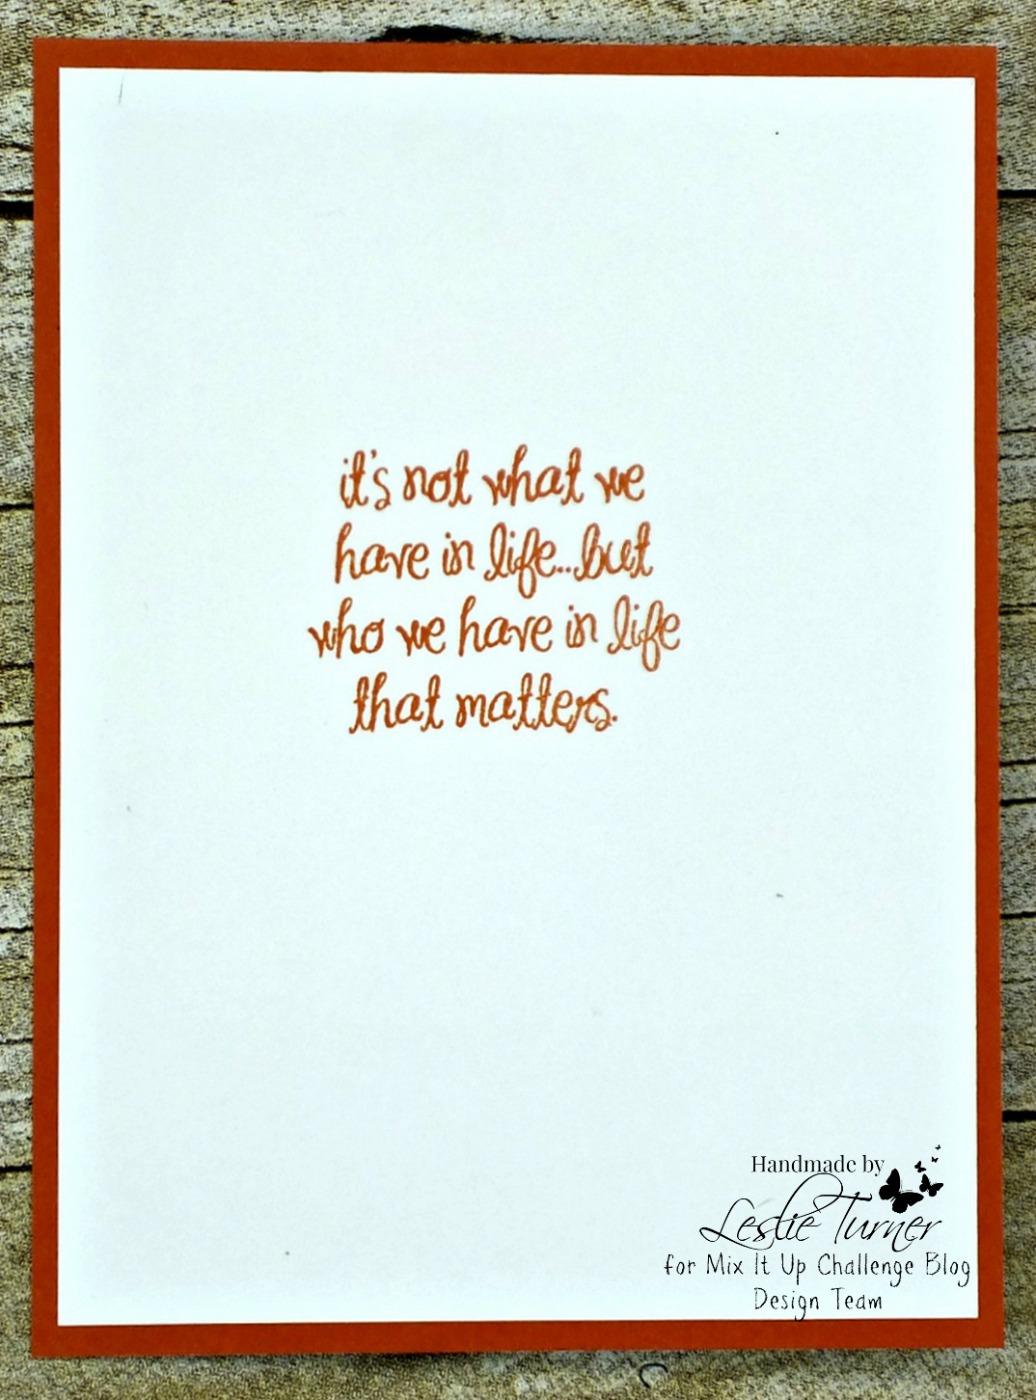
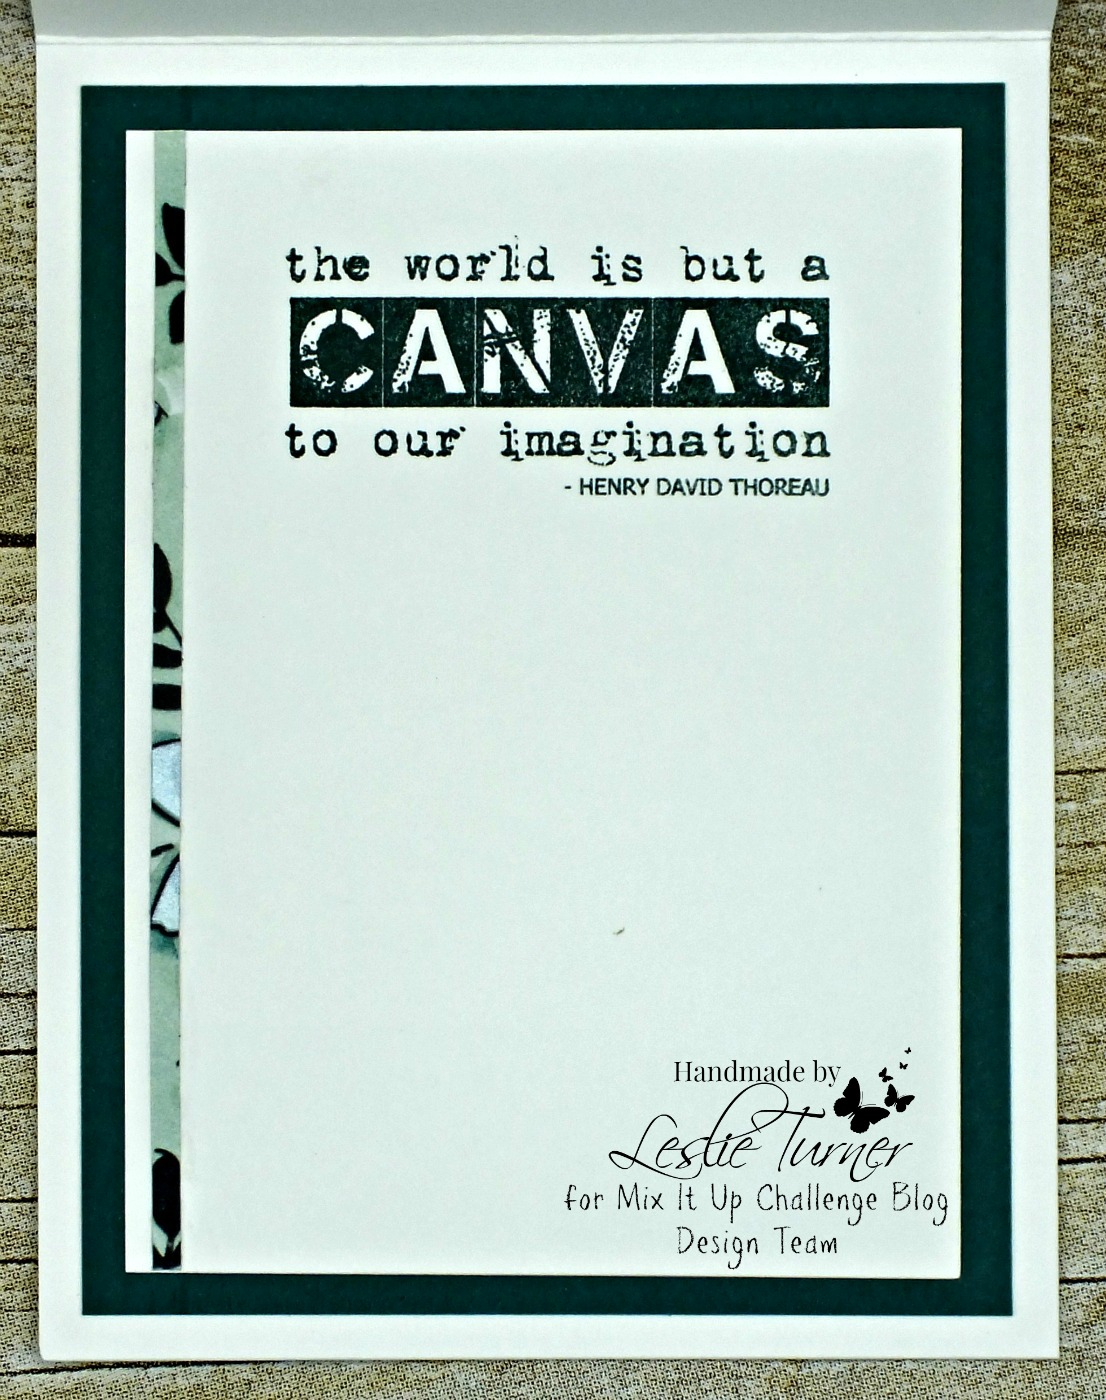
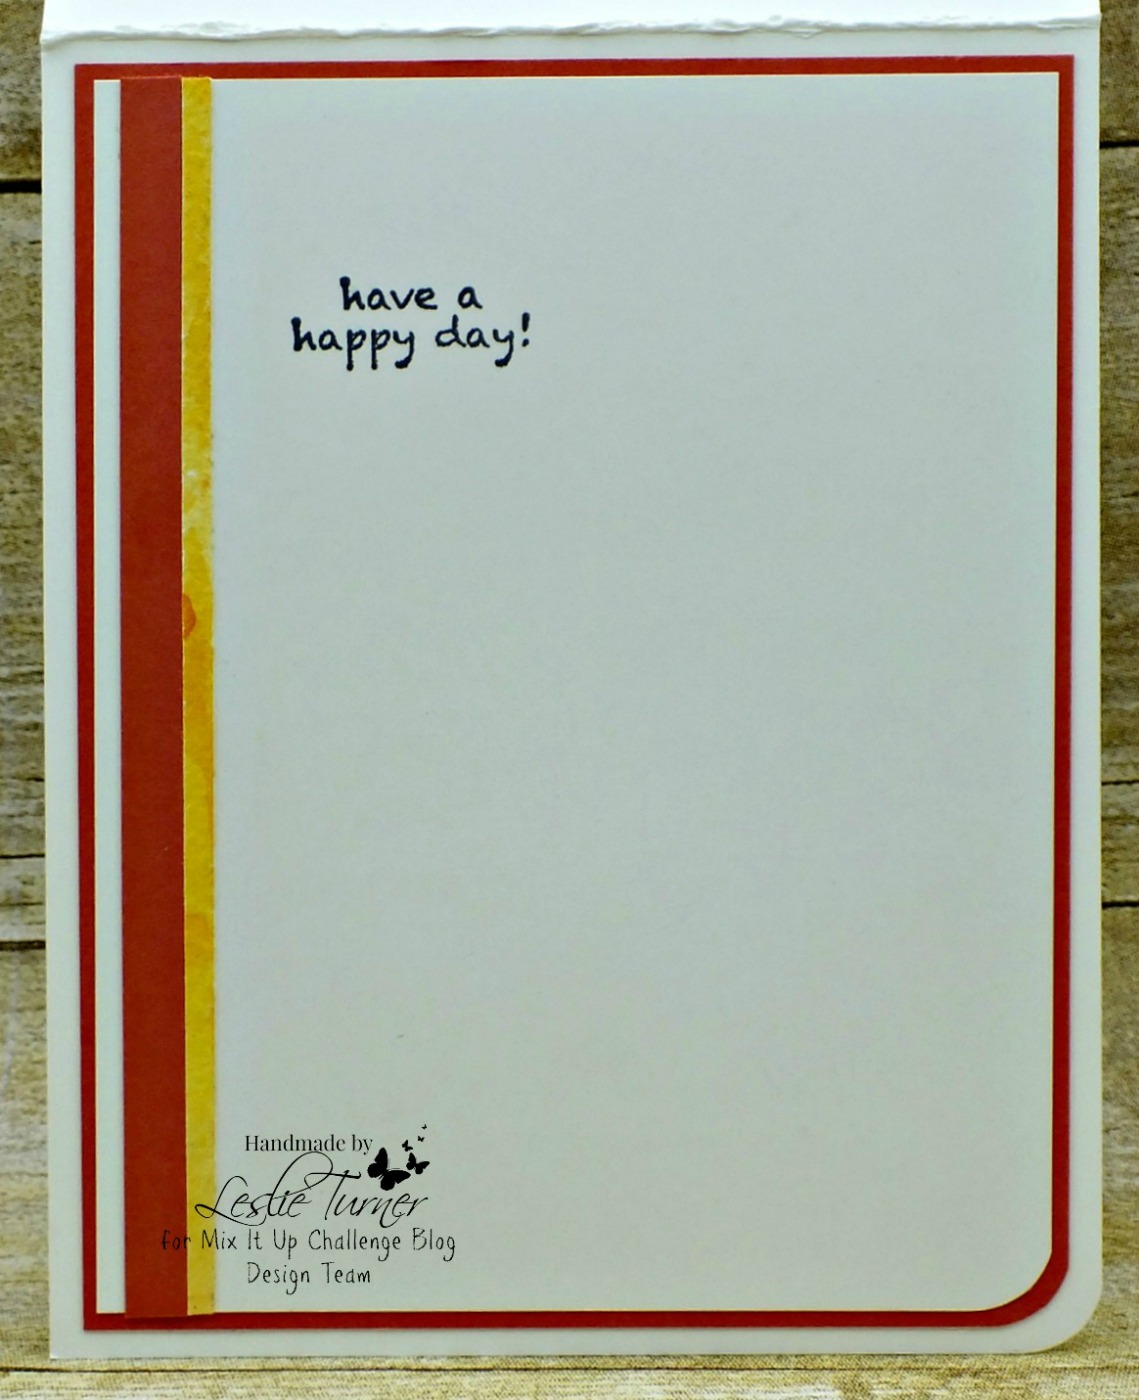
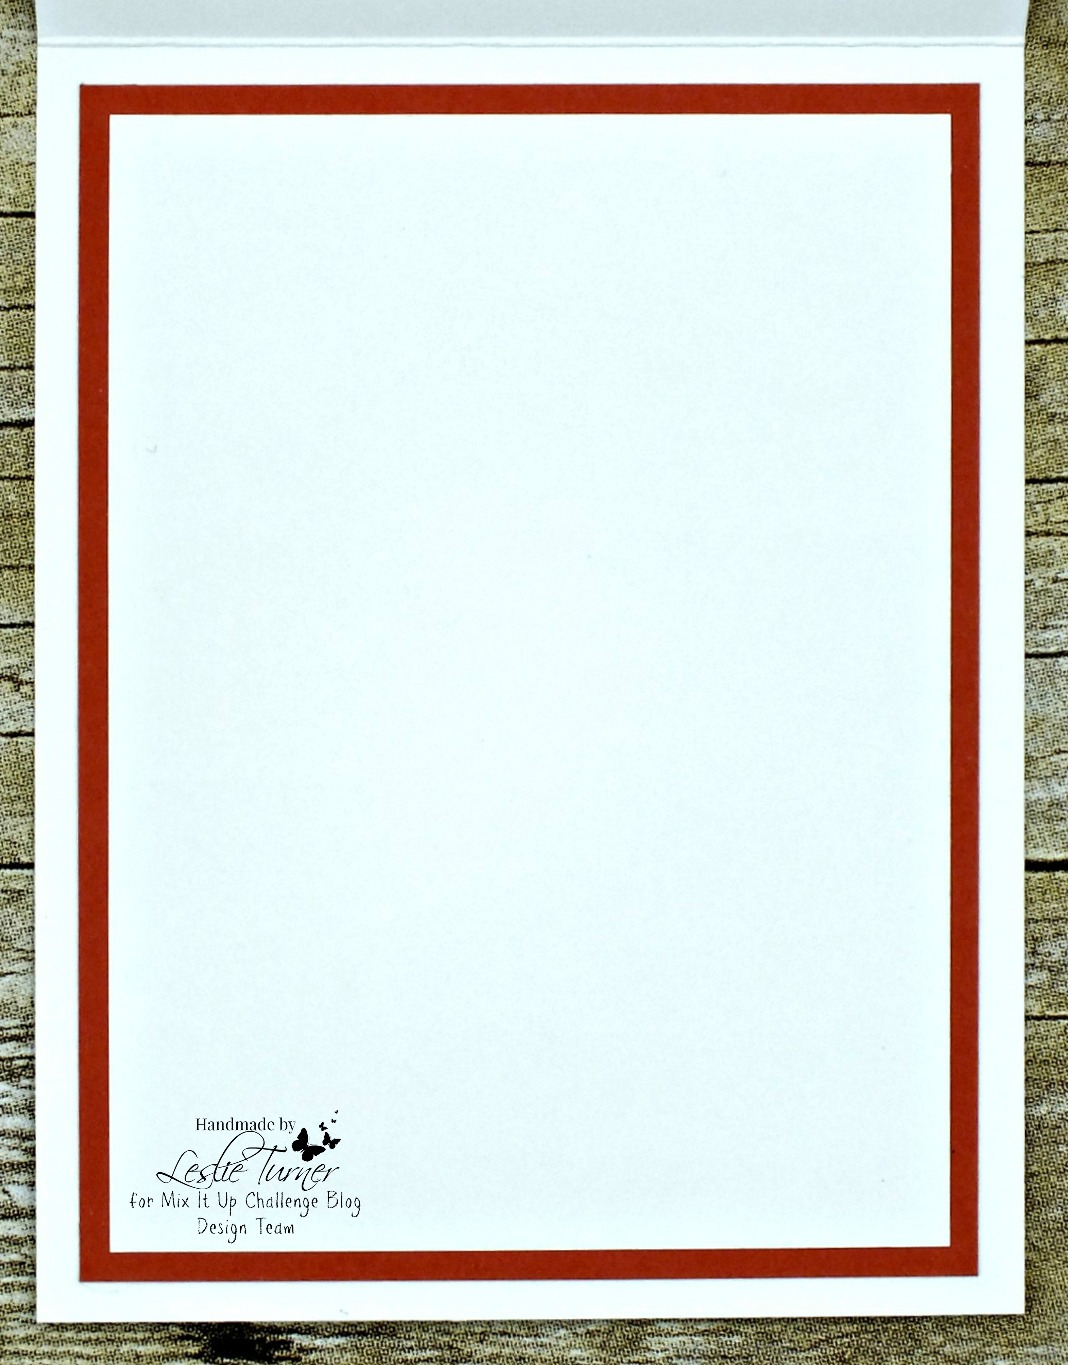
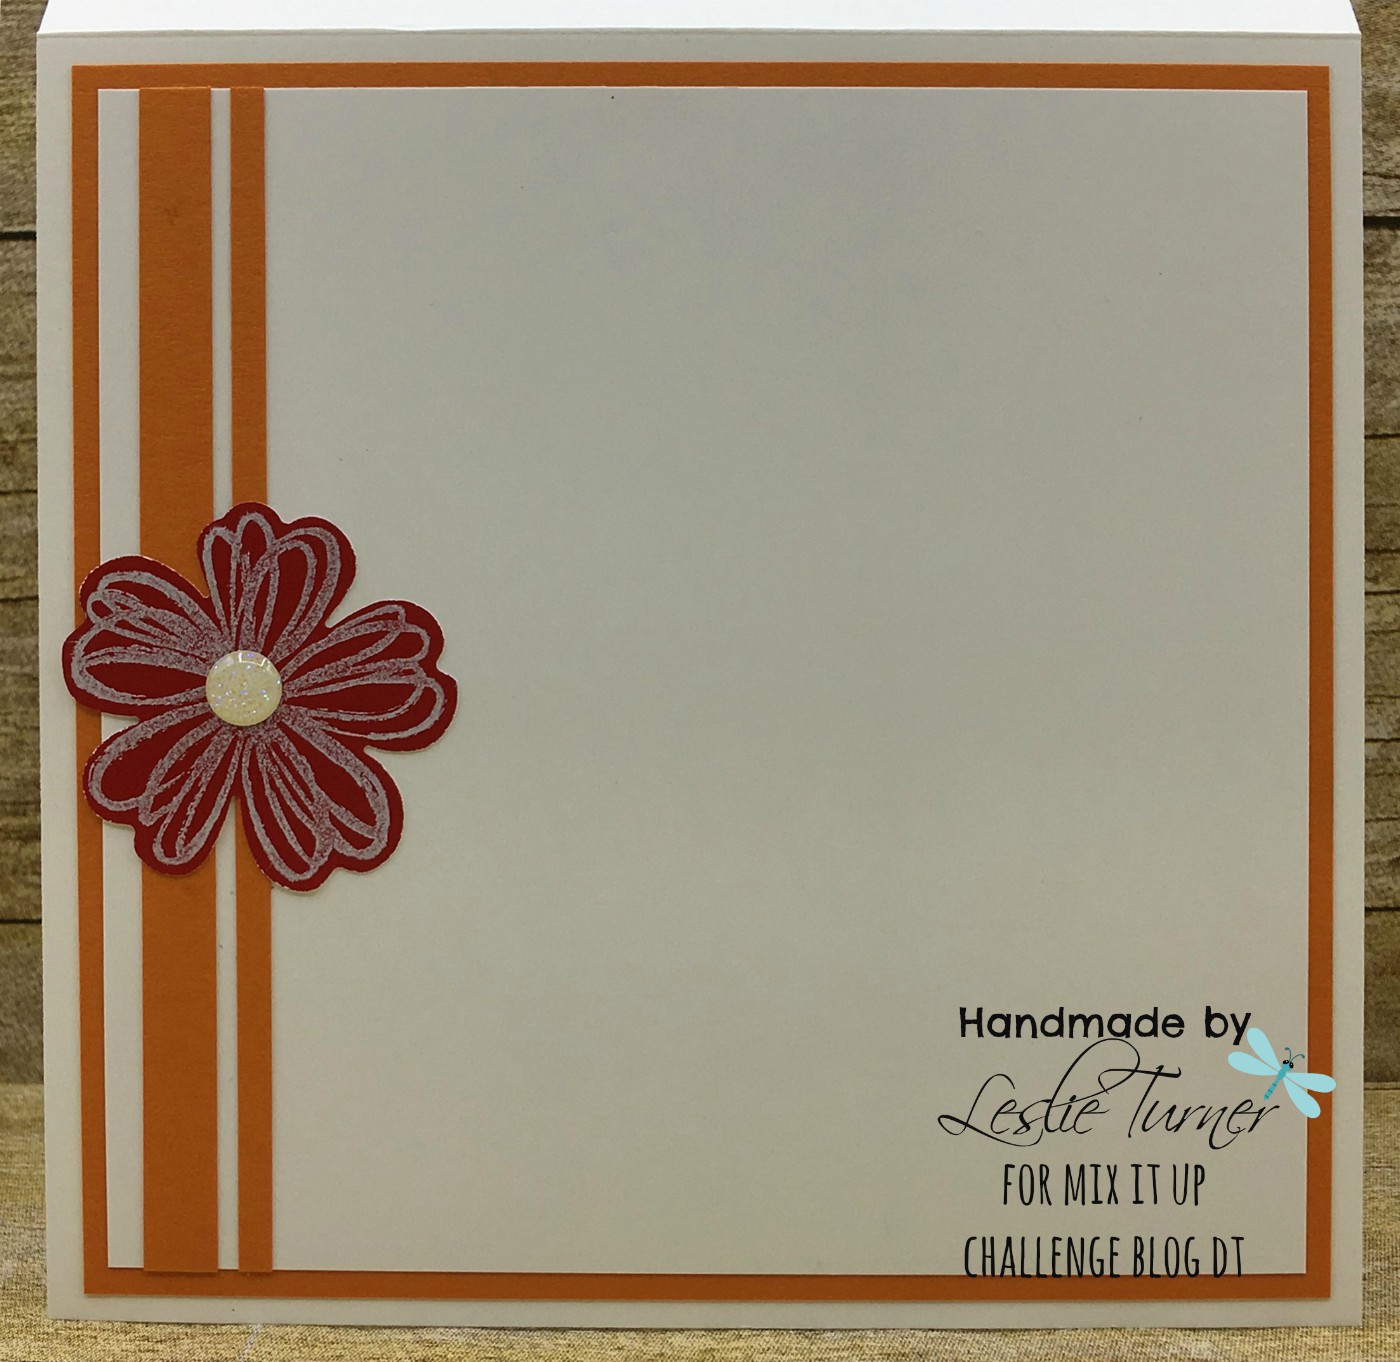
I embellished the inside panel with strips of the same cardstock used to layer the front panel and adhered a stamped/punched flower. I left the inside blank to write a custom sentiment.

2018_11180006a

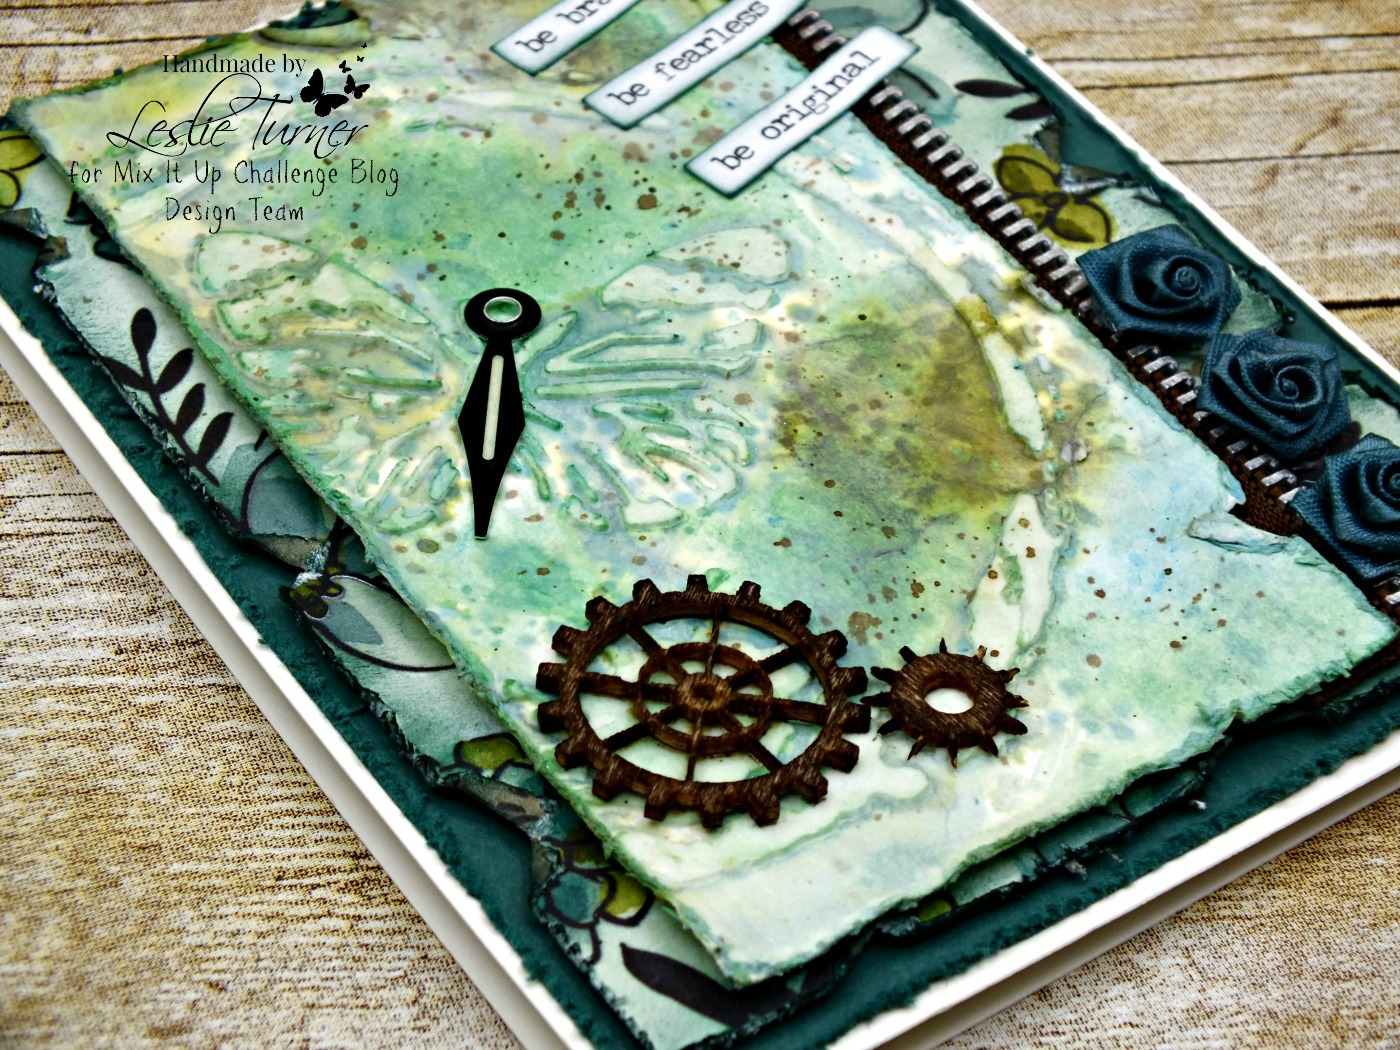
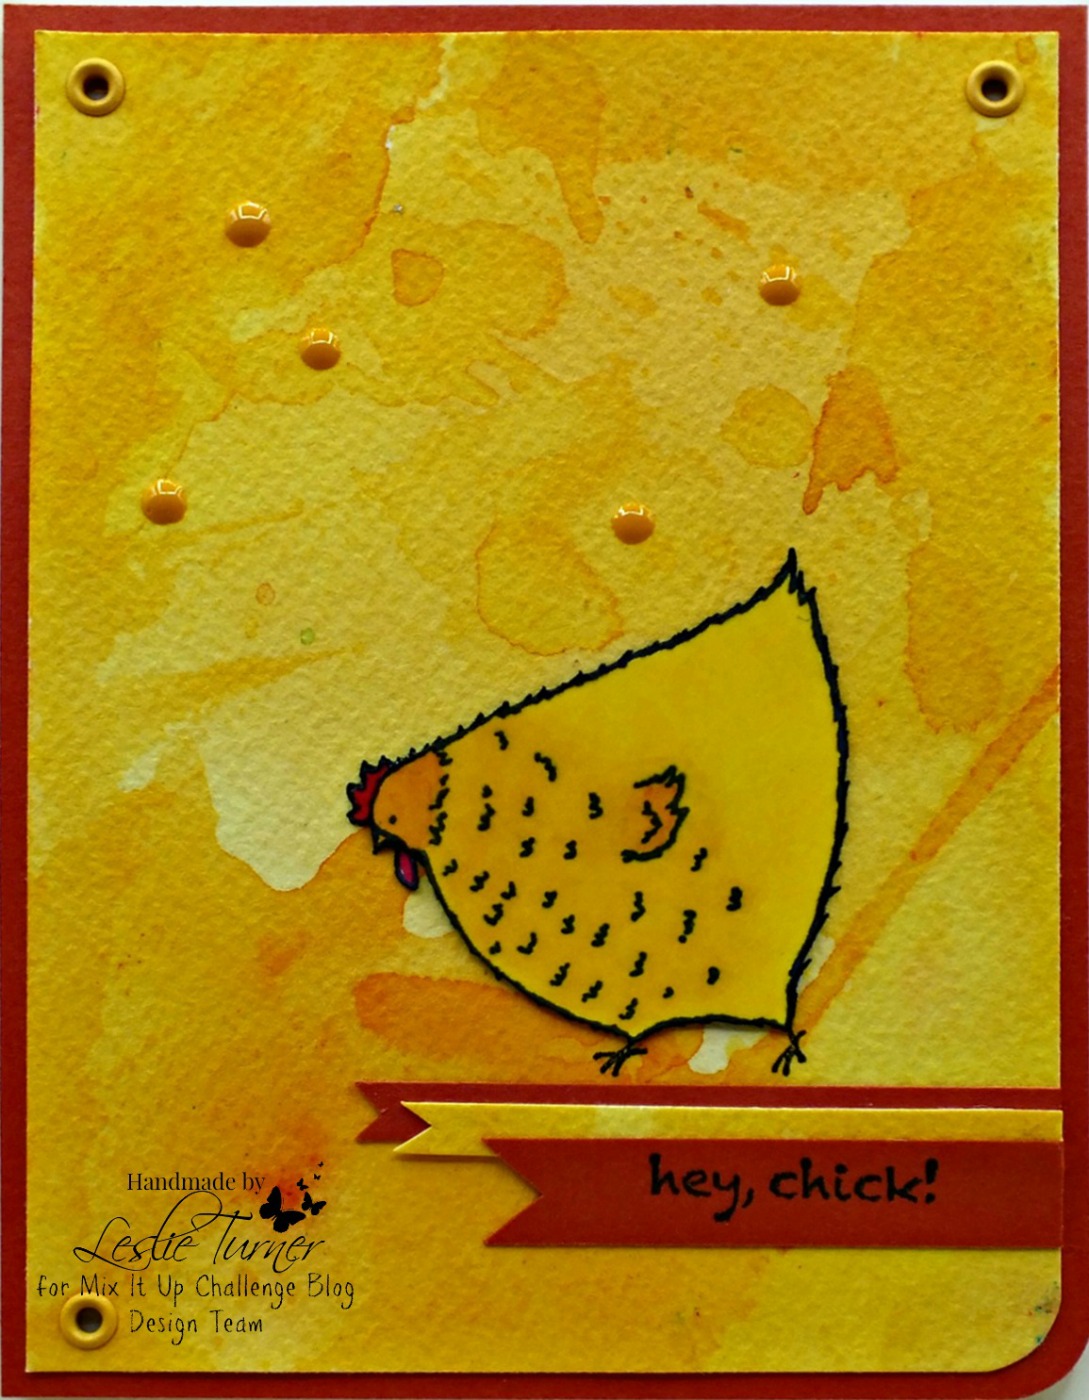
And here’s one more look… I really like rubberband stamping! ;)

2018_11180007a

Products used:
Cardstock/Paper: Stampin’ Up thick and regular Whisper White cardstock, Stampin’ Up Pumpkin Pie cardstock, Valspar paint cards- Caramel Cream, Orange Ochre, Vivid Orange and Classic Red
Stamps: Stampin’ Up Flower Shop and One Big Meaning stamp sets
Ink: Ranger distress ink- dried marigold, wild honey, rusty hinge, barn door; StazOn White ink
Dies/Punches: Stampin’ Up Pansy Punch
Accessories:  Tim Holtz Stamp Platform, YNS White Glitter Gumdrops, Masking Paper, thin and medium rubberbands

I hope you’ve enjoyed today’s project and will link up with us this month! Remember, all of our challenges are ‘anything goes’ and the technique twist is not required to play! Although you have to admit that you’re now intrigued with rubberband stamping, arent’t you, lol, so give it a go! Thanks for stopping by today and we’ll see you again soon! ;)

Scrappy hugs,
lesliesig

a Million and One thanks

Hi everyone! I’m back with another share on this fine Tuesday morning – the first of the month is always busy! A new challenge is live over at Mix It Up Challenge Blog and I’m happy to share my DT inspiration project for MIUCB #21 – Anything Goes + Sentiment as the Main Focus. Remember that all of our challenges are Anything Goes and we always include a technique twist to inspire you but the twist is not mandatory to play! I created a totally green thank you card using some pretty foil and glitter Washi. Yep, I’m looking for some good luck in the New Year!

Leslie

This was an easy card and would be super fun to mass produce to create a set in different colors. Glitter Washi on the background, a stamped sentiment cut with a fancy die, a slightly larger die cut to layer it on, some foam and some Crystal Drops, and poof, you have a card! I see more of these in my near future, lol!

2018_11110013a

For the inside, I embellished a white panel with foil and glitter Washi strips leftover from the front and then stamped a sentiment.

2018_11110014a

And one final look… love it! ;)

2018_11110015a

Happy to enter this card into the following challenges:
The Artistic Stampers Creative Team Blog: January Anything Goes

Products used:
Cardstock/Paper: Stampin’ Up thick and regular Whisper White cardstock, DCWV Washi Stack
Stamps: Stampin’ Up Million & One and Thankful Life stamp sets
Ink: Stampin’ Up Tranquil Tide ink, Versamark
Dies/Punches: Spellbinders Labels Eighteen dies
Accessories:  Tim Holtz Stamp Platform, Hero Arts Clear Embossing Powder, Darice green Foamies foam, Nuvo Ivory Seashell Crystal Drops

I hope you’ve enjoyed today’s project and will link up a project with us this month! It can be a straight ‘anything goes’ or you can play the twist with us – it’s up to you! Thanks for stopping by and we’ll see you again soon! ;)

Scrappy hugs,
lesliesig

Relax

Hello, crafty friends! Well, it’s the first of the month and you know what that means… lots of posts! So thanks for hanging in there with me while I showcase some fun DT inspiration projects I’ve been busy working on! A new challenge launched this morning over at Mix It Up Challenge Blog and I’m stoked to share my project for MIUCB #20 – Anything Goes + No Stamping! Remember that our challenges are always ‘anything goes’ plus we offer a different technique twist each month to inspire you but the twist is not required to play! This month the twist is ‘no stamping!’ I’m wondering if you’ll find that to be as challenging as I did, lol!

I used Canvas Corp Brands ‘A Bit of Feathers’ and ‘A Day At The Beach’ Paper Collections to create my Beach Bums card. I had a particular friend in mind when I created this, and I think she’s going to love it!

Leslie

I punched some beach shell elements, inked the edges and layered them in a cluster on the front panel. I fashioned a bow from twine and tucked it beneath the starfish element on the right side, then created a tag with rounded corners, an eyelet and twine, and adhered it on the top of the cluster. To finish the front, I added the Beach Bums sentiment and some pearls.

2018_06300002a

I kept the inside panel fairly simple – I just inked the edges, added a paper strip along the left side and layered it on black cardstock. I leave the inside panel blank on a lot of my cards blank so a custom message can be written. But this time I left the inside blank because of the ‘no stamping’ twist in the challenge!

2018_06300003a

One final shot to see the dimension. What a fun card – love how it turned out!

2018_06300004a

I’d love to enter this card into the following challenges:
Always Fun Challenges: #86 – Anything Goes
Pammie’s Inky Pinkies: #1847 – Anything Goes
Word Art Wednesday: Weeks #362/363 – Anything Goes

Products used:
Cardstock/Paper: Canvas Corps Brands ‘A Bit of Feathers’ and ‘A Day At The Beach’ Paper Collections, Marco’s black cardstock
Ink: Ranger Black Soot Distress Ink
Dies/Punches: Stampin’ Up 2″ Circle Punch, EK Success 2-1/4″ Circle Punch, Spellbinders Classic Circle die
Accessories:  Fiskars Corner Rounder, Hemptique Bamboo Cord, Melissa Frances Pearls

I hope you’ve enjoyed today’s card and will link up a project with us this month! We’d love to see your ‘anything goes’ project and even a ‘no stamping’ project – so come on over and play with us! Thanks so much for stopping by and we’ll see you again soon! ;)

Scrappy hugs,
lesliesig

Sweet and Joyful

Hi everyone! I’m back on this fine Thursday morning with another 1st-of-the-month post, shaking my head in disbelief that it’s already the beginning of November! A new challenge is live this morning over at Mix It Up Challenge Blog and I’m happy to share my DT inspiration project for MIUCB #19 – Anything Goes + Aperture! Remember, our challenges are always Anything Goes, and the technique twist we offer every month is just for your inspiration and not required to play! This month it’s any shape hole or opening in your project! Come on over and play with us!

I created a fun Christmas card with an adorable little gingerbread man peeking out of a round aperture! I created a fun design using Stampin’ Up cardstock, paper, stamps and punch!

Leslie

Here’s a close-up of that adorable little guy! He couldn’t be any cuter with his tiny red heart! The only embellishments I used were a few red gemstones.

2018_07190007a

And here is the front flap open to reveal the simple inside sentiment. This one’s going in the pile to mail out in a few weeks! ;)

2018_07190008a

And one final look… I’m in love! :)

2018_07190009a

Happy to enter this card into the following challenges:
Crafty Hazelnut’s Patterned Paper Challenge: November Challenge
Digi Doodle Studios: #11 – Christmas/Winter

Products used:
Cardstock/Paper: Stampin’ Up Very Vanilla, Garden Green and Soft Suede cardstock; Stampin’ Up Warmth & Cheer DSP
Stamps: Stampin’ Up Cookie Cutter Christmas stamp set
Ink: Stampin’ Up Soft Suede ink; Spectrum Noir- D2
Dies/Punches: Stampin’ Up Cookie Cutter Punch and 1-3/4″ Circle Punch
Accessories:  Tim Holtz Stamp Platform, red gemstones

I hope you’ve enjoyed today’s project and will link up a project with an aperture this month! We’d love to see what you create! Thanks so much for stopping by – we’ll see you again real soon! ;)

Scrappy hugs,
lesliesig

Lucky

Hi everyone! It’s October 1st and Monday and quite a busy morning! A new challenge is live this morning over at Mix It Up Challenge Blog and I’m proud to share my DT inspiration project for MIUCB #16 – Anything Goes + Monochrome! Our challenges are always Anything Goes and we’d absolutely love to see you play the technique twist – this month it would be a monochrome project in variations of any color!

I really love fun folds and am always on the hunt for new ones. My inspiration for this friendship card came from my friend Dawn who created a fold-out panel card HERE. I absolutely fell in love with this fold and just had to try it! Love how it turned out!

Leslie

I got some new Stampin’ Up designer series paper a while back and settled on several patterned papers from that collection along with some contrasting cardstock for this card. I stamped a sentiment, punched it with a circle punch and layered it on a scalloped die cut and two more circle die cuts.

2018_07100009a

I stamped an image and sentiment in the fold out panel.

2018_07100010a

Here’s a shot of the fold out panel completely open.

2018_07100011a

I stamped a sentiment on the back as well. Such a fun card!

2018_07100012a

Products used:
Cardstock/Paper: Stampin’ Up Whisper White, Tangerine Tango and Grapefruit Grove cardstock, Stampin’ Up Grapefruit Grove 6×6 DSP
Stamps: Stampin’ Up Love What You Do and Thankful Life stamp sets
Ink: Stampin’ Up Tangerine Tango and Grapefruit Grove ink
Dies/Punches: Stampin’ Up 2″ circle punch, EK Success 2-1/4″ circle punch
Accessories:  Tim Holtz Stamp Platform

Proud to enter this monochrome fun fold into the following challenges:
A Bit More Time To Craft Challenge: #77 – Anything Goes
A Perfect Time To Craft Challenge: #10 – October Anything Goes
Always Fun Challenges: #78 – Dies & Punches
Cardz 4 Galz: #81 – What’s New (new fun fold technique)
Crafts Galore Encore Challenge Blog: #56 – October Anything Goes
Craftyhazelnut’s Patterned Paper October Challenge
Lemon Shortbread Challenge Blog: #77 – Anything Goes
Monochrome Magic: #15 – Monochrome or Monochrome w/ Twist of Add a Bow (no twist)
Not Just Cards: Anything Goes
Pearly Sparkles Challenge Blog: #33 – Anything Goes
The Creative Crafters: #8 – Anything Goes
Word Art Wednesday: Weeks #354/355 – Anything Goes
World Wide Open Design Team Challenge: #9 – Anything Goes

I hope you’ve enjoyed today’s project and will link up a project with us this month! Remember, all of our challenges are anything goes with an optional technique twist to inspire you… the twist is not required to play! Thanks so much for hanging with me this morning – we’ll see you again soon! ;)

Scrappy hugs,
lesliesig

Live, Laugh, Love, Create Canvas

Hiya, crafty friends! Here I am again with another first-of-the-month post on this fine Saturday morning! The September challenge is live over at Mix It Up Challenge Blog and I’m happy to share my DT inspiration project for MIUCB #17 – Anything Goes + Layering! I’m really loving mixed media these days and I really enjoyed creating this!

Leslie

I started by laying out quite a few pieces of ephemera and inking the edges of all of them. I hand-cut a large heart from 120# kraft cardstock and inked it. I dusted off my Janome Sew Mini sewing machine and created a gathered flower from a canvas scrap. The final element was adding a rub-on to a canvas strip and stitching around the edge with the Sew Mini. Before I added the two canvas elements, I splattered black ink with a fan brush.

2018_07200020a

There definitely was a whole lotta inking going on! And I might add that the blue and pink color combo made a gorgeous shade of purple! Here are a few more angled shots from different aspects so you can see the elements, dimension and colors.

2018_07200021a
2018_07200022a
2018_07200023a

Products used:
Cardstock/Paper: Paper Accents 120# Kraft cardstock
Ink: Ranger Black Soot distress ink; White Gesso; Tattered Angels Glimmer Mists and spray inks- Camel Glam, Pewter GZ, Vintage Pink GM, Shade SS, Party Pink GM, It’s Blue GM, Gold GM and Woven Burlap
Accessories:  7 Gypsies ‘Drawer’ Salvage Art, ‘Enjoy’ Stash Paque, ‘Inspire’ Parchment Rub-Ons, and Chicken Wire Tall Base; Canvas Corp Brands canvas scraps; Janome Sew Mini sewing machine; Your Next Stamp Purple Glitter Gumdrops; fan brush

I hope you’ve enjoyed today’s project and will link up an ‘anything goes’ project with us this month! And we’d love it if you’d play the twist and add some layers to your project! Easy peasy! Thanks so much for stopping by – we’ll see you again real soon! ;)

Scrappy hugs,
lesliesig

live simply… Faux Leather Tag

Hello, my crafty friends! I’m sitting here shaking my head at quickly this year is flying by! My sister’s birthday is on the 8th and it always seems like once her birthday passes, the rest of the year is a blur! It’s time for a new challenge over at Mix It Up Challenge Blog and I’m excited to share my DT inspiration project for MIUCB #16 – Anything Goes + Acrylic Block Stamping. Remember, our challenges are always Anything Goes and we offer a different technique twist each month just to inspire you – the twists are not required to play!

I created a fun faux leather tag for this month’s challenge and I literally stamped with a 3×3 acrylic block! It’ll be fun to see the different interpretations because everybody sees things a different way!

Leslie

I cut my tag from heavy kraft cardstock, distressed the edges with tool and ink, then sewed around the edges with my Janome Sew Mini.

2018_07190002a

I stamped with the acrylic block, then randomly stamped some partial circle images around the edges. I splattered some distress ink with a fan brush and then applied the Prima crystal flower, butterflies and inked sentiments.

2018_07190003a

I created a grommet around the opening at the top of the tag and then added several pieces of ribbon scraps.

2018_07190004a

One final angled shot. Love, love, love!

2018_07190005a

Products used:
Cardstock/Paper: Paper Accents 120# Kraft cardstock
Stamps: Stampin’ Up Timeless Textures stamp set
Ink: Ranger Walnut Stain, Fired Brick and Spiced Marmalade Distress Ink, Ranger Walnut Stain Distress Oxide
Dies/Punches: Stampin’ Up 3/4″ Circle Punch, 1/4″ Hole Punch
Accessories:  Tim Holtz Distress Tool, Janome Sew Mini sewing machine, Prima Say It In Crystals Flower, Tim Holtz Idea-ology Botanical Ephemera, Tim Holtz Idea-ology Small Talk sticker sentiments, assorted ribbon and jute scraps

I hope you’ve enjoyed seeing this project and will link up with us this month! We’d love to see what you create! Thanks so much for stopping by – we’ll see you again soon!

Scrappy hugs,
LeslieSig

be brave

Hi everyone! Woot-woot! Can you believe it’s July 1st?! It’s time for another fun challenge over at Mix It Up Challenge Blog and I’m super stoked to share my DT inspiration project for MIUCB #15 – Anything Goes + Mixed Media! I inked around the edges with regular ink, I used texture paste with a stencil, I watercolored with distress inks, and I did a little stamping. We are welcoming four new designers this month so be sure to pop over to see what they are all about! AND and we have a prize this month, donated from the personal stash of new designer, Cathy! Woo-hoo!

I’ve been out of the crafting groove for the past several months. Some of you may know that my husband became critically ill in late February/early March due to a brain bleed after biopsies of a brain lesion, and I lost all interest in crafting. Thank God he’s improving, and I feel like crafting again!

I had such a good time creating this! I started with a piece of plain ivory cardstock, patterned paper and dark teal cardstock, and distressed the edges of all the layers. Then I used texture paste and The Crafter’s Workshop Mini Butterfly Collage stencil, and after that dried, I added several colors of distress ink on my craft mat with water in the distress sprayer and smooshed the panel into the ink. I wrinkled it a bit while it was still wet, and then let it dry.

Leslie

Then I put the layers together and adhered them to the card base with foam tape for a little dimension. I affixed a zipper, a clock hand and some inked wooden cogs to the watercolored piece and adhered with foam tape to the layers on the card base. To finish the front, I flicked walnut stain distress ink mixed with water and then added some dark teal fabric flowers and the sentiment.

2018_06300005a

Here are a couple angled shots so you can see the dimension. I’m pretty happy with how this turned out!

2018_06300006a2018_06300007a

I stamped a STAMPlorations sentiment on the inside panel that I layered on dark teal cardstock and decorated with a leftover strip of patterned paper from the front.

2018_06300008

Products used:
Cardstock/Paper: GKD Pure Luxury Ivory cardstock, Stampin’ Up Tranquil Tide cardstock, Stampin’ Up Share What You Love Specialty DSP
Stamps: STAMPlorations Art Is stamp set
Ink: Stampin’ Up Tranquil Tide ink, Ranger Forest Moss, Pine Needles, Evergreen Bough and Walnut Stain Distress Ink
Accessories:  Tim Holtz Stamp Platform, Tim Holtz Distress Tool, The Crafter’s Workshop Mini Butterfly Collage stencil, Ranger Opaque Matte Texture Paste, Small Talk sentiment stickers

I hope you’ve enjoyed this project and will link up with us this month! Remember, all of our challenges are Anything Goes and we offer an optional technique twist to get your mojo going but it’s not required to play! Thanks so much for stopping by today and we’ll see you again soon!

Scrappy hugs,
lesliesig

hey, chick!

Hello, hello, hello! Can you believe it’s already June 1st?! Where has this year gone?! It’s time for another fun challenge over at Mix It Up Challenge Blog and I’m super stoked to share my DT inspiration project for MIUCB #14 – Anything Goes + Smooshing! Okay, “What’s smooshing?”, you ask… it’s the art of ‘smooshing’ your paper down into a puddle of inky water on your craft mat. It’s fun and it’s messy, lol! And remember, all of our challenges are ‘anything goes’ and the optional technique twist is offered to inspire you and is not required to play in our challenges!

Leslie

I smooshed my watercolor paper down into yellow, orange and red Brusho powders spritzed with water on my craft mat. I did this several times, drying each layer before smooshing again, until I got the look I wanted. I trimmed the watercolor paper and the layering panel, and rounded the lower right corner of these pieces as well as the card base. I added eyelets on three of the corners and hand-cut three flags. I stamped the sentiment on the largest flag and affixed them to the panel. I stamped a chicken on the panel and then twice on white cardstock. I colored one of them with Spectrum Noir markers, fussy cut and layered them together, and adhered them over top of the stamped chicken on the panel. I popped the panel up on a piece of white Foamies foam prior to adhering to the card base. I finished the front panel with several dots of Nuvo Crystal Drops.

2018_05270006a

I layered the inside panel and embellished it with leftover strips used on the front, then stamped the inside sentiment.

2018_05270007a

Here’s one final shot showing the dimension. Really loving how this turned out! It’s been ‘forever’ since I used any eyelets and I really love the interest they give this project!

2018_05270008a

Products used:
Cardstock/Paper: GKD Pure Luxury White and Tomato Soup cardstock, Arches Cold Press Watercolor paper
Stamps: Stampin’ Up Hey Chick stamp set
Ink: Yellow, Orange and Red Brusho powders, Memento Tuxedo Black ink, Spectrum Noir- OR1, CT4, DR2
Accessories:  Tim Holtz Distress Sprayer, Tim Holtz Stamp Platform, We R Memory Keepers Crop-A-Dile, yellow eyelets from stash, Kadomaru Pro corner rounder, Darice white Foamies foam, Nuvo English Mustard Crystal Drops

I hope you’ve enjoyed today’s project and will link up with us this month – we’d love to see what you create, using the ‘smooshing’ technique twist or not! Thanks so much for stopping by today – we’ll see you again soon! ;)

Scrappy hugs,
lesliesig

remember to play

Hi everyone! Happy Tuesday! It’s time for another fun challenge over at Mix It Up Challenge Blog and I’m excited to share my DT inspiration project for MIUCB #13 – Anything Goes + Emboss Resist! Remember, our challenges are always ‘anything goes’ with an added optional technique twist to inspire you! I created my card using scraps of embossed paper that I had out for another project, so you can imagine this worked up very quickly. Love it when that happens, lol!

2018_04300005a

I inked the embossed paper using the DTP (direct to paper) technique for nice rich colors. I layered the elements and adhered the flower, a file tab and sentiment word sticker.

2018_04300006a

I left the inside blank to write my own sentiment.

2018_04300007a

One final shot showing the dimension. I’m very pleased with how this turned out!

2018_04300008a

Products used:
Cardstock/Paper: Stampin’ Up Thick and regular Whisper White, Calypso Coral and Peekaboo Peach cardstock, Stampin’ Up Irresistibly Yours Specialty DSP
Stamps: xxxx
Ink: Stampin’ Up Calypso Coral and Peekaboo Peach ink
Accessories:  Paper flower from stash, American Crafts File Tab, Tim Holtz Idea-ology Small Talk word stickers

I hope you’ve enjoyed this project and will link up an ‘anything goes’ project with us this month! The emboss resist twist is optional and not required to play! Thanks for stopping by today and we’ll see you again soon! ;)

Scrappy hugs,
lesliesig