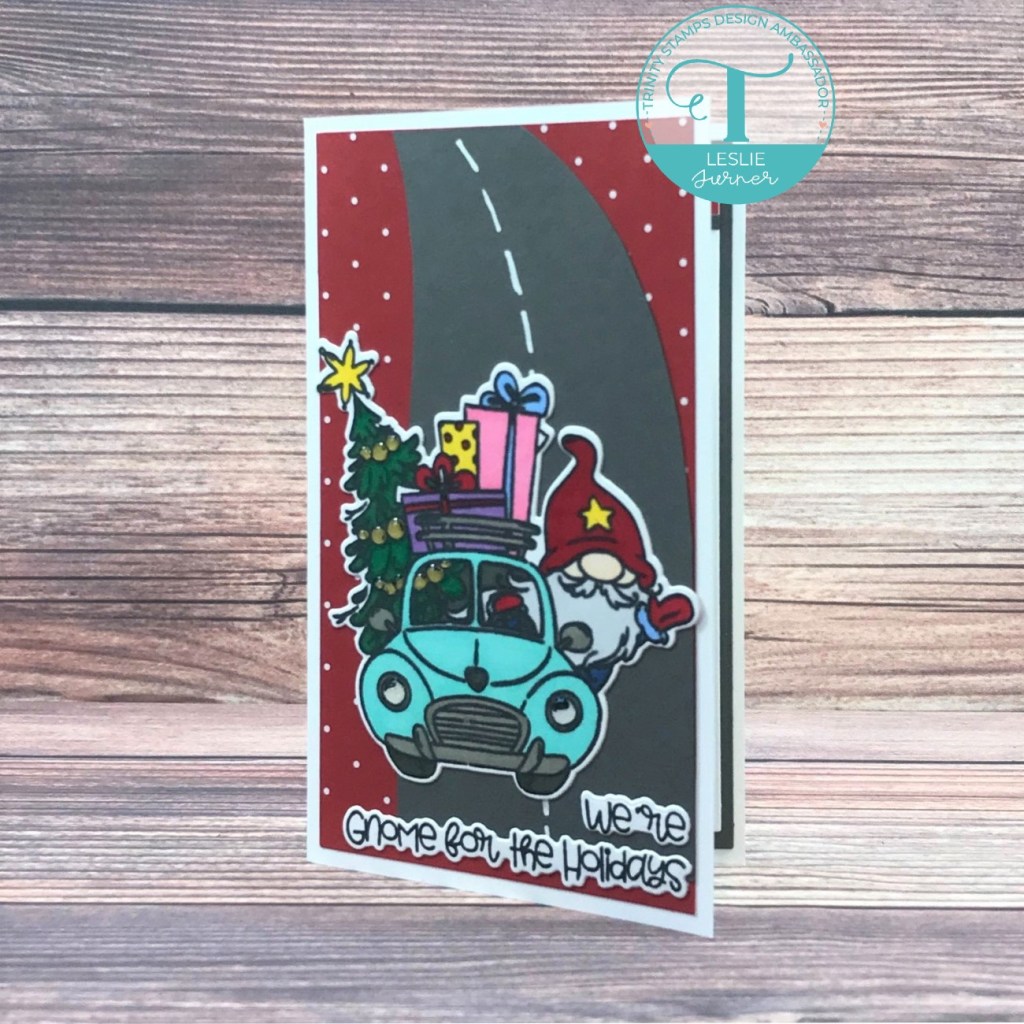
Hi everybody! This is the first project I’m showcasing for the Trinity Ambassador “A Few of Our Favorite Things” Social Media Hop on Instagram starting at 6:00 AM PST this morning and ending at 11:59 PM PST on Friday, December 3rd! My main post is HERE. I was in a mini slimline kind of mood… my new favorite size card (3-1/2″ x 6″) that’s a legal size to mail! Affiliate links are used in this post at no cost to you – I really appreciate your support! This card features the Gnome for the Holidays stamp set and Gnome for the Holidays die set and the inside sentiment is from the A Sentiment for (Almost) Everything stamp set. Such a fun little travelin’ scene!

For your chance to win a $20 gift card to the Trinity Stamps store, be sure to hop along with us on Instagram, starting at @trinitystampsllc – there will be a ton of inspiration! Winners will be announced on the Trinity Stamps blog by December 5th! Have fun hopping!
I cut the mini slim card base from Neenah Classic Crest 110# Solar White cardstock along with a layering panel from the Christmas Holiday Print 6×6 paper pad using the Waffle Flower Mini Slimline Layers die set. I hand-cut the highway from CutCardStock Basis Gray cardstock and used a white paint pen to draw the dotted center line. I stamped the focal image from the Gnome for the Holidays stamp set in black ink on Solar White cardstock, colored it with alcohol markers (and gold pen for the ornaments), and cut it with the coordinating Gnome for the Holidays die set. I added Ranger Glossy Accents to the headlights and the gold ornaments on the tree. I stamped and die cut the sentiment from the same stamps and dies, and adhered all the elements to the card front.

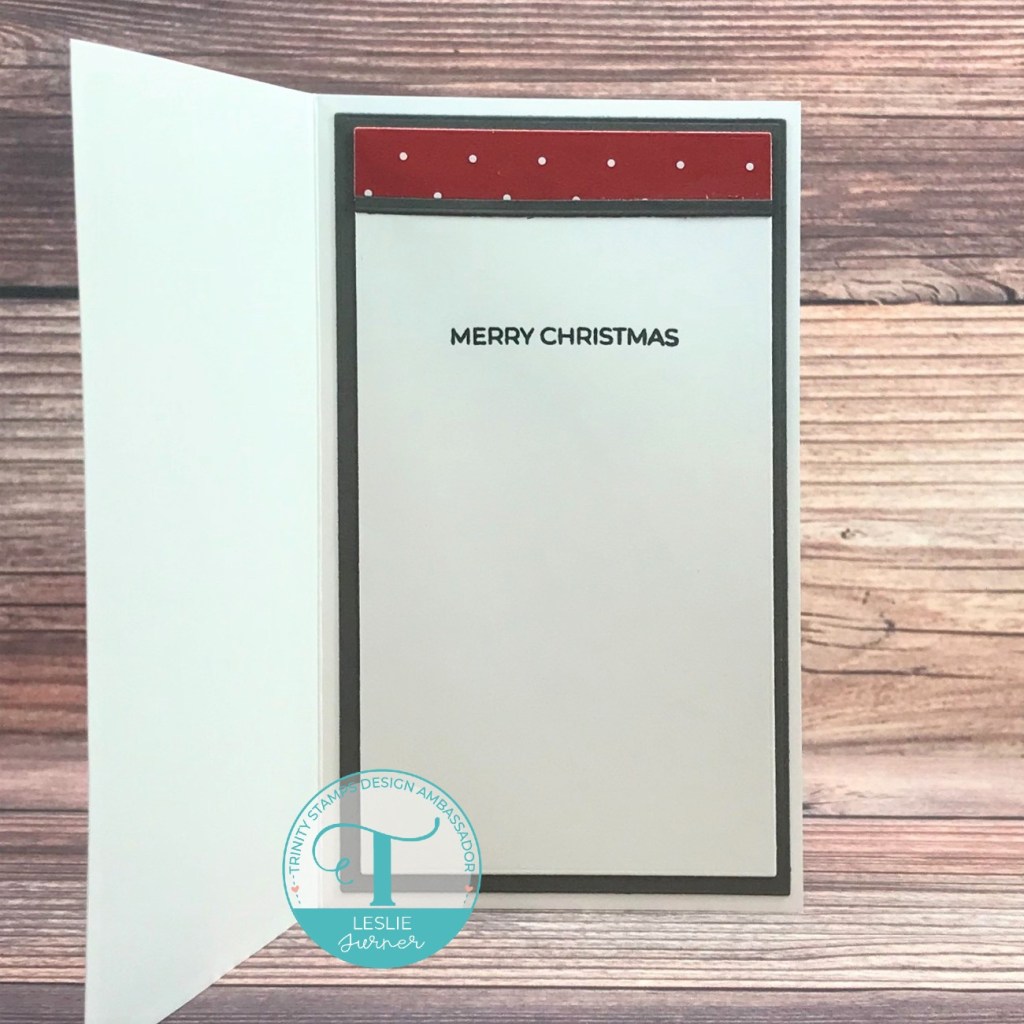
I cut the inside panel from Neenah Classic Crest 80# Solar White cardstock using the Waffle Flower Mini Slimline Layers die set and embellished it with a leftover strip of patterned paper used on the front and a narrow strip of CutCardStock Basis Gray cardstock. I stamped the sentiment from the A Sentiment for (Almost) Everything stamp set in black ink and layered the panel on gray cardstock.
And one more look… I absolutely LOVE gnomes, and Trinity Stamps has some of the most adorable out there! Super happy with this travelin’ guy! ;)

Sharing in the following challenges:
1. A Place To Start: #11 – Craft A Favorite Memory (travelin’ home for the holidays!)
2. Addicted To Stamps & More: #419 – Any Occasion
3. Color Crazy Challenge: #47 – Anything Goes
4. Crafty Catz: #574 – Anything Goes with optional Christmas Non-Traditional Colors (no twist)
5. Creative Inspirations: November – Wonderful Winter/Feeling Festive
6. Creative Moments: #227 – Anything Goes
7. Make My Monday Challenge Blog: #162 – Cute Christmas
8. Scrapping4fun Challenges: #206 – Winter/Christmas
Trinity Stamps products used:
Gnome for the Holidays stamp set
Gnome for the Holidays die set
A Sentiment for (Almost) Everything stamp set
Other products used:
Cardstock/Paper: Neenah Classic Crest 110# and 80# Solar White cardstock, CutCardStock Basis Gray cardstock, Christmas Holiday Print 6×6 paper pad
Ink: Catherine Pooler Midnight ink; Arteza alcohol markers- BG37, G21/23, P13, RP15, B32/37, Y02, R21, BR28, GS02/04, CG08; Pentel Slicci Gold pen, Posca white paint pen
Dies/Punches: Waffle Flower Mini Slimline Layers die set
Accessories: Tonic Studios 12″ Guillotine Paper Trimmer, MISTI stamp tool, Big Shot, Bearly Art precision craft glue, Ranger Glossy Accents
I hope you’ve enjoyed this project and you’re inspired to get those craft supplies out to play! Be sure to check out all the amazing stamps, dies and other goodies at Trinity Stamps! And head on over to the Trinity Stamps Facebook Page for loads of inspiration! And while you’re at it, join the Trinity Stamps Facebook community group to connect with other Trinity Stamps fans! Thanks so much for stopping by today – we’ll see you next time!
Scrappy hugs,