Crazy cat lady and crafting junkie! We care for 15 feline rescues and just added a Forkie pup to the tribe (Frenchie + Yorkie)! I’m addicted to stamping and love making cards, ATCs, and 3-D projects (especially paper shoes, paper purses and mini albums). I also dabble in mixed media, art journaling, altered art and custom jewelry. If you’re looking for me, I’ll either be in my studio or getting some kitty or puppy lovins! ;)
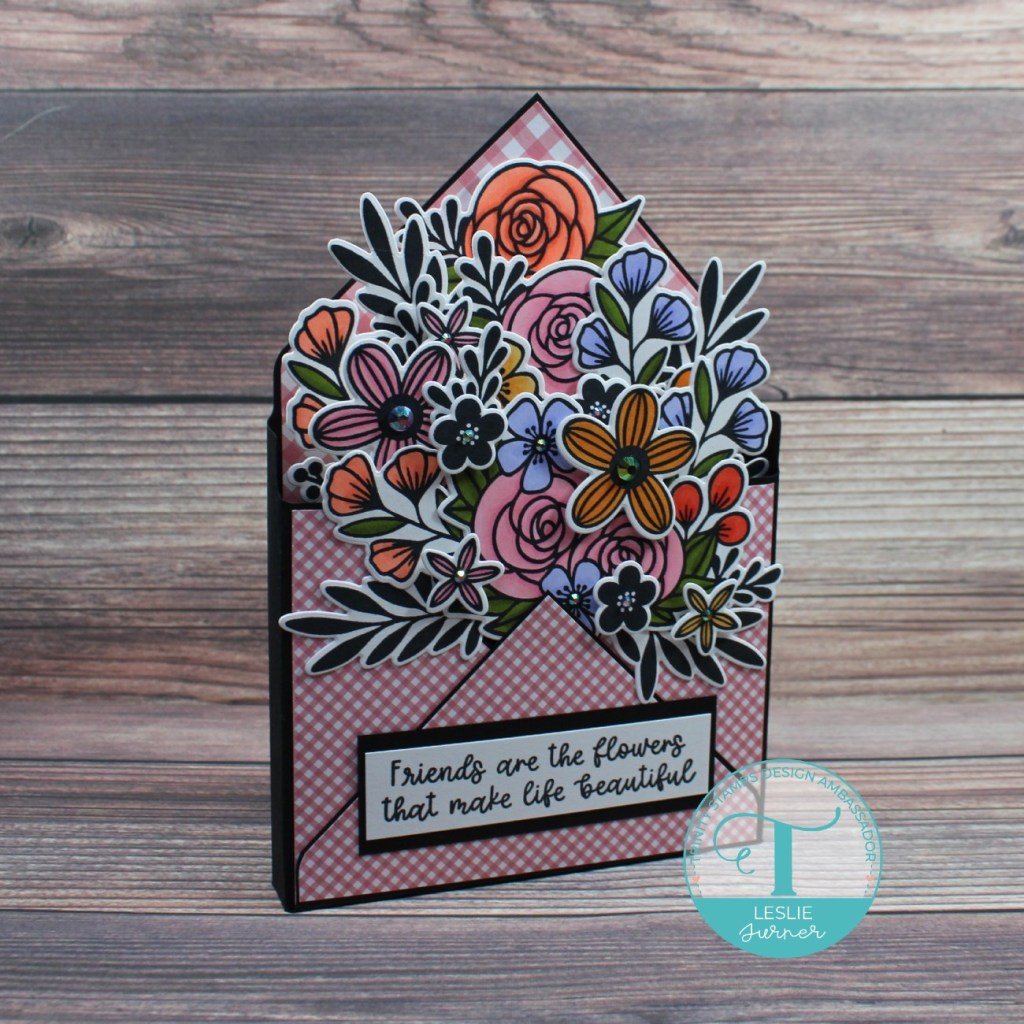
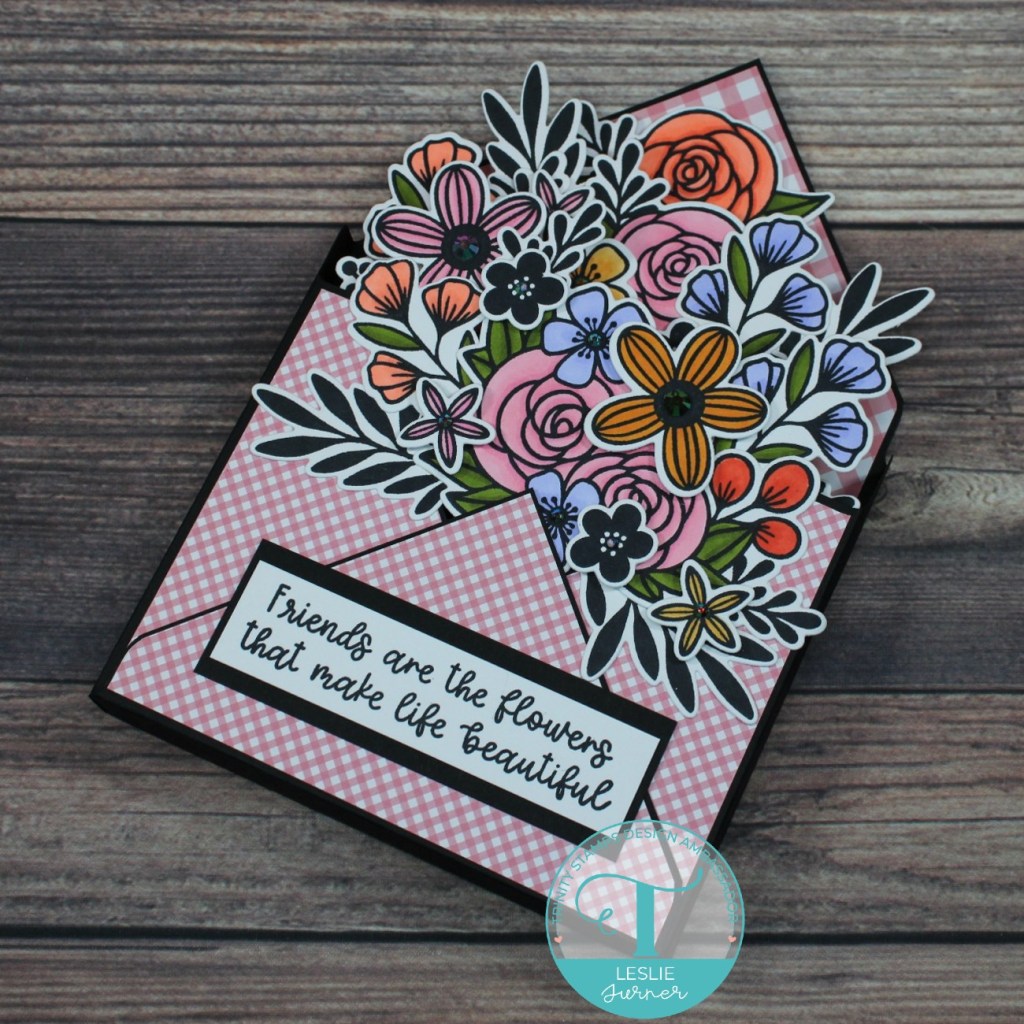
Hi friends! A very Happy Friday to you – I hope you have something fun planned for the weekend! Affiliate links are used in this post at no cost to you. I really appreciate your support! I’ve popped in this afternoon with a Trinity Stamps Ambassador inspiration project that I finished up yesterday afternoon which I’m super stoked to share! If you know me, you know I absolutely love fun folds, and box cards are at the top of the list of my favorites! Trinity Stamps recently released their Summer Blooms Floral Papercrafting Kit and I had a blast stamping, coloring and die cutting all the blooms in this kit for my envelope box card! This is my own design that I created with my WRMK Envelope Punch Board and this one does not fold flat for mailing like the typical box card (which I did for more stability) but I plan to work on an envelope box card design that does fold flat, so stay tuned! ;)
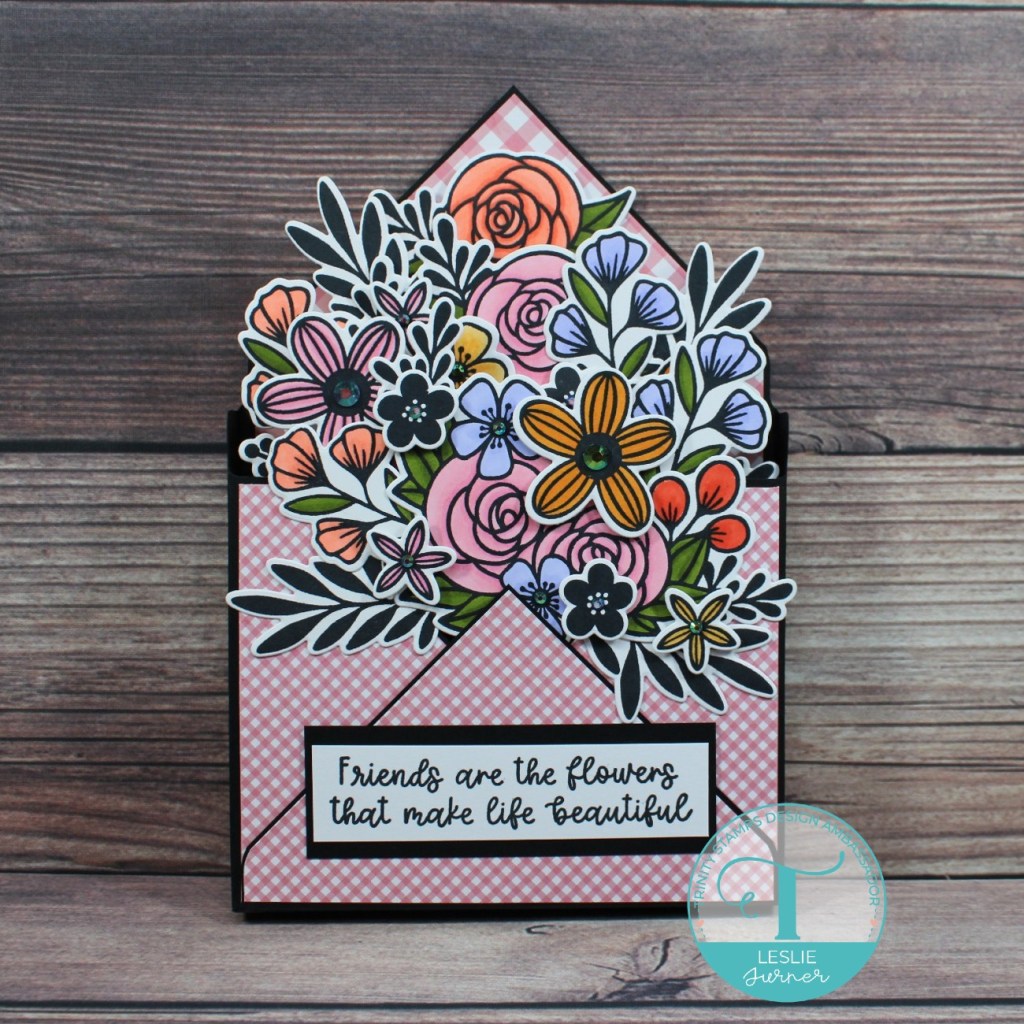
I cut the envelope base from CutCardStock Basis Black cardstock, scored and punched it with the WRMK Envelope Punch Board, and covered the flaps with gingham paper. Using the Summer Blooms Floral Papercrafting Kit, I stamped the blooms (in multiples) on Neenah Classic Crest 110# Solar White cardstock, colored them with alcohol markers and die cut them with the coordinating dies (also included in the kit), and arranged them in layers on the front and inside of the box. I stamped a sentiment from the Friends Are Flowers stamp set, trimmed it and layered it on black cardstock. The final step was adding gemstones from the Summer Sparkles Embellishment Mix (also included in the kit) with the Trinity Pick-Up Stick which really added some pretty sparkle.
I hope you’ve enjoyed today’s project and you’re inspired to get those craft supplies out to play! Be sure to check out all the amazing stamps, dies and other goodies at Trinity Stamps! And head on over to the Trinity Stamps Facebook Page for loads of inspiration! And while you’re at it, join the Trinity Stamps Facebook community group to connect with other Trinity Stamps fans! Thanks so much for stopping by today – we’ll see you next time!
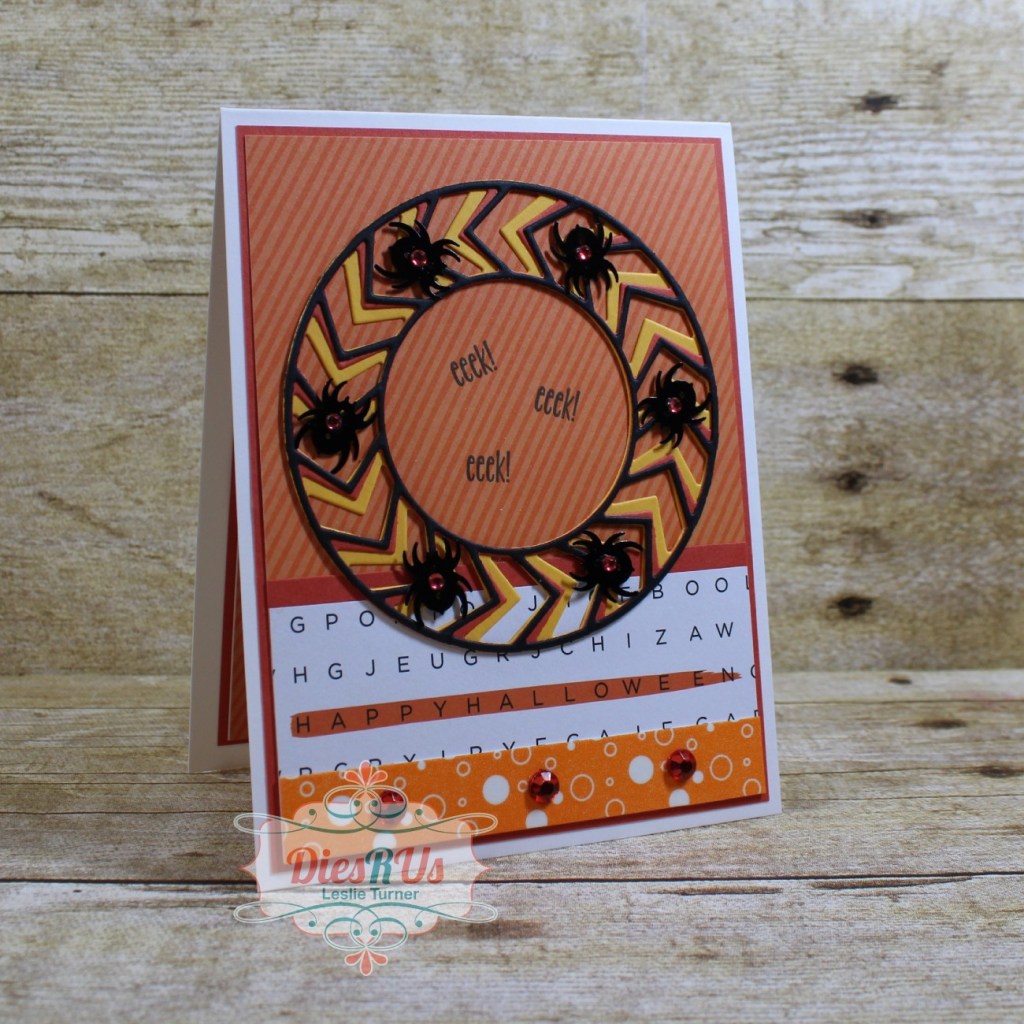
Hi everyone! Woo-hoo, another Friday has rolled around and I hope you have a fabulous weekend planned! Affiliate links are used in this post at no cost to you. I really appreciate your support! I’m delighted to be back on the Dies R Us Inspiration Blog today with another awesome DT inspiration project! I created an adorable Halloween card featuring a spider wreath, lol! Yep, you read that right… a spider wreath created with the Birch Press Design Roundabout Layer Set in black, orange and yellow, with eeeky spiders! This was definitely a fun one! ;)
I cut the inside panel from Neenah Classic Crest 80# Solar White cardstock and embellished it with strips of the Halloween patterned paper and orange cardstock used on the front, stamped the sentiment in black ink, and layered the panel on the orange cardstock.
And one more peek… totally loving how this turned out! Another terrific die set by Birch Press Design! I love them all! ;)
I hope you’ve enjoyed today’s project! Be sure to check out all the fun goodies at the Dies R Us store! They not only sell dies… they also carry stamps, embossing tools and supplies, all kinds of craft supplies, slimline products and even Yupo paper! Be sure to join in the fun going on over at the Dies R Us Challenge Blog – there’s a new challenge theme posted on the 1st and 15th of each month and one lucky random winner will receive a gift voucher prize to the Dies R Us store! And be sure to ‘like’ and ‘follow’ Dies R Us Facebook Page for lots of creative inspiration and to keep up with the latest news! Thanks so much for stopping by today – we’ll see you next time! ;)
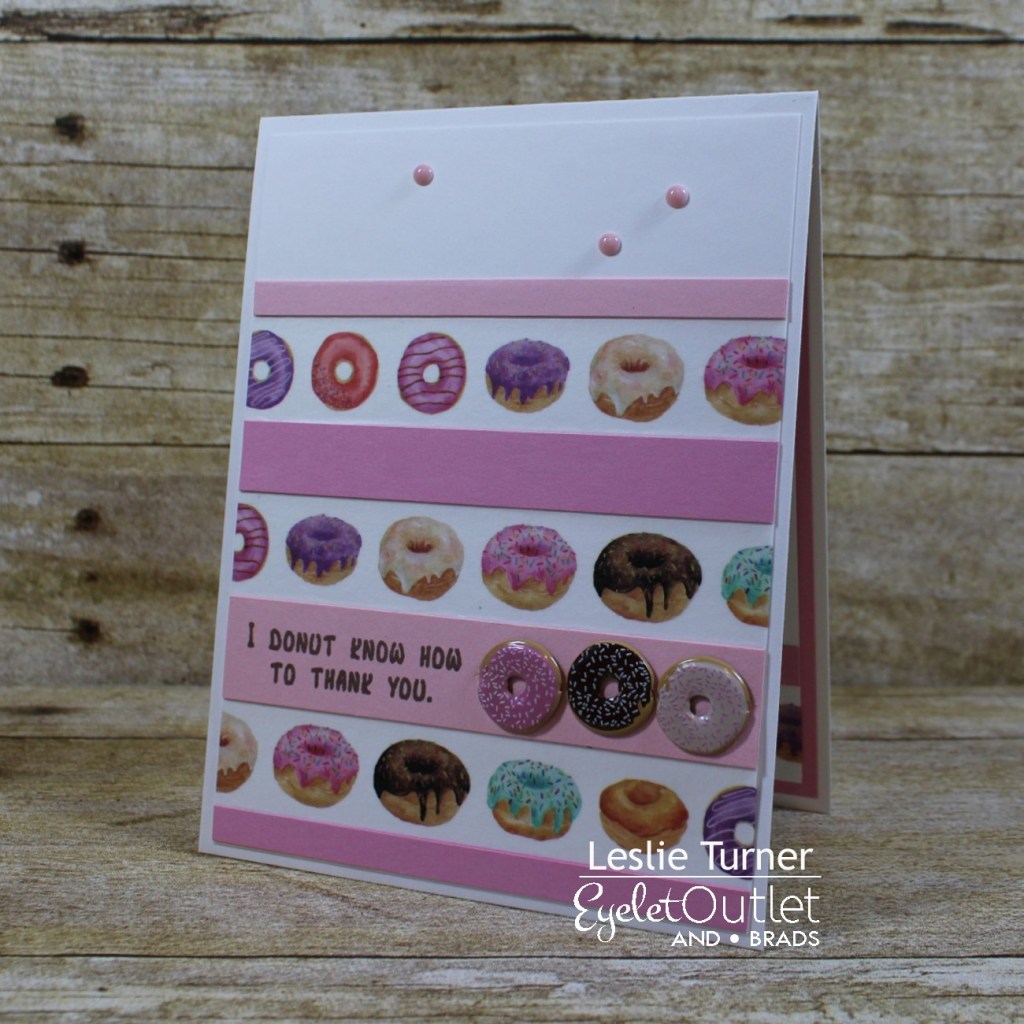
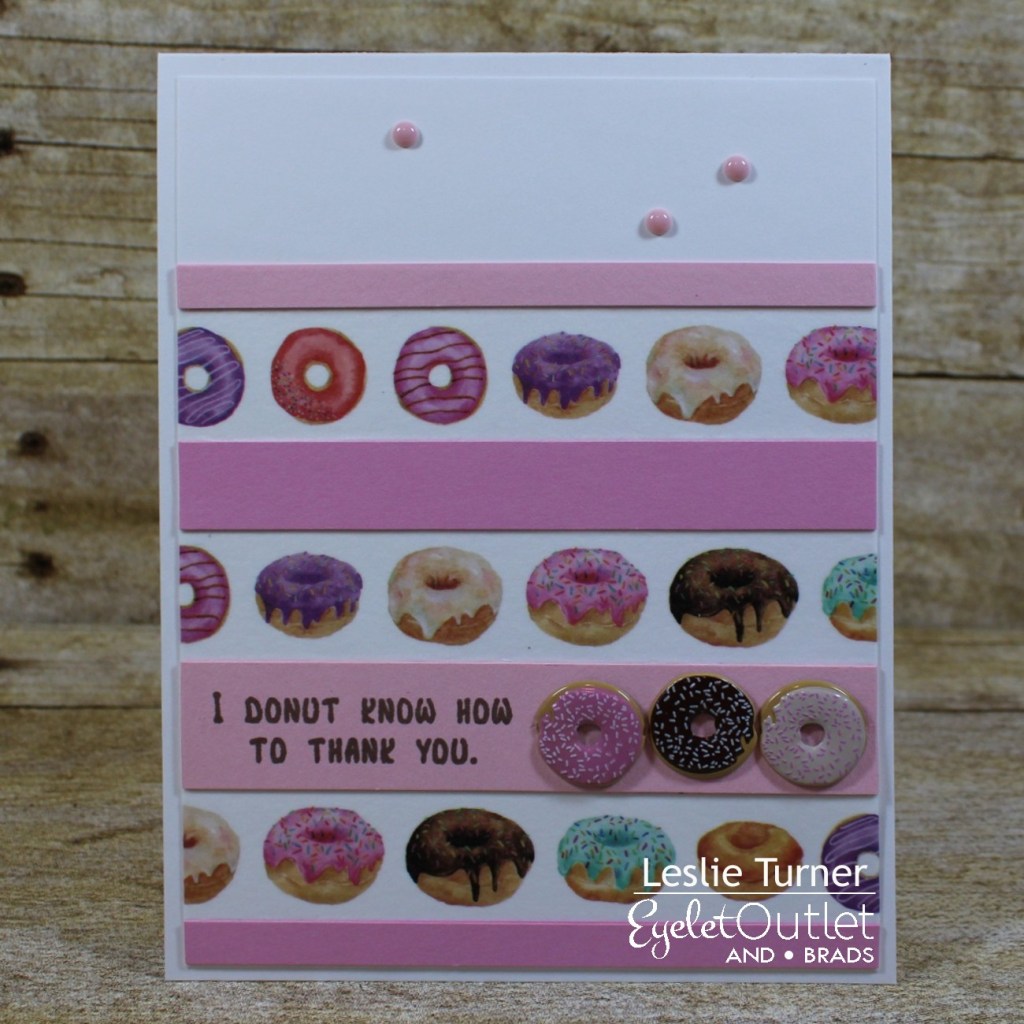
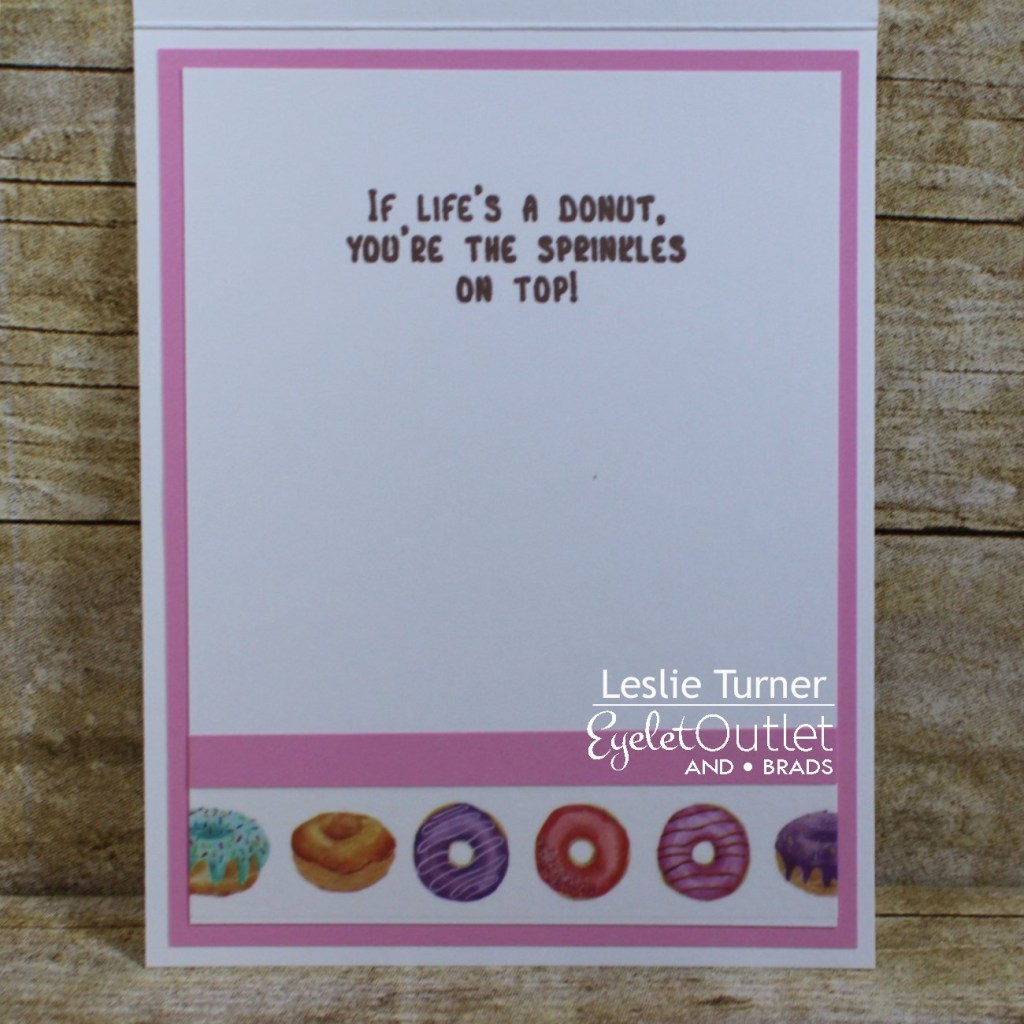
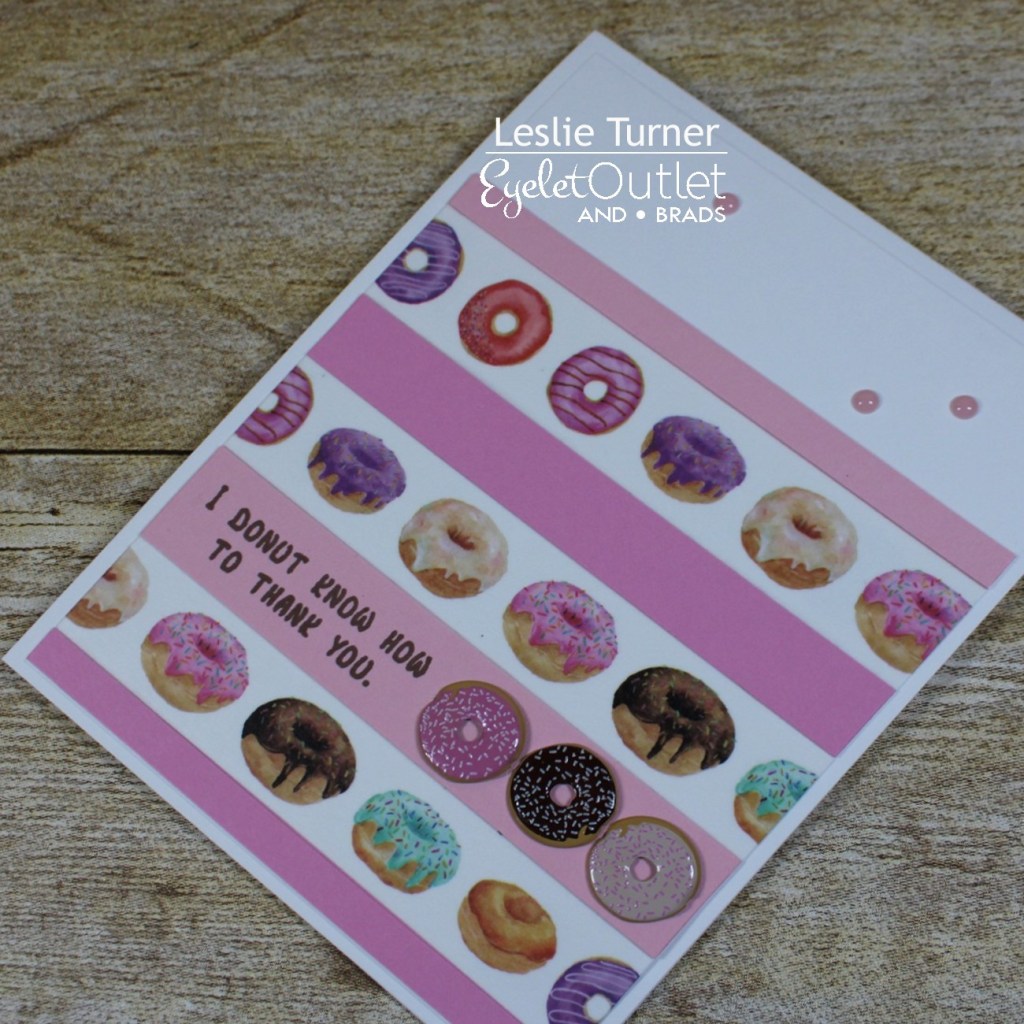
Hi everyone! A very Happy Saturday to you – I hope you’ve had a great week! If you live in the States, you know that today is a sad date to remember – this day marks the 20th anniversary of the multiple terrorist attacks on the World Trade Center. After all these years, my heart still breaks for the families and friends of all those who lost their lives that day. Please take a moment to remember them. Now on to something happy! Affiliate links are used in this post at no cost to you. I really appreciate your support! I’m stoked to be back on the Eyelet Outlet blog today with another awesome DT inspiration project! I created a super fun thank you card featuring our Donut Brads, Donut Washi Tape and Light Pink Enamel Dots! I LOVE these brads and coordinating washi tape! OMG, these make such fun cards!
I hope you’ve enjoyed today’s project! Be sure to check out all the fun goodies at Eyelet Outlet! I can already see you drooling, lol! Be sure to ‘like’ and ‘follow’ Eyelet Outlet Facebook Page to keep up with news and sales, and while you’re at it, join the Eyelet Outlet Fans Facebook group for lots of creative inspiration! Thanks so much for stopping by today – we’ll see you next time! ;)
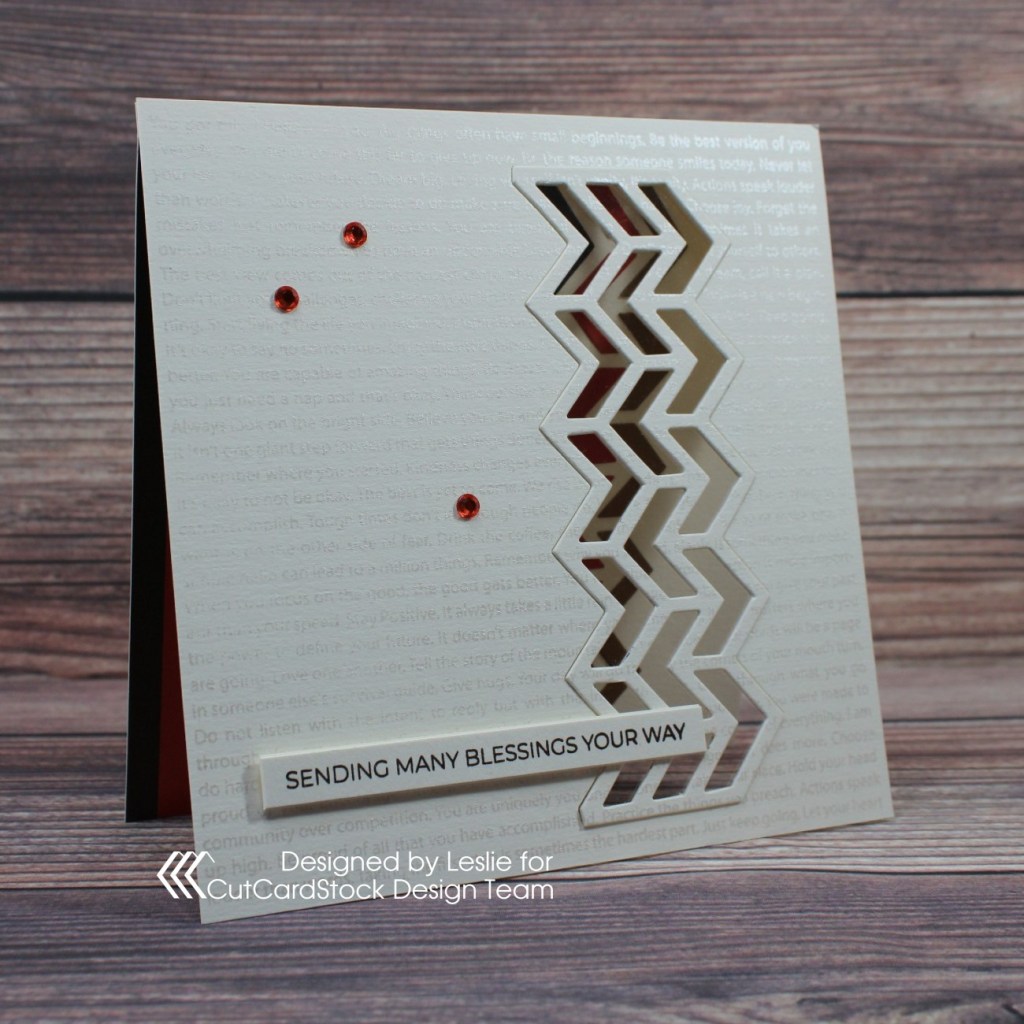
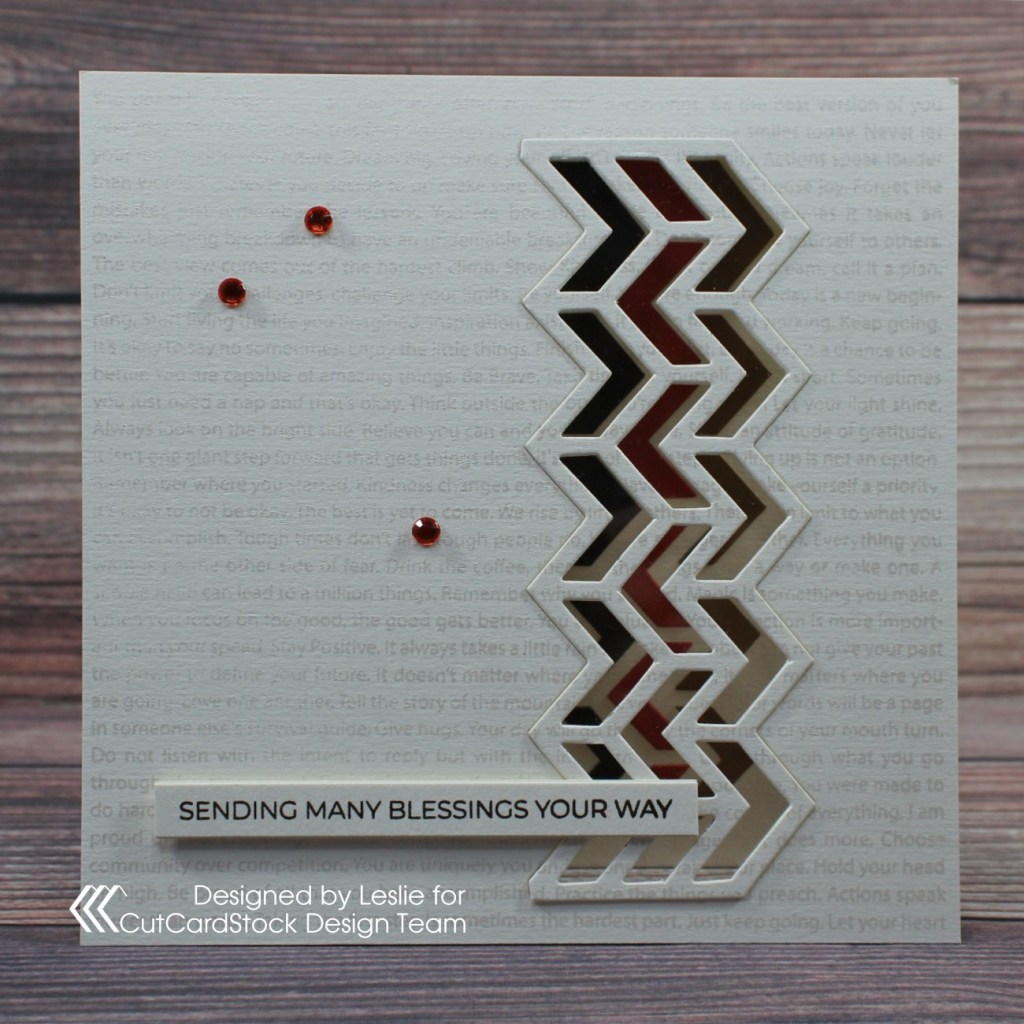
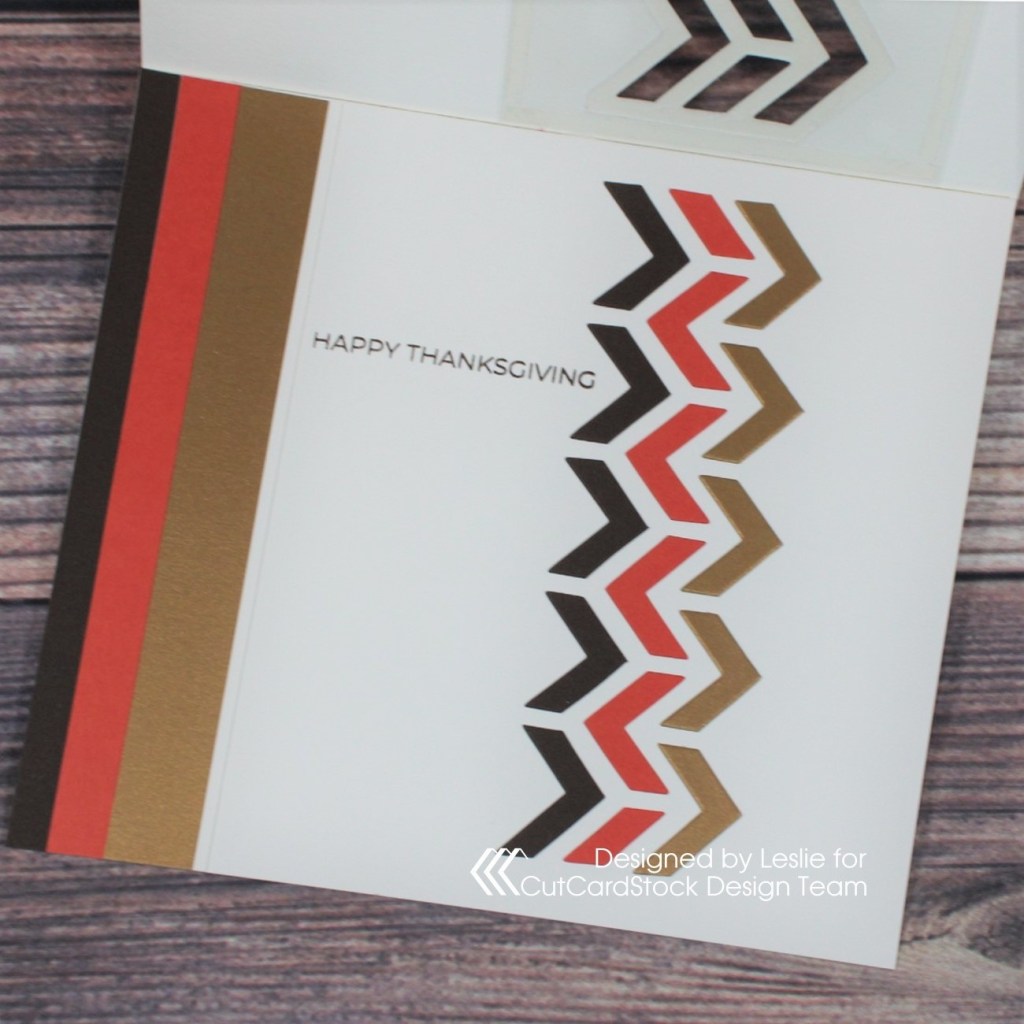
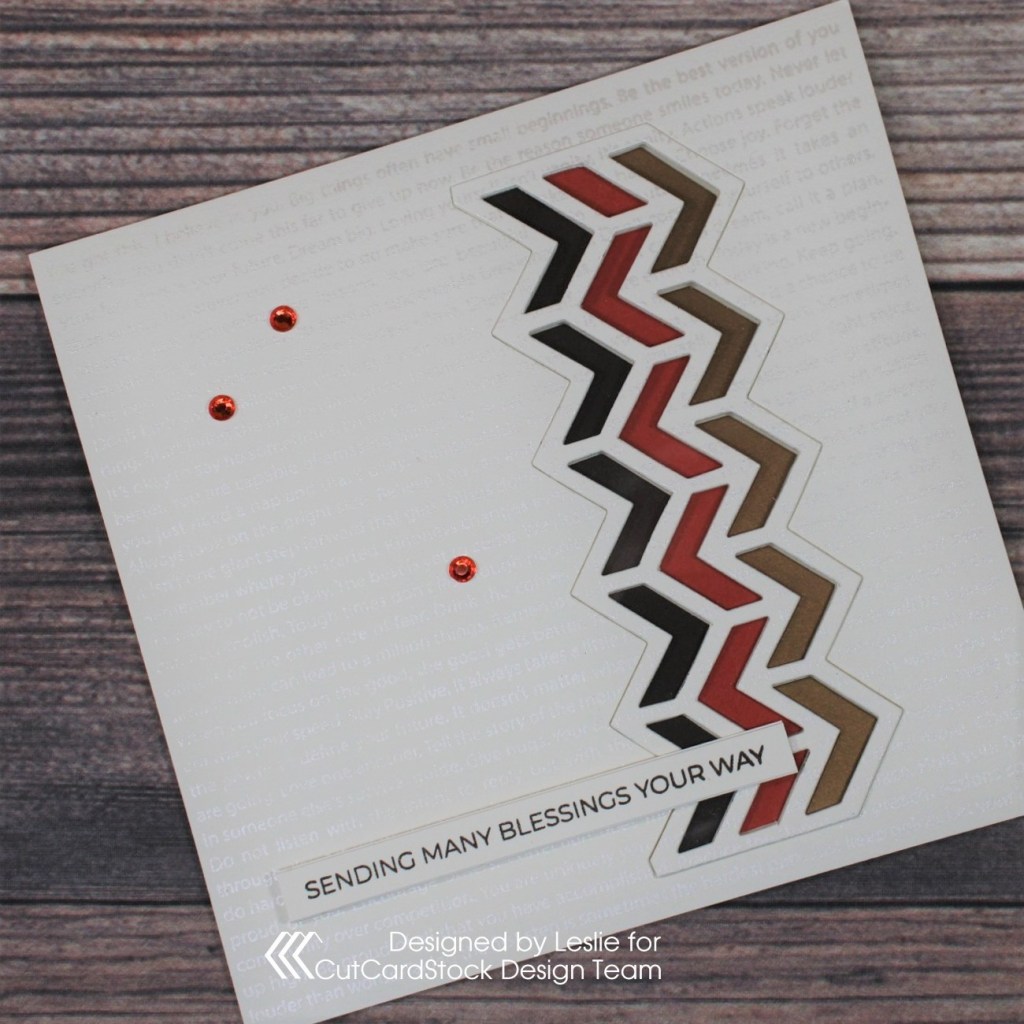
Hi everyone! A very Happy Friday to you – I hope you have something fun planned this weekend! Last Sunday Ed and I went to Four Corners which is the only spot in the United States where you can literally stand in four states at once – Utah, Colorado, Arizona and New Mexico. This was on my bucket list and not very far from where we live, so we made the trip and had a great time! I’m stoked to be back on the CutCardStock blog today with an awesome DT inspiration project featuring our Autumn cardstock (brown, orange and gold) which is on sale this month so be sure to stock up! I paired these gorgeous colors with our Basis Natural which is a good sturdy 110# weight and makes great card bases. Affiliate links are used in this post at no cost to you. I really appreciate your support! I created a pretty Thanksgiving card featuring a clear acetate panel on the front with chevron elements die cut from Basis Brown 80# cardstock, Pop-Tone Tangy Orange 65# cardstock and Stardream Metallic Antique Gold 105# cardstock showing through the acetate.
I adhered a piece of acetate beneath the aperture on the inside of the card base using double-sided tape, and then adhered the stacked frames on top with spray adhesive for some slight dimension. Using the Trinity Stamps A Sentiment For (Almost) Anything stamp set, I stamped the sentiment in brown ink on the natural cardstock, trimmed it and stacked it on three more pieces of cardstock, and adhered it to the bottom portion of the card. The finishing touch on the front was adding several orange gemstones.
And one more peek of that up-close shot… totally loving how this turned out! These autumn cardstock colors are so beautiful and make absolutely gorgeous cards!
I hope you’ve enjoyed today’s project and you’re inspired to get crafty! Be sure to check out all the awesome cardstock and other goodies at CutCardStock (adhesives, labels, stickers, pens, watercolors and ribbon to name a few). And head on over to the CutCardStock Facebook Page for more inspiration! Thanks so much for stopping by today – we’ll see you next time!
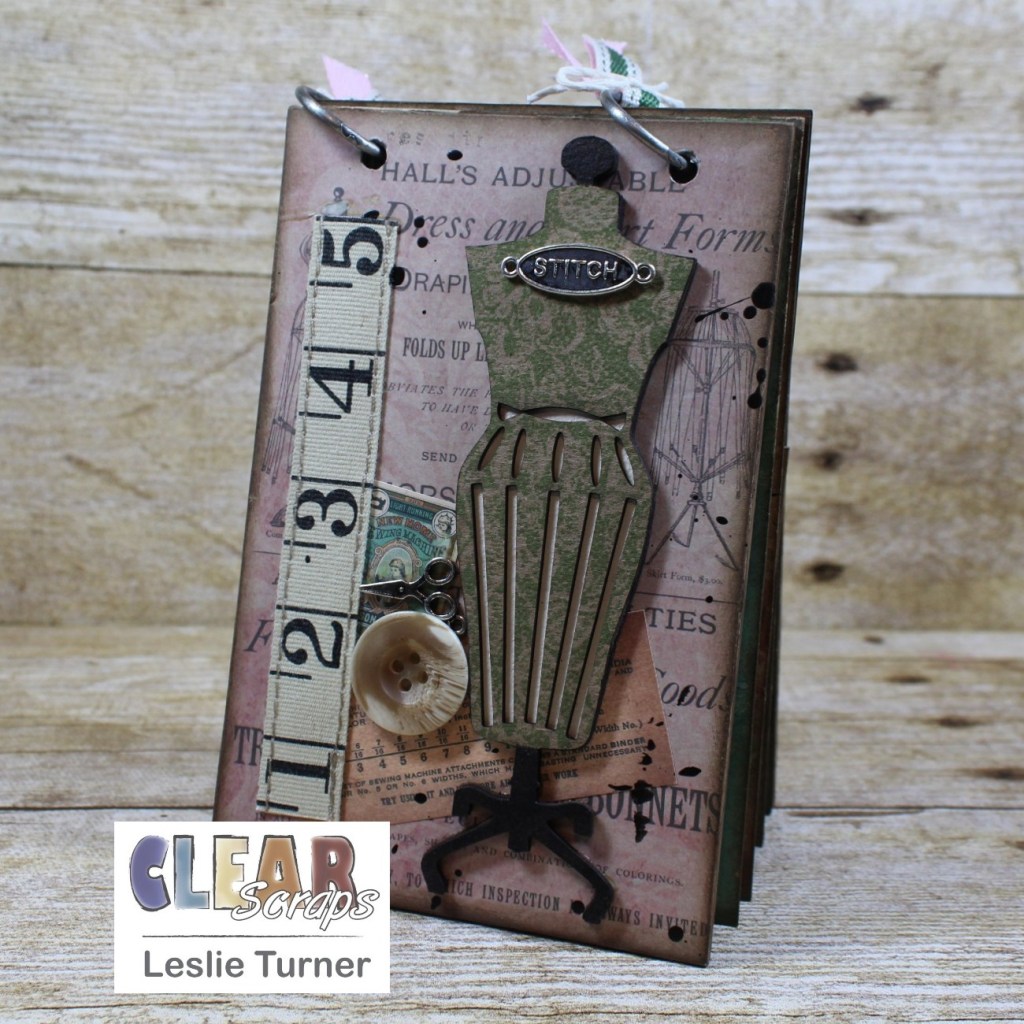
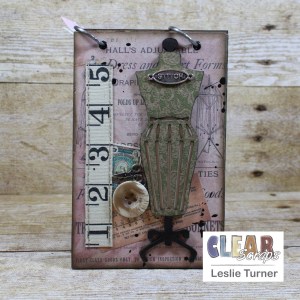
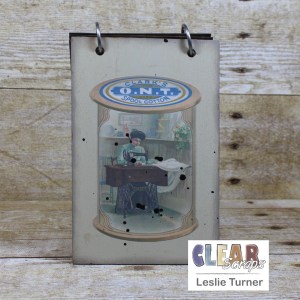
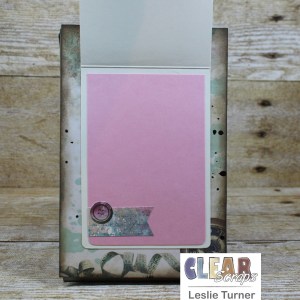
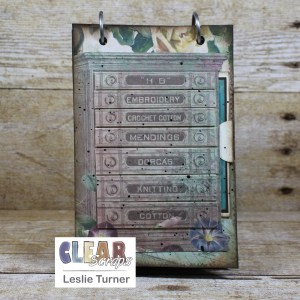
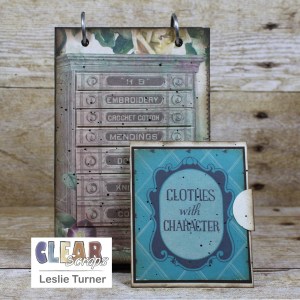
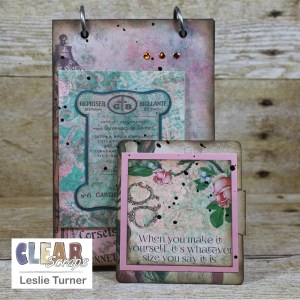
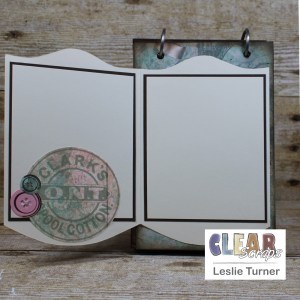
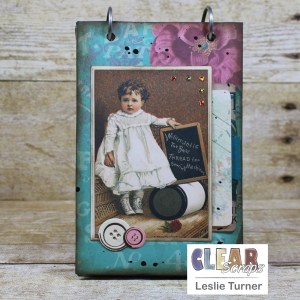
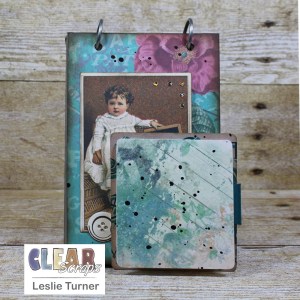
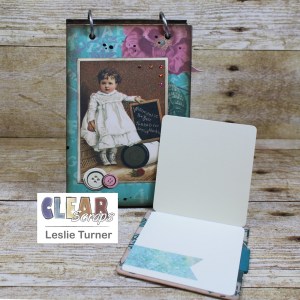
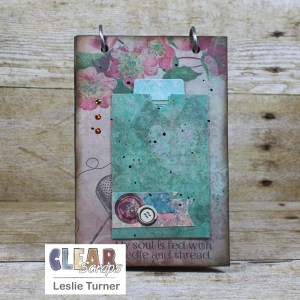
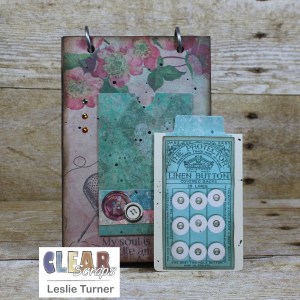
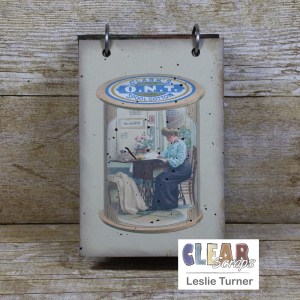
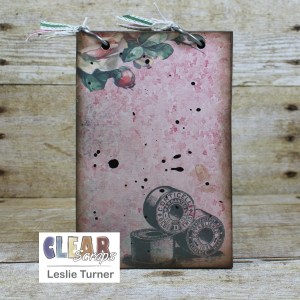
Hey, everybody! Another Happy Hump Day to you – SO hard to believe we’ve already seen the first week of September! I’m thrilled to be back on the Clear Scraps blog today with another awesome DT inspiration project! I created a very cool vintage sewing album using the Blank Wood Card with Dress Form Chipboard Embellishments! This was such a fun project! I layered the two dress forms together to make one embellishment with some really good dimension as the focal on the front of the album. I cut four pages for the inside and embellished the front and back of each page.
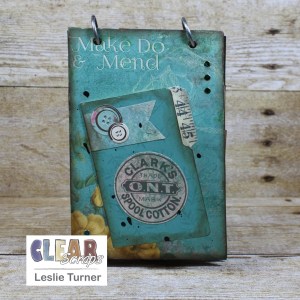
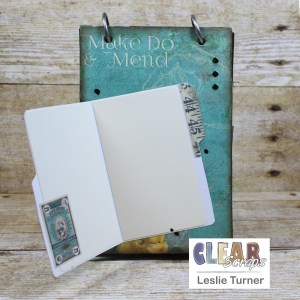
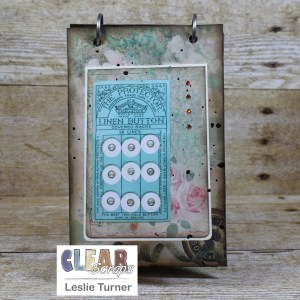
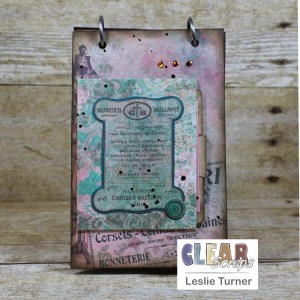
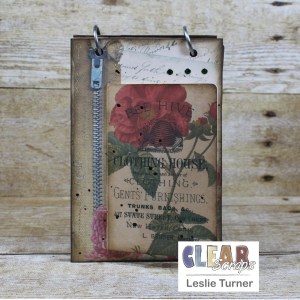
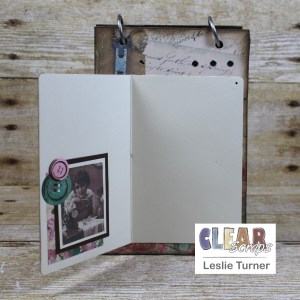
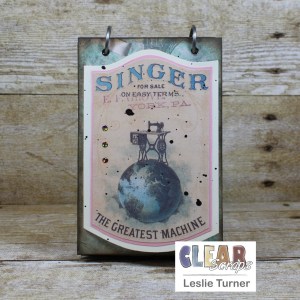
The front and back covers of the album were created with Blank Wood Card. In addition to the stamped and painted Dress Form Chipboard Embellishments on the front, I used a vintage button, charms, ruler ribbon, and elements from the digital accessories. I used Ephemoire’s Til The Bobbin Runs Out digital journal pages and accessories on the covers and all the pages. The edges of the covers and pages are inked with distress ink. The inside of the front and back covers are painted with chalk paint and each has a spool element from the digital accessories. All four of the pages on the inside are embellished with digital journal pages. They also have folders that open, flaps that open up and out, and pull-outs – all embellished with elements from the digital accessories along with stamped and die cut buttons, and all with plenty of room for journaling and/or photos. I did a little ink splattering with a fan brush on each page, trying not to over-do it because I love ink splatters, lol! And finally, I tied two ribbons on the binding rings with crafter’s cord. Here are shots of the front and inside cover, front and back all pages, and the inside and back cover.
Other products used: Cardstock/Paper: CutCardStock Basis Teal cardstock, CutCardStock Basis Brown cardstock, CutCardStock Baronial Ivory cardstock, CutCardStock Pop-Tone Bubblegum cardstock, CutCardStock Sandcastle cardstock Stamps: Great Impressions Lace background stamp, Ephemoire Til The Bobbin Runs Out digital journal pages and accessories, Sunny Studio Cute As A Button stamp set Ink: Memento Bamboo Leaves ink, Ranger Walnut Stain distress ink Dies/Punches: Stampin’ Up 1-3/4″ circle punch, Stampin’ Up 1″ circle punch, Fiskars 2-1/2″ circle punch, Kadomaru Pro corner rounder, Sunny Studio Cute As A Button die set Accessories: Folkart Java, Oatmeal and Sheepskin chalk paint; MISTI stamp tool, 7 Gypsies binding rings, Tim Holtz idea-ology Ruler Ribbon, 3 Girl JAM vintage button, Blue Moon charms from stash, Ranger distress collage medium, Big Shot, fan brush, Really Reasonable Ribbon pink twill and olive canvas ribbon, Hemptique Bamboo crafting cord, Stampendous green and pink Dot Sparklers
I hope you’ve enjoyed today’s project and you’re inspired to get those craft supplies out to play! Be sure to check out all the amazing acrylic, wood and chipboard goodies at Clear Scraps… OMGoodness, you won’t be disappointed! And head on over to the Clear Scraps Facebook Page for lots of inspiration! And while you’re at it, join the Clear Scraps FacebookCreative Group to connect with other Clear Scraps fans! Thanks so much for stopping by today – we’ll see you next time!
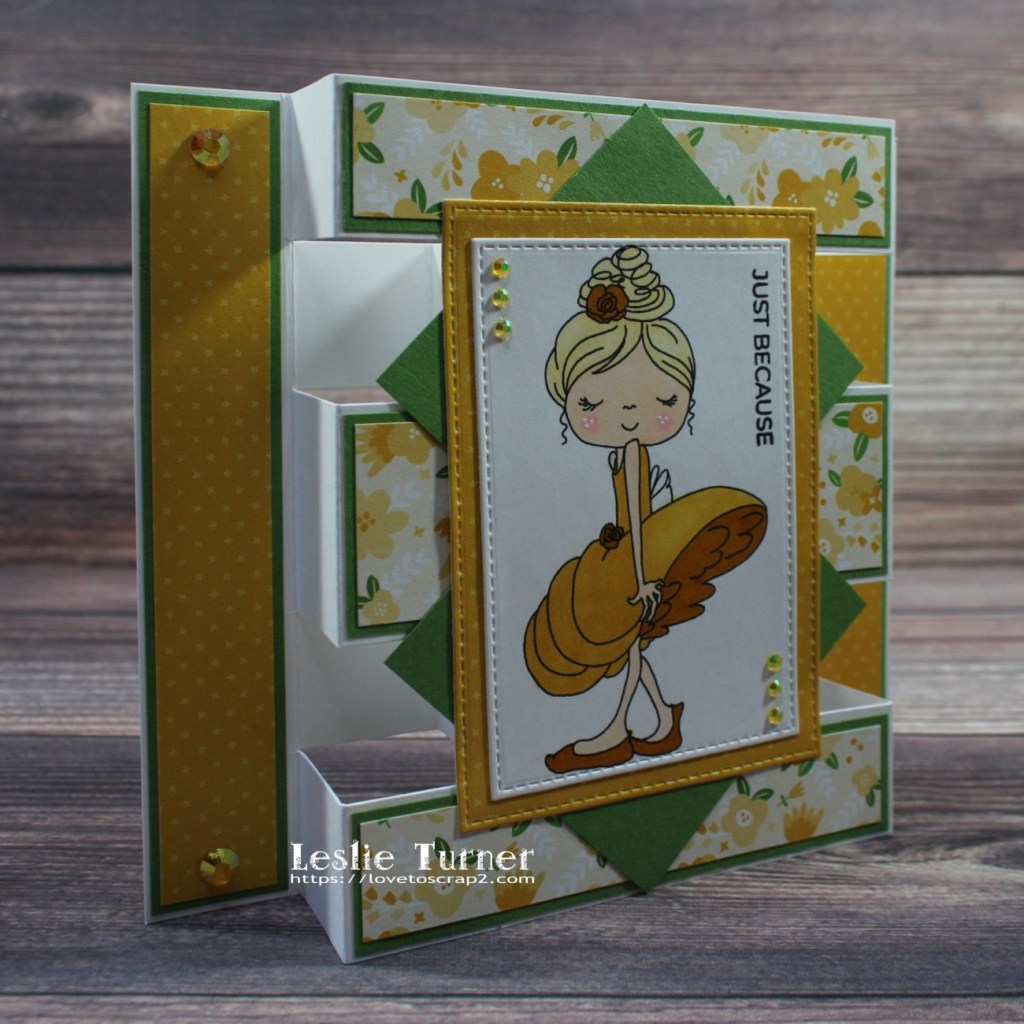
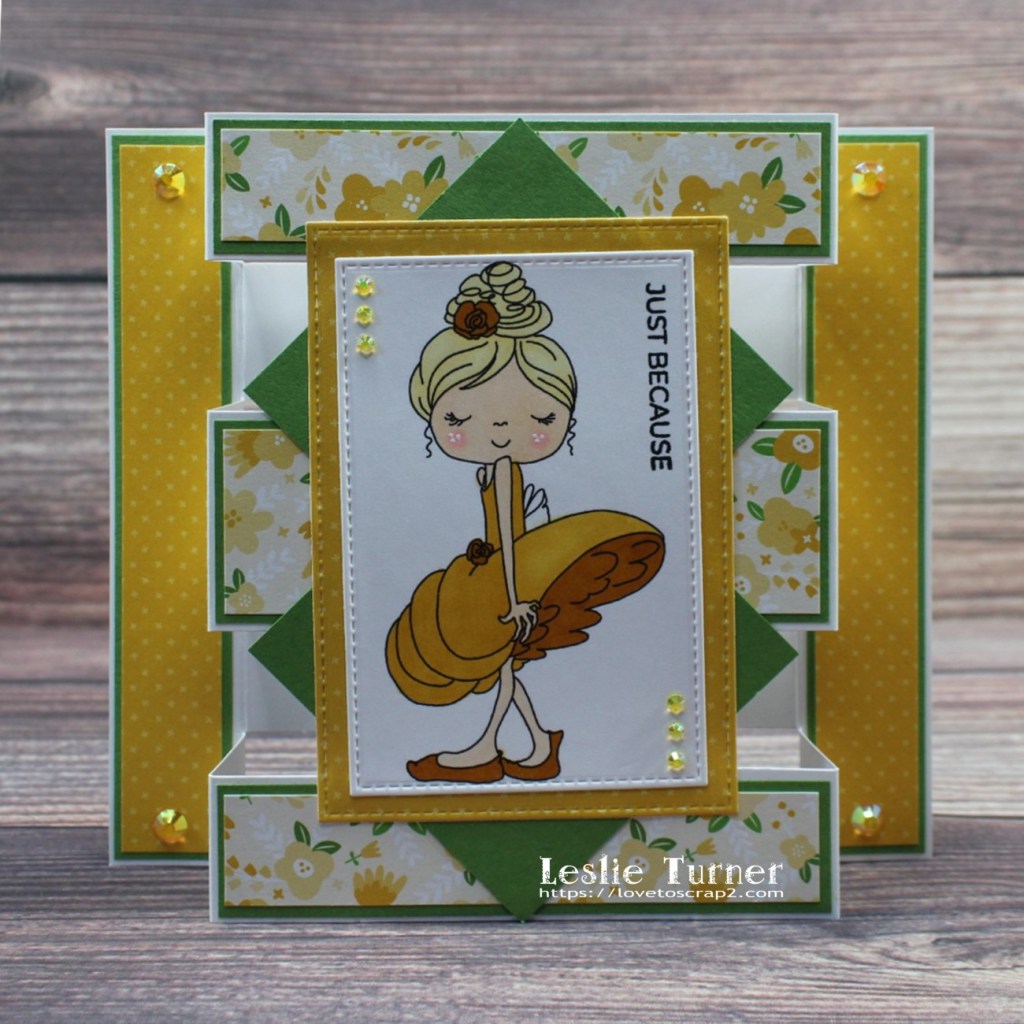
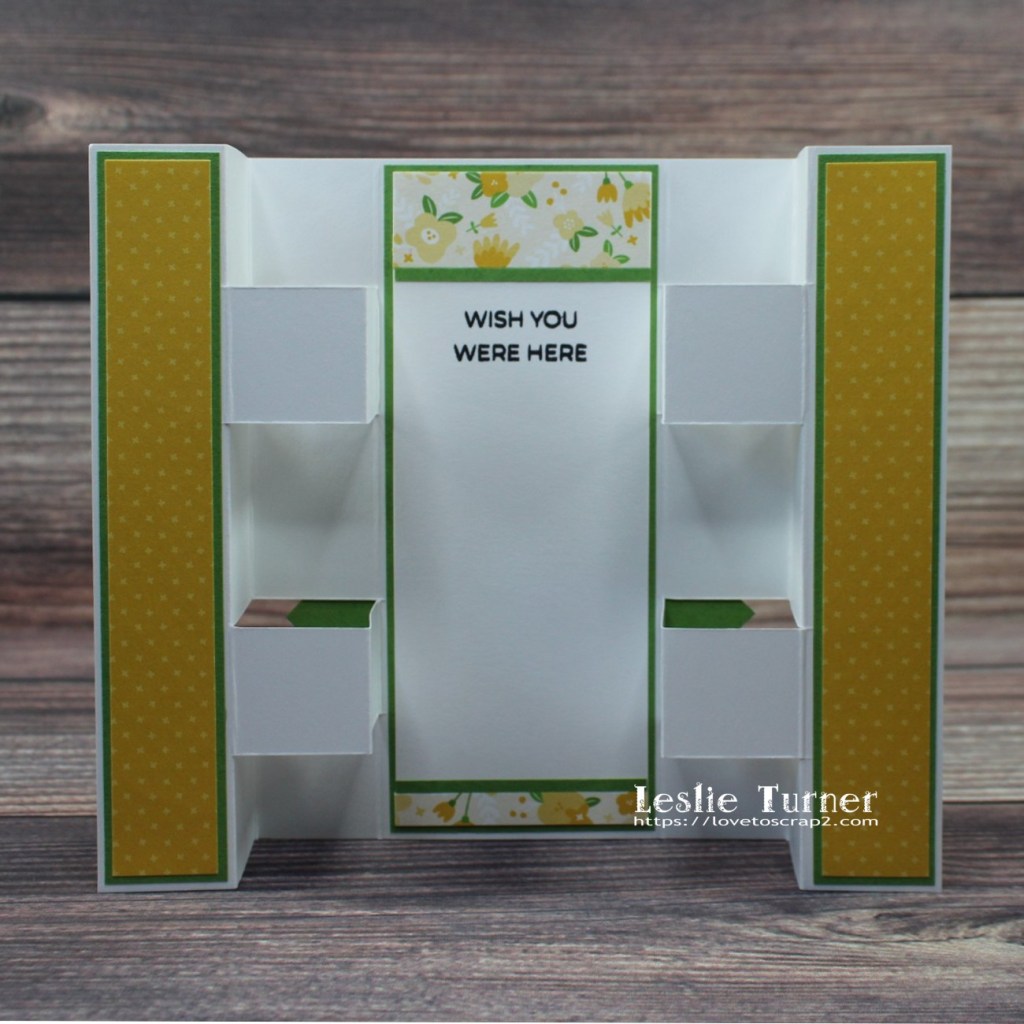
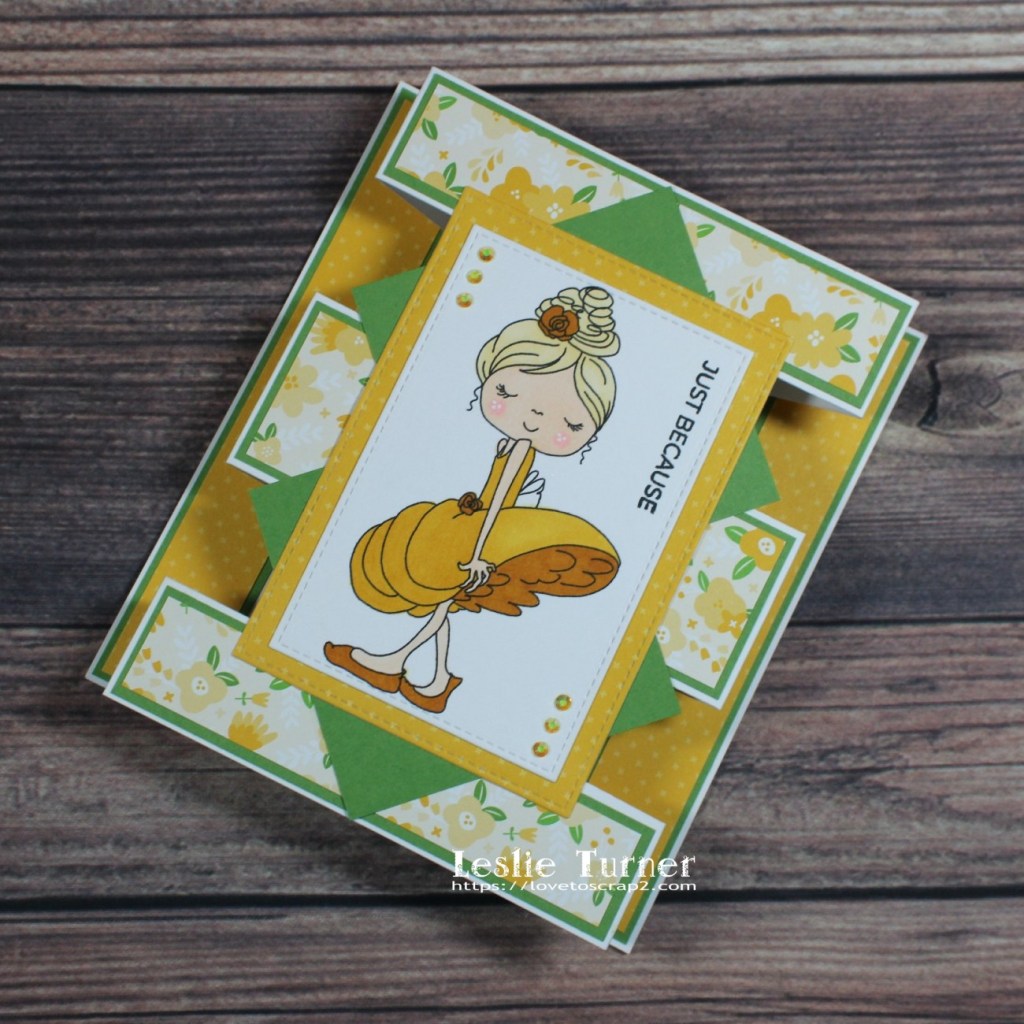
Hi friends! Happy Monday and Happy Labor Day if you’re in the States! I hope you’ve had a great long weekend! Affiliate links are used in this post at no cost to you. I really appreciate your support! I created this sweet ‘just because’ tower card for The Outlawz September Progressive/Freebie Challenge where Hetty Clare Art is our sponsor this month. We were gifted the super adorable digital image called The Little Ballerina to play with for this challenge, and I used a yellow and green color combo for this fun fold.
I hope you’ve enjoyed this project and will come over and join in all the fun at The Outlawz Challenges! Lots of fun going on! Thanks so much for stopping by today – we’ll see you next time! ;)
Hi everybody! I hope you’re having a fabulous weekend and doing something fun! I’m a little late with this post but I’m thrilled to be showcasing three more projects created with the Paper Goods over at STAMPlorations! As is the norm when playing with STAMPlorations goodies, I’m having a blast! Affiliate links are used in this post at no cost to you. I really appreciate your support! These projects were shown on the STAMPlorations blog on August 23rd which was the day after I got home from the hospital after suffering a heart attack. I had what they call a widow-maker’s heart attack with 100% blockage in my left anterior descending. I spent four days in the hospital and came home with a ton of medications that I’ll be on for the rest of my life, along with lots of diet changes and an exercise regimen. I’ve lost ten pounds but I certainly don’t recommend having a heart attack to do it, lol! ;)
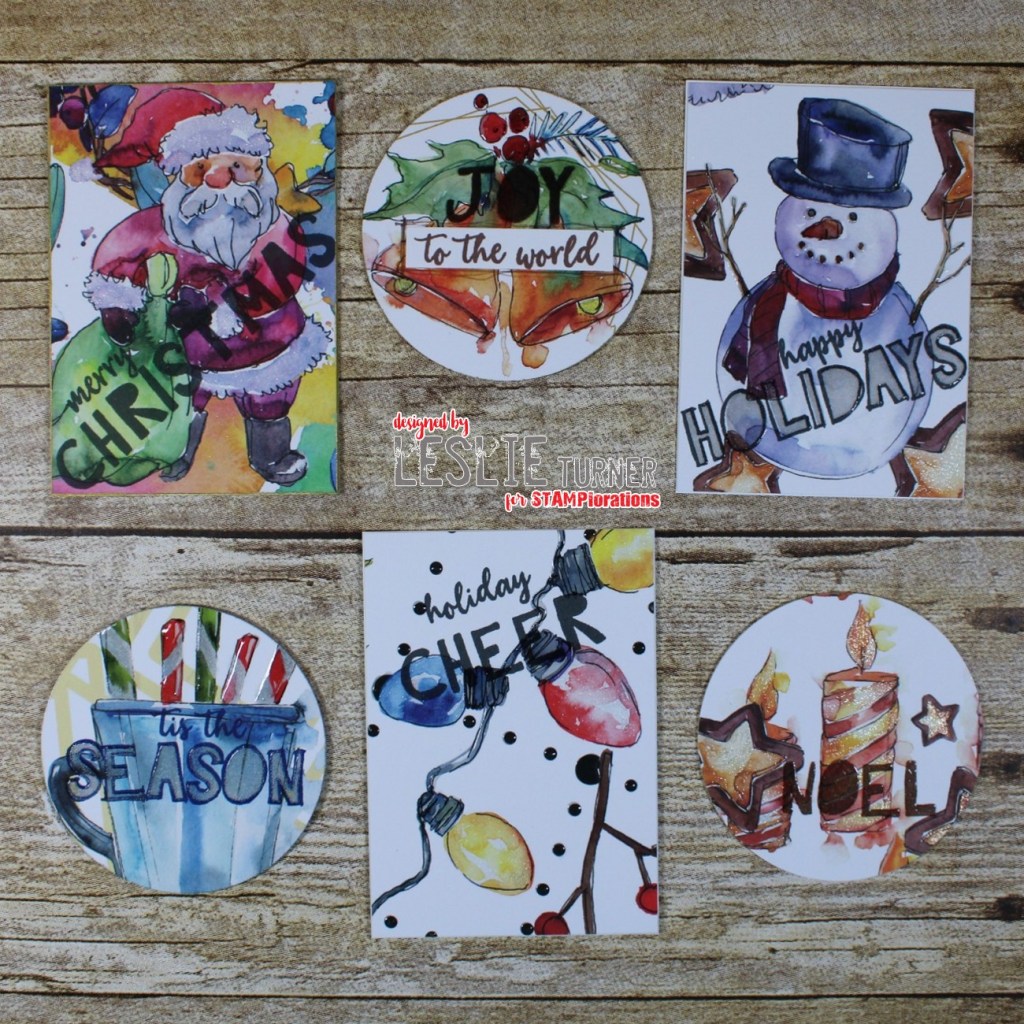
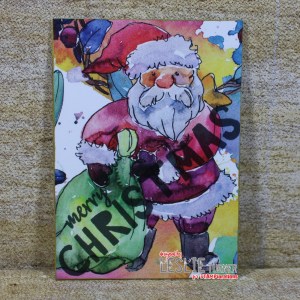
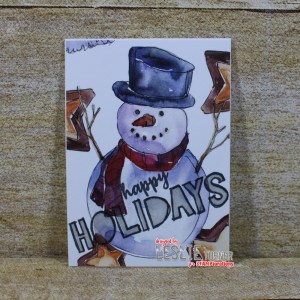
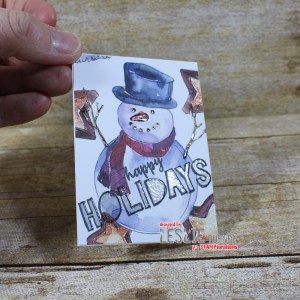
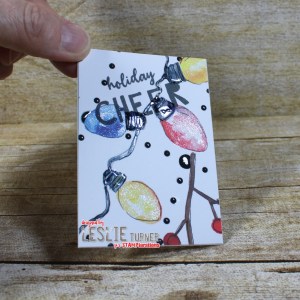
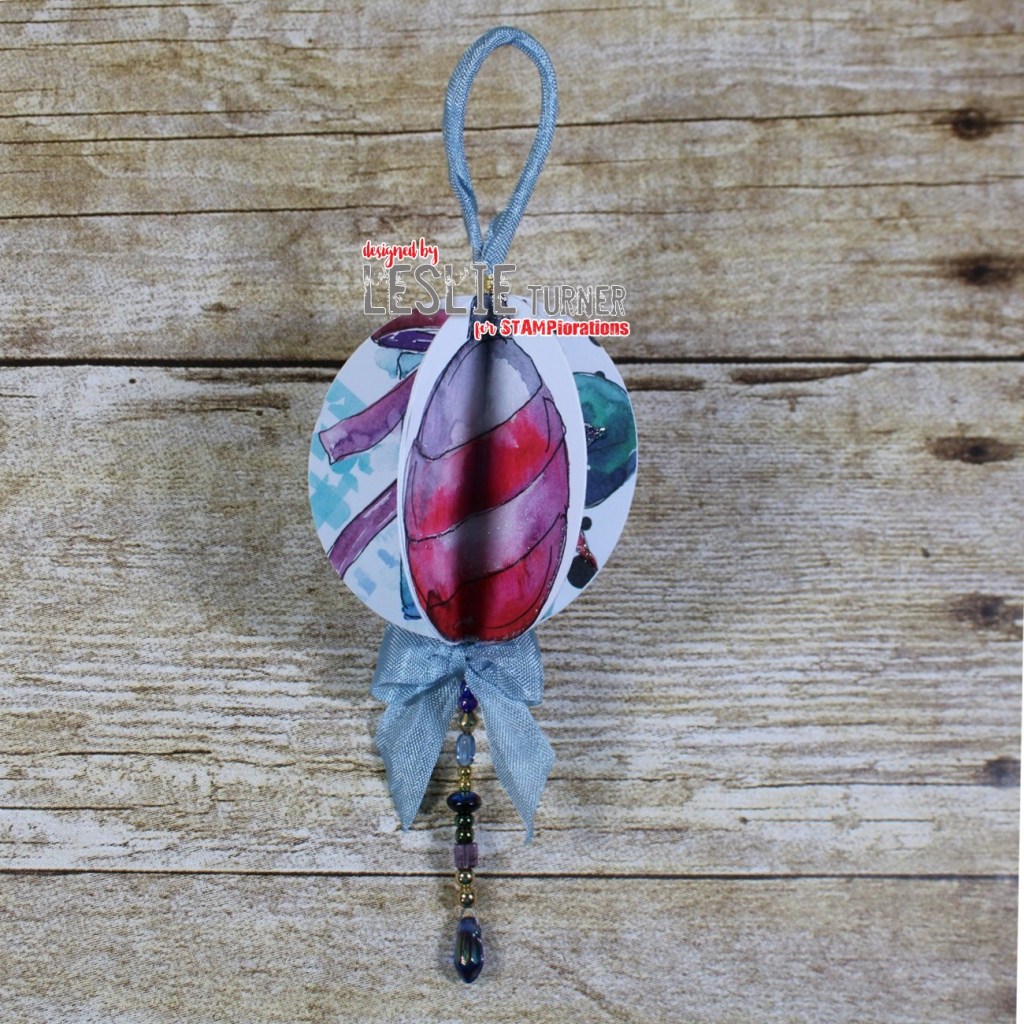
So the posts you’ve seen in my blog over the past two weeks were scheduled in way in advance, and this post is the first fresh post I’ve written since I’ve been home from the hospital. Now, for the fun stuff… for this STAMPlorations feature I have created three fun Christmas projects using the Christmas Backgrounds ATC #1 Ephemera, available in the Paper Goods section of the store. These ATC Backgrounds are so awesome and can be used to create not only artist trading cards, but tags and ornaments as you’ll see here shortly! My first project is a set of six ATCs, cards and coins, featuring the Christmas Backgrounds ATC #1 Ephemera with stamped sentiments from the Joy clear stamp set. All have heat embossing and/or glossy or shimmer overlay. These all have some nice shine going on!
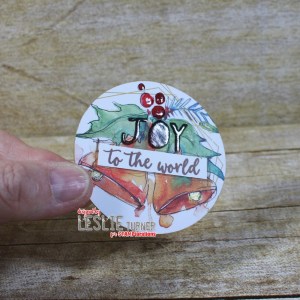
I cut and punched the ATC bases from Neenah Classic Crest 80# Solar White cardstock and adhered them to the back of the individual card and coin panels trimmed and punched from the Christmas Backgrounds ATC #1 Ephemera. I stamped sentiments on each one from the Joy clear stamp set in black, brown, blue, silver and gold ink, and added clear embossing, Glossy Accents, Clear Star Gelly Roll pen, and Crystal Clear Sparkle Overlay marker to embellish each one. I ran gold and silver paint pens around the edge of each ATC to finish them off. Here is a straight and hand-held angle shot of each one (pardon my thumb, lol):
Other products used: Cardstock/Paper: Neenah Classic Crest 80# Solar White cardstock Ink: Catherine Pooler Suede Shoes, Black Jack and Over Coffee ink; Delicata Golden Glitz and Silvery Shimmer ink; Versamark, Sakura Clear Star Gelly Roll pen, Spectrum Noir Crystal Clear Sparkle Overlay marker, Memento Rich Cocoa marker, Posca Gold and Silver pens Dies/Punches: Fiskars 2-1/2″ circle punch Accessories: Tonic Studios 12″ Guillotine Paper Trimmer, Bearly Art precision craft glue, MISTI stamp tool, Hero Arts clear embossing powder, Glossy Accents
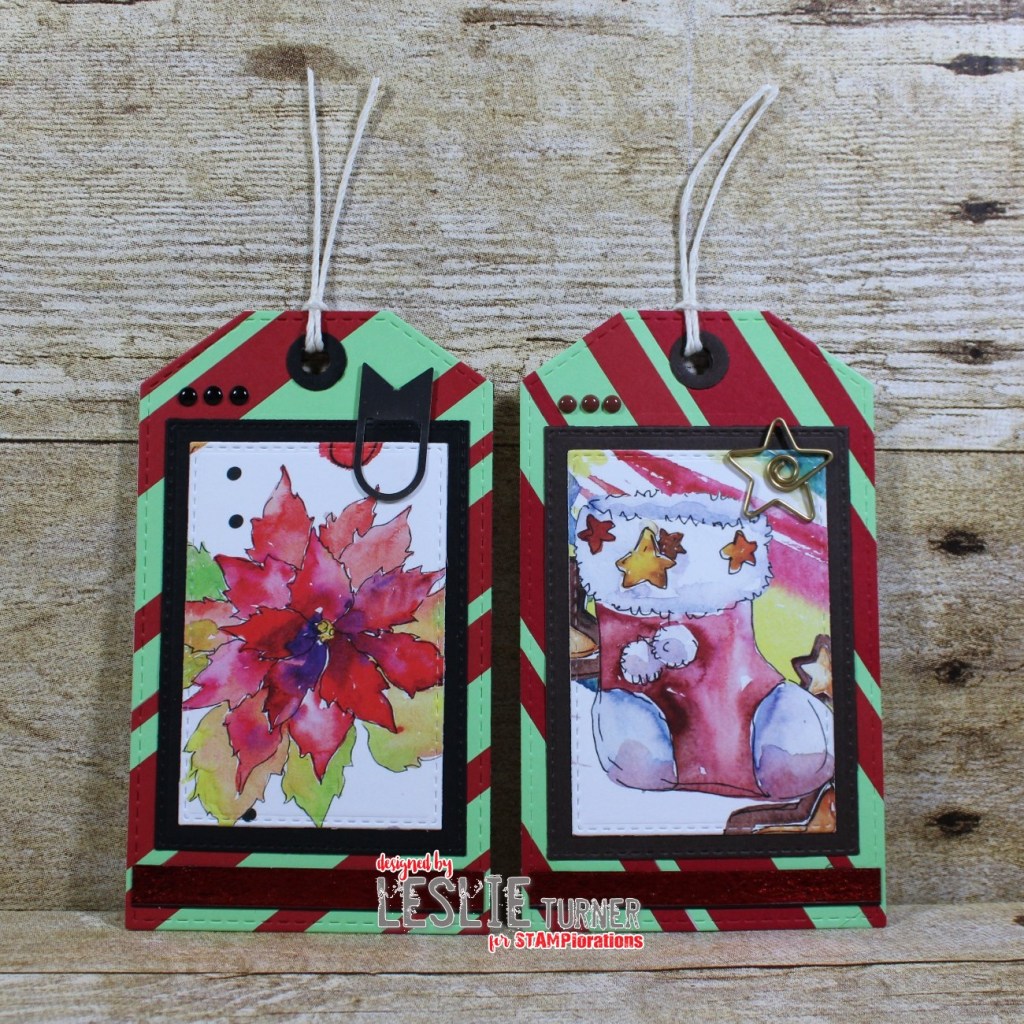
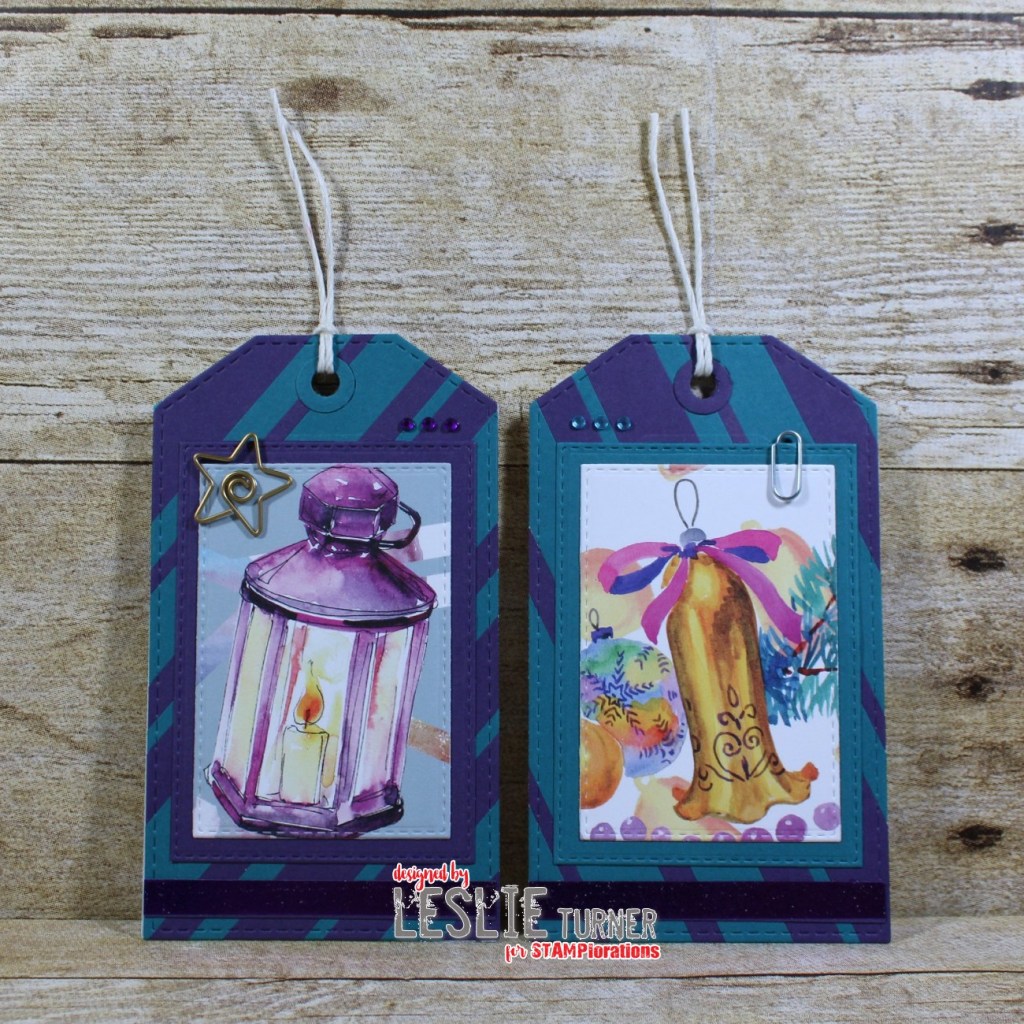
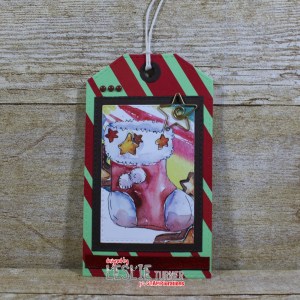
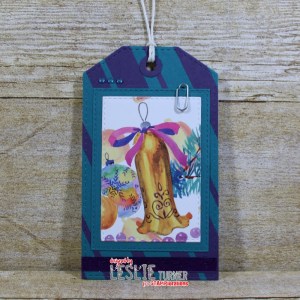
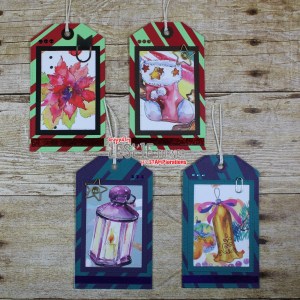
My second project is a set of four Christmas tags also featuring the Christmas Backgrounds ATC #1 Ephemera. I created two of these tags in the traditional colors of red and green, and the other two in non-traditional colors of teal and purple.
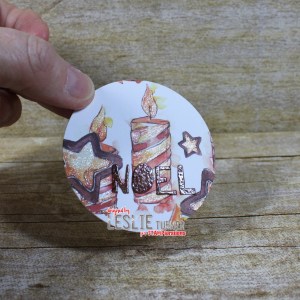
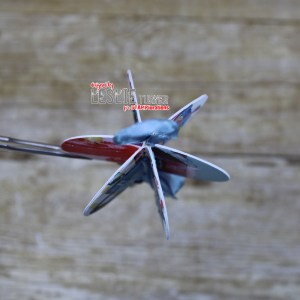
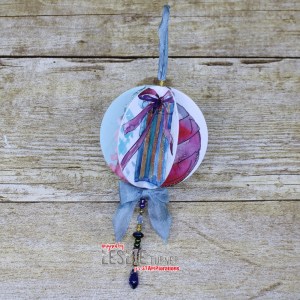
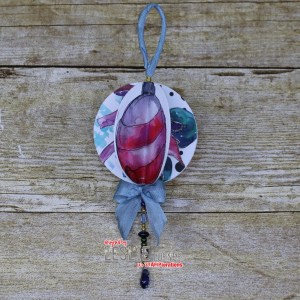
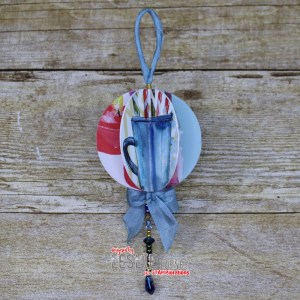
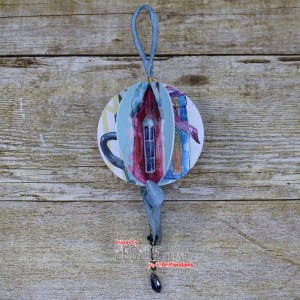
Ornaments are super easy to make. First, I created a beaded tail and loop for the top. I punched circles from six of the images from the Christmas Backgrounds ATC #1 Ephemera, scored them down the middle, and adhered each side to the next, trapping the beading wire and ribbon in the center, with a simple bow adhered at the bottom.
I hope you’ve enjoyed these projects and you’re inspired to get crafty! Be sure to check out all the amazing paper goods, stamps, dies, stencils, digis and other crafty goodies at the STAMPlorations main, outlet and digital stores! Use code STAMPGIRLLESLIE for a 20% discount on your orders in the store (with unlimited uses)! And there is A LOT going on over at the STAMPlorations blog – tons of creative inspiration, tutorials, promotions and giveaways – all month long! If you’ve never visited, you are definitely in for a good time! When you do visit, be sure to leave comments on the posts! Every month Shery draws seven random winners from all the posts published during the month, so the more posts you comment on, the more chances you have to win! And be sure to Follow STAMPlorations on Facebook, Instagram and Pinterest for more creative inspiration! Thanks so much for stopping by today – we’ll see you next time! ;)
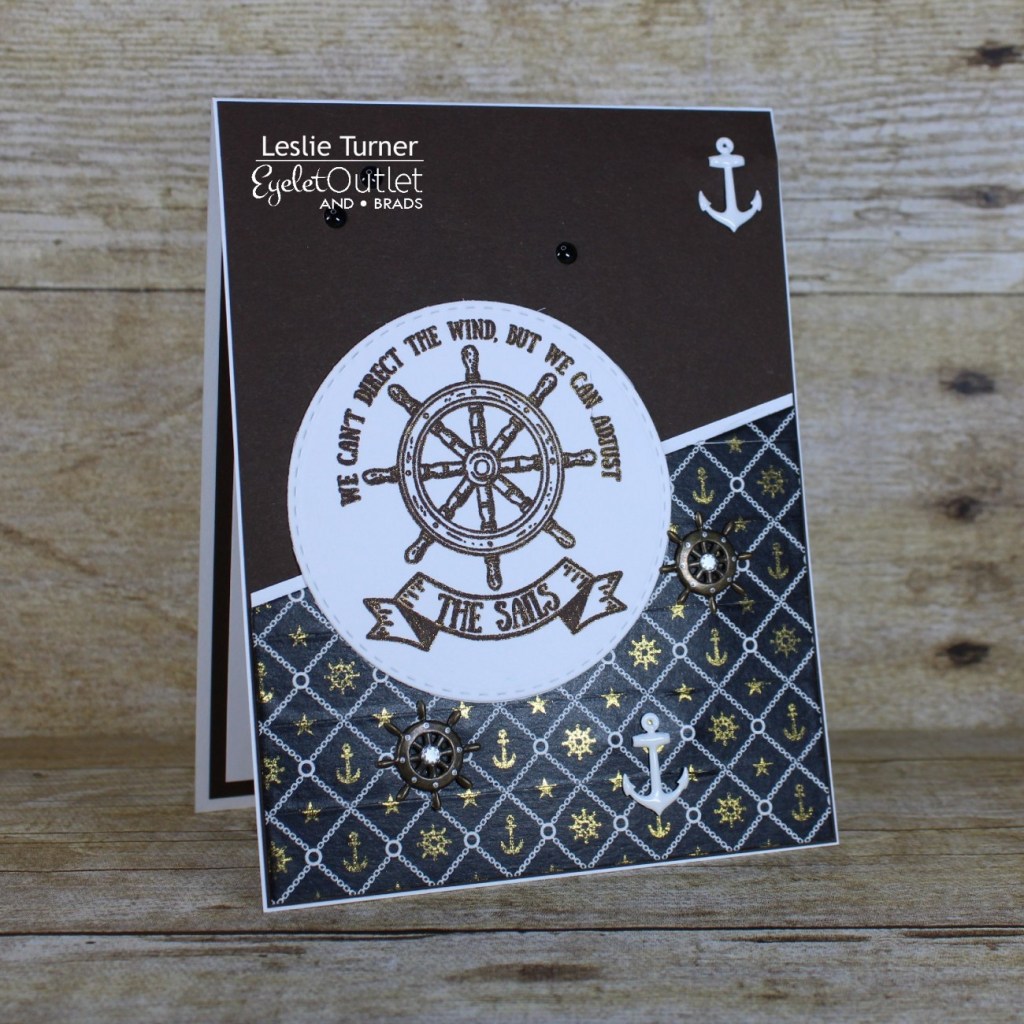
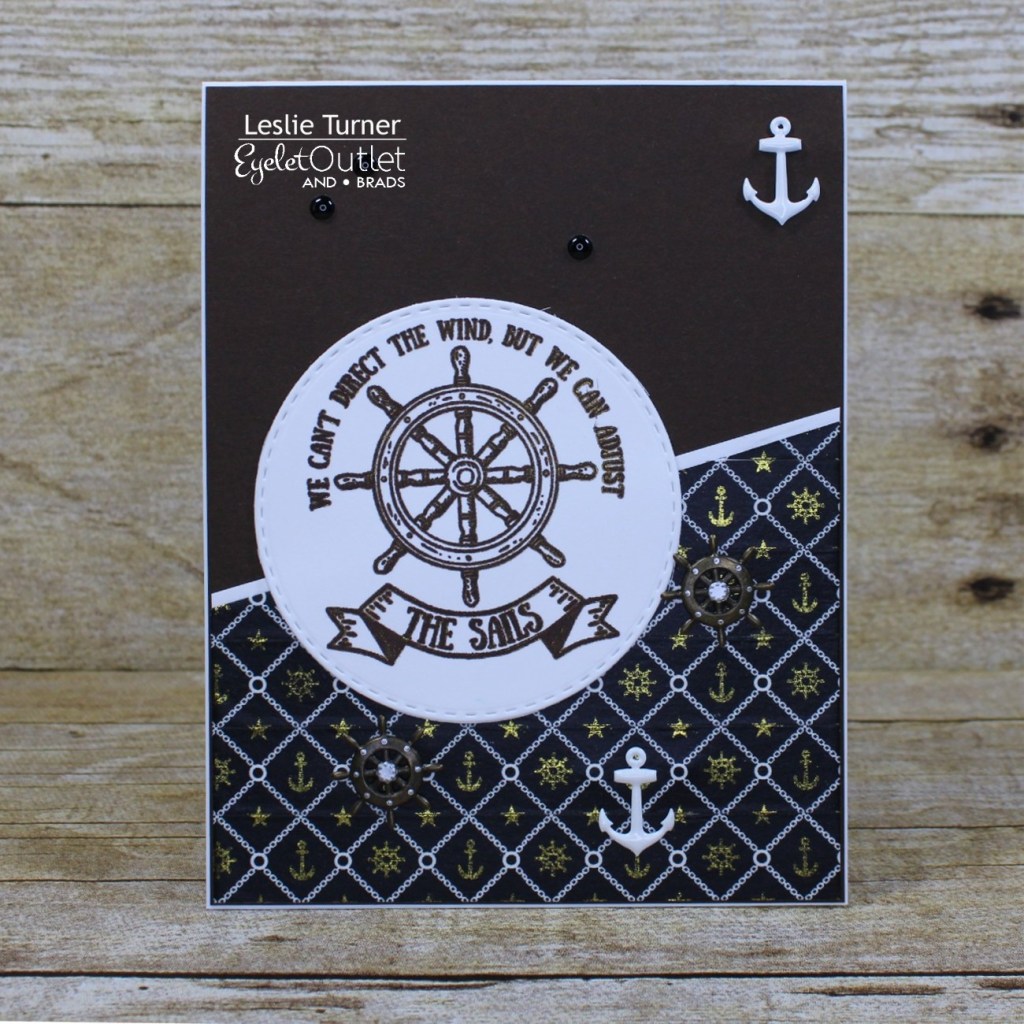
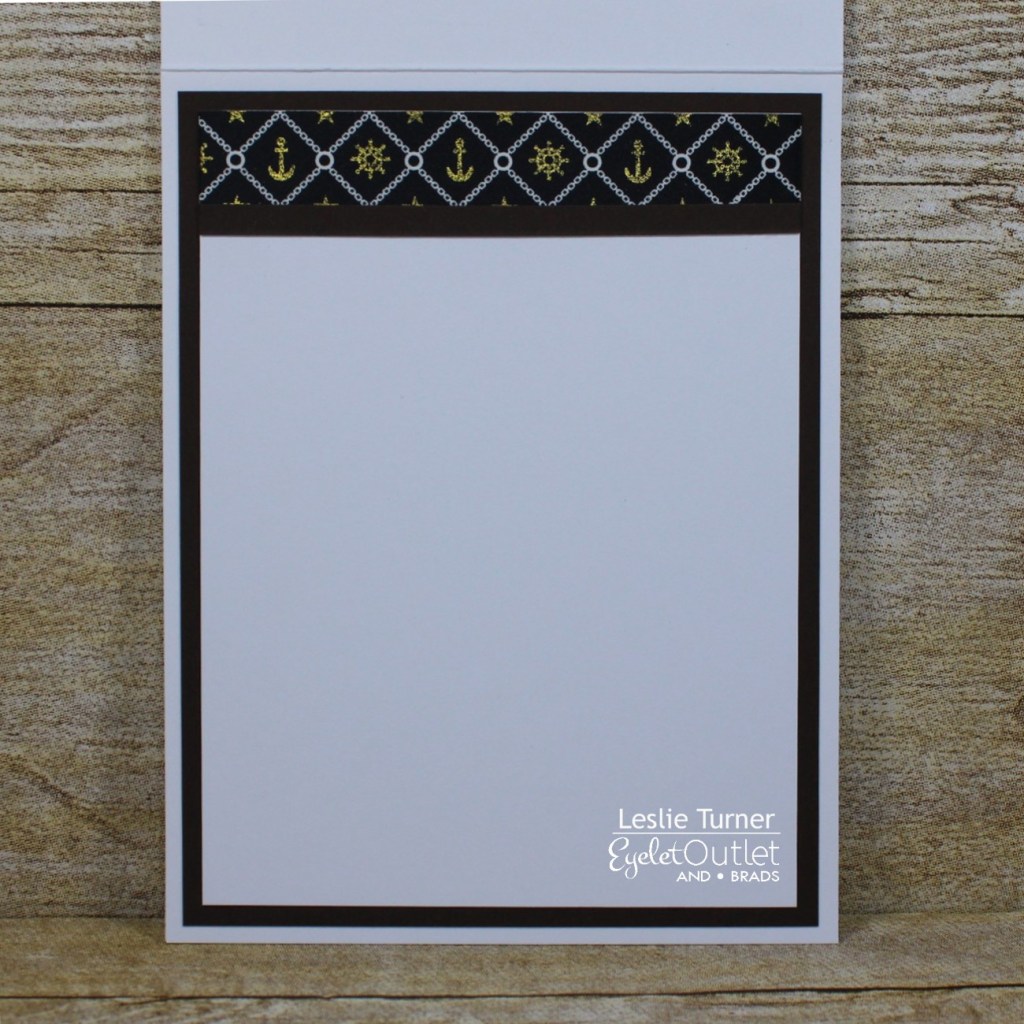
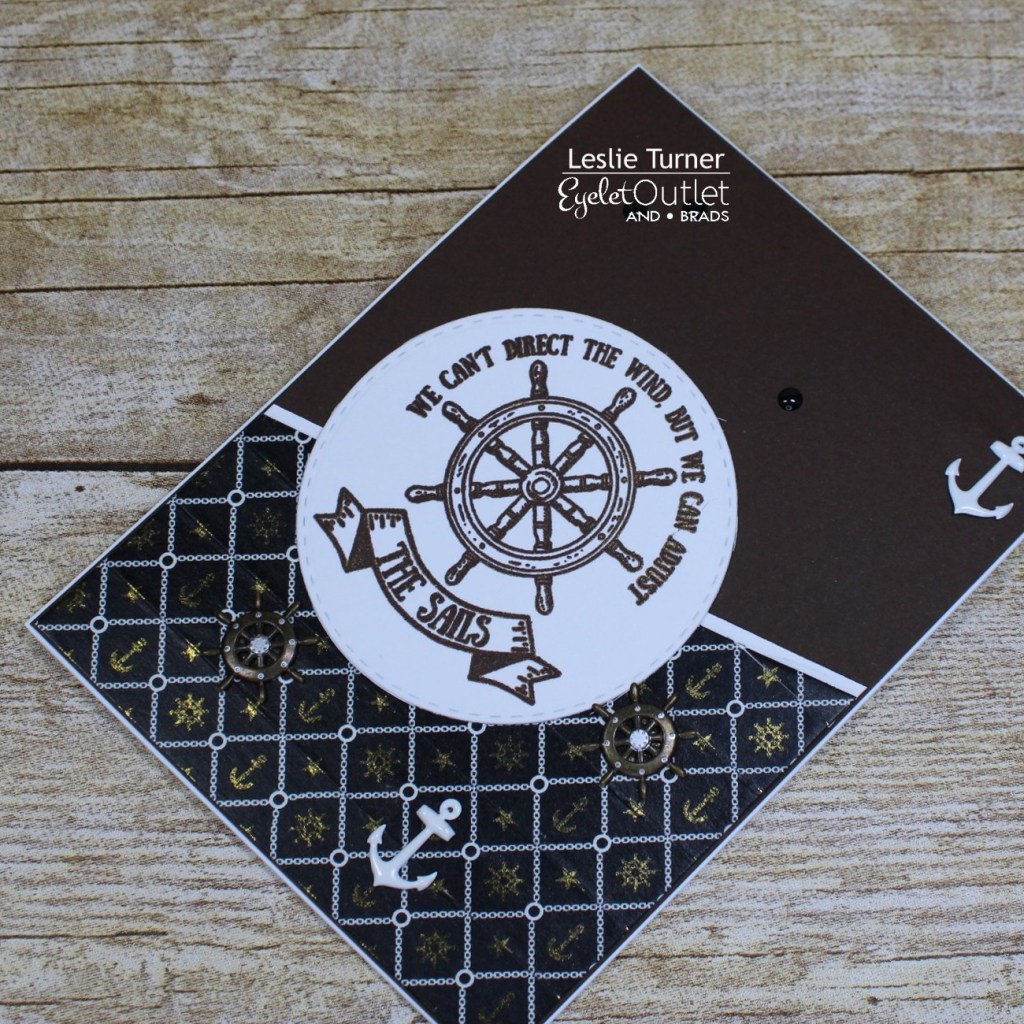
Hi everyone! A very Happy Saturday to you – I hope you’ve had a great week! We’re sure enjoying some cooler weather out here in Colorado and that makes us happy! Affiliate links are used in this post at no cost to you. I really appreciate your support! I’m stoked to be back on the Eyelet Outlet blog today with another awesome DT inspiration project! I created a cool inspirational note card with a nautical feel featuring our Anchor Brads, Ship Wheel Brads, Anchor Washi Tape and Black Enamel Dots! These brads and washi tape are the the bomb – I love using coordinating products!
I hope you’ve enjoyed today’s project! Be sure to check out all the fun goodies at Eyelet Outlet! I can already see you drooling, lol! Be sure to ‘like’ and ‘follow’ Eyelet Outlet Facebook Page to keep up with news and sales, and while you’re at it, join the Eyelet Outlet Fans Facebook group for lots of creative inspiration! Thanks so much for stopping by today – we’ll see you next time! ;)
Hi everyone! Happy Hump Day to you – hope you’re having a fabulous week so far! Things are pretty darn peachy here! Affiliate links are used in this post at no cost to you. I really appreciate your support! Our new challenge has launched over at Love To Craft Challenge Blog and I’m thrilled to share my DT inspiration project for LTCCB #62 – September Anything Goes! I created a sweet birthday card using some fun brads and a super fun die set that I haven’t used in a couple years. I’m trying to go through my humongous die collection and use some that haven’t been used in a while, or in some cases, have never been used at all, lol!
I created a standard A2 size top-folding card base from Neenah Classic Crest Solar White cardstock, along with a black and white gingham paper layer for the front and narrow strips cut from CutCardStock Basis Pink cardstock for the sides. I adhered a stitched oval die cut to the center of the panel cut from CutCardStock Basis Pink cardstock and stamped the sentiment vertically on the left side in black ink. I created the dress from the same black and white gingham paper and CutCardStock Basis Pink cardstock, added tiny black gemstones to the bodice, and adhered it to the center of the oval die cut I added the shoes and purse brads, a white heart brad, and several black gemstones on the sides of the oval, and adhered the panel to the card base.
And one more look… totally loving the black and white with pink which is such a pretty color combo! And that dress! ;)
Products used: Cardstock/Paper: Neenah Classic Crest Solar White cardstock, CutCardStock Basis Pink cardstock, GKD Cold Snap 6×6 paper Stamps: C.C. Designs Birthdays stamp set Ink: Memento Tuxedo Black ink Dies/Punches: Frantic Stamper Pleated Dress die set Accessories: Tonic Studios 12″ Guillotine Paper Trimmer, Tombow Mono permanent adhesive, Bearly Art precision craft glue, Big Shot, MISTI stamp tool, Darice adhesive foam circles; Eyelet Outlet Shoe & Purse Brads, Heart Brads and Black Enamel Dots; Darice tiny black gemstones
I hope you’ve enjoyed today’s project and will link up with us this month! We’d love to see what you’re working on! Thanks so much for stopping by – we’ll see you again soon! ;)
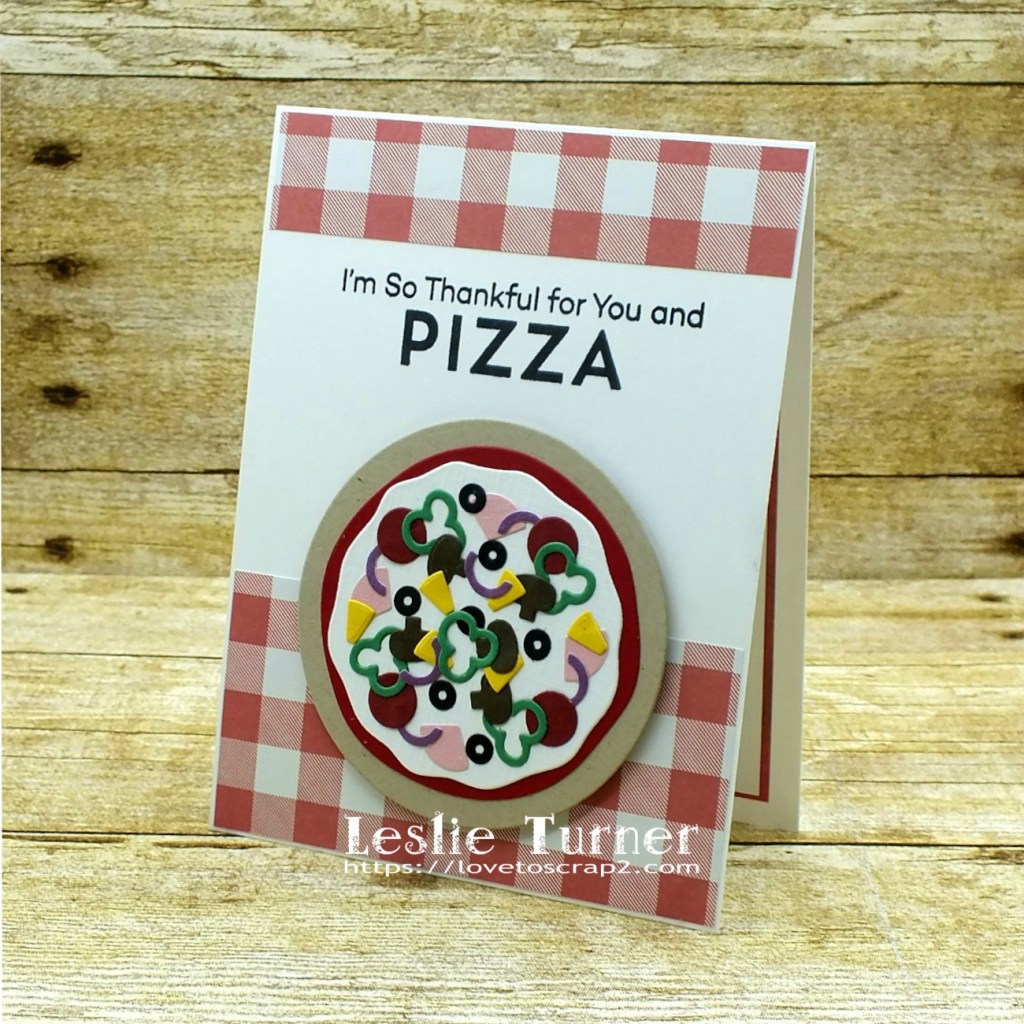
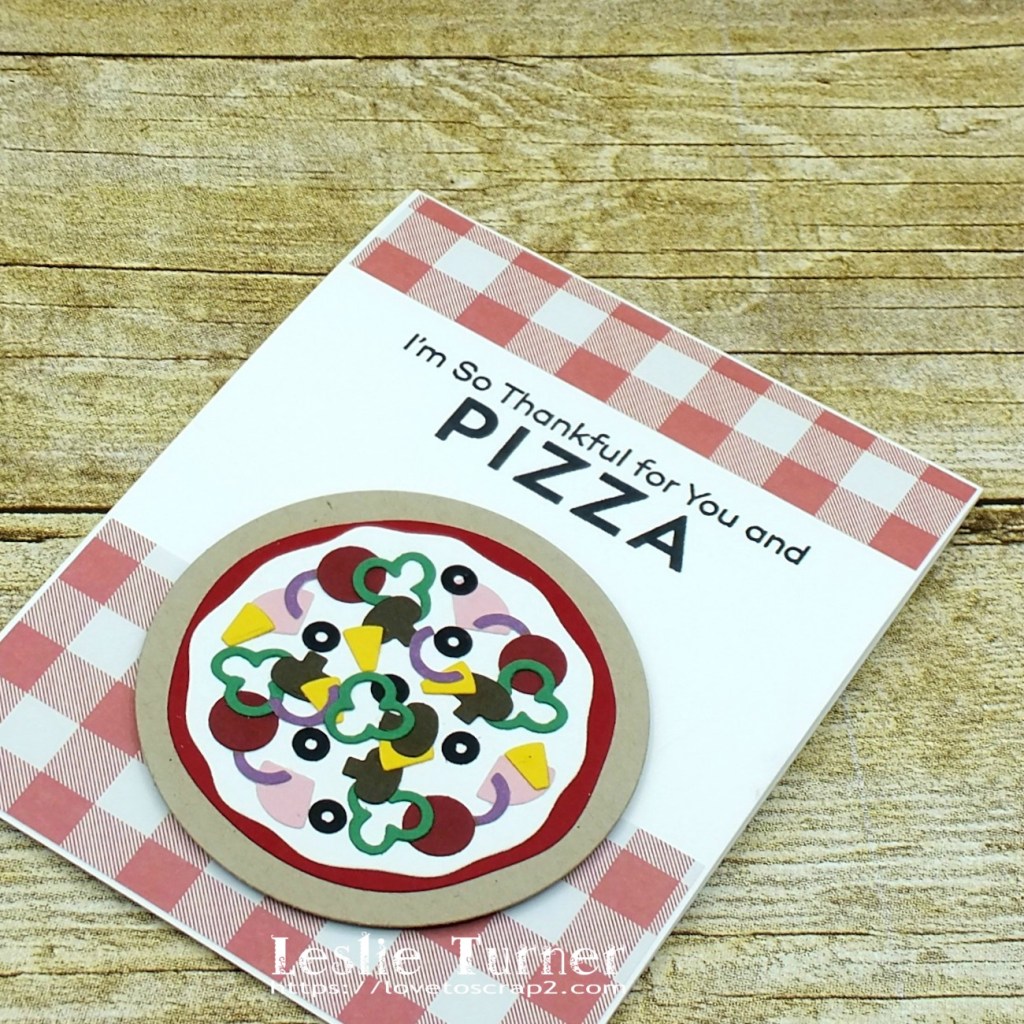
Howdy everybody! I hope you’re having a great week and you’re enjoying this Hump Day! Affiliate links are used in this post at no cost to you. I really appreciate your support! Our new challenge over at Love To Scrap Challenge Blog is live this morning and I’m super stoked to share my DT inspiration project for LTSCB #149 – Anything Goes! This card is so stinkin’ cute I can’t stand it! I work way ahead on all my design team projects and I had a really hard time waiting to share this, lol! I used the My Favorite Things Pizza My Heart stamp set along with the My Favorite Things Pizza Maker die set, of course! ;)
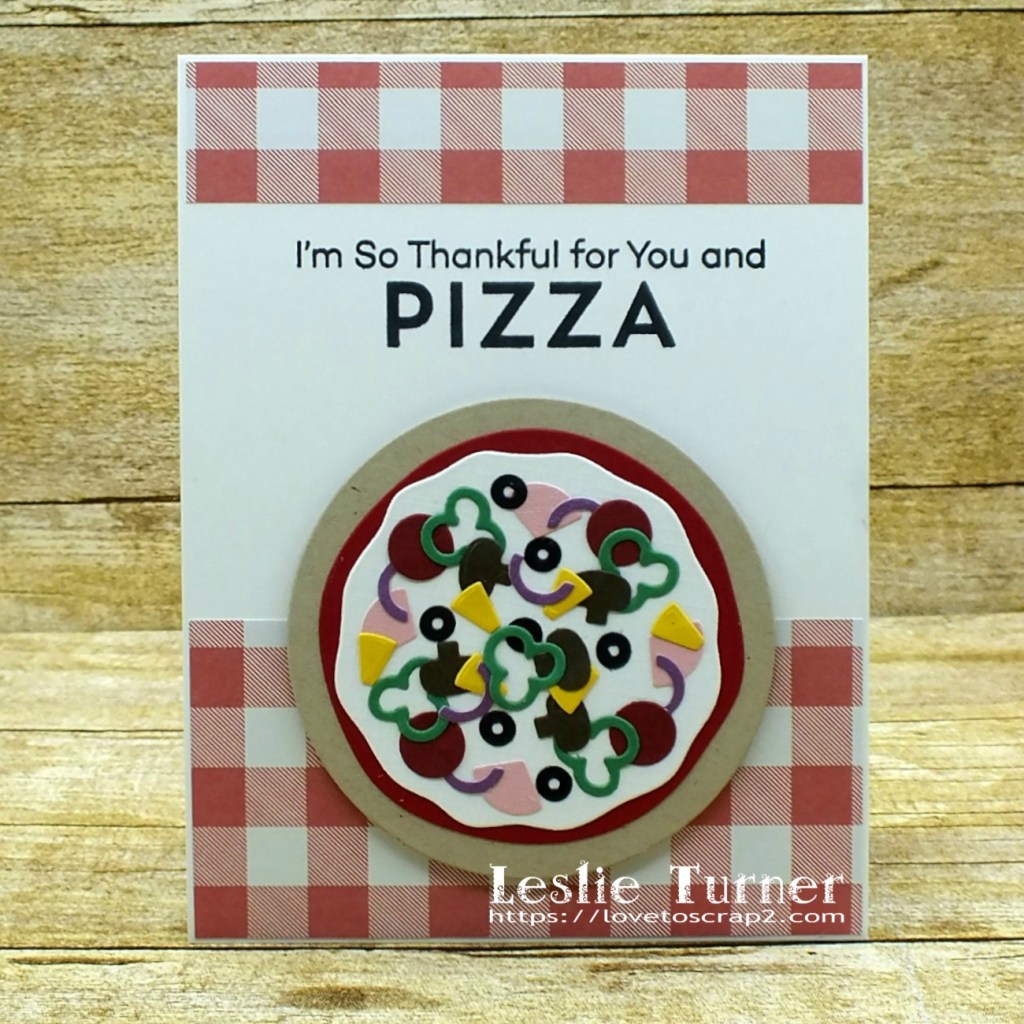
These stamps and dies are definitely among MFT’s cutest sets. I cut a standard A2 size top-folding card base from Neenah Classic Crest Solar White cardstock and added strips of red and white gingham paper across the top and bottom. I stamped the sentiment in black ink and then added the pizza die cuts. It was so fun building the pizza with pepperoni, ham, mushrooms, pineapple, green peppers and black olives – all from scraps out of the scrap bin that seemingly never dwindles, lol! And the gingham paper reminded me so much of the old fashioned tablecloths from back in the day!
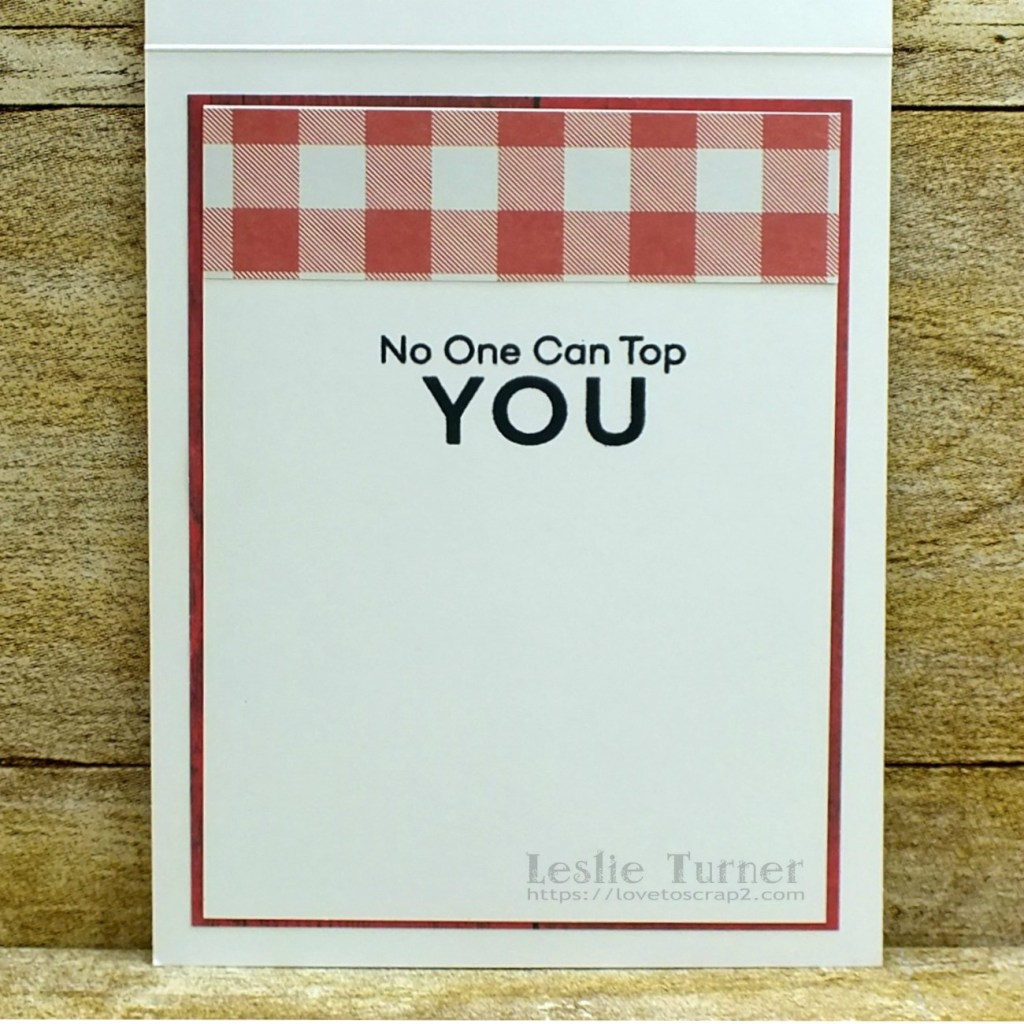
I cut the inside panel from Neenah Classic Crest Solar White cardstock and embellished it with gingham paper, stamped the sentiment in black ink and layered the panel on a scrap of red cardstock from that same bin. ;)
And one more peek… I have loved pizza my whole life – in fact it’s still one of my favorite foods so you can imagine how much fun I had with this! ;)
I hope you’ve enjoyed today’s project and you’ll link up an ‘anything goes’ project with us this month! We’d love to see what you create! Thanks so much for stopping by today – we’ll see you again soon! ;)