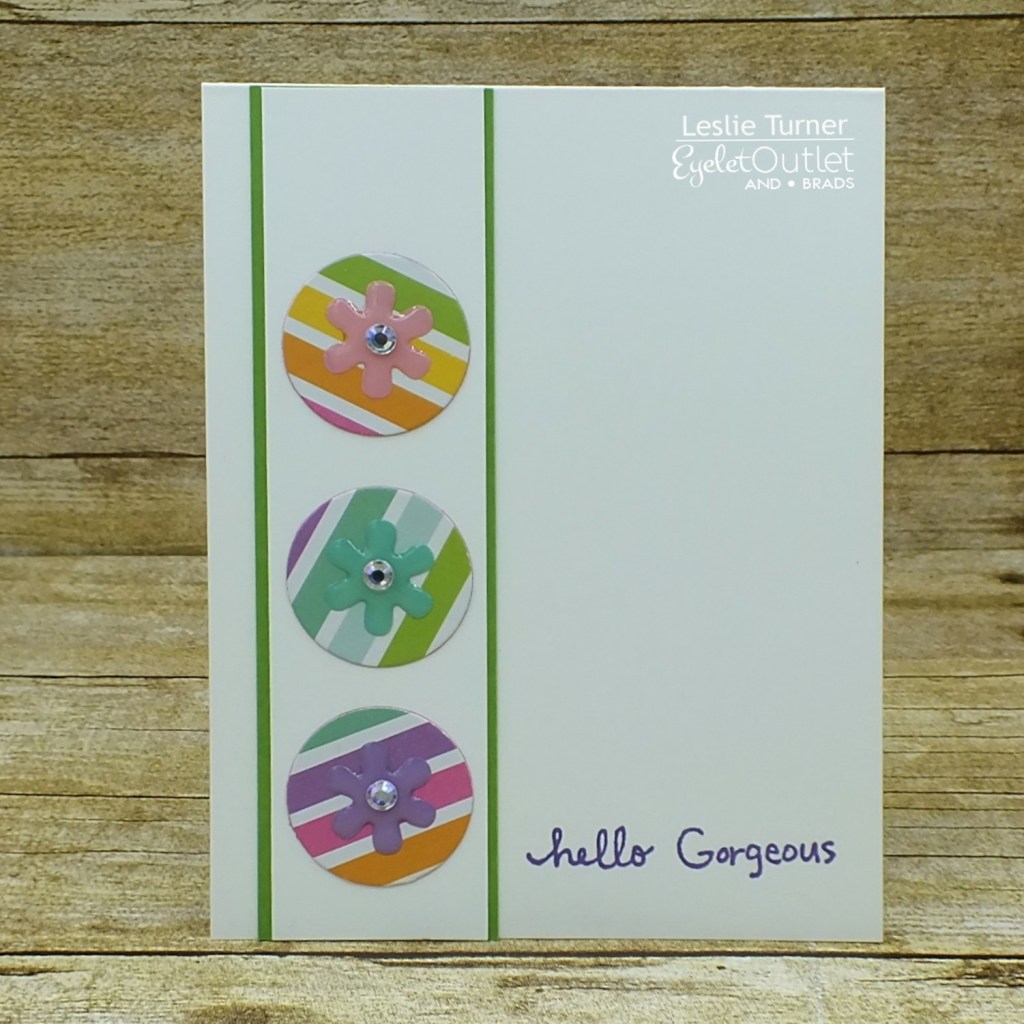
Hi everyone! We are busting right through March – can you believe it?! Affiliate links are used in this post at no cost to you. I really appreciate your support! I’m excited to be back on the Eyelet Outlet blog today with another awesome DT inspiration project! I created a friendship card featuring some super fun brads and some pearls to doll it up!
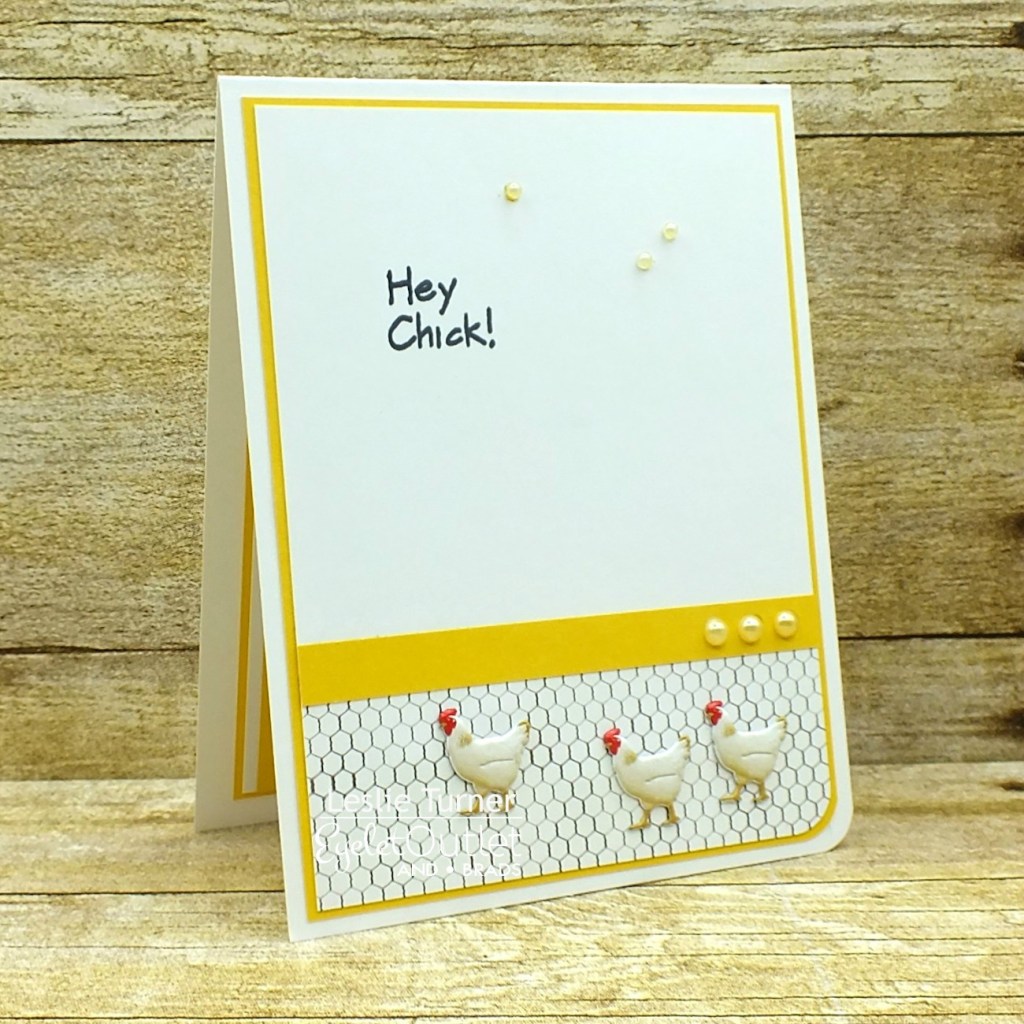
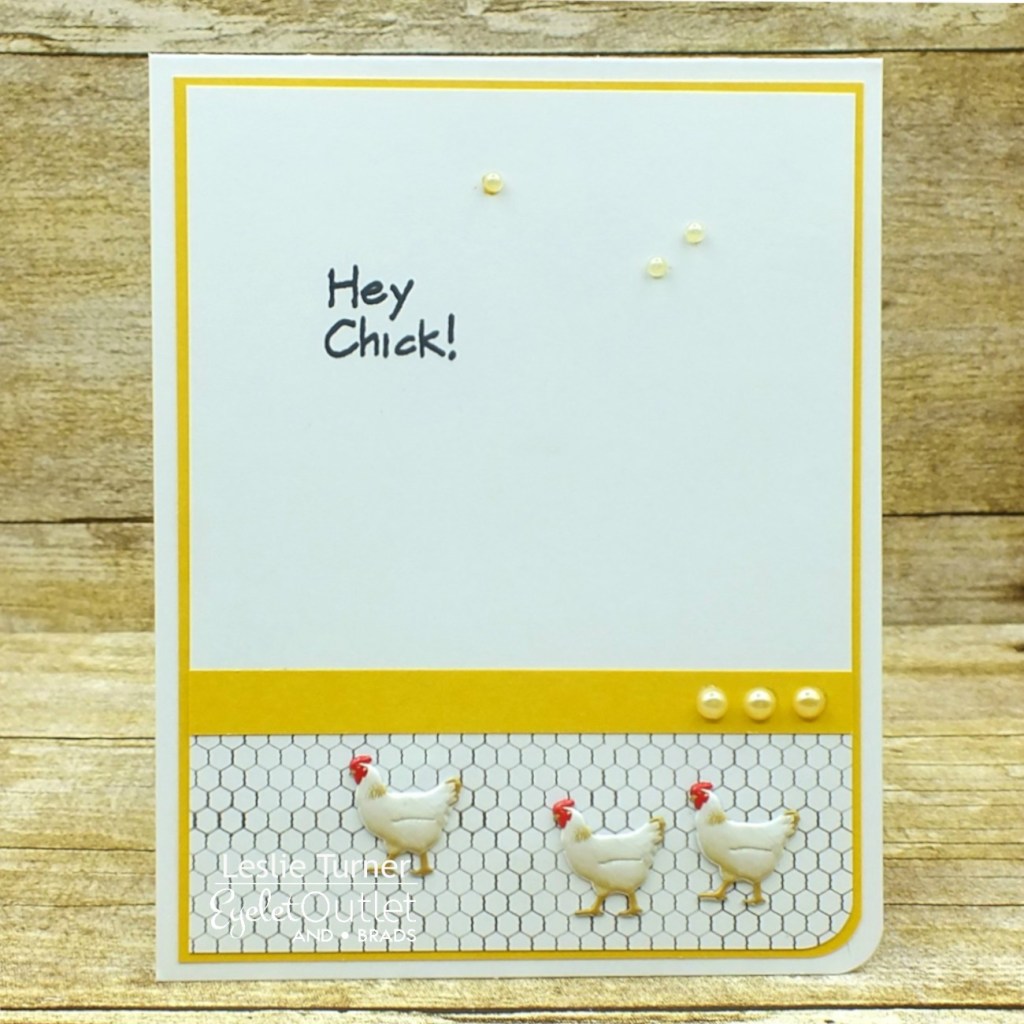
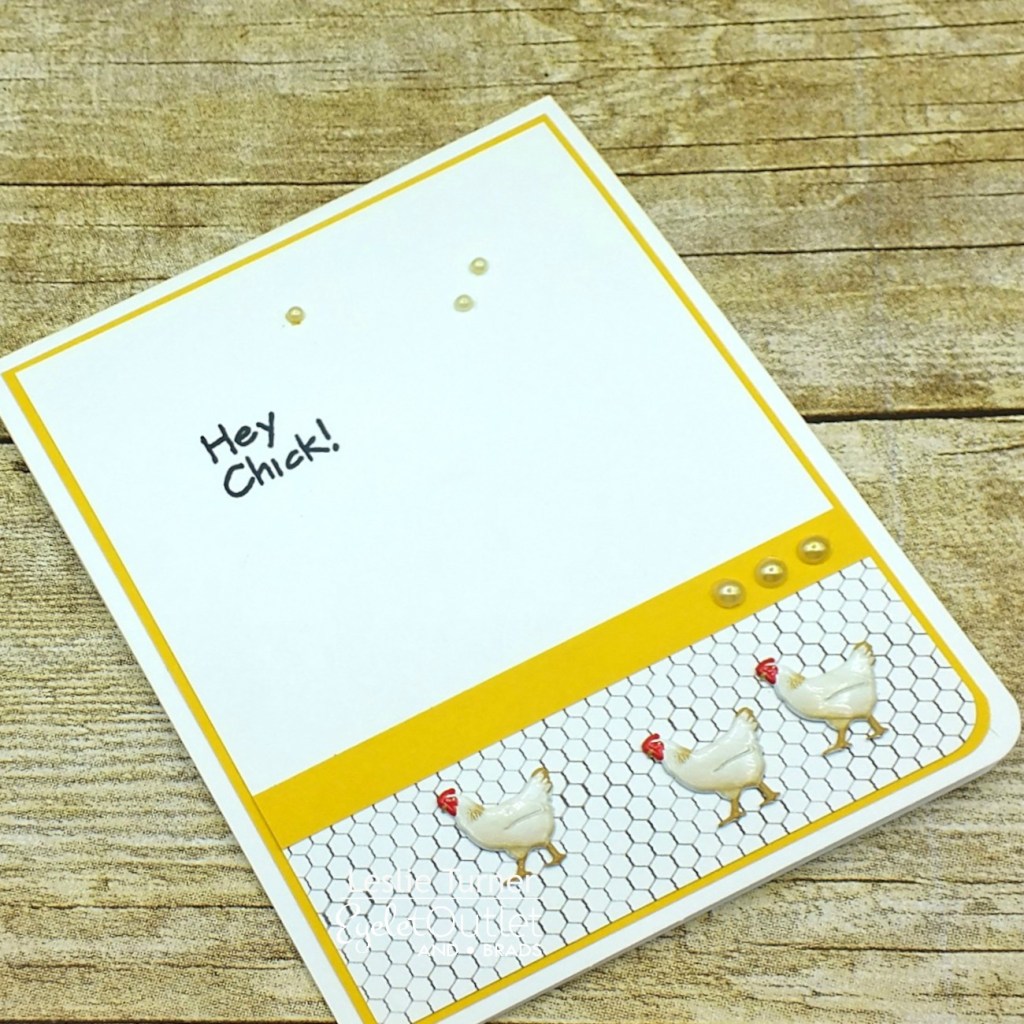
First of all, aren’t these Chicken Brads just a hoot?! When I saw them, I knew I had to have them because I have the perfect stamp set to use with them! I created a top folding card base from Neenah Classic Crest Solar White cardstock and rounded the bottom right corner. I dug into my digital image stash and found a small chicken wire image that I duplicated multiple times and pieced together to make it large enough to go across the panel, keeping it proportional to the size of the chicken brads. I complimented the white cardstock with yellow cardstock, and stamped the sentiment in black ink. I added the Chicken Brads, a few scattered pearls from a White Pearl Bling Strip on the background and three slightly larger White Pearl Bling on the yellow cardstock strip. I colored all the pearls with a tan-colored alcohol marker prior to affixing them to the card front.
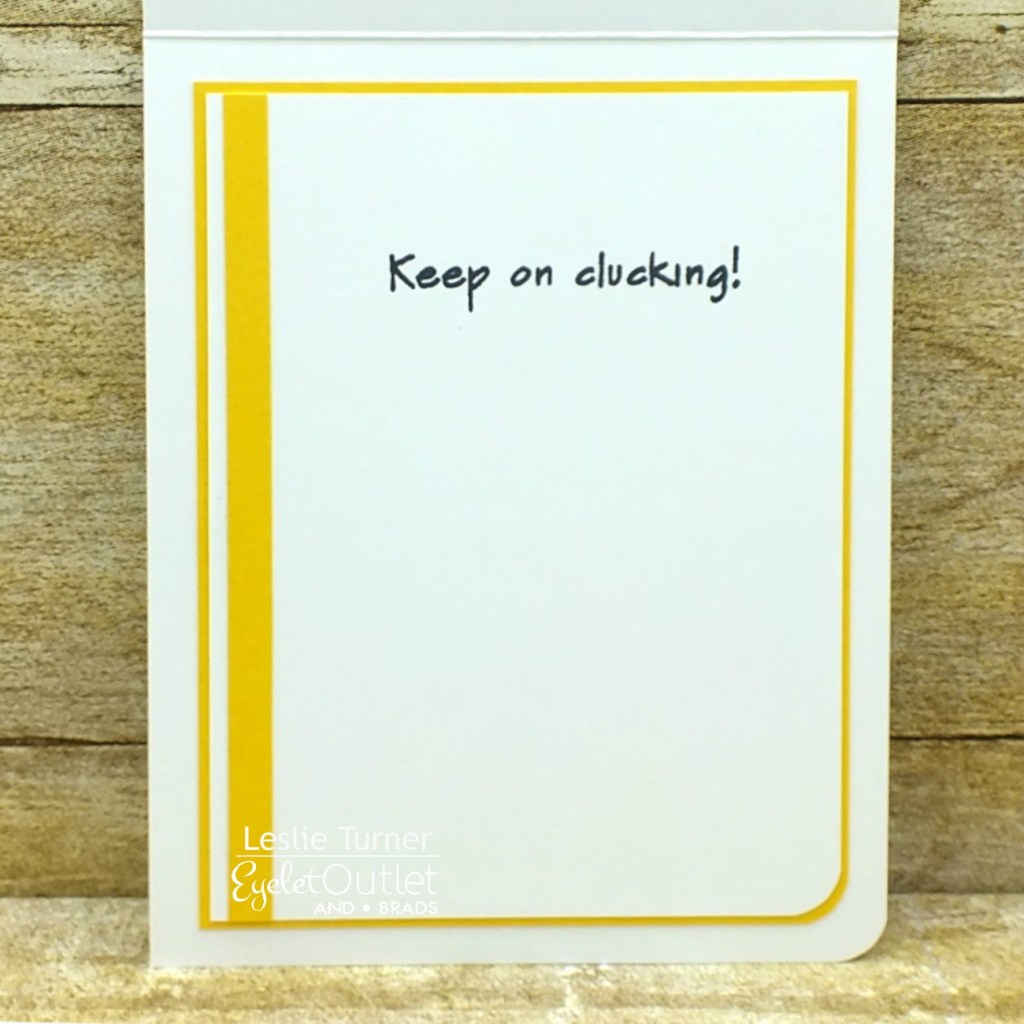
I cut the inside panel from Neenah Classic Crest Solar White cardstock and embellished it with a strip of the yellow cardstock used on the front, stamped the sentiment in black, and layered the panel on the yellow.
And here’s one more peek… I absolutely love how this turned out! Those chicken brads are so fun!
Sharing in the following challenges:
1. A Perfect Time To Craft Open Challenge: #3-2021 – Anything Goes
2. Alphabet Challenge Blog: Y is for Yellow
3. Classic Design Challenge: #3 – Anything Goes
4. Pammie’s Inky Pinkies Challenges: #2111 – Anything Goes
5. Penny’s Paper-Crafty Challenges: #492 – Anything Goes
6. QKR Stampede: #416 – Anything Goes
7. The Creative Crafters: #38 – Anything Goes
8. World Wide Open Design Team Challenge: #03 – Anything Goes
Eyelet Outlet products used:
Chicken Brads
White Pearl Bling Strip
White Pearl Bling
Other products used:
Cardstock/Paper: Neenah Classic Crest Solar White cardstock, Colorbok yellow cardstock
Stamps: Paper Pretties Cluck Part II stamp set, MHK Designs Chicken In digi set
Ink: Memento Tuxedo Black ink; Nuvo alcohol marker- 479 (to color the pearls)
Dies/Punches: Kadomaru Pro corner rounder
Accessories: Tombow Mono permanent adhesive, Bearly Art precision craft glue, MISTI stamp tool
I hope you’ve enjoyed today’s project! Be sure to check out all the fun goodies at Eyelet Outlet! I can already see you drooling, lol! Be sure to ‘like’ and ‘follow’ Eyelet Outlet Facebook Page to keep up with news and sales, and while you’re at it, join the Eyelet Outlet Fans Facebook group for lots of creative inspiration! Thanks so much for stopping by today – we’ll see you next time! ;)
Scrappy hugs,