12/21/24 Weekly Favorite (favorited by three fellow crafters) at Splitcoast Stampers!
12/31/24 Best of 2024 Favorite at Splitcoast Stampers!
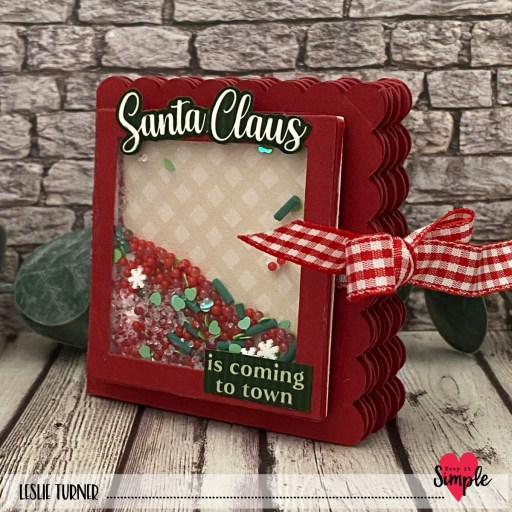
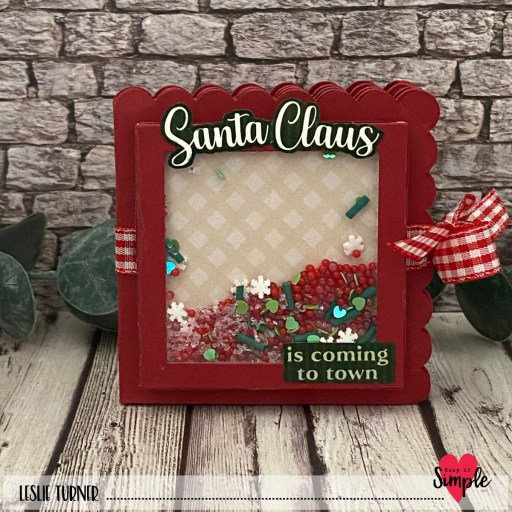
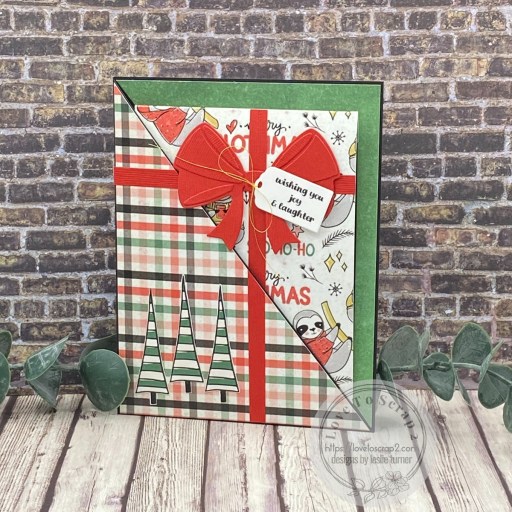
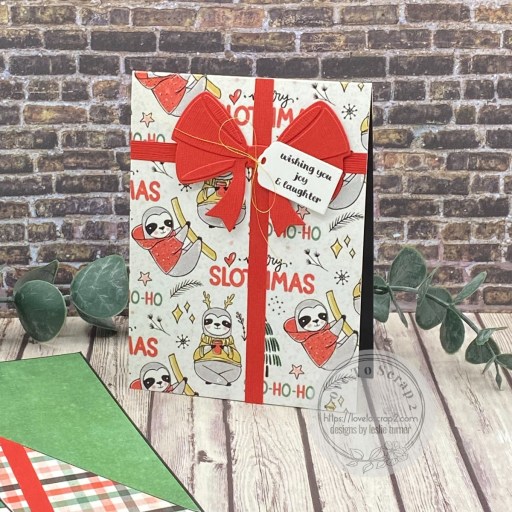
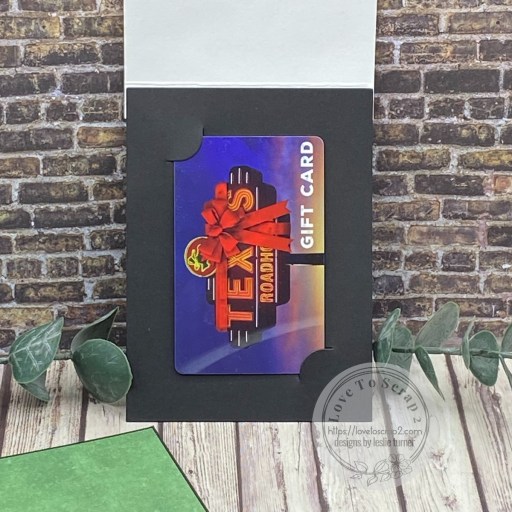
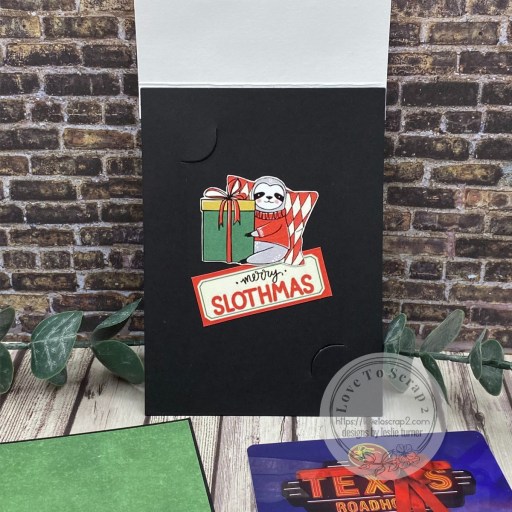
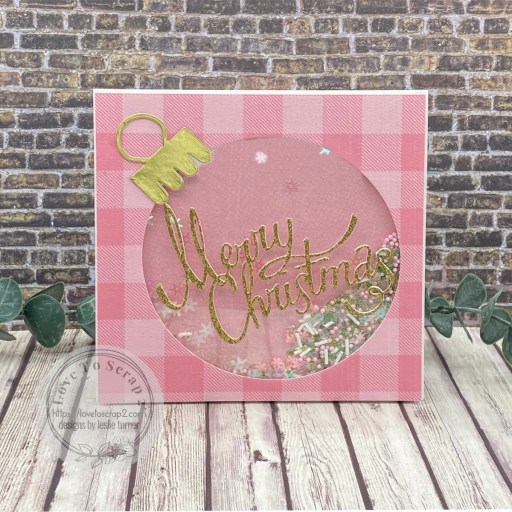
Hey everybody, I’m back with a second post on this fine Friday morning. Only one more Friday in December and I can’t believe how quickly the weeks continue to fly by – Christmas will be here in a flash! I’m delighted to share an Emily Moore Designs DT inspiration project created with our awesome Ornament Gift Card Holder Die, along with our Christmas Sayings-Dainty Cursive Font Digital Sentiments and Card Sentiment Dies used on the inside. I went ‘outside the box’ a bit with this card and used the ornament die to cut a shaker aperture into the card flap rather than use the gift card holder element, and I love how it turned out. Shaker cards never disappoint!
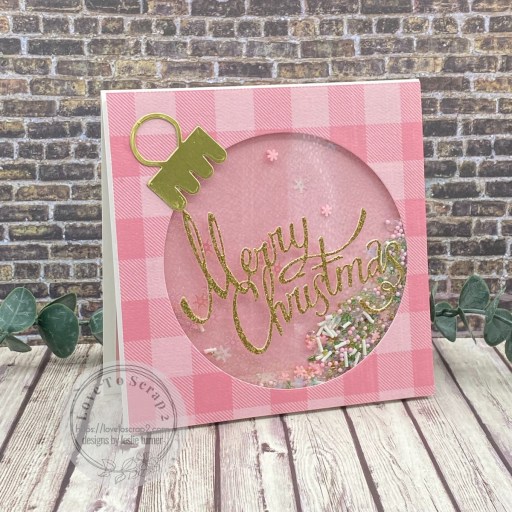
I cut a 5-1/2″ square top-folding card base from Neenah Classic Crest Solar White along with layering panels from a couple prints in the Keep It Simple Back To Basics Rose 12×12 Collection Pack. Using the Ornament Gift Card Holder Die, I cut the shaker aperture into the front flap and added the ornament top which I cut from CutCardStock Bright Gold Foil. I created the shaker using Grafix Craft Plastic, Scrapbook Adhesives Crafty Power Tape and GKD Shaker Strips.
I used a variety of Keep It Simple Sprinkles for the shaker bits, and then added a large sentiment which I die cut from CutCardStock Gold Glitter cardstock using the Sizzix Ribbon Thinlits. I have to say that these Sizzix Thinlits are pretty popular because I realized a while ago that I also used them on my other project posted earlier this morning, lol! Totally unintentional, as I made the other project several months ago! :P
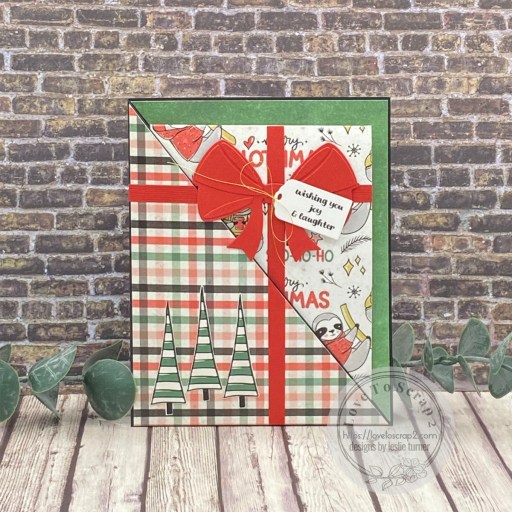
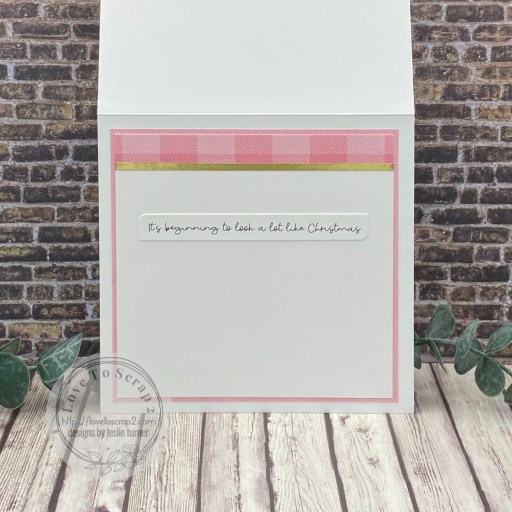
I cut the inside panel from Solar White cardstock and embellished it with leftover strips of the plaid paper and gold foil cardstock used on the front. I printed the Christmas Sayings Digital Sentiments (a free download, by the way) on Solar White cardstock as well, and cut it with a Card Sentiment Die. It’s very cool that Emily sized the digital sentiments to cut with the Card Sentiment Dies!
Emily Moore Designs products used:
Ornament Gift Card Holder Die
Scrapbook Adhesives Crafty Power Tape
Christmas Sayings Digital Sentiments (free download)
Card Sentiment Dies
Affiliate links are used in this post at no cost to you – I really appreciate your support!
Other products used:
CARDSTOCK/PAPER: Neenah Classic Crest 80# Solar White cardstock, CutCardStock Bright Gold Foil and Gold Glitter cardstock, Keep It Simple Back To Basics Rose 12×12 Collection Pack
DIES/PUNCHES: Sizzix Christmas Ribbon Thinlits
ACCESSORIES: Fiskars 12″ ProCision Rotary Bypass Paper Trimmer, Bearly Art precision craft glue, My Sweet Petunia Precision Glue Press, Big Shot, Grafix Crystal Clear Craft Plastic, GKD Shaker Strips, Keep It Simple Iridescent Snowflake Sequins, Pale Pink Caviar Glass 2mm Beads, Clear Caviar Glass 2mm Beads, Green Caviar Glass 2mm Beads, Pale Pink Matte 2mm Beads, Rivers Edge Metallic Crush, and Pink Snowflake Confetti & Silver Pearl Polymer Clay Sprinkles
I hope you’ve enjoyed seeing this project and you’re inspired to get crafty! New customers – use code LESLIE10 for 10% off your order! Be sure to Follow us on Facebook, Instagram and YouTube for crafty inspiration! Emily shares videos on all the social media platforms, and they are awesome and on point! Thanks so much for stopping by today – we’ll see you next time!
Scrappy hugs,