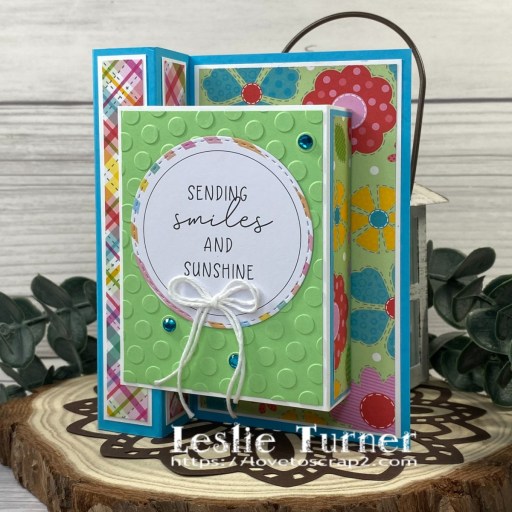
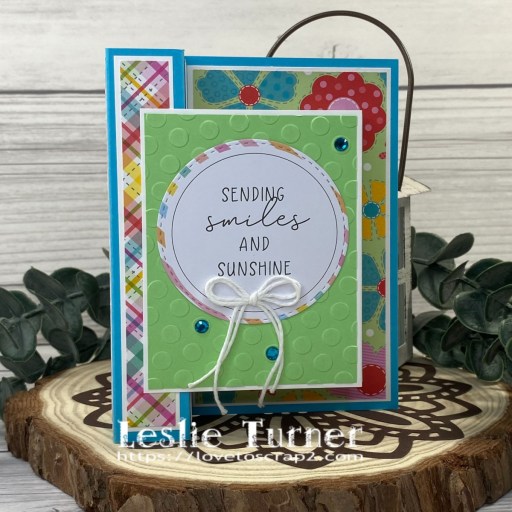
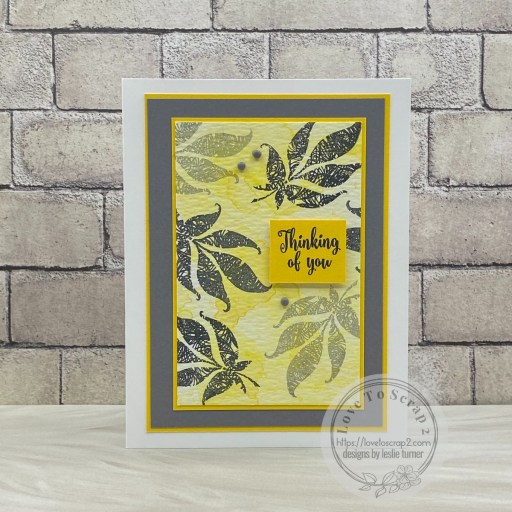
Howdy peeps! Can you believe it’s the first day of September already?! Seems like the new year just started, lol! Our new challenge is live this morning over at Mix It Up Challenge Blog and I’m delighted to share my DT inspiration project for MIUCB #73 – Anything Goes + optional Smooshing! Remember that all of our challenges are ‘anything goes’ and the technique twist is optional and not required to play! Do what inspires you! I have to admit that there’s nothing more relaxing to me than spritzing a little water over ink and then smooshing paper into it! No matter what color(s) you use or how much (or how little) ink you use, the look is different every single time – and I love that! This card features the older Gina K Designs Simply the Best stamp set, Ranger fossilized amber distress oxide ink for smooshing, and Catherine Pooler Twilight, Black Jack and Midnight inks for stamping. I totally love how it turned out!
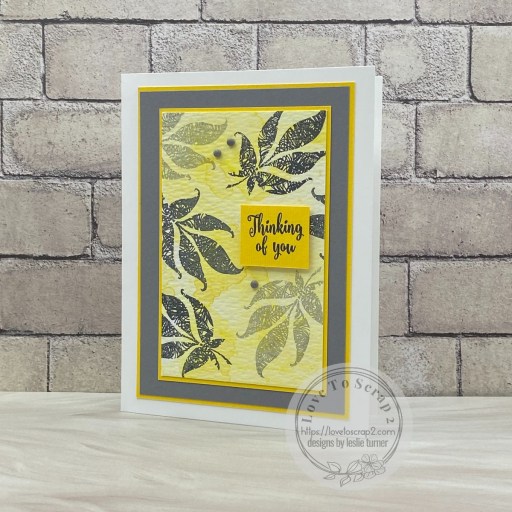
A standard A2 size side-folding card base was cut from Neenah Classic Crest Solar White cardstock. I also cut two layering panels from CutCardStock Yellow Jacket Textured 4×6 cardstock and one from Lessebo Granite Gray cardstock. Finally, I cut a layering panel from Tim Holtz distress watercolor cardstock and created the smooshed background using a Tim Holtz distress sprayer and Ranger fossilized amber distress oxide ink. I trimmed the panel and stamped a leaf image (from the GKD Simply the Best stamp set) multiple times in Catherine Pooler Twilight, Black Jack and Midnight inks. I stamped the sentiment (from the same GKD stamp set) on a scrap piece of Yellow Jacket cardstock, trimmed it and added it to the panel on a double-sided foam strip. The finishing touch was adding several Stampin’ Up Classic Matte Dots.
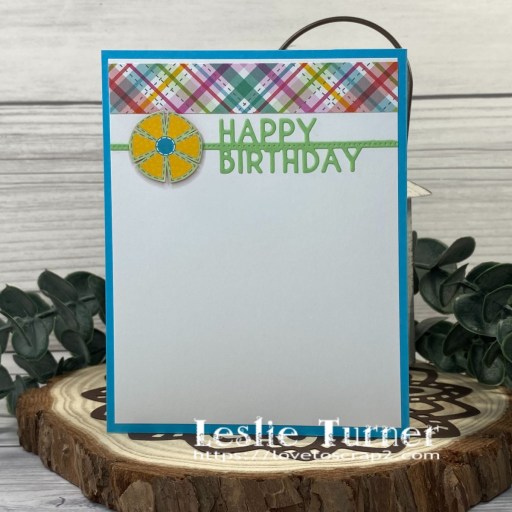
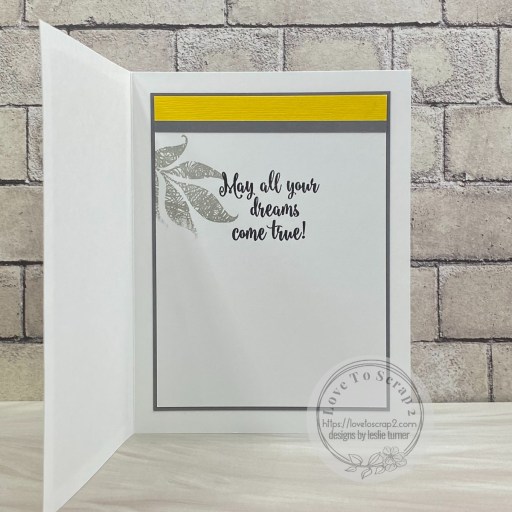
I cut the inside panel from Solar White and embellished it with leftover strips of Yellow Jacket and Granite Gray cardstock used on the front. I stamped a leaf from the same GKD stamp set in Twilight ink and the sentiment in Midnight ink, and layered the panel on Granite Gray cardstock.
Affiliate links are used in this post at no cost to you – I really appreciate your support!
Products used:
CARDSTOCK/PAPER: Neenah Classic Crest 80# Solar White cardstock, CutCardStock Lessebo Granite Gray and Yellow Jacket Textured 4×6 cardstock, Tim Holtz distress watercolor cardstock
STAMPS: Gina K Designs Simply the Best stamp set
INK: Ranger fossilized amber distress oxide ink; Catherine Pooler Twilight, Black Jack and Midnight inks
ACCESSORIES: Tonic Studios 12″ Guillotine Paper Trimmer, Tombow Mono Dots adhesive, Bearly Art precision craft glue, Tim Holtz distress sprayer, MISTI stamp tool, 1″ double-sided foam strip, Stampin’ Up Classic Matte Dots
I hope you’ve enjoyed seeing this project and will link up with us this time! Thanks so much for stopping by today – we’ll see you next time! ;)
Scrappy hugs,