Hi friends! I hope you’re having a beautiful weekend! How apropos to post this pretty card today, on Sunday, even though Easter isn’t for another three weeks! Our new challenge is live this morning over at Ally’s Angels and I’m delighted to share my DT inspiration project for Challenge #80! This project was among the final large batch of SVG files that I cut with my Scan N Cut prior to it’s demise a while back. It’s such a pretty design and I love how it turned out in purple and green with just a pop of gold. And before I forget, I want to mention that our challenges at Ally’s Angels will commence on the 15th of the month (and end on the 10th of the following month) beginning in April, which will align nicely with many of the other challenges out there in blogland.
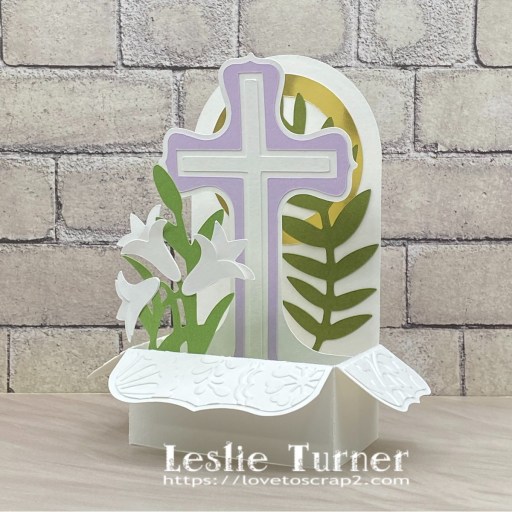
I cut the card base, flap panels, cross and backing, and lilies from CutCardStock Basis White and dry embossed the flap panels with the Cuttlebug Floral Fantasy embossing folder (an oldie but goodie). I cut the ring from CutCardStock Bright Gold Foil and the cross panel from CutCardStock Pop Tone Grapesicle. Finally, the greenery was cut from CutCardStock Pop Tone Jellybean Green and Pop Tone Gumdrop Green.
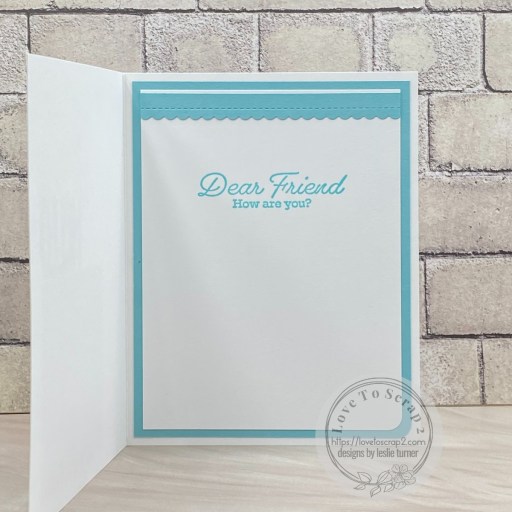
I used the Prickley Pear Stamps Easter Cross stamp set for the sentiment on the back, stamped in Memento Elderberry ink.

Sharing in the following challenges:
1. https://aperfecttimetocraft.blogspot.com/2024/03/a-perfect-time-to-craft-open-challenge.html
2. https://avenue613.blogspot.com/2024/03/march-2024-anything-goes-w-optional.html
3. http://craftycalendarchallenge.blogspot.com/2024/03/march-challenge-more-than-one-fold.html
4. https://cutitupchallenges.blogspot.com/2024/03/cut-it-up-challenge-299-colors-of-spring.html
5. https://scrapping4funchallenges.blogspot.com/2024/03/march-easter-spring.html
6. https://cinspirations.blogspot.com/2024/03/march-challenge-anything-goes.html
Affiliate links are used in this post at no cost to you – I really appreciate your support!
Products used:
CARDSTOCK/PAPER: CutCardStock Basis White 80# 12×12, Bright Gold Foil, Pop Tone Jellybean Green, Pop Tone Gumdrop Green and Pop Tone Grapesicle
STAMPS: Prickley Pear Stamps Easter Cross stamp set
INK: Memento Elderberry ink
DIES/PUNCHES: SVG Cuts Easter Sunday Box Card SVG file
ACCESSORIES: Brother Scan N Cut SDX 125e, Bearly Art precision craft glue, MISTI stamp tool, Big Shot, Cuttlebug Floral Fantasy embossing folder
I hope you’ve enjoyed seeing this project and will link up with us this time! Thanks so much for stopping by today – we’ll see you next time! ;)
Scrappy hugs,