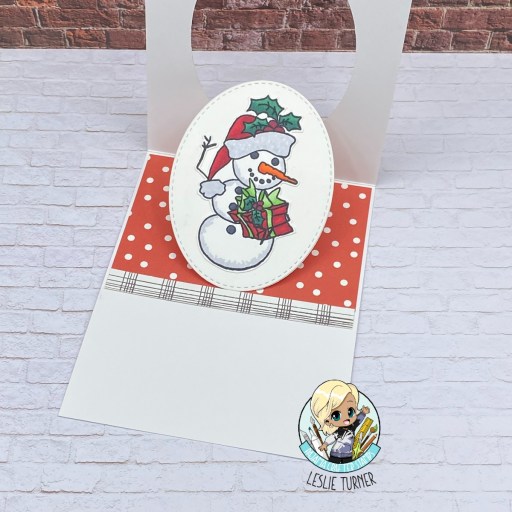
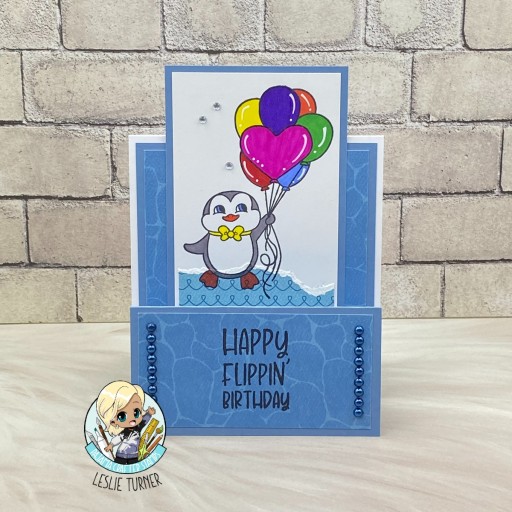
Hi friends! I hope you’re having a great weekend! I have another Pajama Crafter Stamps project to share today featuring the super cute Flippin’ Best stamp set that was released in January of this year. This is another one of the (many) projects I created prior to leaving the team at the end of February and hadn’t yet showcased. There’s nothing cuter than this little guy being showcased on a faux step card with his bunch of birthday balloons! I don’t have written instructions for this faux step card fun fold but it’s basically a double easel fold (seen on Sharon Armonstrong’s blog HERE a while back) with a tall fixed panel to make it look like a step card. The assembled card is A2 size.

The card base was cut from Neenah Classic Crest 110# Solar White cardstock with panels cut from CutCardStock Lessebo Misty Blue. I stamped the penguin from the Flippin’ Best stamp set in Memento Tuxedo Black ink on 80# Solar White and colored him with Sharpie and Bic Mark-It markers. I cut layering panels from papers in the Carta Bella Beach Party Collection Kit and added a sentiment (from the same stamp set) on the bottom flap. The finishing touch was adding several iridescent gemstones to the focal image and two strips of Eyelet Outlet 4mm blue pearls to the bottom flap.
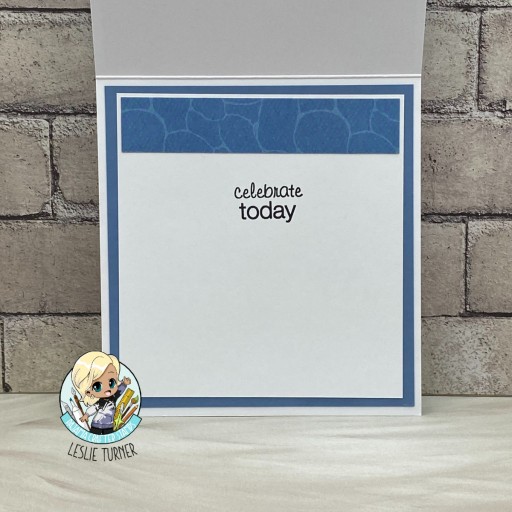
I cut the inside panel from 80# Solar White and embellished it with a leftover strip of paper used on the front. I stamped a sentiment from the Prickley Pear Stamps Spring Scalloped Circles stamp set and layered the panel on Lessebo Misty Blue cardstock.
Affiliate links are used in this post at no cost to you – I really appreciate your support!
Pajama Crafter Stamps products used:
Flippin’ Best stamp set
Prickley Pear Stamps Spring Scalloped Circles stamp set
Other products used:
CARDSTOCK/PAPER: Neenah Classic Crest 110# and 80# Solar White cardstock, CutCardStock Lessebo Misti Blue cardstock, Carta Bella Beach Party Collection Kit
INK: Memento Tuxedo Black ink; Sharpie Ultra Fine Point markers- red, orange, yellow, light green, blue, purple and gray; Bic Mark-It Fine Point Marker- Fandango Pink; Sharpie Fine Point White Paint Marker
ACCESSORIES: Fiskars 12″ ProCision Rotary Bypass Paper Trimmer, Elmer’s Craft Bond Tape Runner, Bearly Art precision craft glue, MISTI stamp tool, iridescent gemstones, Eyelet Outlet 4mm blue pearls
I hope you’ve enjoyed this project! Be sure to check out all the awesome stamps, dies and other goodies at Pajama Crafter Stamps which is the new home of the Prickley Pear Stamps brand and the Pajama Crafter Stamps line! Keep up with news and sales by following Pajama Crafter Stamps on Facebook, Instagram and Pinterest, and join Pajama Crafter Stamps & Friends for lots of fun crafty ideas and to share your creativity! And finally, be sure to visit the Pajama Crafter Stamps blog and sign up for the newsletter to stay in touch! Thanks so much for stopping by today – we’ll see you next time! ;)
Scrappy hugs,